Cr10V2 3d printer
3D Printer review: 100 hours with the Creality CR-10 V2 - 3DPrint.com
Creality CR 10 V2
Along with competitors Anet and XYZPrinting, Creality form a trio of manufacturers that dominate the low-cost 3D printing segment. Only a few years ago 3D printers under $500 were rare, but these firms have made them accessible and have sold hundreds of thousands of them.
In this segment, there are often a lot of issues with print quality and printer reliability. The Creality CR 10 v2 is the upgraded version of the very popular CR 10 and retails for around $500. Creality in the past has also had quality issues and even some safety issues with some components and models. The CR 10 was known to in some cases catch fire. Subsequent safety improvements have made Crealitys safer. We would not recommend running these types of machines unattended, however. Whereas Creality machines tend to work well out of the box, low-cost components do mean that after a few months you will need to replace components.
After testing it for over 100 hours of print time, we can conclude that CR-10 V2 is a value-engineered machine with a large build volume that works surprisingly well.
Unboxing and Set Up
Unboxing is easy and there is some assembly required. This process is simple if you follow instructions. You can find a video showing you how this is done. Most people should be able to do the assembly and set up of the printer.
The printer has a separate console for controls. For some this may mean that your printer takes up more space on your desk but it could also make it more accessible because you could place the console closer to you. Physically separating the main electronics and controls from the motors and frame could make the machine safer though, so that’s a positive. The filament is placed on top of this console, this seems a bit weird initially but works ok. When running the printer for a long time this does mean that you can prevent tangling by placing your filament spool at the correct angle.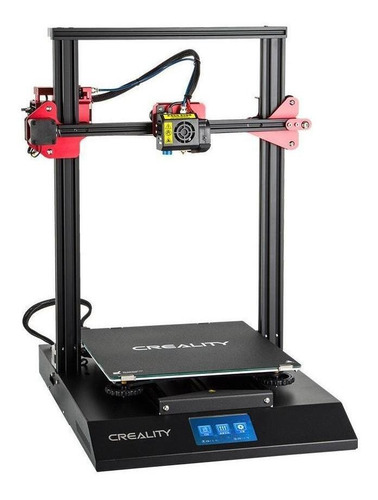 You can also place the spool closer to you so you can easily see if there is tangling or problems with unspooling.
Controls
Controls work through a wheeled button. It is easy to navigate through the menu screens. Do not confuse easy with intuitive, however. Menu structure and operations are far from perfect and can be time-consuming and confusing.
Structure
A nice design element is that it has an extra set of diagonal arms that gives the printer more Z-axis consistency. These arms also make the printer more stable overall and seem to have a handle in improving print quality generally. These arms also help when moving it to a new location. The arms make it much more steady overall and makes it is easy to grasp, move and re-position. Build quality on parts looks better than previous models as does overall attention to details such as cable placement. Machined parts also look like they’re better quality than before.
Operation
The ultra-quiet TMC2208 motherboard does not make the printer that quiet. It is actually annoying if you work in the same place that you print. The printer sounds like an old PC and is much too loud. This is an important point for me and actually made me use the printer less often than I would have liked to.
It has a dual-port hot end cooling fans. This is a refinement over some other clones and seems to improve the surface quality of prints. The printer warms up fast enough. Both the nozzle and the bed preheat quickly enough.
Bed leveling is still a semi-automated process. I did it manually with a piece of paper, but I only had to do it 2 times for a 100 hours of printing.
The resume printing function works extremely well. Several simulated stops and starts worked well and I was able to resume prints without incident. During normal operation, I ran out of filament and was able to replace it easily while print was automatically paused. I also really like doing gradients in colors so I like this feature a lot. It helped me play with gradient colors and gave me more confidence in the machne.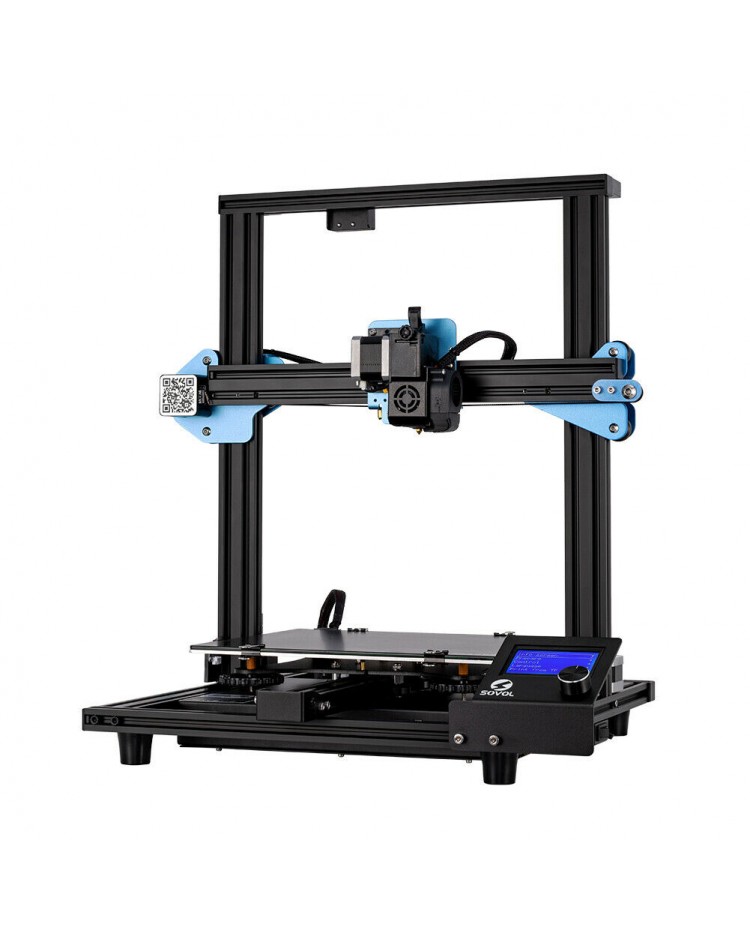
Specs
- Build Volume 300 X 300 X 400mm
- Weight11.5 K
- Movement speed ≤180mm/s, normal 30-60mm/s
- Positioning Accuracy ±0.1mm
- Layer thickness 0.1-0.4mm
- Heated bed temperature ≤100℃
- SD slot
- File format STL\OBJ\AMF
- Slicing software: Cura\Repetier-Host\Simplify
- OS: Mac, Linux, WindowsXP\Vista\7\8\10
- Power supply AC Input 115V/230V
- Output: 24V Power rating 350W
- Auto leveling Optional Extra
- Filaments: PLA/ABS/PETG/TPU (Would only recommend TPU with the optional Titan Direct Drive unit added).
- Filament diameter1.75mm
Overall it’s well equipped for the price and especially the build volume is comparatively good.
Results
Test 1 and 2: Not bad! Some light stringing. Cura: Layer hight: 0.2 – Print speed: 60mm/s – No Supports
Test 3: This shape is not possible to get right a 100% because the tube has a 1cm diameter and is very sensitive to vibrations, but I use it as a test for the Z axis. Cura: Layer hight: 0.2 – Print speed: 60mm/s – No infill
Verdict
Pretty good at details. Cura: Layer hight: 0.2 – Print speed: 40mm/s – No Supports
Higher than initial Creality price points of around $200 or $300, this is still a good value machine at around $500. Build and parts quality is not stellar so I will expect to have to replace parts in the long run. Machined parts and build quality does seem superior to previous models, however. Day to day this printer is adequate for an entry-level user. Operation is not super intuitive but you will get the hang of this machine. It is easy to unbox, set up and organize. An issue that I have with it is that it is surprisingly noisy, also when compared to other similarly priced machines I have. The CR-10 V2 is a value-engineered low-cost machine with a large build volume that works surprisingly well. I was happy with the print results overall and the printer let me customize enough through settings that I could dial in new materials, new colors and optimize prints. The print detail is actually quite good. If you’re willing to take the time to understand the process and variables this could be a good first printer for you.
Stay up-to-date on all the latest news from the 3D printing industry and receive information and offers from third party vendors.
Tagged with: 3d printer • 3d printer review • CR-10 V2 • creality • Creality CR-10 • desktop 3D printer • desktop 3d printing
Please enable JavaScript to view the comments powered by Disqus.
CR-10 VS CR-10S VS CR-10 V2 – Creality 3D
CR-10 has caught many customer’s eyes since it released in mid-2017, Creality, as a potential 3d printer manufacturer based in China, we focus on making high standard 3d printing equipment. with follow-up models such as the improved Creality CR-10S. As of 2019, it is still one of the most copied designs in the 3D printing cosmos. And two years after the introduction of the CR-10, Creality has released a direct successor in the CR-10 V2. For the three printers, lots of people are confused with the difference. After reading this article, you will be enlightened.
The differences between CR-10S and CR-10
CR-10 has a large build size of 300*300*400mm to give more opportunity for you to image and create while ensuring accuracy and quality. Although there is a large size, the installation takes only 10 minutes. It has the industrial-grade circuit board, working continuously for 200 hours without pressure. The Linear pulley system is a patented technology, V-profile and precision pulley with perfect, running more smoothly, more wear-resistant and less noise. Newly upgraded larger leveling nuts with humanized design, in line with ergonomics, levels more convenient. The MK10 extrusion mechanism is a brand-new patented infrastructure that effectively reduces the risk of plugging and poor spillage, and can print almost all filaments on the market.
CR-10S is an upgraded version of CR-10. The machine parameters are quite the same.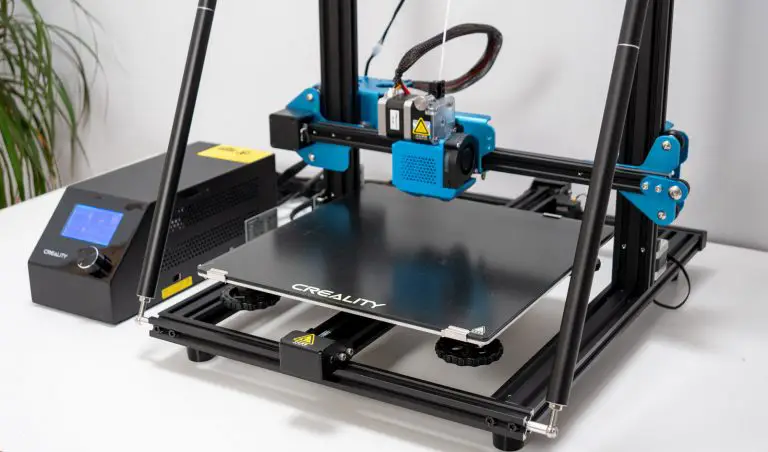 But there’s a lot have been upgraded, such as the Z-axis screw, upgraded motherboard, resume printing, and broken material detection.
1. The Z-axis screw: CR-10S upgrades the Z-axis double screw, more stable lifting, and higher printing accuracy.
2. Upgraded motherboard: Equipped with Creality 3D V2.1 motherboard, CR-10S can constantly print 200 hours without pressure, with quality assurance and industrial-grade process.
3. Resume printing function: CR-10S can resume printing while power-off. The motherboard is fully upgraded and supports continuous power failure, which effectively reduces model scrapping caused by power outages.
4. Filament breakage sensor: CR-10S does equip with broken material detection. When the filament runs out or disconnected, the printer will automatically be suspended to ensure the model can be smoothly printed.
The differences between CR-10 and CR-10 V2
CR-10 V2 is released in 2019, with friendly UI, new firmware, and separate console.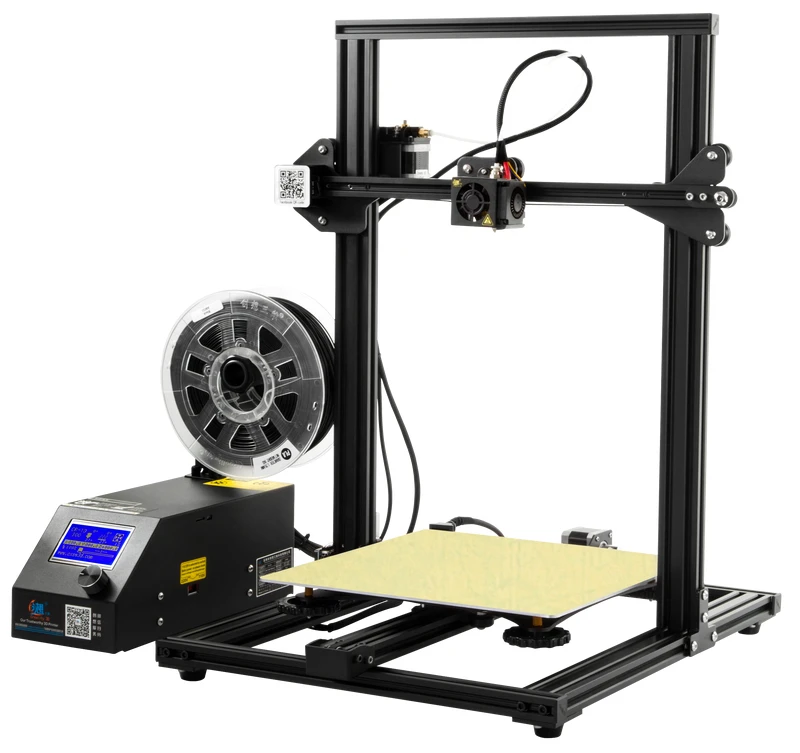 There is the Bowden extruding unit imported titan direct drive. Adding the all-metal extrusion unit, it ensures models with high quality. And it’s great for printing TPU. The dual-port cooling fan extruder can evenly heat-dissipate and immediately cool down, reducing plugging and poor-spillage. High-quality V-profile selected is more stable without any vibration, smooth to print with high precision. Self-developed industrial-grade motherboard and TMC2208 ultra-silent drive are adopted, bring the more stable running, noise reduction, and compression resistance. Solid 350W Meanwell power supplies pairs with thermally efficient bed heater and allows for rapid heating to 100℃. There are also resume printing functions and filament breakage sensor. BL-Touch can be added by yourself, enjoying more fun of DIY your own 3d printer. Carborundum glass platform is easy to remove the model and no-warping.
CR-10 V2 is also an upgraded version of CR-10. but it is with a triangle structure, which prints more stable as it looks. What about the differences? Let’s move on for more details, below are the main update of the CR-10V2:
1. Dual-port hot end cooling fans, cooling down filaments fast, more stable, more safety.
2. Imported titan direct drive, it’s wear-resistant and durable. and filament can be smoothly feed in.
3. Meanwell 350W power supply, it can generate stable electricity.
4. The extruding kit of CR-10 V2 is all metal. It’s sturdy and wear-resistant.
5. BL-touch(auto-leveling function) can be added to CR-10 V2. It’s convenient to level and save time.
6. CR-10 V2 has the ultra-quiet TMC2208 motherboard with silent printing and lower decibel.
7. Resume printing function, recovering from potential print failures before they happen.
8. Filament breakage sensor, saving your filaments when a strike occurs. And CR-10 doesn’t have this function.
The difference between CR-10 V2 and CR-10S
What about the CR-10V2 and CR-10S? with the same printing size and the same has double motor screw rods and patented V-profile design. And both have the filament sensor and resume printing function. Yes, you can pretty much say that CR-10V2 is an upgraded of both CR-10 and CR-10S. here are the main difference between CR-10S and CR-10S V2.
1. CR-10 V2 with TMC2208 ultra-quiet drive, high performance and stability, noise reduction, and compression resistance. That is most friends care about if it prints with more noises while CR-10S has the normal V2.1 motherboard.
2. There’s a connector on CR-10 V2 so that it can be equipped with titan direct extruder, for better print with TPU. Although CR-10S can not, the MK10 extrusion mechanism can also enable you to print with a good result with no plugging. Well, if you need to print with two kinds of filament, you definitely will get a CR-10 V2.
3. CR-10 V2 comes with carbon crystal silicon glass, printing with strong adhesion and easy to take the model without warping.
4. CR-10 V2 with Meanwell power supply, more friendly and reliable for you.
5. Both CR-10S and CR-10 V2 can be added with BLtouch for auto-leveling. Most friends are worried about the bed leveling when you received the printer, sometimes it drives them crazy. This really helps a lot with bl touch.
Source: https://www.creality.com/blog-detail/cr-10-vs-cr-10s-vs-cr-10-v2
Creality CR-10 V2 3D printer review. The best drygost on the market for drygosts?
Hello, friends.
I want to show off my new acquisition. Well, because any review is partly a demonstration of a product, and partly boasting, especially if the subject of the review itself is really interesting.
So, I can immediately say that I am happy with the purchase of the Creality CR-10 V2 printer just like an elephant. The printer is very high quality. It has a large print field, moderately quiet, no problems with assembly, has a rigid frame with struts. In general, the printer is excellent. Its only downside is, oddly enough, the price. Yes, pricey. But on the other hand, I'm not rich enough to buy cheap things. Therefore, I bought the Creality CR-10 V2 and I will tell you about it.
Starting with Creality CR-10 V2 specifications :
Model: CR-10V2
Type: DIY
Material (Frame): Aluminum profile
Platform: Aluminum alloy
Number of nozzles: One
Nozzle diameter: 0.4 mm
Layer thickness: 0.1-0.4 mm
Product size: 300*300*400mm
Material diameter: 1.75 mm
Language: Chinese, English
Creality CR-10 V2 3D printer
with bilateral
cooled and ultra quiet
job
Price: $499.99 Show More
14% BUY File format: AMF, OBJ, STL
Voltage: 110V/230V
Packaging type: Unassembled packaging
Connector Type: TF card, USB
Offline memory card
print:
TF card
Print speed: ≤180mm/s Normal print speed 30-
60mm/s
Auxiliary material: ABS,PETG,PLA,TPU
Product weight: 11.5 kg
Product size (L x W x H): 45.00 x 40.00 x 21.00 cm
I ordered the printer from Alibaba. Yes, it seems like an unusual choice, but now I’ll try to tell you what motivated the purchase.
First, at the time of ordering, this printer was only available on Alibaba.com.
Secondly, when ordering from alibaba, the seller offered to deliver the printer to me in such a way that I do not have to worry about customs and customs fees or customs clearance. And now we have such a situation in Kazakhstan that people who order a 3D printer by regular mail cannot receive it. because despite the law, our valiant customs officials believe that a 3D printer is a product that is not suitable for personal use, which means that the goods need to be cleared through customs. BUT! But at the same time, an ordinary person also cannot clear the goods, since for this you need to be able to do this, plus he is physically located in the city of Almaty, plus he also has to pay money for customs duties, etc. And all sorts of customs brokers do not undertake such work, since the cost and volume of the parcel are extremely small. So it turns out such a vicious circle. In which I was not at all eager to participate. That's why I ordered from alibaba.
And by the way, as it turned out, he didn’t do it in vain. 3 weeks after the order, they called me from Almaty and said that my package had arrived. The only point was that the seller organized delivery without customs clearance only to Almaty. And from Almaty, this parcel was already sent to me by an ordinary truck. And for delivery to Karaganda, I also paid 3500 tenge. (about $ 9) but this is honestly trifles. In total, the entire delivery from the moment of payment to the receipt of the parcel took exactly 25 days. And here I have a Creality CR-10 V2 printer in my hands in a hefty box:
Let's start unpacking.
First, the lower part of the frame is taken out of the box:
She's tough enough. The connection plug immediately catches the eye.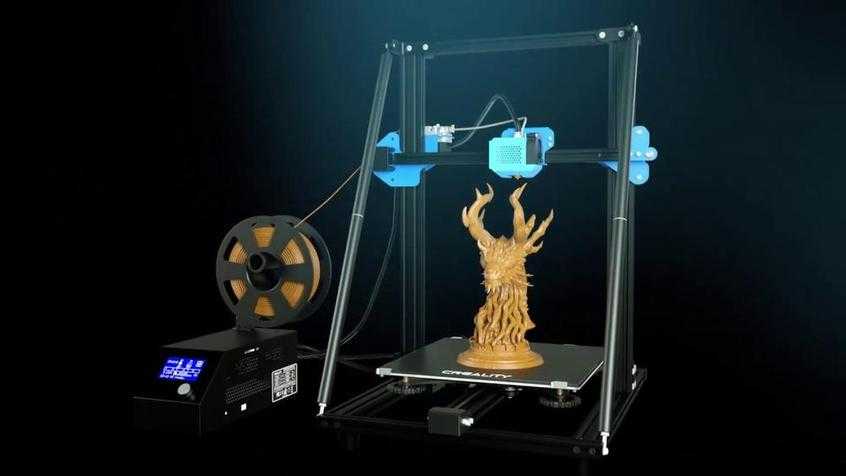 It has a nut, and the wire itself has a hard braid
As we can see, everything is packed more than perfectly:
Next, I removed the case from the box in which the power supply and control board are located. (Tell me what is the correct name for this box?)
On the side, you can immediately notice the MicroUSB port and the slot for a memory card in SD 9 format0003
Back side:
Connectors:
I continue to gut the box. Spacers:
Box with cords, parts and bolts:
In the kit you can see ties for cable management, hexagons, a bunch of bolts. Also in the box were three spare nozzles, an 8GB memory card and a card reader. Spatula and spool holder. As well as a spare Bowden tube.
Also included was 200g of PLA filament. By the way, enough quality:
And last I removed the vertical frame:
A print head, stepper motors, etc. are installed on the frame immediately from the factory.
I start assembling. It takes about 30 minutes on the strength. So if you don’t know what and how.
I twist spacers:
I fasten both parts of the frame with 4 bolts:
By the way, in this photo you can see how the heating table looks like from below:
Then I screw on the spacers, and I get an almost finished printer:
it remains only to collect the scattered tool
Although not, you still need to screw the filament holder onto the control box:
I quickly connect all the plugs and the printer is now completely ready for work:
I turn on the power. The printer's fans rustled vigorously. Information appears on the screen. Printer ready to print:
I run the filament. By the way, there is a filament sensor. And it works (I checked)
First of all, I decide to use the PLA that was in the kit:
I start printing the sample available on the flash drive.
During the printing process, the screen has information about the temperature of the table and nozzle, as well as the approximate percentage of readiness
Printing:
Finished result:
The quality of the model is simply amazing.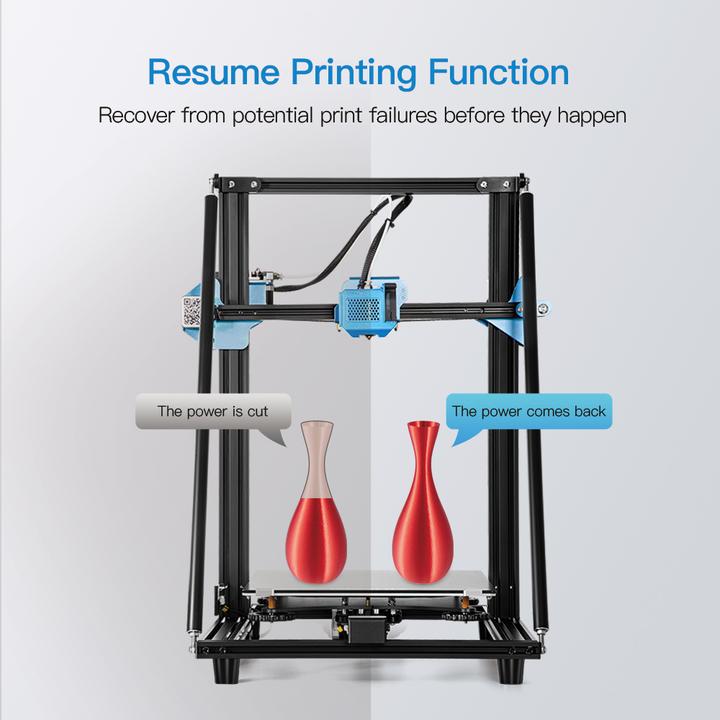 True, due to the fact that the color is white, it is quite difficult to convey this in the photo:
I continue to spend filament and print different figures. By the way, to prepare for printing, the Cura program is used, which was on the included flash drive.
I always print from a flash drive. In order not to keep the computer turned on along with the printer.
For example, this octopus (link to the model) was printed in 3 hours and 50 minutes:
I also tried the method when you first print with one plastic, then pause, and change the plastic. It turned out like this octopus:
Heating the table to 60 degrees takes about 3 minutes. Warming up the nozzle to the desired 220 degrees takes about a minute. (I tried to print ABS, set the table temperature to 110 degrees. It took about 10 minutes to heat up.)
Loved the glass on the hot table. PLA while the table is hot is kept so that it does not tear off.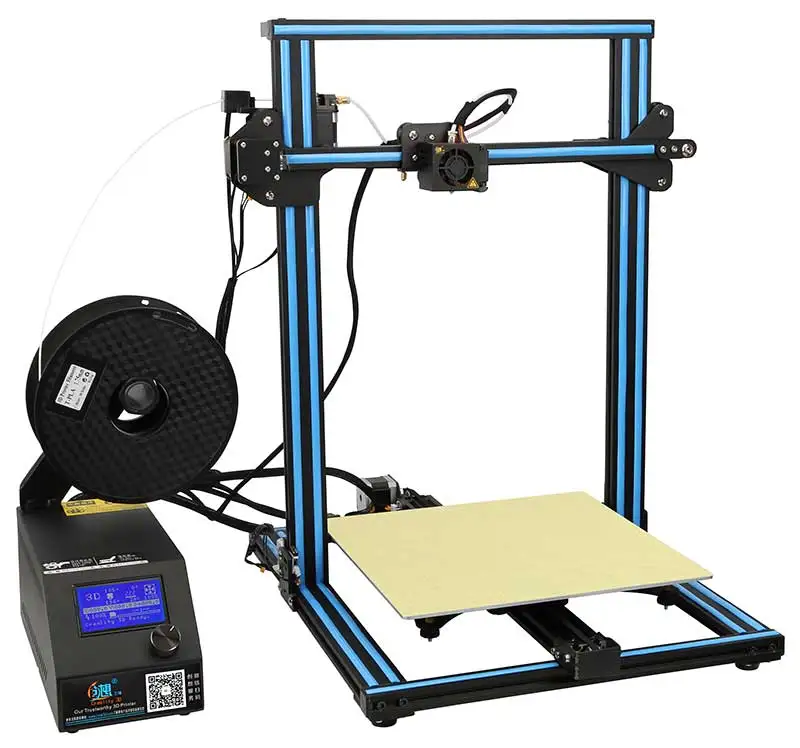 But as soon as it cools down, the model comes off by itself.
It is very comfortable.
I also tried to print with PLA plastics from Creozone and BF. The result is excellent. But with ABS plastic from BF has not yet made friends. Although I set 110 degrees at the table, the model comes off after a while. Can anyone suggest the best settings to use. I have two ABS coils and I need to spend them too.
I also print with PETG plastic without any problems. I set the settings the same as for PLA. the models are good. Below are more examples of some models printed on the Creality CR-10 V2.
Case for Arduino nano (link to model)
Legs for PS4 Slim (Model Link)
Enclosure for Raspberry Pi3 (Model Link)
Case for 18650 batteries (fits 18 pieces) (model link)
Cases for 18650/AA/AAA batteries
And for about a month of use, many different models were printed, which have already been sold to people. I didn't photograph them.
But overall, I'm more than satisfied with the print quality. And most importantly, I like the large print area.
Well, I’ll add more, for those who love giblets. I decided to disassemble the box with the control board. I had two reasons for this. The first is to see if everything is normal there. And the second is a rather noisy cooling fan. I want to change it to a quieter one in the future.
Dismantling showed that there are already three fans inside. The first one is in the power supply, the second one cools the board and the third one, which pushes air out of the case.
You can also see the power supply that powers this printer:
Power supply Mean Well 24V 14.6A. I think there is more than a power reserve here.
Conclusion:
As I said above, the only negative of this printer is the price tag. Well, the attitude of some people to drygostola in general.
I am personally completely satisfied with the purchase. Having spent a good amount once, I immediately got a 3D printer working out of the box, which you don’t need to dance with a tambourine.
As a plus, I can write the following:
-Large print area
-Heated table and glass that does not require additional processing with glue, adhesive tape, adhesives, etc.
- Rigid construction eliminating wobble
-Very quiet operation
-Possibility of upgrade (extruder for two filaments, auto level)
-Assembly from the box takes half an hour at most
-Good print quality out of the box
- Friendliness of the interface and simplicity even for beginners
I can safely recommend this printer for purchase. Especially after a while, when the price of this new product drops below the current $499 (by the way, you can buy it on Alibaba as a clubbing. From 10 pieces they give for $310 with delivery, I think that this is an even better price)
I think that this printer, despite its price, will eventually become as popular as its younger Creality Ender3 model. At the moment, there is no community on thingiverse yet. And there are still few models to improve the printer. But it's only a matter of time.
This is my entire review. If I missed something somewhere, please ask. I'll tell you, I'll answer, I'll add.
Have a great weekend everyone.
PS who may need a link to the official website of Creality
And a direct link to the page dedicated to Creality CR-10 V2 on the official website.
New 3D Printer with Dual Side Cooling
Gadget Reviews
Author Oleg Nauchny Posted by
If you have a hobby like 3D printing, then I want to tell you about the new upgraded 3D printer called Creality CR-10 V2.
The main feature of the Creality CR-10 V2, compared to previous generations, is the presence of a double-sided wedge-shaped nozzle for proper cooling. It promotes uniform heat dissipation, and thus makes printing accurate and correct.
The Creality CR-10 V2 uses an all-metal mechanism, making it highly durable.
Another useful feature of the printer is the BL-TOUCH automatic alignment, which will help you print any figures or details correctly.
An important feature of the CR-10 V2 is the TMC2208 drive, which is characterized by ultra-quiet and silent printing of elements and details.
Additional functions for power failure warning and filament run out detection are also included.
At the moment you can buy a new Creality CR-10 V2 3D printer at a good and low price for only $499.99 with a 14% discount.
14%
Crealy CR-10 V2 3D printer with bilateral cooling and soft work
Price: $ 499. 99SHOW MORE
Price: $ 499.99 Show Less
CREALITY CR-10,
| Features | |
|---|---|
| Model: | CR-10V2 |
| Type: | DIY |
| Material (Frame): | Aluminum profile |
| Platform: | Aluminum alloy |
| Number of nozzles: | Single |
| Nozzle diameter: | 0.4 mm |
| Layer thickness: | 0.1-0.4 mm |
| Product size: | 300*300*400mm |
| Material diameter: | 1.75 mm |
| Language: | Chinese, English |
| File format: | AMF, OBJ, STL |
| Voltage: | 110V/230V |
| Package type: | Unassembled package |
| Connector Type: | TF card, USB |
| Offline printing memory card: | TF card |
| Print speed: | ≤180mm/s Normal print speed 30-60mm/s |
| Auxiliary material: | ABS,PETG,PLA,TPU |
| Product weight: | 11.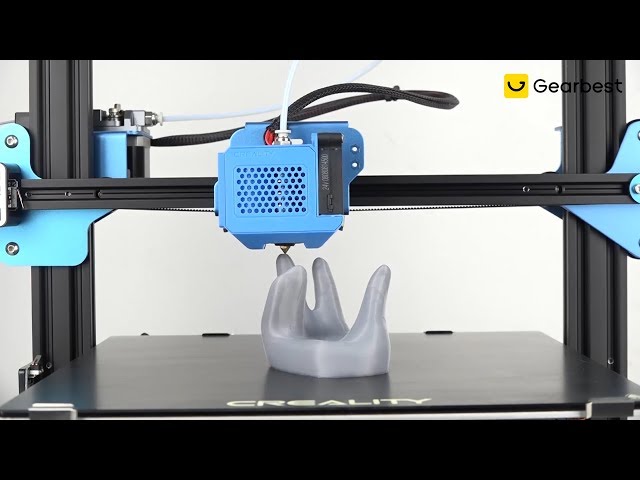 |