Cowtech ciclop 3d scanner
CowTech Ciclop 3D Scanner
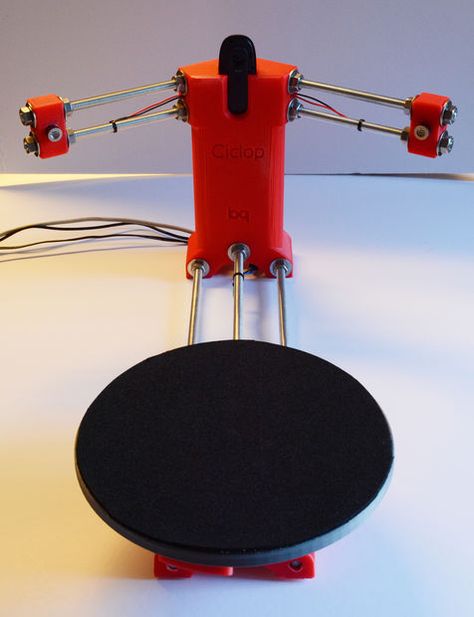
CowTech Ciclop 3D Laser Scanner
Over $180,000 raised on Kickstarter! 1700+ scanners sold and counting.
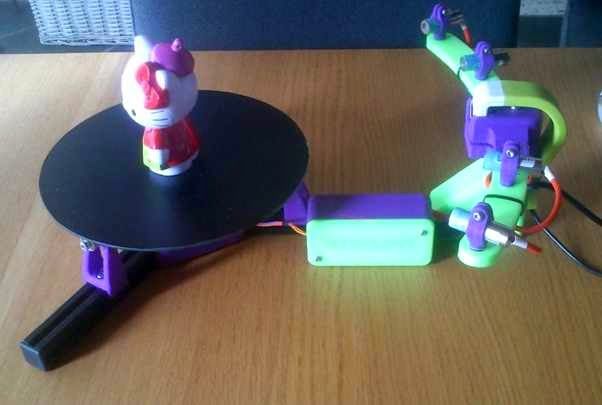
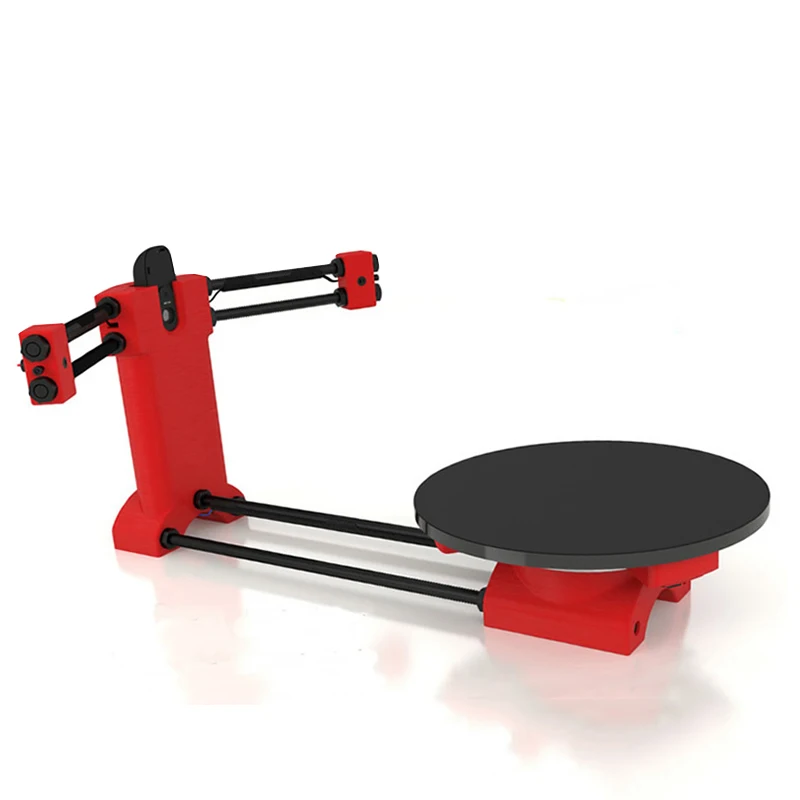
The 3D printing revolution has come, and it’s time for 3D scanning to follow. The CowTech Ciclop is a RepRap 3D scanner with a large scan volume, simple, yet elegant design, and a disruptive price point that blows any other laser scanner out of the water. The user prints the plastic parts on their own printer in any color and resolution they choose, and can assemble the scanner in less than 30 minutes. Then, simply take any object you want to replicate, set it on the 200mm laser cut acrylic turntable, and start scanning. We wanted to make sure our product was usable for anyone who owns a 3D printer, so we meticulously designed our parts for a print bed volume of only 115mm x 110mm x 65mm (4.5 x 4.3 x 2.6in) so they can be produced on even the smallest of printers.
Print your own parts and save money!
How It Works
Laser scanners are a very common type of 3D scanner that use a pair of line lasers that flash in succession in combination with a camera and a rotating turntable. As the lines flash on the object, they trace the outline of the object in red light. The camera then picks up the location of the laser lines in 3D space, converting those lines into hundreds of thousands of points, and as the turntable rotates, every side of the object is scanned into a cloud of points, which can then be stitched together to form a mesh that replicates the surface of the object with up to 0.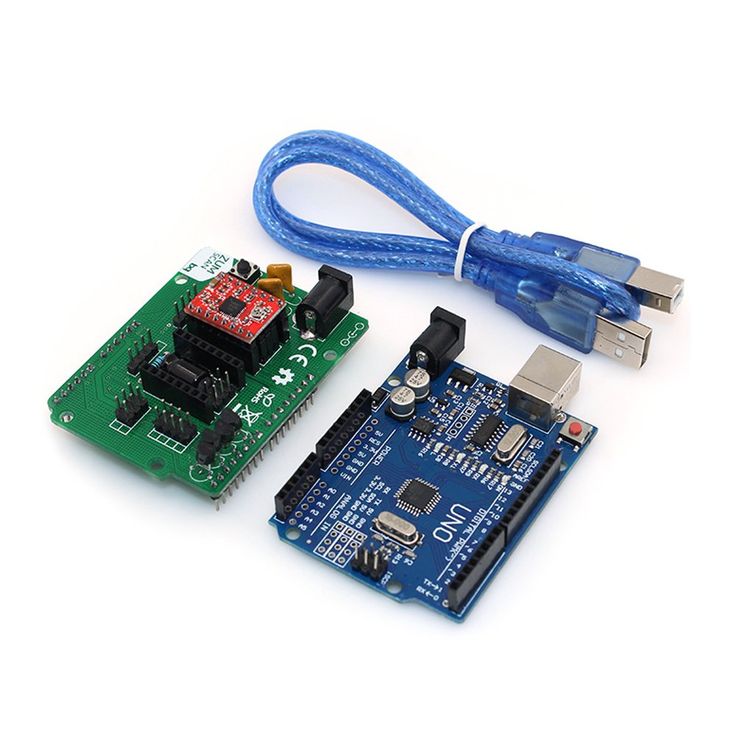 5mm precision.
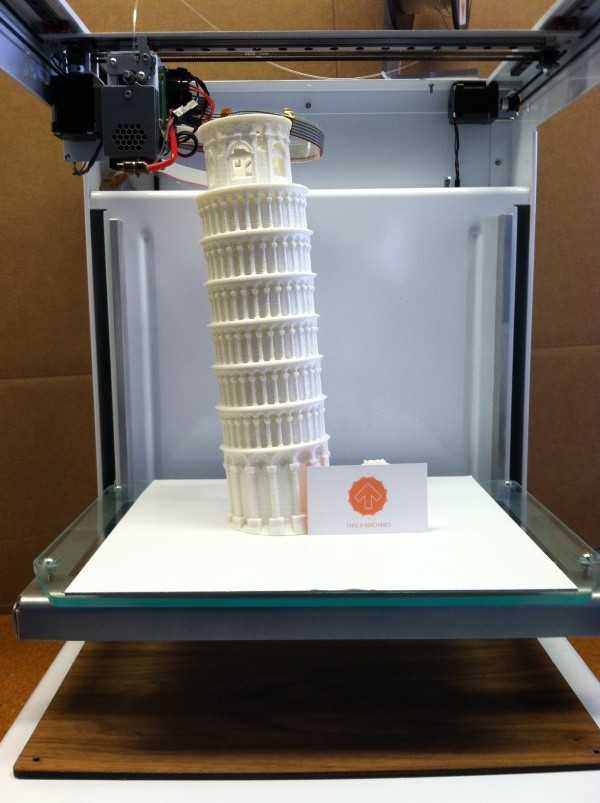
3D printed model lion, 0.2mm resolution, PLA, Prusa i3
The term 3D scanner is a bit of a misnomer. Technically, most 3D scanners are actually point cloud generators. The scanner itself is a tool to make a .PLY file, or a point cloud, made up of hundreds of thousands of points that represent the geometry of the object. The typical user will want to convert this point cloud to an .STL file, which can easily be printed on a 3D printer.
Scanned and post processed model loaded into Cura for slicing alongside the model mesh in CloudCompare
User submitted 3D prints
Once you have a digital 3D file of the part, the possibilities are endless. The CowTech Ciclop uses Horus, software developed by BQ for their version of the scanner. Unfortunately, Horus doesn't support direct .STL exports at this time, but this feature may be developed in later versions of the program. Fortunately, there are many options for post processing programs that can stitch the point clouds together into a printable file.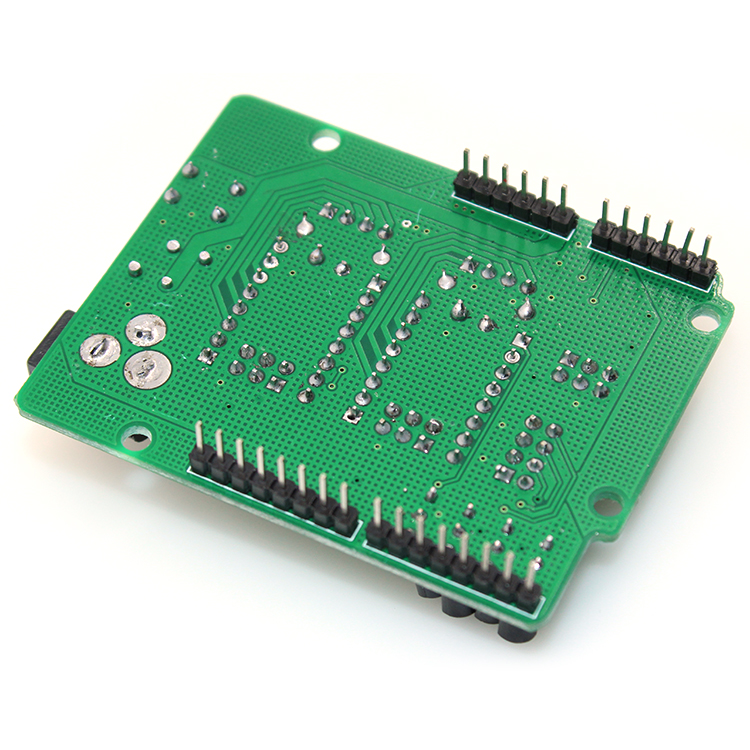 These include Meshlab, Cloudcompare, Netfabb, Blender, and more. We recommend Meshlab and Cloudcompare, and provide detailed documentation with the scanner on how to use these programs.
The CT Ciclop scanner is a fully open source Rep Rap project, and part files and details on how to build your own can be found in the downloads section of our website.
All laser scanners can struggle with objects that are very black, very shiny, or furry, as the laser doesn't register properly with the camera. The CowTech Ciclop, is designed for experienced users who can familiarize themselves with different software programs in order to use the scanner and get high quality outputs from it.
We like to think of a 3D scanner like a video camera. A nice camera gives you the tools to take great pictures and videos, but without post production work in a video editing or photo editing program, you will likely be disappointed in the end result.
Shop Now
CT Ciclop
Ready to Scan Kit
Now Just $179
Ships Free!
Shop Now
CT Ciclop
Standard Kit
Now Just $139
Ships Free!
Shop All CowTech Ciclop Scanners and Accessories
CowTech Ciclop 3D Scanner In-Depth Review
ADVERTISEMENT
8. 2Expert Score
CowTech Ciclop
CowTech Ciclop can be a great opportunity for enthusiasts willing to learn the basics of 3D scanning.
Affordability
10
Quality
7
Speed
8
Capability
7
Practicality
7
User Expectations
10
PROS
- Can be completely 3D printed.
- Customizable design.
- Turntable.
- Dual lasers.
- Open-source.
CONS
- Users complain about the lack of consistency.
Table of Contents
Ciclop is a RepRap 3D scanner hosting a large scan volume. It has a simple yet elegant-looking design with a rotating platform on which users can fix any physical object that they wish to scan.
The results can be manipulated for betterment. Thanks to its open-source attribute, operators can find every piece of information regarding it, online.
CowTech’s strategy behind doing so is to educate people and allow the community to learn and grow in a united way.
Based on laser 3D scanning technology, Ciclop can offer 0.5 mm scan resolution and takes 2-8 minutes for scanning a part or functional prototype.
So, what makes this scanner outstanding? Is it worth the price? Well, let’s find out by going in-depth about the device.
Features
The specialty of Ciclop is users can self 3D print the machine in any color and resolution they seek. The scanner can be assembled in less than 30 minutes. After which, operators can put the object they wish to scan on a 200 mm laser cut acrylic turntable and start processing.
The manufacturer has kept the design considerations of every 3D printer in mind and come up with a bed volume of 115 mm * 110 mm * 65 mm which can be manufactured even on small 3D printers.
Below are some of the most striking features of Ciclop – the scanner that you can self-print if you have a 3D printer at your home.
ADVERTISEMENT
Logitech C270 HD Camera
Known for generating high-quality images, C270 is a popular webcam available at a very affordable price. Ciclop is equipped with this camera that has the capability of capturing video up to 1280 * 720 pixels and images up to 3 megapixels.
With this tool, Ciclop enables users to capture fine details of any object and translate them into computer images that you can better thereafter. Moreover, a VGA image sensor and RightLight technology ensure that everything you capture is clean, sharp even when working in low light conditions.
DIY Kit
To make sure that their device reaches as many hands as possible, CowTech has utilized open-source technology.
Users can customize the scanner and design their parts to ensure they function exactly in the manner they wish to. The creation of a scanner involves a huge amount of learning.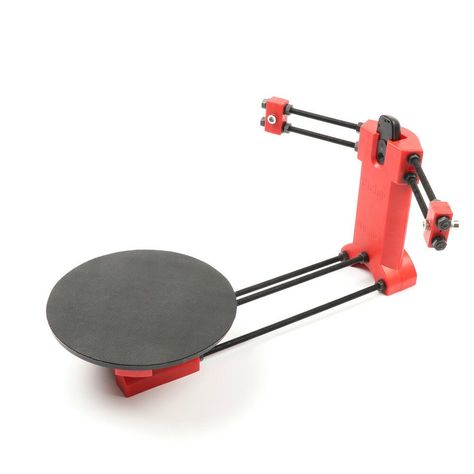 So, if you are an enthusiast, use the machine to quench your thirst for knowledge.
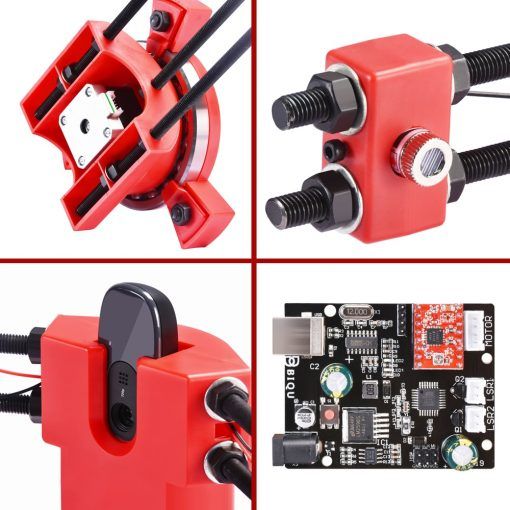
Dual Laser Setup
Two lasers on each side of the scanner’s platform guarantee an extremely high amount of precision. Both these lasers are of class one type. They join very well with the Logitech camera to generate detailed capturing of up to 500 microns.
ADVERTISEMENT
Easy to Use Software
Ciclop comes with Horus software that allows complete control over the 3D scanner. Not only does it handle the complete communication between the computer and the scanner, but also captures and syncs the data. Additionally, it processes the captured image and takes care of the calibration as well.
If you are a beginner, this is one of the best scanning software that you can come across. It can be run on PCs as well as Macs. Also, the program has a sleek and easy-to-use interface.
Moreover, it comes packed with extremely functional tools and advanced calibration capabilities.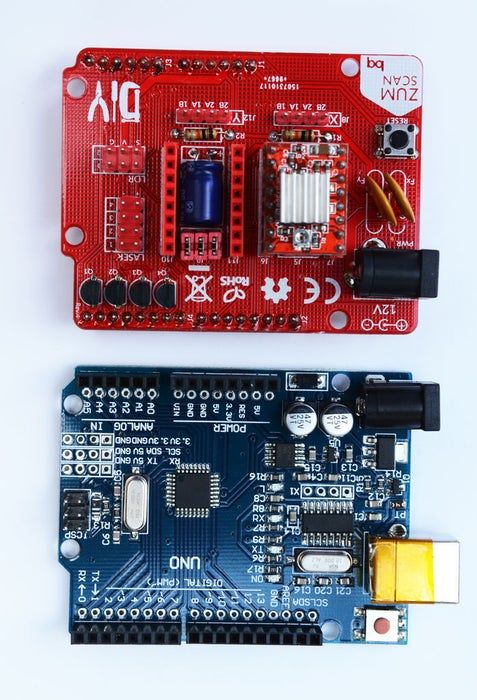 And in case, you do not know the manner in which to code or improve, you can easily fine-tune the program using GitHub Horus.
Based on Open-Source Technology
All the files that one needs to refer to for operating Ciclop can be downloaded online. This is done in order to make the knowledge accessible to all.
Once you have your hands over design, algorithms, maths, all you need is a 3D printer to create the scanner’s structure. In this way, you do not need to buy anything unnecessary. It’s one of those rare 3D scanners that’s built on minimalistic prerequisites.
ADVERTISEMENT
Specifications
| Technology | Laser 3D Scanning Technology |
| Price | 99 $ |
| Scan Resolution | 0. |
| Scan Volume | 200 mm * 205 mm |
| Scan Time | 2 – 8 min |
| Max Supported Weight | 6.6 lbs |
| Number of Lasers | 2 |
 5 mm
5 mmCiclop uses laser 3D scanning technology. It can scan volumes up to 200 mm * 205 mm and deliver 0.5 mm scan resolution. The scanner can perform qualitative work in quantitative amounts using not more than 2-8 minutes of your time. It has a magnetic back cover.
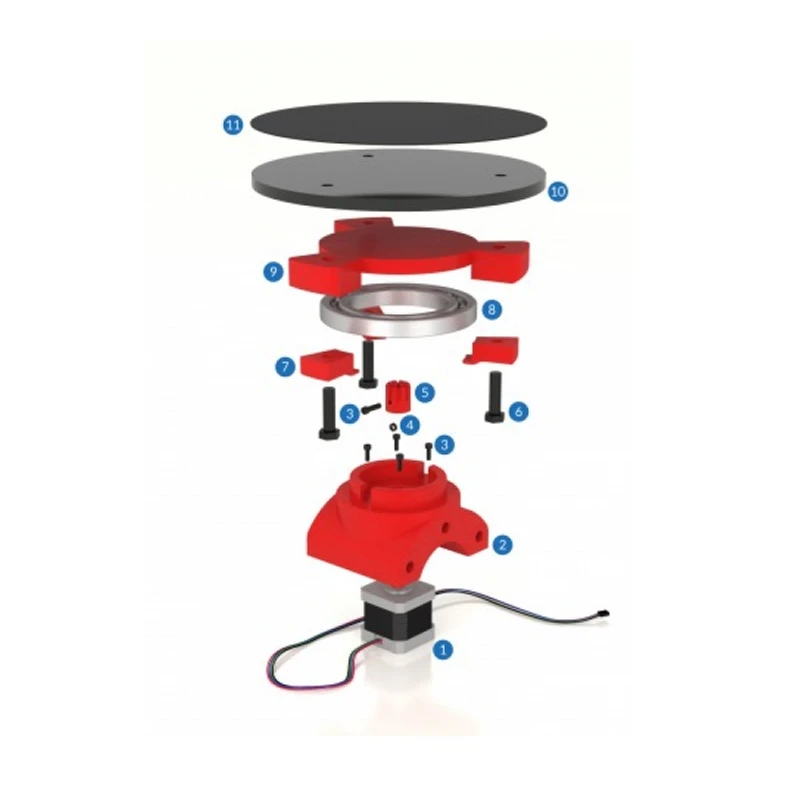
All the parts of Ciclop can be 3D printed. All you need is a Nema 17 stepper motor for the turntable, a custom CT scan shield. As mentioned above, the machine is open source and has a RepRap design that’s accessible to everyone.
Price
CowTech Ciclop is available for $99.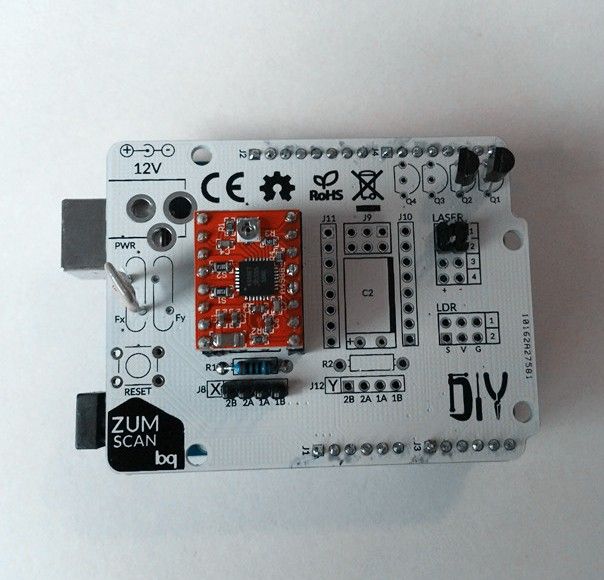
First Impression
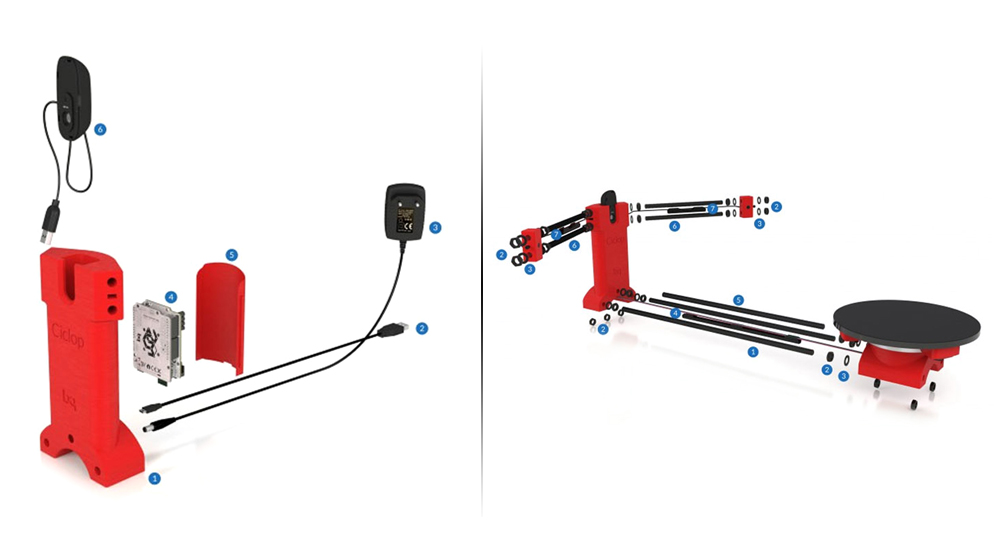
The Classic Ciclop scanner kit contains:
- Acrylic parts.
- A bearing.
- A custom CT scan shield and UNO R3.
- A Logitech C270 webcam.
- Two-line lasers.
- A LED strip.
- A NEMA 17 29 mm stepper motor.
- A hardware kit.
- A right-angle USB cord.
- A 12 Volts 1 Ampere power supply.
Setup
In case you are manufacturing all the parts at your home using 3D printing, you’d have to assemble them to start scanning. And doing so will take more time than buying a readymade scanner.
Experts recommend manufacturing the scanner as a DIY kit and then assembling it. Because all the information about the machine and its components is available online, users should not face any trouble either with manufacturing or assembling.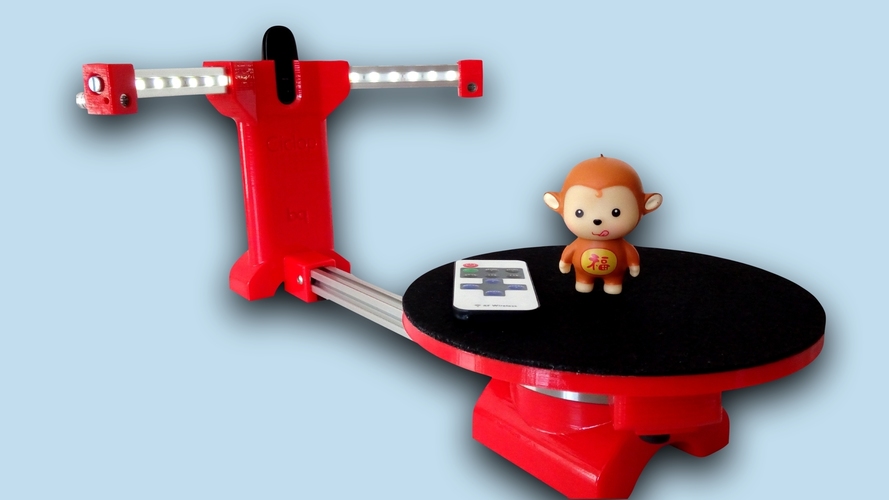
ADVERTISEMENT
Scan Type
Laser-based scanners are the most common type. They usually use a pair of laser lines flashing in succession, in combination with a camera and rotating turntable.
As soon as the lines flashing on the object trace the outline in red light, the camera picks up the location of the lines in space. After which, those lines can be converted into hundreds of thousands of points.
Meanwhile, the turntable rotates and every side of the object is scanned into a cloud of points. These dots can then be stitched together forming a mesh that replicates the surface of the object.
Scan Quality
The scanned images of small showpieces such as a Lion, skull, and faces are available online. Even the models made from the same can be seen to have a decent amount of detail, given the price at which the scanner is available.
Software
As mentioned above, Horus is the name of the software that comes with the scanner.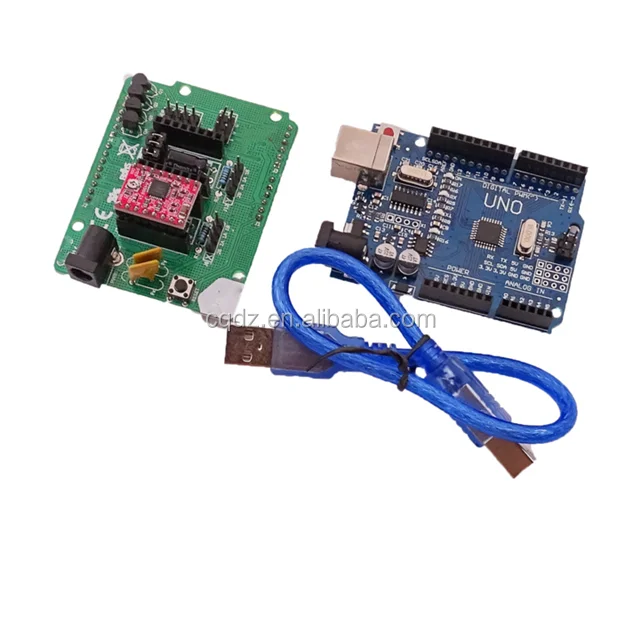 Although it doesn’t support exporting files directly in STL formats, there are other ways in which the stitching can typically be achieved.
Apart from that, the program does good work by capturing and syncing the data as well as image processing and even calibration. The application is easy to use and it comes with useful tools and advanced calibration capabilities.
ADVERTISEMENT
Customer Support
CowTech’s technical team can be contacted over the phone or by email.
Parameters Influencing Buying Decision
Below mentioned are the chief factors concerning the Ciclop 3D scanner.
3D Scanner Cost: Unlike other 3D scanners, Ciclop does not have a particular cost. Users can 3D print it in a way that they find is cost-effective. So, go on and define what’s affordable for yourself!
3D Scanner Speed: Neither there is any to brag about Ciclop’s scan speed, nor there is anything to complain about. It has an average scan speed when compared to others in the same price range.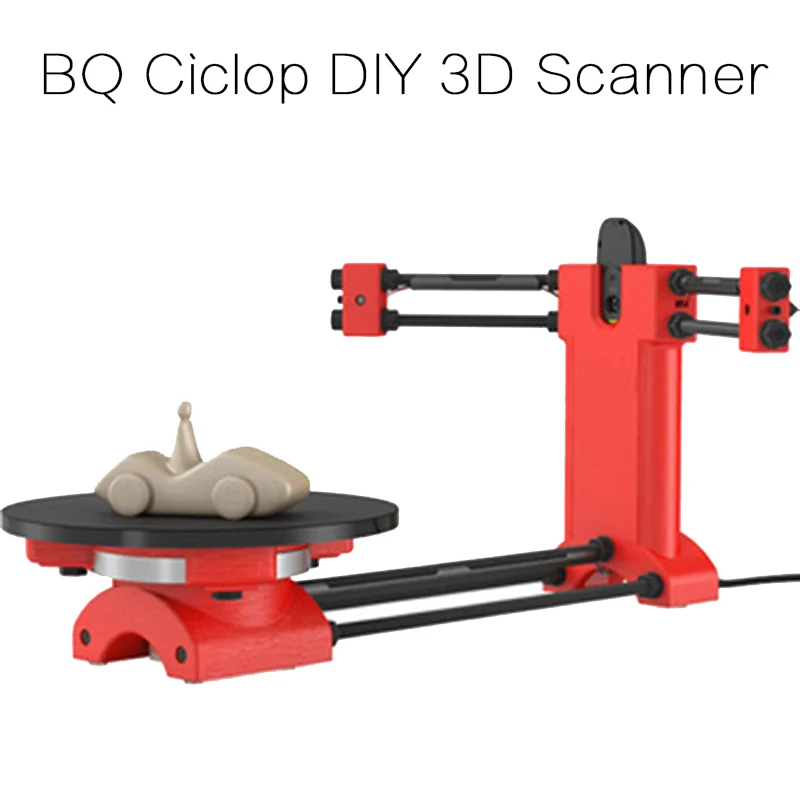
3D Scan Quality: A 0.5 mm scan resolution is a decent one considering the flexibility Ciclop offers its users.
3D Scanner Capability: Ciclop is equipped with a turntable that allows users to rotate certain objects to capture all its views. The dual lasers take care of the quality of the final scan. And the software lets you increase it even more if there is any sort of minor dissatisfaction and scope of improvement by making amends.
3D Scanner Practicality: The machine finds tremendous use at homes in scanning showpieces of varied sizes and geometries. It’s got a lot to do with schools wherein 3D scanning is taught.
3D Scanner User Expectations: Academicians and entry-level users are the two groups of individuals from whom Ciclop benefits the most. The scanner gives them accessibility in a world which they cannot otherwise afford for some other reason.
The Verdict
Ciclop is probably the simplest approach to 3D scanning. It gets your job done with minimal requirements. And this is what makes it extremely budget-friendly.
The ultimate highlight of this scanner is the open-source characteristic that makes the information regarding it accessible to the mass. All you need is a basic 3D printer to manufacture the scanner how you see it in the images.
Also, ambitious users can modify the design to make it even more appropriate for their application. Since it’s open-source, users can tweak it and juggle up with the technology.
In a nutshell, it can be a great opportunity for enthusiasts willing to learn the basics of 3D scanning. The scanner is based on the most common 3D scanning technology, it has dual lasers, a high-definition camera, and straightforward software. Well, that’s all you need to scan an object!
DIY Cyclops assembly and laser scanning software
Greetings to all. Today is a small review of the Ciclop desktop scanner.
Once again, the store offered to take something for review. Since I have long been interested in the question of using this thing for the needs of decorative 3d printing, I chose a scanner.
So, the scanner itself was developed by the Spanish company BQ, which has now ceased its support (supposedly due to Chinese fakes, but it is doubtful. Now the American CowTech also sells this scanner. The source codes for 3d printing of parts of the scanner are freely available at Thingiverse (there are also links to software and electronics).0003
Links to complete documentation kits:
www.cowtechengineering.com/downloads
www.bq.com/ru/support/ciclop/support-sheet
In the kit we have such a “loose”:
The assembly is simple, however there are several points:
1. It is not worth rushing to tighten all the nuts - you still have to adjust the geometric dimensions - the convergence of lasers in the center of the site, the distance to the turntable.
2. In my stand, the camera “dangled” a little, by a fraction of a millimeter - but that was enough to skew the picture. Eliminated by laying foam material.
4. The turntable was transparent and uncoated (as in the original) - I painted it with plastidip.
5. Check the calibration checkerboard patterns. I don’t know how they printed the one from my kit - but the proportions of the squares were violated. I took it from the Internet and reprinted it myself.
6. The focus of the camera is not adjusted to the distance to the platform. He removed the cover and twisted the focus in place.
88. The economy is managed by the "native" Horus software from BQ.
After assembly, the scanner went through calibration procedures in the native Horus software.
Since by this point I already knew that the quality of scanning is very much dependent on the quality of lighting (stability, diffuseness, color temperature), I took care of having a small lightbox in advance in order to at least provide more or less comparable conditions for samples.
Having selected the "candidates" for the samples, I got ready.
Requirements for the object are stated as follows:
1. The object must be larger than 5x5 cm but smaller than 20x20 cm
2. The object must be opaque and still
3. The object must weigh no more than 3 kg
Difficult to scan:
1. Shiny, luminous objects
2. Too dark objects
3. Objects with a blurred surface (eg soft toys)
The result of the scan is a cloud of points in PLY format (which must then be converted to a surface). Here is a guide for post-processing the cloud and preparing the STL file.
After reading the scan optimization guide, I decided to try with a simple cylindrical object.
After several attempts, I was convinced that I had a common problem - mismatches in the point clouds from the right and left lasers, and the issue with proportions.
Nothing worthwhile about this except for trying to calibrate the webcam settings (they are not calibrated when the calibration wizard is running) could not be found (a dude named Jesus from BQ support has not answered questions for a long time).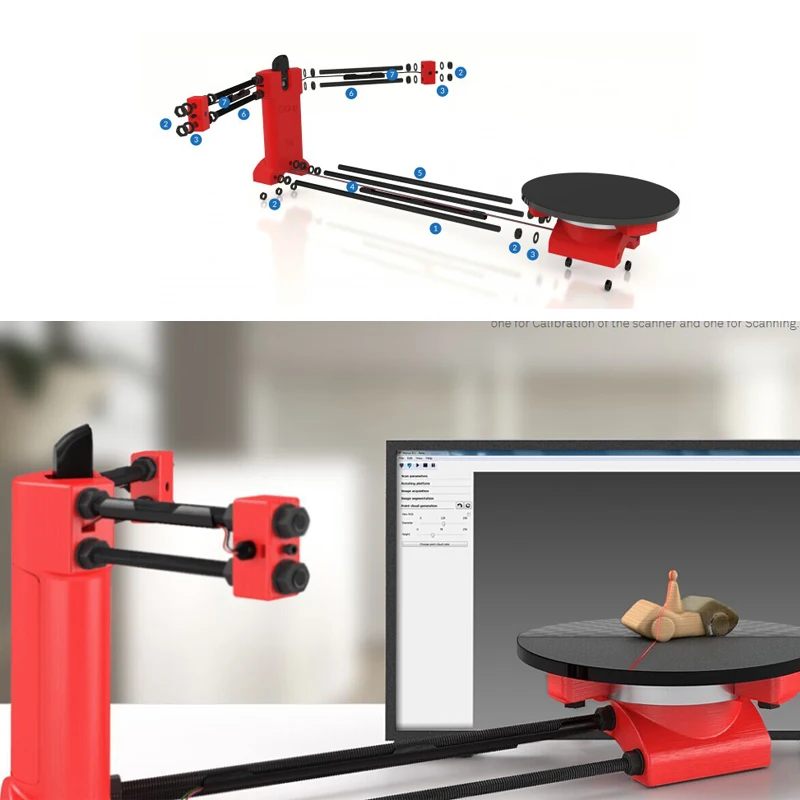 To do this, you need to take several shots with different positions of the calibration table. Done. The situation has improved, but not completely.
I had to manually edit the calibration file (calibration.json in the Horus-a folder) and by trial and error, scanning a cylindrical object, to achieve the coincidence of the clouds.
And everything seems to be ok:
But no - on complex objects, cloud fragments still sometimes do not coincide, moreover, many "blind" zones are formed:
impossible, at least with regular lasers.
You can, of course, continue experimenting with scanning with individual lasers and trying to combine all this economy in third-party software, and then try to bring it into a viable form for STL.
All this is reminiscent of a joke about boats in bottles.
-How do you make boats in bottles?
-I put sand, silicate glue, sticks into the bottle and shake it.
It turns out all sorts of shit, and sometimes boats.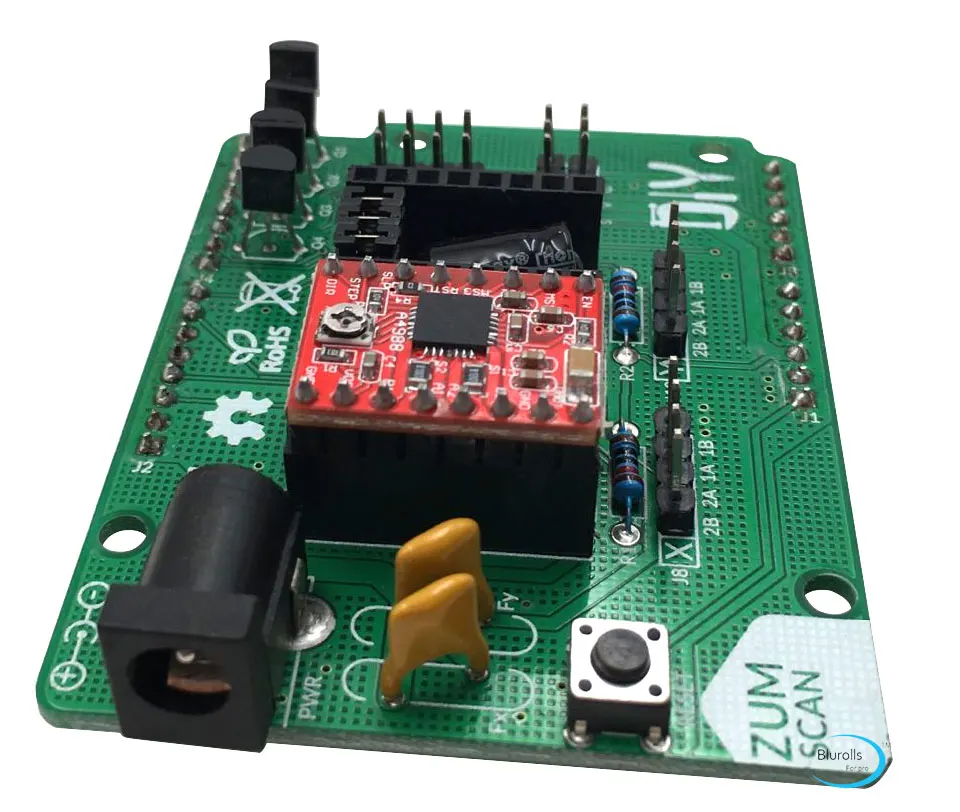
In general, I realized that I am not an adept of such creativity, and I have a suspicion that it is easier to model objects from scratch that are easier for a scanner.
And complex ones - the scanner cannot cope with complex ones in normal mode, two lasers are not enough for it - blind spots remain. To fix this problem, you need to scan in other positions and then again suffer with the combination of clouds. No thanks.
As a result - the thing will fit only for learning the basics of laser scanning, for something more - absolutely useless. No, of course, you can get something with outlines similar to the original model, but on this (and this, taking into account all the tambourines with cloud processing), that's it. No wonder the Spaniards abandoned this case.
The store made sure - in the description it is honestly stated that the result depends on the position of the planets and the mood of Aunt Sonya from the third floor. Open source and all that, let's dance together. No thanks.
Conclusion - don't take it, but if you're into extreme hunting, assemble it yourself from the same material that your friend from the joke makes boats from.
Product for writing a review provided by the store. The review is published in accordance with clause 18 of the Site Rules.
details and technology. Self-made 3D scanner - ABC IMPORT
Contents of the article:
- The principle of operation of shooting in volumetric mode
- What is photogrammetry and how it affects the display of objects
- Turntable - the second stage of creating a scanner
- Additional software
- Spinscan by Tony Buzer: the basis of all scanners0099
- "Atlas" - a completed project that needs some work
- CowTech Ciclop: a new model of a multifunctional device
- So what is the difference between the CowTech version and BQ DIY version
- Turntables and tables for creating scanners
- Microsoft Kinect 3D scanner Before you build a scanner
If you want to make your own 3D scanner, the first step is to find a webcam. If you have it, the cost of the entire project will cost 40-50 dollars. Desktop 3D scanning has made great strides in recent years, but it still has major limitations. The hardware of the technique is built on the basis of a certain volume and resolution of scanning. You can get good results only if your subject meets the requirements and shooting resolution.
How 3D shooting works
You will be interested in: How to control your TV from your phone: recommendations
Photogrammetry uses a set of conventional 2D photographs taken from all directions around an object. If a point on an object can be seen on at least three images, its location can be triangulated and measured in three dimensions. By identifying and calculating the location of thousands or even millions of points, the software can create an extremely accurate reproduction.
Unlike a hardware scanner, this process has no size or resolution restrictions. If you can photograph an object, you can scan it:
- The limiting factor in photogrammetry is the quality of the photographs and therefore the skill of the photographer.
- Photographs must be clearly visible and clearly in focus.
- They must also be placed around the object so that every part of them is covered.
Without a 3D scanner, you can only make a 3D image of large objects. Small items cannot be scanned. To understand this in more detail, we will analyze the concept of photogrammetry.
What is photogrammetry and how does it affect the display of objects?
You will be interested in: Hair dryer for curling: an overview of the best models, specifications, reviews
Photogrammetry is the science of taking measurements from photographs, especially for restoring the exact position of points on a surface. It can also be used to reconstruct the motion paths of designated reference points on any moving object, its components, and in close proximity to the environment.
In short, it gives you the ability to create a 3D grid from multiple photos by comparing similarities between images and triangulating them in 3D space.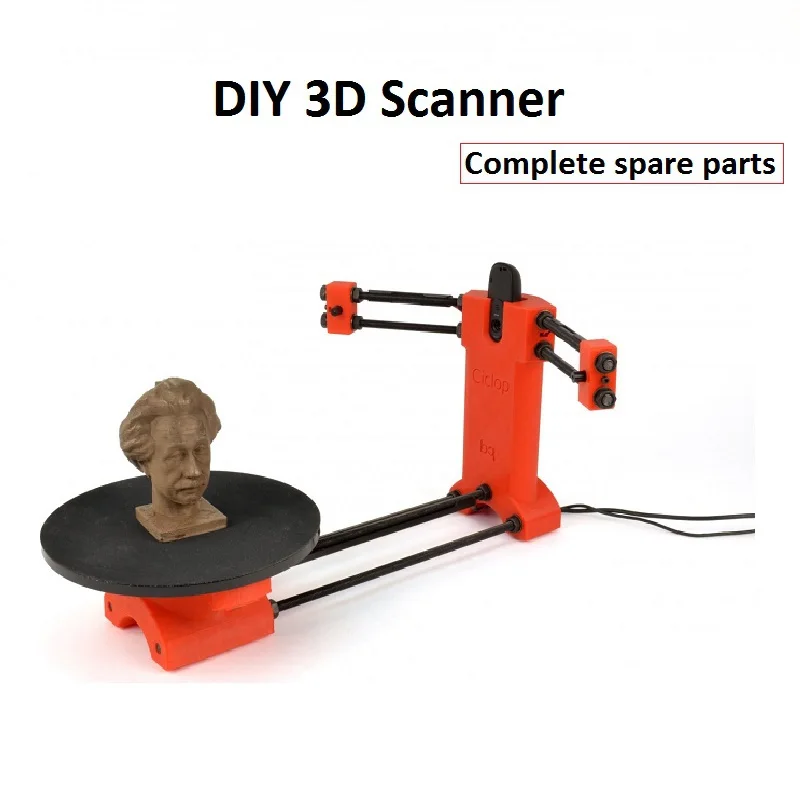
Photogrammetry has been around for a while, but it wasn't until Autodesk jumped into its Memento beta program that things started to work. Memento was renamed to ReMake when it left the beta phase. Sounds like magic, right? Well, it's not magic, it's reality. Now anyone can do 3D scanning without spending hundreds on a scanner. Even affordable open source 3D scanners require quite a lot of knowledge to get them to work properly. With photogrammetry anyone can get what they want.
Turntable - the second step of creating a scanner
All you need to create your own 3D scanner is your smartphone, the included headphones and a player. Here's how it works: you turn the crank, and for every full turn of the turntable, the phone's camera is triggered by the headphone volume 50 times.
You will be interested in:Audiophile headphones: rating, review of the best models
Simple! Transfer photos to your computer and then use Autodesk ReMake to do wonders.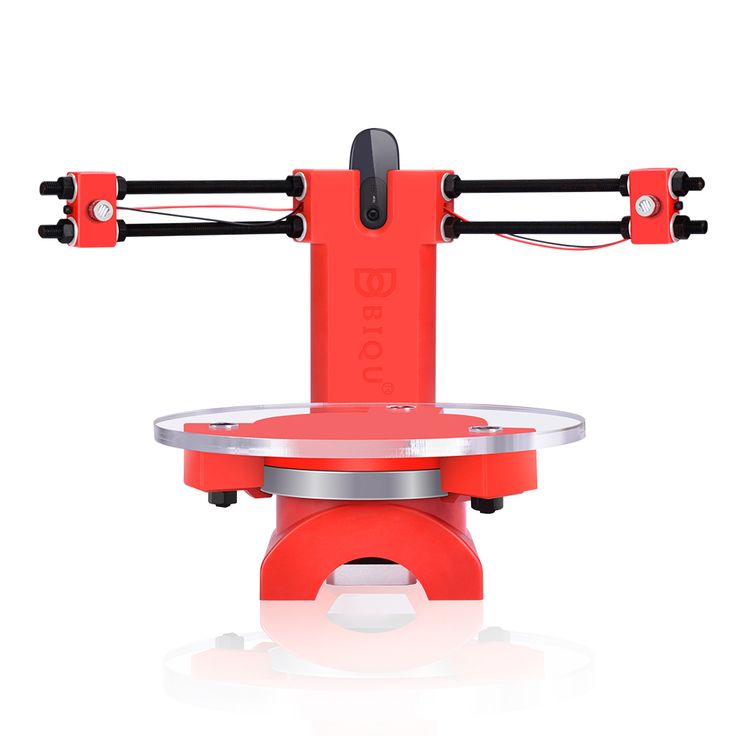 It's amazing, but not only is it good at meshing, it also provides tools to tweak the mesh, repair holes, align, prepare for 3D printing, or serve as a system shape as a 3D resource for games or renders!
Well, given that Apple has removed the headphone jack for the iPhone 7 and above, an updated version of the scanner creation will be used. It is based on the principle of working on a trigger for a Bluetooth camera. This will replace the need for a headphone jack.
- High quality photogrammetric scanning requires high quality photographs of the subject from all angles.
- The easiest approach for scanning small things is to rotate the object while taking the photo.
- To do this, the scanner uses a stepper motor controlled by the Arduino board.
- The stepper rotates the object by a fixed amount, and then the infrared LED turns off in a freaking ingenious series of blinks that mimic a camera's wireless remote control.
An LCD display screen with a set of buttons allows the user to control the Arduino.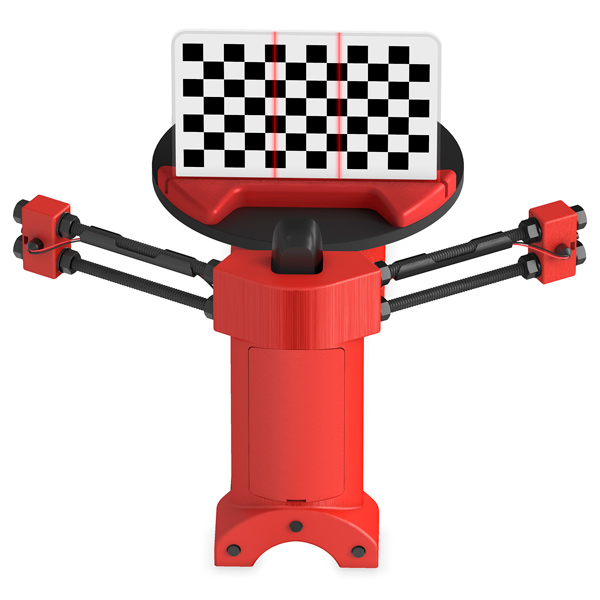 Using the buttons, the user can select the number of shots to be taken per revolution. A high quality DIY 3D scanner can work in automatic mode, where it takes a picture, advances the stepper motor and repeats it until it completes a full revolution.
There is also a manual mode where each press of the button takes a picture, moves the jog dial and waits. This is useful for scanning details. The 3D scanner focuses on the frame around the image.
Optional software
When the photogrammetry software detects a feature in a photo, it tries to find that feature in other images and records the location on all pictures that appear.
There are two solutions:
- One is to move the camera around the subject so that the background stays in sync with the movement.
 This is good for large objects, but it's much more difficult to automate the process.
 - A simpler solution is to leave the background untouched. This is easier to do for small objects. Add the right lighting to that and you're on your way to featureless backgrounds.
Another tip is to overexpose your images with a stop or two. This allows you to capture more detail in the subject's shadow while separating the background so that any remaining background objects disappear into brilliant white.
- "Arduino". It has pins that are not covered by the LCD screen, making it easy to connect.
- SainSmart 1602 LCD Shield which has a display and some buttons to control the scanner.
- Stepper motor driver (Easy Driver).
The NEMA 17 stepper motor will rotate the scan object. With a large stepper motor (with appropriate driver and power supply), this high quality DIY 3D scanner could scale up the scan. 950 nm IR LED triggers the camera.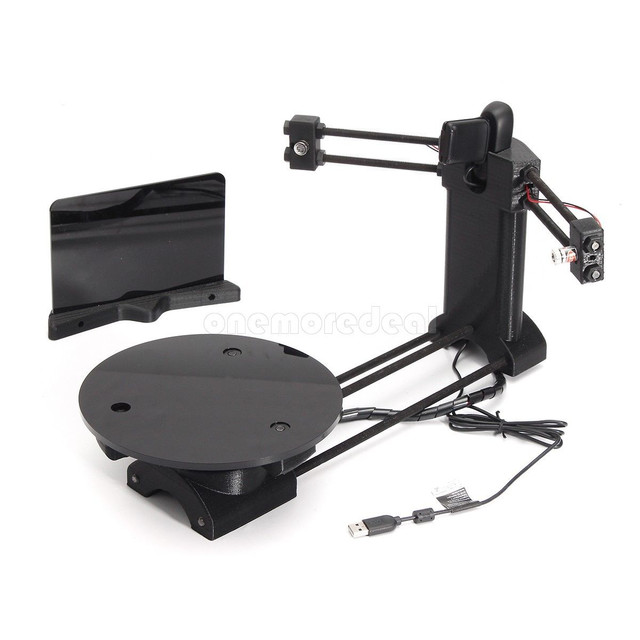 Some popular models of handheld 3D scanners are based on this principle. You can repeat the building process with your own hands. We offer several options to choose from.
Spinscan by Tony Buzer: the basis of all scanners
You will be interested: Where to put the tablet in the dishwasher: instructions
In 2011, 3D printing genius Tony Buzer released Spinscan. This is a homemade open source 3D scanner based on a laser and a digital camera. Later, MakerBot used the ideas from Spinscan to create the closed source Digitizer Scanner.
FabScan
FabScan started as a graduation project and has since been adopted by a small community that continues to improve its capabilities. The FabScan works like many other laser scanners, but it's aided by a built-in housing that helps even out light levels, preventing scan distortion.
VirtuCube
An alternative method for laser scanners is the structured light scanner. Using a pico projector instead of a laser, the VirtuCube can be easily created with a few printed parts and basic electronics.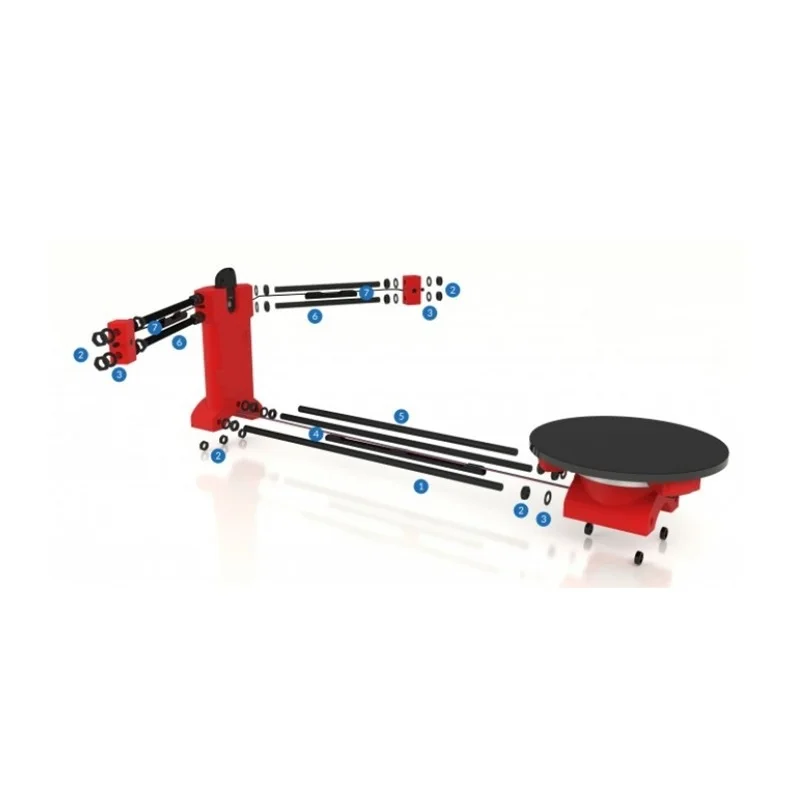 This whole system can be placed in a carton box to prevent other light sources from causing printing errors.
Two exciting new open source laser scanners have already been released: The BQ Cyclop and Murobo Atlas.
BQ - Laser Scanning System
Spanish consumer electronics company BQ announced the Cyclop 3D scanner at CES. Cyclop uses two laser line levels, a standard USB webcam, and BQ's custom Arduino controller. BQ has written his own scanning application called Horus. While reports say the Cyclop isn't available yet, BQ says it will be later this year.
"Atlas" - a developed project requiring improvements
Murobo's 3D scanner is currently seeking funds on Kickstarter. Like Spinscan, Digitizer and Cyclop, Atlas uses laser line modules and a webcam to scan an object on a rotating platform. Atlas replaces the Arduino Raspberry Pi to integrate control and capture into a device. Like Cyclop, the creator of Atlas promises it will be an open source project.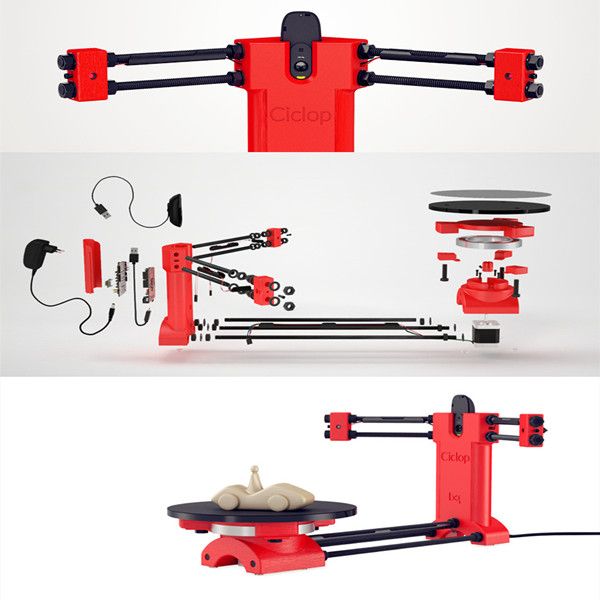 The $129 sets sold out, but some remained at $149 and $209.
In 2019, the company aims to launch a smartphone-based 3D scanner that not only displays background visibility but also constructs focus when capturing an image. In America, DIY novelties are amazing. If you don't know how to make a 3D scanner, use the unfinished version of Atlas. There is a fairly clear functionality, and developers only need to flash the device and ensure the operation of those functions that they want to see as a result.
CowTech Ciclop: new multifunction machine
Price goes up to $160 (depending on whether you print 3D parts or not). The company is based in the USA. The resolution of the finished images reaches 0.5 mm. Maximum scanning volume: 200 × 200 × 205 mm. BQ formed the basis of a DIY 3D scanner kit for a 3D printer. With your own hands, you can modify the version of the model to create images in four-dimensional space.
CowTech Engineering leveraged BQ-led funds to give unique value to the updated model.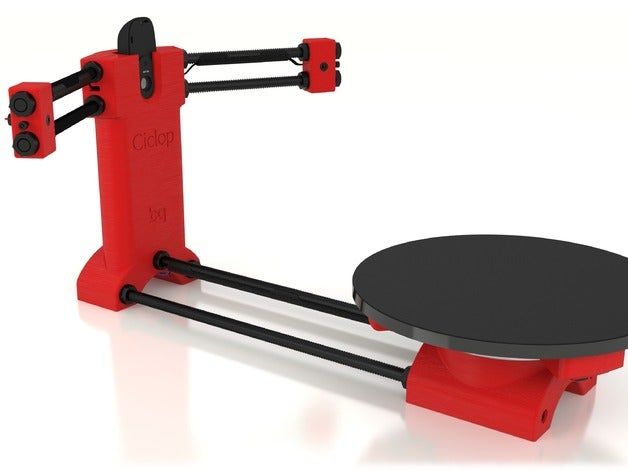 Opportunities added:
- environmental review,
- background capture,
- lens display in inverted style.
True to the open source movement, Cowtech launched a Kickstarter campaign to raise money to launch a production version of the original, Ciclop CowTech. The team set a lofty goal of raising $10,000 but was greeted with surprise and delight when the community was able to raise $183,000. The CowTech Ciclop DIY 3D scanner kit from a camera and phone was born.
So what's the difference between the CowTech version and the BQ DIY version?
CowTech Ciclop still uses Horus 3D software as it is a fantastic store for 3D object scanning. The differences, however, lie in a slightly different design, which the team spent several days developing so that the parts can be 3D printed on any FDM 3D printer.
The same blanks can be used to design your own devices. The company's 3D scanners and printers only have a small build volume, so CowTech has designed parts that can be printed on any printer with a build volume of 115×110×65mm, which is found in almost all 3D printers.
Ciclop from CowTech:
- There are adjustable laser holders here.
- CowTech DIY uses laser cut acrylic.
BQ Ciclop:
- Models use threaded rods.
- No laser cut acrylic.
No big deal, and the scanners still look pretty similar, but CowTech only intended to improve on the existing design, not reform it. CowTech sells scan-ready Ciclop for 159dollars on your website. All in all, this is a great cheap DIY 3D scanner, very efficient for laser triangulation 3D scanning.
Turntables and tables for creating scanners
This is because it is based on photogrammetry rather than laser triangulation and is compatible with your smartphone! You can download the 3D printable file to sync devices.
You can make a 3D scanner with your own hands from improvised means. You just need to trust the creators of DIY 3D. A simple device instantly turns your iPhone or Android into a 3D scanner by connecting it to this player. Then, using headphones and a phone camera, he takes over 50 photographs of the object, which will be scanned as the turntable rotates.
Once you have taken these images, you can load them into a program such as Autodesk ReCap to turn the photos into a full 3D file.
Overall this is a fantastic creative project and a great DIY 3D scanner for people on a budget.
Microsoft Kinect 3D Scanner
It's even lower at just $99 (no longer sold, though Kinect V2 is still available with Xbox One). The company's slogan is: "Make your own 3D scanner from Kinect and surprise your friends.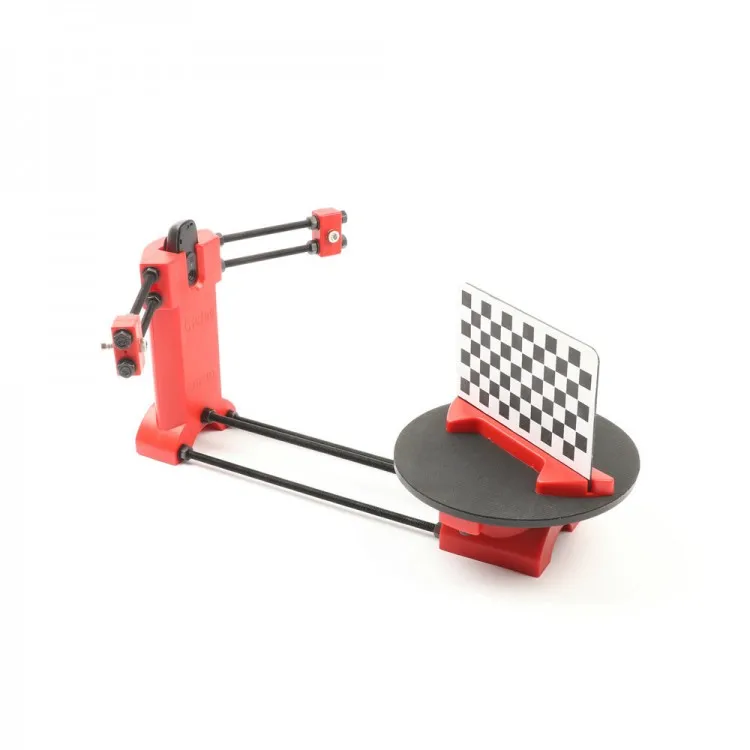
While Microsoft has responded to demand by creating its own 3D Scan app for the Kinect scanner, there are a number of third-party options that may be preferable. These are:
- Skanect, made by Occupital, which also sells a structure sensor.
- Reconstruct Me. It provides a set of tools that allow you to perform 3D scanning for less than $100.
You will be interested in: How to measure the diagonal of a TV: basic methods
The results are not fantastic, but for the price they are quite acceptable. It has been shown to be inferior to traditional protogrammetry in quality, especially in fine detail, such as on small models such as shark teeth. However, for beginning 3D scanners this is a fantastic entry level product, especially since you might already have one for the Xbox 360.
Before you build your scanner
There are many cameras you can use. Of course, in order to know how to make a 3D scanner from your phone with your own hands, you need to calculate what is needed for this.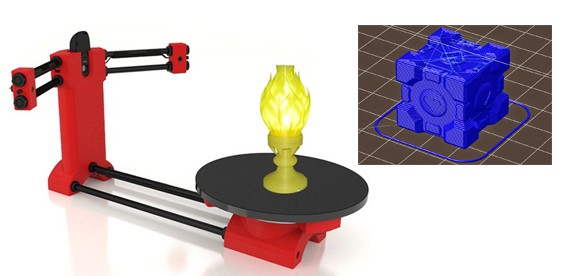 If you plan to use Pi Scan to control your cameras, then you should use the Canon PowerShot ELPH 160. But if you are using some other setup, here are some general recommendations for choosing cameras:

Much depends on the budget. Scanners are sold at the same price as cameras. If you want to do everything yourself, then the budget is limited. Pay attention to the affordable segment of the optics and spare parts market.
- The first difficulty encountered in building a 3D laser scanner is finding a rotating platform. At the same time, it needs to be controlled only with the help of MatLab. Instead of spending a lot of money or time, you can buy a 28BYJ-48-5V stepper motor with a ULN2003 drive test module board.
- Next, glue the platform to the stepper motor shaft and place it in the groove inside the holder.
 The platform should be flush with the "marble", but keep in mind that the cheaper it is, the more inconsistent diameters that can make things not level.
 - If you have a method for obtaining precise rotation that can be controlled in Mat Lab, set up the camera at any distance and height, as well as the laser line to the left or right of the camera and the turntable. The angle of the laser should be optimal to cover most of the turntable, but nothing needs to be exact, we'll handle the difference in model scale in code.
- The most important part for proper operation is camera calibration. Using the MatLab computer vision toolkit, you can get the exact focal length and optical center of the camera with an accuracy of 0.14 pixels.
Please note that changing the camera resolution will change the values of the calibration process. The main values we are looking for are the focal length, measured in pixel units, and the pixel coordinates of the optical center of the image plane.