3D print remove brim
How to Easily Remove Brims & Rafts From Your 3D Prints – 3D Printerly
When it comes to 3D printing, it can be difficult to get a good first layer without the help of rafts and brims, with certain filaments out there. Once your 3D print is complete, removing the rafts & brims can be troublesome.
I went out and researched how to best remove rafts and brims that are stuck to 3D prints.
You should implement settings that increase the gap distance between your model and the brim or raft structure that you use. Rather than forcing the raft or brim off, you can simply cut them off with the right tools, such as a flat-edged cutting tool.
Keep on reading for more details on how to easily remove rafts and brims from your 3D models, plus more.
What is a Brim & Raft in 3D Printing?
A brim, is a horizontal plane of material attached to the external dimensions of the model.
A raft is a horizontal layer of material that’s deposited on the print bed by the printer before printing the model.
Both these layers serve as the support or foundation on which the model is built on.
A raft covers the entire bottom of the model while a brim only extends out from the model’s outside. They are excess materials and are usually removed after the model is done printing.
They help increase bed adhesion, prevent warping, and provide extra stability for models that may be statically unstable.
Best Ways for Removing Rafts & Brims From 3D Prints
Rafts and brims are very useful during the printing process but after that, they are no longer useful. This is why they have to be removed.
Normally rafts and brims are designed to be easily peeled off, but sometimes they remain stuck to the model. I’ve heard many instances where people were unable to remove the rafts from the 3D print model.
When that happens, you have to be careful when removing them because using inappropriate methods can damage your model.
Let’s take you through the best ways rafts and brims can be removed without damaging the model.
Using The Proper Software Settings
Using the proper settings when slicing the model can make a world of a difference when it’s time to remove rafts and brims.
Most slicing software comes with its own presets for building rafts and brims but there are still some tricks and tips that can help make things easier. Let’s go through some of them.
There is a setting called the ‘Raft Air Gap’ which you can adjust to make the raft easier to peel off. It is defined as the gap beween the final raft layer and the first layer of the model.
It only raises the first layer by the specified amount to decrease the bonding between the raft layer and the model. Adjusting these type of settings in your slicer will make rafts a lot easier to remove, rather than requiring a special technique to remove it.
The Cura default for the Raft Air Gap is 0.3mm, so try adjusting this to see if it helps.
Make sure the top layer of the raft is built with two or more layers to achieve a smooth surface. This is important because the top layer joins with the bottom of the model and a smooth surface make it easier to remove.
It also gives the bottom of the model a good finish.
If the temperature of your material is a little too high, it can contribute to adhesion between your raft and model, so try lowering your printing temperature
Cutting The Rafts Off
Most people decide to use a needle-nose plier to remove rafts and brims from their 3D prints since they are really effective at removing the thin layers of plastic.
You want to get yourself some high quality pliers to get the job done as best as you can.
A great one that I can recommend is the Irwin Vise-Grip Long Nose Pliers from Amazon. They have a durable nickel chromium steel construction, along with ProTouch grip for extra comfort and ease of use.
They have great reach abilities to get into those harder to reach areas when needed.
Some people also use other tools like a flat-edged cutting tool, a putty knife or even a craft knife to pry away or cut at the raft or brim gradually. This isn’t advised over the needle nosed pliers because you may damage the model when cutting at the bottom of the model.
While you are removing the raft and brim from your model, you want to keep safety in mind the whole time. Make sure you are using the adequate safety equipment.
I recommend at least having some Safety Glasses and No-Cut Gloves from Amazon to protect yourself properly from any plastic that flings all over the place. This is especially recommended when removing supports from your models.
Click the glasses below to check out the Amazon page.
Click the gloves below to check out the Amazon page.
I wrote an article about How to Make 3D Printing Supports Easier to Remove which you can find a lot of useful information in, so feel free to check that out as well.
Sanding
After you remove rafts and brims from your model, you are likely to be left with rough surfaces, so we are going to want to clear these up. The best way to do that is by sanding the model, which also helps to remove those support bumps as well.
You can create amazing surface finishes when you start implementing sanding into your 3D printing regimine. Some people manually sand their prints, while others have sanding machine tools.
It’s up to you which one you choose.
Check out the WaterLuu 42 Pcs Sandpaper 120 to 3,000 Grit Assortment from Amazon. It has a sanding block to help you easily sand your 3D models and not have to fumble around with the sandpaper.
The electronic tool used for sanding usually comes down to a rotary tool kit which has small, precision pieces that attach onto the tool itself. The WEN 2305 Cordless Rotary Tool Kit from Amazon is a great choice to start with.
Use Soluble Materials
This is a great way to remove rafts and brims, especially if you have a 3D printer with a double extruder.
Certain filaments dissolve when they come in contact with some liquids. These filaments are very useful in building supports.
Filaments like HIPS and PVA can be used to build the raft or brim before printing the model. When the model is done printing, it is immersed in a solution (mostly water) to dissolve the rafts and brims.
Gizmo Dorks HIPS Filament is one example that you’ll see people with dual extruders using as soluble materials. Many reviews mention just how great it works for raft/supports.
This is one of the best methods for removing these support structures without leaving marks on the model. It gets rid of any residual material that may still be on the bottom surface of the model.
If you want to check out some great dual extruder 3D printers, take a look at my article Best Dual Extruder 3D Printers Under $500 & $1,000
When Should You Use a Raft for 3D Printing?
Now that you know how to remove rafts from a model, do you know when you need to use them in the first place? The following are some reasons why you might need to use a raft for your 3D model.
Use a Raft To Eliminate Warping
When printing with some materials like the ABS filament, it’s possible to experience warping on the bottom of the model.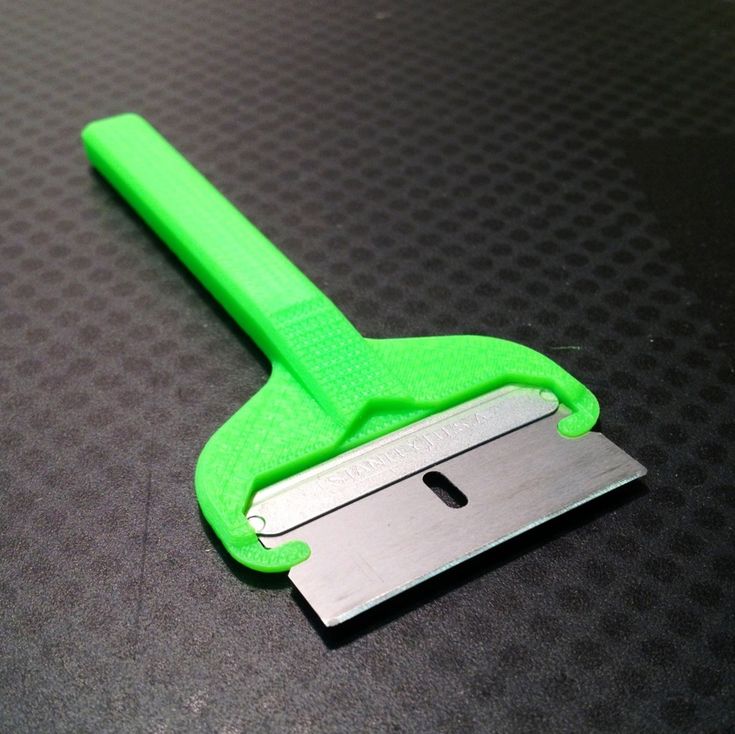
This is caused by the uneven cooling of the model. The part in contact with the print bed cools faster than the rest of the model causing the edges of the model to curl upwards.
Using a raft can help solve this problem.
When printing with a raft, the model is deposited on the plastic raft instead of the print bed. The plastic to plastic contact helps the model cool evenly thereby eliminating warping.
Get Better Print Bed Adhesion With a Raft
When printing some 3D models, they can have trouble sticking to the print bed. This can cause problems leading to print failure. With a raft, these problems are solved.
With a horizontal mesh provided by the raft, the 3D model has a greater chance of sticking to the raft. This reduces the chance of the model’s failure and also gives it a level surface for printing.
Use a Raft to Increased Stability
Some models usually have stability problems due to their design. These stability problems can come in many forms. It can be due to unsupported overhanging sections or tiny load-bearing supports at the base.
With these types of models, using a raft or a brim provides extra support and also helps protect the models against failure.
How Do I 3D Print Without a Raft?
We have seen how useful rafts are and how they can be used to enhance your print.
But using rafts might not be best for some projects due to the material waste they generate and the problems that surface by detaching them.
Let’s take you through some ways you can still print your 3D models without using rafts.
Calibration and Maintenance
Some problems that require you to use a raft can be easily solved by proper calibration and maintenance of the printer. A dirty and poorly calibrated build plate can lead to poor print adhesion.
So before using a raft, consider cleaning your print bed—preferably with an alcohol-based solution—and checking your printer’s settings.
Using A Heated Build Plate
A heated build plate helps keep the model from warping and also ensures firm print adhesion.
The glass build plate works by keeping the temperature of the material just below the glass transition temperature, which is the point where the material solidifies.
This ensures the first layer stays firm and remains connected to the build plate. When using a heated build plate, the temperature of the build plate has to be controlled carefully.
In this case, it’s important to refer to the filament’s manufacturer and find the ideal temperature for the material.
Using Suitable Print Bed Adhesives
Bad print adhesion is one of the major reasons people often use rafts and brims when printing models. Bad print adhesion can be solved by using several types of adhesives.
These adhesives come in several forms like adhesive sprays and tapes. Several of the popular forms of adhesives used are printer tape, blue painter’s tape, and Kapton tape. All these promote print adhesion.
Proper Orientation of the Model
Some parts will require you to print overhangs, which inevitably call for foundational structures like brims and rafts.
However, all that can be avoided if your part orientation is on point. This factor is equally important as other crucial aspects of 3D printing are, such as print resolution, infill pattern, etc.
When your model’s orientation is done properly, you can cut down the need for rafts and brims and print without them instead.
To do this, calibrate your part orientation and try printing anywhere below the 45° angle mark.
I wrote a complete article on the best orientation of parts for 3D printing, so be sure to check that out for more details on this subject.
Use the Ideal Printing Material
Not every 3D printer material is created equal. Some require low temperatures to work with while some may demand you to go higher. At the end of the day, choosing the right material pays off heavily.
PLA, for instance, is an easy-going, biodegradable filament that does not necessarily require a heated bed, and is famous for experiencing low warping. This makes it easier to print with.
Now if we talk about a carbon fiber reinforced PLA, it has even more built-in structural support, therefore being great for more rigid prints.
However, you’ve got other filaments like ABS and Nylon which are well-known to be a lot harder to print with, mainly because they require a higher temperature and lead to being more prone to warping.
PETG is a popular filament for 3D printing, which is great for layer adhesion, though it has been known to stick to the bed quite harshly. If you are using a raft or brim with PETG, you could run into more issues than if you chose PLA.
Nonetheless, you can split a model into different parts so you don’t have to print overhangs that require rafts and brims.
Some people also get great results with bridging and overhangs when they use different types of filaments and brands, so I would definitely try out a few different types until you find your perfect filament.
An article I wrote discusses in detail the Best Filament To Buy on Amazon. Give that a read to find out more.
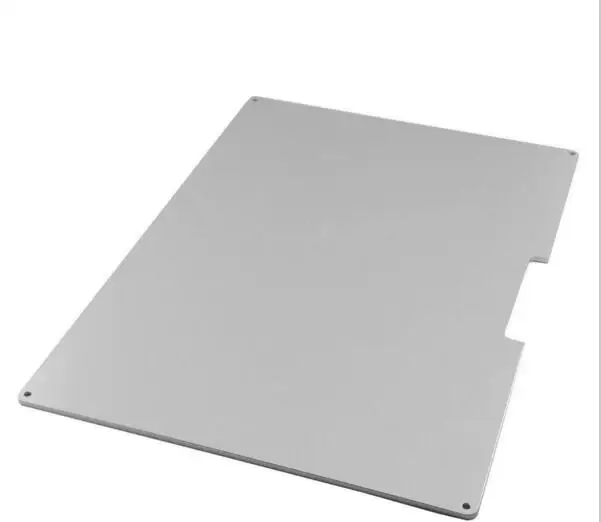
Get a Good Build Surface
A good build surface is essential if you aim to get great quality prints. It provides your model with an even, flat surface on which the 3D printer can perform at its best.
If you want a perfect first layer too, a build surface that’s similar to the quality of PEI or BuildTak will go a long way for improving the standard of your prints.
Gizmo Dorks PEI Sheet 3D Printer Build Surface from Amazon is a great product that works for most users out there. This surface doesn’t need special prep.
All you need to do is peel back the tape liner and carefully place it ontop of your existing surface, borosolicate glass for example. It already has special 3M 468MP adhesive already applied.
One user described their 3D printer going from ‘zero to hero’, and after discovering this amazing surface, decided to not throw their 3D printer in the trash, and actually grow to love 3D printing.
Another user said its a great upgrade for the Ender 3, getting great adhesion consistently with their prints.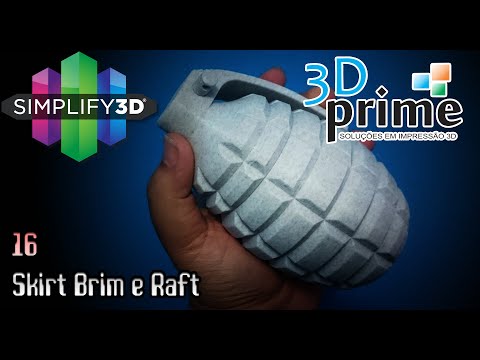
A build surface that isn’t worn out or dusty will make sure your prints are adhering to it properly. This will make the need for support structures out of the question.
Choosing the right build surface can seem very difficult for newcomers and experts alike at times.
This is why I’ve done an article where I discuss the Best 3D Printer Build Surface that you can get for your machine today.
13 Tips for Effectively Removing a Brim From a 3D Print – Printing It 3D
Brims are flat planes that you attach to the model’s external dimensions during 3D printing. Though they’re essential in the process, they become unnecessary afterward, and you will have to remove them. Brims are made of thin layers that you can easily remove, but sometimes it is difficult to extract them from your 3D print effectively without damaging your object.
Here are 13 tips for effectively removing a brim from a 3D print:
- Adjust the slicer setting for the brim (print setup).
- Bend the brim a couple of times with your hand.
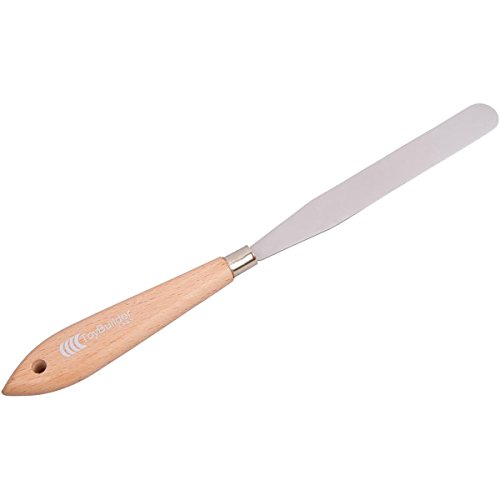
- Cut off the brim using a deburring knife.
- Use a nipper to cut the brim.
- Use a knife (with exchangeable blades).
- Use soluble materials.
- Sand it off.
- Make the first layer of the brim thin.
- Use a thin tweezer.
- Use a hot knife.
- Use needle-nose pliers.
- Use a standard wool hubby knife
- Use a flush cutting tool.
Removing brims from 3D prints can be challenging if you lack the appropriate tools or methods. In this article, I will discuss several tips that will enable you to extract the brims without damaging your print. Read on to learn the method that suits you best.
1. Adjust the Slicer Setting for the Brim (Print Setup)
When printing an object using a 3D printer, the brims usually stick firmly to your print. Although they should peel off after you’re through, removing them can be an uphill task, especially when you want to achieve the preferred shape of your object at the end. Now, using the right software settings on your 3D printer before printing is one of the best ways to avoid distorting your model.
Most model slicing software are preset for building brims and rafts. However, you can adjust them to have your preferred spacing dimensions to increase the gap between the model and the brims (and/or rafts).
Good spacing between the brim and the model produces proper bed adhesion, making it easy for you to remove the brim after printing.
For instance, the “Raft Air Gap” is a setting that you can apply to create a wider gap between the raft and your print model. Although it is designed for rafts, you can also apply the same concept when using brims in 3D printing.
Under settings (Print setup), you can add more brim lines, for instance, 25 line count, which will ease the removal process. You can also preset the brim width option. In this case, you will set a wider width, creating a large ring around your object.
That will help you to peel off the brim from your 3D print without any struggle.
2. Bend the Brim a Couple of Times With Your Hand
After printing your object, the brim usually attaches at the edges of your model. If it doesn’t stick too firmly on the outline, removing the brim with your hands without damaging the print is easy.
Here’s how you can extract such an outline effectively:
Bend the brim first against the model and then backward. Repeat this step a couple of times until it loosens, and the brim will fall off. You can also twist it back and forth as many times as possible, and either way, the brim will peel off.
Note: While removing the brim from your object, ensure that you have some No-Cut-Gloves on. These gloves will protect your hands from the sharp plastic that might slip and cut you while bending it. I like the Dowellife Cut Resistant Gloves on Amazon.com. They’re made of blended special high elastic nylon, which makes the gloves fit perfectly.
3. Cut Off the Brim Using a Deburring Knife
Are you looking for an alternative method of removing a brim from your 3D object? You don’t have to worry, as you can easily cut it off using a deburring tool. The appliance is affordable, readily available, and easy to use.
Here is how to use it:
- Hold the tool so that it is right up against the edge you wish to cut.
- Slice the exterior portion of your 3D print at an angle along the edge to create friction.
- Repeat the procedure on the other corners of your image until the brim falls off.
Helpful tip: Use adequate safety equipment while cutting the brim from the model. For instance, some safety glasses are recommended for protecting your eyes from any plastic that flings all over the place. You wouldn’t want to hurt yourself, right? So, keep safety in mind the whole time.
4. Use a Nipper To Cut the Brim
You can use two types of nippers to remove a brim from your object. These include plastic scissors and flat nippers. Both tools are effective, and you can use either depending on your preference or their availability. However, you can also use both for the best results.
Now, here’s how to extract the brim using a nipper:
1. Take your scissors-like nipper and cut along the external parts of your print carefully. Here’s a video you can watch:
2. Use your hand to extract the brim as it will loosen afterward.
3. Grab the other flat nipper and cut any brim residue that remains after peeling.
Remember, you should always be careful while using these tools as most of them are sharp and can easily cut you if you mishandle them. Moreover, as far as your safety is concerned, cut away from yourself (against the direction you are slicing from).
5. Use a Knife (With Exchangeable Blades)
If you want to make your model look smoother at its edges, you will most likely need a good knife. Try investing in a knife such as the X-Acto X3311 Knife on Amazon.com. It has a lightweight handle and is ideal for delicate, precision cutting, trimming, and stripping.
Using the knife, cut through your model’s edges evenly, and there are chances that the brims will remain. Using a sharp knife will help save time as it will only cut off the parts you want to get rid of (the brim attached to the perimeter of your model).
The knife’s sharpness also helps you to use slight force while cutting off the brims. Moreover, its breaking strength is excellent as you can easily break the part that holds the edge firmly. So, you can make this one of your must-have tools during 3D printing.
6. Use Soluble Materials
Some 3D printers comprise double extruders made of soluble materials and usually come with a dissolving kit.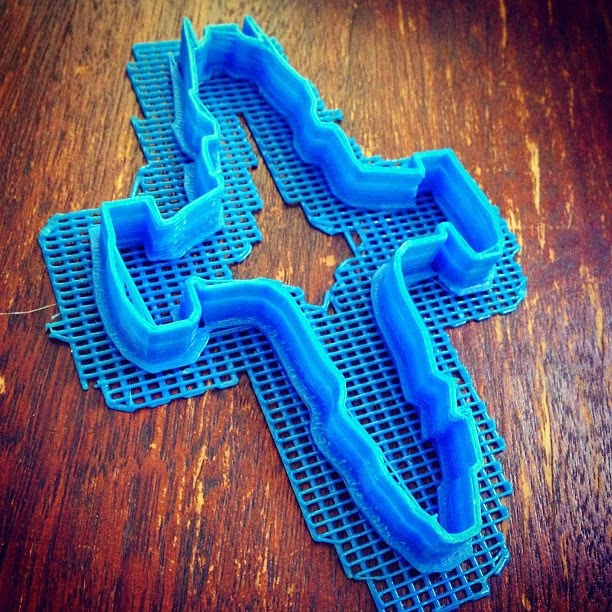 If you bought one that doesn’t have this, don’t worry as you can also use water. It acts as a solvent for removing brims evenly because filaments like PVA dissolve quickly when they come into contact with water.
The best way to dissolve a brim with PVA filament is by submerging your model in cold or warm water (depending on the building material). You can leave it still for approximately ten minutes for it to absorb water evenly. The brim will eventually peel off, leaving no traces on your print model.
However, if you want to accelerate this process, you can heat the water and ensure it is not hotter than 35 °C (95°F). Maintaining a higher than normal temperature in the water will help speed up the dissolving process. You can also stir after subjecting your object to water because moving water lets the PVA melt rapidly.
7. Sand It Off
After removing brims from your 3D print using tools, you might also notice some rough traces on your object’s edges. These are just the brim remnants that you can remove by sanding the surface.
To eliminate these brim remnants, start by sanding the surface manually or using grinding machine tools. Choosing the appropriate one to use will depend on your preference. Whichever way you decide to do this, make sure it removes the brims effectively.
If you are looking for proper sandpaper to use, check out the WaterLuu Wet & Dry Sandpaper on Amazon.com. It comes with a full range of grits assortment and is ideal for aggressive or refined sanding.
8. Make the First Layer of the Brim Thin
Before printing your object, there are vital things to consider to avoid difficulties with removing brims. One of the ways to make it easier for you is by making thin brim layers that you can peel smoothly.
For instance, making the first brim layer about 12 mm (0.47 inches) wide is advisable before the printing process. The thin brim layer will speed up the extraction process as you can split them easily.
Moreover, if you prefer to squish the first layer of the brim, a width of 0. 05 mm (0.0019 inches) can be a good start. Check out how Simplify 3D makes the first layer thin to ease the brim removal process.
9. Use a Thin Tweezer
Usually, prints that use support will require post-processing to remove the brims. However, you can also detach them by hand or use some tools to break them away. Now, tweezers are an example of the tools that come in handy during this procedure.
While separating the brim from your model using tweezers, you should pull the brim upwards. Since the brim only holds the object’s edges, it will be easy for you to detach it.
10. Use a Hot Knife
There is yet another effective tool to use for detaching a brim (or brim remnants) from a 3D print—a hot knife.
A hot knife will remove brims from your 3D print model in no time. This tool resembles a wood burner, but the main difference is that it has a blade and can also regulate its temperature.
If you choose to use this hot knife, there is a specific way to go about it:
- Set the hot knife to about 230 °C (446 °F).

- Allow the temperature to rise for a few minutes.
- Cut through the model’s edges, and while doing this, you will feel it cutting the brim smoothly like slicing butter.
- Use other tips on the hot knife to smoothen out parts of the model.
Check out this video for a closer view of how to use the hot knife:
Note: When using a hot knife, ensure that the temperature is not too high. Extremely high temperatures can discolor or melt some features of your model or eventually burn them.
11. Use Needle-Nose Pliers
Some people use needle-nose pliers to extract brims from their 3D prints. They are among the best tools as they remove the thin layers of plastic effectively.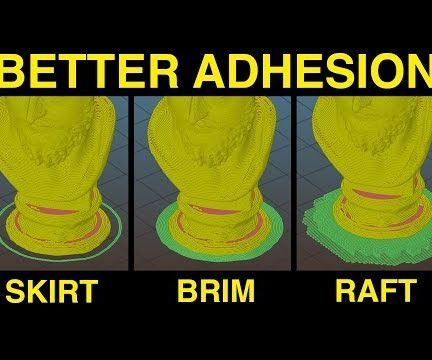 Now, if you want to get some high-quality models for sale after 3D printing, choose a high-quality pair of needle-nose pliers.
In most cases, the brims are usually thin, and their filament is easy to detach from a model. With the help of a needle-nose plier, you can grab the trimmed edges attached to the model no matter how firm they are. Moreover, the pliers can trim the edges to your desired shape.
The AMX3d 5” Needle Nose Pliers for 3D Printing & 3D Print cleanup on Amazon.com are extremely effective. They have anti-slip handles that are easy to grip, making operating them easier.
12. Use a Standard Wool Hubby Knife
Most people use wool hubby knives to cut through carcasses while butchering or when repairing buildings. But did you know you can use it to cut off a brim from your 3D print? It gives the best cut and a perfect split because of its sharp blades.
Using a standard wool hubby knife can help you remove a brim from your object after 3D printing. You just have to cut through the edges quickly and then use your hand to grab them.
Furthermore, if you want to trim your object to its original shape without damaging it, you can use this knife to cut through the brims without applying much force. So, if you don’t want to miss having a full-range cutting motion that makes a clean-cut, get one for your 3D prints.
13. Use a Flush Cutting Tool
Flush cutters are double-edged tools that have different uses apart from cutting thin wires. You can also use them to detach brims from your 3D models in the same way as cutting wire strands.
A flush cutter creates a smooth cut on the edges of a 3D print model. For example, the Lindstrom Cutter Ultra Flush on Amazon.com is an effective tool that will detach brims from your model in no time. It easily snips the brims away, leaving an excellent finish.
You can get flush-cutting tools in various sizes and choose your preferred one for the best results.
Best ways to remove support when 3D printing
Experts recommend
Author: Aleksey Chekhovich
Author: Aleksey Chekhovich
1. Efficient support placement: inclined and scalable supports | 2. Fast removal: prongs, hourglasses and fragments | 3. Powder recycling: perforation and fragmentation | The process of removing supports can be even easier...
Everyone who works with 3D printers knows that the process of creating support structures has its own pitfalls. But what about removing supports? Where it has to be done by hand, a simple removal process and efficient support placement technology can significantly reduce finishing time. This article outlines three strategies that will make it easier for you to remove supports.
1. Efficient support placement: tilted and scalable supports
When support structures are connected to a part at two different locations, such as inside a pipe, slanted supports can be used. You can manually route these supports from the part to the build platform, avoiding unnecessary points of contact.
Left: Connection between sections of a part. Right: pipe with inclined support
If contact with a certain part of the part cannot be avoided, it is possible to guide the supporting structures to an area that is easier to machine, for example, having a flat rather than a curved surface. You can also reduce the width of the supports and thereby reduce the size of the area that needs post-processing. To do this, use the Scalable Platform Projection tool in Materialize Magics.
iQB Technologies Experts Recommend Article: Benefits of Materialize Magics in 3D Printing Supports
2. Quick removal: prongs, hourglasses and fragments
Block supports are used to create this automotive part. Unlike volumetric supporting structures, block structures are not continuous. Joint project with the InMotion development team
Along with the efficient placement of the supports, you can also consider using a design that allows them to be removed quickly. By positioning the thin teeth on the top edge of the support, you get a strong construction that can be easily removed from the part.
Another strategy is to use predetermined hourglass-shaped removal points that break in the middle. This avoids spalling due to poor support removal leading to part damage.
You can then sand the surface. Support structures can be removed without compromising surface quality by adding additional material where support is required.
This material is subsequently removed by machining to obtain the required final shape - the corresponding function in the Materialize Magics program is called the machining tab.
The methods described above have dealt with the ease of removal of the supporting structures of the article. When it comes to removing supports from the build platform, the general strategy is to create gaps between the various support blocks. These fragments are much easier to remove, offering less resistance.
Hydraulic valve from VTT and Nurmi Cylinders with inclined supports
3. Powder recycling: perforating and fragmenting
Since metal powder of the quality required for additive manufacturing can be quite expensive, it is desirable to reuse as much of the powder as possible.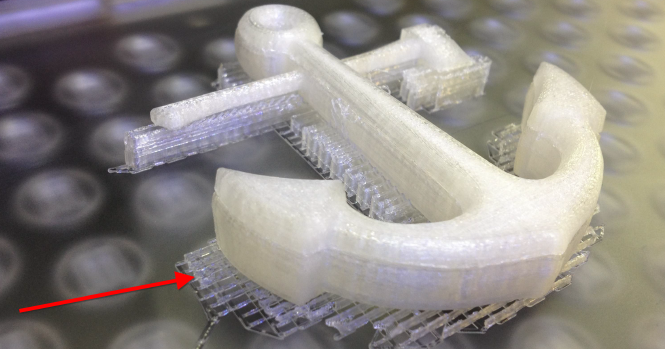 For reasons of safety and to minimize contamination, it is also desirable to remove as much powder as possible in a controlled atmosphere prior to removal of the supports. By perforating and fragmenting them, the Magics software can ensure that a significant amount of powder is reused without compromising the strength of the supports.
The process of removing supports can be even easier...
Materialize offers fully automatic and semi-automatic support generation software for metal additive manufacturing. Those who prefer manual control of the process can use the Materialize Magics SG+ module. If you want to save time creating support structures and make the process of removing them even easier, we recommend using the fully automated Materialize e-Stage metal 3D printing software.
Material provided by Materialize. The original article is at the link.
Article published on 10/01/2018, updated on 07/13/2021
How do I remove the 3D printing media?・Cults
3D printing support is required to successfully design your 3D printed part. Once the 3D printing is complete, these support structures must be removed from the printed model. Cults shows you how.
There are various methods for removing supports for 3D printing. To get a quality printed part without debris, learn here about methods for removing unnecessary 3D printing supports .
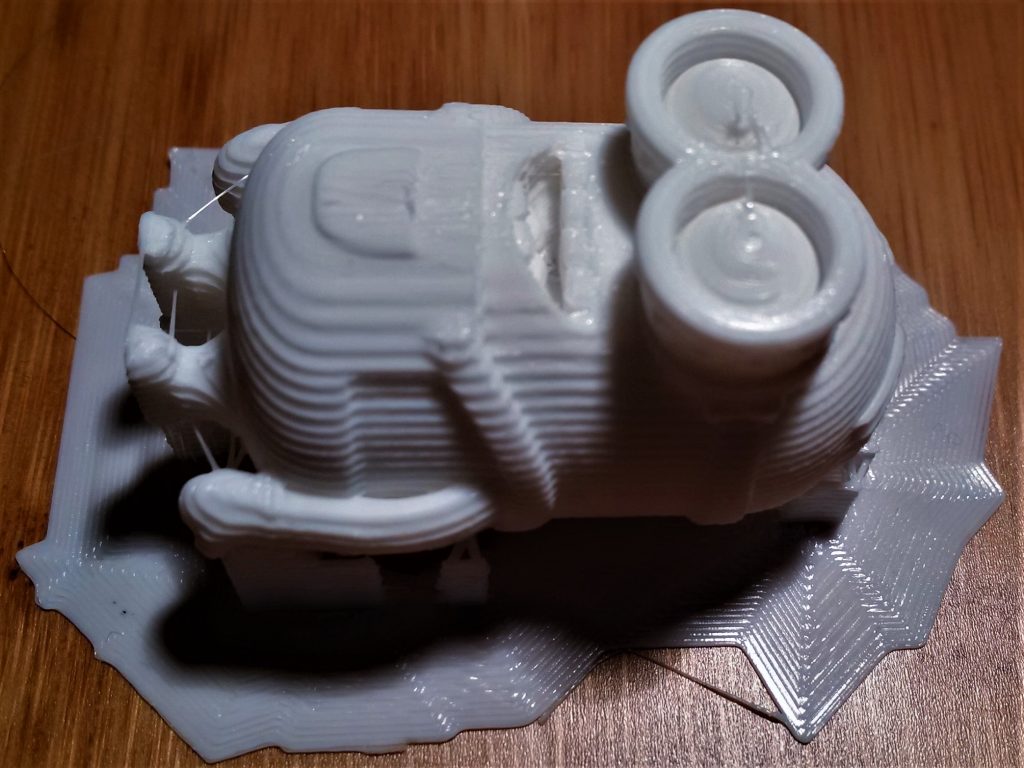
Manual Removal of 3D Print Supports
This is the simplest technique for removing support material that is damaging your 3D printed model. All you need to process the printed parts is your hands and small sharp tools. To do this, you need to go through several stages.
Release plate
Using a cutter or thin blade, carefully remove the plate seal from your printed model .
Media Removal
Removing the print layer makes it easier to remove the support material from the 3D print. However, you should be careful not to damage the 3D printed part, because without the printed layer, it becomes more brittle. The best way to do this is to cut the support structures at various points of contact. The cutting pliers that come with your 3D printer are essential for this operation.
Elimination of deficiencies
Now you have your part, but with fragments of supporting structures and imperfections. To get better access to certain parts, use your cutter or other small, sharp tool and remove any remnants of printed paper.
Sanding
After removing excess printed material from the printed part, you should be able to see its shape, but it still looks rough. To bring the printed model to perfection, it must be polished. To do this, you can use ordinary files or sandpaper. If you chose the latter, use sandpaper 9 first0057 low grit (150). Then, if necessary, continue with a finer grit sandpaper.
Whichever tool you use, sand the printed part in small sections. After filing, part of your printed model becomes more brittle.
Finishing part
Dust may remain on the printed object after sanding.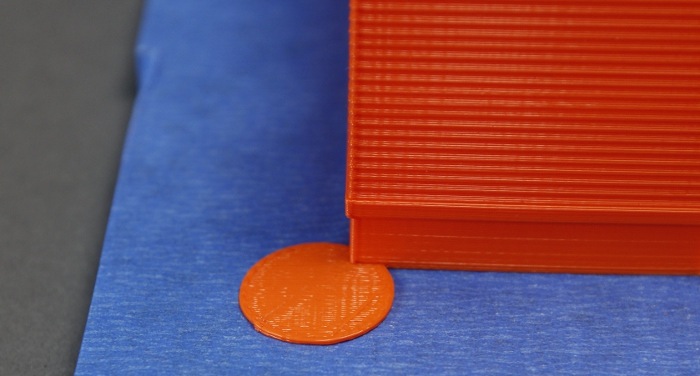 To remove it , use a soft cloth or microfiber cloth . You can also clean the dust layer with mineral oil. The advantage of this technique is that it instantly adds shine to the print. However, be careful not to use too much mineral oil. A few drops are more than enough.
Always have a photo or image of your 3D printed model handy. This will prevent you from cutting the printed part. Use a small knife or a heated blade to make cutting easier, especially if the material is a bit hard. 9The 0057 Dremel and the hand sander can be useful if the backing material is resistant to the sharp object you are using.
It is important to be careful when doing this, as you may break some of the staples with your fingers.
Other methods are also effective for removing the 3D print support from your printed object. However, they are more complex and require the use of special products and equipment.
Acetone vapor smoothing for finishing your 3D model
This post-processing method is for small parts made of ABS filament and FDM . It is mainly used to improve the 3D printed model. During the vapor smoothing process, your 3D printed part will be exposed to acetone vapor in an enclosed area. The fumes will melt the remaining supporting structure and layer lines. After removing the backing material, the acetone vapor polishes and smoothes the surface of the printed model's outer layer, giving it a glossy appearance.
In practice, you will need acetone, a glass or metal container and a lid. A piece of wood or a block of rigid cardboard wrapped in aluminum foil will also come in handy to support the printed product, as well as a hot plate from a printer (any other hot plate will do).
Proceed as follows:
- Pour a few millimeters of acetone into the container.
- Place the container on the hot plate of the printer and wait for the acetone to boil.
- Place the holder at the bottom of the container if the acetone does not reach the part where you will place the 3D printed object.
- Place the 3D printed part on the holder and close the container.
- Let the acetone vapor work. The smoothing time depends on the size of the part (for a small part with a surface area of 3 cm, for example, it may take 3 to 4 minutes).
- Remove the workpiece from the container as it is still soft at this stage.
3D printed part should be allowed to air dry for at least 2 hours .
Using the Support Removal Machine
There are machines on the market today that remove print media from a 3D part for you. Such a device is designed for faster cleaning. This not only ensures that there is no media in the printed part, but also gives it a uniform look.
Ultimaker Cura Software
If you use the 3D printer, you must have heard of Cura. It is often seen as a solution for removing unnecessary supports from a 3D object. In reality, Ultimaker Cura is a software slicer. More precisely, it is for setting up your 3D printer.