Be3D deegreen 3d printer
be3D DeeGreen 3D Printer review: An excellent, expensive, 3D printer that works right out of the box
With the DeeGreen, the notion that 3D printers are a lot of work -- a lesson I recently learned from reviewing the Monoprice Dual Extrusion -- is not true. Not only does the DeeGreen works right out of the box, it also prints fast (for a 3D printer), performs reliably, and can build objects with high details.
Before you get too excited, though, as a single-extruder 3D printer, the DeeGreen is very expensive at €1,500, and shipping internationally that's about $1,900, £1,200 or AU$2,200. It's almost twice the price of the Monoprice, which is a more advanced printer with a dual-extruder print-head and a slightly larger print platform.
But if you're into 3D printing, just the time saved from having to set the printer up and calibrate it already makes the DeeGreen totally worth the extra cost. And the low rate of failed prints (I produced none during testing) is an extra bonus, considering it can take hours to finish printing a large object.
That said if you're looking to enter the world of 3D printing, the DeeGreen is an excellent entry. It's just a question of whether or not you can afford it.
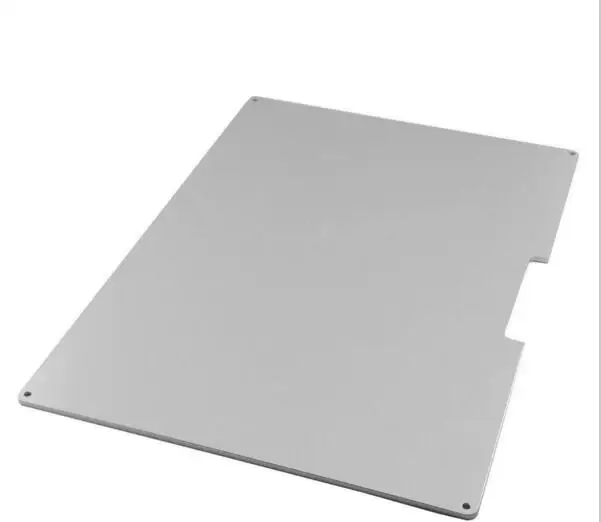
The DeeGreen comes with a removable print plate. Dong Ngo/CNETAlmost plug and play
Measuring 19.4 by 15.5 by 15.3 inches (495x395x390mm), the DeeGreen is about the same physical size as the Monoprice. However, it takes just a fraction of the time to get set up and running. In fact, it was easier to use than some regular printers in my trial.
Out of the box, the printer is fully assembled with all of its important parts tied in place. There are just two parts you need to install.
First is the included 1.7-pound (0.75kg) spool of PLA filament of which the string needs to be loaded in to the print-head, which is an easy job since the filament loading tube has already been assembled. As the DeeGreen is a single extruder printer, it can only work with one filament spool at a time, so if you want to print objects of more than one color, swapping out the filaments, even during a single print, can be a frequent task.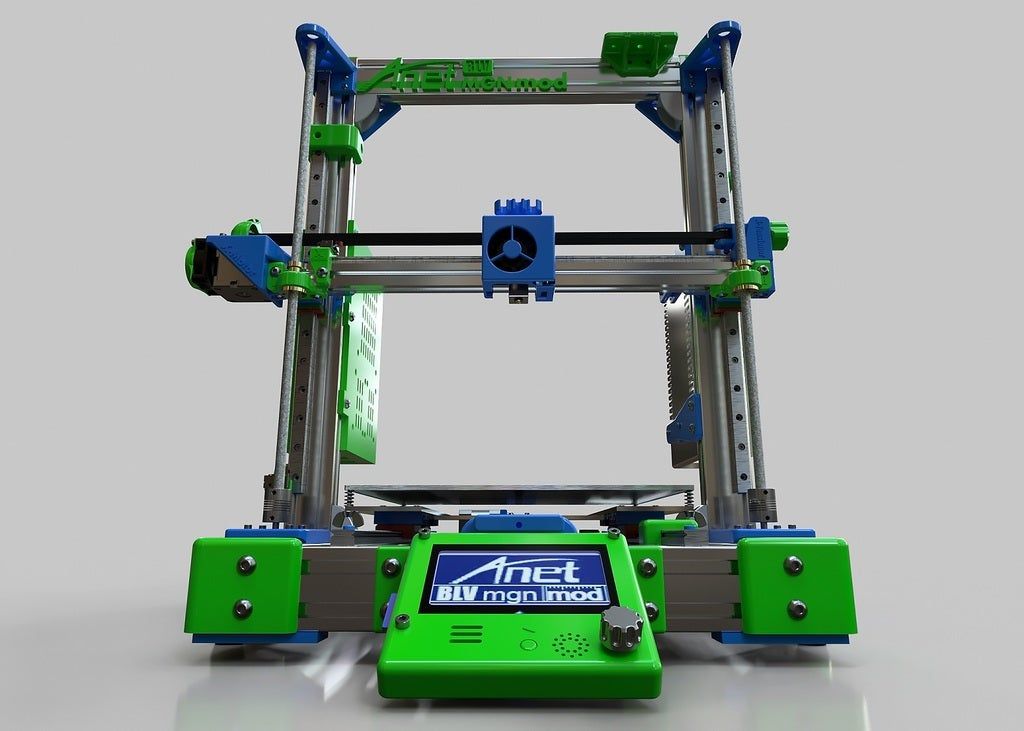
Filaments are the print materials for 3D printing, as ink cartridges in inkjet printers. They come in different colors and are basically easy-to-melt, quickly congealing plastic strings that are fed through the print head nozzles during a print job. Be3D sells extra filaments at about $30 (£20, AU$35) per spool of 1.7-pound. The DeeGreen also works with other standard 1.75mm filaments, such as those sold by Monoprice or MakerBot. The DeeGreen can work with both PLA and ABS filaments, and even though be3D sells both, it recommends only PLA. On top of that, it also uniquely works with be3D's wood-based filament.
The second part to install is the 5.9-inch (150mm) square glass print plate that needs to be placed on its holder, the print platform, underneath the print-head. This plate comes with three magnetic metal feet designed to make it fit snugly and stay put on top of the platform while at the same time allowing users to remove it easily.
The machine comes with all of its parts already assembled and ready to use right out of the box. Dong Ngo/CNET
As for how 3D printers work, during a print job, the print head pulls the filament string from the spool, melts the plastic, and extrudes it onto the platform. The platform lowers gradually depending on the height, and the print head moves around depending on the width and shape of the object being built. As the extruded plastic piles on top layer by layer, it congeals very fast to slowly form the object. This process is called fused-deposition modeling (FDM), which is the 3D printing technology used in all consumer-grade 3D printers.
As you can imagine, the max size of an object a printer can print depends on the size of the print platform. In the case of the DeeGreen, this size tops at 5.9 cubic-inch, which is quite large. In reality you'll print much smaller objects.
Nonetheless, the DeeGreen's removable print plate is a nice design touch that helps with both preparation and post-print process. For preparation, you can easily put supporting materials or just lace the surface of the plate with glue to keep the to-be-built 3D object from being moved around during a print. And once you're done with a print, it's also much easier to remove the object from the plate itself, as well as cleaning the plate's surface from residual materials. The DeeGreen comes included with a glue stick and a palette knife, making it very convenient for anybody print multiple objects right away.
On the front the printer has a large 6-line resolution touchscreen and a SD card slot and on the back it has a power switch and a USB port to connect to a computer via an included USB cable. There's no need to use the USB cable since the printer prints from an SD card (a blank 4GB card is included) but you can use the cable to transfer a file to the SD card prior to a print. More on this below.
I was able to get the printer ready to print from out of the box in just about 10 minutes, partly thanks to a clearly illustrated "Make Your Printer Ready in Five Steps" poster. But mostly because the printer is just so easy to use.
be3D DeeGreen 3D Printer specs
| Extruder | 0. 015-inch Nozzle Single Extruder 015-inch Nozzle Single Extruder |
|---|---|
| Plate | Removable glass plate |
| Print Technology | Fused Deposition Modeling |
| Build volume | 5.9 x 5.9 x 5.9 in. (150x150x150mm) |
| Print accuracy | 0.003 in. (0.1mm) |
| Layer thickness | 0.003 / 0.005 / 0.007 in. (0.1mm / 0.15mm / 0.2mm) |
| Nozzle diameter | 0.015 in. (0.4mm) |
| Print speed | 3.54 in/s (90 mm/s) |
| Printer control | 6-line resolution touchscreen |
| Printable materials | 0.068-in (1.75 mm) PLA, ABS, WOOD |
| Power source | 230 V / 120 W |
| External dimensions | 19.4 x 15.5 x 15.3 in. (495x395x390mm) |
| Weight | 48.5 lbs (22kg) |
| Inputs | USB, SD card |
No calibration needed, simple software
With the DeeGreen, the biggest timesaver is the fact that the printer requires no calibration on the user's part. Calibration is an important part of 3D printing that makes sure the print platform's entire surface is at a consistent and perfect distance from the print-head's nozzle. Proper calibration determines the success and the quality of each print. The DeeGreen has a built-in sensor for this job and the machine is so well put together that this self-calibration process, which takes place before each print, takes just a few seconds to finish.
What also requires very little time, if at all, to get to know is the printing software called DeeControl that's available for both Mac and Windows. It's very easy to install this software in a Windows computer and with a Mac, there's no need to even install it at all, you can just run the downloaded file. Once run, DeeControl has very simple control using a few large buttons. You can load a 3D model file, then use mouse to look around the model. You can also scale, rotate, or set it to stay flat on the platform.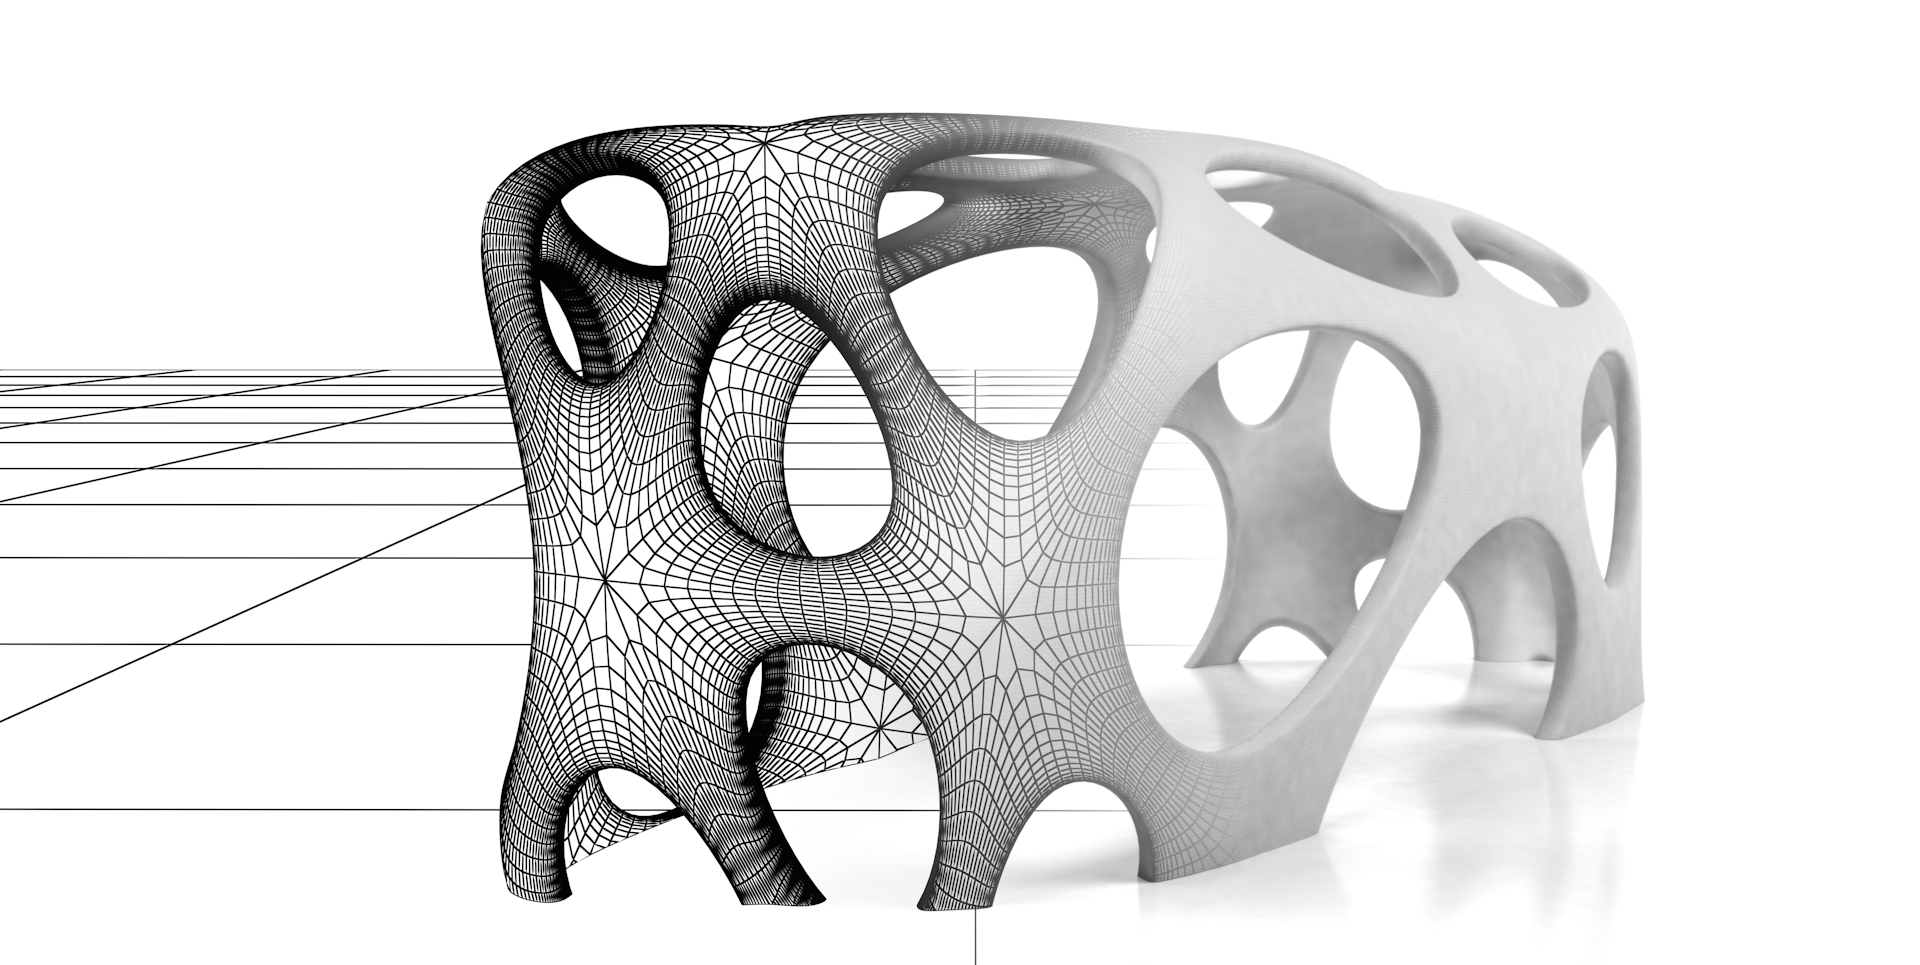 Basically, you can preview how the 3D object is going to look once printed.
As for what to print, there is a huge collection of 3D object models at Thingiverse that you can use. You can also make your own using free software such as SketchUp or Autodesk 123D. The third option is purchasing a 3D scanner than can turn an object into a 3D model file. (For now, 3D scanners carry the starting price of around $400, £250 or AU$450.)
DeeControl allows for standard customizations, including changing the size of the 3D object (scaling), the print quality (fast, normal or high), print speed, and the level of filling, which determines if the object will be hollow or solid. (The default level of filling is 10 percent, the rest will be hollow with supporting honeycomb walls.) You can also add multiple 3D model files to a single print job as long as they don't exceed the max print volume. This is especially helpful if you plan to do a large print job overnight.
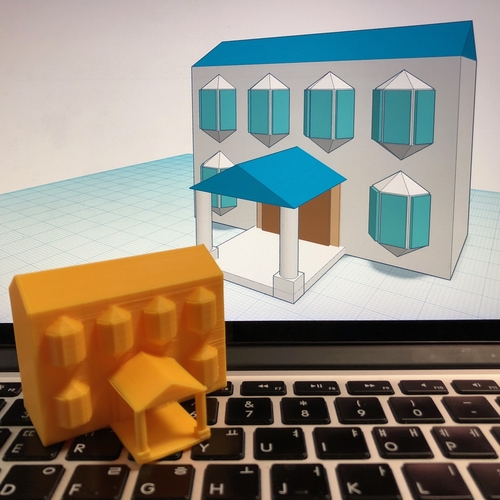
The DeeGreen can print objects with fine details. Dong Ngo/CNET
SD card required for printing
Once you're done with customizing the object, there are two options for printing. You can save the final result to a .gco file on an SD card then use the DeeGreen's touchscreen to initiate the print. Depending on the size and the complexity of the 3D model, it can take up to 20 seconds to save the file to a card. Obviously, the computer must have an SD card slot for this to work. If it doesn't you can use the second option, which is to transfer the file directly to an SD card already inside the card slot of the printer, before printing. Once the transfer is done, the print job will continue without the need for the computer.
In my trial, the second option could take up to half an hour for the transfer to complete when I wanted to print a large 3D model. And in this case the glue laced on the surface of the print plate had dried up before the printing process started. Overall, it's always better to use the first option to print with the DeeGreen.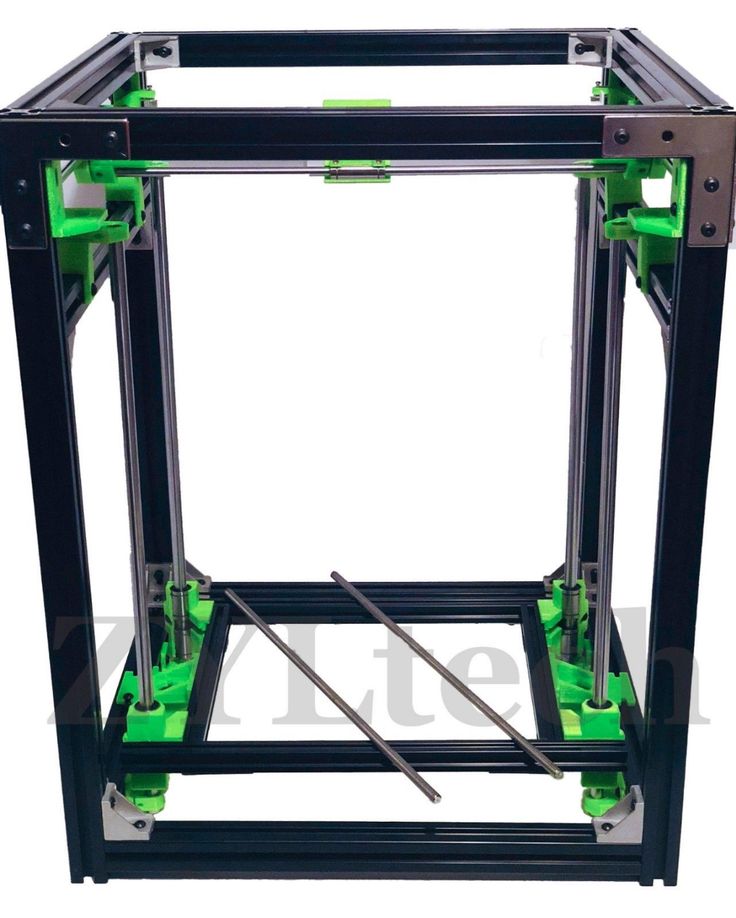
(Aside from .gco file, in my trial the printer also printed .gcode file created by other 3D printing software such as the ReplicatorG used by the Monoprice.)
Overall, it's best to copy the file onto the SD card and print using the touchscreen to start the print job. In this case the print job starts quickly, after about a minute for the print-head to heat up.
While printing from an SD card is a great idea, it also means the printer requires the SD card slot to work. If something happens to this slot, the printer becomes useless. This happened to my first review unit, where the internal cable connecting the card slot to another part of the printer broke loose during transit, forcing me to get a second unit for testing. It would be better if the printer also came with some internal storage so it could print without the need for the card slot at all.
Apart from printing, the touchscreen can also be used for changing filaments (which can be done mid-print), pausing a print job, viewing the status of the printer, and so on.
Performance
The DeeGreen worked very well in my trial. In just three days, I was able to print more than twice the number of objects than I did with the Monoprice in a week. In fact, I didn't run into any unexpected fail prints at all. Every single print came out exactly as expected.
I did try a few things to see if a print job would fail. As it turned out, you don't really need to use the glue on the surface of the print plate when printing a flat object (such as a phone case). But when you print something with a small footprint, such as a thin glass, or a standing doll or basically anything that could topple easily, the glue is very important to the success of the print.
The machine also worked very fast. For example, at the highest quality setting, it took just about an hour to print an iPhone 4S case, a job which took the Monoprice almost twice as long. The print quality is also much better, with greater detailing and a much smoother surface. Obviously at this rate, 3D printing is still very slow but the DeeGreen is obviously an improvement over the Monoprice.
As for how much you can print from a spool of filament, the printer actually conserves materials quite well. After a week of printing dozens of objects using the default level of filling, I used only about a fifth of the included spool. Basically, you can print a lot with a spool of be3D consumables. There are also cheaper PLA filaments you can get from different vendors.
Similar to the case of the Monoprice and 3D printers in general, the DeeGreen is quite noisy when working. It's not deafening but is noisy enough to be a bother if you're using it in a quiet room. It's recommended that you have a different room for it.
Conclusion
After the Monoprice, the DeeGreen totally changed my perception of 3D printing. The new printer turns the new and once-challenging technology into a simple task that even non-savvy user can perform.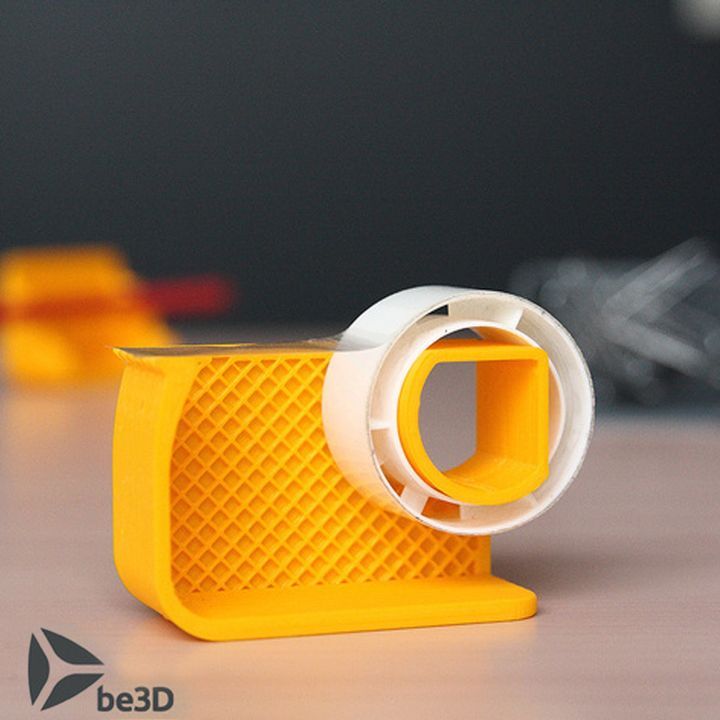 In fact, if it's one part more expensive, it's ten parts easier to use, than the Monoprice.
And speaking of pricing, this remains biggest obstacle of 3D printing, at almost $2,000 the DeeGreen is cost-prohibitive for most users. On top of that, what it can build (namely plastic 3D objects) doesn't practically justify the investment. For example, instead of printing your own iPhone case, you can go to the store and buy an even better one for a fraction of the printer's price, and likely in less time.
But 3D printing is not just about making practical objects, but also about building things you can't buy and being creative. And in this regard, the DeeGreen is an excellent tool that works right out of the box, reliably and is really fun to use.
3D Printing Made Easy: A Review of the be3D DeeGreen 3D Printer by Y Soft
0Shares
When I received word that I would be receiving the Y Soft be3D desktop 3D printer to review, I was pretty hyped seeing that it was the priciest desktop printer (listed at $1,999) I would have yet to lay my hands on.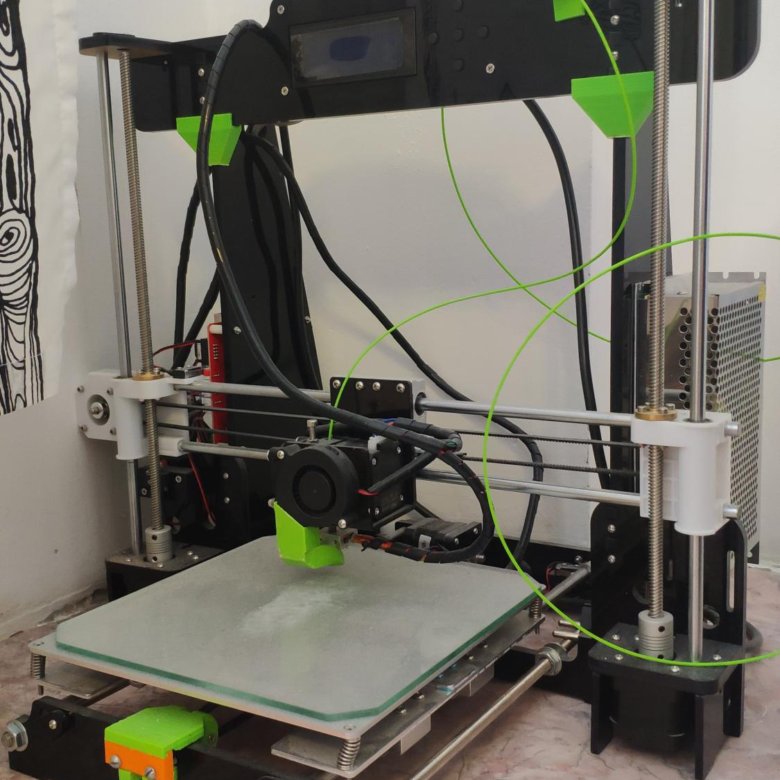 Although UPS tried their hardest to make sure that the now internationally available DeeGreen 3D printer never made it’s way to my Brooklyn apartment, I persevered and finally got my hands on the 64 lb package from Y Soft (the printer itself is a touch over 48 lbs). I’m certainly not the biggest expert when it comes to the internal engineering of 3D printers, so I was relieved to have opened the be3D box to find an almost fully assembled 3D printer with not just one but two 1.7-pound (0.75kg) spools of their bright green plant-based degradable PLA filament. (Thanks Y Soft!)
After easily equipping the glass print bed, which conveniently snaps into place magnetically, and installing the spool holder in the printer’s separate side compartment, where the filament is fed easily through the already assembled filament loading tube, the printer was ready to print. The entire set-up of the printer took no more than five minutes of my time. Within the printer’s SD card input was an preloaded card packed with pretty neat 3D designs such as an orbital spinning top and a small spiraled vase, allowing me to test out the printer’s functions instantly with the push of a couple of buttons from the DeeGreen’s touchscreen user interface.
The DeeGreen’s touchscreen UI loads up quickly, with a simple list of functions that include print, settings, information, and a shut down function. The printer seems to be engineered to be as simple to use as it can be, within the settings function are only two main options, filament change and putting the print bed in parking position. Following suit with the easy-to-use functions, the DeeGreen has an SD card slot front-and-center on the machine, which allows users to use the reliable plug-and-play capability that it boasts about. The auto-calibration and magnetically attachable print bed were also big highlights of the DeeGreen’s focus on user convenience, as the printer quickly calibrates the print bed while each individual print process is being loaded.
But although the UI was engineered to be easily understood and used by novices and experts alike, it was not without it’s minor flaws. A couple of issues that became a persistent, yet not too major of an annoyance for me was that the printer couldn’t recognize that the print door was closed on it’s own, prompting me to have to restart the setting function to either park the print bed or continue my print.![]() The other small problem I encountered was that every time I finished printing a model through my computer/the DeeControl software, the 3D printer would automatically disconnect after completion, which led me to have to restart the printer to reconnect to the DeeGreen to it’s compatible software. This particular issue could have just been isolated to my particular printer or Macbook Pro, but I felt it was worth noting what I perceived as a flaw in an otherwise very reliable UI system.
The other small problem I encountered was that every time I finished printing a model through my computer/the DeeControl software, the 3D printer would automatically disconnect after completion, which led me to have to restart the printer to reconnect to the DeeGreen to it’s compatible software. This particular issue could have just been isolated to my particular printer or Macbook Pro, but I felt it was worth noting what I perceived as a flaw in an otherwise very reliable UI system.
Feeding the filament through (which is stored on it’s spool in a separate compartment on the side of where the action takes place) wasn’t too much of a hassle, though the print head did clog during my first attempted print. Using the touchscreen interface I chose the spinning orbital top provided by Y Soft on the SD Card that was include with the printer, I had already approached an obstacle. But by using the filament change setting to heat up the nozzle, I was able to easily dispel of the initial clog and get my print on.
Laying down an even layer of glue on the build plate, the auto-calibration started and finished quickly and smoothly (taking about 50 seconds to prepare for printing). Aside from the minor issue of the clog, the printer started the surface layer of the orbital successfully. Tracking the progress on the interface display was convenient as well, as I sat watching the printer scurry around the print bed printing three separate top tips and the orbital base simultaneously. The sound of the machine was noticeable but pleasantly subtle (though that could just be the musician in me), but all in all it failed to distract me from completing a good days work or an episode of Rick and Morty.
The build volume of 150mm x 150mm x 150mm isn’t too impressive when compared to other popular consumer desktop 3D printers such as the Ultimaker 2 (223mm x 223mm x 205mm), but the auto-calibration and easily equipped and level glass print bed slightly make up for the disadvantage in size capability. The print was completed quickly (around 30 minutes) and detached from the bed without much strain. The printer is able to reach a resolution of up to 50 microns, leading to a smooth and seamless finish.
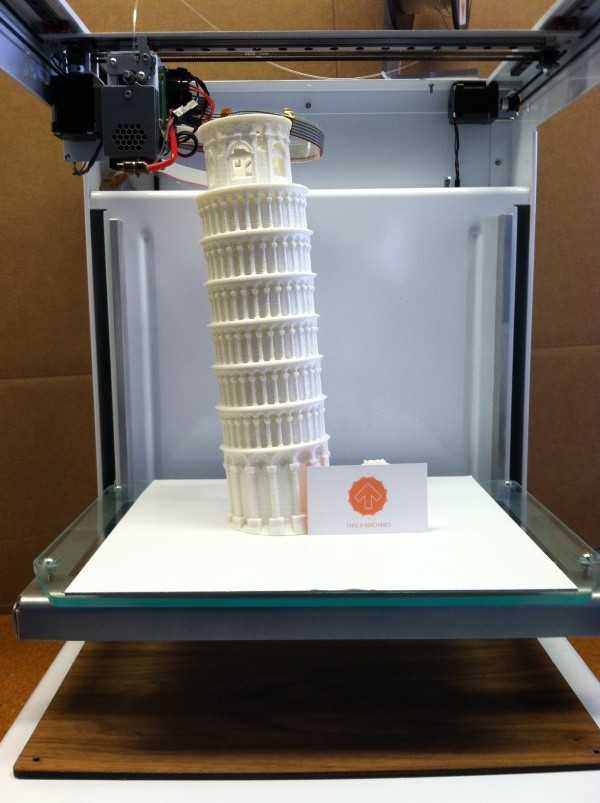
After finishing the orbital design, I went on the explore the other options provided by Y Soft on the SD card. Taking about 14 hours, I was able to print a marvelous spiraling vase which made me think, “maybe this build volume isn’t so small after all”. I then ventured off into the world of Thingiverse and MyMiniFactory to print a low-poly Bulbasaur (the cute little grass guy from Pokemon), some Pacman ghost guitar picks, neatly designed bookmarks, and some polar bear tire valve caps for my bicycle, all of which came out fast and without issue.
To print these freely downloaded designs, I went outside of the SD card and used the Plug-n-Play connection through my Macbook Pro. In order to print these downloads, you must first obtain to complementary DeeControl software, which much like their 3D printer, is super accessible and convenient for makers of all experience levels. Once a design is uploaded into the proprietary software it remains in the library, where it can then be quickly placed on a template of the print bed, duplicated, resized, moved around, and more. The software then slices and converts the design for print in no time, giving you an estimated file preparation and print time during the process.
What made me most fond of the DeeGreen was the bright greenish (maybe some would say yellow?) PLA filament that came alongside it, which is an environmentally degradable plastic made from cornstarch. Y Soft’s specialized filament may be a bit eccentric in color, the implication for the environment is important in an industry that utilizes a massive amount of plastic material. The cornstarch-base doesn’t hinder the quality of the print either, which as stated above is capable of reaching 50 microns.
Aesthetically, I liked the design of the DeGreen, though it did remind me a bit of my Dell desktop computer from back in the day. The separated spool chamber does sort of deceive the expected build volume, but the all-in-all the printer is very well-built and is perfect for anyone looking to take their first step into the expansive universe of 3D printing.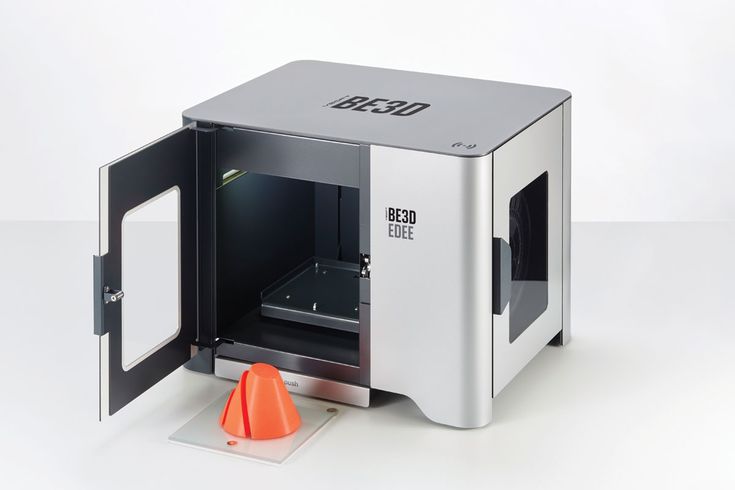 I imagine the ideal setting for the DeeGreen being inside of the home office or classroom, acting as a high-quality and friendly introduction to prototyping and projects. But those with more experience and the need for more build size and control over their prints may want to stray away from dropping a pretty penny on the DeeGreen.
The price tag of $1,999 is a bit steep compared to similarly sized 3D printers on the market, but what really places the DeeGreen in a league of it’s own is it’s ability to be used by almost anybody, regardless of whether or not they have any 3D printing experience at all. Though the design initially made me reminisce on the ancient desktop computer I once ran Windows 98 and dial-up through, to me the inner functioning of the DeeGreen is much more comparable to an Apple computer, though you may not have much control of what’s under the hood, both are simple in design, easy to use, quick, and neither are too prone to errors or viruses…
Build volume: 150 x 150 x 150 mm
Number of extruders: 1
Nozzle diameter: 0. 4 mm
4 mm
Layer thickness: 0.05 / 0.1 / 0.15 / 0.2 mm
Print speed: 90 mm/s
Printable materials: PLA (1.75 mm)
Printer control: Touchscreen
Max Print Resolution: 50 microns
Interior lighting: LED
Power source: 230 V / 120 W (external)
External dimensions: 495 x 395 x 390 mm
Weight: 22 kg
Inputs: USB, SD card
Tyler Koslow
Tyler Koslow is a Brooklyn-based writer for 3D Printing Industry, and has also produced content for publications and companies such as Dell, Brooklyn Magazine, and Equity Arcade. His content is focused on a wide range of topics including tech, gaming, and music . Tyler is also a habitual instrument player, a writer of fiction, and generally all around fun haver. Tyler received a Bachelor’s degree studying English-Creative Writing at the University of Central Florida in 2008.
How a 3D printer works, what can be printed on a 3D printer
The 3D printer is a technology that allows you to create real objects from a digital model. It all started in the 80s under the name "rapid prototyping", which was the goal of the technology: to create a prototype faster and cheaper. A lot has changed since then, and today 3D printers allow you to create anything you can imagine.
Contents:
- What is 3D printing?
- How does a 3D printer work?
- What can be printed?
The 3D printer allows you to create objects that are almost identical to their virtual models. That is why the scope of these technologies is so wide.
What is 3D printing?
3D printing is an additive manufacturing process because, unlike traditional subtractive manufacturing, 3D printing does not remove material, but adds it, layer by layer—that is, it builds or grows.
- In the first step of printing, the data from the drawing or 3D model is read by the printer.
- Next is the sequential overlay of layers.
- These layers, consisting of sheet material, liquid or powder, are combined with each other, turning into the final form.
With limited production of parts, 3D printing will be faster and cheaper. The world of 3D printing does not stand still and therefore there are more and more different technologies competing with each other on the market. The difference lies in the printing process itself. Some technologies create layers by softening or melting the material, then they provide layer-by-layer application of this same material. Other technologies involve the use of liquid materials, which acquire a solid form in the process under the influence of various factors.
In order to print something , you first need a 3D model of the object, which you can create in a 3D modeling program (CAD - Computer Aided Design), or use a 3D scanner to scan the object you want print. There are also easier options, such as looking for models on the internet that have been created and made available to other people.
Once your design is ready, all you need to do is import it into the Slicer, a program that converts the model into codes and instructions for a 3D printer, most of the programs are open source and free. The slicer will convert your project into a gcode file ready to be printed as a physical object. Simply save the file to the included SD card and insert it into your 3D printer and hit print.
The whole process can take several hours and sometimes several days. It all depends on the size, material and complexity of the model. Some 3D printers use two different materials. One of them is part of the model itself, the other acts as a prop that supports parts of the model hanging in the air. The second material is subsequently removed.
How does a 3D printer work?
Although there are several 3D printing technologies, most create an object by building up many successive thin layers of material. Typically desktop 3D printers use plastic filaments (1) which are fed into the printer by the feeder (2) . The filament melts in the print head (3) which extrudes the material onto the platform (4) creating the object layer by layer. Once the printer starts printing, all you have to do is wait - it's easy.
Of course, as you become an advanced user, playing with the settings and tweaking your printer can lead to even better results.
What can be 3D printed?
The possibilities of 3D printers are endless and they are now becoming a common tool in fields such as engineering, industrial design, manufacturing and architecture. Here are some typical usage examples:
Custom Models
Create custom products that perfectly match your needs in terms of size and shape. Do something that would be impossible with any other technology.
Rapid Prototyping
3D printing allows you to quickly create a model or prototype, helping engineers, designers and companies get feedback on their projects in a short time.
Complex geometry
Models that are hard to imagine can be easily created with a 3D printer. These models are good for teaching others about complex geometry in a fun and useful way.
Cost reduction
The cost of 3D printing end-use parts and prototypes is low due to the materials and technology used. Reduced production time and material consumption as you can print models multiple times using only the material you need.
How to choose and buy a 3D printer? →
Metal 3D printing | DMLS Printer | Additive manufacturing equipment
Equipment Additive Manufacturing Equipment
What is metal additive manufacturing?
Eplus 3D Additive Metal Manufacturing
Metal 3D printing equipment and supplies
Eplus3D metal printers, from entry-level models to multi-laser machines, can be used for industrial grade additive manufacturing. We also offer advanced industrial metal 3D printing processes that are compatible with a variety of metal materials, including aluminum alloys, titanium alloys, cobalt-chromium alloys, nickel-based alloys, stainless steel, tool steel, copper alloys, and other metal micropowders.