How to 3d print dice
3D Print Dice - The Ultimate Guide to Dice 3D Printing
ADVERTISEMENT
Table of Contents
3D printers have made everyone believe that it can do better if pushed a little more. And, it does have made itself readily available for functional parts as well.
However, some still think that the functional parts are not only difficult to accomplish, however, takes a lot of time and effort.
But if you plan to 3D print dice, you would come into agreement that the claim isn’t true in every case. It is simple to print, definitely with the right settings. And, it does is very useful.
This is one of the reasons why these 3D files for designing dices are in such high demand. If you google on the internet, you will find many 3D files listed on various online repositories. Some of them are even free to download.
Plus, you can find numerous variants for the design. Few are usual and standard looking dices and others are extraordinary, even printed with metals.
Hence, it is easy to assess the popularity these 3D dices are gaining. Makers with little tricks and by introducing themes such as skull prints are providing a huge list for selection.
But that does not mean you cannot design a file on your own. If you are good at it, why not. Test it and if you think it is worthy of sharing with others, go ahead.
But before that, we would like to present to you some of the tricks to help you with your project as well as a few recommendations of the repositories you may like to visit for the digital file.
ADVERTISEMENT
How to 3D Print Dice?
As mentioned, a functional part could be challenging.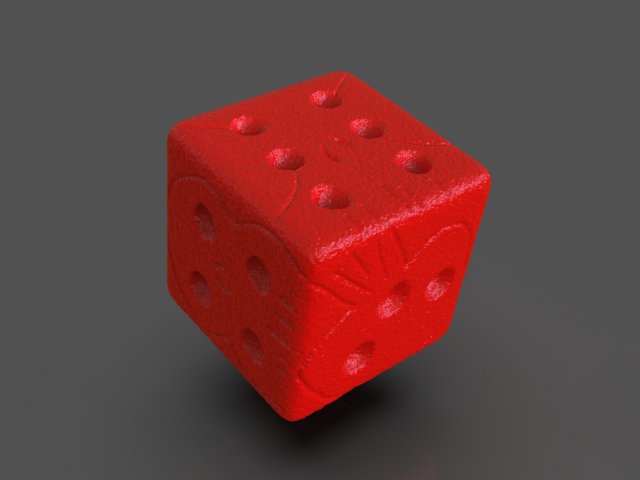 Nevertheless, if you use the right material and keep the optimum settings, printing a dice isn’t a hassle at all. And, because dice is completely functional, 3D printers do bring us the flexibility to go for such parts in the future as well.
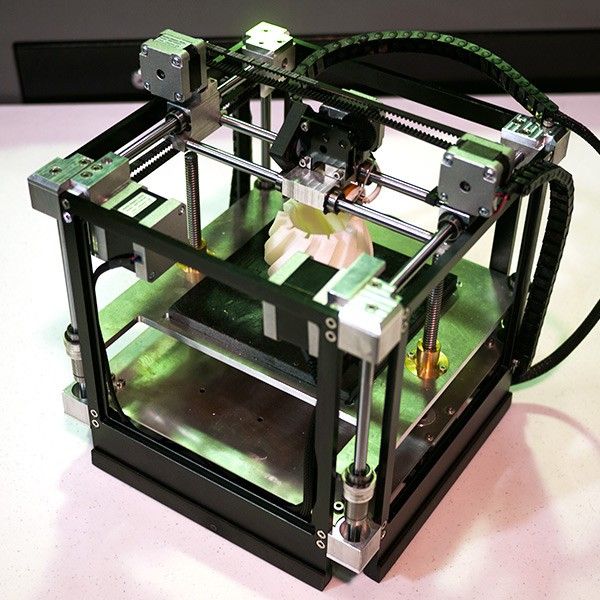
So, where do we start? When 3D printing, the first thing that one must choose is the material and the 3D printing technology. In this case, you can make use of many 3D printing technologies. But let’s talk about the FDM 3D printers first. These are inexpensive and readily available for homemakers.
Step 1: Choose the Material
When we say ‘choose the material’, that does not mean just picking any of the available ones and start printing. There are a lot of things involved in choosing the filament.
When working with FDM materials, you must know one character that almost every material showcases. The materials of FDM 3D printers are prone to non-homogeneous shrinking.
This means that the size of the actual part would differ from the one set in your slicer.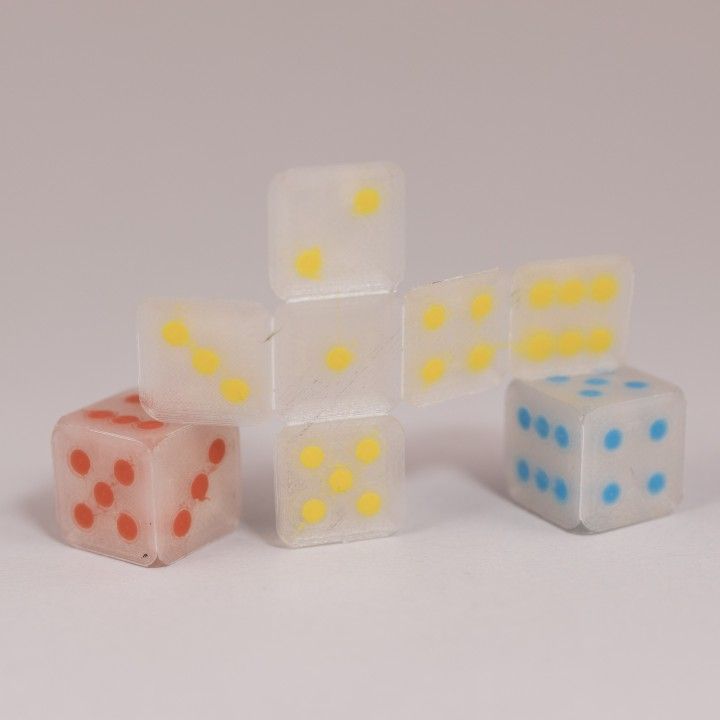 This happens due to uneven cooling as well.
So, you can ensure temperature consistency. But still, there would be shrinkage, low of high, depending on the material you choose.
Hence, you must find out the selected material properties and how much it shrinks when cooled down after deposition.
To find that out, you first need to print a sample cube. Let’s keep the cube 10mm in length on all sides. After the print completes, check the actual length on each side and along each axis.
You will find out the difference in the length because of shrinkage. Adjust the same offset in your slicer to further carry the printing of the actual dice.
ADVERTISEMENT
Step 2: Design the Digital File
This is the most crucial step and you must follow the optimum designing tricks to ensure an easy experience all along. The platonic bodies may look simple, however, they may come with their own challenges.
Let’s be fair while designing your STL digital file.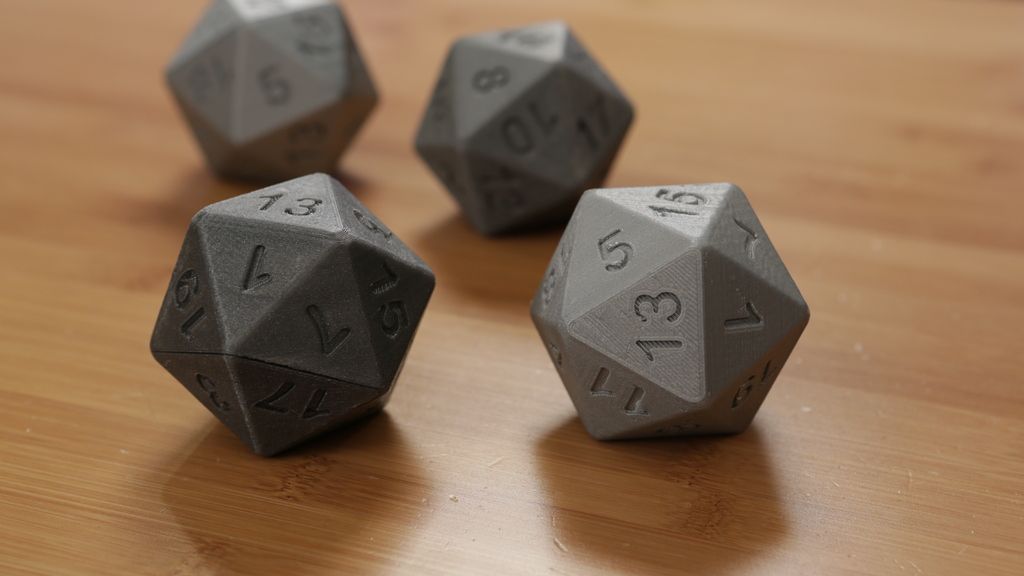 To do so, the number of indentations must be wisely taken care of.
For instance, the indentation must not be too obvious but it should still be readable. The best way to complete this is by using a dual extruder printer.
In this case, you can print with two colors. Hence, you do not have to fill the numbers with varying density material. Rather, you can continue with the same density material using different colors for the numbers.
Also, when indenting the numbers, you must continue with the same surface area for indentation for every side of the dice. This would help you keep adjust the same volume from each face of the dice.
This would also ensure that the center of mass stays in the center of the entire body of the dice. Making it fair to roll every time you play your move.
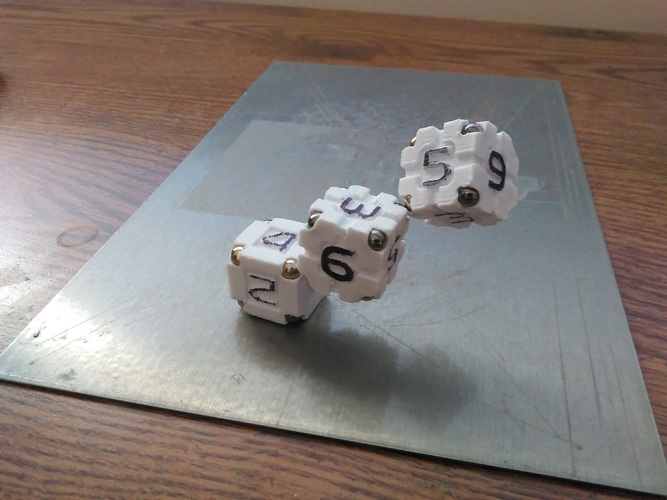
So, what could be the easiest shape of dice to print. Not many know about it but prism-shaped dices with cylindrical design do make it fair to print.
This is rolled over the cylinder surfaces, making it easy to keep the design fair and simple.
The slicing process is hassle-free too. You can take out the cones from both ends to further simplify the design.
ADVERTISEMENT
Step 3: Slice the Design
Slicing brings a few more considerations to the list. The design is fair. But what about the slicer settings, if went wrong could turn your design into an unfair one. Infills aren’t the way to go as they could turn the design crooked.
Hence, we are left with two choices. Either we keep the dice completely solid or make it hollow. In the case of solid design, the dices would be heavier, however, easy to 3D print.
On the contrary, the hollow structure of the dice would save more than 95% of the material but would have its own caveats.
First of all, hollow dices can have sagging flat surfaces. Also, there could be high chances of difference in the wall thickness from the thickness of the flat area.
The settings of layer height and nozzle diameter also matter a lot. To give this delicate design the finish it deserves, you must go with the smaller layer height.
Most of the FDM 3D printers offer 0.05 mm of layer height which is a decent setting for this design.
However, the standard nozzle diameter usually is 0.4 mm. So, you must check with the same and if possible, switch to 0.2 mm or less diameter of the nozzle.
And, do not forget to check the calibration after you make these major changes to the 3D printer. This is to compensate for the offset and manage the shrinking.
After you have gone through all these steps, finally, you can 3D print dice. And, if everything goes as per the plan, you will be able to get the fairly printed dice, with few post-processing requirements to perfect the design further.
ADVERTISEMENT
Step 4: Post Processing
Now that you have got your dice, you must be celebrating the success. But we still need to test for bias. To do so, you can try to use the saltwater layers to float the dice while keeping the tap water on.
This would help you find out the heavy side. And, you can simply sand that side to get the fair design.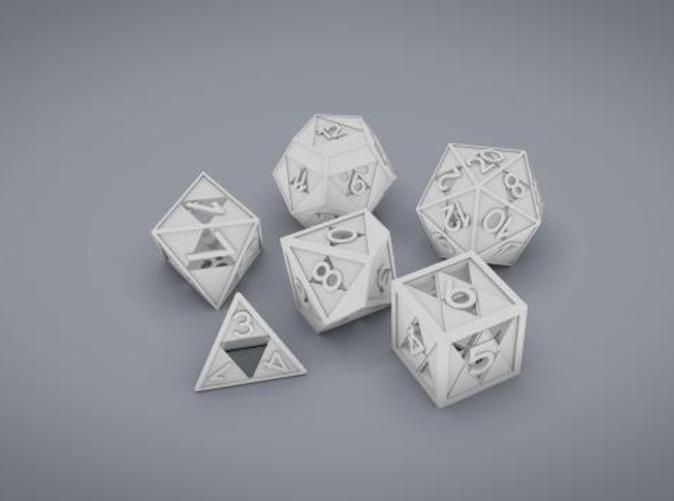
Ensure to test every time you sand a surface until you manage to achieve the same result for each side of the dice.
Sanding is the option when you prepare a solid dice. However, when having a hollow one, you must concentrate on filling the side that’s less heavy.
You can do that with a resin such as epoxy. However, in such a case, you must have the filling hole in your dice design to refill it from inside.
Ensure a complete fill and do not forget that the resin shrinks too when cured. Moreover, it heats up while you cure the material.
Recommendation for Online Repositories for Downloading 3D Files for Dice
Although you can choose to create your own 3D design, there is no harm in knowing about the other options too.
Who knows you can get inspired by some design and create some unique digital file of your own?
Among the accessible websites, few offer a huge variety of files for Dices. And, you would love browsing through the options.
The digital files are simple as well as complex. You can choose the one you like.
ADVERTISEMENT
Thingiverse
Who does not know about Thingiverse? Carrying models for almost every selection, the website has gained huge affection from the 3D printing community.
And, you, believe it or not, this website alone has more than 100s of dice printing choices as well as many related accessories.
The best part is that you can find free models on Thingiverse. However, many of them are not verified as successful printable digital files.
To ensure you do not land on the wrong file, make sure you check the pictures of the ones already printed. Here, you can get the files for standard looking dices as well as some modified versions too.
Yeggi
It’s not exactly a repository for online 3D files. However, it is different and more like a search engine. So, if you are looking for something very specific, with crucial details, you can get it through Yeggi.
It would provide you an assorted list of numerous websites listing the dice design. You can get free STK files for dice design as well.
The best part is that the website is easy to scroll through and interpret. Thanks to the simplified user interface.
In short, you can choose between thousands of dice designs as well as accessories related to the same. No wonder why people rave about this website so much.
ADVERTISEMENT
Cults
Similar to Thingiverse, Cults offer an online community for makers to collaborate and upload their designs to make the website stronger and powerful.
If you can 3D design, you can also upload your files here. Getting back to the process of 3D print dice, you can find a huge selection of digital files related to it.
However, the numbers aren’t very huge. As the website seeks quality over quantity. You would find some of the most remarkable dice designs. Standards as well as modified ones.
Once again, there are many free STL files available for users. So, you can enjoy 3D printing while trying out different dice designs. A perfect place for makers who consider 3D printing more than just a hobby.
Shapeways
Do you know you can get 3D print dice without a 3D printer? Funny, isn’t it? But how about the option of outsourcing your 3D printing needs to someone who is an expert.
Yes, Shapeways can do that for you. You just have to select the file you need to print and ask the experts to do that for you. You will be charged a fee for the same and the model will be delivered at your doorstep.
Alternatively, as with other online repositories, you can also download the 3D file and print yourself. So, you have got both the options.
Talking about the choices, you will find a huge selection of easy and difficult designs.
MyMiniFactory
This is also a famous online repository for those wanting to find quality 3D models. And, there is an array of designs if you wish to 3D print dice.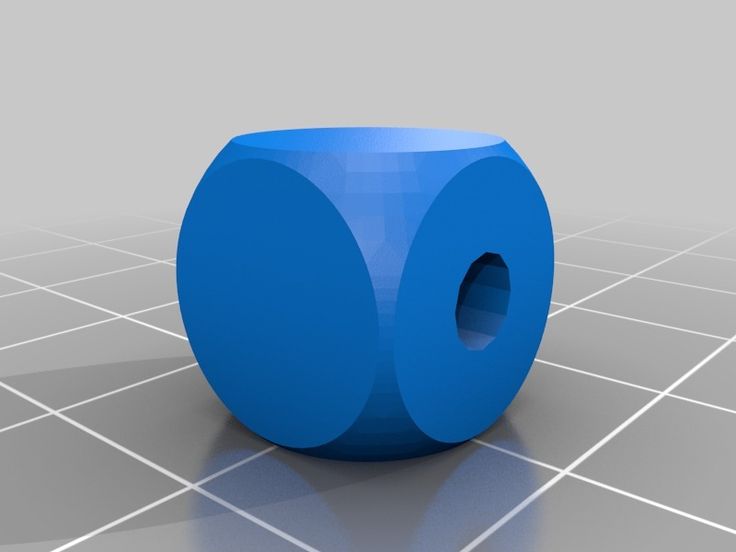
What makes this website trustworthy is that the designs found on MyMiniFactory are all verified for printing. Hence, it is impossible to stick with a bad design.
Whatever model you choose, you can print it for sure. Just remember to follow the instructions.
The Conclusion
When seeking great design, we often fail to follow the ground rules that end up into something unexpected. Even the simplest ones must be printed with care and by following what’s needed.
The same goes for dices as well. These may look simpler, but you do want to get a fair design and not just end up with a dice that is biased on one side.
You do get the point, right? So, 3D print dice with the best design and using the right calibration settings along with other listed priorities. If you do that, you certainly can design a fair dice.
Are 3D Printed Dice Fair? How to 3D Print Fair Dice – 3D Printerly
Creating a fair dice is something that even manufacturers can have trouble with, so how easy would it be to 3D print a set of fair dice? I’d have to say in the real world, you wouldn’t really get a perfectly fair dice because of very small imperfections, so it’s more a question of how fair can we get it.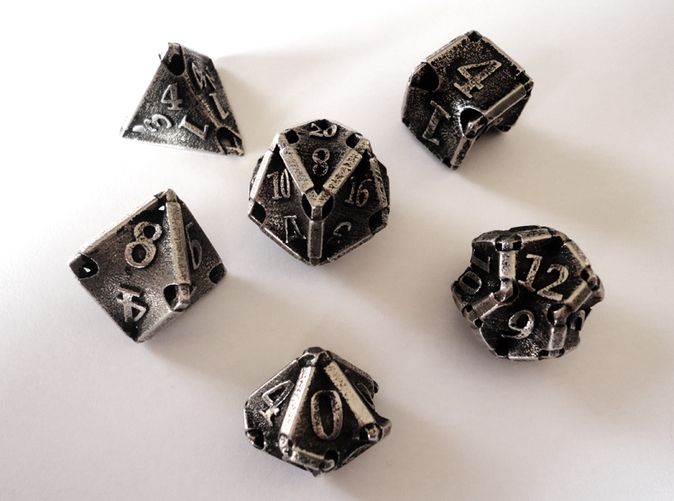
A 3D printed dice can be significantly fair depending on the type of 3D printing technology you are using. There are imperfections that will affect fairness such as small imperfections on the exterior of the print, as well as the symmetry of the infill of the dice.
This article will attempt to go into detail about fair 3D printed dice, and give a guide on how to create as fair 3D printed dice as possible.
Are 3D Printed Dice Fair?
In the real world, no dice out there is perfectly fair, but they are pretty close to it after rigorous testing and manufacturing techniques.
3D printed dice on the other hand, don’t go through the same strenuous testing or refined creation methods, so I wouldn’t put them against a professional set of dice in any instance. Different printing technologies can improve the fairness though.
I guess it’s down to the criteria of what you call fair really. If your 3D printed dice has 90% accuracy for 1,000 rolls, would you consider that fair? Once you determine what is fair to you, then you can start to determine whether 3D printed dice is fair enough for you.
3D printed dice will be uneven, but to a very small degree if done correctly. With several rolls, you wouldn’t see too much of a difference in the longer term, so it works out just fine for practical purposes.
Post-processing is usually involved to make things look sleak, and polished which can have effects on how fair the dice is.
In terms of value and convenience, store-bought dice are always going to take the cake, but when we are talking about customizability, creativity and a sense of making a cool project, 3D printed dice are a really good option.
People out there have definitely 3D printed dice successfully, whether it’s for D&D and their dice towers, or for board games, they are being used regularly without any issues.
On the other hand, one individual 3D printed a few dice and threw them 100 times each, and he found that they were very far from being fair. He said it could have been due to the infill and its orientation.
There are many factors which go into make a pair of dice fairer, which I will go into detail below.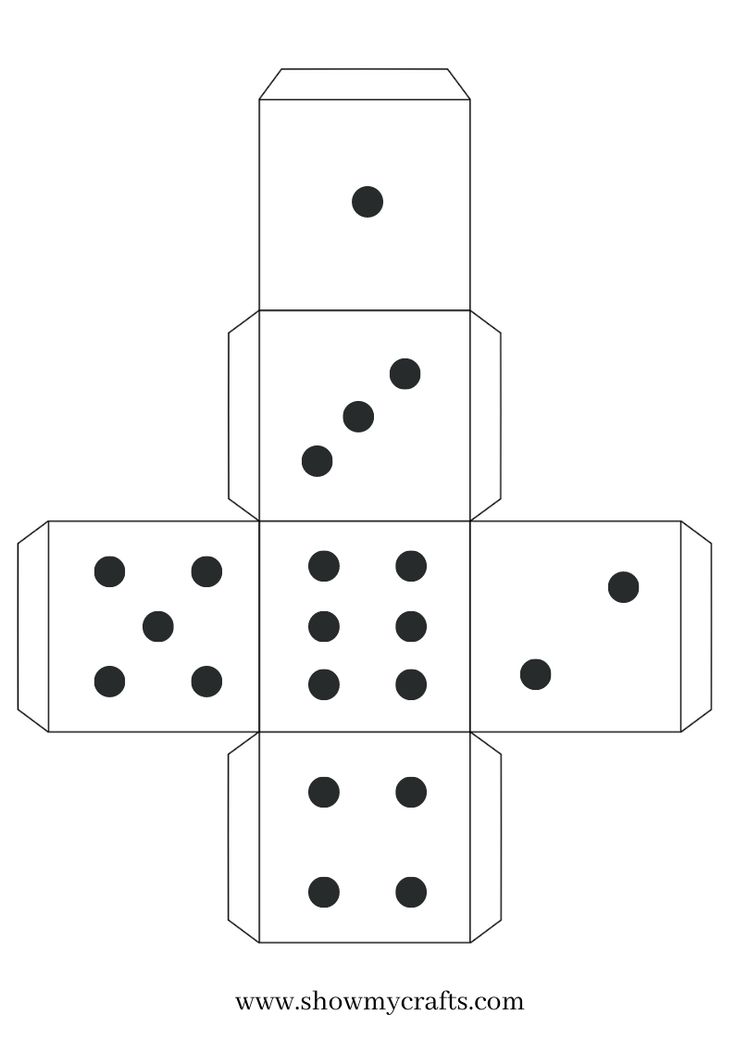
Things to Consider When 3D Printing Dice
- Wall Thickness
- Infill Settings
- Print Technology
- Printing Precision & Imperfections
- Type of Dice
Wall Thickness
The wall thickness is basically the size of the external layers of your model or print. You want to make sure your wall thickness all around your dice is even so there isn’t any weight pushing towards one side, thereby creating an uneven dice.
Many slicers actually make the wall thickness of the base of prints thicker, so keep this in mind when you are deciding which type of die you are going to print.
It won’t usually make a massive difference since the materials you are printing with tend to be lightweight, but it will add to the unfairness of the dice, which we are trying to minimize. You’ll want to be using either PLA or ABS.
You may have to do some tweaks and analyze the layer by layer representation of your prints in the slicing software to get this factor right.
Infill Settings
It may seem like the infill settings is a fairly simple factor since we just want to make it solid with 100% infill, but there are some caveats.
Your slicing software won’t always completely fill in your models, but rather fill the inside with patterns that give stability as well as reducing material and print times. You need to be using a specific pattern that minimizes the instance of this.
An example of this is using the honeycomb infill pattern which creates an infill which goes from bottom to top which gives your die more chance of landing on the bottom of top side.
This usually occurs when you are using an infill pattern which is a non-random fill, so you should use randomized infill patterns which should lead to a more balanced dice.
Print Technology
FDM (Fused Deposition Modeling)
- Melts and extrudes thermoplastic filament
- Lower priced option
- Lower quality and resolution
- Great for simple prototyping and concept models
SLS (Solid Laser Sintering)
- Uses a powerful laser to fuse polymer powders
- Low cost per part as well as high productivity and doesn’t need supports
- Great mechanical properties
- Great for functional prototypes and custom manufacturing
SLA (Stereo Lithography)
- Uses a laser to cure photopolymer resin
- Good choice of materials to print with
- Very high accuracy and resolution
- Great for functional prototyping, patterns, molds and tooling.

This is very similar to SLS but the difference is here you get various colour combinations, and perfect surface. You can reuse the resin as well.
FDM isn’t going to work as well as SLA because of the presence of imperfections and lower accuracy. If you are looking to 3D print the most fair dice you can muster up, I would definitely opt-in for using an SLA or SLS 3D printer.
These used to be very expensive in the past, but an increase in manufacturers and technology have really brought the price down, now in the same price range as FDM printers.
I would recommend going with the Elegoo Mars UV 3D Printer for 3D printing dice.
Printing Precision & Imperfections
You’re going to find the most problems with printing precision and imperfections, unless you have the right equipment behind you.
Trying to get perfectly flat surfaces on an FDM 3D printer is going to be a tough task, especially if you haven’t tuned it well. You’re likely to get bulges on the corners of the die, as well as slight curves around the sides and the top.
You can slightly fix this in your slicing software by decreasing print speed, but it still won’t give you the results you desire.
Some people who have done this decide to add manual support rather than the automated support that is usually implemented. What you can do is configure your slicer to print very thick walls, then post-process the dice with sanding to get them nice and flat.
Type of Dice
Some types of dice are practically speaking, pretty easy to 3D print, while others can be difficult. Dice like the D6 & D4 are going to be fairly easy to get done. When you start moving up to the D8, D12 & D20, you may start running into more issues along the way.
I doubt you’ll get the results you desire after the first print, so do be prepared to have to tinker your settings a few times to get it right.
Although you might think differently, smaller dice are actually tougher to get right because the smaller the object, the more precise it has to be. You have less room for error with a small dice, regardless of how many sides it actually has.
I would opt-in with a large-sized D6 dice to get started, then if you are feeling more adventurous, move onto more complex dice. The hardest ones to print are going to be those small dice with several sides.
Dice that are completely solid from top to bottom are going to bounce around a lot more, so keep this in mind.
Other Things to Consider
Post-processing is probably going to be very useful for you when it comes to 3D printing dice. You can get rid of imperfections like layer lines, ridges and unwanted curves.
If you want to paint your dice, I would use a plastic-safe primer to help the paint adhere to it. Afterwards, it’s a good idea to spray the dice down with a clear-coat sealer in order to protect the outer layers flaking and chipping.
Sometimes using ABS for 3D printed dice is a good option because you can run it through an acetone vapor bath before painting. What this does is smooth out any visible ridges on the outside of your models, so they are smoothed over nicely.
You do need to be cautious when handling acetone, so I would use a tutorial or video guide to get the right tips on how to do this.
How to Check Whether Your Dice is Fair & Balanced
Roll it 100 times, check for evenness of distribution and make sure the average is correct, and then you’re good. It might take a few tries to get it as even as you want, but it’s a cool project to perfect, so you know how to really get that high precision.
It should translate into your future designs and is a good skill to have.
Another method to check whether your dice is fair and balanced is the saltwater trick:
- Fill small jar with hot water
- Put in two tablespoons of salt, put on the lid and shake it
- Put another two tablespoons of salt and shake until most dissolves
- Add another two tablespoons of salt, remove the lid, then microwave on high for 30 seconds
- Put the lid on and shake until it dissolves, it will be hot so use a dish towel
- Once dissolves, set the closest jar in a cold water bath until it cools to room temperature
- Put your dice in the water and note where it lands and how it moves
What are Some Good 3D Printed Dice Designs?
This Balanced Dice model on Thingiverse by RarelyEvil is a great design to try out.
Here are the Facets Dice – a Full Set of Custom RPG Dice by sablebadger on Thingiverse.
Cracked RPG Dice Set (D4, D6, D8, D10, D12, D20) on Thingiverse.
You have a Dice Tower by Lau85 on Thingiverse.
Yet another Dice Tower with Fold-Up Trays on Thingiverse.
A D20 Countdown Die (Dice Holder) on Thingiverse.
You can search through Shapeways for awesome 3D printed dice designs that you can purchase in several materials.
There are more designs that you can search through on MyMiniFactory also.
(There is a solution) How to print fair dice in 3D?
This will be a 3 step answer since 3D printing uses 3 different steps: Design, cutting and material selection of before I develop alternative methods for some honest dice. However, we start with the material since we need to know about it first. In this case, it affects everything from design to slicing to printing.
Step 1: Know your material
Let's face it, most materials used in fused deposition modeling (FDM) experience non-uniform compression between the XY plane and the Z axis. But if you know these specific properties for a printer/ filament/temperature, you can compensate for that. Know your material - you will need it for cutting. Do a test print of a 10x10x10mm cube and measure - 10mm offset on each axis is what you need to compensate with a cut.
Step 2: Design Fair
Platonic Solids
When designing your STL, try to design as fair as possible. Either indent the numbers as little as possible while still maintaining legibility, or if you have a 2-color printer, fill the numbers with the same density but a different color.
Another thing to consider: indent the same surface area on each face of the body. This way you are removing the same volume, and therefore the same weight, from each face, which makes it somewhat fair in the design, as the center of mass should now be mostly in the center of the body.
Prism "dice"
A cylindrical (or rather prismatic) structure that is rolled over its "cylindrical" surfaces can be the simplest to fairly design and fairly easy to cut, without the need to resort to special cutting techniques and many different compensations to keep in mind, or the need to collect the object after printing. It can be made with or without a conical/ellipsoid shape at both ends. Or it could be made as a dreidel having only one conical/ellipsoidal tip for ease of printing, perhaps even the "rod" would be printed as a different object and then assembled after printing.
Step 3: Slicing
So there is a pretty fair design...but what settings to use when printing it?!
The padding will make it wobbly, so there are 2 options: solid (100% padding) and completely hollow (0% padding). Solid is easier to print and heavier. Hollowness saves (depending on the sides of the surface) 95% or more of material as opposed to solid, but can fall prey to flat surface sag or wall thicknesses that do not match the flat surface thickness.
Now that we've selected the fill options, we need to select some other things. We want to print quite delicate materials, so we should use a lower layer height than usual (eg 0.05 mm) and preferably a smaller nozzle - 0.2 mm or even less if available. This again means calibrating the printer/material combination for these two parameters (XY / Z reduction).
After calibration, finally print! Bones should be pretty good in fairness, but they still aren't quite fair...
Additional Step: Post-Processing
You can do a displacement test by placing it on a layer of salt water under tap water... if you manage to make it strong enough to reduce the amount of air inside it to sag between those layers. In this way, you can lightly sand the heavier side until it becomes unbiased.
If you manage to print something clean and hollow, you might consider filling the cavity with some kind of resin (like epoxy) to give the objects some weight. However, this in itself has some caveats: you will have to leave a filling hole, and you will have to coat the inside evenly or fill it several times to ensure complete filling, since most resins shrink when cured. In addition, most resins heat up during curing, although usually not to the extent that they melt FDM. When you work with resin, wear gloves as it is aggressive to the skin!
but! 3D printink can do more!
FDM is home printer material, but maybe you have access to something more... industrial. They are cunning in their own way, and you better know what you are doing with them.
SLS (Solid State Laser Sintering) You just need to know your material compression factors in this case... and no, you don't have to think about filling, this way you can only create solid, 100% filled objects. But you will also have virtually no air in your print. However, having SLS at home is rare. However, this is most likely what you get when you order printed... but remember: SLS powder is highly hygroscopic and must be sealed. In addition, over time, it becomes yellowish if it starts to turn white. The use of recycled powder also greatly degrades print quality. and never look into a running machine.
DLMS (Direct Metal Laser Melting) is a fairly new and largely metallic variant of SLS. If you make your bones this way and get them almost indistinguishable from cast metal. Lightly polish the surfaces, do not smell the powder, and do not look into the laser.
DLP/SLA Projector for (Direct Light Recycling/Stereo Lithography) Printing that due to resin curing is actually quite close to SLS, but it has some similarity with FDM in parts...big advantage: you can do very delicate details, and in the height layer you get very subtle - and you have a huge number of colors to choose from. But you should keep in mind that you may want to either make the bones solid or design them with holes in each of the sides or corners to allow excess resin to flow out. You get perfect surfaces and can use the resin for quite a long time depending on the printer and storage location, but remember: SLA is a stinky thing, never look into the press, and resins are very corrosive to the skin, so use gloves when working with printing and printing until they will be properly cleaned.
But wait, what if you don't actually print the dice, but just print a positive dice result and then make a negative cast out of it?
Yes, it can be done. Do you know what lost wax casting is? Here you are. Here is your step by step:
- Print out your bones.
- maybe even stack the positive together of multiple faces printed in the same orientation for maximum print equality.
- Add molding inlet and air outlet to the print.
- Cast the positive into either clay material or plaster.
 Let it dry/harden.
 - Burn/melt the positive, you will get a hot and empty negative form.
- cast in liquid metal or resin
- break the mold, remove the holes, polish a little and... voila!
If you're good at green sand casting, you can use that instead of lost wax casting - and reuse a positive result for a second casting. Or, if you're good, you can make two-part molds that can be reused.
Option 3b: mold it!
If we can print a positive result and make a form out of it, we might as well print the form directly. Then we can just cast "cold" materials, but if you have something that can be cast this way (some resin or wax), you can make either cubes or sprues to cast the lost wax this way. However, designing here will be different in the last steps: after creating the desired object, use it as a "tool" to cut out of the more or less square block that surrounds it. cut out the material and air inlet/outlet from the block. Then cut to your liking if you want a reusable multi-part mold. You may want to add a ditch to add wire or elastic around the print to keep the mold together while casting.
Or we go to industrial production with this model, take CNC, make mold halves in this way and refuse to print cubes...
Know your printer, know your material, design according to your printer's requirements, design honestly, maybe avoid printing real cubes, but print a positive result for molding and casting, or print out a mold.
Best 3D Printing STL Files Dice・Cults
Island D20
Free
D 20 Swamp
Free
Doctor Who D20
Free
Single and multi-row cube tray
Free
Ornament D2022
0.96 €
Cubes
Free
Pachinko style dice tower with tray
Free
Rogue's Bag Dice Vault - SUPPORT FREE!
€4.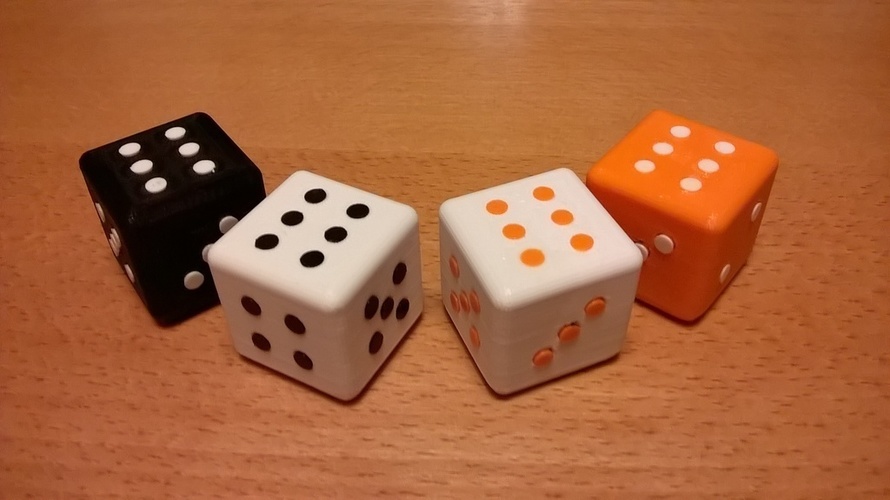 81
81
Rogue's Bag Dice Tower - FREE!
6.74 €
Wizard's Magic Tome Spell Card Holder - SUPPORT FREE!
2.88 €
Wizard's Magic Tome Dice Tower - FREE!
6.74 €
Dice Keepers: 3D Printed Dice Holders & Keeper Miniatures
Free
10-sided die (-5 to +5)
Free
Psychic Warfare 6X6 dice
Free
Which cryptocurrency to buy for dice
Free
edema apple
0.57 €
SPACE FUTURE HAMMER OF WAR AND THUNDER
Free
Cubes
Free
space gnomes 16 mm dice box
0. 65 €
65 €
Space Gnome Accessory Box
4.82 €
You don't say 2D Wall Art
Free
Destroy the tower of cubes "Spire"
Free
weighted d20
free
night light Pikachu pokemon card
1.45 €
Various boxes for War Hammer Grimdark dice
4.81 €
Dice coin D20
€7.24 -25% 5.42 €
Cube tray with storage
Free
Bones Charader Valve CAP
Free
Imperial Fists Dice 30k
0. 71 €
71 €
Cubes of Aquila
0.71 €
Iron Warrior Cubes 30k
0.71 €
Deathguard Dice 30k
0.71 €
Barrel dice tower
5 €
D6 dice
Free
HEXAGONAL DICE STORAGE AND ROLLING TRAY
€2.50
Storage for round cubes and rolling tray
2.50 €
BASTELNA HOUSE BEER: "OUTTISTS" FACETED MULTIPLE DICE
5 €
Basteln's Homebrew: "Innies" polyhedral dice
4 €
Discs for Seeburg 160 Selections jukeboxes
4 €
Votann Dice cup and card box
3.