Cartesian vs delta 3d printer
3D printing technology – Delta versus Cartesian
Back
The 3D printing market is quite competitive and each printer has its own 3D printing technology and unique capabilities, so it’s important to know which printer is most suited for the results you want to achieve. As most 3D printers, Tractus3D printers use the FFF 3D printing method (also known as FDM 3D printing), which means everything is printed layer by layer using filament.
In the FDM 3D printing technology, two types of printing systems can be distinguished: Cartesian and Delta. The biggest difference between these two systems is the method of moving. Because each system has its own way of moving, you will achieve different results.
First more about the FDM technology
There are several different 3D printing technologies, but the most used is Fused Deposition Modeling (FDM 3D printing). The FDM technology is a Stratasys-patented additive manufacturing 3D Printing method of rapid prototyping. This process is also known as FFF 3D printing (Fused Filament Fabrication). The FDM technology is very popular. Over the past two decades, the FDM 3D printer has become even the most used 3D printing technology in the world.
With FDM 3D printing technology, the extrusion nozzle moves over the build platform horizontally and vertically. Thermoplastic material is heated to its melting point and then extruded, layer by layer, to create a three dimensional object. Each of these layers can be seen as a sliced horizontal cross-section of the eventual object. Once a layer is completed, the base is lowered to make room for the next layer of plastic. Once an object comes off the FDM 3D printer, its support materials can be removed.
In FDM 3D printing technology, there are two types of printing systems: Cartesian and Delta. The biggest difference is the method of moving. We will explain…
Delta 3D printer
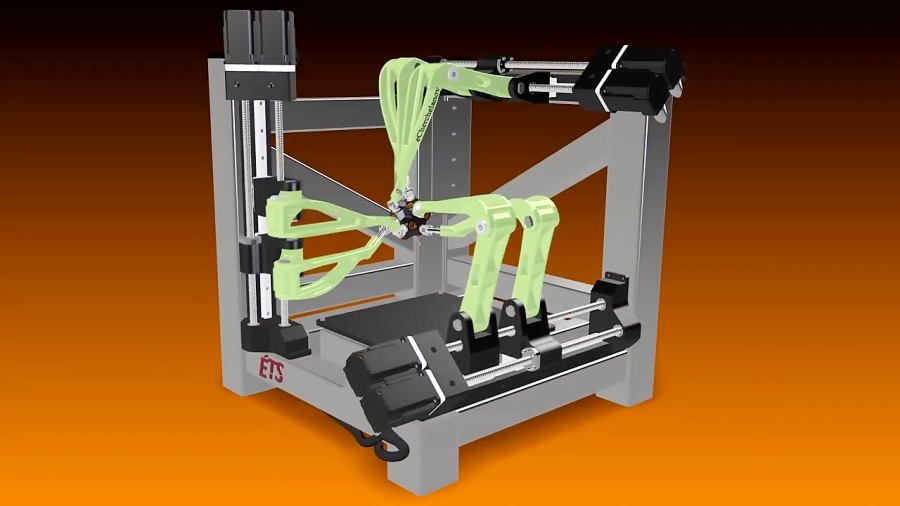
Delta 3D printers also use the Cartesian coordinate system, but do not use linear-motion tracked movement to deposit the filament. Instead, they use three arms, each consisting of a parallelogram. They also move from one X or Y point to another, but do so by changing the angles of these parallelograms. The arms of a Delta 3D printer hang down from a fixed platform. All of the mechanics that drive the motion of the arms are located in that platform. As a result, the print head of the Delta 3D printer is a lot lighter than if it also had to contain motors for movement. This reduced weight leads to reduced inertia. By reducing the inertia, particularly at the end of a movement, the production head is able to respond quickly, while retaining its accuracy.
A Delta 3D printer usually features a circular print bed, which is immovable. Due to its circular print bed, the natural shape of a Delta printer is a circle. Therefore, rectangular objects tend to be rather small in comparison to a Cartesian 3D printer. What a 3D Delta printer excels at, in comparison to the 3D Cartesian printer, is its capability to build tall objects. Especially the highest point of the print can be made exceptionally accurate. It is also fairly easy to make them bigger, especially in height, due to their design. With an overall less complicated construction and less parts to be used, it reduces maintenance and costs. If you do not have/need a lot of horizontal space, but instead want to build a lot of layers on top of each other (vertical), then you should definitely consider a Delta 3D printer.
Its downside comes in the fact that a Delta 3D printer must be much taller than its build volume, due to the arm construction of the machine. This is why you will generally need more space to place your printer than you would with a Cartesian 3D printer.
Delta 3D printer disadvantages
- Format, it requires more space (in height)
- More difficult to pinpoint errors
- Harder to print objects with large surfaces (horizontal)
Delta 3D printer advantages
- Excels in printing in height
- Light, thus easy to move
- Instant change of direction possible
- More accurate in the centre than on outer limits
- Easy to maintain and upgrade
- High print speed and accuracy
Cartesian 3D printer
Cartesian printers owe their name to the Cartesian coordinate system they use, which was invented by Rene Descartes. They don’t just function based on an X and Y coordinate system, but also drive the print head on a mechanism that travels linearly on both the X and Y axis.
Cartesian printers move from left to right, front to back and up and down. Simply put, it gets from A to B by moving just one axis at a time. Most Cartesian printers consist of a square, moving print bed. Instead of having the nozzle move towards the print bed, the print bed moves towards the nozzle in some cases.
Cartesian 3D printers see their downside in the fact that their moving parts are quite heavy. Because of this, it is hard for a Cartesian printer to stop or change direction in an instant. The constant jerking of the platform can lead to prints coming loose and to inaccurate prints, especially when the prints get higher.
Cartesian 3D printer disadvantages
- Weight
- Hard to modify due to spatial constraints
- No instant change of direction
- Not fit to print tall objects
- Small build volume
Cartesian 3D printer advantages
- Excels in width (horizontal) prints
- Easier to learn due to understandable kinematics
- Consumer friendly
- Easy to enclose most models due to cubic frame
- Cheaper
Delta vs Cartesian 3D Printers » 3Deometry Innovations
by deom | Jan 15, 2022 | Blog | 0 comments
3D Printing has taken the whole manufacturing industry by storm, by reducing prototype lead times while saving on costs.
3D printing has evolved beyond a niche hobby to become a robust technology used in research and development, product design, manufacturing business, education, architecture etc. For any 3D printing system to be properly specified and engineered for manufacturing, the printer needs to fit into the workflow smoothly.
Beginners are confused on which mechanism to opt for especially for their first machine. For those in to 3D Printing for a long time, know the cold war that is being waged upon between Delta vs Cartesian 3D Printer Mechanisms,
The 3D Space follows the Cartesian Coordinate System, but we have different mechanisms that cover this 3D Space. Fused Filament Fabrication (FFF) Technology has a variety of 3D Printing mechanisms to choose from ranging from Cartesian, Scara, Delta, Polar Etc. In this blog we are going to cover the two commonly used mechanisms for 3D Printing which is Cartesian Mechanism & Delta Mechanism
Advantages –
- Easy to Manufacture
- Maximum Space Utilization
- Widely Used Mechanism
- Printing Flexible Materials (Thanks to Direct Drive Mechanism)
- Great Community Support
Disadvantages –
1. Higher Maintenance Costs compared to Delta Mechanism
2. Frequent Calibration Required
3. Comparatively Noisier
Cartesian 3D Printing System has a Hotend Mounted on a planar system either moving along the XY Axis and the Gantry System which holds the build plate moves along the Z Axis.
Delta 3D Printer
Advantages –
- Lower Maintenance Costs
- Faster Print Speeds
- Build Plate is Stationary
- Frequency of Calibration is Much Lower
- Silent Machines
Disadvantages –
1. Printing Flexible Materials can be difficult (Bowd Drive Mechanism)
2.Space Utilization is Lower
Delta 3D Printing is completely different from the cartesian mechanism. Here we have a fixed build plate, ideally circular in shape, while the hotend moves across all 3 axis of XYZ.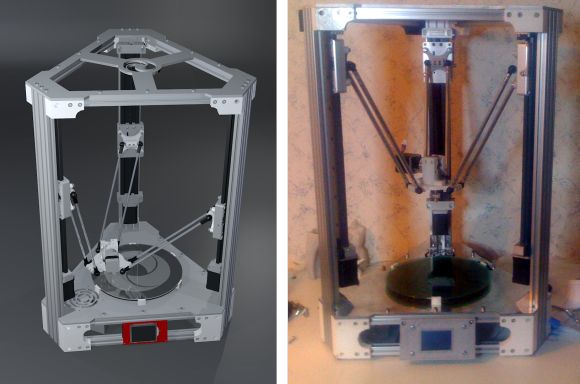
Personally we have used both the Cartesian as well as the Delta Mechanism, and we have found that once you are accustomed to the Delta Mechanism, shifting to the cartesian mechanism seems a little difficult and more complex, especially leveling the bed with the screw adjustments and making sure that the first layer is perfectly printing so that the chances of failure reduces.
Cartesian 3D printers have been designed from the ground up to follow the Cartesian coordinate system. Delta 3D printers are a more modern take with their design based on gantry systems, holding the build plate in fixed position. The build plate does not move at all; instead the hotend does all of the work.
We are not saying that the delta mechanism is completely perfect but yet the frequency of calibration is much more less overall (Like once in 3 to 4 Months for us), unlike the cartesian, where after every 3 to 4 prints(1 to 2 Days) the bed needs to be calibrated. This will not pinch a lot initially but once you build a farm of 3D Printers you will realize time is money, and spending 5 to 10 minutes everyday on a machine for calibration is pretty cumbersome and time consuming.
calibration, setting up a 3d printer delta, which one is better (pros and cons)
3D printers with delta kinematics stand out among other models with a high printing speed of very complex parts. Such devices are quite expensive, but they can be assembled independently. Consider the assembly steps, configuration and nuances of using a delta printer.
Which 3D printer is better - delta or cartesian?
Cartesian (also called Cartesian) and delta printers use the same filaments for printing. In addition, they have the same working parts (extruder, platform, motor), but their location is different.
For Cartesian 3D printers, the movement of the extruder or platform is along the rods of the X, Y and Z axis (Cartesian plane). That is, work items move left, right, forward, backward, up, and down.
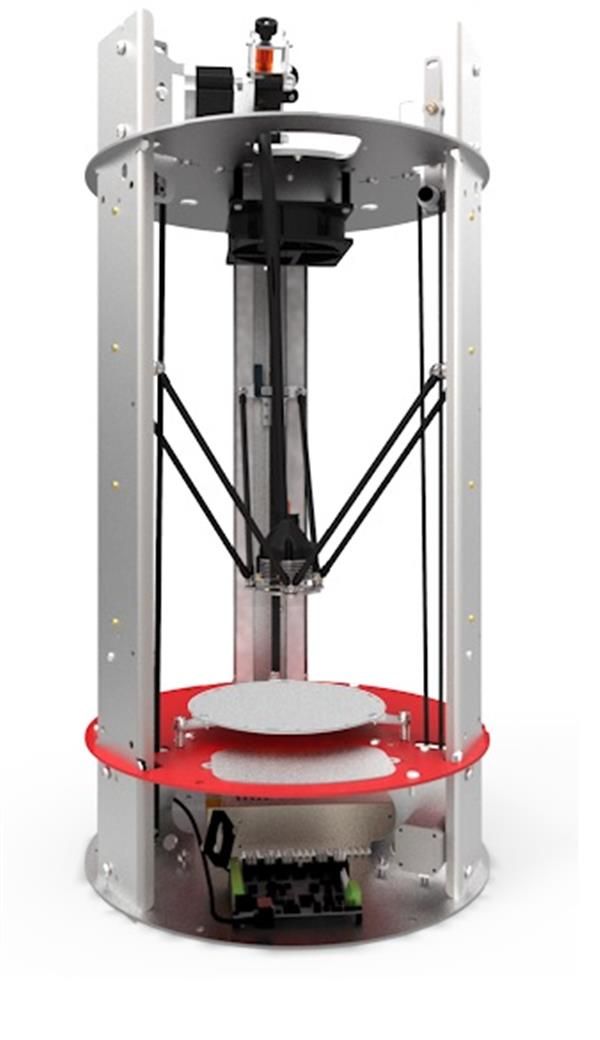
Delta 3D printers are based on a different movement system. The machine is equipped with three brackets that support the extruder. The brackets themselves are attached to three vertical posts, which are arranged in the shape of a triangle. The extruder on a delta printer can move in all directions, and each arm can only move vertically up and down.
Considering the structural features of both types of equipment, you can determine which one will be better used for certain purposes. To do this, we highlight the advantages and disadvantages of the Cartesian and delta printers.
Pros and cons of the delta printer
The main advantages of the delta printer are:
- very fast printing of complex objects;
- high detail of thin and small parts of the product;
- easy replacement of the extruder.
Along with the advantages of the delta printer, it also has the following disadvantages:
- a small amount of information about the operation, assembly and configuration of the device;
- complex assembly, adjustment and calibration for correct operation of the printer;
- Difficulties with the selection of parameters and settings when printing complex objects at high speed.

Pros and cons of a Cartesian printer
Traditional printers based on the Cartesian coordinate system have a number of advantages when used:
- stable print result in mass production;
- a large amount of free information about the structure, operation, configuration and maintenance of the printer on thematic forums;
- the size of the created product is not limited, since the model for printing on a Cartesian printer can be divided into its component parts.
The main and significant disadvantage of the Cartesian printer is a much slower print speed than that of the delta device. This is because the Cartesian printer spends a lot of time accelerating and decelerating the system. Because of this, the print head moves more slowly to the desired point.
How to make a Delta 3D printer with your own hands: step by step instructions
Before you start assembling a delta printer, you must select all the parts correctly. The following components are required to construct a workable device:
- frame with plastic bushings;
- guide rollers;
- heated table;
- stepper motors;
- RAMPS 1.4 expansion board;
- mechanical stops;
- microcontroller Arduino Mega 2560 R3;
- Threaded rods M5 format;
- step-down voltage regulator;
- power supply 12 V;
- extruder;
- optical limit switches;
- filament spool;
- two coolers (for blowing parts and for blowing drivers).
- display and button with 220V terminal.
Assembly of the delta 3D printer is carried out in the following order:
- First, the frame and end supports are designed. The lead screws at the top remain free.
- The voltage regulator is soldered to the power input. A microcontroller is installed and a regulator is attached to it from behind.
- The expansion board is then soldered separately to the legs.
 Mechanical stops are set in the direction of correct polarity.
 - Before setting up the firmware, the printer is connected to electronic components and optical ends. They also install a table, an extruder, coolers and a material reel.
- The firmware for the printer is configured based on its size. Also, when installing, it is important that all the rods are the same length.
Help. To make rods of equal length, it is necessary to screw the hinges on equally cut pieces of the stud on both sides. After that, you should install neodymium magnets on the finished bar and rotate the pin until the hinges are clearly in the middle of the magnet. After adjusting all the rods, it is necessary to fix the thread at the hinge with glue.
Setup and calibration
The most convenient way to calibrate the delta printer is with the OpenDACT utility or Pronterface. These programs will auto-calibrate the equipment by electrical contact between the metal nozzle and the table.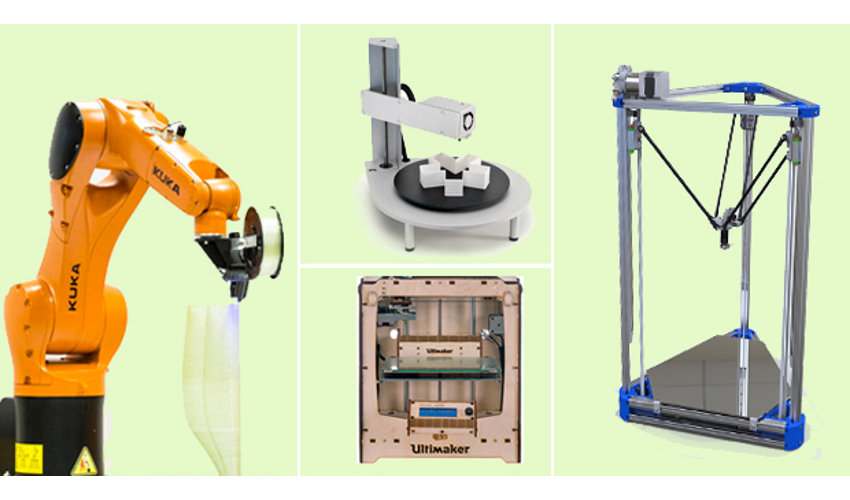 This procedure is carried out in three stages:
- Aluminum tape to stick on the work table.
- One end of the wire is crimped into a block, the other two ends are fixed on the radiator and on aluminum tape. After the three ends of the wire are connected to the 3D printer.
- The printer is then connected to a computer from which the auto-calibration program is launched. The whole process can take a long time, as it requires you to select all the necessary geometry parameters.
After or before calibrating the printer, you must also calibrate the device desktop. This will achieve maximum print accuracy. Table calibration is performed as follows:
- Heat the table to +90 °C, tighten the screws and move the print head to the center of the table. A sheet of white paper is placed directly under the extruder nozzle. It should not be strongly pressed down by the nozzle, but it should not “walk” under it either.
- After adjusting the central part of the table, move the sheet to the corners of the work surface and calibrate the table in the same way.

Errors during creation and tips on how to avoid them
When assembling and setting up the delta printer on your own, the user can make a number of errors that will negatively affect the operation of the device:
- Incorrect printer calibration. It will lead to backlash and deviations in the geometry of the structure. And these problems will cause serious distortion of the part when printed.
- Sliding rods off the magnets. It can lead to deformation of the printed product. You can avoid slipping of the rods from the magnets by providing clamps for the rubber bands. They will not allow the hinge to come off the magnet.
- The product cannot be printed to the full working height of the printer. This problem occurs because the print head is not properly positioned. It must be provided with a separate space in the printer that does not take up useful working space.
Having considered the features of the assembly and configuration of the delta 3D printer, the user can independently create an apparatus for fast printing of complex structures.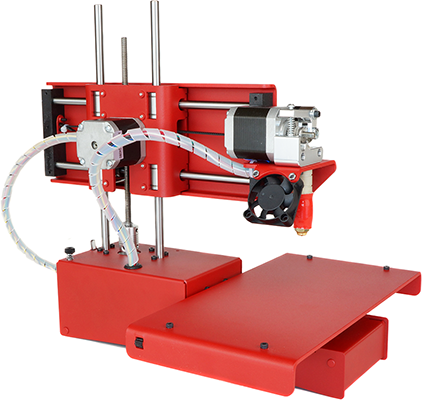 However, it should be noted that the assembly of such equipment is very complex and special knowledge is required for its design.
- March 28, 2021
- 2544
Get expert advice
Advantages and disadvantages of delta 3D printers
Among the various designs of 3D printers, the delta system is considered the most successful. Its kinematics has a number of advantages over classical 3D printers with a Cartesian coordinate system. In addition, delta printers look interesting, and the process of their work is simply mesmerizing.
Cartesian 3D Printer Problems and Delta Dominance
80% of all printers are Cartesian. Their axes of movement are independent of each other. Each is responsible only for its own displacement vector, miscalculations for one axis cannot affect the movement of others in any way.
The problem with Cartesian printers is that it takes too long to travel from point A to point B.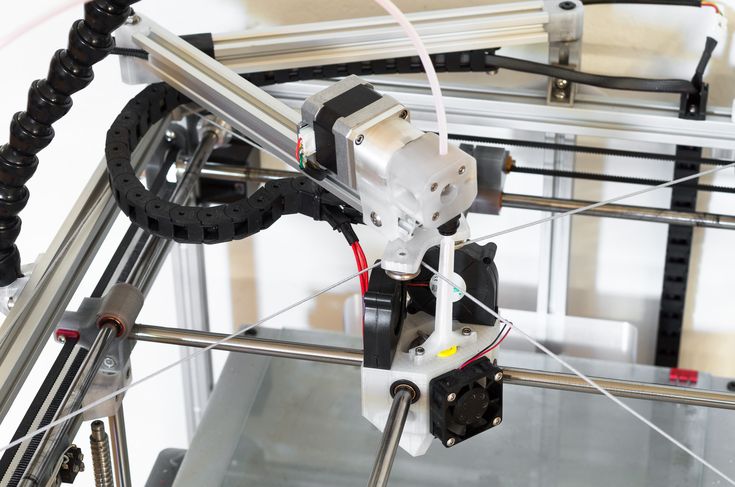 It takes a long time for the system to accelerate and decelerate before the print head reaches its position. As a result, the printing of one part, instead of two hours, can drag on for four.
Of course, you can increase the movement speed, reduce the acceleration and deceleration times by accelerating the stepper motors to higher speeds and adjusting the settings in the firmware. But electronics may not be able to cope with the task, and besides, no one has canceled physics: the parts of the head are too heavy to be accelerated or slowed down at high speeds in time, and therefore the head simply cannot accelerate sharply or stop in time. Engines will have skipping steps, which will inevitably lead to displacement of the layers of the part.
Delta printers do not have this problem at all. At a low engine speed, the head moves as quickly as possible due to the unique system of rods. With this design, the printer prints at ultra-fast speeds while using far less effort to move the print head.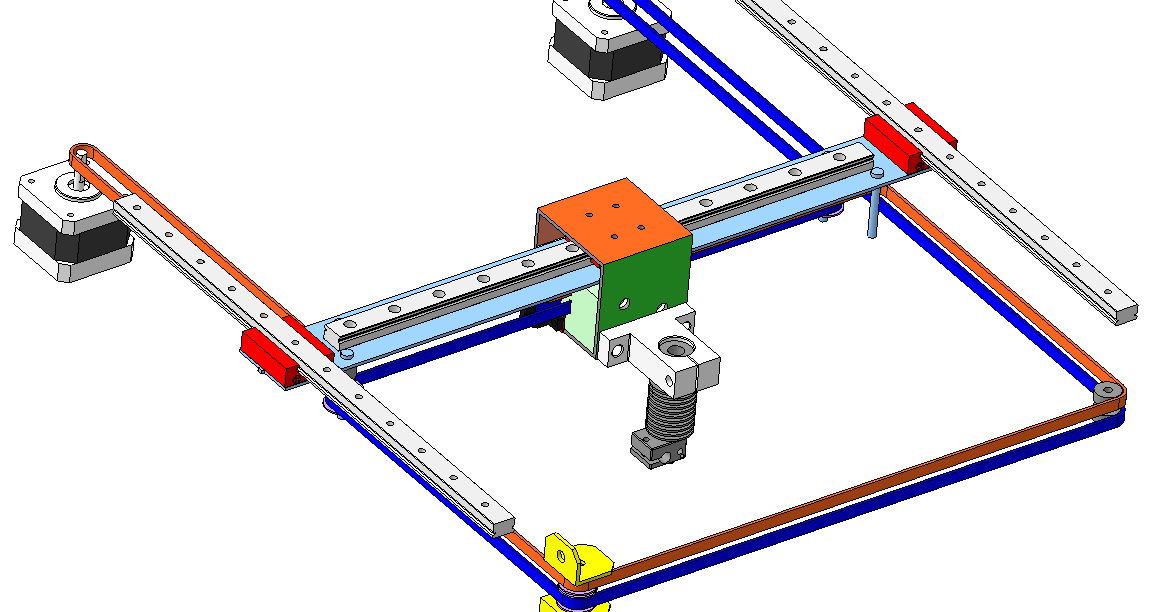
Pitfalls of delta printers
The movement axes of a delta 3D printer are dependent on each other. A small change in one axis will move the print head in all three directions. To move the head at least in one direction, you need to make calculations using a complex formula, which must take into account the entire design of the printer, the working surface, the length of the rods, the dimensions of the device itself and the backlash.
If you decide to build your own delta 3D printer, get ready for the fact that the calibration will take weeks. The disadvantage is precisely in the setting, since the slightest backlash or deviation in the geometry of the structure will cause serious distortion of the part when printed.
Another drawback of the delta is its height dimensions. In addition to the selected area for printing, part of the printer's volume is needed to move the head itself.
A few words about the electronics of the Delta 3D printer
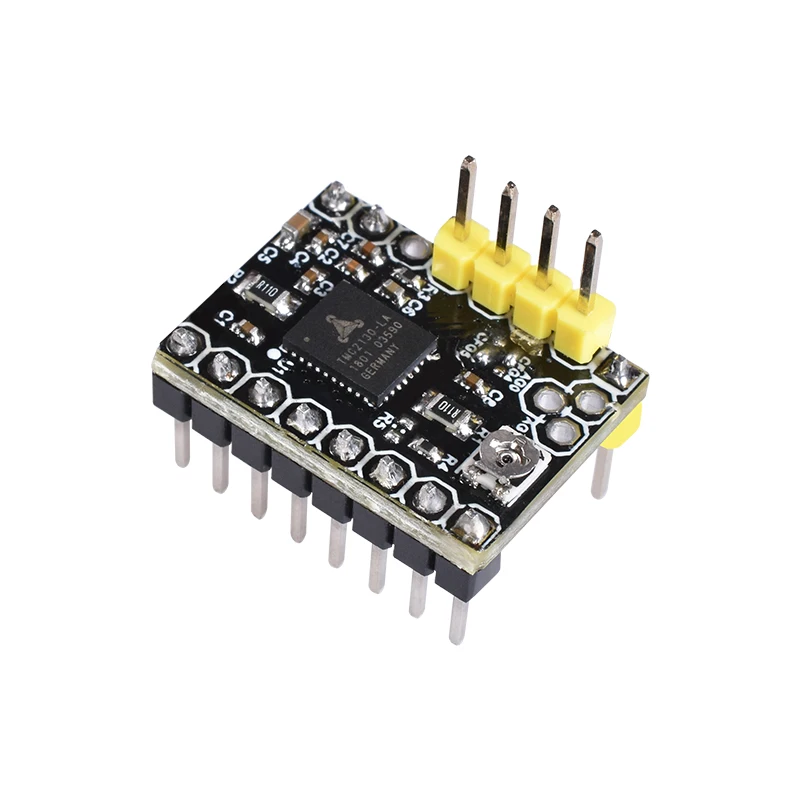
Since the delta printer uses complex formulas, you will have to worry about a good controller when building it.