Formlabs form 2 3d printer review
Form 2 Review 2022 - Why This 3D Printer Is NOT Worth $3499!
4
See Price
When you’re searching for a high-end 3D printer, you’ll find that it gets harder and harder to find models that justify their price. Sure, they might come with advanced features, but are you actually going to utilize any of them?
Today we’ll be looking at a premium printer: the Formlabs Form 2. As such, we’re not going to pull any punches; if it has problems, we’ll let you know. However, we’ll also be sure to highlight any areas in which it excels. This will allow you to decide whether the Form 2 is right for your needs or not.
| Printer Type | SLA |
| Supported Materials | Various resins |
| Connectivity | Ethernet, WiFi, USB |
| Build Volume | 5.7 x 5.7 x 6.9” |
Table of ContentsShow
Design
The Form 2 has a futuristic appearance, with an orange translucent cover and a clean, simplistic design. It’s different from most other 3D printers on the market, though, as it uses SLA printing instead of FFF. This means that it doesn’t use filament and build layer by layer – it uses a laser to solidify the resin.
Now, this resin is more expensive than regular filament, but the Form 2 can produce highly detailed models where the layers are all but indistinguishable. As such, it’s great for producing complex items. With a larger than average build area, there’s very little this printer can’t do.
Formlabs have taken steps to allow this printer to be used commercially. You’re not limited to proprietary resins, although there are specialized materials available for everything from jewelry to dentistry. Simply put, you’ll have a hard time finding a 3D printer that’s more versatile than the Form 2.
Printing
SLA printers almost always have higher overall quality than FFF ones, and the Form 2 is no exception. We found that it does an amazing job at creating extremely complex models, and there’s very little extra material left hanging off. Even sharp edges and overhangs pose very little threat to this printer.
The Form 2 goes out of its way to make things easier for you. It automatically finds the best orientation for any given print, and the user interface is very easy to get the hang of. It even provides a progress meter and displays the estimated remaining time, which is impressive.
It’s also worth mentioning that this is among the fastest printers we’ve seen. A 5” tall model takes around seven hours to print, so you can build working prototypes very quickly, safe in the knowledge that you won’t be wasting time on a failed print or a model with severe distortion.
Features
One of the best things about this printer is the Quick Print function. This not only orients your model properly, it automatically builds any supports needed to hold it in place. The kit comes with all the tools you’ll need to finish your models too – including plastic snips for eliminating these supports after building.
While there’s no SD card support, there is a Gigabit Ethernet port for local connections, and you can also choose to send files via WiFi if you’d like.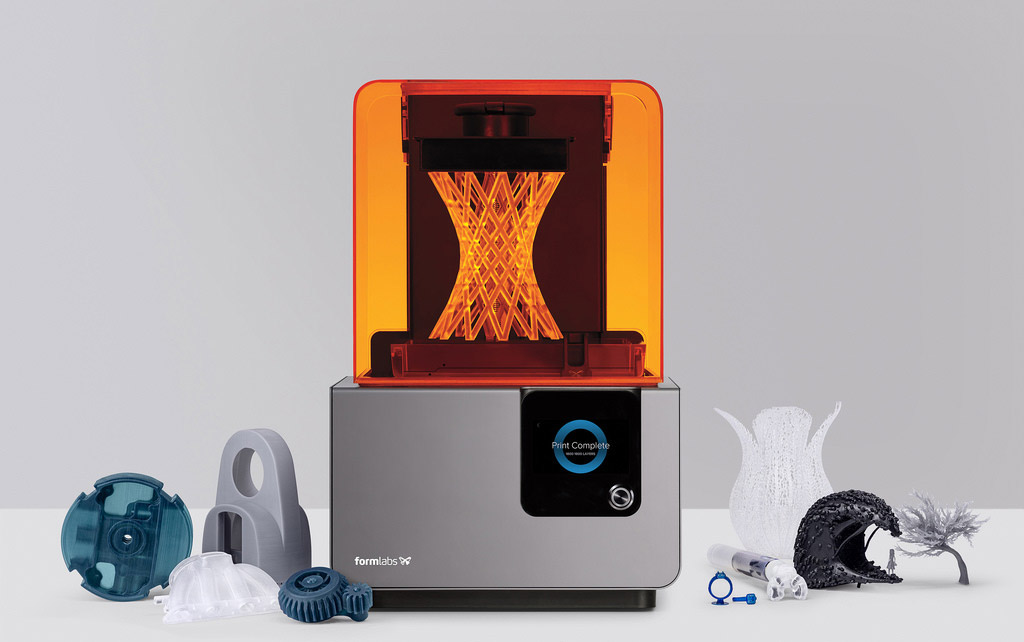 To be fair, this feature is to be expected from a high-end printer. There’s always the option to print from a USB stick if all else fails, though.
Not only does the resin refill automatically, but you can experiment with all sorts of things. Want to add things into the middle of a print? No problem! Want to etch things mid-print? That’s okay too! Obviously, these features are intended for experts, but if you’re buying this model, it’s likely you’re already pretty experienced.
Cost
Now, here’s the kicker: this product retails for around $4,000. This is probably too expensive for most hobbyists, but for medical or manufacturers, it represents a good way to reliably create professional-level objects that can be customized on demand. There are some extra costs involved, however.
If you’re using this commercially, you’ll likely want to wash and cure the finished products to clean them and maximize their strength. Formlabs sells two accessories for this, but they’ll set you back a further $1200. They do allow you to automate the process though, so you could save a lot of time.
There’s also the cost of the resin to consider. One liter of basic resin costs about $200, so it’s not really worth it for creating simple models. In these cases, a basic FFF printer would be superior. As such, we’d advise using the Form 2 only for the most critical prints.
Support
The Form 2 comes with a one-year limited warranty, which is fairly standard. However, this can be extended by two years if you’re willing to pay around $550 more. Also, you can choose a service plan for around the same price. But what does this do?
Essentially, Formlabs will train you to use and maintain the printer yourself. They’ll also prioritize your queries over other customers, and hot-swap broken parts out so your business can keep running in case of any problems. This is a must-have for 3D printing businesses, even at this price.
Support is available via email, live chat, phone, or the user forums. The staff can give advice in English, German, French, and Italian, and Formlabs claims you’ll hear back in a matter of hours. This is clearly a premium support service for a premium product, and we’re glad the company pays such good attention to you even after they have your money.
Summary
To be brief: the Form 2 is a printer that boasts exceptional resolution and build quality. It allows you to fully automate the process, and the support team is absolutely fantastic. If you work in manufacturing or a medical field, there’s a lot of potential here.
That said, only large organizations will be able to afford this model. The printer, its add-ons, and support options are all prohibitively expensive. If there’s room in the budget, though, and you really need finely detailed models, we’d advise going for it – simply, there aren’t many printers better than this one.
Formlabs Form 2 3D Printer Review
When you purchase through links on our site, we may earn an affiliate commission.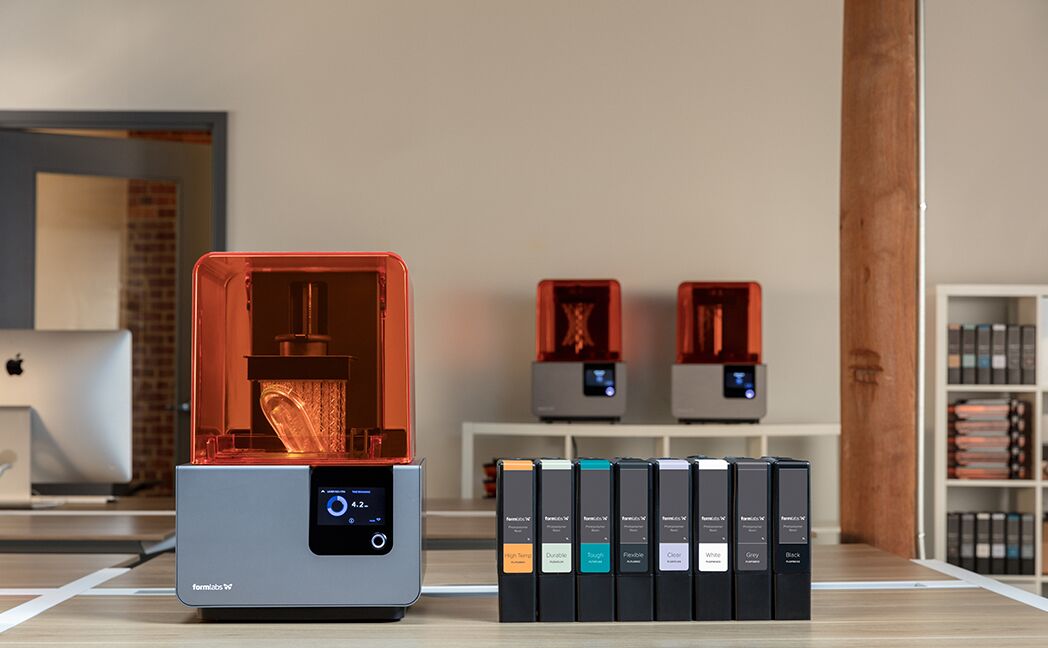 Here’s how it works.
Editor's Choice
Tom's Guide Verdict
The Form 2 is an excellent, but expensive SLA printer that produces very high-quality prints.
Pros
- +
Excellent print quality
- +
Good selection of print materials including support for third-party resins
- +
Simple-to-use software
- +
Very adaptable for multiple users
Why you can trust Tom's Guide Our expert reviewers spend hours testing and comparing products and services so you can choose the best for you. Find out more about how we test.
Today's best FormLabs Form 2 3D Printer deals
No price information
For more information visit their website
One of the first low-cost stereolithography (SLA) printers for 3D printing enthusiasts, the Form 1 from Formlabs has seen other, cheaper models like the $1,500 Da Vinci rise up to challenge it.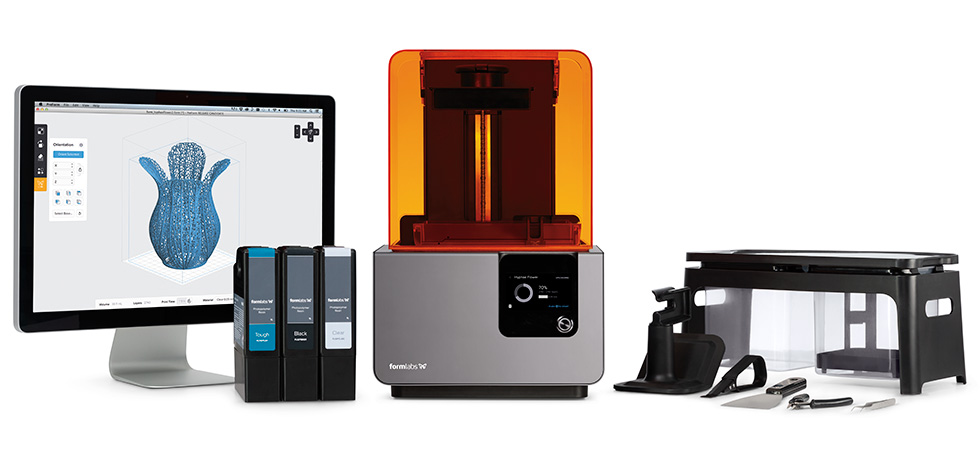 Formlabs' response, the Form 2, is a powerful, easy-to-use printer that smooths out most of the rough edges of the older model and produces beautiful prints.
It's no longer inexpensive, though: At $3,499 for the printer kit and $150 per liter of resin, the Form 2 is too pricey for all but the most dedicated home users. But professionals will love it, and new resin materials widen the appeal to users like jewelers and other artisans. That's why we include the Form 2 on our list of the best 3D printers available.
Design: Simple, Easy to Control
The Form 2 is an SLA printer, which means it prints by firing an ultraviolet (UV) laser into a thin layer of liquid resin between the print head and the bottom of the print tray. Once hit by the UV light, the resin solidifies. By tracing a pattern with the laser, the printer creates a solid layer. When the layer is complete, the print bed slides sideways and the print head lifts, taking the solid layer with it and letting in more resin. The print head then lowers to make another liquid layer, and the laser fires again. This process repeats to form the 3D model, layer by layer.
That is the same process that was used on the previously reviewed Form 1+, but there have been lots of improvements in how this process works. First, the print area on the Form 2 has increased to 224 cubic inches, measuring 5.7 x 5.7 × 6.9 inches. That's up from 156 cubic inches on the Form 1+. Second, the ultraviolet (UV) laser that solidifies the resin is bigger as well, doubling the power to 250 mW.
A new mechanism in the Form 2 also deals with the tricky business of lifting the solid layer and making sure that no gunk or air bubbles interfere with the liquid resin. The Form 1+ did this by tilting the print tray to peel the printed layer off the bottom of the print bed, but the Form 2 slides the print tray as it lifts the print head, then uses a wiper to clear any bits and bubbles away before the print head is lowered again.
Finally, an automatic mechanism fills the print tray with resin as required. It's a more complicated mechanism, but it is also better. We had significantly fewer failed prints than with the Form 1+.
The Form 2 shares the same simple overall design as its predecessor, with an orange plastic hood sitting over the simple silver box that holds the laser and electronics. Both are slightly bigger than on the Form 1+, and a color touch screen has replaced the LCD display. This screen means that you can start, stop and pause prints from the printer itself, which makes controlling things much easier. During printing, the screen shows the progress of the print and an estimate of how long is left.
On the back of the box are the connections: power, USB and Gigabit Ethernet. That's the other big change here: The Form 2 connects to your computer over either USB or wired/wireless Ethernet. That feature makes it much easier for multiple people to use the same printer. Each user can run the PreForm software to prepare a 3D model, send it to the printer, and then walk over and touch the screen to start printing.
The Form 2 has other under-the-hood changes, with its base now sealed to keep dust away from the laser mechanism. A heater warms the print tray to get the resin to the right temperature for printing.
MORE: 3D Printer Buyer's Guide
The plastic hood that covers the printing area is orange, to block any stray UV light from hardening the resin in the tray. This hood is attached to the base by a hinge on the back, so you can lift it up and over to reveal the printing area. Here, the print tray sits on top of the silver base, locking into the mechanism that moves it and slides the wiper across the transparent base. This was easy to install, and the print tray comes with a lid that fits on top of the tray after you’ve removed it. This stops the resin from setting.
Above the print tray is the print head, an imposing chunk of metal that attaches to the arm that lifts the print head up. The print head is removable, locked in place by a metal latch on the top. When a print is done, you remove the whole print head so you can pry the print off.
Print Materials: Third-party Resins Allowed
Formlabs offers seven types of resins for the Form 2: Clear, Tough, White, Grey, Black, Flexible and Castable. That covers a wide range of uses and should satisfy most users. The castable resin is particularly interesting, as it is designed for jewelers and modelers who want to cast objects in metal. Missing from Formlabs' list, though, is a dyeable resin that can be made a particular color.
We used the clear resin in our tests. These resins come in a new container, a rectangular tank that drops into the back of the printer. This means you don't have to pour the resin yourself, because the printer automatically monitors the level of resin in the tray and fills it when required. That's a big step up from the manual filling of the Form 1. These resin tanks have a chip inside that identifies the type to the printer, so the printer will warn you if you use the wrong type of resin for the 3D print.
We didn't find much of a speed increase with the Form 2 compared to the Form 1+, though the new model is by no means a slow printer.
We found that the clear resin produced clean, sharp details of models, with an attractive, almost glasslike quality. Prints came out mostly clean, but definitely benefitted from a little bit of touch-up with a sharp knife and a light polish with sandpaper. The clear resin was a little soft, though. Our set of test gears quite quickly became worn from the repeated motion, and the surface of prints does easily get scratched and marked.
You'll have to pay up for the Formlabs resin. Each tank (which holds 1 liter of resin) costs $149 for the clear, white, grey and black resins; $175 for the tough; $199 for the flexible; and a steep $299 for the castable resin. That's a big step up for someone used to using spools of filament that cost $30 per kilogram.
To put those numbers in context, our gear-set test model used about 52 mL of resin, which costs about $7. 80 to print. A solid, 4.5-inch-high print of our Thinker figure used much more: about 155mL, which would cost about $30.85. The same Thinker figure would cost $85 to print in white plastic at the 3D printing service Shapeways. Printing on a filament printer like the LulzBot TAZ 5 would be even cheaper, though. You can buy a kilogram of filament for less than $30.
One of our complaints about the Form 1 was that you were locked in; you could not use resins from other manufacturers. That seems to have hit a nerve, as FormLabs has said that it will allow use of third-party resins. However, you'll have to manually fill the print bed since the automatic filling and reservoir features will be disabled when third-party resins are used. This support will be added in a future firmware update.
Print Quality: Excellent
We found that the Form 2 produced prints of excellent quality, with very fine detail and excellent reproduction of our test models' shapes. The printed parts needed little trimming or cleaning, and fitted together well.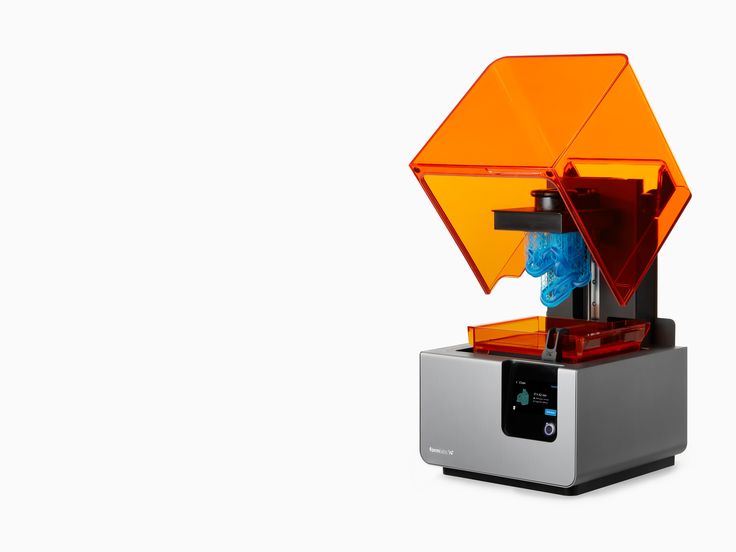
Our first test model is a complicated pile of gears that comes together to form a planetary gear-reducing set. The Form 2 aced this test, having no problem creating the screw threads and cogs of the gears. After we had removed the supports, these parts fit together smoothly, needing only a small amount of trimming to remove a few small lumps of resin that were still attached. Once assembled, the gears turned easily and smoothly.
The Form 2 produced prints of excellent quality, with very fine detail and excellent reproduction of our test models' shapes. The printed parts needed little trimming or cleaning, and fitted together well.
Our second test model is a geometric sculpture which involves a lot of complex overhanging parts and edges. Again, the Form 2 handled this without issues, reproducing the difficult model very well. This included the numerous sharp edges and pointed parts that defeat many printers.
MORE: Best 3D Printers
Finally, we used a 3D scan of Rodin's Thinker to create a 3D print.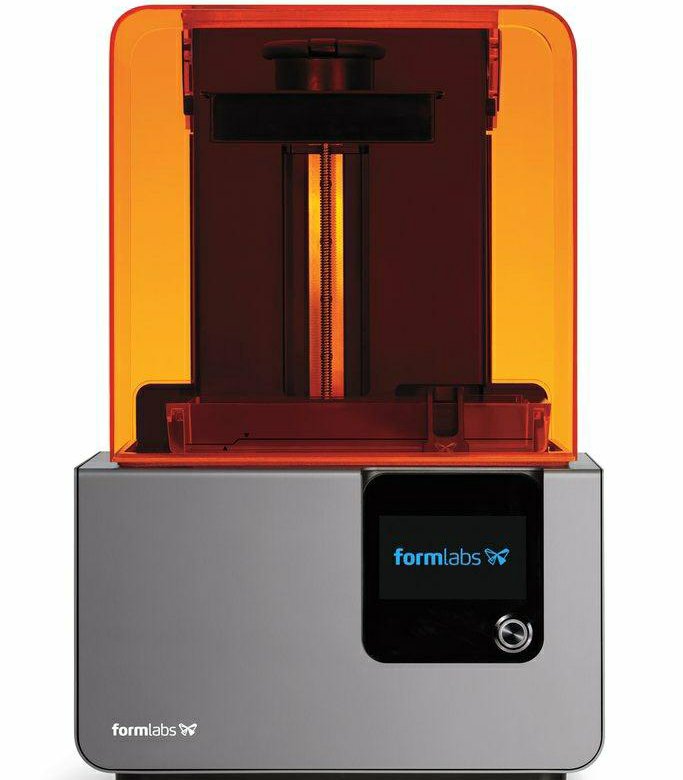 The Form 2 also printed this without issues, producing an attractive, clean print of the sculpture. Printing at both the 0.1mm and 0.05mm layer heights, we did see a certain amount of layering. In the shoulders of the sculpture, the layers that the printer uses to build the model are clearly visible. All 3D printers produce a certain amount of this, but the clear resin that we used for testing seemed to exaggerate the layering somewhat. This can be mostly removed by some gentle sanding, though.
Setup: Simple
All you have to do to set up the Form 2 is unbox it, plug it in, install a print bed and slide the resin tank into place, then connect it to USB or a network. It's all very simple.
We had no issues getting the printer up and running, and were ready for our first test print in less than half an hour.
Before each print, the Form 2 needs to fill the print tray and preheat the resin to 30 degrees Fahrenheit. That can take a fair amount of time if the room is cold.
Interface: Software And Control Panel Are Easy To Use
The printer offers two methods of control: the PreForm software and the touch-screen controller. With the PreForm software, you load 3D models and prepare them for printing. You can do some simple operations like scaling and shifting a 3D model here, but PreForm is not a 3D-modelling app. Still, the app is well-designed and easy to use, with the controls on the left side and a 3D preview of the model in the main window.
(Image credit: Richard Baguley)One very welcome feature with the software is the Quick Print button. Click this, and the software checks your model, orients it for the best print quality, builds the supports that hold it in place while printing and prompts you to send the model to the printer. This performed well in our tests; we used it on all of our test models with good results. The program also offers a good level of detail on how long the print will take and how much material it will use, a critical factor when the resin costs as much as it does for the Form 2.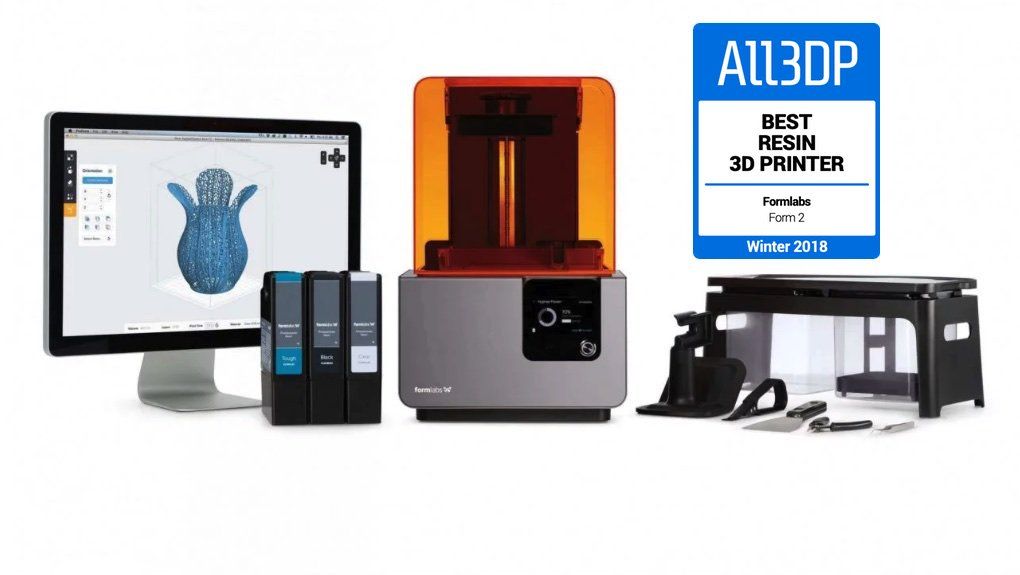
PreForm supports multiple printers, and each printer supports multiple users, so it would be easy to set up an office with multiple printers for high-volume printing, or for several users to connect and send prints to a single printer.
Once the print file has been sent to the printer, you control the process from the Form 2 itself. The 3-inch LCD touch screen on the front of the printer makes this a simple process. You just look for the model name in a list of loaded models, tap it and press the button to confirm that you want to print.
You use the same touch-screen interface for managing the printer in tasks like joining a wireless network. To enter the password for a wireless network, you use a small touch-screen keyboard, which is somewhat awkward. Fortunately, you only have to do that once; the printer saves the password and automatically joins the network when it's powered on.
The same touch screen shows you a small thumbnail of the model, and once the print has started, a progress indicator and an estimate of the time remaining.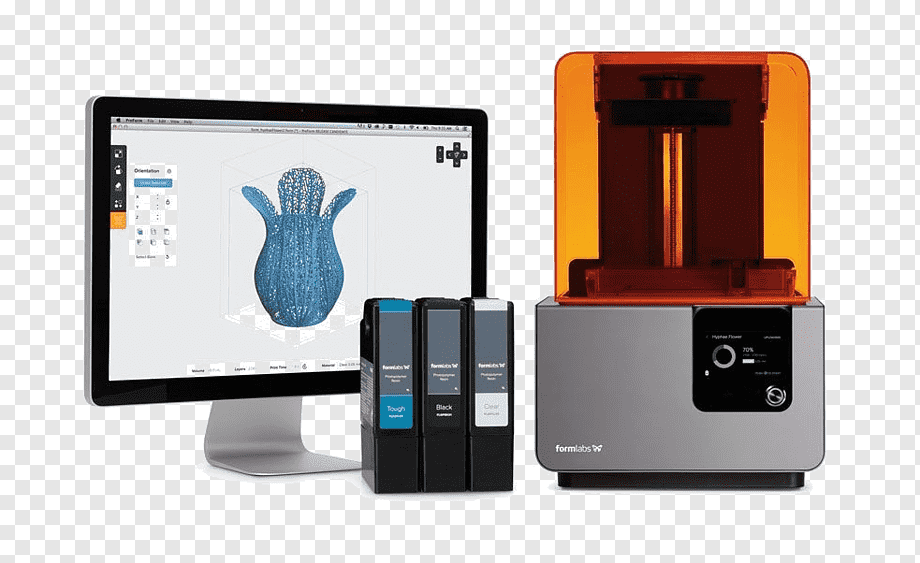
Print Process: Mostly Straightforward
Printing a model on the Form 2 is a somewhat-involved process, because prints need to be cleaned after they are complete. You remove the print head and release the model from it.
Release is a kind way to put the process. It often involves some fairly serious chiseling to get underneath the bottom layer of the print, especially with large models. This is a little easier than with the Form 1, though, because Formlabs has changed the way the supports for models are made. The base of the print now has holes in it, which means less sticking. A plastic base that holds the print bed while you are doing this chiseling is included, too, which also makes removal easier. Once you get the included scraper or prier tool under one edge of the print, you can (gently) pry the model off the base to release it.
Once the print is free, you use the included finishing kit to wash the print in isopropyl alcohol; that removes any liquid resin left sticking to the model.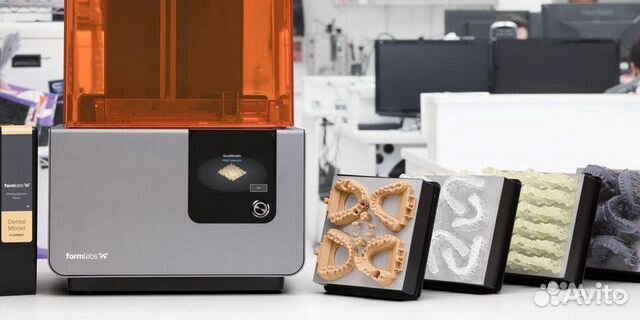 This kit includes a stand, two containers for the alcohol, a sieve tray that fits inside the containers, disposable gloves and a few tools. The alcohol itself is not included, but it is available from most drug stores.
After washing your model, you leave it to dry, and then remove the supports. These can usually be trimmed off easily with the included snippers. The PreForm software makes these supports tapered, so the support connects to the model only at a very small area. It does leave a slight mark on the model, but we had no issues buffing this out with fine-grade sandpaper.
We did have a few print failures in our tests. Several times while printing on the thinnest layer height, parts of a print were not properly formed, leaving only a partial print. After some investigation, we found that a loose piece of resin from a failed print had scratched the base of the print bed. This meant that the layers formed in that area were not lifting from the base of the print bed, but instead sticking to the base, causing the entire print to fail.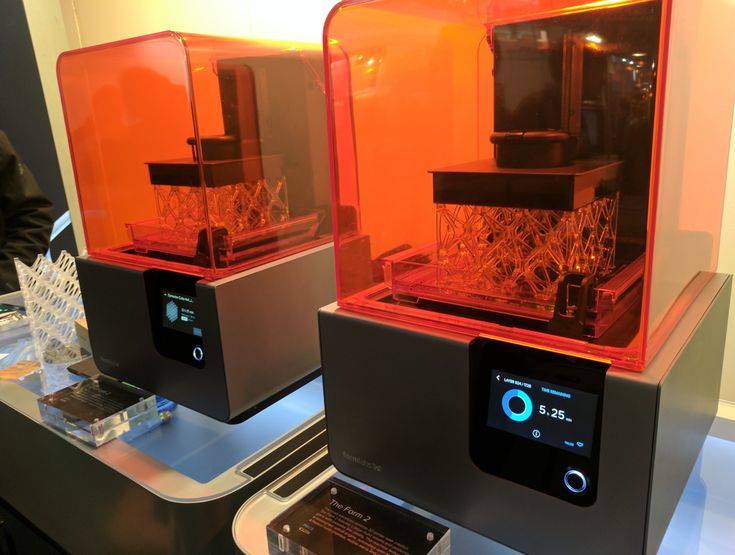 The only way to fix this was to replace the entire print tray, with a new tray costing $59. The problem did not occur again, but it is a reminder that the whole mechanism is rather fragile, and even a small problem can cause the prints to fail.
Print Process Photos
The 3D model is loaded into the software, processed and sent to the printer. The software automatically places the model and builds the supports.
(Image credit: Richard Baguley | Tom's Guide)While printing, the Form 2 shows the status and estimated time left.
(Image credit: Richard Baguley)The finished print, removed from the print bed and washed in alcohol with the supports still in place.
(Image credit: Richard Baguley)The final print, with the supports removed.
Print Speed: Faster For An SLA Printer
We didn't find much of a speed increase with the Form 2 compared to the Form 1+, though the new model is by no means a slow printer.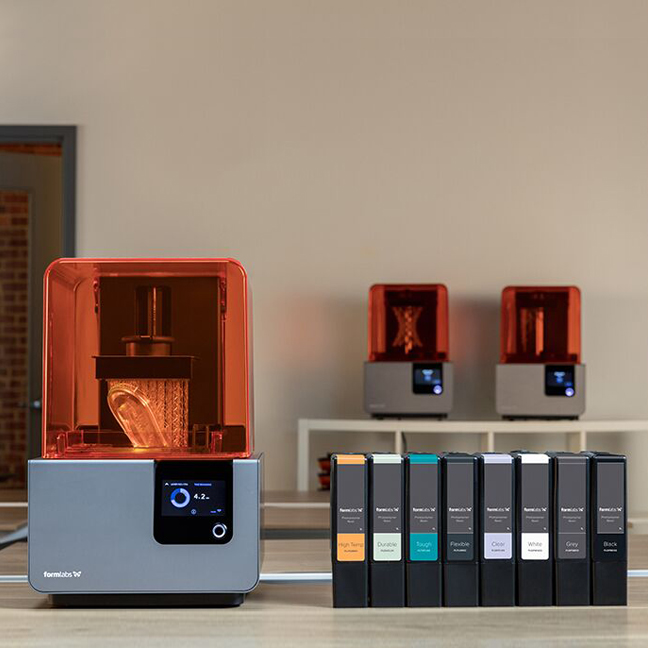 Using the Print Wizard in PreForm, a 4.5-inch high model of the Thinker sculpture took 7 hours and 5 minutes to print on the 0.1mm layer height, or 11 hours and 15 minutes on the thinnest layer height (0.05mm) that the Form 2 offers. That's a little faster than the Form 1+, at 0.05mm, which took 12.5 hours. However, the Form 1+ was faster at the 0.1mm layer height, taking 6 hours and 5 minutes.
To compare this with a more-current model, the XYZprinting Nobel 1.0 took 10 hours and 21 minutes, and 29 hours and 6 minutes, respectively, to print the same model at the same layer heights. So, the Form 2 is significantly faster than the cheaper XYZ model.
Bottom Line
The Form 2 is an excellent 3D printer that can produce high-quality prints with very clean, sharp edges and fine reproduction of subtle details. Although the clear material we used in testing is quite soft, we were able to easily assemble our set of test gears, with multiple cogs, screws and pins fitting together after only minimal trimming; the complex overhanging edges of our geometric sculpture were also cleanly printed. All of the SLA 3D printers we've tested are slow, but the Form 2 is definitely the speediest of the lot.
You get good software, excellent models and decent speed, making the Form 2 a great printer for engineers, artists and jewelers who need accurate, attractive prints on demand. But you pay for the privilege: The Form 2 costs a steep $3,499, and the resin costs $149 and up for a liter. That puts the Form 2 out of the range of many users. Casual printers will be better off with a cheaper FDM printer like the LulzBot Mini, using the leftover money at 3D printing services like Shapeways that can produce occasional prints in other materials.
That said, a cheaper SLA model might be a false economy. We found that the $1,499 XYZprinting Nobel SLA printer had disappointing print quality. If you can justify the cost outlay, the Form 2 is the high-end SLA printer to beat, and nothing we have tested so far comes close.
Today's best FormLabs Form 2 3D Printer deals
No price information
For more information visit their website
Richard Baguley has been working as a technology writer and journalist since 1993. As well as contributing to Tom's Guide, he writes for Cnet, T3, Wired and many other publications.
Form 3 and Form 2: Formlabs
Desktop 3D Printer Comparison With the release of the latest Formlabs Form 3 and Form 3L 3D printers, you may be wondering how our modified Low Force Stereolithography (LFS)™ print engine differs from the desktop engine. stereolithographic (SLA) printers such as the Form 2, which has become an integral part of the workflows of tens of thousands of designers and manufacturers in various industries.
In this article, we'll cover the major improvements we've made to the Form 3, why we've redesigned the stereolithographic printing process and optical system, and why the latest Formlabs printers are our most intuitive and reliable printers. We will focus on the differences between our desktop 3D printers, Form 3 and Form 2.
-
If you've never used a Formlabs 3D printer and are looking for a modern, affordable printer for professional 3D printing, we highly recommend the Form 3.
-
If you need a large format 3D printer, the Form 3L is the best choice, with five times the print volume of the Form 3.
-
View our Statement of Continuous Support, which outlines our commitment to continue to provide industry-leading support and supplies for the Form 2.
Compare tech. data: 3D printers (SLA) Formlabs
Want to see the resulting quality with your own eyes? Choose your application and we'll send a Form 3 printed sample straight to your office.
Request a Free Sample
Five years ago, Formlabs was the first to launch high-resolution stereolithography desktop 3D printers that were much smaller and more affordable than existing industrial stereolithography systems. Since then, the Form 2 has become the industry's leading desktop 3D printer, with over 40 million parts printed on Form 2 printers by engineers, designers, fabricators, dentists, jewelers and more.
A 3D printing station at the University of Sheffield's Advanced Manufacturing Equipment Research Center (AMRC) made up of Form 2 printers is supporting the work of hundreds of engineers.
Form 3 and Form 3L printers use Low Force Stereolithography (LFS) technology. This is a new step in SLA technology, using a flexible tank and linear lighting, which provides a huge quantum leap in terms of printing and printer reliability.
Form 2 printers take up significantly less space than industrial lithographic printers by inverting the print process - learn more about this technology in our complete guide to 3D printing.
Inverted 3D printing involves peeling forces on the model as it separates from the tank surface, limiting print volume and requiring strong support structures. The Formlabs Form 2 printer is carefully calibrated against peel forces to produce high quality parts, thus offering industrial quality 3D printing at an affordable price and making it available to more businesses.
The Low Force Stereolithography technology on which the Form 3 is built has been specifically designed to dramatically reduce peel force and dramatically improve print quality and printer reliability. One of the key improvements is the elastic film at the base of the tank, which provides a softer separation of the layers from each other during printing.
Low Force Stereolithography 3D printing significantly reduces the peel force that can lead to rough surfaces, resulting in improved surface quality and detail definition. Both models are printed in Tough Resin at a layer thickness of 100 microns.
Reducing the peel force provides several important benefits:
- Improved surface quality - layer lines are less visible and surface roughness is reduced, resulting in a very smooth surface and definition even at a layer thickness of 100 microns.
- Easy Detachable Support Structures with small contact points easily detach from the part for faster cleaning and post-processing.
- Improved print results in all materials, especially noticeable on materials with high viscosity and low raw material strength .
While we will continue to release media compatible with both printers, some future media releases will only be compatible with the Form 3.
Reduced breakout force results in incredible surface finish, easier support removal and the ability to use advanced materials. Opting for the Form 3 means better surface quality and easier post-processing.
“Improvement in the form of easily detachable supports is very effective. It's hard to convey your emotions when you take the model for the first time and pull it from the supports, and it separates without any problems. This takes the stress out of designing and cleaning parts and allows you to focus on design and creativity."
—Justen England, Managing Director, Delve
The Form 2 Precision Optical System has proven over time to meet the most stringent precision requirements (such as dental labs that need to produce many high-precision parts on a repeat basis).
The Form 2 uses two X and Y positioning galvanometers to direct laser light from the back of the printer to a large stationary mirror that delivers the beam to the print plane.
For Form 3, we focused on further improvements in accuracy and stability, as well as system scalability. 3D printing based on LFS technology involves placing optics in a Light Processing Unit (LPU) that moves along the X axis. A single galvanometer positions the laser beam in the Y direction, and then directs it along the deflecting and parabolic mirrors so that it is always perpendicular to the plane platforms.
Light Processing Unit Form 3 contains a system of lenses and mirrors to produce an accurate and stable laser spot.
Although there is little beam deflection at the print plane on Form 2 and Form 3 printers, the perpendicular beam ensures uniformity as the device size increases, enabling the development of the Form 3L large format printer.
The LPU also features a spatial filter that produces a sharp laser spot and a high frequency galvanometer that provides a distinct advantage in print speed over the Form 2.
| Form 3 | Form 2 | |||
|---|---|---|---|---|
| Laser capacity | 120 MW | 9097|||
| n/d | ||||
| Laser spot size | 85 μm | 140 μm | ||
| 405 nm | 405 nm | |||
| Laser specifications | Certificate EN 60825-1:2007 Laser class 1 | Certificate EN 60825-1:2007 Class 1 laser |
data: 3D printers (SLA) Formlabs
The light processing unit provides the Form 3 and Form 3L with more uniform and accurate optical performance than the Form 2 and is easier to replace in the rare event that an optical system has problems. Choose Form 3 and Form 3L for maximum optical fidelity, fidelity of detail and consistently consistent print quality.
Webinar
Watch this product video to learn more about Low Force Stereolithography (LFS) technology. Our expert will talk about how you can use the Form 3 printer in your workflows.
Watch the webinar now
When we developed the Form 2, our goal was to create the most reliable 3D printer on the market. It has been amazing to see companies ranging from dental labs to Gillette integrate fleets of Form 2 printers for mass production.
Ashford Orthodontics, the UK's largest orthodontic lab, has built a digital department from the ground up that now produces 1200 clear aligners and retainers per month using a fleet of 12 Form 2 3D printers.
Formlabs machines are designed to free up time and enable you to focus on designing and building without worrying about printer setup and maintenance.
New features added to Form 3 to increase uptime:
- The 's built-in sensors detect and maintain ideal printing conditions and send alerts when action is required.
The optical sensor can even detect dust!
- Light processing unit, resin tank, rollers and optical window are designed so that can be easily replaced with by yourself. Some Form 2 components can be replaced by the user, and through user interaction, we learned how to make such replacements even more intuitive.
- Improved error detection and handling means you can easily experiment with complex geometries. If a print failure occurs, the Form 3 can print a cleaning grid for easier cleaning.
The Form 3 takes printer reliability to the next level with more features that let you spend less time maintaining your printer and focus on designing and building.
“The Form 3 printer handles a range of tasks for you while producing quality parts. This is an example of the right approach to product design.
The surface quality is better, and the dimensions of the supports are smaller, so everything is obtained in a more finished form.It takes less work to get usable models. This speeds up the whole process, especially when you have to try something for a few days, "playing around" with the dimensions. You can't achieve the same fast design cycles if you're building something outside of the company."
—Nick Payton, Mechanical Engineer, RightHand Robotics
If you receive an urgent print request, Form 3 gives you the option to start printing from anywhere. Get your printer ready before you leave the office, then start your print job from anywhere in the world (not just your local network).
Start printing on the Form 3 from anywhere with the Remote Print solution.
If you've used Form 2 before, the Form 3 workflow will sound familiar to you. Even if you've never used a Formlabs printer, getting started with both printers is easy. For the convenience of beginners and faster workflows for advanced users, Formlabs offers similar service and training options for both machines.
The highlights of the printing process are as follows: Import your project into PreForm, select media from our large media catalog, insert a compatible cartridge and click Print. Our automated post-processing machines, Form Wash and Form Cure, are compatible with both Form 2 and Form 3, which share the same working platform.
Good news for Form 2 users: we've updated the software for all of our printers with upgrades to both the PreForm interface and the touch screen interface!
Several new features have been added to the Form 3 to make the printer easier to use:
- Larger, higher resolution touch screen . The Form 3 can be controlled entirely digitally from the screen, while the Form 2 needs an additional button. The large screen also makes it possible to translate the interface into other languages in the future.
- Two status LEDs and the speaker are ideal for visual and audible alerts and attracting the attention of anyone passing by.
- Streamlined hardware upgrade design : Printer cover that opens parallel to the wall, polymer-resistant optics, and user-replaceable components.
| Form 3 | Form 2 | |||
|---|---|---|---|---|
| Printer Control | Interactive Touch Screen 5.5" Resolution 1280 × 720 | Interactive touch screen 4.3" Resolution 480×272 Key | ||
| Notifications | Touch screen alerts SMS / email messages via Dashboard Two status LEDs Speaker for audible alerts | Touch screen alerts SMS/E-mail messages via Dashboard |
data: 3D printers (SLA) Formlabs
With cross-compatible materials and accessories and the same intuitive software, multiple Form 2 and Form 3 printers can be managed simultaneously as a single fleet.
Today, Formlabs users know more than anyone how to expand 3D printer manufacturing from a single tool to a continuous digital factory, turning a prototyping tool into a powerful business development tool. The Form 2, the industry-changing 3D printer, is now available at an even more affordable price point, adding industrial-quality 3D printing to your company's arsenal of tools.
By redesigning the printing process and implementing Form 3 (and its large-format counterpart, Form 3L) LFS printing technology, Formlabs offers companies the opportunity to build their own production platform that is more reliable and versatile than ever.
Order Form 3 Request Sample
Overview of Formlabs Form 3 photopolymer 3D printer. Formlabs 2 VS Formlabs 3
Hello, Friends! 3DTool is with you!
Formlabs is one of the world's leading manufacturing companies in the field of additive manufacturing. Form 3D Printers became famous in 2011, when a young team of developers began their journey in the laboratory of the Massachusetts Institute of Technology. However, a serious approach became visible already from the first attempts, since the technical task was to create the most automated device that does not require the user to have special skills in working with 3D printers and its settings. We must pay tribute to the team, they coped with the task « to excellent ” and after a successful campaign on “ Kickstarter ”, the first 3D printer from the manufacturer FormLabs – Form 1 was presented to the public. Of course, the printer had certain childhood diseases and rough edges, but the precedent set in SLA technology certainly stirred up the market. In today's review, we got a representative of the third version of this equipment - Formlabs Form 3 . Let's take a closer look at what Form 3 is, where and how it can be used, and what are the advantages over analogues on the market SLA 3D printers.
1. What is Formlabs Form 3?
Form 3 Resin The 3D printer has a rich history of predecessors, a competent approach to development and one of the best, if not the best in its class. Thousands of previous Formlabs models have worked successfully in every industry imaginable and have performed well. Form 3 first of all, it is powerful and easy to use, the most automated SLA (LFS) 3D printer . By using proprietary FormLabs cartridges with different properties, the risk of printing errors is minimized. Everything is thought out for the user.
So what is Form 3 ?
The Form 3 is a professional level desktop stereolithographic 3D printer for the right price. This is a great and thoughtful design, convenient and smart software. As well as a real ecosystem FormLabs includes: Form 3 3D printer, Pre-Form software, photopolymers of various properties and types, Form Wash and Form Cure post-processing systems, as well as a powerful user community. FormLabs Form 3 is an automated working solution for SLA (LDS) 3D printing of out of the box, requiring no special knowledge from the user. Follow the instructions on the screen and everything will work by itself. Working with various photopolymer 3D printers , the engineers of our company 3Dtool - unanimously said: this 3D printer - Iphone, among the variety of models SLA / DLP 3D printers . Those. everything is also convenient and thoughtful, reliable as in products from Apple .
2. An overview of photopolymer resins from FormLabs.
Thanks to a wide range of photopolymers with different properties, Form 3 is used everywhere, where high surface quality and ease of use are required.
Starting from engineering workshops, prototyping departments, continuing with hobbyists and collectors of miniatures and wargames, and ending with medicine - dentistry and surgery. Let's start in order:
- Hobbies and prototyping.
In the basic version, the printer comes with one polymer cartridge - Standard Gray . It allows you to achieve high quality printing, while not requiring excessive post-processing. It is enough to wash the product with isopropyl alcohol from the excess of uncured photopolymer.
Photopolymer resin "Standard" comes in several colors and is considered "basic", it is used, for example, in prototyping or prototyping of any parts that do not require special properties, but with a high-quality surface of the part. This is the basic type of photopolymers Formlabs .
If necessary, you can also use a transparent version of the material. If you need to print elements with a certain light transmission. For example, a display on the body of the device, or a transparent glazing of a car model. This material is also optimized for printing master models for subsequent casting in silicone.
The color of the resin also affects its properties.
For example, Gray Standard resin is suitable for models with fine details, while White Standard resin is suitable for parts that require an extremely smooth surface.
Another material in this range is Draft Resin, which is specifically honed for really fast SLA 3D printing at 300 microns (or 0.3mm) if you need fast results in a limited amount of time.
This is followed by a line of engineering photopolymers.
- Functional samples.
Engineering materials are represented by a wide range of photopolymers with various useful mechanical and isotropic properties. First of all, these materials are used in functional prototypes, in complex products that require different physical properties from its elements and, if necessary, to make something that will be actually used and work, and not just demonstrate the concept itself.
The first three materials are Resin Gray Pro Resin , Rigid Resin and Durable Resin . The first, as you might guess, is an improved version of the standard material and allows you to perform lightly loaded mechanisms with rubbing parts, has low shrinkage and good viscosity.
The second type of resin is Riged Resin , a high hardness reinforced composite, excellent for thin wall applications and various blades and fans.
The third type of resin - Durable Resin , resembles nylon in properties, it should be used in parts loaded with friction.
Three special materials follow - Elastic Resin , Flexible Resin and Hight Temp Resin . You can already guess from the name that the first two are Formlabs elastic resins with slightly different stiffnesses and appearance, but their main area of application is where the production of flexible products is required.
Elastic Resin is the softest 50A Shore engineering resin in the Formlabs line. It is great for prototyping models usually made from silicone. Elastic Resin should be chosen for models that will need to bend, stretch, compress and withstand repeated cycles without breaking.
Flexible Resin is used primarily for low deformation flexible models. With a hardness of 80A Shore and a soft touch matt black finish, this polymer is the choice for ergonomics in larger assemblies. It is ideal for cushioning and damping, wearable and consumer product prototypes, handles, grips and pads.
High Temp Resin - high temperature photopolymer resin from FormLabs, the main property of which is heat resistance up to 238 degrees Celsius. This photopolymer is also very durable and can be used in thermally stressed environments.
The most common of the engineering materials is Tough Resin, its balanced strength characteristics perfectly withstand variable loads. It is quite light but does not lose strength and can be used, for example, for a quadrocopter frame.
- Jewelry and stencils.
Formlabs offers two resin options for this application.
These are burnt out photopolymer resin and burnt out wax.
Castable Wax Resin is a 20% wax polymer that provides reliable casting with zero ash and clean burnout. It accurately renders complex elements and produces the smooth surface that stereolithographic 3D printing is known for. The printed models are durable, do not need additional illumination, and are ready for try-in and investment casting immediately after printing.
Castable Resin differs from the previous material in a new and original formula for investment casting. The burn-off curve for this resin is different from the standard wax burn-off curve. That allows you to use it when working with particularly thin elements of injection models and better optimize the process itself.
- Medicine. Surgery and dentistry.
One of Formlabs' most sought-after product lines is dentistry. The company offers several types of biocompatible resins.
For example, Dental Model is a high-precision printing material for creating models of dentures and the production of transparent aligners. The main advantage of the material is a low degree of shrinkage, which allows printing products with clear edges and contacts within ± 35 µm. It is ideal for printing crown and bridge models, clear aligner models, orthodontic models, diagnostic models, dental implant models.
Another biocompatible resin used in dentistry is Dental SG. This material is highly heat resistant and can be disinfected in autoclaves. Due to its characteristics, it is used to 3D print precise surgical templates, allowing dentists to accurately position implants.
guides and templates for drilling teeth and jaws.
Another material for dentistry is Dental LT Clear Resin. Long lasting clear biocompatible photopolymer for printing tires and nightcaps.
Also, when creating prostheses and other dental products by pressing, they use the already familiar Castable Wax Resin , which is used in the manufacture of cast caps and intraosseous parts of implants, cast crowns and crowns made by pressing and cast partial removable frames of dentures.
3. Formlabs Form3 Features, Package Contents and Appearance.
Let's start with the specs first:
-
3D printing technology : Low Force Stereolithography (LFS)
-
Material 3 Print D: Photopolymer resins
-
Resolution XY: 25 µm
-
Laser spot size: 85 µm
-
Laser power: One 250 mW laser
-
Power Requirements: 100-240V AC current, 2.
5 A, 50/60 Hz, 220 W
-
Print Volume (W x D x H): 14.5 x 14.5 x 18.5 cm
-
Layer thickness: 25 – 300 µm
-
Resin Delivery System: Automatic
-
Layer thickness: 25 – 300 µm
-
Resin cartridges: 1
-
Support structures: Auto-generated
-
Working temperature: Automatic heating up to 35 °C
-
Network interfaces: Wi-Fi (2.4, 5 GHz), Ethernet (1000 Mbit), USB 2.0
-
Printer control: 5.5" interactive touch screen 1280 × 720 resolution
-
Notifications: Touch screen alerts, SMS/email via Dashboard, Two status LEDs, Speaker for audible alerts
-
Software: PreForm Slicer
For comparison, Form 2 had a smaller working area - only 175 mm in height, and also had a less advanced material mixing system. The Form 3 also uses a completely new laser optical system to illuminate the photopolymer.
The package, however, has not changed much. A standard set of various cuvettes for product processing, a huge bag of disposable gloves and the necessary tools.
And if you do not see the printer with your own eyes, you might think that it has not changed at all.
No matter how!
Form 3 differs markedly from its predecessors, which it replaced. First of all, the dimensions are striking. It is clearly larger than the old model, primarily due to the improved mixing and lighting system, but more on that later.
The control display has moved to the middle of the front panel. Removed all unnecessary buttons, now the printer is controlled exclusively from the touch panel.
Added a convenient opening handle on the protective cap and a very stylish Formlabs logo in the lower left corner.
The sides of the printer are empty, on the back wall there are well-known connectors:
Ethernet, USB, power connector and service information with printer serial number.
When you open the lid, you can see a solid ball screw, a convenient print platform bracket with branded fasteners, a modified cuvette and a mixing system that now works on two levels.
,
4. Form 3 Key Features
What has changed in the new device in terms of the technical part?
First of all, the approach to working with the material has changed. Although Form 3 is called an SLA 3D printer, in fact, the new technology is called LFS (Low Force Stereolithography)
Which uses a flexible cuvette and additional linear illumination, like on scanners, to achieve the ideal print quality and reliability.
The laser illumination system of the device has also undergone a major change:
The use of a new more powerful laser with a high beam density, a special spatial filter and parabolic lenses made it possible to achieve, together with improved layer registration and additional surface illumination, really impressive results.
With the same layer thickness and standard parameters, the Form 3 noticeably outperforms the previous From2 model in terms of surface smoothness and line accuracy.
Also, the device has acquired several new sensors that control the 3D printing process and the flow of material into the cuvette, which greatly increased fault tolerance. However, the printer still needs to be leveled using a special menu on the display during the first start. The process itself is necessary to make sure that the liquid level in the cuvette is not skewed and there will be no overflows when printing on the model. In other words, in this way the system double-checks that the printer itself is perfectly level on your table, without skew.
5. Interface and software.
The functionality of the interface has not undergone major changes.
On the left side of the screen, we can switch between different settings - Main Screen, Print Queue, Printer Status and an impressive settings menu.
In the last menu of the list, all the necessary settings are available to us. From network connection, to firmware updates and manuals for self-replacement of the LPU (additional illumination module) Yes, it is understood that the user can do it himself.
The software is a Pre-From slicer, let's connect our printer and move on to the 3D printing process. After installing the program from the manufacturer's website.
As you can see, the cartridge is already installed in the Formlabs Form 3 printer, and the printer itself is connected to the computer via a USB cable. PreForm has already automatically detected which photopolymer is installed. This is the very convenience of automating the process. You only need to load the cartridge and select the settings.
Let's load the model. We will print parts of a miniature soldier from a desktop wargame. At the same time, let's see how the printer copes with fine detail.
So let's choose a model.
Now you need to select all the parts, perform automatic repair, and then place the parts on the table. By the way, the program also does this automatically by pressing the corresponding key.
Supports are also generated automatically, but you still have full-fledged functionality for your own customization. Everything can be configured. From the thickness of the layer, to the size of the point of contact of the supporting column with the surface of the product.
We prepare all our files and send them for printing.
6. 3D printing process.
After sending the model to print, PreForm will alert us to check the process on the printer screen.
Here we only need to press the print button and wait for the process to finish. Which, by the way, will take an hour and 20 minutes. Which is pretty good for a product with a 50 micron layer thickness.
Well, the result was not long in coming! The quality turned out great. Even at 50 microns, although the printer can print at 25 microns of quality, all the detail is captured perfectly.
And here is our soldier in comparison with the factory prototype. Not a big difference.
We will print a few more products to make sure the quality of the printer.
7. Result.
Well, the printed products speak for themselves. The ring is printed with thin walls and a 50 µm layer.
The denture is 25 microns, its surface is just perfect.
The well-known couple baby Yoda and his friend the Mandalorian, 100 microns, so as not to spend a lot of time printing.
The result is excellent.
8. Summary.
Well, in summary, let's go over the main advantages of the model once again and determine where this 3D printer can be used with the greatest success.
With improved print control systems and multiple sensors, the Form 3 delivers the most consistent print experience, a huge improvement over the company's previous models.
The new polymer illumination system using additional illumination and a flexible cuvette makes it possible to achieve the best quality and the absence of sags and overflows on the surface of the model, and also has a positive effect when printing at high quality - 50 microns or less.
The expanded list of photopolymer resins expands the already extensive list of applications and deepens existing examples.
At the same time, it remains affordable both in price ( compared to industrial analogues ), and in terms of ease of learning the printing process and using the printer.
The Form 3 will make a great workbench on the table of the dental technician and dentist, as well as in the jewelry shop, or even the jewelry factory, thanks to the ability to print with high-performance burnout resins with a minimum ash content. At the same time, the use of engineering materials implies the printing of functional prototypes with various functions, which will be indispensable when working in an engineering bureau, design studio, or in a prototyping department in a large-scale production.
And thanks to its ease of use and a wide range of additional accessories, Form 3 will perfectly prove itself as a teaching tool in educational centers, CMITs and departments of prototyping and additive technologies of universities.


