Build a 3d printer from scratch
How to Build a 3D Printer From Scratch
If you are reading this article that means that you’ve probably decided to join the community of 3d printing enthusiasts and find out more about 3d printers, or maybe you have already got some experience in it and are ready to try to create your own 3d printer from scratch.
In this article you will find general understanding how 3D printers can be built as well as links to really useful resources where you can find more detailed information with step-by-step description.
Currently there is a big variety of 3d printers in the Internet that already assembled and are ready to print right after you unpack them from a box, of course you also need to buy a 3d printer filament for it. Do not forget that not all 3d printers can use the same filament types, so please read the instruction before you purchase it.
But for some people who love to make something new with their own hands can be more interesting to build their own 3d printer from scratch. Based on our research the 3D printing community is filled with many enthusiastic people so called DIY’ers (Do It Yourself’ers), who are fascinated with building 3d printers literally almost from scratch.
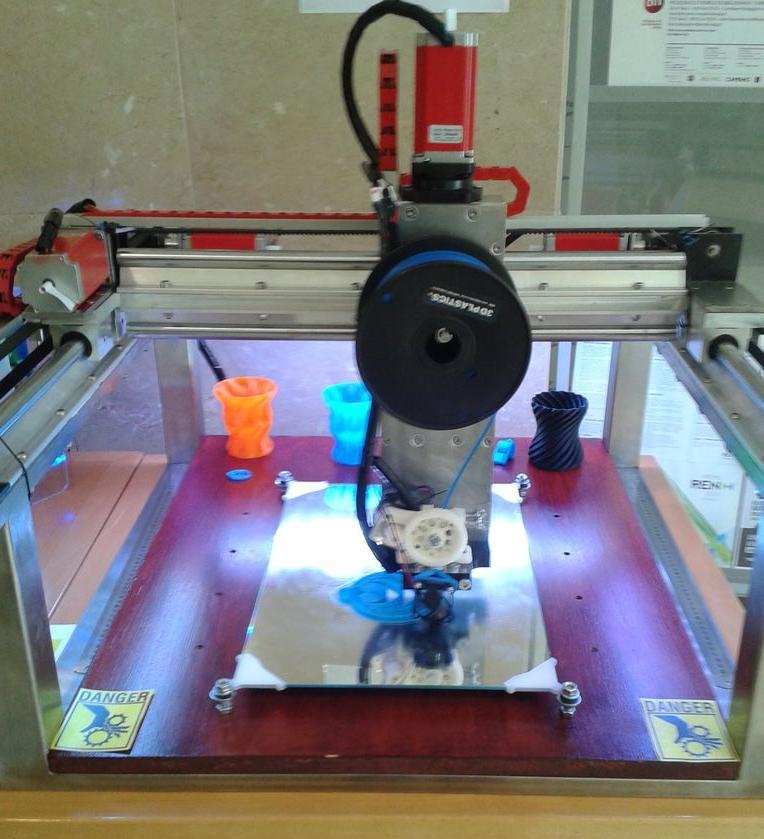
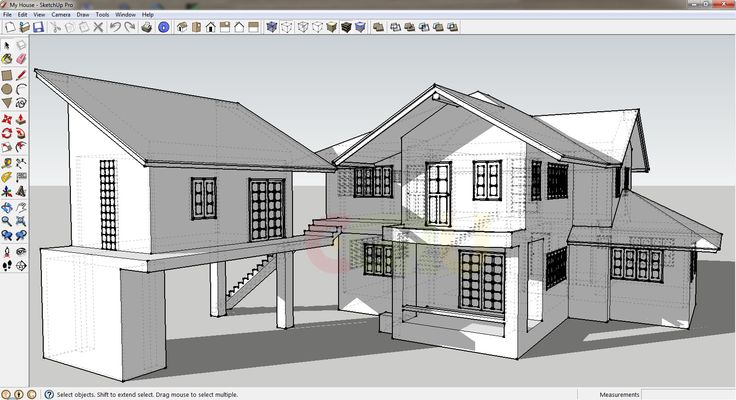
Good example of it is RepRap movement. RepRap is short for a Replicating Rapid-prototyper. In other words it is the self-replicating 3d printer. In fact most of today’s top consumer level 3D printers (picture above) are originated in one way or another from RepRap.
You can find a lot of examples on how to build a 3d printer from scratch on RepRap website, but we also want to describe some of more essential steps in order to give an overall understanding of what to expect if you really decide to make your own 3d printer.
The first step is to find and buy 3d printer DIY kit. Kits usually contain most of parts needed to assemble the printer and can be divided into two main types:
Scratch Built 3D Printer – This 3d printer DIY kit is for those who prefer to build thing from scratch, or in other words go to DIY RepRap route.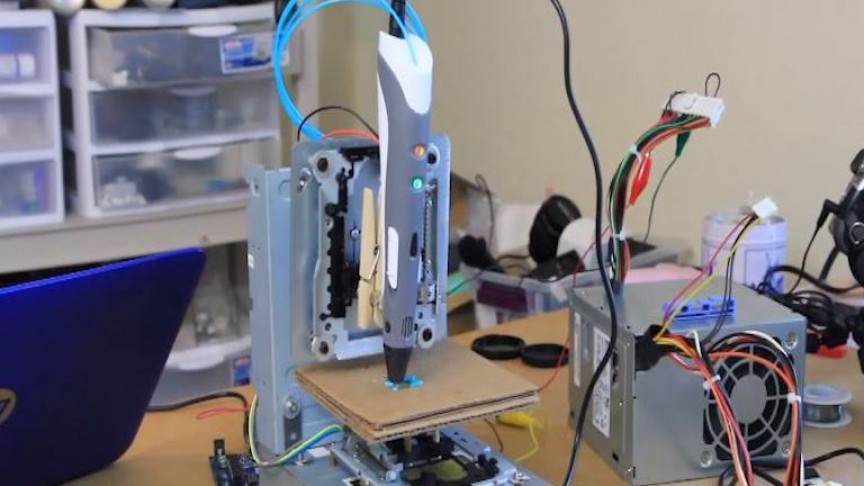 Apart from some essential advantages this approach has also its disadvantages. In theory it can save you some money and since you build it from scratch you will know every nut and bolt in it by the time you can use it and successfully print your first object. Main disadvantage of this method is time. Literally it will take a lot of time to deal with all these hundreds of bolts, wires, belts and much other stuff. In the end you still need to select and purchase or build a controller board, but it depends on your skills level.
Kit Built 3D Printer – This type of kit is good if you want to save some money and at the same time not to deal with all challenges described in the 1st kit type. Many manufactures sell such kits with “easy-to-assemble” instructions included. I doubt that it will be as easy as assemble a chair from IKEA, so you still have to be mechanically inclined and able to understand basic geometry. Some of such kits contain not all parts and you may need to buy something in addition.
The next step will be to determine the design for your 3D printer. In my humble opinion most of DIY 3D printers have not very breathtaking and futuristic design in comparison with MakerBot and other brands. But it is also a matter of taste, for some people the design is not very important.
Once you have got your 3d print DIY kit and chosen the design you could go ahead and start the most fascinating and time consuming part – build your own 3d printer. Be prepared for sleepless nights and a lot of fun. Maybe you will make up something new and present your findings to RepRap community.
When the hardware part of the 3d printer is ready you also need to add a software component to it. It basically does the following things: allows you to view and alter 3d graphical objects, as well as converts the 3d images into instructions that 3d printer can understand.
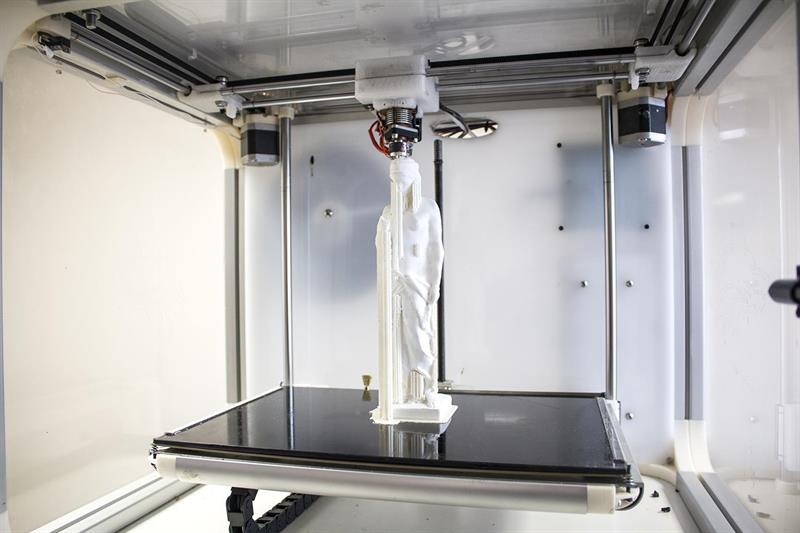
Finally you can 3d print your first object! If you do not have anything to print, you can find a big variety of objects on specialized marketplaces such as Shapeways, Thingiverse and others. Before printing make sure that the object you want to 3d print has the right size and fit on the printer frame.
At the end there is a list of some links where you can find more information about how to build your own 3d printer from scratch:
- RepRap options
- 3D Printer DIY: How to Build Your Own 3D Printer from Scratch
- 3D Printing: Build Your Own 3D Printer and Print Your Own 3D Objects
- Arduino Controlled CNC / 3D Printer Hybrid
- El34 World – 3D Printer Build using 1 inch T-Slot extrusions
- CNET 3D Printer Build Week
Also watch a video from Ben Heck in which he answers on some 3d printing related questions.
Related Articles:
- What is 3d printing – 3D printing technologies overview
- What is 3D Printing?
- History of 3D Printing
- Direct and Binder 3D Printing techniques
- Photopolymerization and Sintering
- 3D Printing Process
- 3D printing revolution
- 3D Printing Materials
- How to choose a right 3D printer filament type
- 3D Printer Filament Types Overview
- Types of 3D printers or 3D printing technologies overview
- How to find and buy a right 3D printer
- History of 3D printing in one picture
- Places to download 3D printer files and files formats overview
- 3D Printing Services Overview
- You Should Know These Important 3D Printing Concepts
How to Make/Build a 3D Printer at Home
- Author
- Recent Posts
Martin
Martin has a M. Sc. in physics and has gained many years of experience in industry as a lab manager and quality assurance manager. He has now tested dozens of 3D printers and is happy to share the collected experience with each new article.
Latest posts by Martin (see all)
Disclosure: Links marked with * are Affiliate Links. I earn from qualifying purchases if you decide to make a purchase through these links – at no additional cost for you!
While building your 3D printer from scratch is fun if you’re generally enthusiastic about the field of 3D printing, it also takes time. Basically, there are two ways to make a 3D printer yourself: assemble the printer from a kit* or build the machine entirely from scratch.
Why you should do the assembly of your 3D printer yourself:
Although there are many types of 3D printers on the market, the following article focuses on Fused Deposition Modeling (FDM) printers, which are the leading 3D printers on the market today. This is mostly due to their ease of use and the low price.
Check Price at:
Amazon*
Table of Contents:
- 1 Your Possibilities
- 2 Assembling a 3D Printer Using a Kit
- 2.1 Choosing of the Right Kit
- 2.2 Useful tips for the Installation
- 3 Building a 3D Printer Yourself
- 3.1 The Right Preparation
- 3.2 Components needed for a home-built 3D printer from scratch
- 3.3 General Notes on Safety
- 3.4 Useful Software and Firmware
- 3.5 Joining a Community
- 4 Case Study: Self-Assembly of a Prusa i3
- 4.1 Step 1: Unpack the kit and review key information about the 3D printer
- 4.2 Step 2: The printer frame
- 4.3 Step 3: Assembling the Z-axis
- 4.4 Step 4: Assembly of the Y-axis
- 4.5 Step 5: Assembling the X-axis
- 4.6 Step 6: Combining the individual axes with the other parts
- 4.7 Step 7: The Printing Bed
- 4.8 Step 8: The extruder
- 4.
 9 Step 9: End stops
 - 4.10 Step 10: Connection
- 4.11 Step 11: Energy supply
- 4.12 Step 12: Organization of the cables
- 4.13 Step 13: Spool holder
- 4.14 Step 14: Software
- 4.15 Step 15: Calibration
- 4.16 Step 16: Printing
- 4.17 Step 17: Upgrade the printing bed using a glass plate
Your Possibilities
When it comes to buying a new 3D printer, you have several options. These range from a high-quality, simple FDM 3D printer to a professional printer that can cost up to several thousand dollars. However, if you want to print objects with a high quality right away, it makes sense to choose a ready to use 3D printer.
But if you are a big fan of 3D printing and enjoy a personal challenge, you can build your own 3D printer. It will take time, but it can be a much more cost-effective project than getting a ready-to-go printer. Also, building your own 3D printer gives you a deeper insight into the inner workings of the machine and the many ways to calibrate it.
You have two options for building your own 3D printer: Either you choose a kit or you build the machine from scratch. The following article will give you a detailed view into the Kit and DIY methods, as well as some valuable tips for easy assembly. You’ll also see a case study of the steps you need to take to assemble and commission a 3D printer using a kit.
Related Posts:
- Best 3D Printers Under $300
- Best 3D Printers Under $500
- Best 3D Printers Under $1000
Assembling a 3D Printer Using a Kit
A 3D printer kit* is the easy way to build your own device, as it already contains all the parts you need. In addition, a kit usually comes with the tools you need and a detailed and clear manual.
The quality of the printouts of a printer assembled with the help of a kit is similar to that of an already assembled device. The biggest difference, however, is the price, since a kit can be much more affordable.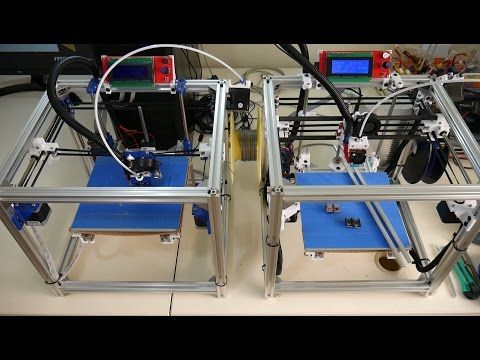
Choosing of the Right Kit
You can choose from a lot of kits for 3D printers that are available to you, which are generally recommended and can be easily purchased online*. The Ender series from Creality, such as the Ender 5 Pro*, the Prusa i3 MK3S* and many Tronxy 3D printers such as the X5SA*, are among the popular choices.
Ender 5 Pro*Check Price at:
Amazon*
A kit basically contains all parts you need. It is not necessary to drill or solder single components.
Furthermore, you don’t have to adjusting the voltage requirements of the individual parts, since all components are already adjusted. Your only task is to assemble the parts as described in the manual.
Useful tips for the Installation
Even if it should be self-evident: Always follow the instructions in the manual. Usually, 3D printer kits contain detailed instructions and troubleshooting guides.
You should read them carefully before you start the assembly. In addition, some kits provide comprehensive videos of the setup and instalation, which can also give you useful hints. But in doubt, you will find what you are looking for with a simple web search and you will also find solutions for specific problems.
It is likely that you will not get everything right on the first try. Therefore practice patience. You’ll be rewarded with success and the first great printed objects from your custom-built 3D printer.
In particular, the correct levelling of the printing bed is crucial for producing a successful print later. If you still have doubts, you will find helpful articles on our website or on the web, which explain the correct levelling of the printing bed in detail.
Normally, 3D printer kits come with standard slicers, but you will most likely need further soft- and firmware. There are a lot of free downloadable options available that can improve not only the performance but also the features of your printer.
Building a 3D Printer Yourself
If you want to build your 3D printer from the bottom up piece by piece, it’s a challenge, but it can be very rewarding for you as a 3D printing enthusiast than using a kit.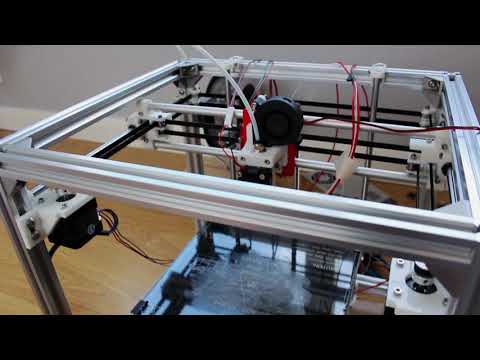
Of course, you need to have some knowledge of how those devices function, for example, you need to know exactly what components you need and how to construct them to a whole machine.
The Right Preparation
First of all, it is necessary to determine the exact size you want to use to determine what kind of frames you’ll need. If you are not sure about the frame selection, you can find helpful articles on the Internet.
By choosing a particular type of printer, you also determine how the print bed and head should move. For example, a standard cartesian printer moves its print head on both the X and Y axes. The bed, on the other hand, moves along the Z-axis.
To determine the nozzle type, you must decide what your print resolution should be. Because 3D printer nozzles are directly related to the print accuracy, you can follow the standard tips available from many manufacturers. Most 3D printers have a nozzle with a diameter of 0.4 millimeters, but there are also nozzles with a diameter of only 0. 1 millimeters or 1 millimeter.
The majority of 3D printers have only one extruder. However, if you want to have two extruders on your machine, make sure that the mainboard is capable to do that. Your printer should be configured to allow this. If you are not sure whether your device also supports two extruders, you can find useful tips on double extrusion on the Internet.
Components needed for a home-built 3D printer from scratch
Once you’ve decided on all the specifications you want for your new 3D printer, you’re ready to begin selecting the components you need. To build a working 3D printer are:
- control board
- stepper motors
- print head
- end stops
- print bed
- power supply
- printer frame
Control Board
Control boards that are sufficient for 3D printers and are often recommended are the Arduino Mega* and the RAMPS-Shield* from RepRap. However, there are also other possibilities of different control boards available*.
Check Price at:
Amazon*
Stepper Motors
Your 3D printer requires at least four stepper motors*. One for each horizontal axes, two motors for the vertical Z-axis. You’ll also need a minimum of one stepper motor for each extruder.
If you manage to get all engines running on the first try, it’s a stroke of luck. Normally it is necessary to regulate the potentiometer so long until it works. A helpful video can be found at the respective manufacturer’s site, which explains how to identify and couple the wires.
3D Printer CNC Controller Kit*Check Price at:
Amazon*
Printhead
The print head consists of the extruder, an element and a sensor. There are direct extruders*, where the motor is directly on the extruder or a Bowden extruders*, where the motor is on the frame. A fan* is also recommended.
End stops
The starting point for moving the print head is the home position. The end stops help the print head to knows where the zero position is.
Printing bed
The print bed is important because it is the surface you print on. Its adhesion is a vital parameter of the success of your prints.
Glass plates* are also very popular, or a flexible film such as BuildTeks FlexPlate* can be applied to the existing printing bed to ensure even better adhesion.
BuildTak 3D Printing Build Surface*Check Price at:
Amazon*
Power supply
It’s important that you calculate how much power your 3D printer will need. Typically, the minimum power is at 12V/20A.
The default value for 3D printers is generally 12 or 24V. 12V is sufficient for printing. The default value of 12 volts refers to 1.75 millimeter PLA*, 24 volts is required for 3 millimeter ABS filament*.
You should ensure that all components of the 3D printer, including the extruder, fan and print bed, are made for the same supply voltage to avoid control problems.
Printer frame
When choosing a printer frame, you can choose a standard frame that you can easily order* or you can choose to make your own one.
3D Printer Frame*Check Price at:
Amazon*
General Notes on Safety
Especially when working with a 3D printer, security is an important issue. There are some potential risks you should be aware of and consider.
Danger due to electric shock
When used improperly, the high-voltage current of 3D printers can be very dangerous! Therefore, it is recommended that you get a supply with appropriate protection.
You have to check if the correct voltage is set. To be sure you should use a multimeter. Always turn off the 3D Printer or unplug the power before connecting components such as motors or sensors.
Danger due to heat
Depending on the type of filament you’re working with, the nozzle of your 3D printer is heated to 200 degrees Celsius or more. Be careful not to burn yourself when working with the extruder or print head.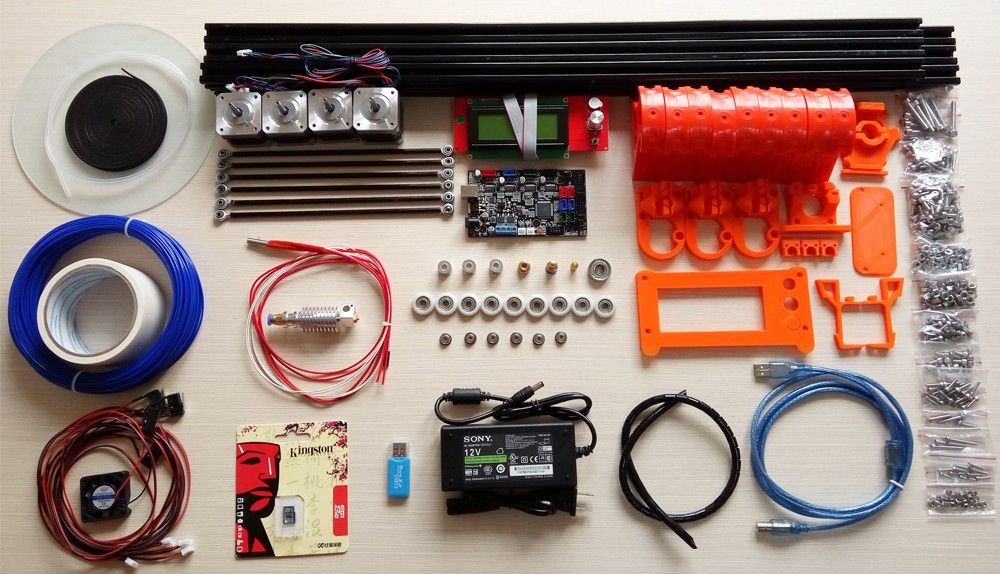
Danger due to fire
An ignored 3D printer poses an increased risk of fire. Always keep an eye on your 3D printer and make sure it is not alone, especially during a print run.
To avoid the problem of a possible fire, you can opt for a monitoring software/setup such as OctoPrint, which even allows you to print when you are not at home and still keep an eye on your equipment.
Useful Software and Firmware
Once you’ve assembled your new 3D printer, you’ll need something to control it. Basic equipment for designing and printing 3D printed models includes CAD software, slicer software and good firmware.
Do I need a CAD software?
You use CAD software to design your 3D printed models. If you’re new to CAD software, you should use it in training sessions or various exercises so that you can both draw and design what you want. There are many training videos available on the Internet, just search by software name.
CAD software is usually somewhat expensive, but many manufacturers offer free versions, such as Autodesk.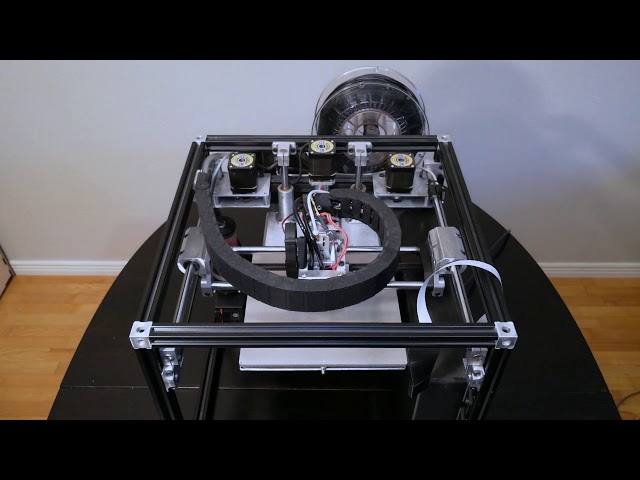 However, in addition to being able to design objects yourself, you also have the option of downloading object files from MyMiniFactory, Thingiverse or GrabCAD. But there are many other helpful providers as well.
Slicer Software
Once you have a CAD design, a slicer software will prepare it for printing by generating a G-code. The G-code includes the controls that are read by the 3D printer which in turn translates them into movements.
The most popular slicer software is probably Cura. This is a free 3D printer slicing software that you can easily download.
Another great option is the program Slic3r. Slic3r is also free of charge and offers many interesting functions.
Simplify3D is a cutting program with costs, which is especially characterized by its preview function. This offers you the possibility to check every single step of the printing process.
Firmware
The firmware is responsible for how your 3D printer responds to the G-code that is sent to it. It is installed to control the motors, the heaters, the sensors and the end stops. As such, it essentially serves as the link between the software and the hardware of the device.
Perhaps the most popular firmware for 3D printers is Marlin. However, you should remember that you need to configure this firmware and some settings on your printer should also be adjusted. For this, an Arduino is recommended.
This includes the definition of the construction rate, the motherboard, the extruder, the filament diameter and the temperature sensor. Another well-known firmware is Repeater, which, similar to Marlin, requires you to edit the files in the Arduino to define a configuration. The soft- and firmware work very well together. If you encounter problems, you can rely on a large and experienced community.
Once the firmware is on your 3D printer, it’s ready to make its first test print.
Joining a Community
When you decide to join a 3D printing community, you’ll have a great opportunity to interact with other users.
RepRap represents a particularly large community, which has also become very well established. Here you can buy 3D printed parts, contact other users and get a lot of helpful discussions.
On the Instructables website, you’ll find many comprehensive articles about self-assembled 3D printers.
Hackster provides numerous free training sessions, webinars and online conferences that not only give you experience in 3D printing but also give you a glimpse into other exciting electronic projects.
The various 3D printing forums are a great place to ask a knowledgeable community your questions and get in-depth explanations from experts. The vast Reddit platform now has thousands of forums where you can share your 3D printer experiences and join in interesting discussions.
Case Study: Self-Assembly of a Prusa i3
Just because a printer is inexpensive doesn’t mean it has to be bad. The Prusa i3* is one of the printers in the low price segment and offers excellent value for money.
You have the possibility to print offline and the device has a heated printing bed. By default, there is no glass bed installed, but you have the option to upgrade it*.
Prusa i3 MK3s Kit*Check Price at:
Amazon*
The assembly of the Prusa i3 is relatively simple. On the included SD card you will find some video instructions for orientation. Assembling the printer usually takes about five hours. Afterward, you can calibrate the printer and make a first test print.
The best way to do this is to use a small cube with a side length of one centimeter. You can get the print files for such test or calibration cubes on Thingiverse.
To assemble the Prusa i3 yourself, you should follow the following 17 steps carefully:
Step 1: Unpack the kit and review key information about the 3D printer
The kit contains all the parts and tools you need to build this 3D printer. They are packed in a sturdy cardboard box and divided into three layers.
The nozzle size is 0.4 millimeters with a core area of 190x190x180 millimeters. The printing speed is between 20 and 100 millimeters per second. The included software is Cura. With the Prusa i3 you have the possibility to print both PLA* and ABS* and you can do this offline.
Step 2: The printer frame
First, you remove the foil from the individual frame parts. This is easiest if you use your fingernails. If you use tools, they should not be sharp so that you do not scratch the components.
Step 3: Assembling the Z-axis
First, you have to create the main frame. On the SD card included in the delivery, you will find a video with instructions on how to assemble the frame. However, the video only contains instructions on how to assemble the frame and not on its connections.
Step 4: Assembly of the Y-axis
Now you assemble the Y-axis using the instruction video on the SD card. The distance between the longest screws should be adjusted to the bearings, otherwise, the axis cannot move smoothly. Make sure that you tighten the belts.
Step 5: Assembling the X-axis
The X-axis is also mounted on the SD card using the instruction video. The toothed belt should support the Z-axis in combination with the X-axis. It is also important that the back plate closes completely at the end.
Step 6: Combining the individual axes with the other parts
Now you can combine the X, Y and Z axis with the other components. Before switching on, it is recommended that you add two small plastic pieces at the top of the Z-axis to bring the bars into an optimal position. Make sure that you screw everything very tight. Be careful not to destroy anything.
Step 7: The Printing Bed
A heated print bed is generally better because your 3D printed objects will adhere better to the surface and won’t peel off during printing. On the heated print bed, you can also apply blue tape, which gives your print models extra adhesion. A disadvantage of this method, however, is that the object can be difficult to remove later. Basically, using a printing bed with a glass plate is the best option.
Screw the heated printing bed to the metal plate of the Y-axis using the supplied screws and springs.
Step 8: The extruder
Now you screw the extruder to the X-axis with three screws. You should make sure that the extruder is fixed very tight. To cool the printed layers you now also fix the fan.
Step 9: End stops
End stops are used by 3D printers to determine their exact position. Before each print, the printer positions itself at the zero point of each axis and then begins printing. You should place end stops on each axis and also make sure that the movement is restricted.
For this you can, for example, attach a piece of plastic using double-sided adhesive tape. For the X-axis the end-stop should be placed near the extruder. For the Y-axis, the stop should be placed near the motor on the back of the printer. The Z-axis requires the end stop above a motor of its Z-axis. Which one you choose is up to you.
Step 10: Connection
Using the instructions you now connect the individual wires:
To connect the printing bed, you plug the connector in TEMP-BED on the control board. Connect the two cables without plugs to the screw terminal labeled BED. Connect the red cable to the positive wire and the black cable to the negative wire. For the last cable connector, you only have one possibility to connect it on the other side of the heated printing bed.
You connect the extruder by attaching both fans to the respective screw terminals. The stepper motor is connected to the MOTO-E0 opening. The thermistor is connected to TEMP_E0 by means of a connector.
Step 11: Energy supply
Make sure that the power supply is turned off when you now connect the printer to the power supply. Be especially careful with this step because of the high voltage.
Step 12: Organization of the cables
Now you arrange the individual cables with the help of a flexible cable wrap and cable ties.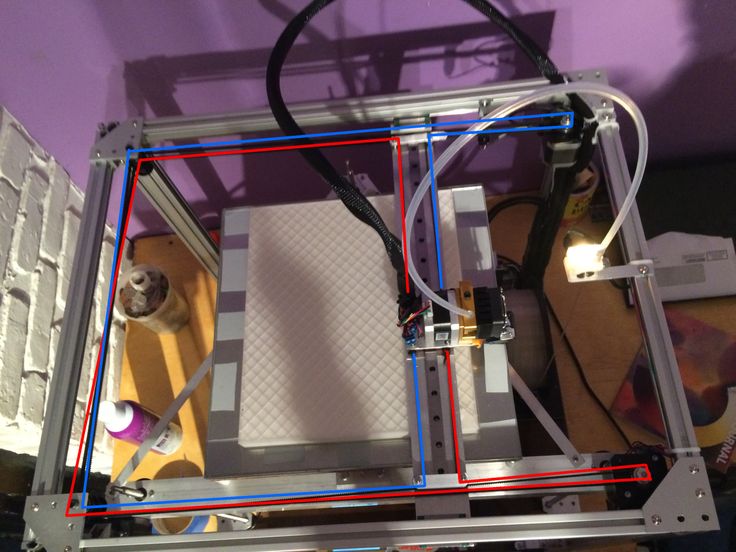 Not only does this make it look better, it also prevents the individual cables from getting tangled or kinking, which can lead to damage in the worst case.
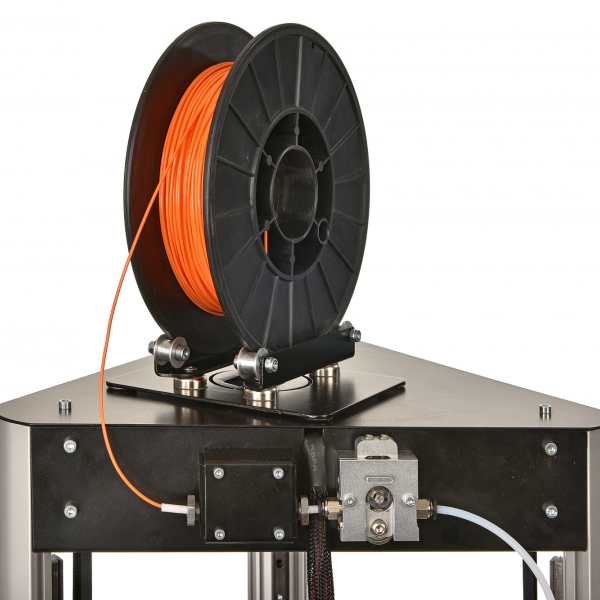
Step 13: Spool holder
Unlike other kits for 3D printers, this kit contains a very robust spool holder which you now attach to load your filament in the future.
Step 14: Software
The most used software is Cura. This is a free and very popular program that you install for your 3D printer in this step. For the Prusa i3, experience has shown that the best settings are the following:
The layer height should be between 0.2 and 0.25 millimeters. The layer thickness should be at least 0.8 millimeters. The filling density can be adjusted as desired. The recommended printing speed is 40 millimeters per second. The printing temperature and the temperature of the printing bed depend on the filament used. The filament diameter is set to 1.75 millimeters at a flow rate of 100 percent and a nozzle size of 0.4 millimeters.
Step 15: Calibration
To calibrate your 3D printer, go to the “Prepare” menu and select “Autohome”. Then select “Move Axis” from the “Prepare” menu and enter 1 millimeter. Now you move the print head over the entire print bed, but do not change the position of the Z-axis. Turn the screws in the print bed to get the same height at every point and level the bed optimally.
Step 16: Printing
If you have not preset temperatures in Cura, it is necessary to preheat the print bed and print head before each print. To print, select the appropriate function from the SD card and find your G-Code. You may need some test prints, but if the device is calibrated and properly assembled, the Prusa i3 will be able to produce high-quality 3D print models.
Step 17: Upgrade the printing bed using a glass plate
If you have a glass plate on your printing bed, not only will this optimize the adhesion of the 3D printed object, but it will also make it easier to remove your model from the printing bed after the printing process is complete.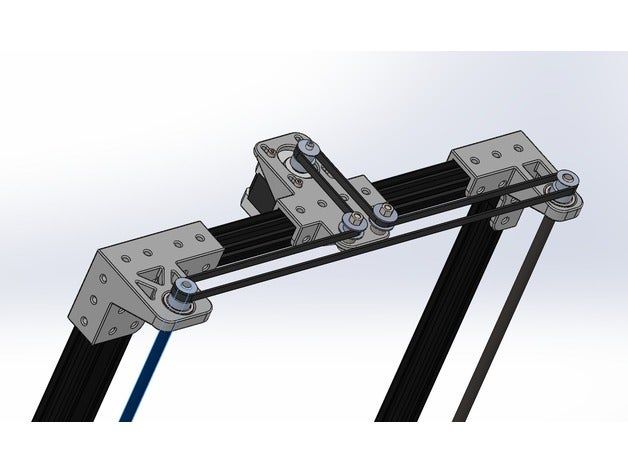
With a glass plate, you don’t need any additional tape or glue sticks to make print models from PLA. In contrast, printing on clear glass with ABS filament is almost impossible. So if you want to print with ABS, you should use additional painter’s tape, glue stick or a special pad.
If you decide not to buy a finished glass bed and want to make your own glass bed, you will need a piece of glass, a glass cutter, a tape measure, four black paper clips and a long and rigid object to cut the glass straight.
First, you remove the blue tape you initially applied from your printing bed and clean it with alcohol or petrol. Cut the glass to size 21.5*20.5 centimeters. With the help of the black paper clips, you now attach the cut glass plate to your heated printing bed and calibrate it again.
From now on you are able to print without the need for annoying adhesive tape. Another advantage of the glass plate is that the underside of your 3D printed objects is perfectly smooth and you can remove the models more easily after cooling down.
Disclosure: This website is the property of Martin Lütkemeyer and is operated by Martin Lütkemeyer. Martin Lütkemeyer is a member of the Amazon Services LLC and other Affiliate Programs. These are affiliate advertising programs designed to enable websites to earn advertising revenue through advertising and linking to Amazon.com and others. Links marked with * are affiliate links.
Build a home 3D printer with your own hands: recommendations from personal experience
3D printing and assembly of 3D printers is my hobby and passion. Here I will not share detailed diagrams and drawings, there are more than enough of them on specialized resources. The main goal of this material is to tell you where to start, where to dig and how to avoid mistakes in the process of assembling a home 3D printer. Perhaps one of the readers will be inspired by applied engineering achievements.
Why do you need a 3D printer? Use cases
I first came across the idea of 3D printing back in the 90s when I was watching the Star Trek series. I remember how impressed I was by the moment when the heroes of the cult series printed the things they needed during their journey right on board their starship. They printed anything: from shoes to tools. I thought it would be great someday to have such a thing too. Then it all seemed something incredible. Outside the window is the gloomy 90s, and the Nokia with a monochrome screen was the pinnacle of progress, accessible only to a select few.
Years passed, everything changed. Around 2010, the first working models of 3D printers began to appear on sale. Yesterday's fantasy has become a reality. However, the cost of such solutions, to put it mildly, discouraged. But the IT industry would not be itself without an inquisitive community, where there is an active exchange of knowledge and experience and who just let them delve into the brains and giblets of new hardware and software. So, drawings and diagrams of printers began to surface more and more often on the Web. Today, the most informative and voluminous resource on the topic of assembling 3D printers is RepRap - this is a huge knowledge base that contains detailed guides for creating a wide variety of models of these machines.
I assembled the first printer about five years ago. My personal motivation to build my own device is quite prosaic and based on several factors. Firstly, there was an opportunity to try to realize the old dream of having your own device, inspired by a fantasy series. The second factor is that sometimes it was necessary to repair some household items (for example, a baby stroller, car elements, household appliances and other small things), but the necessary parts could not be found. Well, the third aspect of the application is "near-working". On the printer, I make cases for various IoT devices that I assemble at home.
Agree, it is better to place your device based on Raspberry Pi or Arduino in an aesthetically pleasing "body", which is not a shame to put in an apartment or take to the office, than to organize components, for example, in a plastic bowl for food. And yes, you can print parts to build other printers :)
There are a lot of scenarios for using 3D printers. I think everyone can find something of their own.
A complex part in terms of drawing that I printed on my printer. Yes, it's just a figurine, but it has many small elements
Ready solution vs custom assembly
When a technology has been tested, its value in the market decreases markedly. The same thing happened in the world of 3D printers. If earlier a ready-made solution cost simply sky-high money, then today acquiring such a machine is more humane for the wallet, but nevertheless not the most affordable for an enthusiast. There are a number of solutions already assembled and ready for home use on the market, their price range ranges from $500-700 (not the best options) to infinity (adequate solutions start from a price tag of about $1000). Yes, there are options for $150, but we, for understandable, I hope, reasons, will not dwell on them.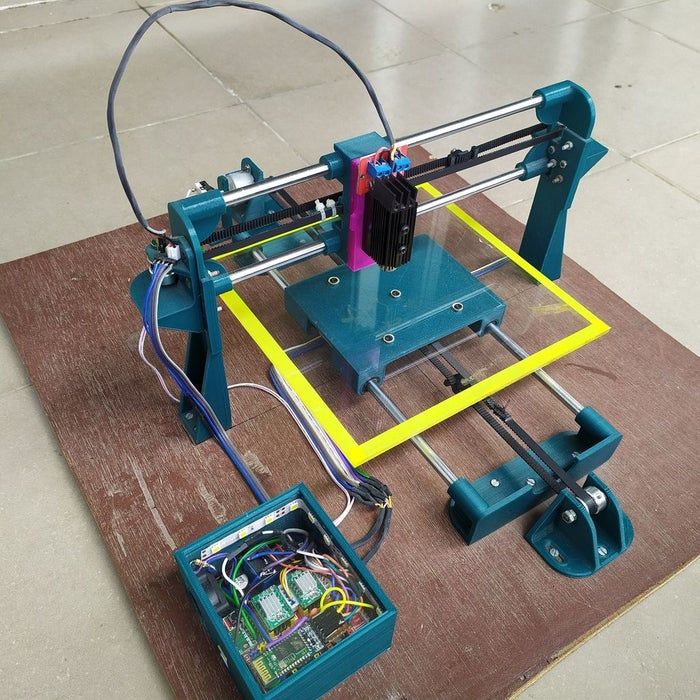
In short, there are three cases to consider a finished assembly:
- when you plan to print not much and rarely;
- when print accuracy is critical;
- you need to print molds for mass production of parts.
There are several obvious advantages to self-assembly. The first and most important is cost. Buying all the necessary components will cost you a maximum of a couple of hundred dollars. In return, you will receive a complete 3D printing solution with the quality of manufactured products acceptable for domestic needs. The second advantage is that by assembling the printer yourself, you will understand the principles of its design and operation. Believe me, this knowledge will be useful to you during the operation of even an expensive ready-made solution - any 3D printer needs to be serviced regularly, and it can be difficult to do this without understanding the basics.
The main disadvantage of assembly is the need for a large amount of time. I spent about 150 hours on my first build.
What you need to assemble the printer yourself
The most important thing here is the presence of desire. As for any special skills, then, by and large, in order to assemble your first printer, the ability to solder or write code is not critical. Of course, understanding the basics of radio electronics and basic skills in the field of mechanics (that is, "straight hands") will greatly simplify the task and reduce the amount of time that needs to be spent on assembly.
Also, to start we need a mandatory set of parts:
- Extruder is the element that is directly responsible for printing, the print head. There are many options on the market, but for a budget build, I recommend the MK8. Of the minuses: it will not be possible to print with plastics that require high temperatures, there is noticeable overheating during intensive work, which can damage the element. If the budget allows, then you can look at MK10 - all the minuses are taken into account there.
- Processor board. The familiar Arduino Mega is well suited. I didn't notice any downsides to this solution, but you can spend a couple of dollars more and get something more powerful, with a reserve for the future.
- Control board. I'm using RAMPS 1.4 which works great with the Arduino Mega. A more expensive but more reliable board is Shield, which already combines a processor board and a control board. In modern realities, I recommend paying attention to it. In addition to it, you need to purchase at least 5 microstep stepper motor controllers, for example - A4988. And it's better to have a couple of these in stock for replacement.
- Heated table. This is the part where the printed element will be located. Heating is necessary due to the fact that most plastics will not adhere to a cold surface. For example, for printing with PLA plastic, the required surface temperature of the table is 60-80°C, for ABS - 110-130°C, and for polycarbonate it will be even higher
There are also two options for choosing a table - cheaper and more expensive. Cheaper options are essentially printed circuit boards with preheated wiring. To operate on this type of table, you will need to put borosilicate glass, which will scratch and crack during operation. Therefore, the best solution is an aluminum table.
 - Stepper motors. Most models, including the i2 and i3, use NEMA 17 size motors, two for the Z axis and one each for the X and Y axes. Finished extruders usually come with their own stepper motor. It is better to take powerful motors with a current in the motor winding of 1A or more, so that there is enough power to lift the extruder and print without skipping steps at high speed.
- Basic set of plastic fasteners.
- Belt and gears to drive it.
Examples of elements appearance: 1) MK8 extruder; 2) Arduino processor board; 3) RAMPS control board; 4) motor controllers; 5) aluminum heated table; 6) NEMA 17 stepper motor; 7) a set of plastic fasteners; 8) drive gears; 9) drive belt
This is a list of items to be purchased.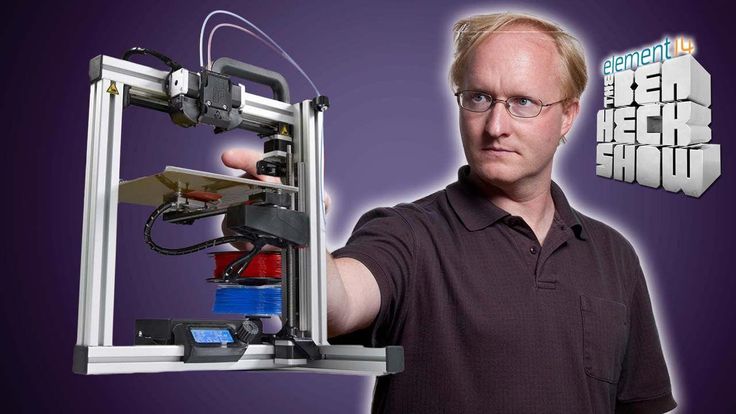 Hardcore users can assemble some of them themselves, but for beginners, I strongly recommend purchasing ready-made solutions.
Yes, you will also need various small things (studs, bearings, nuts, bolts, washers ...) to assemble the case. In practice, it turned out that using a standard m8 stud leads to low printing accuracy on the Z axis. I would recommend immediately replacing it with a trapezoid of the same size.
M8 trapezoid stud for Z axis, which will save you a lot of time and nerves. Available for order on all major online platforms
You also need to purchase customized plastic parts for the X axis, such as these from the MendelMax retrofit kit.
Most parts available at your local hardware store. On RepRap you can find a complete list of necessary little things with all sizes and patterns. The kit you need will depend on the choice of platform (we'll talk about platforms later).
What's the price
Before delving into some aspects of the assembly, let's figure out how much such entertainment will cost for your wallet. Below is a list of parts required for purchase with an average price.
Platform selection
The community has already developed a number of different platforms for assembling printers - the most optimal case designs and the location of the main elements, so you do not have to reinvent the wheel.
i2 and i3 are key platforms for self-assembly printer enclosures. There are also many modifications of them with various improvements, but for beginners, these two classic platforms should be considered, since they do not require special skills and fine-tuning.
Actually, illustration of platforms: 1) i2 platform; 2) i3 platform
On the plus side of i2: it has a more reliable and stable design, although it is a little more difficult to assemble; more opportunities for further customization.
The i3 variant requires more special plastic parts to be purchased separately and has a slow print speed. However, it is easier to assemble and maintain, and has a more aesthetically pleasing appearance. You will have to pay for simplicity with the quality of printed parts - the body has less stability than i2, which can affect print accuracy.
Personally, I started my experiments in assembling printers from the i2 platform. She will be discussed further.
Assembly steps, challenges and improvements
In this block, I will only touch on the key assembly steps using the i2 platform as an example. Full step by step instructions can be found here.
The general scheme of all the main components looks something like this. There is nothing particularly complicated here:
I also recommend adding a display to your design. Yes, you can easily do without this element when performing operations on a PC, but it will be much more convenient to work with the printer this way.
Understanding how all components will be connected, let's move on to the mechanical part, where we have two main elements - a frame and a coordinate machine.
Assembling the frame
Detailed frame assembly instructions are available on RepRap. Of the important nuances - you will need a set of plastic parts (I already talked about this above, but I'll repeat it better), which you can either purchase separately or ask your comrades who already have a 3D printer to print.
The frame of the i2 is quite stable thanks to its trapezoid shape.
This is how the frame looks like with parts already partially installed. For greater rigidity, I reinforced the structure with plywood sheets
Coordinate machine
An extruder is attached to this part. The stepper motors shown in the diagram above are responsible for its movement. After installation, calibration is required along all major axes.
Important - you will need to purchase (or make your own) a carriage for moving the extruder and a mount for the drive belt. Drive belt I recommend GT2.
The carriage printed by the printer from the previous picture after it has been assembled. The part already has LM8UU bearings for guides and belt mount (top)
Calibration and adjustment
So, we completed the assembly process (as I said, it took me 150 hours) - the frame was assembled, the machine was installed. Now another important step is the calibration of this very machine and extruder. Here, too, there are small subtleties.
Setting up the machine
I recommend calibrating the machine with an electronic caliper. Do not be stingy with its purchase - you will save a lot of time and nerves in the process.
The screenshot below shows the correct constants for the Marlin firmware, which must be selected in order to set the correct number of steps per unit of measure. We calculate the coefficient, multiply it, substitute it into the firmware, and then upload it to the board.
Marlin 9 firmware constants0022
For high-quality calibration, I recommend relying on larger numbers in measurements - take not 1-1. 5 cm, but about 10. So the error will be more noticeable, and it will become easier to correct it.
Calibrating the extruder
When the frame is assembled, the machine is calibrated, we start setting up the extruder. Here, too, everything is not so simple. The main task of this operation is to correctly adjust the supply of plastic.
If underfeeding, the printed test item will have noticeable gaps like test cube 1. Conversely, the result will look bloated if plastic is overfed (dice 2)
Getting Started Printing
It remains for us to run some CAD or download ready-made .stl, which describe the structure of the printed material. Further, this structure needs to be converted into a set of commands understandable to our printer. For this I use the Slicer program. It also needs to be set up correctly - specify the temperature, the size of the extruder nozzle. After that, the data can be sent to the printer.
Slicer interface
As a raw material for printing, I recommend starting with regular ABS plastic - it is quite strong, products made from it are durable, and it does not require high temperatures to work with. For comfortable printing with ABS plastic, the table must be heated to a temperature of 110-130 ° C, and the extruder nozzle - within 230-260 ° C.
Some important details. Before printing, calibrate the machine along the Z axis. The extruder nozzle should be approximately half a millimeter from the table and ride along it without distortion. For this calibration, a regular sheet of A4 paper inserted between the nozzle and the surface of the heated table is best suited. If the sheet can be moved with little effort, the calibration is correct.
Another thing to keep in mind is the surface treatment of the heated table. Usually, before printing, the surface of the table is covered with something that hot plastic sticks to well. For ABS plastic, this can be, for example, Kapton tape. The disadvantage of adhesive tape is the need to re-glue it after several printing cycles. In addition, you will have to literally tear off the adhering part from it. All this, believe me, takes a lot of time. Therefore, if it is possible to avoid this fuss, it is better to avoid it.
An alternative option that I use instead of scotch tape is to apply several layers of ordinary light beer, followed by heating the table to 80-100 ° C until the surface is completely dry and re-applying 7-12 layers. It is necessary to apply the liquid with a cloth moistened with a drink. Among the advantages of this solution: ABS plastic separates from the table on its own when it cools down to about 50 ° C and is removed without effort, the table does not have to be peeled off, and one bottle of beer will last you for several months (if you use the drink only for technical purposes :)).
After we have collected and configured everything, we can start printing. If you have an LCD screen, then the file can be transferred for printing using a regular SD card.
The first results may have bumps and other artifacts - do not worry, this is a normal process of "grinding" the printer elements, which will end after a few print cycles.
Tips to make life easier (and sometimes save money)
In addition to the small recommendations given in the text above, in this section I will also give a short list of tips that will greatly simplify the operation of a 3D printer and the life of its owner.
- Do not experiment with nozzles. If you plan to immediately print from materials that require high temperatures, then it is better to immediately take the MK10 extruder. On MK8, you can "hang" special nozzles that support high-temperature conditions. But such modifications often cause difficulties and require special experience. It is better to avoid this fuss on the shore by simply installing the right extruder for you.
- Add starter relay for heated table. Improving the power supply system for this important printing part with a starter relay will help solve the known problem of RAMP 1.4 - overheating of the transistors that control the power of the table, which can lead to failure of the board.
 I made this upgrade after having to throw away a few RAMPS 1.4s.
 - Select the correct filament diameter for printing. I recommend using 1.75mm plastic for MK8 and MK10. If we take plastic, for example, 3 mm, then the extruder simply does not have enough strength to push it at an acceptable speed - everything will be printed much longer, and the quality will drop. ABS plastic is ideal for MK8, MK10 will be able to produce products from polycarbonate.
- Use only new and precise X and Y guides. Print quality will be affected. It is difficult to count on good quality with bent or deformed guides along the axes.
- Take care of cooling. During my experiments with various extruders, the MK10 showed the best results - it prints quite accurately and quickly. The MK10 can also print plastics that require a higher print temperature than ABS, such as polycarbonate. Although it is not as prone to overheating as its younger brother MK8, I still recommend taking care of its cooling by adding a cooler to your design.
 It must be permanently enabled, this option can be configured in Slicer. You can also add coolers to keep the stepper motors at an acceptable temperature, however, make sure that their air flows do not fall on the printed part, as this can lead to its deformation due to too rapid cooling.
 - Consider heat retention. Yes, on the one hand, we are struggling with overheating of the elements. On the other hand, a uniform temperature around the printer will contribute to high-quality printing (the plastic will be more pliable). To achieve a uniform temperature, you can put our printer, for example, in a cardboard box. The main thing is to connect and configure the coolers before that, as described above.
- Consider insulating your desk. Heated table heats up to high temperatures. And if part of this heat leaves properly, heating the printed part, then the second part (from below) just goes down. To concentrate the heat from the table onto the part, you can perform an operation to insulate it.
 To do this, I simply attach a cork mouse pad to its bottom using stationery clips.
Pins
I am sure that during the assembly process you will encounter a number of difficulties specific to your project. Neither this text nor even the most detailed guides will insure against this.
As I wrote in the introductory part, the above does not claim the status of a detailed assembly manual. It is almost impossible to describe all the stages and their subtleties within the framework of one such text. First of all, this is an overview material that will help you prepare for the assembly process (both mentally and financially), understand whether you personally need to bother with self-assembly - or give up on everything and buy a ready-made solution.
For me, assembling printers has become an exciting hobby that helps me solve some issues in home and work affairs, take my mind off programming and do something interesting with my own hands. For my children - entertainment and the opportunity to get unusual and unique toys. By the way, if you have children whose age allows them to mess around with such things, such an activity can be a good help for entering the world of mechanics and technology.
For everyone, the vectors of using 3D printers will be very different and very individual. But, if you decide to devote your personal time to such a hobby, believe me, you will definitely find something to print :)
I will be glad to answer comments, remarks and questions.
What to read/see
- what can be printed;
- 3D printer forum;
- RepRap community site with model descriptions and assembly instructions;
- printer that prints electronics.
Subscribe to the Telegram channel "DOU #tech" so you don't miss new technical articles.
Topics: DIY, embedded, tech
3D printers in construction: application prospects
At first glance, 3D printed structures look like the shell of a half-finished building. But upon closer examination, you will not find even a brick. Layers of material seem to build up one on top of the other - this is how a complex structure is created. It's a futuristic world of 3D printing where robotic arms automatically layer and compress layers of concrete or plastic or any other material into a foundation and build a structure.
This construction method is quite niche today - only a few prototypes of 3D houses and offices have been printed in the world. However, this technology represents an exciting and potentially powerful solution to building change.
What is 3D printing in construction, what is the potential, and will we be working on 3D printed projects in the near future?
- What is 3d printing in construction?
- 3D printers in construction: how is it done?
- 5 examples of innovation
- How can 3d printed projects help construction companies?
- 3D printing distribution
- Civil engineering 3D printing
- Wiki House technology - an open source project for 3D printing: what is behind the concept
- Reverse side of the coin
- How 3D printing can be integrated into construction
- About PlanRadar
3D printing in construction - what kind of technology?
3D printing for construction uses both a 3D printer, which has a robotic “crane-arm” that builds structures right on the construction site, and the creation of certain elements by printers at the factory, which are already assembled into a structure on site.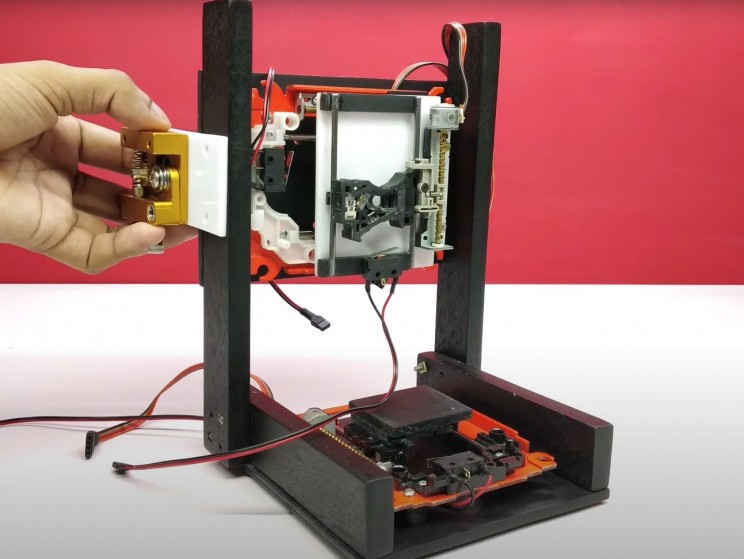
The concept of 3D printing is not new: it first appeared in the 80s. But it has only been in the last decade that this technology has been improved enough (and the cost has been reduced significantly) that it has become a real mainstream.
3D printers are not much different from regular inkjet office printers. The software tells the printer about the dimensions of the final product. And then the printer starts to output the material to the platform according to the plan. 3D printers often use liquid metals, plastics, cement, and variations of various materials that, when cooled and dried, form a structure.
In a 3D construction printer, the CAD or BIM programs tell the machine what to print and the machine starts layering the material according to the design plan.
3D printers in construction: how do they work?
3D printing concept - The printer extrudes a defined liquid mixture in layers, layer by layer, creating a design based on a 3D model. The prepared mix of concrete, filler, plasticizer and other components is loaded into the hopper of the device and fed to the print head. The mixture is applied to the surface of the site or to the previous printed layers. This is how most 3D printers work. Among them, there are three types of devices for 3D printing:
Robotic printer
Read also: New technologies in construction 2021
5 innovative examples of 3D printing
To date, only a few 3D printing projects have been implemented in the construction industry. Here are five of the most impressive and promising projects:
Dubai City Hall Office Building, UAE
1. Dubai City Hall Office Building, UAE
3D printed building. The office block built in the UAE is 9,5 meter high building with an area of 640 m2.
An Apis Cor 3D printer moved around an open-air construction site with a crane and erected different parts of the structure.
2. Office of the Future, UAE
Office of the Future, UAE
Another impressive 3D printed building in the UAE, the Office of the Future is a unique, fairly large structure that currently houses a temporary headquarters organization Dubai Future Foundation.
For this building, the elements were not created on site and were printed in 17 days, while the building itself was assembled in 48 hours.
3. WinSun 3D Printer Homes, China
WinSun 3D Printer Homes, China
WinSun 3D Printing Company of China has also applied factory-built 3D printers to build residential buildings. The company has created several house projects, including a small multi-storey building. All construction details can be printed quickly and cheaply and then quickly assembled on the construction site.
The company calculated that it would cost as little as $161,000 to build and print their five-story building.
4. 3D printed license plate in Lewis Grand Hotel, Philippines
3D printed license plate in Lewis Grand Hotel, Philippines
When planning a trip to the Philippines, consider staying at the Lewis Grand Hotel in Angeles City , Pampanga, where visitors will be greeted with the world's first 3D printed hotel suite. The hotel room was designed by Lewis Jakich, hotel owner and materials engineer, in collaboration with 3D printing specialist Anthony Rudenko. They created a massive 3D printer that prints sand and concrete based on volcanic ash. The room was printed in 100 hours.
5. Two-story mansion in Beckum, Germany
Two-story mansion in Beckum, Germany
The first 3D-printed residential building with an area of about 80 square meters - the brainchild of the German construction company PERI GmbH and the architectural design bureau MENSE-KORTE ingenieure + architecture. A BOD2 3D printer was used to print one square meter of double wall cladding in 5 minutes. The building is a structure with three-layer hollow walls filled with insulating mass. The installation of hollow pipes and connections during printing was carried out manually.
3D printing in construction seems really impressive, but what are the real benefits of such technology?
How can 3D printed designs help construction companies?
Proponents of 3D printing houses and commercial offices point to several advantages of this construction method:
- Zero waste construction
In the UK, almost a third of the waste comes from the construction industry. According to the Transparency Market Research Group, the construction industry worldwide will produce 2.2 billion tons of construction waste by 2025. And although most of the waste is related to the demolition of buildings, the construction sites themselves produce a lot of waste.
Conversely, 3D printing can reduce waste to almost zero. A 3D printer uses a well-defined amount of material that is required to print a design - no more, no less. This can be a big savings.
- Reduced energy consumption
3D printing in construction encourages the use of locally available materials and natural ingredients. This practice can reduce energy costs in transportation, construction and manufacturing, as most local materials require less energy to process or install. If traditional materials with toxic chemical impurities are replaced with natural ones, then the toxicity of the entire construction can be reduced. In addition, local materials are often better suited to local climates and can reduce a building's heating or cooling load, which also reduces construction costs.
- Save time and money
As with AI in construction, a 3D printer can run 24 hours a day, 7 days a week. This means construction projects have the potential to be completed much faster and a number of low-skilled labor costs can be avoided. What's more, 3D printing eliminates the need for temporary structures, such as formwork and scaffolding, that are commonly used in traditional construction. Studies of 3D printed concrete structures have shown a significant reduction in formwork requirements, reducing costs by 35-60%.
- Can realize unusual design shapes
One of the most attractive characteristics of 3D printers is their ability to create complex and unusual design designs, including the only one that is unique. Since the job of a 3D printer is to layer the material, they can be programmed into absolutely any unusual shape that would be much more difficult to create with traditional techniques.
- Minimize human error and improve safety
The published injury statistics at the workplace by the American agency BLS in 2020 indicates that construction is one of the most traumatic areas and a high incidence of diseases. Every day, about 5333 workers die on the construction site. And with the advent of 3D printing, the number of work injuries and fatalities will obviously decrease as it makes construction more programmable and automated. Robotic construction requires standardized, accurate, and complete digital building information, making this technology more accurate and efficient, with minimal rework due to human error or any information inconsistencies. The usual problems with materials and components that need to be stored somewhere, protected from damage - are leveled out, as well as problems with installation and work in progress due to damage - 3D elements are created as you build, they do not need to be moved and stored.
- Exploring new markets
The use of a 3D printer also allows construction companies to enter new market sectors that were previously inaccessible to them. And for start-up companies, having a 3D printer will be a competitive advantage. What's more, 3D printing is a brilliant way to elevate or improve the reputation of a construction company's brand among those who believe that concrete production has an impact on the planet's environment.
Distribution of structural 3D printing
3D printing for structural reinforcement, small scale components and structural steel could revolutionize design, construction and space exploration. In addition, the European Space Agency (ESA) believes that using 3D printed metals to create high-quality complex shapes can significantly reduce their cost, and they will become very common.
ESA has developed a project with the European Commission to improve the printing of metal components that can be used in space. In total, 28 European partners have united for the joint project AMAZE (Additive Manufacturing Aiming Towards Zero - layer-by-layer 3D printing for zero waste from production and efficient production of high-tech metal products).
Almost everything can be designed on a computer, so AMAZE plans to install a 3D printer on board the spacecraft, and as soon as an astronaut needs any part, a tool, he can simply print it.
Structural 3D printing
Civil engineering 3D printing
Civil engineering 3D printing has been gaining popularity over the past decade, as has the aerospace and biomedical industries. This revolutionary manufacturing technique is based on its unique ability to create any geometric shape without any formal restrictions, minimizing waste but increasing productivity and results. The construction industry's push towards automation has recently reached important milestones, including the creation of the first structures using robotic "arms" and 3D printing technology.
The use of 3D printing in the creation of structural elements from polymer materials, concrete and metals is becoming more common.
These civil engineering technicians can create freeform and innovative architectural designs using CAD-integrated software.
However, despite considerable research in the aerospace and bioengineering industries to evaluate and analyze this mechanism, there is still a lack of understanding of its use, the impact of 3D printed materials in civil structures, both in terms of material properties and structural response.
Imperial College London
Read also: Best Building Apps in 2021
WIKI HOUSE - 3D printing in construction: what is the concept behind
Wiki House is an innovative project created by a small group of architects in London in 2011 . It offers an open source digital house design system that allows users to create, upload and share designs and print their own houses.
The kit does not require any special knowledge and training and can be created in 1 day. Elements are digitally cut from ordinary sheet material, like plywood, using a CNC machine. And it's much faster, less costly, and doesn't require the involvement of experts, as in conventional traditional construction.
A standard two bedroom house can be built for less than £50,000 and additional components such as cladding, insulation, windows and more can be added to the main frame of the structure. The first house that was built on the basis of the open source Wiki House technology was a two-story building. The 3D printed house was presented at the London Design Festival in 2014.
The Wiki House movement was spearheaded by Alastair Parvin, whose TED presentation "Architecture for People, Built by People" talked about the promise of 3D printing in construction. The creator of this project believes that Wiki House can help solve the housing problem, especially in emergency situations such as earthquakes (there is already evidence that 3D-printed houses can withstand shocks up to magnitude 8).
In the future, this could become a real alternative to low-cost houses, while allowing the customer to control the design of the project.
3D building built using Wiki House
Will 3D printing be the sustainable future of building?
3D printing has the potential to revolutionize the supply chain and structure through a new method of design and manufacturing. According to the study, 3D printing can help the construction industry become more economical, more efficient and greener.
Saxon University of Applied Sciences scientists Ivo Kotman and Neils Faber claim that 3D printing technology will be a "game changer". They explored the possibilities of 3D printing concrete, and their conclusions are:
- 3D printing shortens the supply chain and the overall design process. 3D printing right on the job site eliminates time-consuming steps in the design process. The architects, engineers, contractors, clients, and executives who normally have to be actively involved in a project are no longer needed in 3D printing. Since all tasks can be combined in one figure of the architect, who uses the modeling method and reproduces the exact holistic designs.
- Pipe fitting and electrical wiring become easier and more efficient. Heating systems, insulation, plumbing and electricity all require the laborious on-site installation of conventional construction.
 However, in 3D printing, some of these features can be incorporated into the 3D printing process. Cavity wall printing is less resource intensive, improves insulation, and allows the use of 3D-printed hot or cold water channels. Moreover, the need for on-site installation is eliminated, which directly affects the reduction of waste.
 - The best logistics. 3D printing eliminates 3 logistics and shipping issues. Firstly, a lot of materials and elements often deteriorate upon delivery, and if everything is printed on site, then damage is minimized
Secondly, in order to withstand transportation, the parts must be with increased technical characteristics, which by default increases the cost of them, and therefore the entire project. 3D printing right on the construction site will help to avoid such additional costs.
- Creation of individual house designs available to the general market.
 Usually, building a house with the involvement of an architect is an expensive pleasure for most consumers. But with concrete 3D printing, you don't have to worry about the chosen shape, it won't cost more. In fact, this means that in the future more people will be able to buy houses of their own design, according to their individual needs
Reverse side of the coin
While 3D printing is definitely attractive, it's still important to look at it impartially, removing some of the promotional stimulus. Skeptics note several disadvantages of this technology.
- Research and development costs
Most construction companies operate with relatively low profitability. To start using 3D printing everywhere, significant investments will be required.
- Will consumers see this as a marketing ploy?
3D printed houses, offices, shops and other infrastructure are often impressive. But do most people really want to live or work in one? For most people, brick houses are much more familiar and attractive. Other technologies such as prefabricated houses also seemed like an attractive technology of the future for some time, but have not been widely adopted, despite the fact that in many cases they were cheaper than traditional ones.
- Difficulty integrating with other components
3D printers can create unique and interesting designs. However, if you need a building that will use different materials or different elements that will not be suitable for 3D printing, then it will be a challenge to include a 3D printer for the building process.
- Lack of skilled labor
With the current problem of a shortage of skilled labor in the construction sector in general, 3D printing will require an even larger set of specialized knowledge and skills, which will have to be selected from an already small niche of candidates.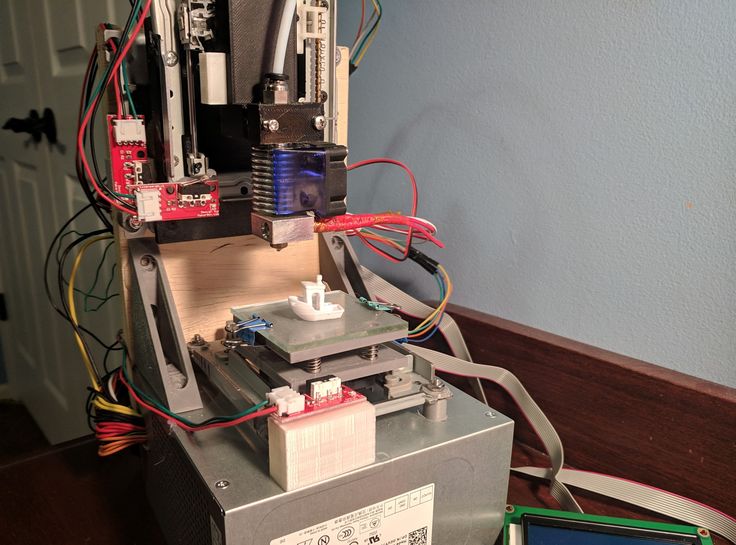 So finding specialists to work in 3D printing for construction may be another difficult task in the future.
- Construction quality control
Weather conditions can slow down the traditional construction process, but things are even worse for 3D printing. The environmental factor for commercial construction may reduce the demand for 3D printing. What's more, quality control can be a much more serious task, requiring constant monitoring of the process by real people at the construction site.
- No standards and regulations
Despite the regular mention of 3D printing in the media, it still has not had a significant impact on the construction sector. There is an obvious liability issue when using these printers, even more so than human liability when doing some construction work. And quite a few other ambiguities regarding this technology. So until norms and standards are established, as well as rules in this area, 3D printing is unlikely to become mainstream in the construction industry.