Boxxy 3d printer
CalEarth
Brief
Our team explored what directions CalEarths SuperAdobe technology could go in the next decade. SuperAdobe’s unique low barrier to entry and inheirant insulatory cooling features make it an ideal technology to build communities out of and we explore speculative futures under the lens of global warming and the coming climate shifts.
Team Members:
Dillon Chi
Mason Noboru
Mehar Nangia
Project Description
Today when a house or building is built there is a mountain of paperwork, zoning, planning and permitting done. It is costly to spin up individual projects as it requires employing some 30 odd roles to complete.
Our project explores a system where non-designers could design their own homes to take advantage of the heat insulative properties and other advantages of superadobe. The system also explores how future communities might be planned without the massive overhead.
Research
To gain a better understanding of the housing/community space, our research started finding articles about smart home technology, smart cities, and sustainable/modular housing. The following are some highlights from articles that we read in these subject areas.
Contextual Inquiry
In order to better understand the workings of the CalEarth institute, we went to visit the site and got a chance to explore the project on a deeper level. In addition to the direct value we got from being able to understand the materiality of the SuperAdobe firsthand, we also gained valuable insights about the process and scalability from the team. Particularly, the importance of soil quality was a key insight that helped inform how we approached the accessibility of our project. In addition, by getting a chance to see CalEarth homes built with varying missions in mind from flood-proofing, to Americana, to Mars-ready layouts, we gained a greater appreciation for the scalability of the technology at hand.
CLA
We conducted a CLA method mapping exercise to talk about the current infrastructure collect the ideas of the “land property” space.
After doing the current and near-future (2021-2025) we did the same for 2025-2035. (Yellow Post-Its).
We discussed the core beliefs surrounding property, how people talk about property today, the systems in place to support this, and the products that exist today as a result of these systems. (Orange Post-Its)
In our review session, we did an inverse thinking session of how individual parts of these layers could go wrong. (Gray Post-Its)
In retrospect, much of our thinking was limited to the consumer aspects of property management and we could have expanded this thinking to how organizations (ie: education and government) would manage the property.
Interviews
We wanted a deeper understanding of attitude towards space, what was considered “smart”, “Public”, and “Outdoor”. We wanted to understand ownership and want it meant to be in a community and what people’s ideal community spaces were.
We knew that to move to the next steps we would need detailed persona’s.
We had a hypothesis that people’s attitudes towards their spaces had shifted over the course of the pandemic. We also hypothesized that people generally had limited engagement with their community.
We created an interview discussion guide, here are some of the questions that we asked.
What is home? Where is home?
How would you rate your space?
How was your living situation two years ago?
What is your “community”
What do you do with other people in your neighborhood?
Describe your ideal community space.
KJ Method
After interviewing we affinitised the results and using the KJ method distilled the following patterns.
Most rated their spaces highly, 10/10, their reasons for rating were quite interesting. In the realm of privacy, on one hand for many people it meant security, comfort, stability, and peace.
 On the other hand, it helped people feel isolated, that they didn’t have ties to their community and it was hard to meet new people.
When asked about where home was or what it is, some responded philosophically while others stated physical aspects.
Most of the responses clustered around themes of emotional, comfort, and relationships.
“This is where my roots are and where my story starts”
“Home for me is someplace where you can detach yourself from work”
“My significant other and my kids are my home.”
Some of the themes we found with “what community was” were heavily skewed far from the physical aspects of “geographical community”.
“the teacher that teaches my son, the man that picks up my garbage.”
“Scarcity brings people together”
While it wasn’t a repeated theme these quotes from one of our interviewees really spurred our thinking.
“Some spaces are predetermined and not truly a community [space], like amusement parks, this isn’t technically an open space, there is an expectation to do something.
 ”
”“Hachiko in Shibuya Square became a community landmark, it is where many people go to wait for their friends that get off of work out of the subway.
When asked about how they interacted with their community. We found some patterns of interaction:
Some people had neighbors they considered friends, some had limited to no interaction with others, and some interactions could be categorized as “incidental only”.
“A child came up to my significant other, so we spent a few hours finding their parent”
“I fostered a dog, and my dog would go and lick people and then you have to talk to them”
In terms of limited interaction, this consisted mostly of saying hello, or waving at each other.
“I am not a social butterfly, if I see the kids in the street I wave at em”
Some were fortunate to be able to share ideas and food with each other and work in communal spaces.
What surprised us the most were some communities getting together to get active!
Ideation
We came up with our final design through exercises of writing and rewriting user stories that fit the needs of the personas that we had created. We also referred back to the research and methodologies we used to uncover themes and generate ideas..
Over the course of a week, we explored near-future scenarios and far-future scenarios.
For our near future ideas of a potential system, we ideated around user-stories around creating food pantries, music studios, community gardens, and local community movements like addressing climate change in Echo Park.
Some of our most interesting discussions happened when we ideated in near-future disaster scenarios. Forced urbanization due to global warming heatwaves in city centers, and global earthquakes that disrupt supply chains.
Here are some of those stories:
Near future - Music Studio
Alice is a mom of two from Highland Park, California.
She and her husband both work and so she’s always looking for childcare to take care of her kids after school. Due to budget cuts, LAUSD cut the after-school music programs from her kids’ school last year.
She hears about the “CalEarth for Cali” website through a poster down her street. She decides to visit the site to learn more.
Alice decides to submit a request for a music studio to be built in her neighborhood, as her kids all love music.
Alice goes through the onboarding process, using the portal to fill in metadata, and complete her proposal. The portal then tells her to build a team and she recruits local friends to support her idea.
After she posts her idea, it gets submitted for approval from the CalEarth team and they begin to help her in the process of getting the idea turned into reality. They help her select a public-use land lot to develop her music studio.
In the meantime, Alice goes through her community looking for donations and support. While that is happening, the CalEarth team goes through its Rolodex and pushes out marketing about Alice’s project.
Within a few weeks, thanks to a donation from local community members that Alice recruited as well Pharrell Williams and the Adidas team, the Highland Park Music Studio has begun construction.
Thanks to the CalEarth team’s partnerships with the local government, the city public library decides to sponsor the maintenance of the project.
Near future - Food Pantry
Their small community will often have food that is going to expire soon and isn't going to get finished, so many people post that to Nextdoor.
Allen has realized that there is an opportunity to create a small food pantry with refrigerator space and some shelves. He also knows that some of the local grocery stores and restaurants throw out tons of just day-old food and sometimes it's just misprinted.
In order to raise money for it he sets up a "Donation product" on Nextdoor, people in the neighborhood buy it and their money goes towards the money pot.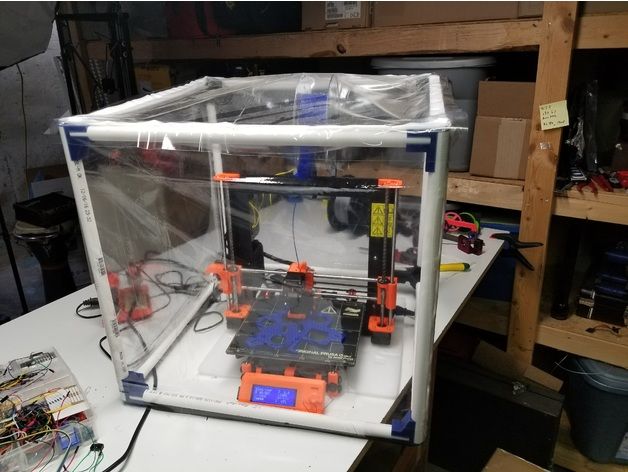
The system collects which ones are receiving the most attention (KPI is not necessarily $ amounts) and adds it to the list of up-and-coming projects on its platform for non-profits and philanthropists.
Within a month the project gets fully funded and Allen uses the system to schedule shifts and communicate when the pantry is open. The shifts are exclusively for the members of that community or the ones in the neighborhoods nearby as a way of getting everyone "their first job" and building valuable life skills.
Our feedback during this sprint was to see about picking the user stories that had told the best story together. For example, the school/music studio stories, and the food pantry/community garden stories.
We met for an extended meeting at the end of the sprint and discussed, taking into account the needs of our client CalEarth and what they could potentially grow to take it to the next level we decided on an assisted CalEarth designer available to everyone.
Takeaways and Next Steps
Daily 3D designs, themes, templates and downloadable graphic elements on Dribbble
-
View Blog App - UI Design
Blog App - UI Design
-
View Daily Task - Web Platform Design
Daily Task - Web Platform Design
-
View Eraser.

Eraser.
-
View Article App - Exploration
Article App - Exploration
-
View Health App - Track daily steps
Health App - Track daily steps
-
View Game Profile Dashboard - Daily UI
Game Profile Dashboard - Daily UI
-
View 1K followers!
1K followers!
-
View Loma icon pack website (light mode)
Loma icon pack website (light mode)
-
View Daily UI #028 Contact Us
Daily UI #028 Contact Us
-
View Daily Medication Reminder
Daily Medication Reminder
-
View Hero Image Explorations - Vespax
Hero Image Explorations - Vespax
-
View WANNA SLICE?
WANNA SLICE?
-
View USB snake
USB snake
-
View 🔥 Daility 2 UI Kit [Light mode] | 280+ Artboards
🔥 Daility 2 UI Kit [Light mode] | 280+ Artboards
-
View Daily Time Tracking Icon Animation
Daily Time Tracking Icon Animation
-
View IOS Vibe
IOS Vibe
-
View Building Performance App
Building Performance App
-
View 3D Toggle switch
3D Toggle switch
-
View CHAINS_002.

CHAINS_002.
-
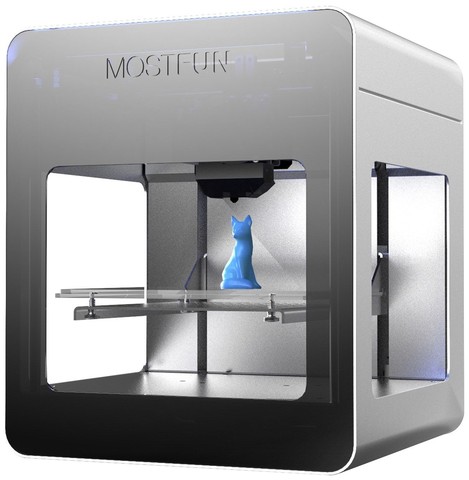
View Boxxy Cat
Boxxy Cat
-
View Covid-19 Daily Report Landingpage
Covid-19 Daily Report Landingpage
-
View Arch - Mediation & Sleep App
Arch - Mediation & Sleep App
-
View CHAINS.
CHAINS.
-
View Hero Image / Digital Marketing Tools - Explorations
Hero Image / Digital Marketing Tools - Explorations
Sign up to continue or sign in
Loading more…
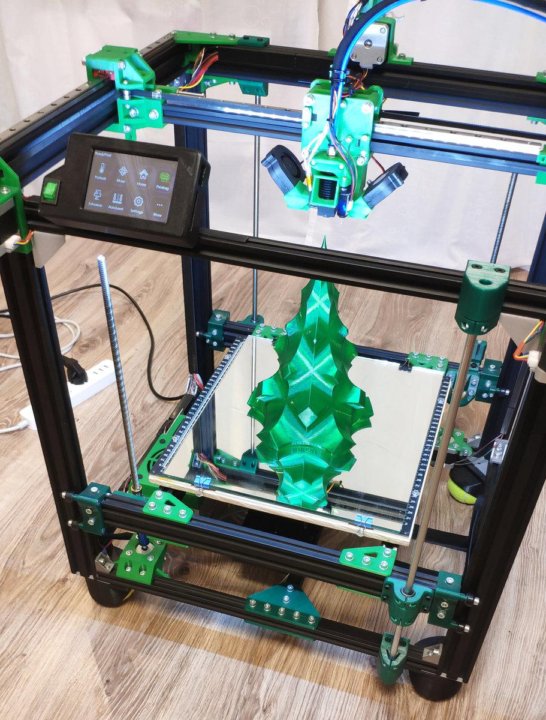
Thermal cabinet (box) for 3D printers
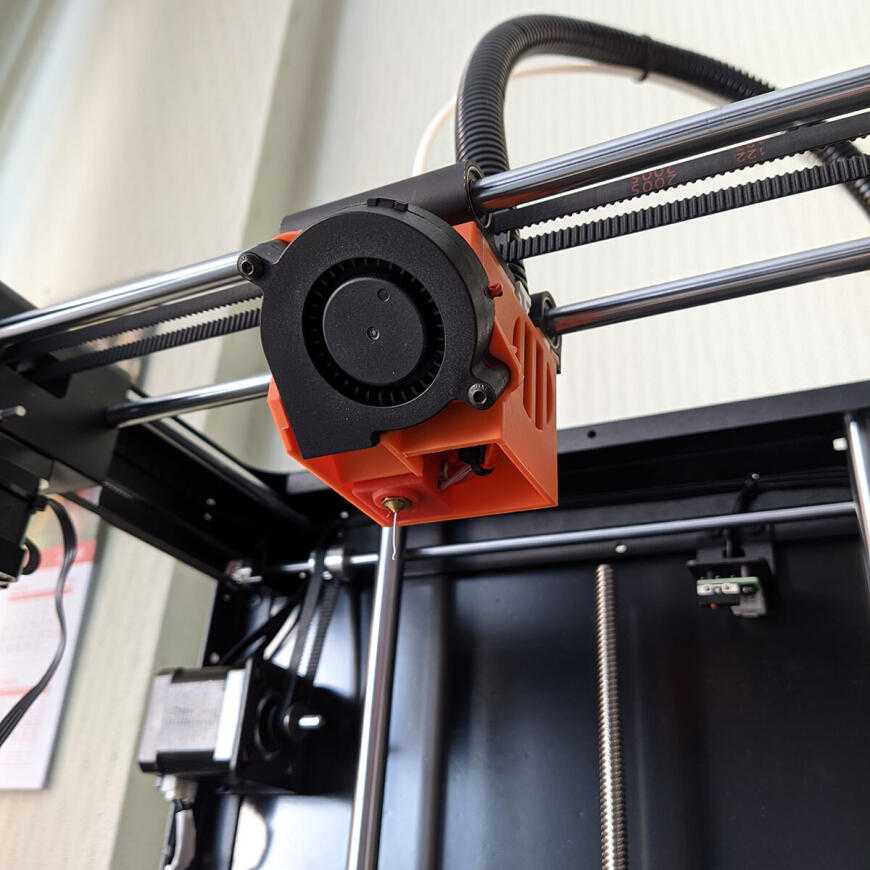
In the world of rapid development of 3D printers, all kinds of applications for them are also rapidly gaining momentum, one of these is thermal box. The main difficulty of FDM printing on 3D printers that do not have a closed or semi-closed housing is the preservation of thermal climate. Thus, many enterprising users resort to the use of thermal cabinets.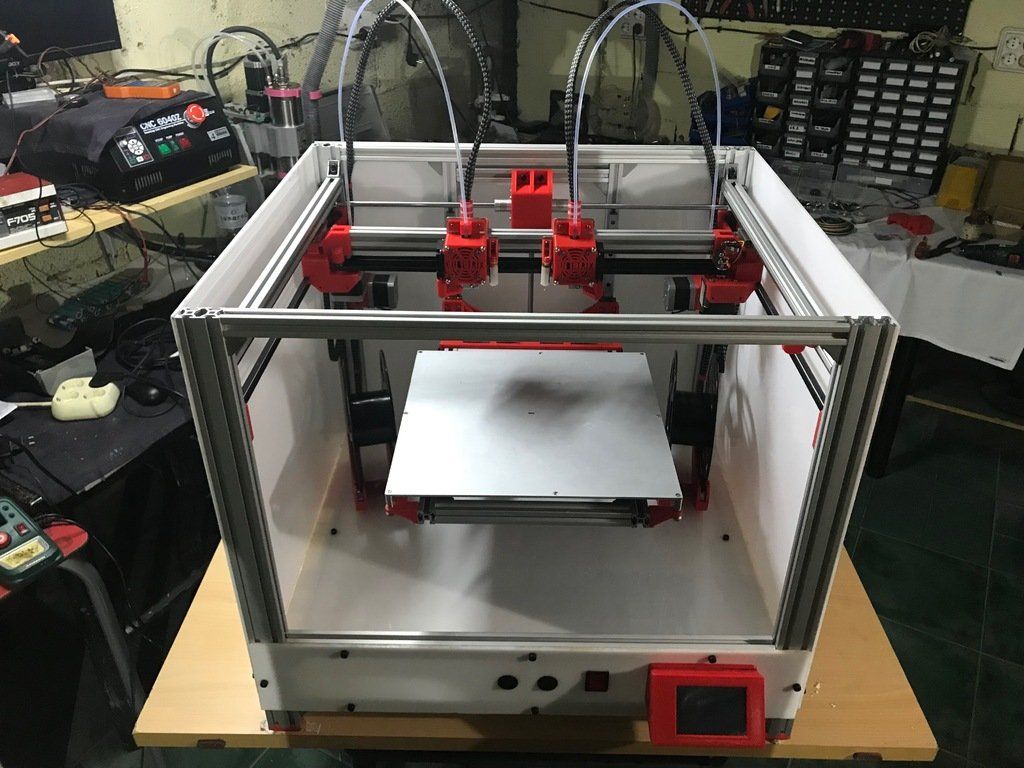
Shakf is any structural shell for a 3D printer that allows you to maintain temperature conditions. Simply put, it is a box to store heat and prevent external factors from changing the printing conditions. The shell helps the 3D printer stabilize the printable area, neutralize external factors and prevent warping. Such chambers are especially important for printing ABS plastic.
There are many ways and different materials used for cabinets. They may have one or more doors, some models are acrylic, others are metal. And there are also models designed for a specific 3D printer. Although this makes them more reliable, it also increases the price, often provided by the companies themselves as optional accessories for a 3D printer.
They are available from online stores such as Amazon and Ebay. But it is possible to find this device in the form of printable files, on sites such as thingiverse. While some are kits, others may require users to print additional latches or locks. Some kits are as easy as using a hex driver to tighten screws, while others have to be glued or drilled.
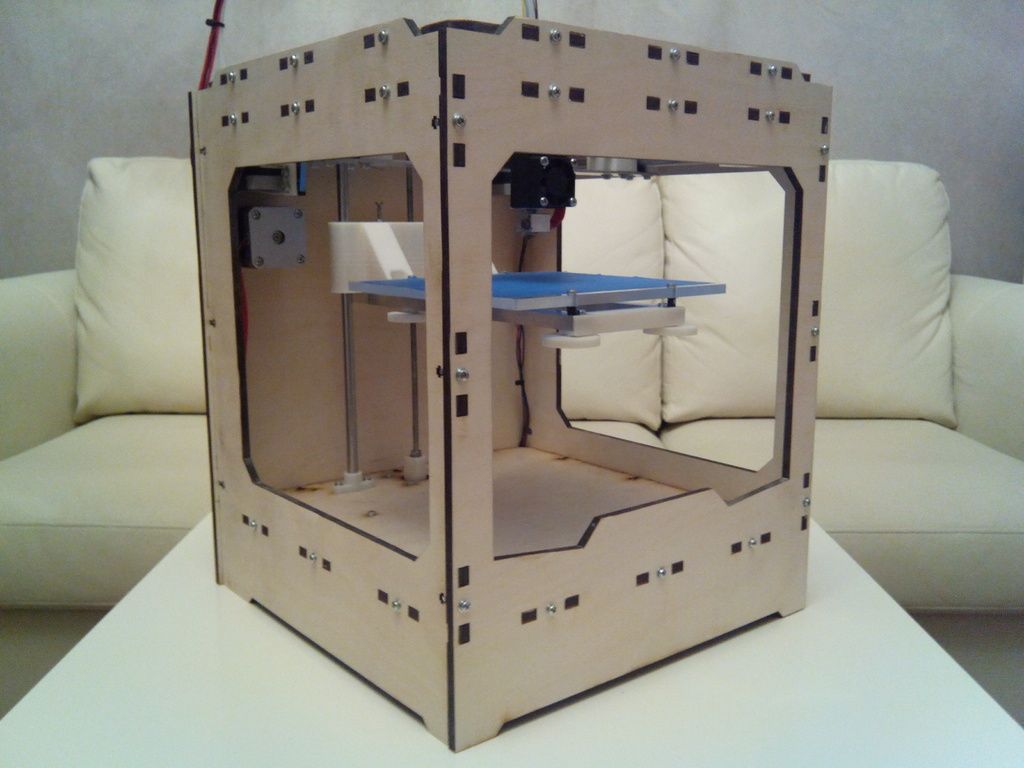
Simple DIY 3D Printer
This is the cheapest option. A simple DIY case will certainly help, but it has to be done right. For example, the picture above uses acrylic boxes. It consists of 2 boxes fastened together and reconfigured with a cutting wheel.
When making this box, remember that you need to run wires, and it is also important to provide enough space for the 3D printer to move in all 3 axes. The shape should also allow for easy loading and unloading of the filament. In addition, consideration must be given to how best to set up the 3D printer to correct values such as table alignment and jamming in case of printing errors.
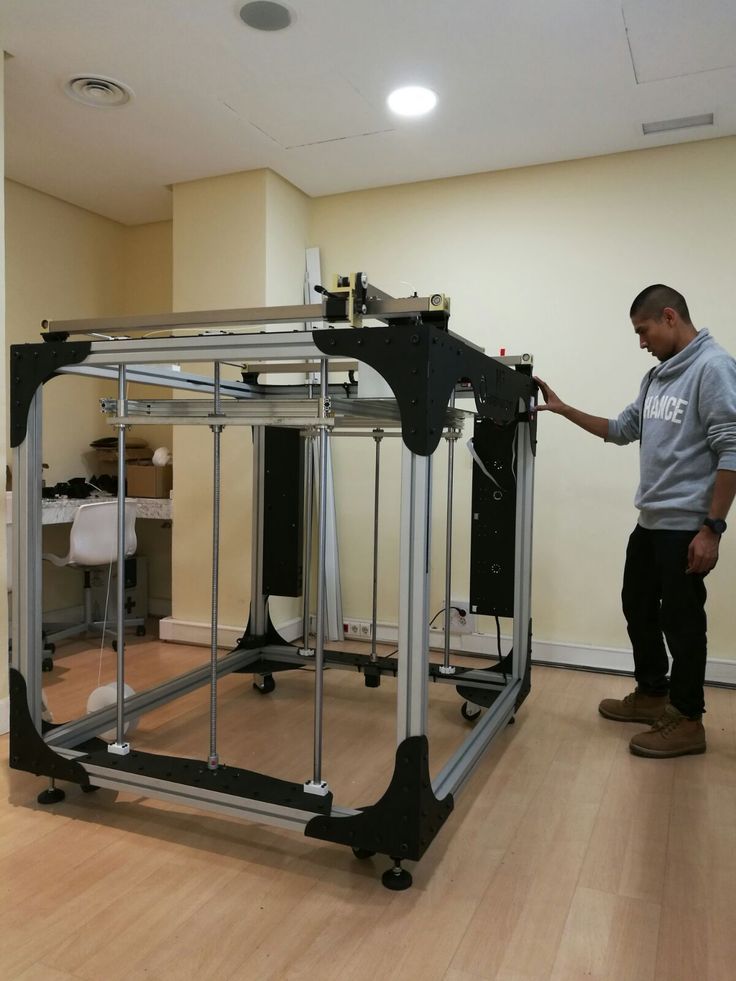
Complex DIY 3D Devices
The figure above shows a relatively complex system. It uses a metal frame with various printed parts. It has a complex anatomy and is carefully positioned according to the 3D printer. This particular sample costs just under $400. This may sound expensive, but it is a very complex system with a heat sensor and very specific materials.
The advantage of a DIY shell is that it can fit your 3D printer. The system shown above also appears to be more robust, and the configuration makes it easier to calibrate the 3D printer.
Other examples of simple products:
Instructables has many examples, but one of the best is Schlem. It consists of a series of plexiglass panels connected by hinged corners and ABS. Connecting parts are made of ABS.
Robert Soyak created a great cabinet using a simple frame with a bunch of ingredients, including 10x10mm slats, small hinges, a couple of screw latches, a handful of small corner brackets, and 6 meters of window duct tape. It consists of acrylic panels, hinges, lock nuts and screw latches, as well as room for a fan and additional electronics.
If wood is your preference, GrabCad has a tutorial on how to build this device. Originally built by a user named Jonathan, the hotbox is a sleek and functional device. It's like the LeapFrog Bolt front panel is warped in the middle.
Hotbox is suitable for any 3D printer that does not exceed 26x26x24. It has a removable hood, LEDs for lighting - space for a cooling fan. An internal 72W power supply is required to power the fan and LEDs. It takes quite a bit of work to create a hotbox, but it's certainly one of the most impressive skins out there.
Of course, if you save on buying the 3D printer itself, but want to get
high-quality printing you will need such a miracle cabinet, but maybe you should immediately buy a 3D printer, with a closed or semi-closed case and don’t think about it anymore, especially since the price is not much different.
Stackable boxes for storing radio components and more
It just so happened that one of the reasons for buying a 3D printer for me was the need to print a large number of boxes for various kinds of radio electronic modules, radio components and other things.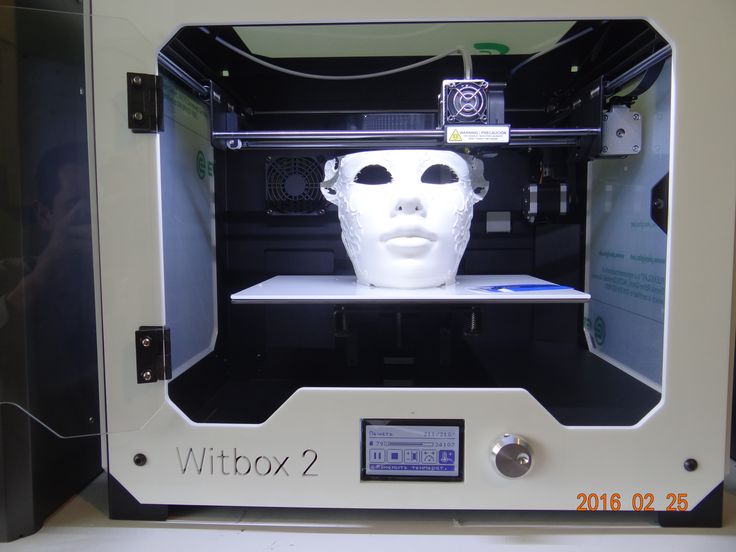 Unfortunately, it is very difficult to find high-quality boxes here, and those that are available are also not cheap. And besides the boxes, a lot of tasks have accumulated that could be quickly solved only with the help of a 3D printer. As a result, a 3D printer was purchased to solve all these problems. And the printing began. As it turned out, the models I have chosen are not without flaws. As a result, they had to be improved. Actually about it and all post.
Printed with ABS, PLA, PET-G and SBS (Wattson). Such work helped to choose the optimal print parameters for these plastics and achieve maximum quality. In order not to waste a lot of plastic for nothing, I developed a couple of test models. I wrote about this in the article “A selection of test models for calibrating and setting up 3D printer printing”, it has a separate section “Test models of stackable boxes”, and since I already wrote about this, it makes no sense to dwell on this issue. Read on the given links.
And so. The plan is as follows: We print the chassis ourselves from hard ABS, PLA, PET-G plastics, we print drawers with SBS, PET-G plastic. Most of all I liked to print drawers with SBS plastic. But here I was in for a pleasant surprise. the models are too thin-walled and the drawers just cracked in the corners. There was no durability. As a result, I spat and began to refine everything for myself. That is why this article is being written. I’ll clarify right away, I just finalized the models for myself.
Model source from Thingiverse 9 website0003
The author of the models Piotr Karkovski
In the post, the models modified by me, their images and their source codes are laid out. So everyone who needs to make a revision for themselves can do it without any extra effort.
In addition to the improvements, I developed several of my own models. These are accessories. Namely: a stand at the bottom to improve the stability of the boxes, side and top plugs to keep the surface straight, a couple of brackets if you want to stack the boxes like in the photo above.
Now about the print options. Since most of the elements are thin-walled, for printing, a couple of the following parameters are needed in the CURA slicer:
Fencing - Number of wall lines “ 2″
Fencing - Filling gaps between the walls “ Everywhere”
For printing with SBS plastic, in order to avoid artifacts on the part, I strongly recommend turning off the combing
For printing, a layer height of 0.3 was used
You will have to select the rest of the parameters yourself, according to your printer, plastic, etc.
Now let's go through the models.
They are the same stackable rectangular pieces into which drawers are inserted. The set contains the following sizes:
Chassis 1x1
Chassis 1x2
Chassis 2x1
Chassis 2x2
Minimal modifications were made to the models and roundings were added in the bottom area.
Drawers.
Things are a little more interesting with drawers.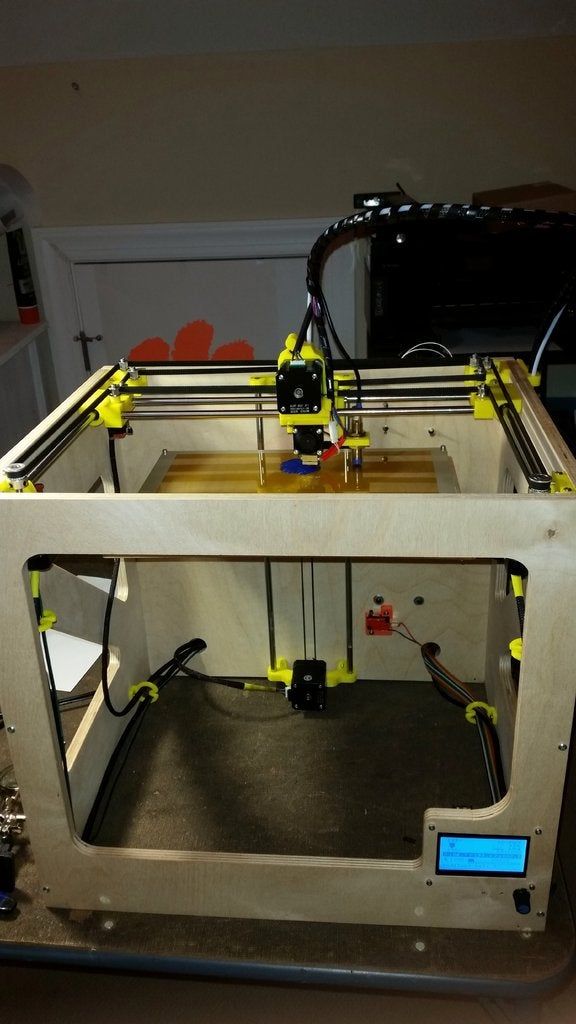 All the above models have been modified for printing with SBS plastics, the walls and transitions have been strengthened. also added several models with an internal, which I finalized for myself. Just because drawers are designed for SBS printing doesn't mean you can't print them with other plastics. after finishing, they are perfectly printed on all types of plastics Below are the models that are in the set:
Shuflyada 1x1
Shuflya 1x1 2 slots along
Shuflya 1x1 2 slots across
Shuflya 1x1 3 slots across
Shuflyada 1x1 4 slots across
shuffle 1x -segrade 1x 2x Drawer 1X2 2 slots along
Drawer 1X2 4 slots
Drawer 2X1 4 slots along
Drawer 2X1 8 slots
Drawer 2X2
were not finalized in my collection. I see no reason to duplicate. With regards to the 2X2 drawer, I didn’t see much reason to divide it into slots in principle.
Accessories.
Well, these are my personal developments. After the set of boxes gained a significant height, it turned out that it was not stable enough on the table. Somehow I didn’t really want this thing to flash one day, through my fault or through the fault of the cat, and all the contents scattered throughout the office. As a result, I designed the legs for this structure:
Stand
This thing allows the structure to stand confidently on the table. I recommend printing from the same materials as the chassis.
To reinforce the floating chassis, the following structure was developed:
Spacer 1x2 Left
Spacer 1x2 Right
To help you understand what I mean by “hanging chassis”, here is an example picture:
Great item to reinforce the structure. Left and right have been fixed in the repository. So you can put it on both sides.
And now for some decor. Not everyone will like the fact that the boxes have spike connections on all sides. Sometimes you want a smooth surface. To do this, I developed stubs. Which will allow you to cover the spikes and grooves, and in case you need to print and dock a couple of boxes, you can remove them, dock the boxes and reinstall the decorative caps. It is not necessary to put them in the trailer, but for those who really want to, I added them to the repository:
plug 1x1 top
plug 1x1 bottom
plug 1x1 left
plug 1x1 right
plug 2x2 top
plug 2x2 bottom
pile of 2x2 left 9000 With the description of models and accessories is finished. And since you have read up to here, you are wondering where to download these models?
You can download them in my repository on Github
And finally, a couple of photos:
If you have not got a 3D printer yet and are thinking about which model to choose, I can recommend the following models: These links are to trusted sellers who sell original printers. They provide technical support and give a one-year warranty.
Many thanks to Printers3d.