Bukito 3d printer review
Review: Bukito - Make:
3D Printing & Imaging Workshop
Deezmaker / deezmaker.com
Price as tested $799 assembled
Print volume 5″×6″×5″
Heated bed? No
Print materials PLA, nylon, Laywood
OS supported Linux, Mac, Windows
Print untethered? With SD card, initiated from computer
Open-source hardware? Yes
Open-source software? Yes
Printer control software Repetier-Host or Pronterface
Slicing software Slic3r
Following up the Kickstarted success of their Bukobot 3D printer, Deezmaker, an open-source 3D printer store and hackerspace in Pasadena, Calif. , has created something entirely new with the Bukito. We consider it the new standard for portable 3D printing: small, simple, and high-performing. (For more on Deezmaker, see page 106.)
Portability Without Sacrifice
With portability, there usually come sacrifices. That’s not really the case with the Bukito, as it was designed and optimized for printing on the go. Its build volume of 5″×6″×5″ is small when compared to its big brother the Bukobot, but it’s enough for most users’ printing needs. And it’s rock solid, using V-slot extrusions (another Kickstarted project, by OpenBuilds) for its frame and linear motion components. V-slot is an extruded aluminum profile with chamfered interior slots for plastic wheels to ride along, so it does double duty as a structure and motion component, simplifying construction.
Looking around the machine, you can see that Deezmaker has really built the Bukito to be mobile. There’s little exposed wiring: Wires for the motors, hot-end, and thermistor are nicely routed and sleeved, and the power cables are tucked away neatly, but the power button and the power and USB jacks are still easily accessible.
Users will likely notice the lack of a heated print surface (Deezmaker has plans for upgrades), so PLA is the material of choice. This decision was also likely a result of portability, as it decreases the overall power requirements. The Bukito also comes standard with SD printing capabilities, though users still must initiate print jobs from a computer.
Unique and Innovative Hardware
Users will notice a couple of differences between the Bukito and other 3D printers out there. Notably, the Bukito uses syncromesh cables instead of the typical flat-toothed timing belts. Syncromesh has a smaller overall profile than typical timing belts, which allows it to be routed inside the aluminum extrusion slots for a more streamlined integration. It also has the added benefit of being less prone to slipping and wear.
Another difference is the use of a Bowden extruder: The drive mechanism for pushing the filament is located off to the side rather than on the carriage. This allows the Bukito to achieve very fast speeds since the print head (hot-end) doesn’t have to carry around all that extra weight.![]() During testing, we were able to increase speeds by four times the default and the Bukito didn’t miss a step! No spooling mechanism is included with the Bukito, so a lazy susan is recommended for your plastic management needs.
During testing, we were able to increase speeds by four times the default and the Bukito didn’t miss a step! No spooling mechanism is included with the Bukito, so a lazy susan is recommended for your plastic management needs.
In our testing, we ran Deezmaker’s recommended settings and found the Bukito to be a really formidable machine. It was fast, quiet, and accurate with minimal fuss. One area that could use improvement was retraction, i.e. when the filament is pulled back while the print head relocates. We experienced noticeable stringing when printing multiple segmented features. This is likely a result of unoptimized retraction on the Bowden setup, and presumably will be addressed when the machine goes into production.
While we were testing, the Bukito successfully raised its fundraising goal on Kickstarter. Documentation and the usual resources were unavailable, but comparisons can likely be made in looking at the Bukobot (see our review on page 84).
Conclusion
The Bukito is a printer that’s good for multiple types of users: hackable enough that enthusiasts can modify to their hearts content, but simple enough that teachers can put it on students’ desks.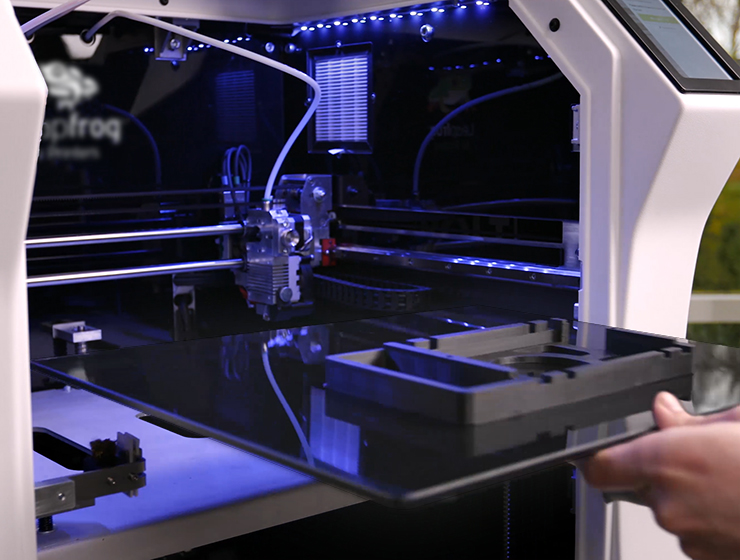 The small footprint and overall portability make it a really adaptable machine, and the PLA-only option is good for all environments, with no unpleasant odors to contend with.
The success of the Bukito will be contingent on the quality of the setup and troubleshooting documentation for the new user, but we’re impressed with this machine.
Primo Features
- Synchromesh cables provide the accuracy and durability of cables and the easy mounting convenience of timing belts.
- Spitfire extruders have a unique “snap shut” filament tensioning system that impressed our testers.
- V-slot extrusion frame is light, rigid, and very portable, with a carrying handle.
Who’s It For?
- Makers
- Tinkerers
- Educators
Pro Tips
- Put a fan on it! At time of testing, the Bukito did not have a built-in extruder fan, which is critical when printing with PLA-only machines. We recommend that you either add one or use a freestanding fan to improve print quality.
This review first appeared in MAKE’s Ultimate Guide to 3D Printing 2014, page 64. Check out the full issue for more!
Deezemaker bukito - 3D Printers - Talk Manufacturing
Jopeeps
#1
I bought a deezemaker bukito mini recently and I was curious if anyone used deezemaker products? I’ve spent so long trying to find a way to get it to print correctly with absolutely no useful assets online. They have one guide for cura and not much else to show for. There’s no active forums, no advice, no updates, not even old forums with useful information. I read some good reviews on their products but after getting one of their printers I’m in the dark. Does anyone have any experience with this brand at all or am I stuck with a bad brand?
1 Like
bvandenbroeck
#2
Got plenty of experience (own a few Bukitos for the classroom), how can I help? Deezmaker is a small company so it’s tough for them to provide total support for every possible issue with their products.
printwithme
#3
Their online forum is pretty much the only self-service support out there: http://forum.bukobot.com/ You can usually search your way to a solution provided for someone with a similar issue, or submit your own question.
Roberto_32
#4
I bought a Bukobot green and everything is fine…how can I help you?
Jopeeps
#5
Most of my issues lay in lack of consistency. The preset Bukito settings they offer create an blobby inconsistent print. It could be over extrusion but even when I modify the settings it’s always a similar result. It also over extrudes on corners causing blobs that make the extruder rub while printing. I even tried letting it print the same object multiple times and each print got consistently worse. I can’t figure out the issue. Even with the bed leveled, the first and second round of the bed leveling test on cura leave a 1/4" difference between the two lines. I’m hoping it’s not a manufacturer defect.
Ken_Olson
#6
I built a version one duo Bukobot about 3 years ago now and have wanted a Bukito to be portable to visit sick kids but havnt been able to afford. I know Diego after many days spent in the store and makerspace but have never ran a Bukito only watched the amazing little bugger.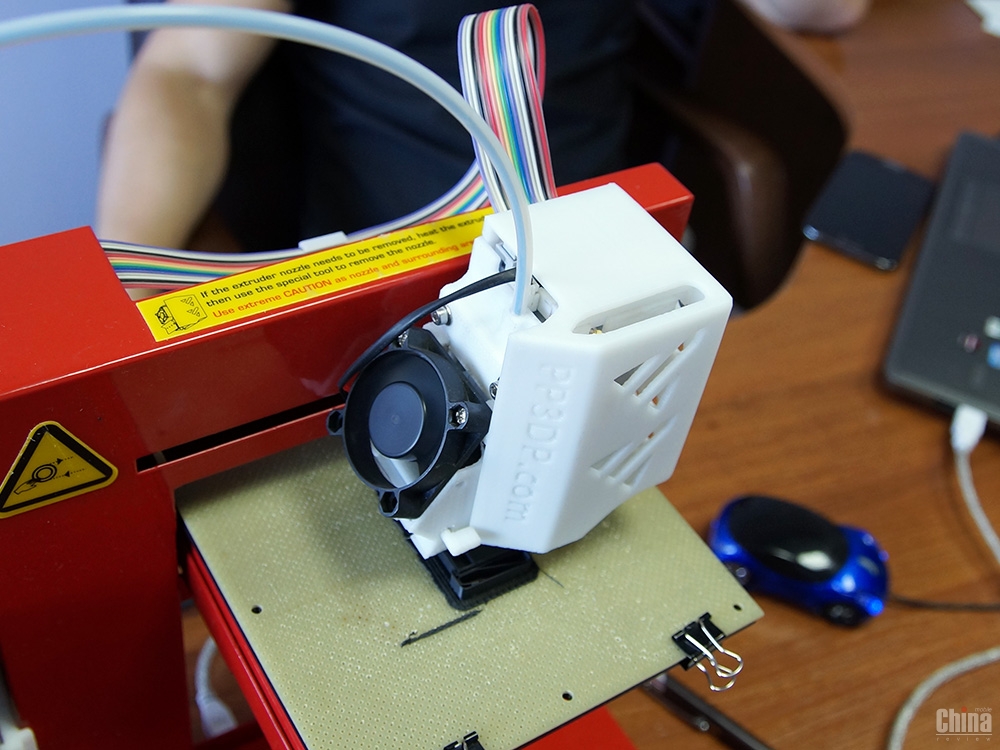 They do recommend cura for all their printers now but slicer will get you started being that it’s built into Mac and PC versions. PC also has Cura built in. Much cleaner prints and smoother running machine with Cura. There are also forums for the printer, look for Bukobot site not the Deezmaker site I will look for quick link for you. http://forum.bukobot.com/ this is a forum for a bukobots. There are Bukito discussions in each. If you were close to me I could help you out. But if you were close to me that means you would be close to Deezmaker(: good luck
Ken_Olson
#7
You have a setting or two wrong and when dealing in Microns .1 makes a WORLD of difference. Sounds like you need to lower your flow or increase your feed rate.
tammish
#8
I don’t know if you are near Burbank CA at all. but if so stop by the makerspace. We have a lot of experience with the Bukito printers. Also is it possible for you to show some images of said prints, and can you confirm that you loaded the profiles from bukito3d.com. The direct link is from github : here
Hope this helps.
~Metal
bvandenbroeck
#9
Did you buy your machine pre-built or as a kit? That may answer a few questions right off the bat.
Jopeeps
#10
So I changed my feed rate and print speed with much better results. The only inconsistency now is the beginning of each print being a sloppy mess (mind you much better than before, thank you Ken) And at detailed edges it leaves clumps which isn’t a big issue but does present a problem if detail is for my prints without sanding or cutting the figure afterwards being necessary. I’m homing in on the settings to work for my machine and I feel like I’m so close! I talked to the owners of deezemaker in California and they basically told me to read their same forum again which is a bit disappointing but I guess they’re not going to take much effort to an older model which sucks but at least they took an effort. If you have any advice on the clumps I appreciate it but at his point I’m thankful for all your help guys, thank you.
bvandenbroeck
#11
What do you mean by clumps? Could you describe it in more detail? Is it over extrusion, under? Also, what is your filament manufacturer? A machine is only as good as the filament you put into it at the end of the day.
It’s important to keep in mind that your extruder can only make .5mm thin walls so fine corners will be rounded. I am usually fine with blue painters tape on acrylic, but printing with buildtak and a bit farther away from the printbed is also an easy way to improve layer one quality. You can also try to slow down your first layer speed.
Jopeeps
#12
It ends up that Ken_Olsen was right with the printer speed and extrusion percentage but part of the first layer issue lays in that my printer consistently messes up printing the main first layers of any print. I attempted a print of several object that had a good quarter inch of solid foundation for the object but for some reason completely bypasses those layers and instead begins printing the more the upper layers where the the lower ones aren’t showing. It could be part of the coding On the .stl but I’m still experimenting to see if I can figure it out. Ironically because of the the machines design it print inconsistently on the further side of the bed from the intersecting axis no matter how the leveling is changed and also progressively prints the objects at an angle instead of perfectly vertical. I talked to the head of Deezemaker and they basically informed me that the only help they can offer me (because it’s an older model then their newest) is a link to an expired forum with no moderator where people have asked question before similar to mine. I have yet to find many useful pieces of advice on it it but I guess all I can do is keep tweaking until I find a way, I guess I kindve deserve it in buying an older model (mind you I didn’t know) for cheaper instead of. 1.5k one.
Ken_Olson
#13
So your first layer has to do with your z height at beginning of print. You should be able to take apiece of paper and slide it under the extruder tip when it is homed in Z. If it is too high the first layer will not adhere properly leading to problems. If it is to close it will begin to dig into the first layer on subsequent layers . As far as the z axis needs to be perpendicular to the x and y, if they are not it will result in the lean you are explaining. You may need to tighten up the union or ad a shim while using a steel square to square up the machine. Good luck you will be pro once you get this;)
A detailed review of the Raise3D PRO3 3D printer from 3Dtool. Reliable FDM printer in 2022.
Contents:
- 1 General information
- 2 Features and contents
- 3 Appearance
- 4 Interface and control
- 5 Working area and print unit
- 6 Mechanics and kinematics
- 7 Electronics and electrical
- 8 Output
Hello everyone, Friends! With you 3DTool!
Raise3D is well known to Russian 3D printing specialists, makers and individual enthusiasts. Having released 4 full-fledged lines of desktop devices in its short, by the standards of the “dinosaurs of the market”, but very rich history, as well as developing the high-temperature Raise3D E2 and metal Metal Fuse, the company did not stop there and continued to refine its devices. One such response to current trends and market demands was the modification of the basic Pro line under the number 3. At the beginning of this year, the company introduced the Raise3D Pro3 to the general public, a new line of devices with seriously redesigned key nodes. Raise3D Pro3 has already arrived in our demo room, and we are ready to share our first impressions with you in this promo review.
Raise3D 3D printer catalog
Let us make a reservation in advance that this article does not set itself the task of a thorough analysis of the novelty with a complete deconstruction of electronics, components of P.O. and other certainly interesting, but rather time-consuming questions in the analysis. We will share with readers our personal experience and observations, analyze the characteristics and improved features of the device, and draw a generalized conclusion to form an overall impression of the device.
It should be noted that over the past few years, since the release of the first line of its Raise3D N1 \ N2 desktop printers, Raise3D has won high marks from foreign specialized magazines and 3D printing portals, and is also in the top lines of the 3D Hubs rating. This speaks to the high quality of the products, the alignment of customer expectations with the reality of owning these devices, and generally positive market acceptance of the brand. Our team of service specialists and sales managers, along with customers, also highly appreciate this brand of devices, primarily because of the convenience of work, the predictability of the print result, as well as high fault tolerance and maintainability.
The Pro3 line is represented by two models - the basic one, with a print area of 300x300x300, and the extended one, with an area size of 300x300x605. The rest of the models are identical.
In our review, we will rely on the base Raise3D Pro3 model. Let's take a look at its specifications and features.
2. Features and contents
Let's start with the kit. The printer comes in a well-known corrugated box with soft foam inside.
The package includes the following items:
-
Power cable 2 pcs.
-
hex keys
-
Plastic coils 2 pcs.
-
Filament guide tube 2 pcs.
-
USB stick
-
Heat resistant gloves
-
Filament holder
-
shoulder blade
-
Nozzle cleaning kit
-
Tweezers
-
Knurled screws and other accessories (spare)
-
Calibration plate 0.3 mm
Having cut the lavsan slings and lifting the box up, we find the first part of the package - a set of various adapters for a power outlet and a plastic coil.
In the printer itself lies the second part pressed by the table. It is necessary to turn on the device in the network and raise the table, and then remove the complete set. Inside, we will again find a picture familiar from previous models - a small user manual, heat-protective gloves and other small things.
Consider the technical characteristics of Raise3D PRO3 :
- Print technology: FDM/FFF
- Thread diameter: 1.75 mm
- Material type: ABS, PLA, PETG, Flex, Carbon, TPU, others
- Build area size: 300×300×300 mm (printing with 1 extruder) 255×300×300 mm (printing with 2 extruders)
- Housing material: Aluminum
- Air filter HEPA filter
- Site Surface Build Tak
- Type plate: flexible, steel
- Number of printheads: 2
- XY positioning accuracy: 0.78125 micron
- Z-axis positioning accuracy: 0.078125 micron
- Recommended pad heating temperature: up to 120℃
- Layer thickness: 0.
 01 - 0.25 mm
 - Nozzle diameter (mm): 0.4mm (0.2/ 0.6/ 0.8/ 1.0mm optional)
- Extruder working temperature: up to 300℃
- Extruder travel speed: 30-150 mm/s
- Display: 7" touch screen (1024×600)
- WiFi
- Connection interface: LAN, USB port, Wi-Fi
- Integrated video camera
- Software: IdeaMaker
- Operating systems: Linux, Mac OS, Windows
- Supported formats: STL/ OBJ/ 3MF/ OLTP 9 files0006
- Calibration: Autocalibration
- Storage temperature: -25°C to +55°C, rel. humidity non-condensing
- Ports: USB 2.0*2, Ethernet*1
- Positioner: Atmel ARM Cortex-M4 120MHz FPU
- Controller: NXP ARM Cortex-A9 Quad 1 GHz
- Ambient temperature: 15 - 30 °C, 10 - 90% humidity
- Power supply: 100-240 V AC, 50/60Hz 230 V @ 3.3 A
- Display resolution: 1024*600
- Power consumption: 24 V DC, 600 W
- Memory: 1 GB, built-in flash memory 8 GB
- Operating noise: < 55 dB
- Weight (unpackaged): 52.
 5 kg
5 kg - Dimensions (without packaging): 620×626×760 mm
- Country of origin: China
- Warranty: 12 months
The Raise3D Pro3 is definitely a large area printer. The table dimensions of 30x30x30 centimeters allow printing almost any product as a whole, without the need to divide it into smaller parts, and the dual-extruder printing unit allows the use of soluble supports in cases of complex model geometry.
Speaking about the characteristics, we can note the increased printing temperatures of the nozzle and table, the refinement of the body and an extended list of materials used. However, the parameters of the new and old models are largely identical.
Globally, if you put two models in front of you on the same table, it is quite difficult to distinguish the new Pro3 from the previous Pro2 model outwardly. The same touchscreen display with a bright interface, spool holders recessed inside the case and closed by a door, axis guides and a printing unit, at first glance everything is the same, but there are still differences, let's look at them in more detail.
3. Appearance of the new PRO3
Outwardly, there are no striking differences, but if you look closely, you can see thicker side rails, a different design of the printer's supporting frame and a ventilation system on the back wall. By the way, as in previous models, the use of a HEPA filter is declared.
From the frontal view, the differences in the printing unit are also visible, outwardly they end there. Except that the acrylic cap is no longer glued, but thermoformed, which should have a positive effect on strength.
The touch screen has not changed either in size or in technical parameters, but the interface has changed significantly, let's move on to it.
4. Interface and touch screen control
As expected, the interface of the Raise Pro3 has been brought in line with the E2 model, which you can review HERE. Now the communication between the printer and the user is simplified and fully interactive, and at the time of calibration and configuration of the device, the printer will clearly suggest what needs to be done and how. These advanced features are combined into a full-fledged intelligent assistant system, called EVE.
Eve will help keep track of the required time to complete scheduled maintenance, as well as help solve possible printing problems using the built-in FAQ without leaving the printer. In fact, this is a full-fledged chat bot, although communication is conducted directly with the printer itself.
With the declared automatic table calibration in Pro3, the process itself has not changed much, but it has been noticeably simplified thanks to the additional BL Touch sensor. Before using the device for the first time, you just need to set the gap on the probe map, and then follow the recommendations of the device, then calibration will not be required, only if you replace nozzles or quick-release blocks (more on them later).
5. Working platform and print unit of 3D printer
A small amount of manual calibration is still present, but the printer helps you fine-tune it yourself. During the adjustment process, the device prints a series of lines, which allows you to choose the most even application and thereby finely adjust the pressure of the nozzle.
The main innovation in the work area, in addition to the modified printing unit, which we will touch on a little later, was the modernization of the bed of the heating table. If earlier the adhesive sticker was attached to the glass, then pressed in special grooves, now a flexible substrate with a metal base is used as an adhesive. In turn, the bed of the table has also changed, now it is equipped with 10 magnets that ensure reliable fixation of the working surface. Also, with the change of the table, the calibration springs under its surface are no longer available to the user, so now it’s impossible to accidentally break the calibration in principle, and the Pro3 builds the height map on its own based on the BL Touch sensor readings.
Otherwise, the heating table has not changed, except that the heating temperature has risen to 120 degrees.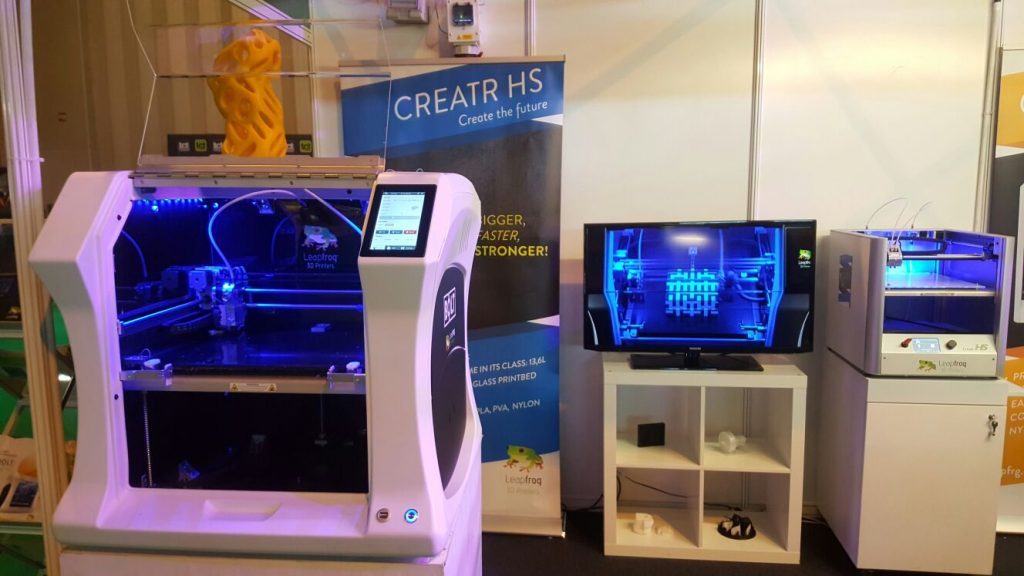 Let's move on to the printing block.
But the manufacturer clearly tried on this node! The entire design has been redesigned, the unit has become lighter in weight, which allows you to win in speed of movement while maintaining print quality, the blowing system has changed, active nozzles have changed, the appearance and design of the pulling mechanism has been changed, a more noticeable highlight of the extruder status has been added, and, most importantly, now hot ends are quick-detachable blocks, which significantly increases the convenience of using the device when using different materials for printing.
To replace the block, just release the red flag and remove the node. By the way, the operating temperature of the nozzle heating is also increased to 300 degrees, which allows you to work with a wide range of carbon-filled and composite plastics. However, in addition to the all-metal extruder, there was also a low-temperature extruder for printing PLA and other lightweight plastics, such as WAX.
The printer did not receive new print control sensors, but retained all the old ones. Threading sensor, plastic breakage and emergency stop printing are present in full.
Also, the filament sensors have now moved to the spool compartment in order to further reduce the weight of the printing unit. And now there is a closing / opening sensor on the front door and if the door is opened during printing, the printer will pause.
Also, you can not miss the new system for supplying and removing air from the chamber. Now it is a beautiful and efficient assembly with a HEPA filter and powerful intake and exhaust fans. This control of the air supply allows you to print tricky materials like wax and some types of elastomers.
6. Mechanics and kinematics
The manufacturer did not forget to pay attention to mechanics and kinematics. The scheme remained the same - 4 cylindrical guides of the table and two ball screws along the Z axis, scissor kinematics along the XY axes, but the mechanics have obviously been finalized. Thicker table guides have been installed, as well as improved slide bushings on the XY axis.
Although in general the design has not changed, however, this is not required of her. The current configuration perfectly solves its tasks.
Let's move on to electronics.
7. Electronics and electrical
Let's start with the printing block.
Since the functions of this node were greatly expanded, a change in the electronics was also required. The PB received a full-fledged control board with the wiring of the main elements right on it, and all this splendor is connected to the motherboard using a flexible cable, it was decided to abandon the chain cable channel.
The motherboard has changed to look more like the E2 version, but still runs an Atmel ARM Cortex-M4 120MHz FPU as the motion processor and an NXP ARM Cortex-A9 Quad 1GHz as the CPU.
The device also received an improved surveillance camera with a higher resolution. Now it will be even more convenient to watch the process through Raise3D Cloud.
This is where the innovations in electronics end, except for the interesting boards for connecting replaceable extruders for the printing unit. We have seen this technology many times, and it has proven itself well. Well, time to sum up a little.
8. Output
Raise3D Pro3 is definitely a novelty that many fans of both the brand itself and just 3D printing have been waiting for. Before the release, she did not set herself the task of significantly advancing or changing the form factor and capabilities of this device, however, she successfully solved the task of modernizing the platform and brought herself into line with today's trends.
Of course, these innovations properly affected the print quality, which Riase3D already had at its best. The key innovations of the release are the system of interchangeable extruders and the new interface on the touch screen, these units really needed to be improved for a long time.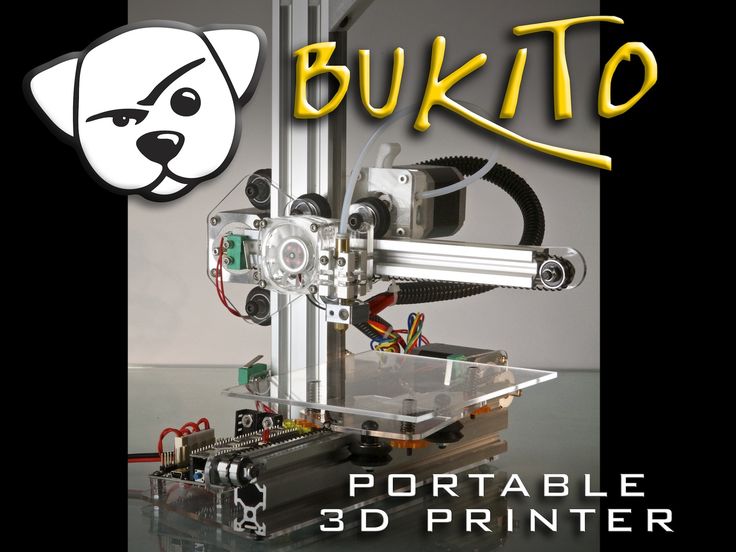
Answering the question - is it worth changing the well-proven Pro2 for a new model, we probably say it's not worth it. A significant difference in price will not give the same significant gain in print quality, but if you choose the first and main printer, or additional to devices from other manufacturers, the Pro3 is worth considering!
The already convenient and high-quality printing printer has become even better and, apparently, Raise3D is not going to stop there.
By the way, the specialists of our service center are certified engineers for Raise3D products, and when you buy any device from this manufacturer from us, you get a stricter Quality Control Department and warranty service!
And that's all we have! Thank you very much for reading, we hope the article was useful for you!
Raise3D 3D printer catalog
To purchase or ask your question, you can contact us:
• By phone: 8(800)775-86-69
• E-mail: Sales@3dtool. ru
ru
• Or on our website: https://3dtool.ru/
Don't forget to subscribe to our YouTube channel:
Join our groups in social networks:
INSTAGRAM
VKontakte
Facebook
examples and perspectives of home, household, educational and commercial use
Creating real objects from digital models seemed to be something unattainable, from the world of fantasy. However, technological progress is moving forward. One of the significant results of its rapid development was 3D printers - devices for three-dimensional modeling. Until recently, installations cost “like a Boeing wing”, and only in the last decade has 3D printing become available to all consumers. The demand for printers has increased due to the development of modern domestic and foreign models of economy class with an intuitive interface.
Explore the possibilities of additive technologies. This is a good way for printer owners to expand their horizons, and for entrepreneurs to see promising areas in small business.
Contents:
- 3D Printer Features
- Use of 3D printers at home
- In the space industry
- Aviation
- In architecture
- Weapon
- Clothes
- Art
- Medicine
- Surgical planning
- Manufacture of prostheses
- Bioprint
- Dentistry
- Foodstuffs
- Characters
- Household robots
- Musical instruments
- Footwear
- Medicines
- Automotive
- Customization and molding 0005 Furniture
- Jewelry
- Construction
- Education
- Total
- melting or sintering of powder;
- photopolymerization;
- extrusion;
- laser stereolithography;
- lamination.
- make a digital model of the object on a computer or download a ready-made template;
- divide the workpiece into many transverse layers using special software;
- start the device for printing - layer-by-layer build-up of the product.

- for the kitchen - hooks for towels, napkin holders, a shelf for spices, kitchen utensils;
- in the bathroom - soap dishes, shelves for shampoos, shower gels;
- in the bedroom - shades for lighting fixtures;
- in the office - organizers, pencil holders;
- in the living room - vases, figurines, photo frames, flower pots and much more.
- up to 50% better product retention than standard production;
- exact dosage of the substance;
- reduction of drug manufacturing time;
- the ability to produce drugs according to an individual prescription.
- simplification of the launch of jewelry production;
- obtaining high-quality jewelry: even, smooth, with high detail;
- efficiency - elimination of risks of waste of precious metals.
- Visual teaching of the sciences.
 The teacher will be able to show the section of the engine, human bones or a three-dimensional model of hydrogen - all this will be a good motivation for learning.
 - Development of students' imagination and creativity. 3D modeling develops spatial thinking, helps to visualize the fruits of the imagination.
3D printer features
Three-dimensional printers are equipment for printing a physical object based on its digital 3D model. The operation of most devices is based on the layer-by-layer deposition of the material or the gradual solidification of the photopolymer resin. As "consumables" they use all kinds of plastic, metal powder, building mixtures, glass powder and other raw materials.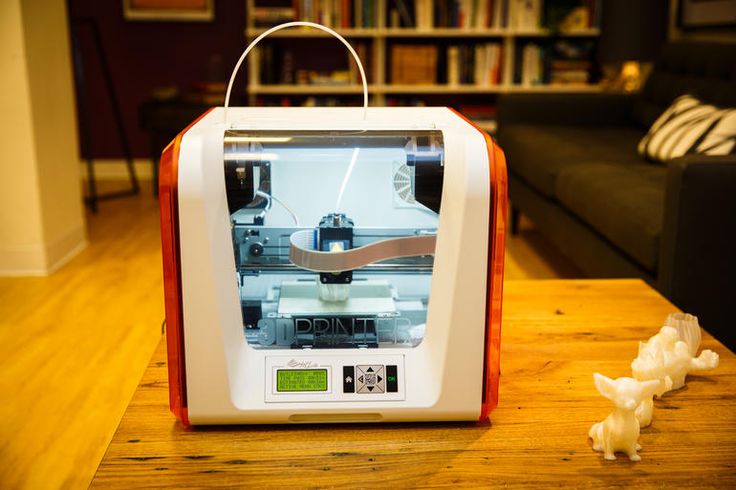
There are several types of printing technologies that differ in the principle of operation, the properties of materials, the software used:
Using printers, you can create models of any shape and complexity of execution. 3D printing allows you to reduce the cost of manufactured products and speed up the production process.
Use of 3D printers at home
3D modeling technology has been used for various purposes in everyday life. It is easy to print a hook for the hallway, a case for a smartphone, a tablet, a toy for a child at home on a printer. To do this, you need to perform a number of tasks:
The printer will become an assistant in the house. Let's be clear: we are surrounded by numerous plastic parts that often fail or get lost. It’s not at all by the way that the handle of the washing machine may break, the blender gear will fall apart, or some fragile button will crack. Using a 3D printer to recreate a broken polymer element is not a problem, but an exciting creative process.
Devices for 3D modeling allow you to print household items or decor in any room in the house:
If you wish, you can organize "your own business" from home. Using a printer to produce original Christmas and children's toys, souvenirs, bags for phones, tablets for sale is a profitable idea.
In the space industry
Three-dimensional modeling is a promising technology in the aerospace industry. And it is already actively used. Manufacturer SpaceX announced the Dragon v2 spacecraft, its engine is assembled using printed parts.
3D printing is also used in space. In 2016, NASA sent an industrial printer to the ISS that can operate in a vacuum. With it, astronauts will be able to print the desired item or part, thereby reducing the time to wait for delivery from Earth.
Aviation
Additive technologies have found a place in the aviation industry. Boeing and Lockheed Martin Corporation of America have developed laser-sintered engine parts, load-bearing components and ventilation systems.
Architectural
The ability to create virtual and then printed three-dimensional models is a breakthrough in the field of architecture and design. With the help of printers, it is easy to make a model of a future building for accurate visualization of its features, presentation to investors or buyers.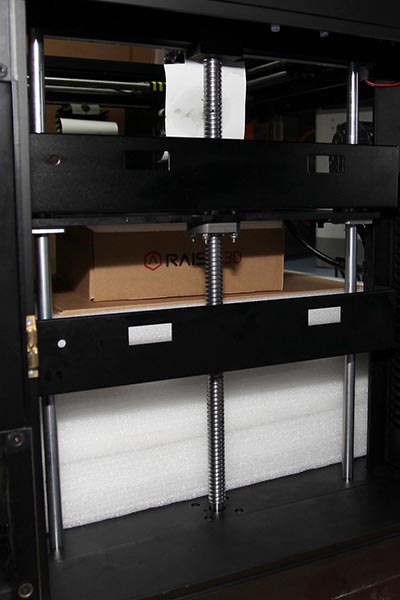 Layouts have been used in architecture for a long time, but it is printing that leads to the acceleration and simplification of project development.
Weapons
Three-dimensional technologies are not always used for good. Weapon printing is a prime example of this. Even budget printers can print a functional plastic gun. From one shot, it will collapse, but even a single pull of the trigger can cost a person his life.
However, it is believed that people should be able to self-defense. So, employees of Defense Distributed posted 3D models of the Liberator pistol online. They also manufacture spare parts for the Kalashnikov assault rifle and the AR-15 rifle. With them, it is possible to assemble weapons using a printer and available consumables.
Clothing
Polyamide powders are suitable materials for clothing and underwear. Nylon printed items have an unusual shape, they combine high strength with elasticity.
New York-based design lab Continuum Fashion presented printed clothing at a fashion show.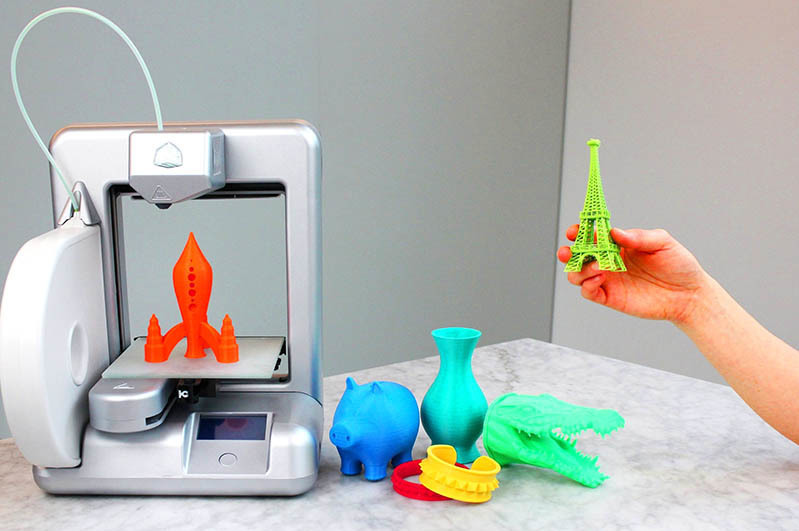 The announced models are non-experimental and can be purchased from the Shapeways website.
Art
Create a wax replica of Donatello's David or Venus de Milo - why not? If desired, copies of famous wax sculptures can be purchased, but they will be expensive, and they are not sold everywhere. A 3D printer will help out art lovers: load a digital model into the device, select the material for printing and start making a replica. A three-dimensional image of the original can be obtained from a regular photo with its subsequent conversion to 3D. Or use a handheld 3D scanner with the ability to capture overall products.
Medicine
Three-dimensional modeling is used in various medical areas.
Surgical Planning
Careful preparation is the key to a successful operation. With the help of scanners, an image of the necessary area of the body is obtained, a copy is printed from the virtual model. It makes it easier for surgeons to simulate an operation: try out different scenarios, perform instrument testing, and calculate timing.
Manufacture of prostheses
3D printers are used in prosthetics. They allow you to create prostheses that correspond to the anatomical features of the patient. Swedish manufacturer Arcam is developing devices for electron beam melting. Their task is the execution of solid metal structures, including titanium ones. They are used in prosthetics to replace joints, bones or limbs.
Bioprint
Engineers are developing organic imitators that are similar in properties and structure to natural tissues. Printing vessels, muscles or whole organs - all this has become possible. The matter has not yet reached the transplantation of printed organs, but work is underway. In parallel, methods are being developed to restore damaged bones and cartilage. In medicine, “3D biopens” have found application, with which living cells are applied to injured tissues for their healing.
Dentistry
Dental braces made of plastic, crowns, dentures, jaw implants - all this can be quickly and profitably produced on a 3D printer. Align Technology engineers have developed a technique in which the oral cavity is scanned and the subsequent manufacture of individual prostheses. Here, liquid resin polymerization technology is used, it provides a high degree of accuracy of finished structures.
Food stuffs
Print minced meat, sugar syrup, melted chocolate - fiction? Not at all! Food printers have ceased to be the prerogative of fairy tales and science fiction films. They are able to produce food of unusual shape.
British company Cadbury uses 3D printers to make molding stencils and candy prototypes that require a complex production line. Italian Barilla uses machines for making pasta, German Biozoon Food Innovations uses dishes for the elderly.
A popular food production device is the Foodini. The printer works with any pasty raw material. Its disadvantage is poor temperature processing of food, but it may soon be eliminated.
Characters
Creating a collection of movie characters, comics, games, figurines of famous personalities has become possible with 3D printers. Want a small replica of the giant robot, Hulk, Iron Man? They can even be printed on a compact desktop printer. Collecting a collection of favorite characters is available to everyone.
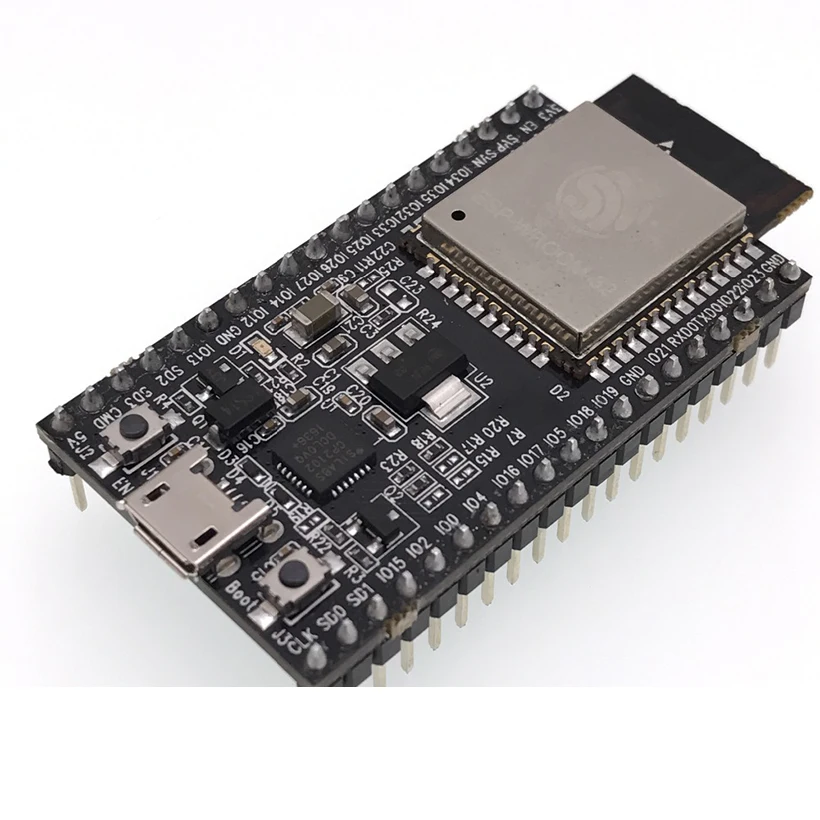
Domestic robots
Arduino, a low-cost board company, has allowed users to design various electronic devices. Many have taken the idea into service for the equipment of the "smart home" system. All you need to do is print the case, install the servo, board and get your home robot.
To help people who do not understand soldering or programming, specialists from the Massachusetts Institute are developing a project to automate the construction of robots. According to the plan, you will need to set the functions of the future device, choose a design - the system itself will send the necessary details for printing.
Musical instruments
Printers can print drums, guitars, flutes, violins. Yes, professional musicians may doubt their quality, since valuable pieces are designed for years, and they serve for decades. The printed tool will not be able to become a worthy alternative. But no one says that it should be all plastic. The printer can be used to print individual parts, such as the neck or soundboard. Due to three-dimensional machines, it will be possible to make tools that are unusual in shape and design.
Shoes
Printers can print sandals, boots, shoes, slates or individual parts of shoes: insoles, heels, soles. Nylon or other flexible materials (Ninjaflex, FilaFlex) are suitable for this. The advantages of printed shoes are conformity to the anatomical features of the foot, comfort, wear resistance. A nice bonus is the possibility of producing products that are unique in appearance with openwork heels that wrap flowers around a thin hairpin.
Printed footwear has already become the hero of fashion shows, but the time is not far off when it will become available to the mass consumer.
Medicines
3D printing has proven promising in the pharmaceutical industry for printing drugs. Her virtues:
Organization Organovo is working with new technologies. Engineers use a gel material to precisely connect the components. 3D printers are not suitable for the serial launch of medicines. But they have found use in the manufacture of medicines for individual prescriptions.
Automotive
Many car mechanisms can be printed. In the world there are already examples of the use of components made on printers. "Formula 1" distinguished itself, it involved printed parts in fireballs. The American Local Motors announced a car at all, the body of which is made only from printed parts.
So far, the mass production of spare parts for printers is not economically feasible - it is expensive.
Customization and molding
Adding decorative elements to finished products is an original way to update and transform them. Wicker lampshades for sconces, an unusual frame for a bicycle, a car with author's tuning will attract attention, because there are no analogues of our own production.
Furniture
No, we're not just talking about toy items. 3D printers make it possible to produce furniture that is difficult to distinguish from "traditional" products. This result can be achieved through the use of special plastic with the addition of micro-sawdust. For example, Laywoo-D3 has a woody smell.
You can print anything: tables, stools, shelves, chairs, bedside tables. Products are easy to machine, they can be coated with paint, varnished.
There are examples of metal furniture creation in the world. Dutch designer Joris Laarman designed a machine for 3D printing without the use of a laser and vacuum chambers. 3D machines are used to paint with metal through the air - a great option for getting interesting furniture with an elegant wicker design.
Jewelry industry
3D printing helps to reduce and speed up the production of jewelry at the expense of cheap consumables. With printers, jewelers can redesign jewelry and quickly produce prototypes.
Advantages of 3D technology:
The use of 3D printing is relevant for many brands, including Cityscape Rings, Lace, Radian, Ross Lovegrove and others.
Construction
3D printing of buildings has become achievable. For the construction of structures, a mixture is taken, including cement, filler, plasticizer and other additives. The construction composition is squeezed out of the extruder nozzle in layers, repeating the computer model. 3D printers simplify and speed up the construction of structures, lead to a reduction in waste and manual labor costs.
There is no ideal machine for 3D construction in the world yet, but developments are underway. The Chinese organization Winsun has released a large-sized apparatus (60x100x400cm) for the production of floors, walls with the necessary holes and niches for utilities. Its minus is immobility (the finished building will need to be moved to another place).
Scientists from Spain, on the other hand, are designing small robotic systems. Their principle of operation is based on fastening to finished building elements and erecting the following parts. Time will tell which of the construction devices will be more preferable.
Education
3D printers are available not only for large companies and leading research centers. Prices for economy models start from several thousand, which makes them popular in the field of education. They are purchased for the equipment of schools, secondary special and higher educational institutions.
Advantages of 3D printing in education:
Summing up
3D printers are the most amazing technology of recent times. Initially, it was available for researchers, scientists, and now an inexpensive machine can be bought for entertainment. With it, it is possible to create various products and objects, design objects, develop an unusual design for everyday things. In production, the scope of use of devices is amazing: with their help you can print everything from food to architectural structures. Probably, such machines will soon become familiar appliances, like a vacuum cleaner, a refrigerator or a TV.
However, the widespread use of such equipment in production is still not so rosy.