3D printing watertight
Watertight 3D printing PT1: Vases, cups and other open models
Have you ever tried printing vases, bowls, cups and other waterproof models? If so, what type of filament did you use, what settings did you print it with? Were you ever able to make your model watertight?
You probably know by now that 3D models won’t be waterproof without any extra work. If you tried to fill various vases printed with regular settings (0.15mm – Quality, 15% Gyroid infill) with water, you probably found out that thin-walled models tend to leak a lot, whereas those with thick walls usually hold the water much better. The nature of 3D printing means it may not have the same characteristics that we are used to from the injection or blow-molded plastics, therefore it’s necessary to make few adjustments to prevent fluids from leaking. In this article, we present useful tips and tricks that prevent water leaks and will make your prints more functional.
Easy Isn’t Always the Best
Your first thought might be that the easiest way to accomplish a water-tight print is with some form of post-processing. Simply print the object, then cure it with epoxy resin, or smooth it with acetone, etc. These processes might not be the most practical solution though. You need to spend extra time on post-processing, even gather some required tools, manipulation with acetone might be required, etc. For these reasons, it’s better to design your print and adjust your slicer settings in a way that the print is waterproof from the start, and there’s no need for post-processing.
The good news is that we’ve run numerous tests for you to find the best settings to make watertight prints. We printed several dozens of test models to find where the waterproof boundary lies, then we compared our results along with some of the suggestions commonly given on the internet and we are happy to present the results to you.
Material Choice
There are filaments that provide good mechanical, temperature, or chemical resistance, but are there any types of materials that excel in their water resistance? Well, yes but actually no.
First of all, there are some filaments like PVA and BVOH that are completely unfit for attempting to print a watertight part because they are soluble in water. If you were to pour water inside a print created in one of these filaments, in no time it would start to leak and turn into something resembling something from someone’s nose. But is there any difference between PLA and PETG?
Here’s our verdict: If you print models with thick walls (6 perimeters / 2-3 mm or more), it actually doesn’t matter what material you print with. However, with thin walls (2-4 perimeters / 0.9-1.8 mm) the difference becomes clear. Here, the best water barrier is provided by PP, followed by CPE, PC, ASA and ABS. TPEE was slightly worse but still had very similar results. Other tested filaments (HIPS, Nylon, PETG, PLA, PVB) leaked significantly more.
Several sources claim that PLA can partially dissolve in water and lose its ability to hold water. The reality is that PLA won’t dissolve but in certain conditions can swell and serve as a wick for water, meaning in theory, there can be a situation where you would fill the vase with water and it would leak after several weeks.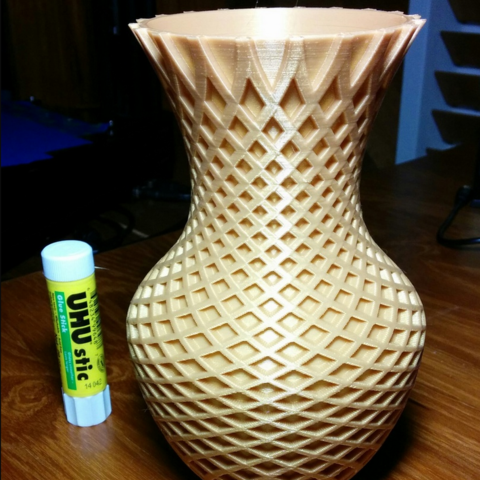 In our testing though, we didn’t have this problem with any of our test objects (printed with Prusament PLA). This included flower pots printed in PLA, that over our long testing period, we noticed no leakage at all (see our gardening article).
Choosing the right model
One of the keys to success is to avoid overly complex models. Models with complex shapes usually have more holes in their walls that might cause leaking. It’s also good to choose models with thick walls (2-3 mm or even thicker). If you choose a model that will allow you to set, for example, only 2 perimeters, it will probably be unable to hold water and will require some form of post-processing.
Layer height
Various articles say that you should increase the layer height to reduce layer seams, one of the main sources of leakage. Similarly, some people say that printing transparent prints is better with high layers too – and we disproved this hypothesis. Now we have disproven this method for printing waterproof models too. Printing with slightly thicker layers makes sense only for printing with wider nozzles but when we talk about 0.4 nozzles, it’s best to print with 0.15 mm layer height. Contrary to other people’s statements, we found that the lowest layer heights (0.05 mm) had the best waterproof properties and the highest layer heights (0.3 mm) had the worst. To be clear, it seemed that the main source of leakage wasn’t from contact between layers but seams and the transitions between solid infill and perimeters. Printing with 0.15 mm layer height not only provides great print quality but also quite good waterproofness. The main goal is to make the wall as dense as possible and we showed that the best way to achieve this is by printing with low layer height, solid infill and high temperature – see our older article about printing transparent parts.
Bottom/top layers
We didn’t forget to test a number of top/bottom solid layers. Interestingly, we found that the number of solid layers isn’t as important as the number of perimeters. All our test objects with 2-7 bottom solid layers (and 8 perimeters) were waterproof. It’s important to know that the bottoms of these cylindrical test objects were printed with a flat surface facing down on the heatbed and that the first layer may have become the main water barrier due to it being squished into the bed. The main problem with bottom solid layers is infill overlap between the solid layers and the perimeters. You can tweak these settings (print settings / advanced / infill overlap) to improve the connectivity or increase flow (see below).
Perimeters
Our test results show that the number of perimeters is the most important (most common) element influencing how waterproof the final print is, simply said: The more perimeters you use, the higher chance you have to end up with a waterproof print. In our tests, most of the 3D printed parts worked fine with 4-6 perimeters (wall thicknesses of 2-3 mm). Of course, various materials have different perimeters required to become waterproof. Below you will find limits for chosen materials when you print a simple test cylinder:
| Material | Minimal number of perimeters |
| ABS | 2 |
| ASA | 2 |
| CPE | 2 |
| PC | 2 |
| PP | 2 |
| TPEE | 3 |
| PETG | 4 |
| PLA | 4 |
| PA | 4 |
| HIPS | 5 |
| PVB | 5 |
Printing with one perimeter in vase mode was sufficient to become waterproof for all tested materials. This helped back up our finding that the main source of leaks found in prints is the seam created when changing layers. More simple models can be printed in vase mode but complex shapes may not. That’s why we consider two perimeters as the lowest value.
Flow
By increasing the flow setting, you can make the model more waterproof too but it has one great downside, the print will lose its precise dimensions and it will probably have an unsightly surface. It might not bother you much if you are printing a design that doesn’t require much precision, often then you can increase the flow to 105-110% (Filament settings / Extrusion multiplier), but don’t forget that it will likely cause a lot of stringing and oozing (PETG for example).
Increasing the flow is probably the simplest way to gain waterproof qualities for your 3D print. If you want to print with vase mode, this is probably the only way to seal the walls (unless you want to go down the post-processing road).
A Couple More Tips
- Make sure that the nozzle is clean outside and inside. Dust (and other) particles present in the nozzle, or the nozzle clogging, might increase the number of holes inside your print.

- If you print models with thick walls, it’s unnecessary to print them with 100% infill, but in this case, it is important to increase the number of perimeters. A higher number of perimeters not only increases the waterproofness but also improves the mechanical properties of the model.
- Increase temperature by 5-10 °C (according to the filament type). The most ideal settings are to increase the temperature in combination with low layer heights, this will improve the layer-to-layer connection. The result should be a model as dense as possible.
Summing It All Up
- Choose simple shapes for printing
- It’s best to print thin-walled models with PP or CPE
- Do not increase the layer height (0.15 or lower is good)
- The number of bottom layers doesn’t matter. However, set it to 5 or higher, just to be sure.
- Print with 4 perimeters or more (when not printing in Vase mode).
- Increase the flow if you can’t use more perimeters.
As we have shown, with some basic settings changes and the right choice in filament, it’s usually possible to obtain waterproof prints without any postprocessing, but what if we need a little more? Here are some postprocessing possibilities for getting the most out of your prints.
Acrylic lacquer
The simplest, user-friendly method for making a waterproof vase, is using clear acrylic varnish. Simply spray the model outside and inside a few times and let it dry. Acrylic varnish (matte and glossy) can be bought in an average hobby market or hardware store. Keep in mind that we don’t recommend using acrylic varnish to make food-safe models. For these cases, we suggest using certified food-grade epoxy resin or choosing another method of surface post-processing.
Nail polish
This may sound a little strange but Nail polish may seal the surface too. Its main advantage is accessibility, simply buy it in a drugstore or ask anyone who uses it. The main disadvantage of this method is its impractical application, nail polish is usually in small bottles with tiny brushes. Plus it’s quite expensive compared to other methods.
Epoxy resin
Sealing the surface with food-grade epoxy resin will not only help you make the model waterproof but it’s also one of the few methods that can be used to make food-safe 3D printed dishes. Keep in mind that using epoxy resin is very messy work that comes with fumes that will likely require extra safety measures. It is highly recommended to use gloves and respiratory protection at a minimum. You should always follow the manufacturer’s recommendations, especially when trying to make food-safe models. Curing the epoxy resin may also take several days adding to your wait time to complete your project.
Chemical smoothing
By far the most elegant method of post-processing is chemical smoothing. It’s relatively clean work, although it usually comes with some odor. However, the result is a clean, smooth version of the material you used. Probably the biggest downside of this method is the low number of materials that can be easily smoothed. To be clear: every type of filament has its solvent but there are only four materials that can be smoothed with common and safe chemicals – ABS, ASA, HIPS and PVB. We’ll not discuss the methods of chemical smoothing here, it would take the whole article. Wait a minute, we’ve done that already! Check our older article and read our material guide to find out more.
Making vases, cups, and other waterproof models is not rocket science. With proper print settings, you can print a myriad of models and with a little bit of post-processing, nearly everything can become waterproof. You may object that we didn’t mention all of the possible variants. For example, vacuum impregnation or annealing is missing here, but hopefully, we will all agree that these are advanced and rarely used methods, even by the most experienced makers. In a future article, we’ll show you whether it’s possible or not to print truly watertight (airtight) models, for example, closable boxes that can be submerged in water for some time. In the meantime, we would love for you to share your watertight prints with us. Happy printing!
Watertight prints | Prusa Knowledge Base
Relevant for
:
MINIMINI+MK2.5MK2.5SMK2SMK3MK3SMK3S+MMU2SPlus 1.75 mm
Last updated
a year ago
This article is also available in following languages:
A print coming from molten plastic one might assume that it is water-tight, but that is not always the case. How to make an object look good and what makes it watertight does not always overlap. That said, the tips presented here might help you make your printed parts more robust, even if they should not be a container for liquid.
Watertight does not mean food safe! Foodsafe 3d prints is (potentially) another can of worms!
Geometry
The shape of the model obviously matters. Thick walls which require infill is often waste in this case. It can cause irregularities and may leak into the void between the inner and outer walls, creating a place where all kinds of nasty stuff can grow.
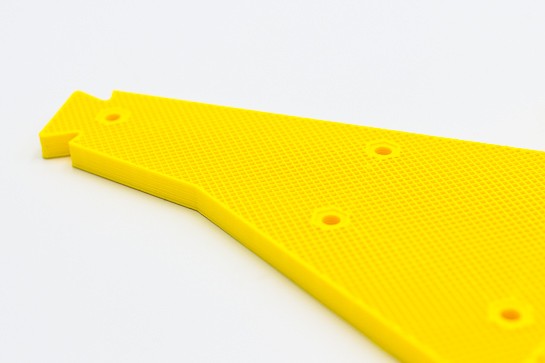
A wall should be even. Artifacts like protrusions for showing the water-level etc. can cause issues. In the picture below is a PLA print where everything is water-tight, except by a little nubbin for this purpose.
Perimeters
More of them! You want to go with at least 3-4 perimeters for a single wall. Depending on the geometry you can also increase this to 5-6, but is rarely necessary.
Temperature
More of if it! To ensure a proper bond between the layers we would recommend raising the Nozzle-temperature with 5-10C over the presets available or use the highest recommended temperature on the box of the filament (You can also go about 5c above this). Some experimentation needed.
Extrusion-multiplier
This refers to the Flow-rate of the filament and is set in PrusaSlicer under Filament Settings. Increase this by 5-10 percent from the default value. Another way of manipulating this is to set the line-width 5-10% wider (i.e. from 0.4mm to 0.44mm), but this can affect other aspects of your print. If in doubt experiment, or do the simple option.
Layer-height
Very high layer-heights just won't do, but having very tight layers will also increase the number of places where something can go wrong. CNC-kitchen found that the most durable prints were at 0.15mm height, but 0.2 will do fine. If you want to print fast and have very high layers (like 0.4mm+) get a larger nozzle. Generally, for best results, you should not use a height of more than 60-65% of your nozzle-width.
XY-Overlap and other settings
This applies more to if your print is leaking from the bottom, and you have tested with the previous suggestions. XY-Overlap is a variable in PrusaSlicer that says how much a line of solid infill crosses the perimeter. This is by default set to 25% (of nozzle diameter, so 0. 1mm). Increasing the temperature and extrusion-multiplier will in turn affect this, but if you are still seeing leakage you can try to increase this to 40-50%.
Materials
These tricks should work with most materials. On materials like ASA or ABS, these tricks might not be necessary if you simply vapor-smooth your prints with acetone.
The Complete Guide to Stereolithographic (SLA) 3D Printing
Stereolithographic (SLA) 3D printing is gaining immense popularity due to its ability to produce highly accurate, isotropic and waterproof prototypes and models with fine details and smooth surfaces from various modern materials.
This comprehensive guide explains how SLA printing technologies work, why thousands of professionals use them today, and how this 3D printing technology can be useful in your work.
White Paper
Download our white paper to find out how SLA printing works, why thousands of people use it today, and how this 3D printing technology can help your work.
Download white paper
The development of 3D printing technology continues to influence how companies approach prototyping and manufacturing. This technology is becoming more accessible, and equipment and materials are developing in accordance with the possibilities and requirements of the market. That's why today designers, engineers and others are integrating 3D printing into workflows at all stages of development.
3D printing is helping professionals across industries reduce recruitment costs, accelerate iteration, streamline manufacturing processes, and even discover entirely new business models.
Stereolithographic 3D printing technology has evolved significantly. In the past, resin 3D printers were monolithic and costly, requiring skilled technicians and costly service contracts to operate. Today's small desktop printers are highly flexible and produce industrial-quality products at a much lower cost.
Stereolithography is a type of additive manufacturing.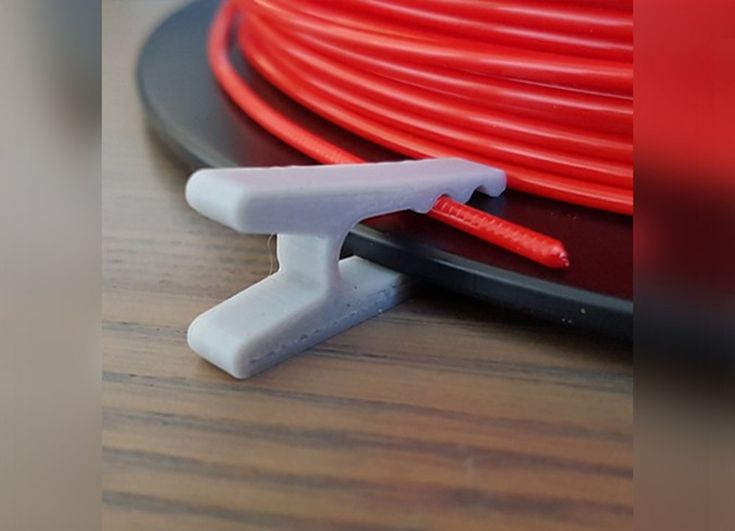 It is also known as photopolymerization in the bath or 3D printing using polymer resin. Devices that use this technology have a common principle of operation: under the influence of a light source (laser or projector), a liquid polymer turns into a solid plastic. The main differences are in the location of the main components such as the light source, work platform and resin tank.
See how stereolithography 3D printing is done.
Stereolithographic 3D printers use light-sensitive curable materials called "polymers". When stereolithographic polymers are exposed to specific wavelengths of light, short molecular chains join together causing the monomers and oligomers to polymerize into either rigid or flexible patterns.
Graphical representation of the main mechanisms of stereolithographic 3D printing.
Models printed on SLA printers have the highest resolution and accuracy, the finest detail, and the smoothest surface of any 3D printing technology, but the main advantage of this method is its versatility.
Materials manufacturers have developed innovative formulas for stereolithographic polymers with a wide range of optical, mechanical and thermal properties similar to standard, engineering and industrial thermoplastic resins.
Comparison of 3D stereolithography with two other common plastic modeling technologies: Fused Deposition Modeling (FDM) and Selective Laser Sintering (SLS).
Sample
Experience the quality of 3D stereolithography for yourself. We will send a free sample of the printed model directly to your office.
Request a Free Print Sample
Learn how to go from design to 3D printing with a Form 3 3D printer. Watch this 5-minute video to learn the fundamentals of using a Form 3 printer, from software and materials to processes printing and post-processing.
Use any CAD software or 3D scan data to design the model and export it to a 3D print file format (STL or OBJ). All printers based on SLA technology work with software that allows you to set print parameters and separate the digital model into layers. After the settings are complete, the model preparation software sends instructions to the printer via a wireless or cable connection.
More advanced users can design directly for SLA technology or, for example, print models with voids to save materials.
After a quick check of the settings, the printing process starts. The printer may run unattended until printing is complete. In printers with a cartridge system, material is replenished automatically.
Formlabs' online Dashboard allows you to remotely manage printers, resins, and employee access.
After printing is complete, models should be rinsed with isopropyl alcohol to remove resin residue from their surface. After the washed models have dried, some materials require final polymerization, a process that ensures the best possible strength and stability of the parts. Finally, remove the support structures from the models and sand down the remaining traces of the supports for a clean finish. Models produced with SLA technology can be machined, primed, painted or assembled depending on the intended use.
Final polymerization is particularly important for functional polymer resins used in engineering, dentistry and jewellery.
Engineers, designers, fabricators and others choose 3D stereolithography because it provides excellent detail, smooth surfaces, superior model fidelity, isotropy, and water resistance. In addition, it allows you to work with various materials.
Because 3D printing builds models layer by layer, the strength of finished parts can vary depending on the orientation of the part relative to the printing process: the X, Y, and Z axes will have different properties.
Extrusion-based 3D printing processes such as deposition filament modeling (FDM) are anisotropic due to a special approach to creating different layers during the manufacturing process. This anisotropy limits the application of FDM technology or requires additional changes in the design of the model to compensate for it.
Check out our detailed guide comparing FDM vs. SLA 3D printers to see how they differ in terms of print quality, materials, application, workflow, speed, cost, and more.
Stereolithographic 3D printers, on the other hand, allow the production of highly isotropic models. Achieving detail isotropy relies on a number of factors that can be tightly controlled by integrating the chemical composition of materials with the printing process. During printing, the components of the polymers form covalent bonds, but when creating subsequent layers, the model remains in an "immature" state of partial reaction.
When immature, the resin retains polymerizable groups that can form bonds between layers, giving the model isotropic and waterproof properties after final curing. At the molecular level, there are no differences between the X, Y, and Z planes. This results in models with predictable mechanical characteristics critical for applications such as jigs and fixtures and finished parts, as well as functional prototyping.
SLA printed parts are highly isotropic compared to FDM parts.
Due to its isotropic nature, stereolithographic printed models, such as this jig for Pankl Racing Systems, can withstand directional loads during the manufacturing process.
SLA printed objects are continuous, whether they are solid or have internal channels. Watertightness is important when it is necessary to control and predict the impact of air or liquid flows. Engineers and designers are using the water resistance of stereolithography printers for air and fluid flow applications in the automotive industry, biomedical research, and to test the design of parts in consumer products such as kitchen appliances.
OXO relies on the water resistance of stereolithographic printed models to create durable working prototypes of air and liquid products such as coffee makers.
Stereolithographic 3D printing is used to produce precise, reproducible components in a variety of industries, including dentistry and manufacturing. In order to produce accurate models during the printing process, many factors must be strictly controlled.
The quality of stereolithographic 3D printing is between standard and precision machined. SLA has the highest tolerance compared to other commercial 3D printing technologies. Learn more about tolerances, accuracy and precision in 3D printing.
The heated resin tank combined with the closed working environment provide virtually the same conditions for every model. The higher accuracy also depends on the lower printing temperature compared to thermoplastic-based technologies in which the raw material is melted. Because stereolithography uses light instead of heat, it prints at close to room temperature and models are not subject to thermal expansion and contraction.
Dental example (comparison of a scanned component with the original CAD model) demonstrating the ability to maintain tight tolerances for the entire stereolithographic model.
LFS stereolithography 3D printing involves an optic in a Light Processing Unit (LPU) that moves along the x-axis. parabolic mirrors so that it is always perpendicular to the plane of the platform, so it always moves in a straight line, ensuring maximum precision and accuracy. This allows consistency to be achieved as the size of the equipment increases, for example, when working with a large-sized Formlabs Form 3L stereolithography printer. The LPU also uses a spatial filter, which forms a clear laser spot.
The characteristics of the individual materials also play an important role in ensuring the reliability and reproducibility of print results.
Formlabs Rigid Resin has a high green modulus, or modulus of elasticity, before final polymerization, allowing you to print very thin models with high precision and reliability.
Stereolithography printers are considered the best 3D printers due to the smooth surface of the produced models, the appearance of which is comparable to parts produced by traditional methods such as machining, injection molding and extrusion.
This surface quality is ideal when a perfect finish is needed and also helps reduce post-processing time because these models are easy to sand, polish and paint. For example, large companies like Gillette use stereolithography 3D printing to create finished products such as razor handles in their Razor Maker platform.
Large companies like Gillette use stereolithography 3D printing to create finished products such as razor handles in their Razor Maker platform.
The Z layer height is often used to determine the resolution of a 3D printer. On Formlabs stereolithographic 3D printers, it can be adjusted from 25 microns to 300 microns to trade off speed and print quality.
FDM and SLS printers typically print Z-axis layers between 100 and 300 microns wide. At the same time, a part printed with 100 micron layers on an FDM or SLS printer is very different from a part printed with 100 micron layers on an SLA printer. Models printed on a stereolithographic printer have a smoother surface immediately after printing, because their outer walls are straight, and each new printed layer interacts with the previous one, smoothing out the effect of the stairs. When printed on an FDM printer, layers are often visible in models, and the surface of models printed on an SLS printer has a grainy structure due to sintered powder.
In addition, the stereolithography printer can print fine details: the Form 3 laser spot size is 85 microns, while industrial SLS printers have a laser spot size of 350 microns, and FDM-based devices use nozzles with a diameter of 250– 800 microns.
Models printed on FDM printers often show layer lines and may have inaccuracies around complex features. Models printed on stereolithography printers have sharp edges, a smooth surface, and almost imperceptible layer lines.
The advantage of SLA polymers lies in a wide range of formulations offering a variety of characteristics: they can be soft or hard, contain additives such as glass and ceramics, or have special mechanical properties such as high bending temperature under load or impact resistance. Materials can be designed for a particular industry, such as dentures, or have properties close to those of final materials to create prototypes that can be tested and run under stress.
Ceramic Resin can be 3D printed with a stone-like texture and then fired to create a ceramic product.
In some cases, it is this combination of versatility and functionality that is leading businesses to use polymer-based 3D printing in-house. After solving existing problems through the use of a certain functional polymer, other applications are usually quickly discovered. In this case, the printer becomes a tool for discovering the various properties of different polymers.
For example, hundreds of engineers in the Design and Prototyping group at the Advanced Manufacturing Equipment Research Center (AMRC) at the University of Sheffield have access to 12 stereolithographic 3D printers and various construction materials that they use in numerous research projects for these partner companies like Boeing, Rolls-Royce, BAE Systems and Airbus. They printed High Temp Resin washers, brackets, and a mounting system for a sensor that must operate in high temperature conditions, and used Durable Resin to create complex spring components for a material handling robot as part of a composite manufacturing automation system.
AMRC engineers have access to 12 stereolithographic 3D printers and various construction materials, allowing them to create custom-designed parts for a variety of research projects, such as brackets for a stacking robot (above) and mounts for an environmental sensor. high temperature (below).
Material selection
Need help choosing a material for 3D printing? Our new interactive materials wizard will help you make the right material decision based on what you're going to use it for and the properties you care most about in our growing range of polymers.
Get material recommendations
Stereolithographic 3D printing makes it easier for businesses across industries to innovate. Such industries include engineering, manufacturing, dentistry, healthcare, education, entertainment, jewelry, and audiology.
Rapid prototyping with 3D printing enables engineers and developers to turn ideas into working proofs of concept, transform concepts into high-quality prototypes that look and work like end products, and take products through testing phases to launch into mass production.
Find out more
By creating the necessary prototypes and 3D printing special tools, molds and production aids, manufacturing companies can automate production and optimize workflows at a much lower cost and in much faster time than traditional manufacturing. Thus, production costs are reduced and defects are prevented, quality is improved, assembly is accelerated and labor productivity is increased.
Find out more
Digital Dentistry reduces the risks and uncertainties associated with human error, enabling consistent quality and precision at every step of the workflow, and improving patient care. 3D printers can produce a range of high quality custom products at low cost, providing exceptional fit and reproducible results.
Learn more
3D printers are multifunctional tools for creating immersive learning and research environments. They stimulate creativity and introduce students to professional-level technology, enabling the implementation of the STEAM method in the fields of science, technology, art and design.
Find out more
Affordable, professional-grade desktop 3D printers help clinicians produce medical devices that meet individual needs and improve patient outcomes. At the same time, the organization significantly reduces time and money costs: from laboratories to operating rooms.
Learn more
High resolution printed physical models are widely used in digital sculpting, 3D character modeling and prop making. 3D-printed models have been featured in animated films, video game characters, theatrical costumes, and even special effects for blockbuster films.
Learn more
Professional jewelers use the power of CAD and 3D printing to rapidly prototype, customize jewelry to customer specifications and produce large batches of blanks for casting. Digital tools allow you to create dense, highly detailed models without the tedious, error-prone production of stencils.
Learn more
Hearing professionals and labs use digital workflows and 3D printing to simplify the production of high-quality custom and hearing aids, as well as to mass-produce behind-the-ear hearing aids, hearing protectors, custom earmoulds, and headphones .
Find out more
Many companies are starting to use 3D printing technology through service bureaus and laboratories. Outsourcing can be a great solution when the need for 3D printing is infrequent or you need to do one-off jobs using materials that have unique properties or produce special models. Service bureaus can also provide advice on various materials and offer additional services such as design or improved finishes.
The main disadvantages of outsourcing are the high cost and duration of production. Often, outsourcing becomes a step on the way to in-house production as needs grow. One of the main advantages of 3D printing is its speed compared to traditional production methods. But it is noticeably reduced when the delivery of the model produced by the involved organization takes several days or even weeks. As demand and production capacity increase, the costs of outsourcing are rising rapidly.
With the increasing availability of industrial quality 3D printing today, more companies are opting to bring 3D printing into their factory right away, vertically integrating it into existing workshops or labs, or providing printers to engineers, designers and other professionals who benefit from digital transformation. projects into physical models or are engaged in the production of products in small batches.
Compact desktop stereolithography 3D printers are an excellent solution for rapid model production.![]() Depending on the number of parts needed and the volume of prints, the investment in a compact 3D printer can pay for itself in just a few months. In addition, compact appliances allow you to purchase just the amount of equipment you need to run your business and scale your production by adding more units as demand grows. Using multiple 3D printers also allows you to print models from different materials at the same time. And when the need arises for the production of large parts or the use of non-standard materials, service bureaus can come to the rescue.
Depending on the number of parts needed and the volume of prints, the investment in a compact 3D printer can pay for itself in just a few months. In addition, compact appliances allow you to purchase just the amount of equipment you need to run your business and scale your production by adding more units as demand grows. Using multiple 3D printers also allows you to print models from different materials at the same time. And when the need arises for the production of large parts or the use of non-standard materials, service bureaus can come to the rescue.
INTERACTIVE
Try our interactive ROI tool to see how much time and money you can save by printing with Formlabs 3D printers.
Calculate your savings
High production speed is an important reason to buy a desktop 3D printer. When working with a print bureau, there are delays related to the speed of production, communication and delivery. A desktop 3D printer like the Form 3 delivers models in hours, allowing designers and engineers to print multiple parts a day.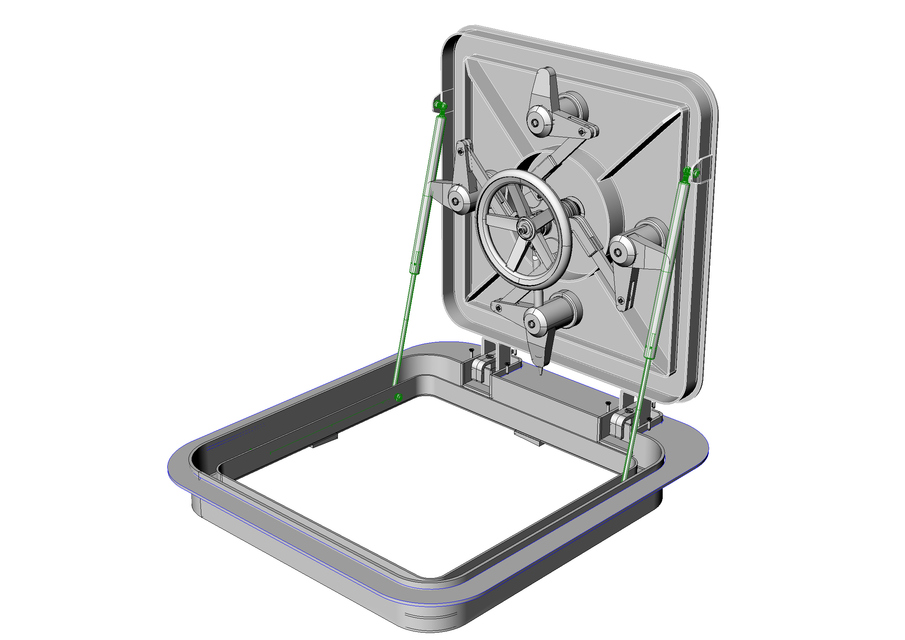 This contributes to faster iterations and significant time savings in product development, as well as rapid testing of mechanisms and assemblies, avoiding costly tool changes.
Purchasing a desktop 3D printer saves a lot of money by eliminating bureau services and traditional processing methods, as their cost rises sharply with increasing demand and production volumes.
For example, the production engineer and others at Pankl Racing Systems used stereolithographic 3D printing technology to produce products on a tight schedule. This allowed them to independently manufacture custom-designed jigs and other small-sized components for the production line. While stereolithography was initially viewed with skepticism, this technology proved to be an ideal solution to replace the machining of a number of tools. In one of the cases, it made it possible to reduce the manufacturing time of conductors by
By 3D printing custom-designed jigs, Pankl Racing Systems has significantly reduced both order preparation time and production costs.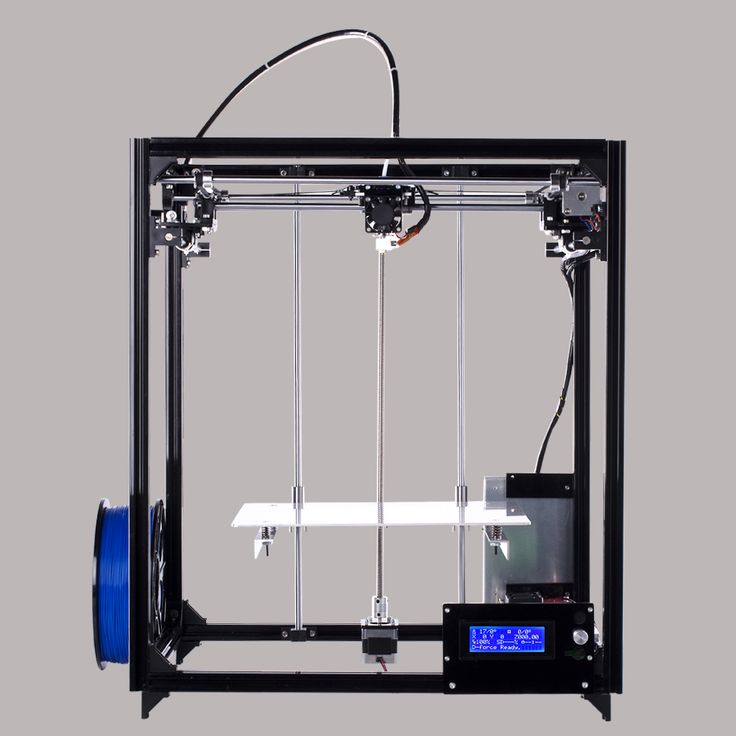
Compact units allow you to purchase just the amount of equipment you need to run your business and scale your production by adding new units as demand grows. Using multiple 3D printers also allows you to print models from different materials at the same time.
The University of Sheffield's Manufacturing Advanced Research Center (AMRC) has an additive manufacturing station with 12 Form 2 stereolithography (SLA) 3D printers that hundreds of engineers working on various projects have access to.
Formlabs offers two high-precision stereolithographic 3D printing systems, an ever-growing range of specialty materials, intuitive print preparation and process management software, and professional services, all in one solution.
To learn more about 3D stereolithography, experience it for yourself: request a free printed sample in your choice of material, delivered right to your door.
Request a Print Sample
50 3D Printing Ideas
It looks like we're about to start drowning in useless stuff made for 3D printing projects. But you can do something that will really be useful! If you're running out of ideas, here's a list of 50 3D printable items you're unlikely to throw away.
Bag clip with screw cap
Now the bag clip will have a new feature - a hole with a lid for quick access, as in the photo. This clip is easy to print and convenient to use. Strange that no one thought of this before.
Author: Minkix
Where to download: Thingiverse
Modular Furniture Connector
This connector allows you to quickly assemble modular furniture. The default model is designed for 17×17 mm wood, but the size and material can be changed to suit your needs using a parametric file for customization.
Creator: LeFabShop
Where to download: Cults
Sealant cap
No more throwing open sealant tubes away. The screw cap for the nozzle presses the o-ring tightly against the body of the tube and closes the access of air to the solvents inside.
Author: The-Mechanic
Where to download: Thingiverse
Laptop niche
Now the laptop will always be at hand, but hidden from prying eyes in a special niche that is attached to the bottom of any coffee table.
Author: Too Snide
Download: Thingiverse
Phone Holder - Candice
Elegant and simple, perhaps the easiest thing you can 3D print.
Author: Clem.C2
Where to download: Cults
Polypanels
The idea for Polypanels came from Devin Montes. A polypanel is a series of three-dimensional building blocks. The individual elements of a Polypanel look simple, but if you print a lot of them and different types, you can create all sorts of complex designs. Something like LEGO where you can design each brick.
Author: MakeAnything
Where to download: MyMiniFactory
Clothes Hook
This clothes hook is designed as an E3D nozzle and can be printed as many times as you need for all your clothes.
Author: Filar3D
Download: Cults
Plant Pot
This anatomical brain flower pot is easier to print than it looks, creator DrFemPop says. For assembly, it is only necessary to glue the parts after printing. It turns out an original house for plants.
Author: DrFemPop
Where to download: Cults
Door Holder
This is a simple solution for holding a door. Double-sided adhesive tape is sufficient for surface mounting.
Author: Akiraraiser
Where to download: Thingiverse
Piggy bank
A simple piggy bank for beginners, no complicated settings.
Author: lecaramel
Where to download: Thingiverse
Cable ties
This tie is perhaps the simplest and most ingenious of all devices. Clips are printed as a whole sheet at once, and then the required amount can be cut off from it.
Author: Sunshine
Where to download: Cults
Roller ruler
An indispensable device if you need to measure the length of something non-linear: a piece of rope, a curved line, a perimeter with bends, etc. The ruler is called Geneva and has step 5 mm.
Author: MechEngineerMike
Where to download: Thingiverse
Pliers
This small solid piece of plastic can replace your pliers/pliers. These forceps take the force to the handles and redistribute it at the end of the grip. It's definitely pliers. Just smarter.
Author: BYU CMR
Where to download: Thingiverse
Cylindrical textured box
Beautiful tube from Syboulette decorated with hexagons. Well suited as a kitchen utensil for storing oatmeal, rice and other crumbly substances.
Author: Syboulette
Where to download: Cults
Door Stop
This stop is modeled after the Guyer Anderson cat statue in the British Museum. The design is hollow, which allows you to fill the limiter with something for additional weight.
Author: Duaneindeed
Where to download: Cults
Plague Doctor Mask
Not exactly the most useful item on the list since bubonic plague is a thing of the past. But a mask can come in handy, for example, when you need to clean up after your pet. And you can also go to the carnival in it.
Author: Odrivious
Download: Cults
Universal Spool Holder
This adjustable spool holder uses a spring and an adjustable rewind clutch. It's the perfect place to store those pesky wires.
Who made it: Vincent Goenhuis
Where to download: Thingiverse
Sturdy waterproof box
This tight-fitting box will keep things from getting wet. Print it in PLA or PETG, add a flexible TPU seal and M3 screws for the spring hinge, and you're done.
Author: ZX82
Where to download: Cults
Dice
This dice is suitable for flat 3D printing and has a face size of 16mm.
Author: Devin Montes (MakeAnything)
Where to download: MyMiniFactory
Collapsible Coat Rack
Really cool coat rack. That's all there is to say about her.
Author: Komaru
Where to download: Thingiverse
Business Card Holder
Perfect for showing off your new business cards to your Wall Street friends. What could be more delightful than this Zippo card holder with flip-top lid.
Author: PentlandDesigns
Where to download: Cults
Pencil and pen holder
Iceberg or melting beehive? Be that as it may, this is a handy pen and pencil holder that is cheaper to print than to buy.
Author: BeeVeryCreative
Where to download: Cults
Groovi Monster Audio Amplifier
This is a passive smartphone audio amplifier that looks stylish and does the job well. It's called Groovi Monster for a reason.
Author: 3DShook
Where to download: Cults
Cup holder
Can be used not only as a cup holder, but also as a coaster for hot dishes. The dimensions of the template are easily adjusted to suit any size cookware.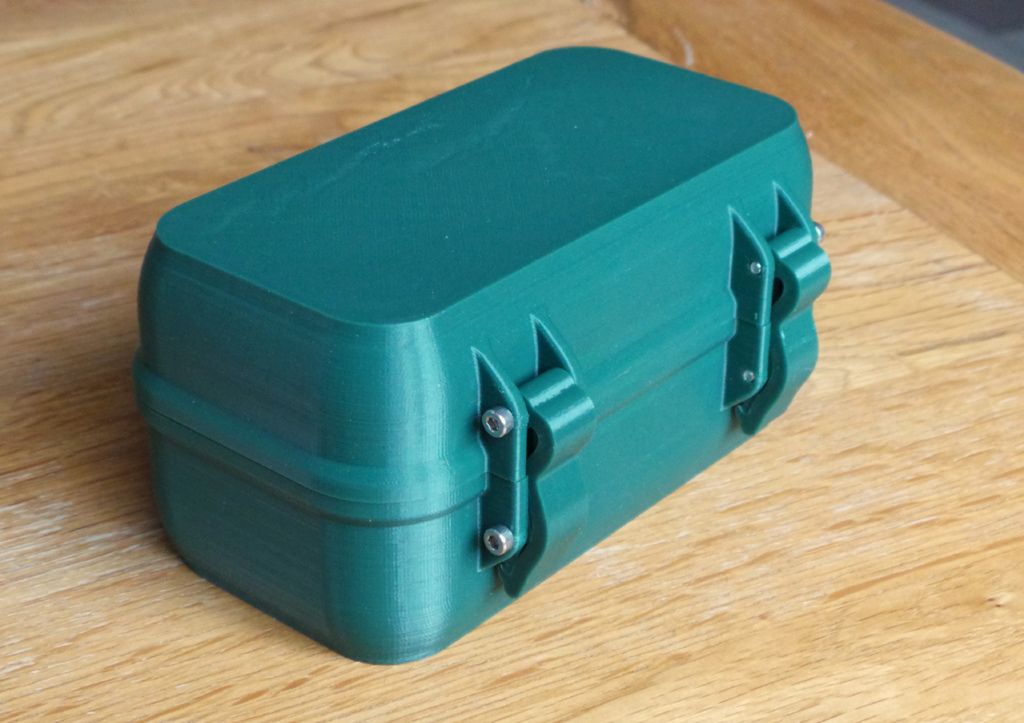
Author: jmdbcool
Where to download: Thingiverse
Clamp
Designed to hold various materials, including the ends of the wire in the coil. Also great as a clothespin replacement.
Author: Med
Where to download: Cults
Pencil box
Suitable for storing all your desk trivia and trinkets (memory cards, rubber bands, pencils, paper clips, etc.).
Author: Monkey3D
Where to download: Cults
Headphone holder
This is a duck. Yes, you can hang headphones on it.
Author: Toshi_TNE
Download: Thingiverse
Polyhedral Succulent Pot
Unusual geometric pots for your growing succulent collection. These small pots can be configured to be connected together.
Author: PrintFutura
Download: Cults
Survival whistle
This is a survival whistle with original design. It is durable, easy to make and very loud (118 dB is more than enough to be heard in an emergency).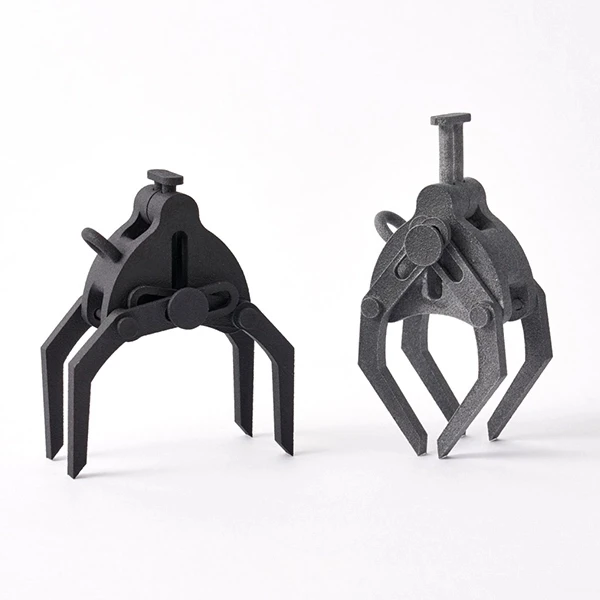
Author: Joe Zisa
Where to download: Thingiverse
Measuring cube
A simple and original measuring cube for the kitchen. On each side there are recesses for measuring the volume of ingredients (in cups - according to the American system, and in metric units for everyone else). It is best to print with PETG material, it is the safest for products.
Author: iomaa
Download: Thingiverse
Hinge
This is a parametric hinge that can be sized to fit your needs.
Written by Rohin Gosling
Where to download: Thingiverse
Car Eyewear Holder
Attaches to your car's sun visor. Glasses will always be at hand.
Author: Trevor Long
Download: Thingiverse
Opener
The simplest things are usually the most useful. Convenient and easy to print opener. Covers the sharp edges of the cork as much as possible, protecting you from injury.
Author: Jeremy Peterson
Download: Thingiverse
Superhero Keychains
Sometimes you need to remind yourself of your hidden superpowers. Stylish and cool keyrings are well suited as a small gift.
Author: Formbyte
Where to download: Cults
Headphone stand
It will be useful for music lovers and gamers who use headphones a lot and often. After all, now they will no longer roll around anywhere.
Author: MakerBot
Where to download: Thingiverse
Bag clip
The model consists of two printed parts. Allows you to keep packages closed and keep food fresh longer.
Author: Walter Hsiao
Download: Thingiverse
Plastic wrench
Handy wrench, but don't choose soft plastic to make it.
Author: Daniel Noree
Where to download: Cults
Sliding Decal
No more worrying about whether cups are clean or dirty now in the dishwasher! With the help of a special mechanism, the slider easily changes the inscription on the plate.
Who made it: MiddleFingerBoss
Where to download: Thingiverse
Collapsible basket
Cool picnic item. A folding square basket with five sections is printed from several parts and then glued together. For product safety, it is recommended to use PETG plastic.
Author: PatternToPrint
Where to download: Cults
Self-watering plant pot
Houseplants are dying from your forgetfulness? This will not happen again! This pot will water them by itself, and your conscience will be clear.
Author: Parallel Goods
Where to download: Cults
Maze Gift Box
Cash is not the most original gift. But if you present them in such a gift box, your friend will surely like it. The lucky recipient will have to work hard to get to the prize, because there is only one right way.
Author: Robert
Download: Thingiverse
Wired headphone holder
The headphones will now be protected from tangling and breakage.
Author: Robert
Where to download: Thingiverse
Tube Squeezer
Helps squeeze out the contents of the tube to the last drop. Wide enough to fit most tubes on the market. Printed in three separate parts.
Author: Justin Otten
Where to download: Thingiverse
Webcam slider shutter
The best thing for the paranoid and just for those who are uncomfortable being under the gun of a webcam. Instead of sticking tape or sticky tape over the lens, attach a slider shutter to the body and open it when you need a video call.
Author: Horizon Lab
Where to download: Cults
Hexagonal Prefabricated Drawers
Useful to free your desk from the noodles of cables, wires and just every little thing. The design can be easily expanded if necessary.
Author: Dan O'Connell
Where to download: Cults
Wall Mounted Phone Shelf
Attach the shelf to a power outlet and place your phone on it while charging. The model also has a corner slot that holds your smartphone or tablet upright for watching videos.
Author: Tosh Sayama
Where to download: Cults
Card Shuffle Machine
Awesome item for poker lovers.