3D printer first layer test
3D Printing - The Perfect First Layer
Prerequisites:
-Clean Build Plate (Isopropyl Alcohol 90% or higher recommended)
-Flat Build Surface (we recommend our 3DMaker Polypropylene Build Plate)
-Quality Filament (we recommend our 3DMaker Pro Series Filament)
-Precision Printer Nozzle (we recommend our 3DMaker Printer Nozzles)
-Digital Calipers (we recommend Neiko 0-6" Digital Calipers)
-Calibrated Extruder esteps (Step-By-Step Tutorial)
-Download free Bed Level Wizard and First Layer Test STL from Downloads section
The most important step in 3D printing is a great first layer. When I read forums I see many posts about different issues that people are having from adhesion issues to warping. I would estimate 90% of those 3D printing issues could be traced back to an incorrect first layer. For 3D printing, it is vital that your first layer is perfect. ..or close to it. If you don't get that part right, you print is destined for failure.
There are several steps to getting a great first layer but if you break them into sequential steps it is extremely easy to achieve. We will go over each of these steps to get your print off on the right foot:
- Bed Leveling
- Hotend Temperature
- Bed Temperature
- First Layer Speed
- First Layer Height
- Fan Speed
- Calibrating Z-Offset
At the end of this guide you will feel confident knowing your first layer will lay down perfect ensuring your print succeeds.
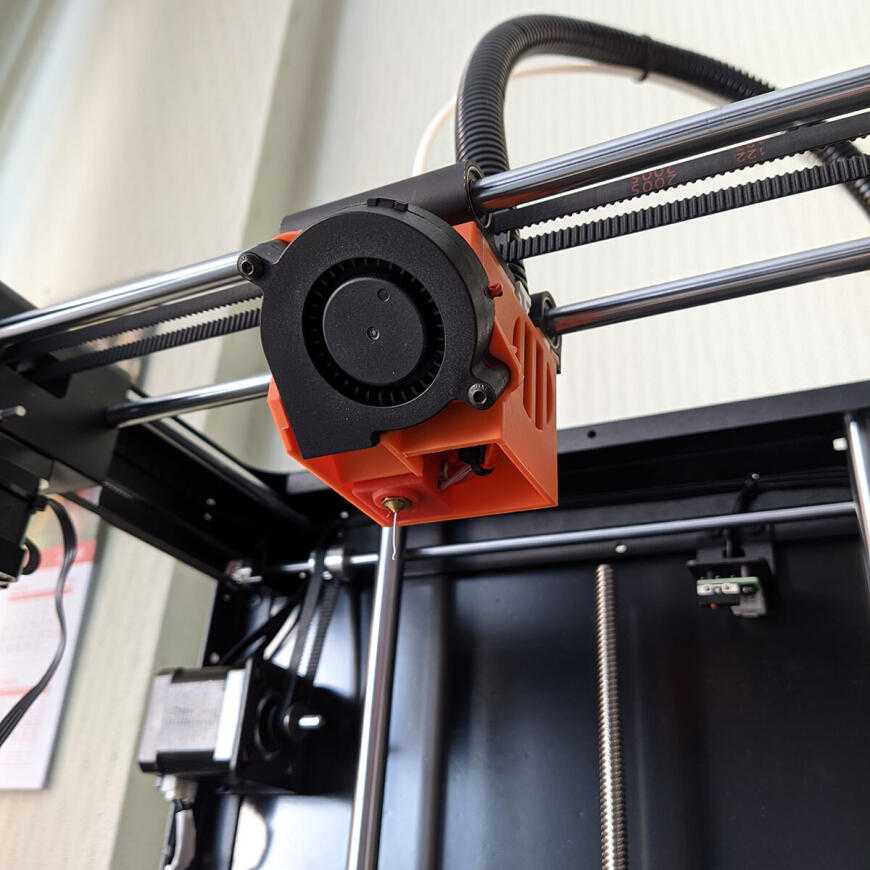
The first step is to make sure you have a level bed. Some machines come with a bed level wizard built into the machine. This automatically moves the nozzle to the four corners and center of the bed. It will typically raise the Z axis between moves to ensure you don't scratch your bed. This makes life easier but it is not completely necessary. You can also download our free Bed Level Wizard in the download section which can be configured for your specific printer. The steps will be the same regardless of which method you go with.
- Set your print bed to your normal operating temperature before doing any leveling. Heat can alter the level so doing this on a cold bed could give poor results. While your bed is heating verify that the tip of your nozzle is clean from any filament. All filament must be removed from the tip prior to leveling
- Once the bed is heated and the nozzle is clean, begin the leveling process by running the g-code you generated from our Bed Level Wizard or with your printers built in wizard if it has one.
- Regardless of which method you choose, the nozzle should "home all" and then go to one of the corners of the bed and lower close to the build surface. Once nozzle has stopped moving, slide a piece of paper between the nozzle and bed. If you are unable to fit paper between them you might need to tighten your bed adjustment knobs to lower the bed until it fits.

- Wiggle the paper in and out while at the same time loosening the bed adjustment knobs until the paper just starts to get pinched between the nozzle and build surface.
- Do this for each corner and then verify the center is roughly the same.
- Repeat this process again until all four corners have the same resistance when paper is placed between the nozzle and bed. You will find that each of the four bed level knobs will need slight adjustments during the second round. This generally takes a minimum of two times going around to get a good level. Note: If you get the four corners level and the center is too low you may need to put a piece of tape under the center of your build surface to compensate for an uneven bed. If it is too high in the middle, you can try flipping the build surface (ex. glass) over and using the tape method.
The temperature you print at will affect both layer adhesion (part strength) and also first layer adhesion to the build surface. 3D filament can extrude from the nozzle at a much lower temperature than what is recommended by the manufacturer. The problem with this is it will extrude "dry" instead of "molten." You want your filament, especially on your first layer, to come out molten so that it fuses to the build surface. For example, if the PLA you're using recommends 190-220, I recommend trying to stay around 210-215 for the first layer and then lower to 205 the rest of the print if necessary. This will ensure the filament will bond with the build plate but on later layers it will still perform well on overhangs and bridging. As mentioned, PLA will likely still extrude at 190 just fine but your layer adhesion will suffer at these low temperatures. Keep in mind you want the layers of your print to merge into one cohesive body.
For this I typically follow the filament manufactures recommendation. If they say that a heated build plate is optional I still turn on my heated bed because it allows the part to pop off on its own after it has cooled when the print is complete. It beats accidentally damaging your print trying to pry it off the build surface. One thing to watch out for is overheating your bed. This tends to soften the bottom layers causing it to sag which causes the "elephant foot."
This is a topic many hobbyists will disagree with me on. I print every material, every time, at 15 mm/s for the first layer. This is very slow but you want to make sure your filament has time to fully melt in the hotend before getting extruded. This avoids "extruding dry" which can make your initial layer adhesion suffer. Sure, I know some materials I could get away with double this speed but at 15 mm/s I know for certain I won't have to restart a print from a failed first layer. When you think about how many layers you are printing, slowing just one down changes your print time by a negligible amount so why rush it? You can push the following layers all you want, but keep your first layer slow.
90% first layer height? Nope. Regardless of what layer height I am printing with I usually stick with a 0. 24mm initial layer height for a 0.4mm nozzle. The exception is for PETG which tends to build up on around the nozzle during the first layer. For PETG I like a first layer height of 0.28mm which seems to help with the build-up issue PETG is known for. There are a lot of users that swear you need to "squish" your first layer with a layer height of less than 0.20mm. This is normally to cover up another issue like incorrect speed or hotend temperature. A thicker layer will hold more heat and allow it to adhere to the surface better before cooling down. Also, a super-thin first layer will likely cause a lot of issues if your printer build plate isn't perfectly flat or your X and Y axis doesn't run completely true.
Regardless of filament type you should always leave your fan off during the first two layers. Again, you want the filament to stay molten as long as possible to allow it to fuse to the build plate to reduce the chances of the part coming off during the print. For filament that does recommend using a fan I like to use the profile below:
Layer 1: 0%
Layer 2: 0%
Layer 3: 50%
Layer 4: 75%
Layer 5+: 100%
I used to think that leveling my bed was the same thing as setting my Z-offset. For years I would assume that by leveling I was at the same time making sure my Z0 was also correct. In order to do this next step, it is necessary to have a set of digital calipers. You can get a nice set off Amazon for cheap. If you are in this hobby for the long haul it is truly an invaluable tool to have. I use mine every day and recommend anyone with a printer to get one. I personally use the Neiko 0-6" Digital Calipers and for around $20 you cannot ask for better.
After downloading, load the First Layer Test STL file from the downloads section into your slicer to create the g-code for this step. Make sure your first layer height is set to 0.24mm before slicing. If your slicer shows more than one layer in the preview then you have something set incorrectly. This print should only take a few minutes which makes it ideal for doing several iterations if required. Once the print is complete carefully peel it off the build plate and use your digital calipers to measure the layer height in several places. Ideally, you should be close to 0.24mm in all places but if not then you need to adjust your Z-offset. For example, if you measure 0.20mm then you need to raise your Z-offset by 0.04mm.
Repeat this process until you get a reading close to the First layer height you set of 0.24mm. If you find that your readings are extremely different depending on where you measure on the circle you may need to re-level your bed.
Now that you have tuned your first layer you will find that you very rarely have a failed print. As tempting as it is to just jump into a print, it's a good idea to go through these items before your first print. After many hours of printing, you may also find that you need to revisit some of these adjustments. Things can become uncalibrated from the heat, vibrations, and the force required to remove larger prints. It is usually pretty easy to know when it is time to make adjustments again. You can reference the image below for help identifying when your printers first layer needs work:
Image: Peter Soloman, Wham Bam Systems
-3DMaker Engineering
▷ first layer test 3d models 【 STLFinder 】
Fast First Layer Test
thingiverse
Fast an economical first layer test.
First Layer test
thingiverse
A simple 0.2mm layer high First layer test
First Layer Test
thingiverse
My parametric version of a first layer test. Adjust according to your 3D printer specifications. ... The stl file was made with a height of 0.3 and a length of 50 mm.
first layer test
grabcad
.24mm thick 15x20 first layer test can be placed over the spring of your print surface. Or also added to the the first layer of a print as a custom support for thin small foot print parts. Use a .48 extrusion with and 3 perimeters. layer height .2...
first layer test
thingiverse
A simple 40mm by 40mm first layer test. This test is for .2 mm layer height. Use this test to see how your first layer goes down. I printed in less than 3 minutes. ...I also changed the line pattern to check how that looked.
First Layer Test
thingiverse
I found that most first layer tests that I found were rather small. ... I made this one at 150mm to test the first layer of my Anet A8 that has a 220mm bed. ... This larger test will make sure the corners are leveled properly.
First layer test cross 300x300mm
thingiverse
First layer test cross shaped
Bed leveling / First layer test
thingiverse
Bed leveling test / First layer test
CR10-S5 First layer test
thingiverse
I wanted a first layer test for CR10-S5 but didn't find it here. .. ...so I made one.
quick 300mmx300mm First layer Test
thingiverse
quick first layer test for 300mm x 300mm printers like Artillery Sidewinder X1 or Creality CR10 or other in that size
First Layer Test
thingiverse
Simple Thing to test your first Layer an Bed Leveling.
First layer test
prusaprinters
A very simple test of your first layer
First Layer Test
thingiverse
This is a rectangle 100mm x 30mm x .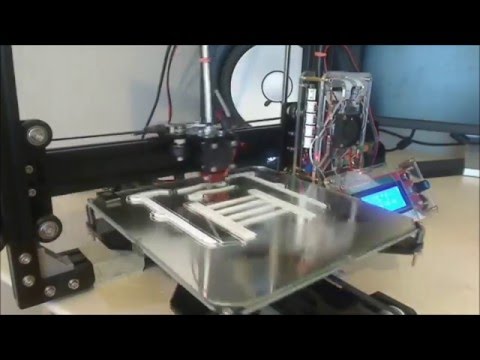 2mm. ...This is to test the first layer of your prints for proper extrusion (assuming a .2mm layer height).
First Layer Test
thingiverse
Simple test print for trying out your first layer settings. ...Print Settings Printer: Creality CR-10 Rafts: No ...
First Layer Test
thingiverse
Needs to be printed at .2mm 110mm by 100mm Printing it this large will give you a lot of time to test for the perfect first layer
First_Layer_Test
thingiverse
. .. little by little height of the nozzle and test in Y and X axes. This object has 1.4 mm height and 150mm by 150mm. Also I use it to test first layer in Ender3 Pro. Also give you the chance to see quality of the layer. ...
Print and Enjoy..!!
.. little by little height of the nozzle and test in Y and X axes. This object has 1.4 mm height and 150mm by 150mm. Also I use it to test first layer in Ender3 Pro. Also give you the chance to see quality of the layer. ...
Print and Enjoy..!!
First_Layer_Test
myminifactory
......If you Slices, with slow print speed, that allows you to modify little by little height of the nozzle and test in Y and X axes. This object has 1.4 mm height and 150mm by 150mm. Also I use it to test first layer in Ender3 Pro. ... Print and Enjoy..!!
First Layer Test
thingiverse
Some test files to adjust your settings to get the perfect first layer. These will print 1 layer provided you are using a 0.2 mm layer height in your slicer settings. Then inspect your print and tweak one setting at a time until you get a perfect...
First Layer Test
thingiverse
5cm and 10cm by 0.02mm Circle and Square flat files for testing FDM 3D Printers first layer. Use to ensure your printer is properly configured. ... https://www.youtube.com/watch?v=ld0WJXj_sOA
First layer test
thingiverse
Having a problem with my Printrbot printing the first layer when there are small perimeters (i.e holes?). This object was created to show this as a test for fellow Printrbot users to try.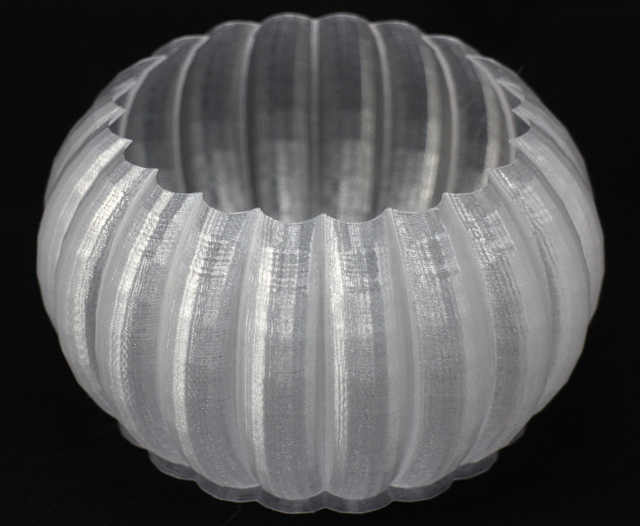 There is no need to print the whole thing.. ...In my case, the...
First Layer Test Square
thingiverse
I use this to test the first layer when I change filaments or make other adjustments. The square is 0.6mm high. This gives you three layers when using a 0.2mm layer height. The square is 56mm X 56mm. Watch the first layer for signs of...
First layer test
thingiverse
Test
First layer test
thingiverse
Voici un petit test de calibration pour votre première couche d'impression (First layer height).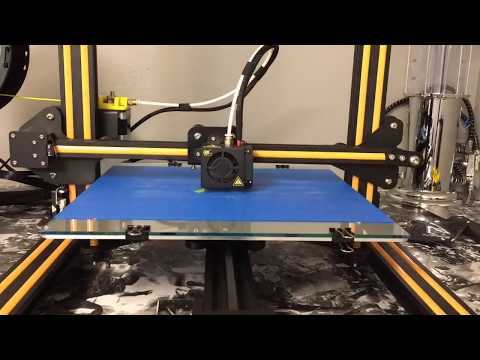 C'est simplement 2 feuille de plastique une de 0.2 et l'autre de 0.3
Il est conseiller d'avoir un outils de mesure précis pour optimiser les...
C'est simplement 2 feuille de plastique une de 0.2 et l'autre de 0.3
Il est conseiller d'avoir un outils de mesure précis pour optimiser les...
First Layer Test
thingiverse
These models were designed in order to allow users to test their first layer adhesion and quality. The model is 0.3mm tall so it should use much plastic, while allowing you to see if your bed is properly leveled or if your leveling sensor is working...
First layer test prints
prusaprinters
A bunch of test prints, intended to be used to check the first layer (after you do all other recommended calibrations as suggested by the manual).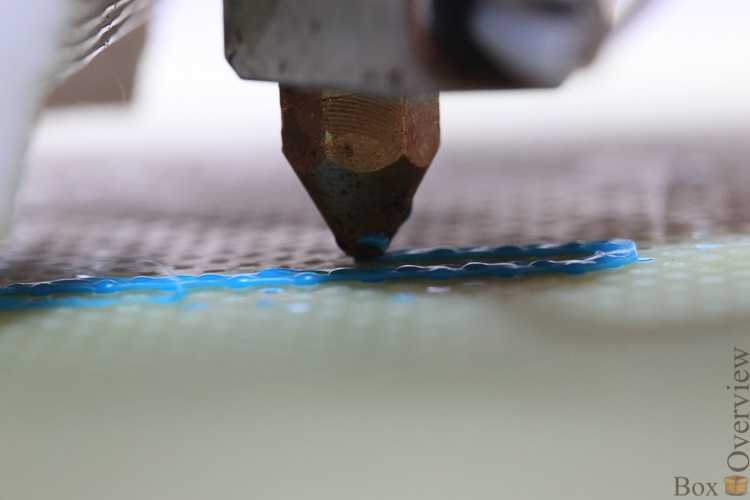 If you get uneven results, try to adjust your bed and/or use this guide to compensate it in the...
First Layer Test
thingiverse
Sliced in Simlpy 3D chris elkins profile adjusting the first layer height and width. Width is across the X, width is the Y. ... resoulation is at .200mm % going from 120% to 95%
First layer test 100mm
thingiverse
Roughly 100mm by 100mm in size seems to get my creality CR 10 s set well, In your slicer you can make it larger or smaller just keep the Z at your first layer height I print it with a brim, the brim alone is all you need to print. Print, then check. ..
..
Creality CR-10 Smart First Layer Test
thingiverse
Simple First Layer Test for Creality CR-10 Smart.
First layer test for small printers (100x100)
thingiverse
A first layer test for small printers with built dimensions of 10 x 10 cm. ...The squares in the corners should be 10mm wide.
First layer test 100x100 mm square
prusaprinters
First layer 100x100 mm square with 0. 2 mm height 60x60 mm square https://www.prusaprinters.org/prints/9838-first-layer-test-60x60-mm-square
10 models for 3D printer calibration. Set up your printer
Before you start printing on a 3D printer, you need to test it. For this, special models are most often used to diagnose and calibrate the device. Next, we will list the top 10 models for calibration, in our opinion.
3D Benchy
Among all 3D printing tests, the flagship is 3D Benchy. This model is a boat that can test everything from protrusions to extrusion. If you want to test your 3D printer, then the benches will help you determine the optimal settings for the ideal result. On Thingiverse, more than three thousand users posted photos with their samples, and the boat itself was printed by more than a hundred machines and no fewer materials.
Model reference
All-In-One
A very interesting model, which is called “all-in-one”. Everything is represented in the model: canopy, bridge, string, temperature and belt tension test, extrusion. This is an ideal model for testing the device at several levels at once. A manual is included with the model to help you troubleshoot any issues you find. On Thingiverse, more than 75 users have posted test results on different 3D printers and different materials.
Model Reference
XYZ Calibration Cube
Very simple and fast model for testing. This is a cube with a side of 20mm. It helps to gain dimension by adjusting the steps in millimeters. Also, the model allows you to test extrusion, vibration, temperature. This cube was printed simply by countless 3D printers and a variety of materials.
Model Link
Cali Cat
Nice little calibration cat or just Cali Cat is a simple model that allows you to test the accuracy of the device, as well as detailing, lugs, bridges, vibration and extrusion. And all this in just one hour. More than 2.5 hundred users have submitted their test results on the service.
Model Reference
Phil A.
 Ment
Ment The MatterHackers Mascot is a Phil A. Ment test model. It was originally intended for manufacturers. The description mentions the fact that Phil has several functions. And they were originally designed specifically for 3D printers. The model has small inserts, relief details, cylinders of vertical and horizontal orientation, ledges. In addition, the model contains chamfers, bridges and fillets. And this miracle is performed by a domed helmet. The record size on the service is 5,1397mm. A total of 84 models were published.
Model Link
Calibration Temperature Tower
You can use this model to adjust the heat of your 3D printer. You can also test for different materials at what temperature the print comes out better.
NEW model Autodesk
This is a new model, or rather not even a model, but a whole procedure that will allow 3D printer manufacturers to show all the capabilities of devices to Kickstarter supporters. And of course, calibrate. The test was developed by Andreas Bastian and is a consolidated STL file that is able to test the system for the following indicators:
- authorization;
- alignment;
- accuracy;
- bridge, etc.
The model has it all. For example, if the 3D printer is set up well, then the horizontal function will be performed with a minimum of problems.
Model Link
PolyPearl Tower
If you want to test curves, cuts, bridges, cuts, then this model can be a great solution. In the description for this test model, the name "torture tower with a twist" appears. It is worth trying to use it for calibration.
Model Link
Rapid Screening
This model is a very quick test to check temperature, cooling, and retract function. Among the advantages of the model is its cost-effectiveness. The model will weigh only 0.23g. With its help, you can immediately remove the "strings".
Model Reference
Parametric Calibration Object
A particular difficulty in calibrating a 3D printer is lowering the stage level. With this model, you can draw the right conclusions to improve the first layer of printing, and as a result, get better prints.
Model reference
8 test print models
3D printer test models are required for:
- When you bought a new printer and need to test it on your favorite media
- When you have purchased new media and need to check the print specifications
- When you have been using a material for a long time, but do not know its tensile strengths
We will talk about the 8 models most used for testing in 3D printing.
1. 3D Benchy
3D Benchy is one of the most popular 3D printer test models. The boat figurine perfectly demonstrates the capabilities of FDM printers in any price category. Such a model will help you determine exactly the settings you need to set in order to get the perfect 3D print.
Printing 3D Benchy - will allow you to see how the printer copes with the "rendering" of curved surfaces, inclined planes, arcs, holes. The model is available in several versions, including multi-color. It takes approximately one hour to print a standard size 3D Benchy.
Download model on Thingiverse
2. All-in-one 3D printer test
A comprehensive test model for a 3D printer will allow you to check the quality of printed overhangs, bridges, extrusion stability, the possibility of “snot” and the dependence of the result on temperature. An important advantage of this model is the instructions for it, which indicate potential solutions to various problems.
Quite a complex model in terms of setting all the parameters, but it's worth it, try it.
Download Thingiverse model
3. XYZ 20mm Calibration Cube
The main purpose of the XYZ 20 mm calibration cube is to establish the dependence of the movement of the extruder on the step of the motor. A test model for a 3D printer helps to make sure that 20 mm in the drawing corresponds to 20 mm of the printed product. At the same time, the calibration cube helps to establish the dependence of the degree of extrusion and print quality on the temperature of the extruder.
Download Thingiverse Model
4. Matter Hackers' Mascot Phil A. Ment
This is a small astronaut figurine that has elements designed to test 3D printing.
These are small inserts, small relief details, overhangs, vertical and horizontal cylinders, fillets, chamfers, lintels and a perfectly domed helmet.
A feature of the model is the ability to obtain accurate data for different dimensions of the printed product.
Download model on Thingiverse
5. Smart compact temperature calibration tower
The calibration scale demonstrates the capabilities of the 3D printer when printing at different temperatures with one filament. The test model clearly shows the quality of overhangs, lintels, tensions, and the product can also be used to judge the ability of a 3D printer to print curved surfaces with a certain plastic.
A simple and intuitive tool allows you to find out the possibilities of materials that have not previously been used in work or printed with only one temperature.
It is important to consider that the print temperature setting for each signed element (floor) must be set in the slicer or manually in Gcode.
Download model on Thingiverse
6. Open-Source Printer Evaluation
This is a universal print model from Kickstarter and Autodesk. It was created taking into account the experience of using other models for testing. It contains bridges, overhangs, fine detailing and elements for assessing the spatial accuracy of 3D printing.
Download model on Github
7. Economical Stringing Test
When printing complex-shaped objects, without knowing the capabilities of the filament and the printer, the user may encounter stringing (from string - string), and in Russian simply “snot” - when plastic reaches for the extruder, forming thin plastic fibers in the air. Such “snot” appears when the extruder is idle. To avoid this, the retract function is used - the retraction of the filament during idle movement. Correct setting of the retract level requires consideration of extruder speed, extruder temperature and filament properties.
This test model is used to quickly check the correct setting of the 3D printer. If the strings between the vertical pyramids do not form, then the settings are correct. If horizontal plastic filaments appear, then some of the 3D printing parameters should be changed.