Best home 3d printer reddit
Best 3D Printer Under 1000 Reddit : 3dPrintersMania
Best 3d printer under $1000 reddit on 2020-21.
Best Overall: Prusa i3 MK3. reddit best 3d printer
Best Value: Creality Ender 3.
Best For Your Desk: Monoprice Maker Mini Pro.
Best Value Delta: Monoprice Mini Delta.
Best Value Resin: AnyCubic Photon. Best 3d printer under 1000 reddit
For Moe Details: https://3dprintersmania.com/
For the last five years we've invested in the 3D printing world, using as many printers as we can to see what is good and what is bad. We all know that printing can be expensive — there are machines out there that start at $3,000 and go up from there — so we want you to have some idea of what you can get for cheaper. When it comes to value and quality you can't beat the Prusa i3 MK3. While it isn't the cheapest of the machines on this list, it is easily the best quality in terms of build and print.
Best Overall:
Prusa i3 MK3
Best Value:
Creality Ender 3
Best For Your Desk:
Monoprice Maker Mini Pro
Best Value Delta:
Monoprice Mini Delta
Best Value Resin:
AnyCubic Photon
Best Overall: Prusa i3 Mk3
In the world of hobbyist 3D printing, there are few names as well known as Josef Prusa. His work in open source 3D printing has revolutionized what can be done at home and on a budget for those who want to create amazing prints. The Prusa i3 MK3 is the latest machine based on his open source design and is easily the most advanced printer in this list.
The Prusa has automatic bed leveling, making each print start the best it can, but it also corrects the print on-the-fly if anything happens to shift the bed. With a sensor in the extruder, the Prusa can tell when you run out of filament, pause the print, and alert you to add more, saving countless mistakes in the process.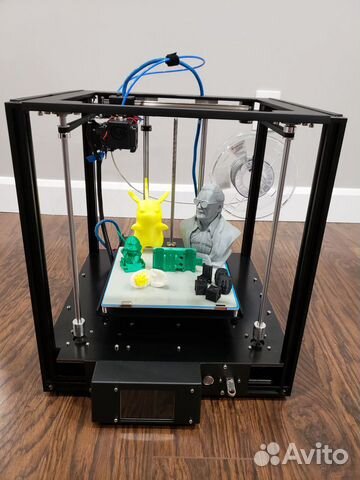 From the removable bed to easily being able to remove prints without breaking them to the excellent save function, which stops your prints being lost in a power cut, the Prusa goes out of its way to make every print work.
The listing is for the kit version of the i3 mk3 so you will be required to build it yourself. Prusa does supply a fully made one but it's $200 more when you add in the extra shipping. Which one you buy will depend on your preference, but we recommend getting the kit. Plus, it's actually a lot of fun learning to build one from scratch.
Pros:
Auto bed leveling
Excellent print quality
Open source
Active community
Save functionality
Cons:
Cheaper to buy the kit
Best Overall
Prusa i3 MK3
Fantastic quality
If you are just starting out in the 3D printing game and you want to start off with the best, then go for the Prusa MK3.
$750+ at Prusa Research
Best Value: Creality Ender 3
The Creality Ender 3 is a shining example of how a community can get together, take something cheap and flawed, and turn it into something special. The Ender 3 is not a printer for someone who wants quality prints straight of the box — you have to earn them. Sure, it's easy to get set up and it doesn't take much other to put together — just a few screws —but to get a print that you can be proud of takes effort.
The Ender 3, while being cheap, it is not configured well by Creality. The extruder setup is poor, as are a lot of the acceleration settings and because of that, it can take endless fine-tuning. Don't be dismayed though, there are people out there who are willing to help put you on track.
I never would have gotten the Ender 3 to the point of usability without the help of the Facebook and Twitter 3D printing communities, and I strongly urge you to look into those places if you intend to buy an Ender 3. Especially check out Filament Frenzy on Twitter. He can make the Ender 3 sing and dance like magic.
Of course, if you have the time to spend on it, $220 for a full-size printer that can make some fantastic prints is a bargain.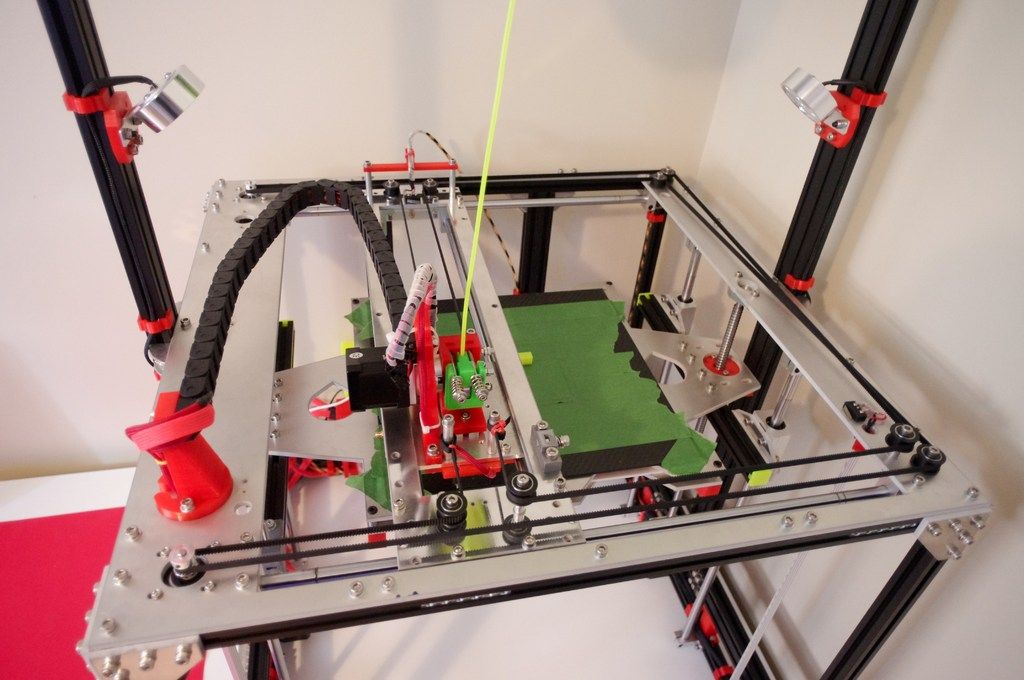 If you have time to love it, it can be a great investment.
Pros:
Extremely cheap
Simple setup
Can create amazing prints
Cons:
Can take a lot of work to get right
Best Value
Creality Ender 3
Community favorite
The Ender 3 can be a real pain to get right, but when you do it can some amazing prints. Make sure you join some communities for help.
$230 at Amazon
Best For Your Desk: Monoprice Maker Mini Pro
If you are completely new to 3D printing and want something simple, reliable, and cheap, you can't do much better than Maker Mini Pro by Monoprice. The printer itself is small enough and quiet enough to sit on the desk in your office and allow you to make small, fun little projects fairly quickly. The Mini has several high-end features like Wi-Fi connectivity, along with the SD Card and direct PC connection that you normally get with larger printers.
It even comes with auto bed-leveling, which can be picky but is a great addition. There's also a heated bed for printing with multiple types of filament, something you'd expect on a more expensive printer, all wrapped in a sturdy metal body that reduces the "noise" often associated with cheaper printers. With a 4.75-inch print bed, the Mini is the smallest of the printers on this list, but if you are just starting out in 3D printing and only want to experiment, the small bed is more than enough.
With the Bowden extruder setup already a part of the Mini the results of printing are significantly better than I ever thought a $200 printer would produce. I helped my local youth room purchase three of these so the young people there can learn how to design and print in 3D and so far the only issue I have had is a blocked nozzle and an uneven print bed, both of which are the basic foibles of 3D printing and easily fixed by anybody.
Pros:
Auto bed leveling
Fits on your desk
Wi-Fi printing
Heated bed
Cons:
The print bed is really small
Best For Your Desk
Monoprice Maker Mini Pro
Teeny desk printing
Sometimes you just want a little fun at your desk. The Mini Pro is perfect for a desktop 3D printing setup.
$200 at Amazon
Best Value Delta: Monoprice Mini Delta
When I first used the Mini Delta I was ready to write it off from the start — $160 for a delta printer? It was obviously going to suck. Turns out, I was wrong. I like the Delta for a lot of reasons including its portability, it's build quality, as well as its great print quality. None of those things are as awesome as the price though. For just $160 you can have a 3D printer of your own that works as soon as you turn it on.
The interface on the Mini Delta is incredibly simple, making it perfect for youngsters and first-timers who aren't interested in taking things apart to make them work. The printer has three buttons and each one is self-explanatory, helping you get printing straight away. The nature of delta printers — delta printers use three constantly moving servo arms instead of rods and screws — means this mini model is dependable, even when being jostled.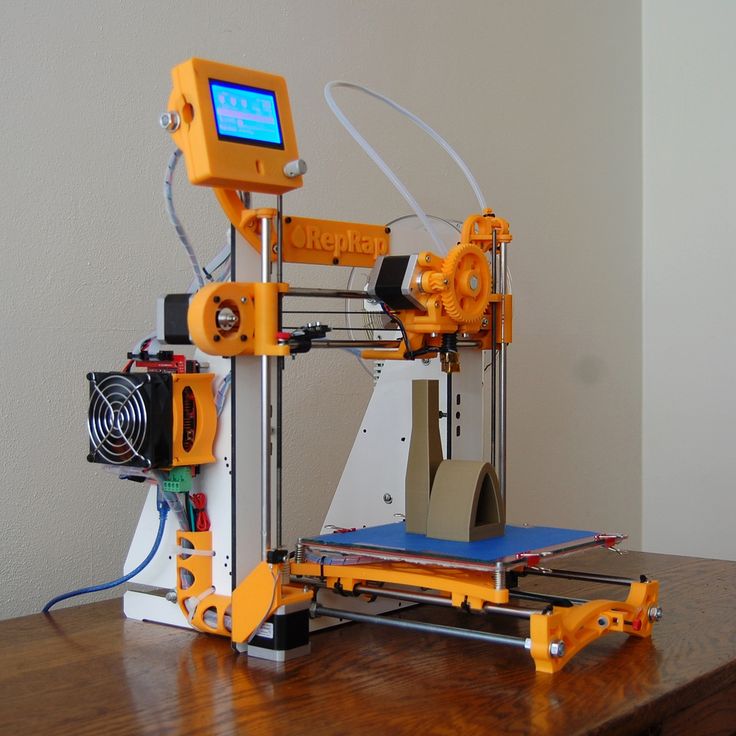 A delta, once dialed in, will give you great prints even under the worst of circumstances.
I was blown away by the print quality of this little machine and, even though it can only make really small models, it remains one of my favorites to have close by for small, quick jobs. The only issue I sometimes have is the auto-leveling is sometimes a little off and you will need to manually adjust or use a product like Magigoo to help keep it all stuck down.
Pros:
Solid as a rock
Great print quality
Simple interface
Portable
Cons:
Small
Bed leveling is janky
Best Value Delta
Monoprice Mini Delta
Mini dependability
The Mini Delta is an amazing little machine with some advanced features. The print quality is excellent and the portability is superb.
$160 at Amazon
Best Value Resin: AnyCubic Photon
Resin printing can be expensive. The machines themselves are normally high-priced and the resins can be even pricier. Resin printing differs from the other printers on this list because it uses a liquid plastic that is cured over a UV light or shot with a laser. It can be messy, difficult, and a little dangerous so it's best to know what you want before you buy.
Somehow Anycubic made an affordable resin printer that produces some of the best quality prints I've seen from a printer under $2,000. The prints from a resin printer are gorgeous and are often impossible to tell that they are 3D printed. They often look like injected molded models.
Using Chitubox — a slicer now used by a large number of 3D printer manufacturers — to slice the models is simple and effective and makes the entire process of printing models on the Photon a breeze. One word of warning though: make sure your supports are thick in Chitubox since they can be a little wimpy if you aren't careful.
Of all the resin printers that I have owned and used the Photon is the one I recommend to friends, and therefore to you, dear readers. It's dependable and accurate every time.
Pros:
Entry level price
Almost invisible layer lines
Simple to use
Excellent slicing
Cons:
Small build plate
Chitubox can be tricky
My review of my first 3D printer, the AnyCubic Mega SE: : 3Dprinting
The AnyCubic Mega SE is my first 3D printer. I found it thanks to the Monthly Purchase Advice Megathread (Feb 2022) and thanks to /u/richie225's Generic FDM Printer Recommendations, 2022 post.
I figured I'd post this for any other first-time buyers out there. Here's what I'll cover:
Why I chose the AnyCubic Mega SE over, say, Elegoo Neptune 2
What's in the box
Assembly, Design, and QA Notes
First Impressions
Other items
Shipping
Firmware
Album of Images. All images linked in the below post are included in this album, and there are no extra images in the album.![]()
TL;DR
I'm happy with the purchase. It was pretty easy to get started and the print quality appears to be good without having to do a whole bunch of calibration. I would recommend this for first-time buyers.
https://imgur.com/uumWgke.png
1. Why AnyCubic Mega SE?
My first limitation was price - I wasn't sure if I was going to like the 3D printing hobby so I wanted to minimize my (potentially wasted) investment. That narrowed things down to the AnyCubic Mega SE, the Elegoo Neptune 2, and the Kingroon KP3S 3.0 - the three least expensive options on /u/richie225's list.
I opted against the Kingroon KP3S 3.0 because of the smaller print area and the cantilever design.
The Elegoo was a little pricier and has, according to /u/richie225, a "subpar extruder". Plus it was sold out, so I went with the AnyCubic.
2. What's in the Box
Aside from the frame, PSU, and control hardware, you also get:
https://imgur.com/QUrIknv.png
5 Allen wrenches / hex keys (1.
 5m, 2mm, 2.5mm, 3mm, 4mm)
an 8gb micro SD card (file listing below)
An SD and micro-SD to USB converter thing
flush snips
Two wrenches (~8.5mm and ~10mm)
Mini USB-A to USB-A cable (about 6ft / 2m)
Assembly screws
~30g / 10m white PLA
Scraper
Filament holder
All stepper motors and whatnot are pre-assembled and attached to the frame.
Assembly consists of joining the vertical XZ frame to the Y frame and connecting cables.
The Micro SD Card
These are all the files that were on the SD card. I didn't notice any malicious items but I'm always wary of external storage so I pulled the files that I wanted to keep to a secure VM and then wiped the SD card.
https://imgur.com/JcEXZui.png
09:53:06 <redacted>@<redacted> /media/<redacted>/FCAC-6CAB $ tree -a . ├── BIN ├── Files_English_Mega SE │ ├── Anycubic Mega SE-ABS-V1.0.curaprofile │ ├── Anycubic Mega SE-PLA-V1.0.curaprofile │ ├── Anycubic Mega SE-TPU-V1.0.curaprofile │ ├── Cura │ │ ├── Mac │ │ │ └── Ultimaker_Cura-4.2.1-Darwin.dmg │ │ └── Windows │ │ └── Ultimaker_Cura-4.2.1-win64.exe │ ├── Driver_Ch441 │ │ ├── Mac │ │ │ ├── Ch44x_Install_V1.4.pkg │ │ │ └── ReadMe.pdf │ │ └── Windows │ │ └── Ch441SerSetup.exe │ ├── EN-Mega SE-English-V0.0.2.1.pdf │ ├── owl.gcode │ └── owl.stl ├── System Volume Information │ ├── IndexerVolumeGuid │ └── WPSettings.dat └── 资料_中文_Mega SE ├── Anycubic Mega SE-ABS-V1.0.curaprofile ├── Anycubic Mega SE-PLA-V1.0.curaprofile ├── Anycubic Mega SE-TPU-V1.0.curaprofile ├── Ch441驱动 │ ├── Mac │ │ ├── Ch44x_Install_V1.4.pkg │ │ └── ReadMe.pdf │ └── Windows │ └── Ch441SerSetup.exe ├── CN-Mega SE-中文-V0.0.2.1.pdf ├── Cura 切片软件 │ ├── Mac │ │ └── Ultimaker_Cura-4.2.1-Darwin.dmg │ └── Windows │ └── Ultimaker_Cura-4.
2.1-win64.exe ├── owl.gcode └── owl.stl 15 directories, 25 files
3. Assembly, Design, and QA Notes
Assembly
Overall assembly was pretty easy.
One of the screws that attach the vertical XZ frame to the Y frame needed re-threading, so I had to borrow a friend's tap and die set for that. I highly recommend testing all screws first before assembly.
The t-nut, which connects the aluminum frame to the control box, was a little tricky. Here's how I did it:
Screw the t-nut to the control panel, making sure to not tighten it fully.
With the control panel side of the frame over the edge of a table, tilt the control panel counterclockwise 90 degrees. It should be off the edge of the table completely.
Insert the t-nut into the aluminum frame.
Rotate the control panel 90 degrees clockwise. This should rotate the t-nut with it so that it’s in the correct orientation (long side of t-nut is vertical).
Slide the control panel to the proper position and insert the front screw.
Tighten.
The cable management could be a little better. Specifically, the Y cables can get caught on the edge of the bed as it moves to the very back, so make sure to put them under the frame instead. Also, the X cables typically sit close to the Z lead screw.
Design
A couple minor design flaws were found:
The PSU prevents access to the back of the Z rail eccentric nuts.
As mentioned before, cable management could be better.
It does not have any ethernet connectivity. I would love to network this thing...
The t-nut could have just been a standard through-hole screw.
QA
Overall QA seemed pretty good. Two items that I initially thought were QA issues turned out not to be. I've included them here so that others don't make my same mistake.
One of the aluminum strut end caps was missing.Actually this is intentional for mounting the control panel.
One of the rubber feet was not in the correct position.Actually this is intentional for mounting the control panel.There is a small chip in the PSU threading. Did not affect assembly. https://imgur.com/54KBxna.png
The heat shrinking on the Z and Y limit sensor lines was not tight enough. Nothing a head gun can't solve though.
The included scraper has some sharp corners that I had to file down else I'd scratch the print surface.
As I don't have any experience with 3D printing, I sadly cannot speak to more than that.
4. First Impressions
The instructions have you assemble the unit, connect cables, level the bed, run a filament test, and then print an included 3D model ("owl" by etotheipi). https://imgur.com/x4YPZvS.png
I performed nothing other than the bed leveling and extrusion test and then printed the object as a baseline.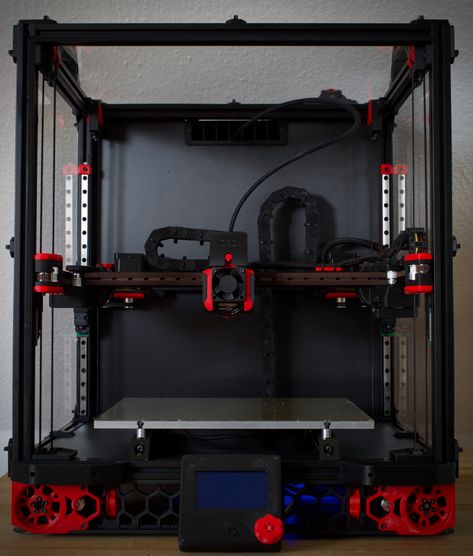 I think it turned out pretty dang well for not doing any calibration!
It printed at 190° with a bed temperature of 60°. https://imgur.com/S9rak23.png
There was a tiny bit of stringing between the owl ears and one layer had a little blob/loop, but otherwise I can't see many issues.
Other Items
Shipping
The Mega SE is not available on Amazon, so I placed my order directly. AnyCubic has the option of also adding 1kg of PLA to the order, so I did so (I wasn't aware that it would come with 30g / 10m of "starter" PLA). Total cost: $196.00 US
Shipping was very quick for the base unit (shipped to southern CA, USA). They estimated 3-8 business days, but it arrived in 3 calendar days. I placed the order on Feb 19th at 10am, received a notice that the order was on the way on the 21st at 11:30am, and received it on the 22nd at 2:30pm. It was shipped via UPS.
However, the 1kg of filament did not arrive with the printer. It was not communicated to me that it would be shipped separately - I had to contact support to find that out.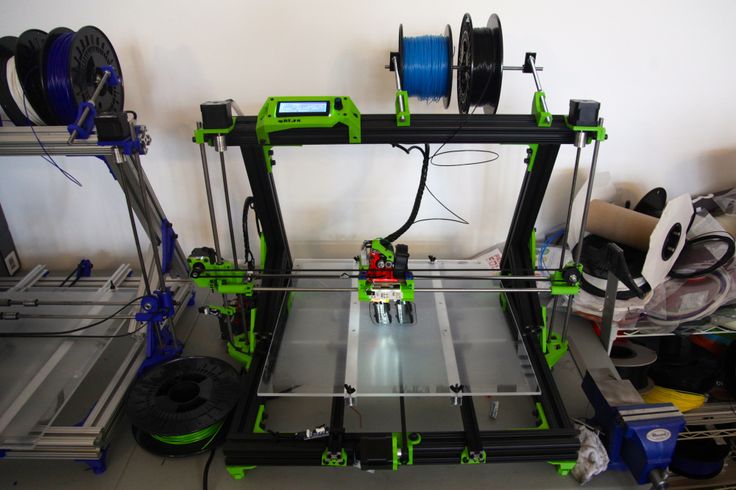 They were pretty quick to reply, only taking about 4 hours for an email response. The filament is shipped via USPS and has not yet arrived.
EDIT 2022-03-05:
The filament finally arrived via USPS (2 weeks!). It's AnyCubic branded green PLA, 1.75mm. I'd say it's not worth bundling the filament in the order like I did. Save $10 and a bunch of time by finding a $20 spool on Amazon or somewhere.
Firmware
I have not yet tried updating the firmware. The control board is labeled "Mega Zero", so I assume that any firmware that works for the Mega Zero will also work for this one. If someone has already flashed the firmware for the Mega SE, please let us know how it went.
https://imgur.com/019hpyR.png
https://imgur.com/Do55ik9.png
EDIT 2022-03-05
I successfully updated the firmware using the instructions found here: https://www.th4dstudio.com/hc/downloads/unified-2-firmware/anycubic/anycubic-mega-zero-v1-v2-firmware-melzi-board/ with the following code changes:
In step 1.
 e select the board that has the heated bed:
//#define AC_MEGA_ZERO #define AC_MEGA_ZERO_V2
Also edit the X and Y steppers to use the correct TMC2208 per /u/l0vader's comment here https://www.reddit.com/r/anycubic/comments/s6tof4/anycubic_mega_se_firmware/ht84dsz/. Note that for Th4D's Unified 2 firmware, v2.42 (based off Marlin 2.0.9.3), the line numbers of these
#definestatements are different than what /u/l0vader has. For me, it was lines 401 and 402.#define X_DRIVER_TYPE TMC2208_STANDALONE #define Y_DRIVER_TYPE TMC2208_STANDALONE
Well that's all I have to say about that.
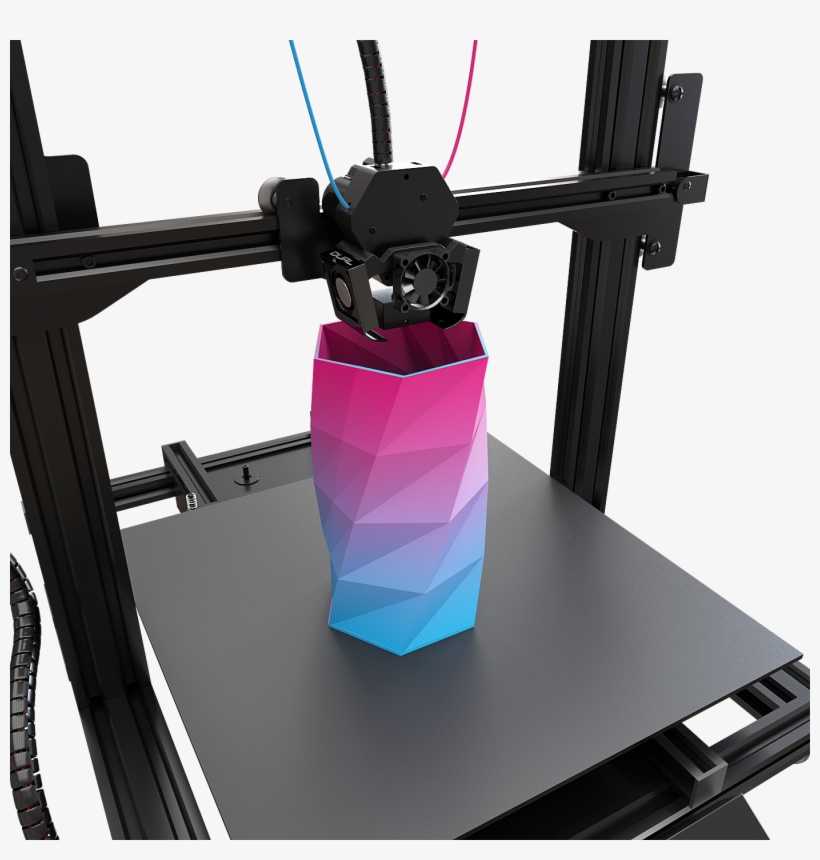
Building a home 3D printer with your own hands: recommendations from personal experience
3D printing and assembly of 3D printers is my hobby and passion. Here I will not share detailed diagrams and drawings, there are more than enough of them on specialized resources. The main goal of this material is to tell you where to start, where to dig and how to avoid mistakes in the process of assembling a home 3D printer.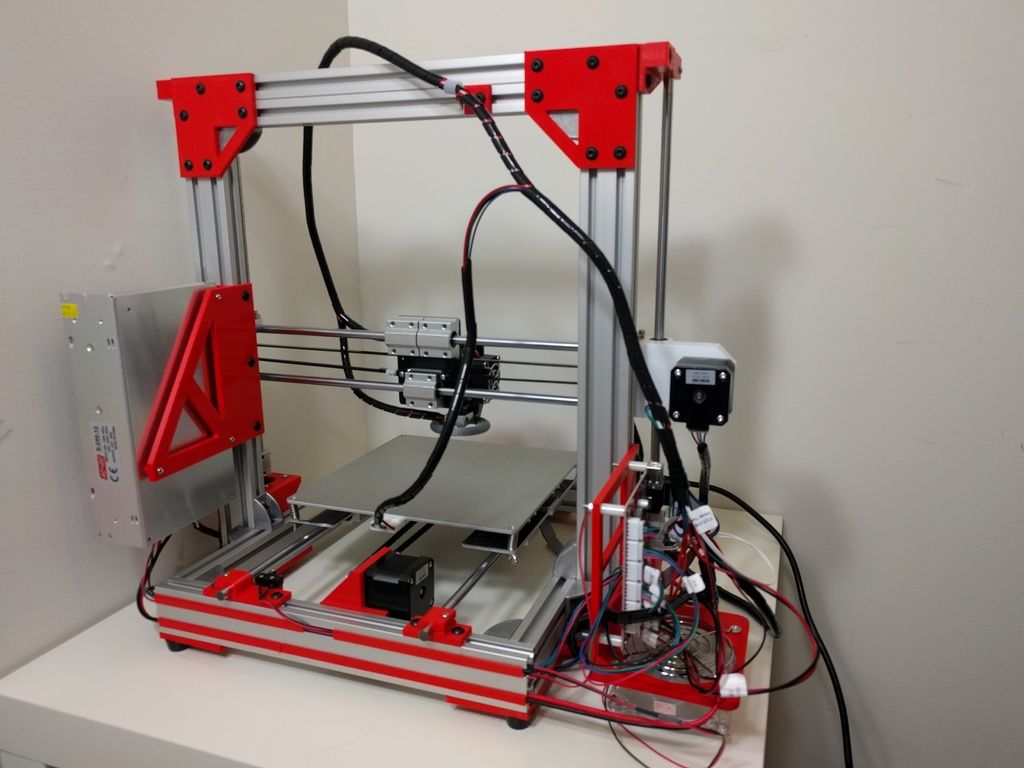 Perhaps one of the readers will be inspired by applied engineering achievements.
Why do you need a 3D printer? Use cases
I first came across the idea of 3D printing back in the 90s when I was watching the Star Trek series. I remember how impressed I was by the moment when the heroes of the cult series printed the things they needed during their journey right on board their starship. They printed anything: from shoes to tools. I thought it would be great someday to have such a thing too. Then it all seemed something incredible. Outside the window are the gloomy 90s, and the Nokia with a monochrome screen was the pinnacle of progress, accessible only to a select few.
Years passed, everything changed. Around 2010, the first working models of 3D printers began to appear on sale. Yesterday's fantasy has become a reality. However, the cost of such solutions, to put it mildly, discouraged. But the IT industry would not be itself without an inquisitive community, where there is an active exchange of knowledge and experience and who just let them dig into the brains and giblets of new hardware and software. So, drawings and diagrams of printers began to surface more and more often on the Web. Today, the most informative and voluminous resource on the topic of assembling 3D printers is RepRap - this is a huge knowledge base that contains detailed guides for creating a wide variety of models of these machines.
I assembled the first printer about five years ago. My personal motivation to build my own device is quite prosaic and based on several factors. Firstly, there was an opportunity to try to realize the old dream of having your own device, inspired by a fantasy series. The second factor is that sometimes it was necessary to repair some household items (for example, a baby stroller, car elements, household appliances and other small things), but the necessary parts could not be found. Well, the third aspect of the application is "near-working". On the printer, I make cases for various IoT devices that I assemble at home.
Agree, it is better to place your device based on Raspberry Pi or Arduino in an aesthetically pleasing "body", which is not a shame to put in an apartment or take to the office, than to organize components, for example, in a plastic bowl for food.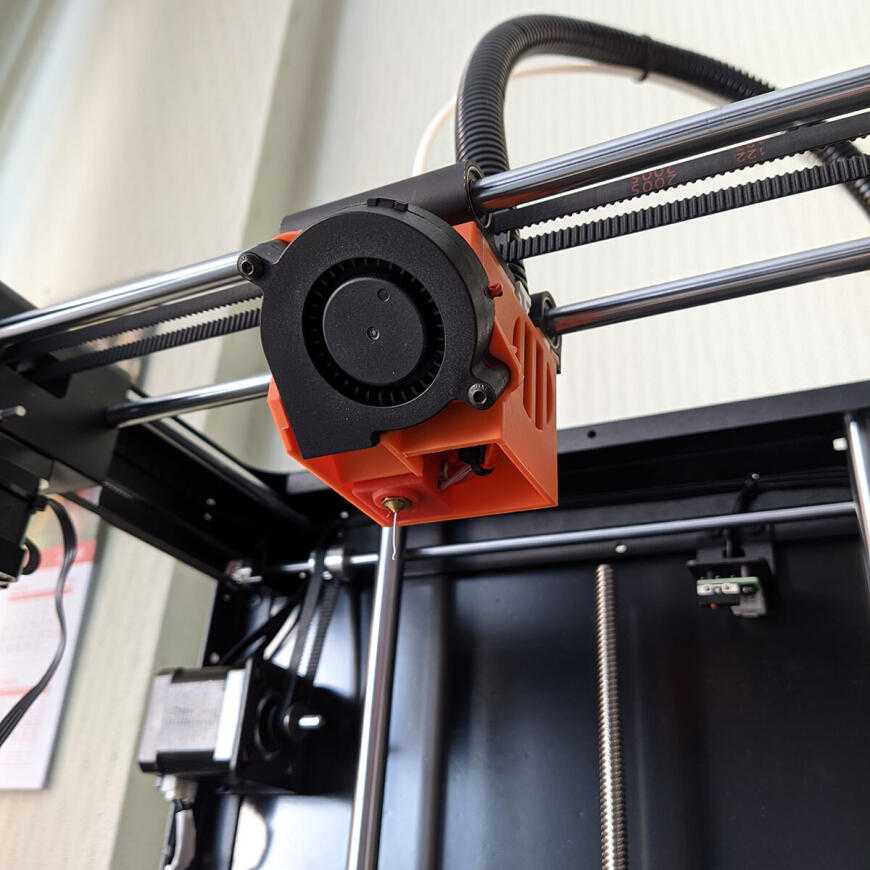 And yes, you can print parts to build other printers :)
There are a lot of scenarios for using 3D printers. I think everyone can find something of their own.
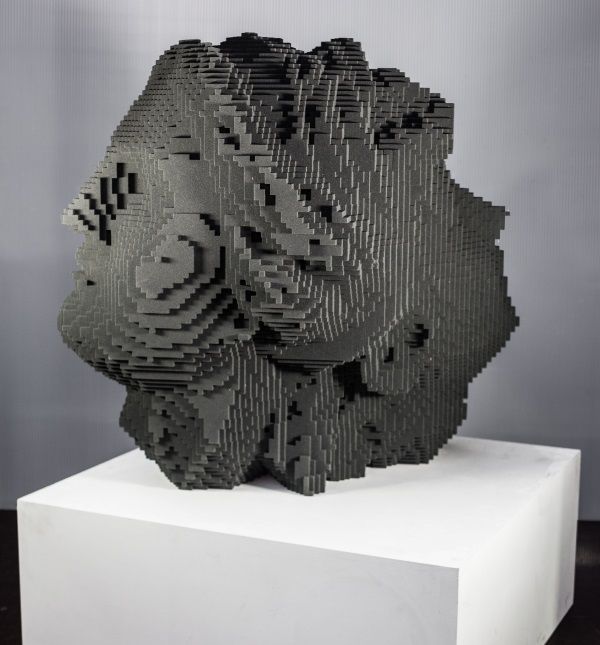
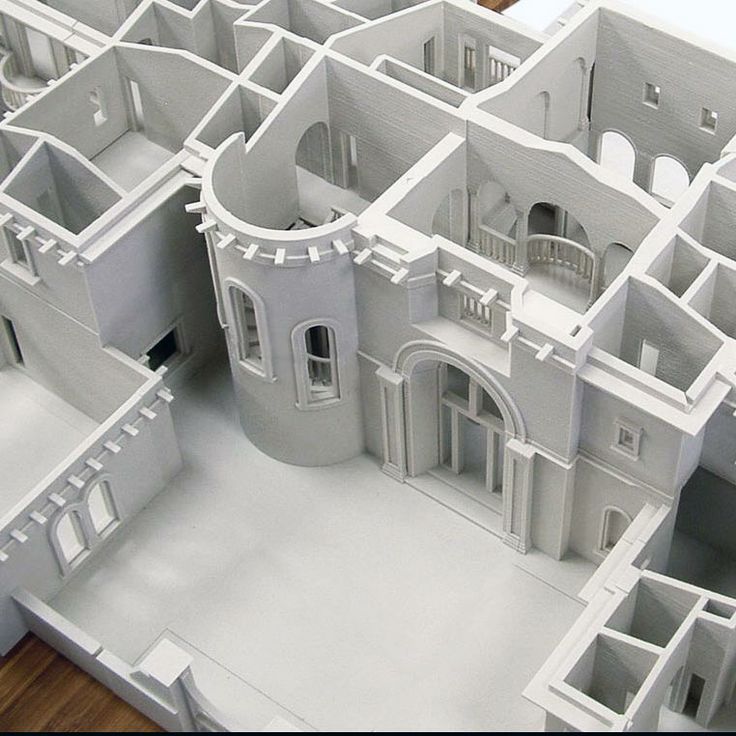
A complex part in terms of drawing that I printed on my printer. Yes, it's just a figurine, but it has many small elements
Ready solution vs custom assembly
When a technology has been tested, its value in the market decreases markedly. The same thing happened in the world of 3D printers. If earlier a ready-made solution cost simply sky-high money, then today acquiring such a machine is more humane for the wallet, but nevertheless not the most affordable for an enthusiast. There are a number of solutions already assembled and ready for home use on the market, their price range ranges from $500-700 (not the best options) to infinity (adequate solutions start from a price tag of about $1000). Yes, there are options for $150, but we, for understandable, I hope, reasons, will not dwell on them.
In short, there are three cases to consider a finished assembly:
- when you plan to print not much and rarely;
- when print accuracy is critical;
- you need to print molds for mass production of parts.
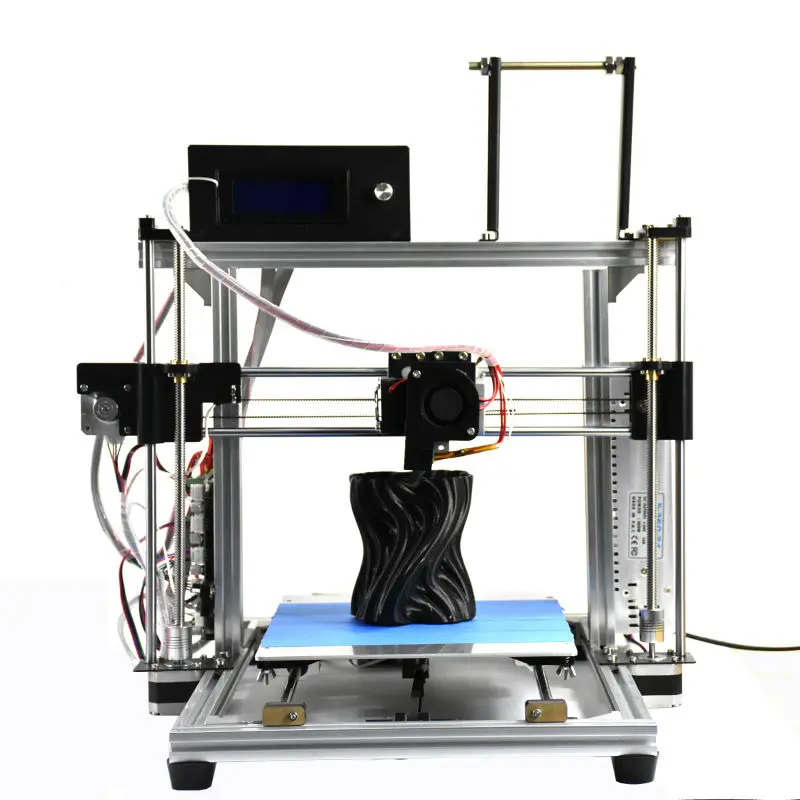
There are several obvious advantages to self-assembly. The first and most important is cost. Buying all the necessary components will cost you a maximum of a couple of hundred dollars. In return, you will receive a complete 3D printing solution with the quality of manufactured products acceptable for domestic needs. The second advantage is that by assembling the printer yourself, you will understand the principles of its design and operation. Believe me, this knowledge will be useful to you during the operation of even an expensive ready-made solution - any 3D printer needs to be serviced regularly, and it can be difficult to do this without understanding the basics.
The main disadvantage of assembly is the need for a large amount of time. I spent about 150 hours on my first build.
What you need to assemble the printer yourself
The most important thing here is the presence of desire. As for any special skills, then, by and large, in order to assemble your first printer, the ability to solder or write code is not critical. Of course, understanding the basics of radio electronics and basic skills in the field of mechanics (that is, "straight hands") will greatly simplify the task and reduce the amount of time that needs to be spent on assembly.
Also, to start we need a mandatory set of parts:
- Extruder is the element that is directly responsible for printing, the print head. There are many options on the market, but for a budget build, I recommend the MK8. Of the minuses: it will not be possible to print with plastics that require high temperatures, there is noticeable overheating during intensive work, which can damage the element.
If the budget allows, then you can look at MK10 - all the minuses are taken into account there.
- Processor board. The familiar Arduino Mega is well suited. I didn't notice any downsides to this solution, but you can spend a couple of dollars more and get something more powerful, with a reserve for the future.
- Control board. I'm using RAMPS 1.4 which works great with the Arduino Mega. A more expensive but more reliable board is Shield, which already combines a processor board and a control board. In modern realities, I recommend paying attention to it. In addition to it, you need to purchase at least 5 microstep stepper motor controllers, for example - A4988. And it's better to have a couple of these in stock for replacement.
- Heated table. This is the part where the printed element will be located. Heating is necessary due to the fact that most plastics will not adhere to a cold surface. For example, for printing with PLA plastic, the required surface temperature of the table is 60-80°C, for ABS - 110-130°C, and for polycarbonate it will be even higher
There are also two options for choosing a table - cheaper and more expensive. Cheaper options are essentially printed circuit boards with preheated wiring. To operate on this type of table, you will need to put borosilicate glass, which will scratch and crack during operation. Therefore, the best solution is an aluminum table.
 - Stepper motors. Most models, including the i2 and i3, use NEMA 17 size motors, two for the Z axis and one each for the X and Y axes. Finished extruders usually come with their own stepper motor. It is better to take powerful motors with a current in the motor winding of 1A or more, so that there is enough power to lift the extruder and print without skipping steps at high speed.
- Basic set of plastic fasteners.
- Belt and gears to drive it.
Examples of elements appearance: 1) MK8 extruder; 2) Arduino processor board; 3) RAMPS control board; 4) motor controllers; 5) aluminum heated table; 6) NEMA 17 stepper motor; 7) a set of plastic fasteners; 8) drive gears; 9) drive belt
This is a list of items to be purchased.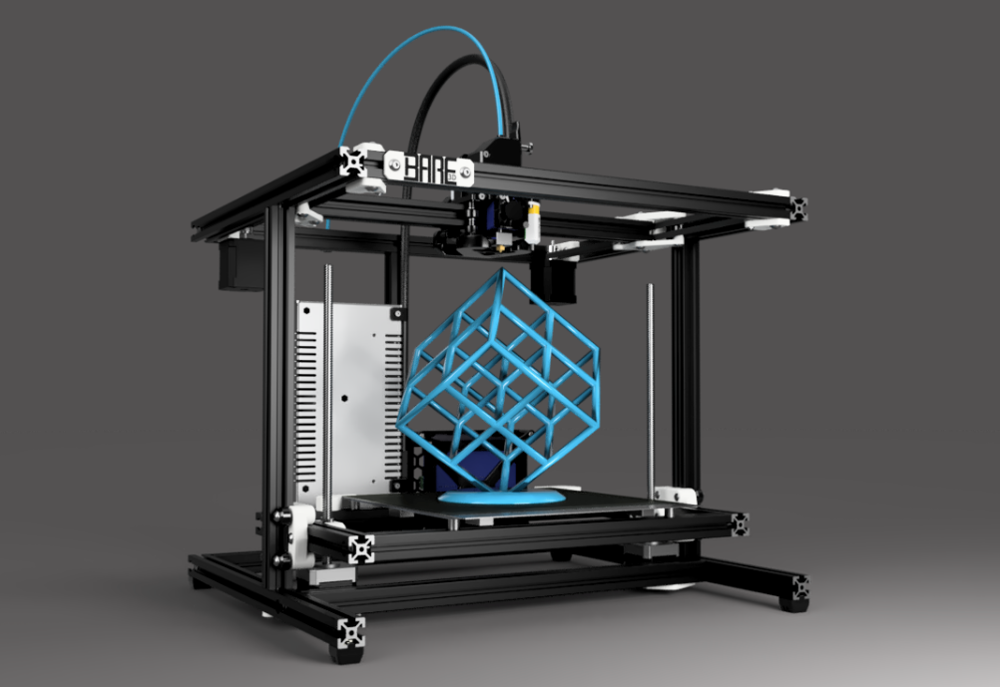 Hardcore users can assemble some of them themselves, but for beginners, I strongly recommend purchasing ready-made solutions.
Yes, you will also need various small things (studs, bearings, nuts, bolts, washers ...) to assemble the case. In practice, it turned out that using a standard m8 stud leads to low printing accuracy on the Z axis. I would recommend immediately replacing it with a trapezoid of the same size.
M8 trapezoid stud for Z axis, which will save you a lot of time and nerves. Available for order on all major online platforms
You also need to purchase customized plastic parts for the X axis, such as these from the MendelMax retrofit kit.
Most parts available at your local hardware store. On RepRap you can find a complete list of necessary little things with all sizes and patterns. The kit you need will depend on the choice of platform (we'll talk about platforms later).
What's the price
Before delving into some aspects of the assembly, let's figure out how much such entertainment will cost for your wallet.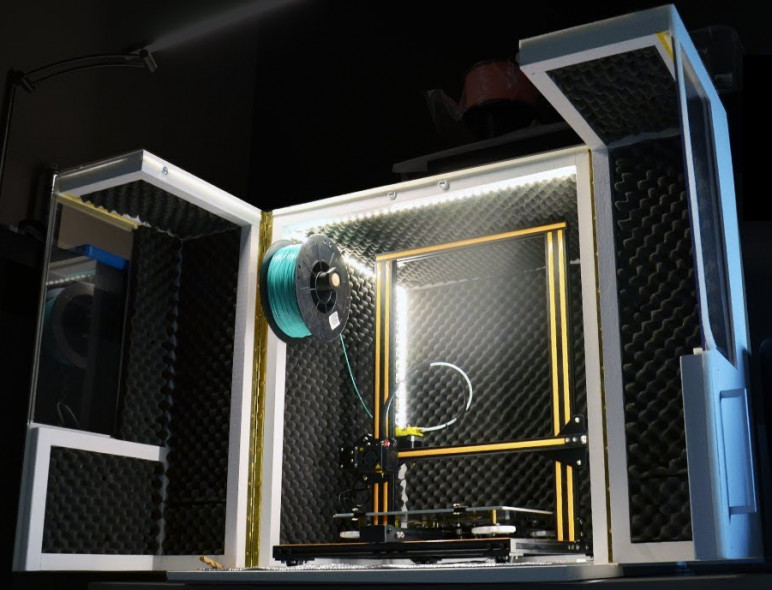 Below is a list of parts required for purchase with an average price.
Platform selection
The community has already developed a number of different platforms for assembling printers - the most optimal case designs and the location of the main elements, so you do not have to reinvent the wheel.
i2 and i3 are key platforms for self-assembly printer enclosures. There are also many modifications of them with various improvements, but for beginners, these two classic platforms should be considered, since they do not require special skills and fine-tuning.
Actually, illustration of platforms: 1) i2 platform; 2) i3 platform
On the plus side of i2: it has a more reliable and stable design, although it is a little more difficult to assemble; more opportunities for further customization.
The i3 variant requires more special plastic parts to be purchased separately and has a slow print speed. However, it is easier to assemble and maintain, and has a more aesthetically pleasing appearance. You will have to pay for simplicity with the quality of printed parts - the body has less stability than i2, which can affect print accuracy.
Personally, I started my experiments in assembling printers from the i2 platform. She will be discussed further.
Assembly steps, challenges and improvements
In this block, I will only touch on the key assembly steps using the i2 platform as an example. Full step by step instructions can be found here.
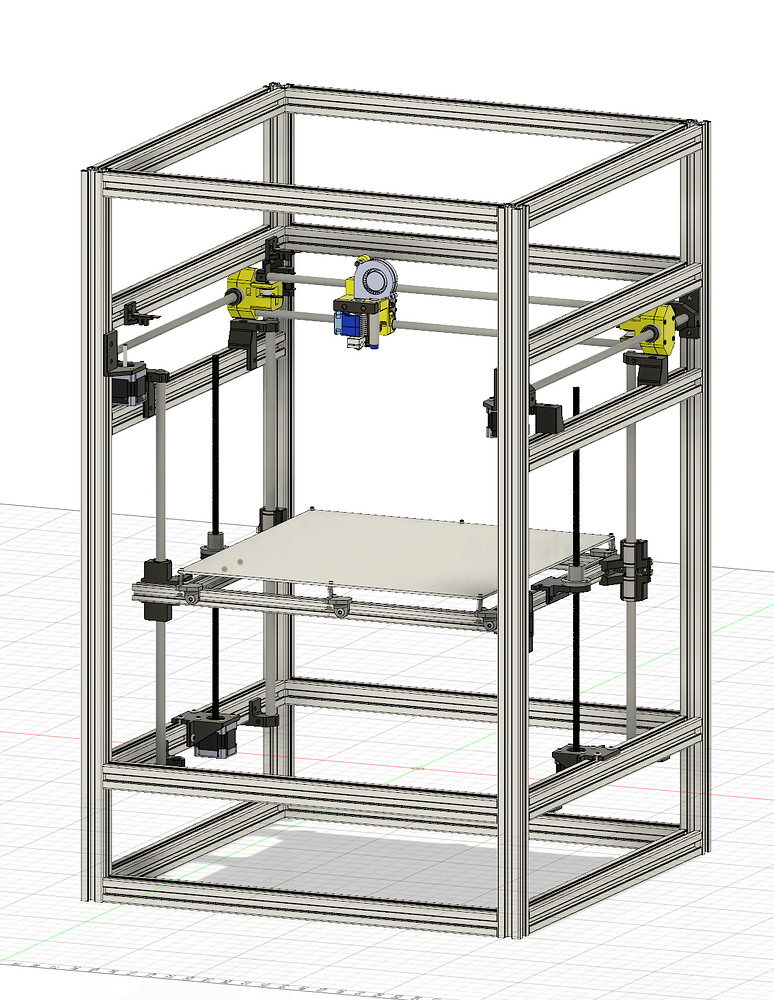
The general scheme of all the main components looks something like this. There is nothing particularly complicated here:
I also recommend adding a display to your design. Yes, you can easily do without this element when performing operations on a PC, but it will be much more convenient to work with the printer this way.
Understanding how all components will be connected, let's move on to the mechanical part, where we have two main elements - a frame and a coordinate machine.
Assembling the frame
Detailed frame assembly instructions are available on RepRap. Of the important nuances - you will need a set of plastic parts (I already talked about this above, but I'd better repeat it), which you can either purchase separately or ask your comrades who already have a 3D printer to print.
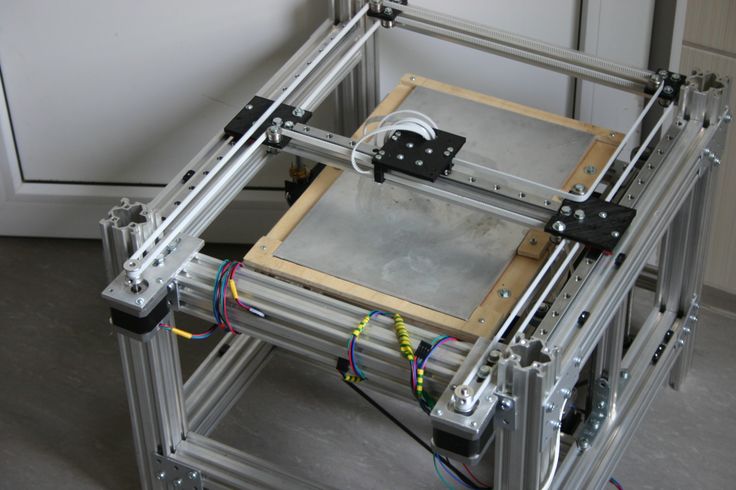
The frame of the i2 is quite stable thanks to its trapezoid shape.
This is how the frame looks like with parts already partially installed. For greater rigidity, I reinforced the structure with plywood sheets
Coordinate machine
An extruder is attached to this part. The stepper motors shown in the diagram above are responsible for its movement. After installation, calibration is required along all major axes.
Important - you will need to purchase (or make your own) a carriage for moving the extruder and a mount for the drive belt. Drive belt I recommend GT2.
The carriage printed by the printer from the previous picture after it has been assembled. The part already has LM8UU bearings for guides and belt mount (top)
Calibration and adjustment
So, we completed the assembly process (as I said, it took me 150 hours) - the frame was assembled, the machine was installed. Now another important step is the calibration of this very machine and extruder. Here, too, there are small subtleties.
Setting up the machine
I recommend calibrating the machine with an electronic caliper. Do not be stingy with its purchase - you will save a lot of time and nerves in the process.
The screenshot below shows the correct constants for the Marlin firmware, which must be selected in order to set the correct number of steps per unit of measure. We calculate the coefficient, multiply it, substitute it into the firmware, and then upload it to the board.
Marlin 9 firmware constants0022
For high-quality calibration, I recommend relying on larger numbers in measurements - take not 1-1.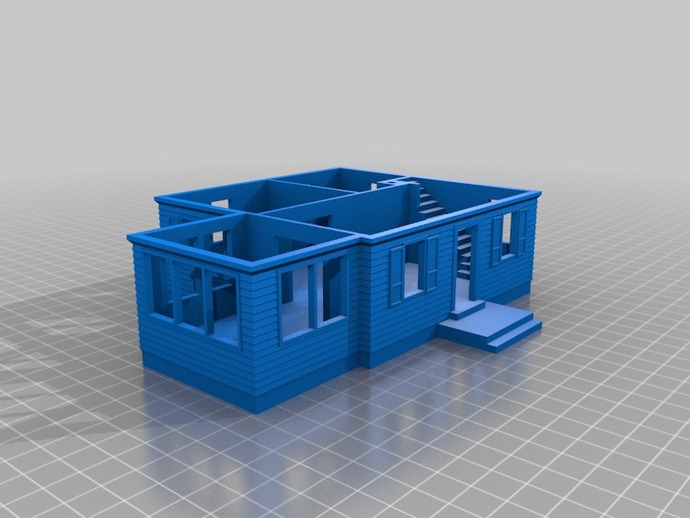 5 cm, but about 10. So the error will be more noticeable, and it will become easier to correct it.
Calibrating the extruder
When the frame is assembled, the machine is calibrated, we start setting up the extruder. Here, too, everything is not so simple. The main task of this operation is to correctly adjust the supply of plastic.
If underfeeding, the printed test item will have noticeable gaps, like test die 1. Conversely, the result will look bloated if plastic is overfed (dice 2)
Getting Started Printing
It remains for us to run some CAD or download ready-made .stl, which describe the structure of the printed material. Next, this structure needs to be converted into a set of commands understandable to our printer. For this I use the Slicer program. It also needs to be set up correctly - specify the temperature, the size of the extruder nozzle. After that, the data can be sent to the printer.
Slicer interface
As a raw material for printing, I recommend starting with regular ABS plastic - it is quite strong, products made from it are durable, and it does not require high temperatures to work with. For comfortable printing with ABS plastic, the table must be heated to a temperature of 110-130 ° C, and the extruder nozzle - within 230-260 ° C.
Some important details. Before printing, calibrate the machine along the Z axis. The extruder nozzle should be approximately half a millimeter from the table and ride along it without distortion. For this calibration, a regular sheet of A4 paper inserted between the nozzle and the surface of the heated table is best suited. If the sheet can be moved with little effort, the calibration is correct.
Another thing to keep in mind is the surface treatment of the heated table. Usually, before printing, the surface of the table is covered with something that hot plastic sticks to well. For ABS plastic, this can be, for example, Kapton tape. The disadvantage of adhesive tape is the need to re-glue it after several printing cycles. In addition, you will have to literally tear off the adhering part from it. All this, believe me, takes a lot of time. Therefore, if it is possible to avoid this fuss, it is better to avoid it.
An alternative option that I use instead of scotch tape is to apply several layers of ordinary light beer, followed by heating the table to 80-100 ° C until the surface is completely dry and re-applying 7-12 layers. It is necessary to apply the liquid with a cloth moistened with a drink. Among the advantages of this solution: ABS plastic separates from the table on its own when it cools down to about 50 ° C and is removed without effort, the table does not have to be peeled off, and one bottle of beer will last you for several months (if you use the drink only for technical purposes :)).
After we have collected and configured everything, we can start printing. If you have an LCD screen, then the file can be transferred for printing using a regular SD card.
The first results may have bumps and other artifacts - do not worry, this is a normal process of "grinding" the printer elements, which will end after a few print cycles.
Tips to make life easier (and sometimes save money)
In addition to the small recommendations given in the text above, in this section I will also give a short list of tips that will greatly simplify the operation of a 3D printer and the life of its owner.
- Do not experiment with nozzles. If you plan to immediately print from materials that require high temperatures, then it is better to immediately take the MK10 extruder. On MK8, you can "hang" special nozzles that support high-temperature conditions. But such modifications often cause difficulties and require special experience. It is better to avoid this fuss on the shore by simply installing the right extruder for you.
- Add starter relay for heated table. Improving the power supply system for this important printing part with a starter relay will help solve the known problem of RAMP 1.4 - overheating of the transistors that control the power of the table, which can lead to failure of the board.
 I made this upgrade after having to throw away a few RAMPS 1.4s.
 - Select the correct filament diameter for printing. I recommend using 1.75mm plastic for MK8 and MK10. If we take plastic, for example, 3 mm, then the extruder simply does not have enough strength to push it at an acceptable speed - everything will be printed much longer, and the quality will drop. ABS plastic is ideal for MK8, MK10 will be able to produce products from polycarbonate.
- Use only new and precise X and Y guides. Print quality will be affected. It is difficult to count on good quality with bent or deformed guides along the axes.
- Take care of cooling. During my experiments with various extruders, the MK10 showed the best results - it prints quite accurately and quickly. The MK10 can also print plastics that require a higher print temperature than ABS, such as polycarbonate. Although it is not as prone to overheating as its younger brother MK8, I still recommend taking care of its cooling by adding a cooler to your design.
 It must be permanently enabled, this option can be configured in Slicer. You can also add coolers to keep the stepper motors at an acceptable temperature, however, make sure that their air flows do not fall on the printed part, as this can lead to its deformation due to too rapid cooling.
 - Consider heat retention. Yes, on the one hand, we are struggling with overheating of the elements. On the other hand, a uniform temperature around the printer will contribute to high-quality printing (the plastic will be more pliable). To achieve a uniform temperature, you can put our printer, for example, in a cardboard box. The main thing is to connect and configure the coolers before that, as described above.
- Consider insulating your desk. Heated table heats up to high temperatures. And if part of this heat leaves properly, heating the printed part, then the second part (from below) just goes down. To concentrate the heat from the table onto the part, you can perform an operation to insulate it.
 To do this, I simply attach a cork mouse pad to its bottom using stationery clips.
Pins
I am sure that during the assembly process you will encounter a number of difficulties specific to your project. Neither this text nor even the most detailed guides will insure against this.
As I wrote in the introductory part, the above does not claim the status of a detailed assembly manual. It is almost impossible to describe all the stages and their subtleties within the framework of one such text. First of all, this is an overview material that will help you prepare for the assembly process (both mentally and financially), understand whether you personally need to bother with self-assembly - or give up on everything and buy a ready-made solution.
For me, assembling printers has become an exciting hobby that helps me solve some issues in home and work affairs, take my mind off programming and do something interesting with my own hands. For my children - entertainment and the opportunity to get unusual and unique toys. By the way, if you have children whose age allows them to mess around with such things, such an activity can be a good help for entering the world of mechanics and technology.
For everyone, the vectors of using 3D printers will be very different and very individual. But, if you decide to devote your personal time to such a hobby, believe me, you will definitely find something to print :)
I will be glad to answer comments, remarks and questions.
What to read/see
- what can be printed;
- 3D printer forum;
- RepRap community site with model descriptions and assembly instructions;
- printer that prints electronics.
Subscribe to the Telegram channel "DOU #tech" so you don't miss new technical articles.
Topics: DIY, embedded, tech
Who creates the best work as a 3D printer client?・Cults
BLU-5 is one of the most affordable desktop 3D printers we've ever made. It offers the largest print area of any TwoTrees 3D printer, the most consistent performance, and is suitable for users of all skill levels.
Its all-metal base and frame provide durable performance. Simple, elegant design combined with outstanding performance makes the BLU-5 a toy for DIY enthusiasts, as well as a professional printing machine for designers and factories.
Here is a video review made by Aurora Tech, you can search for other video reviews of the BLU-5 printer on Youtube (formerly known as BLUER Plus).
90% pre-assembled, easy to install
BLU-5 comes with 90% pre-assembled parts that require minimal installation. Most installations can be easily done with hex wrenches.
To ensure that users receive devices without printing problems, each device is assembled for a 3D cube printing test prior to shipment. Few factories test the print before shipping as it is time consuming and labor intensive.
90% Finished Desktop 3D Printer
Smart 3D Touch Sensor and Auto Leveling
The BLU-5 also has a built-in 3D touch sensor that allows the printer to check if the build platform is level and apply if necessary. adjustments.
After checking that each part is installed correctly, it is recommended and necessary to perform alignment before printing. The alignment and leveling function in Tool Settings (on the touch screen) allows you to move the nozzle and 3D touch sensor around multiple points and register the position of each one. If the distance between the dot, nozzle and print bed differs from other dots, the software automatically starts the alignment process.
Built-in 3D touch sensor
Large print area for more options
Compared to other TwoTrees consumer 3D printers, BLU-5 is the largest 3D printer with 300*300*400mm print area. It is also one of the best large-scale 3D printers available in the consumer market.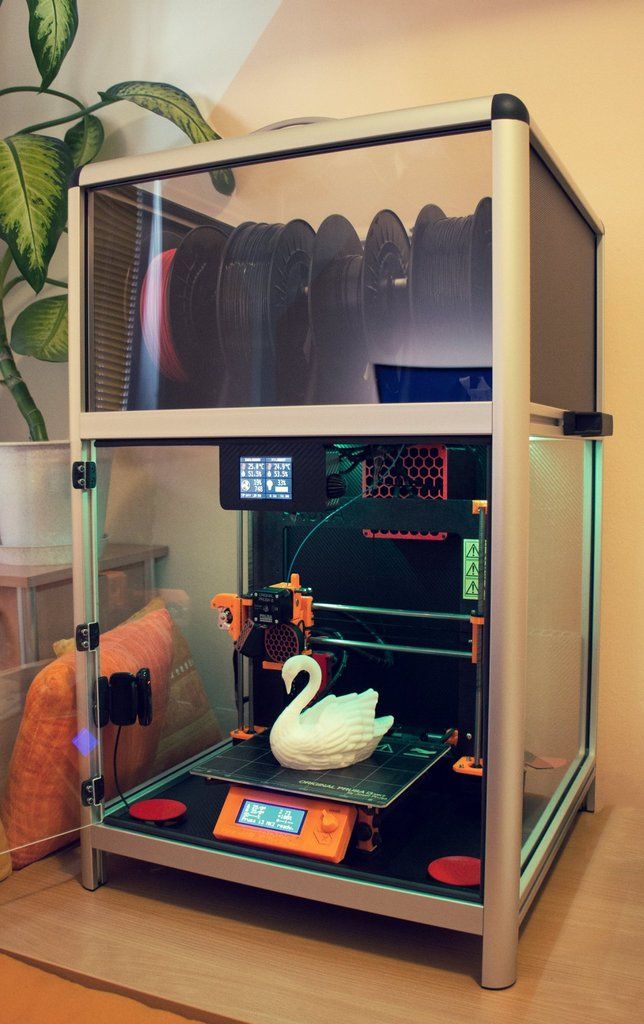 The print size of 300*300*400mm provides enough space for most DIY projects and allows users to complete printing of multiple models in one print. If you're not sure what size you need, the BLU-5 is a good budget option if you take everything into account.
Large 3D Printer
Patent Development: Automatic Space Adjustment Function
The basic working principle of FDM 3D printing requires that the print head and print bed move in sync with the design file. Since 3D printing is extremely demanding on precision, any imperceptible defect can cause the print to fail or become distorted.
Patented auto-spacer kit with spring kits greatly reduces motion-induced vibration for high precision and smooth printing.
Auto interval function
Silent operation: TMC2209 mute driver
One of the main disadvantages of using FDM 3D printers is annoying noise.
TMC2209 mute driver reduces running motor noise and makes 3D printing an enjoyable experience.
Dual Z-Axis and Synchronous Belt
Instead of a single Z-axis lead screw, the BLU-5 uses two lead screws with a synchronous belt for smoother movement and faster response.
This unique setting effectively reduces vibration and improves print accuracy and speed.
Z-Axis Twin Guide Screws
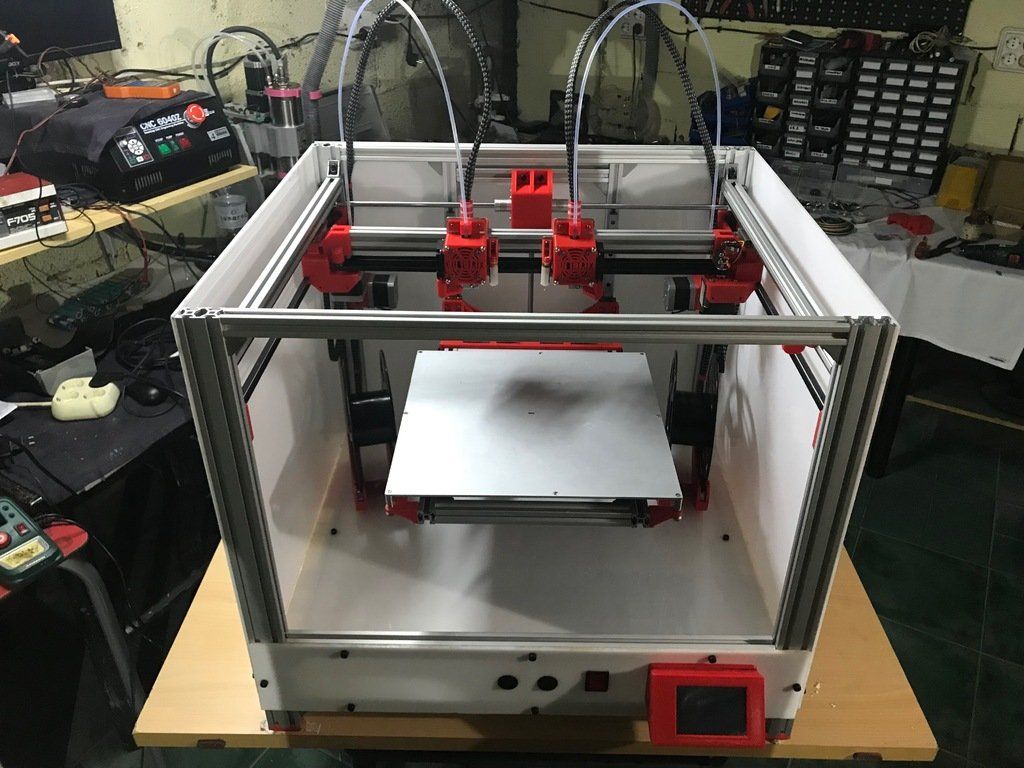
Transparent Dual Stage Extruder
Compared to 3D printers with single stage extruders, the BLU-5 uses dual stage extruders to provide greater stretching force to achieve more stable and smooth extrusion.
Transparent housing allows users to observe and control the entire process with the naked eye.
Packed PEI greenhouse
Although the PEI greenhouse is a basic accessory for 3D printers, users usually have to pay extra for it from most vendors.
In order to provide users with a print-ready desktop 3D printer, a PEI greenhouse is included with the BLU-5 printers.
Thanks to the resilient and wear-resistant surface, you can easily remove printed designs.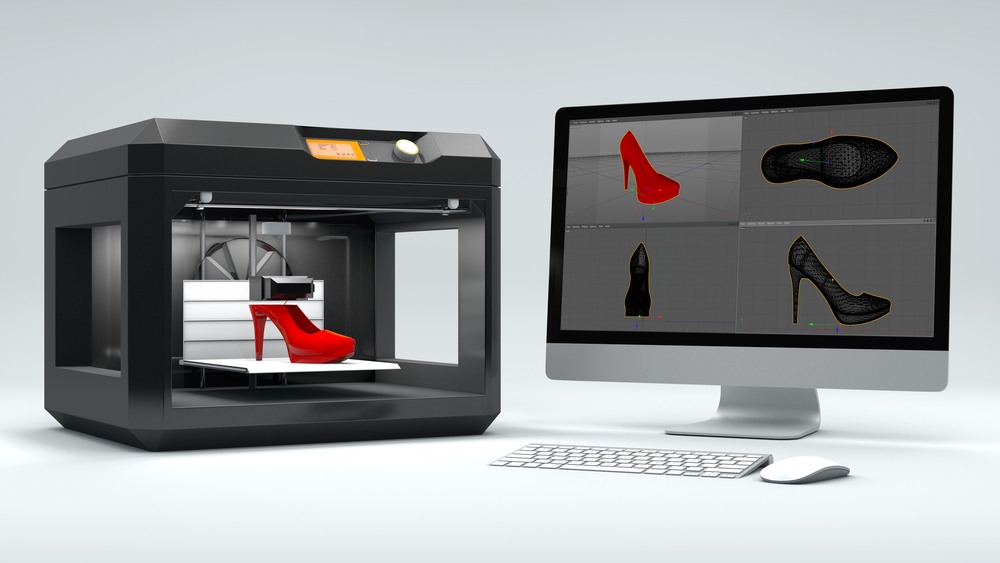
RJ45 jack
Instead of using other jacks, the BLU-5 uses the common RJ45 interface for connection, which is much more readily available in local stores and easier for users to find replacements on demand.
RJ45 is also more reliable and efficient in signal transmission.
RJ45 jack
Filament running out detection function and resuming printing on power up
It is quite normal when filaments run out during printing, and restarting wastes a lot of time and money on filaments. To solve this problem, all TwoTrees 3D printers are equipped with an intelligent low filament sensor and a restart function.
Whether printing is interrupted due to a power failure or a broken filament, the printer will resume printing at the exact layer or position where it left off.
Thread flow detection
- X and Y belt tensioner allows users to make proper adjustments without the need for additional tools.
- Removable motherboard service cover makes motherboard replacement much more convenient.
- The 4.3-inch touch screen control panel provides a clear, simple interface and fast response to every touch.
- All-metal base and frame make the 3D printing machine strong and durable for long-term use.
Click to use promo code
(coupon code automatically added at checkout).
Established in 2017 as a manufacturer of 3D printer accessories, TwoTrees is fast becoming one of the most trusted companies in the world in developing, manufacturing and marketing desktop FDM 3D printers. In addition, TwoTrees is the pioneer of self-developed laser engraving machines in China. Today, our business includes FDM 3D printers, filaments, resins, as well as laser engraving machines and related accessories that have a global reach.
With R&D teams and a specialized experimental studio, we promise to always maintain a customer-oriented concept to provide more cost-effective innovative products.