3D printed chandelier
3d Chandelier - Etsy.de
Etsy is no longer supporting older versions of your web browser in order to ensure that user data remains secure. Please update to the latest version.
Take full advantage of our site features by enabling JavaScript.
Find something memorable, join a community doing good.
( 354 relevant results, with Ads Sellers looking to grow their business and reach more interested buyers can use Etsy’s advertising platform to promote their items. You’ll see ad results based on factors like relevancy, and the amount sellers pay per click. Learn more. )
3D Printing for Manhattan Chandelier and Lighting Designers « Fabbaloo
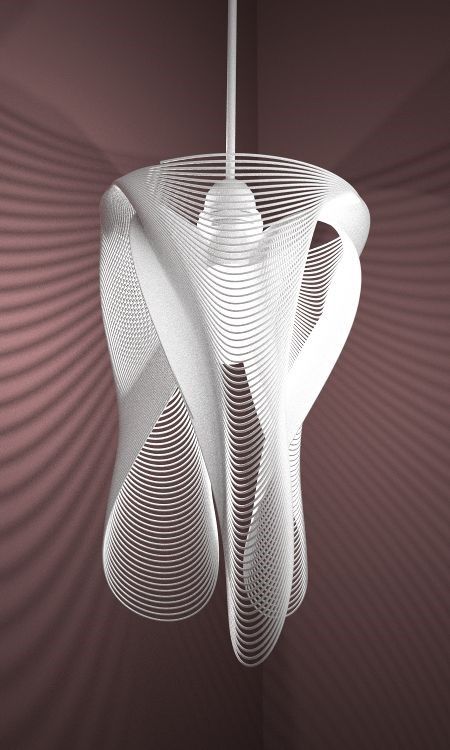
‘Forms in Nature’ by designers Thyra Hilden and Pio Diaz [Source: My Modern Met ]Charles Goulding and Andressa Bonafe of R&D Tax Savers discuss 3D printing in lighting design.
3D printing has played an important role in bringing innovative lighting design to life. The combination of additive manufacturing and more efficient, smaller LED lighting has enabled unprecedented design freedom, which is seen in unique and innovative products, such as the ones referred to as the “Manhattan chandeliers”. Lighting designers and artisans who use 3D printing may be eligible for R&D Tax Credits.
The Research & Development Tax Credit
Enacted in 1981, the federal Research and Development (R&D) Tax Credit allows a credit of up to 13 percent of eligible spending for new and improved products and processes. Qualified research must meet the following four criteria:
-
New or improved products, processes, or software
-
Technological in nature
-
Elimination of uncertainty
-
Process of experimentation
Eligible costs include employee wages, cost of supplies, cost of testing, contract research expenses, and costs associated with developing a patent.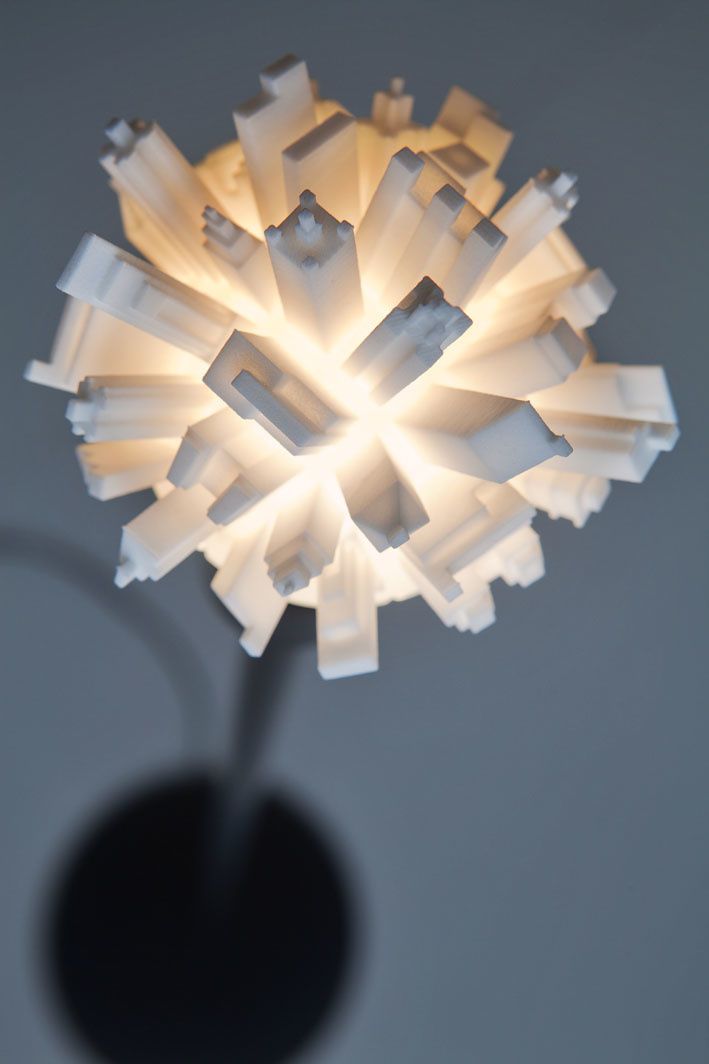 On December 18, 2015, President Obama signed the bill making the R&D Tax Credit permanent. Beginning in 2016, the R&D credit can be used to offset Alternative Minimum Tax and startup businesses can utilize the credit against $250,000 per year in payroll taxes.
The Manhattan Chandelier
A recent article at the Financial Times lifestyle magazine “How to Spend It” highlights how innovative designers based in NYC are inaugurating a new genre of lighting design. The piece presents the apparently contradictory aesthetics of these made-to-order, high-end chandeliers that have “architectural but organic” silhouettes and a style that is “modern but warm”. The author, Mark O’Flaherty, gives numerous examples of ground-breaking designs that mix “geometry with nature”, “organic with industrial”. The so-called “Manhattan chandelier” is simultaneously “ancient and futuristic”, “bold yet delicate, hard yet soft, heavy yet light”.
Gabriel Hendifar, from the celebrated Apparatus Studio, points out that in addition to a common ideal, or zeitgeist, the “Manhattan chandelier” movement is about returning to traditional materials, such as brass, glass, porcelain, lacquer and wood, “materials that humans have been trying to make things out of for centuries. ” The Financial Times article cites Stephen Alesch, from Roman and Williams, according to which “there is a shift towards traditional and vernacular detailing and form – albeit with a refinement of detail”, he further states that “careful proportion and symmetry appear to be back in style, while period fluff is being eliminated.”
3D Printing for Lighting Design
Additive manufacturing brings the most cutting-edge designs to life with unparalleled ease, giving designers unprecedented freedom in terms of shape, use and mechanisms. 3D printing is especially interesting for made-to-order designs, as it allows for production to meet the scale of demand. Designers that do not follow a mass-production business model can particularly benefit from an economic standpoint.
3D printing can be particularly useful for quick prototyping, which enables designers to assess the viability of their work. The expansion of 3D printing materials, which now include metals, also allows for new production techniques, which can be expedited. 3D printing helps overcome the limitations of classic manufacturing approaches, allowing for enhanced design flexibility and enabling virtually unlimited new forms.
As underlined by the Financial Times, 3D printing is particularly useful for ambitious designers as it allows them to execute complex pieces at relatively low costs. Ease of alteration is also an important aspect, especially as the coding aspect of it reduces the risks involved. The single-step manufacturing process itself eliminates the need for tools and molds and allows for complete production once the digital model is complete. Additional benefits include the reduction of waste, as material quantities are precisely calculated.
3D Printing for Cutting-Edge Lighting Design
There are numerous examples of innovative 3D printed lighting structures, including iconic pieces that mix functionality and artwork. Unveiled in 2006, Luc Merx’s “Fall of the Damned” sheds light on the potential of 3D printed design. The thought-provoking piece brought together two hundred and four bodies around an illuminated axis, creating a dramatic chandelier.
Similarly, Linlin and Pierre-Yves Jacques used additive manufacturing in the “Animal Lace” series to build wall-mounted lamps shaped as the heads of a dear, bear, and elephant. The decorative pieces are made out of white polyamide and gloss paint and incorporate lighting inside.
‘Animal Lace’ designed by Linlin and Pierre-Yves Jacques [Source: Design Swan ]Also mixing art and functionality, Dutch artists Thyra Hilden and Pio Diaz created “Forms in Nature”, a chandelier (image top) that “turns any room into a wild forest made of haunting oversized shadows.” The designers utilize a software program that multiplies and refines original hand drawings to create a unique pattern. The components are subsequently 3D printed with special hardened plastic powder that can withstand the heat from the light bulb and will stay bright white over time. These elements are finally put together by hand, in an eight-hour process.
3D Printing and NYC Lighting Design
David Weeks
‘LORRE’ created by the David Weeks Studio [Source : David Weeks Studio ]NYC-based designer David Weeks has experimented with additive manufacturing in lighting design. The David Weeks Studio has created LORRE, a proof of concept installation exploring the interaction between space, light, and material. It includes 3D printed kinetic lights made of nylon plastic, which were printed using selective laser sintering, an additive manufacturing technique that utilizes heat from a high-power laser to fuse together powdered material. The sculptural lighting piece is based on the idea of altering a space with simple lines. Using the inherent conductivity of copper cables, the light source is free to move without the constraints of wiring.
Apparatus Studio
In a recent interview, Gabriel Hendifar of Apparatus stated that 3D printing is often a part of his design process.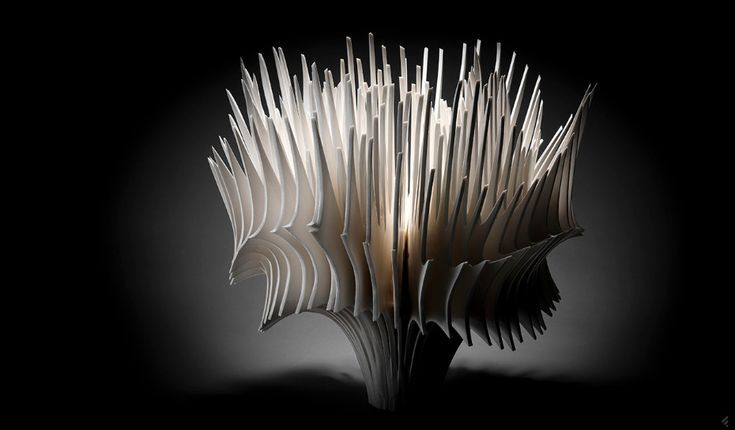 In his own words, “once I have a solid idea for the mood and shape of a new product, I hand sketch and review those sketches with our design team. Then we explore proportion using digital modeling, and generally make a 3D print or full-scale model to experience a piece in real space.”
Lindsey Adelman
Lindsey Adelman, who is considered a pioneer of contemporary New York lighting design, has pointed out how 3D printing enables major cost savings especially in relation to tooling and mold-making. For instance, ceiling medallions that often accompany chandeliers can be produced through additive manufacturing and subsequently electroplated in copper to match the finishes of the entire piece. Lindsey has used 3D printing in jewelry design and production.
Bec Brittain
Known for its detailed, crystalline work, Bec Brittain also incorporates 3D printing into the design process. In a 2014 interview, she underlined the benefits of 3D printed hardware prototypes, which enable designers to see and test pieces in a back-and-forth process between digital and physical models. Many of her products, such as the iconic SHY, have modular hardware and thus allow for numerous different configurations. 3D printed prototypes facilitate the testing process for new, customized shapes that meet demands of different spaces.
Gabriel Scott
The GABRIEL SCOTT Showroom in NYC [Source: Design Milk ]The Canadian furniture and lighting brand Gabriel Scott started operations in NYC in 2014. With a background in architecture, industrial design and jewelry-making, Gabriel Kakon and Scott Richler bring a multidisciplinary set of skill and style to the furniture and lighting world as GABRIEL SCOTT. In a 2017 interview, they highlighted the importance of 3D printing for quick prototyping.
The GABRIEL SCOTT Showroom in NYC [Source: Design Milk ]Robert Debbane
Brooklyn-based designer Robert Debbane explores the interaction between traditional art-making and digital processes.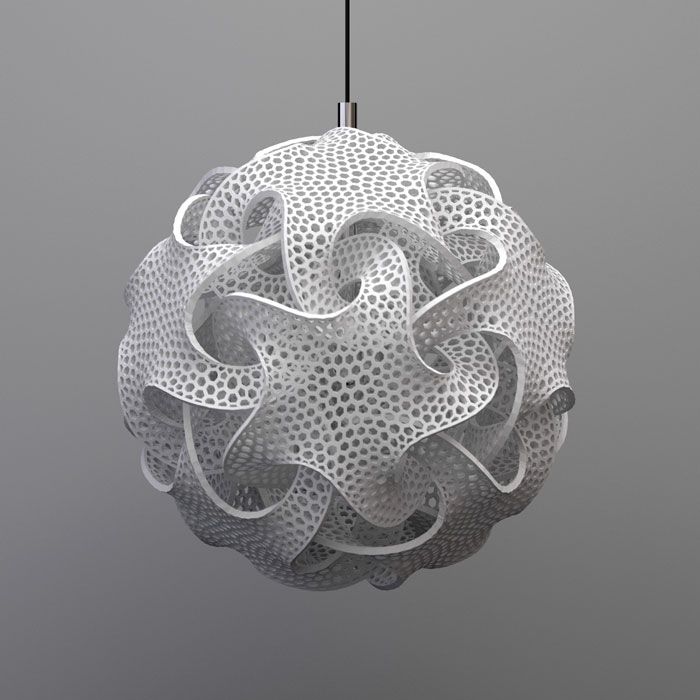 Of Lebanese descent, he takes inspiration from Islamic tile patters, nature, and images of outer-space to create innovative 3D printed lighting designs that are made-to-order. The sculptural lamps and chandeliers are printed in ABS plastic and in nylon to create a combination of different amounts of lighting passing through to generate geometric designs.
Conclusion
3D printing opens the way for unprecedented design freedom, enabling lighting designers to reach new creative and aesthetic heights. As NYC-based designers strive to leave their mark through ground-breaking, unique work, additive manufacturing can be an invaluable tool to open up new possibilities. Artists and lighting designers who engage in 3D printing of lighting fixtures should take advantage of R&D Tax Credits to support their innovative efforts.
Signify To 3D Print Massive Quantities of Light Shades And Fixtures
Signify announced a plan to mass customize lighting products using 3D printing technology, potentially requiring as many as 500 3D printers.
Rensselaer Polytechnic Institute Professors Give Presentation on 3D Printing in the Lighting Industry
Charles Goulding and Peter Favata of R&D Tax Savers delve into 3D printing in the lighting industry.
Startup Targets 3D-Printed Consumer Goods with Unique Four-Gantry 3D Printer
It was around 2014 that the consumer 3D printing bubble burst, causing the stocks of stalwarts like Stratasys and 3D Systems to plummet.
The Lighting Industry, LRC, and the 3D Printing Industry Get Proactive
Charles Goulding and Rafaella July of R&D Tax Savers discuss 3D printing in the lighting industry.
3D Printing for Manhattan Chandelier and Lighting Designers
Charles Goulding and Andressa Bonafe of R&D Tax Savers discuss 3D printing in lighting design.
Design of the Week: Splashlight
This week’s selection is the surprising Splashlight by Australia-based Avooq Creations.
Design of the Week: LED Bridge
This week’s selection is the rather large LED Bridge lamp by Thingiverse contributor Janis Jakaitis.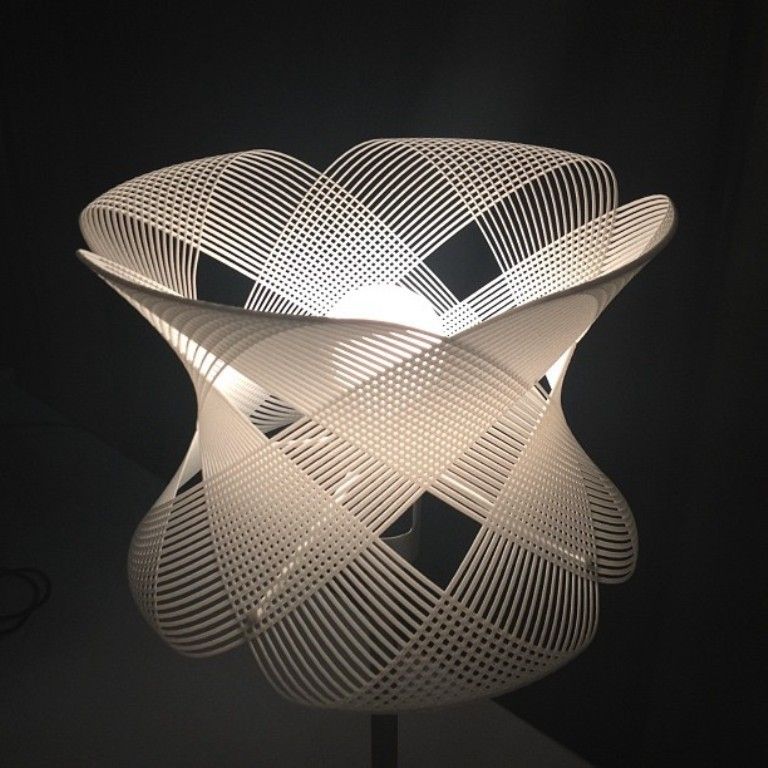
Design of the Week: Voronoi Pearl Light Lamp No. 1
This week’s selection is the decorative Voronoi Pearl Light Lamp No. 1 by designer Gravity Shapes.
Design of the Week: Lily Lamp
This week’s selection is now-historical Lily Lamp by well-known 3D designer Janne Kyttanen.
What is the actual size of the product after 3D printing?
05/10/2018 in 3D Modeling, Expert Blog, Instructions
In this article, we will consider the most common reasons for changing the final dimensions of manufactured products printed on a 3D printer. This article will be helpful for designers and inventors to understand how to design 3D models for 3D printing.
First, let's introduce some terminology. All deviations that occur in the technological process of 3D printing and related technologies, we will call “error”. Consider what types of errors are and delve into each of them.
- Extrusion width error.
- Approximation of radii depending on layer height.
- 3D printer extruder positioning accuracy.
- Inertial beats.
- Uncontrolled material shrinkage.
- First layer error.
- Porosity.
- Matching accuracy after printing details, splitting into components.
- Locations where support material is torn off.
- Thin wall roughness.
Extrusion width error.
Preparing a 3D model for 3D printing comes down to creating a so-called G-code. G-code is a computer code that sets the movement for all the electric motors of a 3D printer. These motors include those responsible for moving the extruder (the 3D printer's 3D printed head). The movements and movements of the extruder are given by the trajectory, which is determined by the line. In preparation for 3D printing, the model is split along the Z axis into layers, determined by the selected layer height. The trajectory of the extruder is built based on the dimensions of these layers, and in the case of the layer perimeter, it describes the outer surface of the model, averaged along the Z axis. In turn, the extruder repeats the trajectory laid down in the G-code, namely the center of the nozzle. Ultimately, when designing models, it is necessary to take into account the fact that the nozzle itself has a hole diameter through which plastic is extruded. In simple terms, the nozzle radius is added to the size of the 3D model. When choosing a 3D printer, in terms of extrusion width error, the accuracy of the part will be higher on the one with a smaller diameter nozzle.
 And when designing three-dimensional models for 3D printing, it is necessary to lay a margin for model widening. I want to note that in other 3D printing technologies that use a laser or an illumination device, the width of the outer perimeter line depends on the focus, that is, on the thickness of the beam. As a rule, these parameters can be clarified with the manufacturer of the 3D printer or with Studia3D specialists.
Let's see how it works on the example of a 3D model that has a hole.
The figure shows the 3D model, rendering of the prepared G-code and the trajectory of the center of the extruder nozzle for the 7th layer of 3D printing. Select the perimeters of the holes and overlay the actual extrusion width on the trajectory (Highlighted in light green).
As you can see, the hole diameter is smaller. How much? On the nozzle radius on one side + the nozzle radius on the other. That is, when designing a hole, I need to lay a gap equal to the width of the nozzle.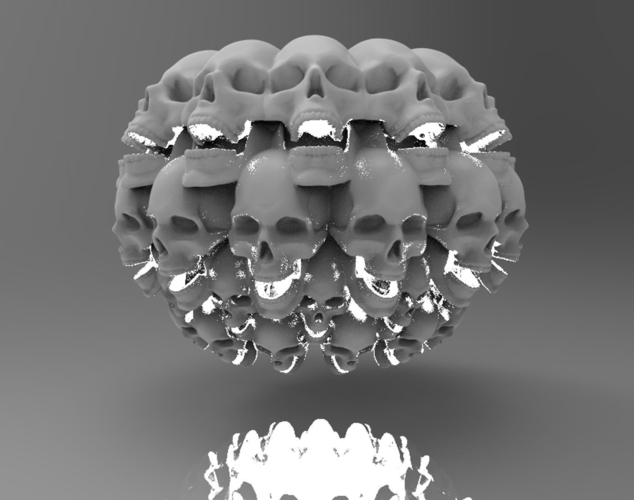 The same goes for all other cars. The smaller the nozzle size, the closer to the nominal dimensions the part will be. At the same time, printing with a nozzle of a smaller diameter will cost more. This is due to performance. Through a larger nozzle, more plastic comes out per unit time, which affects the speed of printing. The operating time of the printer, as well as the amount of material, affects the cost of obtaining the product.
Approximation of radii depending on layer height.
The specified layer height directly affects the accuracy of 3D printing. This is clearly expressed on the radii in the sections of the model along the vertical. Consider the part from the previous paragraph, positioning it on the edge in the 3D printer chamber.
As you can see in the figure, the quality of the hole depends on the selected layer height. The lower the layer height, the better the detail. In this case, it is worth considering the time of 3D printing. As the layer height increases, the print time decreases by reducing the total length of the trajectory described by the extruder.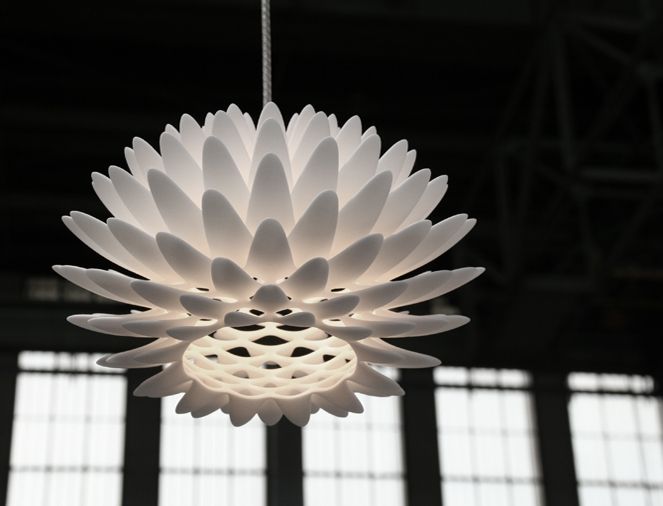 Accordingly, the price of the part is reduced, because. The operating time of a 3D printer directly affects the cost of 3D printing.
3D printer extruder positioning accuracy.
This parameter determines the accuracy of repetition by the center of the extruder nozzle of the trajectory specified in the G-code. In other words, this parameter characterizes the maximum possible deviation of the center of the extruder nozzle from the trajectory during printing. This parameter is specified by the 3D printer manufacturer for a specific printer model. But it should be noted that this parameter corresponds to the manufacturer's recommended 3D printing speed. In turn, Studia3D specialists, when preparing the G-code, reduce the influence of this parameter to a minimum, but do not exclude it at all. In addition to speed, this parameter is affected by the rigidity of the 3D printer and the extruder drive system.
Inertial beats.
As a special case of positioning accuracy, we single out inertial beats that occur during 3D printing as a separate point. This parameter is affected by the same positions that were described in the previous paragraph, however, this error is reduced in a different way. This can be understood by studying the moment at which the influence of this error on the print quality arises - a sharp change in the direction of the extruder's motion vector. When the electric motors, together with the drive system, abruptly change the direction of the trajectory, the print head, which has some characteristic weight, continues to move in the previous direction by inertia. As a result, dynamic damped oscillations occur, which negatively reflects the surface. The influence of this error is reduced in two ways. Decreasing the speed of printing the outer perimeter, which we use when printing all models without exception and is laid at the stage of preparing the G-code. The second method is laid down when designing the model: if possible, it is necessary to add mates to acute-angled faces in the model, which, when the part is positioned on the 3D printer platform, in sections parallel to the XY plane, will give sharp corners in the perimeters.
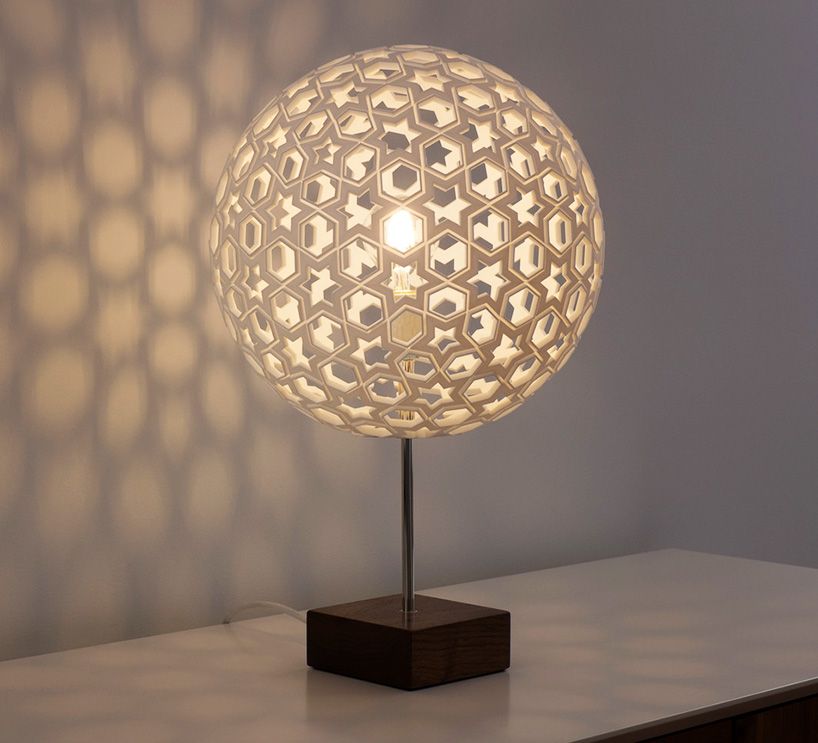 As practice shows, a pairing of 2 mm is considered sufficient. We show with an example.
As you can see in the figure, by rounding the corner (by entering a fillet on the face), we minimized the influence of this error.
Uncontrolled material shrinkage.
This parameter has its effect, as a rule, in the case of 3D printing of large objects. Large - this means more than 30% of the maximum size of the 3D printer camera along any of the coordinate axes. Most often, this error manifests itself in interlayer adhesion and a decrease in dimensions in planes parallel to XY.
Our observations have shown an approximate shrinkage for some of the most common materials in relation to cross-sectional dimensions parallel to the coordinate axes.
ABS: XY ≈ 5%; Z ≈ 1%
PLA: XY ≈ 2%; Z ≈ 0.5%
Polypropylene: XY ≈ 7%; by Z ≈ 10%
First layer error.
The G-code preparation program considers the 3D printer platform to be absolutely parallel to the XY plane, however, in practice, platform calibration also has its own error. In Studia3D, the norm for the difference in thickness of the first layer is:
Δ=0.1 mm from a layer height of 0.2 mm
Δ=0.05 mm from a layer height of up to 0.2 mm
Porosity.
Porosity in the case of 3D printing is usually discussed only in the case of the percentage of filling of internal floors up to 100%. However, when printing with 100% infill, the porosity does not go anywhere.
This can be clearly seen by examining the gap in the workpiece through a microscope to determine the strength characteristics.
If the model is not included in the printable area of the 3D printer, it is split into components. In the best case, grooves are provided for the most accurate assembly. You need to understand that the assembly of the model from the components also affects the accuracy of the overall design. This accuracy is very difficult to assess. We accept deviations from the given model of the order of + - 2%. To fix the joint, we almost never use glue, but use a special chemical solution.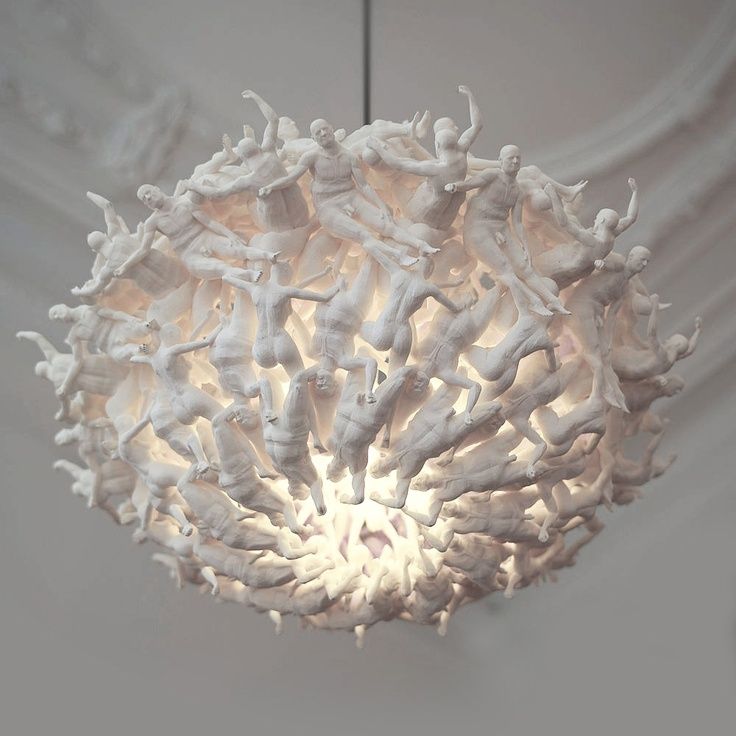 Ultimately, the parts are not glued, but soldered, only not by thermal melting of the material, but by chemical. As for the adhesion strength: it is higher than the adhesion between layers. In simple terms, if you throw such a part against a wall, it will break, but first of all not at the joints.
Locations where support material has been torn off.
This item applies to mechanically removed supports. Since the material of the support and the material of the main part consist of the same material, they are simply soldered together under the influence of temperature. When such supports are torn off, traces, threads, chips, etc. remain.
To minimize this error, it is necessary to order 3D printing with soluble supports. Due to the expensive soluble support material, the cost of 3D printing also increases significantly. Accuracy, like beauty, requires sacrifice.
Thin wall roughness.
When preparing a G-code in standard form, the program strives to make your part as strong as possible. This is bad only in one case, when the product has thin-walled elements. When constructing a trajectory, we set the minimum wall thickness inside which the infill will be built. As a rule, this thickness is equal to the 3rd nozzle diameter. But in cases where there are places where the thickness is less than the thickness of the outer wall, when constructing the trajectory, the program will draw one perimeter on each side, and fill the void between them. Due to the fact that filling will occur at a distance of 1 to 2 nozzle diameters, the extruder will begin to vibrate, inertial beat will begin (see point inertial runout ). The more this distance is reduced to 1 nozzle diameter, the faster the near-resonant frequency occurs. All this negatively affects the appearance of this wall, since the vibration is transmitted to the adjacent material. Let's look clearly.
To minimize this error, it is necessary to design the part in such a way that the wall thickness is a multiple of the nozzle diameter. Face difference!
Output.
In conclusion, I want to note that when designing three-dimensional models for 3D printing, it is necessary to take into account the totality of all factors affecting the accuracy of products, and not consider any particular one. The Studia3D team works every day to ensure that the 3D printing process is completely predictable and controllable, however, like any kind of production, 3D printing has its own precision. There are no ideal sizes. Therefore, we are very pleased if, in addition to three-dimensional models, a working drawing of the product is provided, where all fits, tolerances, roughness, etc. are indicated. Only in this case we can choose the technology, properly prepare the G-code and guarantee the quality laid down by the designer. In other cases, before starting a batch, it is necessary to make “sighting” seals, having examined and selected the necessary parameters.
3D printed clothing | Live interestingly
Mrs. interesting 03/29/2013 Interesting things comments 17
3D printing of clothes will soon be available to fashion lovers, not just catwalk divas and models. Engineers and designers have been working in this direction for many years and create new concepts for consumer 3D printers that can print clothes as easily as you print text on paper.
No threads, needles, sewing machines. Only computers, printers, design programs and unbridled flight of fancy.
The concept of a compact 3D printer to print clothes, from boring or out of fashion, are offered by designer Joshua Harris.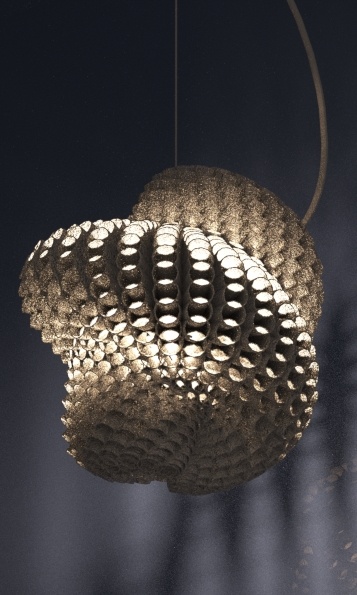 The concept is conceived as a 3D printer that connects to a clothing retail chain.
Fashion designers and fashion designers can sell electronic versions of their products online. It remains only to load the boring old thing into the printer, select the appropriate model, and after a while you can already show off a new T-shirt, trousers or blouse.
It is a pity that the technology of this 3D printer is still in virtual reality, but in reality, only pictures and dreams. But, as we have already seen, dreams come true, and new technologies are gaining their place in real life.
For now 3D printed dresses are shown in fashion collections of haute couture designers. In January of this year, Dutch designer Iris van Herpen, in collaboration with American designer Neri Oxman, and Austrian architect Julia Kerner presented their 3D outfits at Paris Fashion Week.
3D printing Dresses from the Dutch designer were made by Stratasys. The printing process used multi-materials, which include both hard and soft materials.
The variation in the elasticity of the materials made it possible to create the outfit that you see in the photo below, with a fluffy cape and skirt.
Julia Kerner's stunning black airy dress was printed by Belgian firm Materialise using selective laser sintering.
The little black dress looks amazing in my opinion. The dress does not resemble plastic packaging, it looks soft and alive.
What cannot be said about original black dress created by designer Michael Schmidt and architect Francis Bitonti for dancer Dita Von Teese.
Dress printed from nylon using selective laser sintering. The mesh structure of the dress is designed taking into account the rule of the golden ratio and allows it to stretch, which does not restrict movement when walking.
The sensual black dress, adorned with 1,200 Swarovski crystals, was unveiled in New York at the Ice Hotel in early March as part of Shapeways' 3D printed display case.
On the stunning figure of the dancer Dita, the dress looks luxurious and at the same time soulless, as if the plastic essence of the dress is felt.