Support material 3d printing
Which 3D printing supports to use: PLA, PVA or Breakaway
David Roberson5 December 2017
Applications
With the launch of Ultimaker’s Breakaway support material, there are now even more options for supporting your 3D prints. But which one is right for your design? Let’s take a look at the different options and when to use each one.
When using an FFF 3D printer, support material enables you to print models that would otherwise not be possible due to, well, gravity. It ‘supports’ the material above it so you can print objects with features like overhangs or cavities.
A model with support material
And with support material removed
For more advanced users, support material can also give you more design freedom. With it you can orient your model exactly how you want for the best results, or create designs with moving parts built in that are free to move once you remove the support material.
Build material supports
The original way to support your 3D print. If you are printing with, for example, PLA, then 3D printing software like Ultimaker Cura can create support structures for your model that will print in the same material.
If you are using a single-extrusion 3D printer, this is the only way to print support structures. It’s also a good option if you don’t want to worry about material compatibility. Not all build materials are compatible with separate support materials.
The main drawback to using build material supports is that when you remove the supports manually, you will never be able to get a model that is 100% accurate compared with your original design. If you cut or sand your supports too much or leave any small bumps, your model will be a slightly different shape to your design.
This can be a problem if your 3D print needs to be very accurate, for example you are prototyping a part to test its fit or form.
Cutting and sanding away supports can also damage the surface of your 3D print and need post-processing techniques like polishing to achieve a good quality surface finish.
To remove build material supports, you will need a cutting implement (most people use a knife or pliers) and sandpaper to get rid of any final traces.
Dissolvable PVA
If your 3D printer can print more than one material, then it is also possible to combine your build material with a separate support material that is easier to remove.
PVA is a water-soluble support material. Because it dissolves away when submerged in water, it gives you almost complete design freedom. Large overhangs, cavities, intricate shapes are all possible, and there is no risk of scratching your print while removing the support. It leaves behind a very smooth surface.
One downside of PVA is that while it is effortless to remove, it does take several hours to dissolve so it can hold up your 3D printing workflow. PVA is also more expensive than other support material options and its quality can degrade if not stored properly.
Ultimaker PVA is optimized for use with PLA, Nylon, and CPE.
To remove PVA, all you need is a container of tap water big enough for your model. Read our complete guide to dissolving PVA.
Breakaway supports
The newest support material offered by Ultimaker, Breakaway has some similarities to the other types of support.
Watch the videoLike build material, it is removed manually. But like PVA, it is a separate material printed with dual extrusion.
The result is a balance between the advantages of the other support material options. You can remove Breakaway by hand so there’s no need to wait hours for anything to dissolve, but it also peels away cleanly from the rest of your print so you have an accurate model and don’t need to post-process it.
However, for the smoothest surface finish we still recommend PVA. And the Breakaway material in your print needs to be accessible for you to remove it, so you do not have complete design freedom.
Ultimaker Breakaway is optimized for use with ABS, Nylon, PLA, CPE, and CPE+.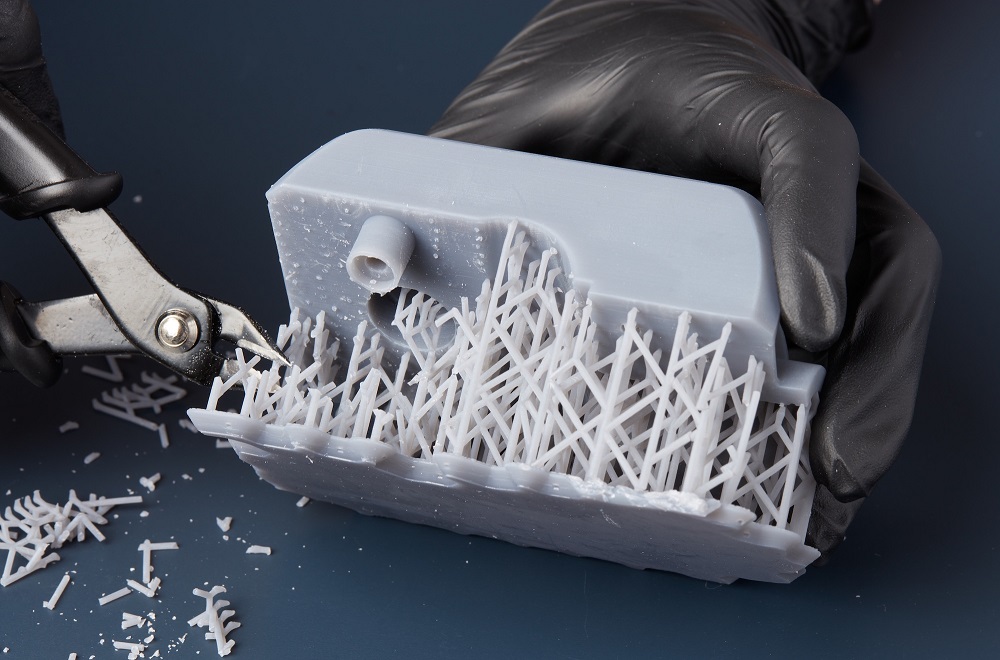
To remove Breakaway supports, you will need a set of pliers. Read our complete guide to removing Breakaway.
Quick comparison: When to use...
Build material supports: When you don’t need a print that is 100% accurate compared to the dimensions of your 3D design. Or if you only have a single extrusion 3D printer
PVA: Ideal if you’re printing a complex shape or when you want a really smooth surface finish beneath your supports, but takes several hours to dissolve
Breakaway: If you’re short on time, Breakaway is quicker to remove than PVA and keeps the dimensional accuracy of your print, with a quality surface finish
Explore Ultimaker materials
3D Printing - Truths and Myths of 3D Printing with Support Material
Our knowledge of FDM additive manufacturing is mostly derived from the past 25+ years of industrial-style 3D printing. Over this time period, we’ve tended to print small (less than 8”x8”) parts and it’s become commonplace to create “dissolvable” support structures from a second extrusion head.
The support structures are designed to hold up “overhangs” so that the part does not collapse as it is being layered. Afterward, the support material is dissolved, usually in a caustic sodium-hydroxide mixture in a circulating heated tank, leaving the main material forming the desired part.
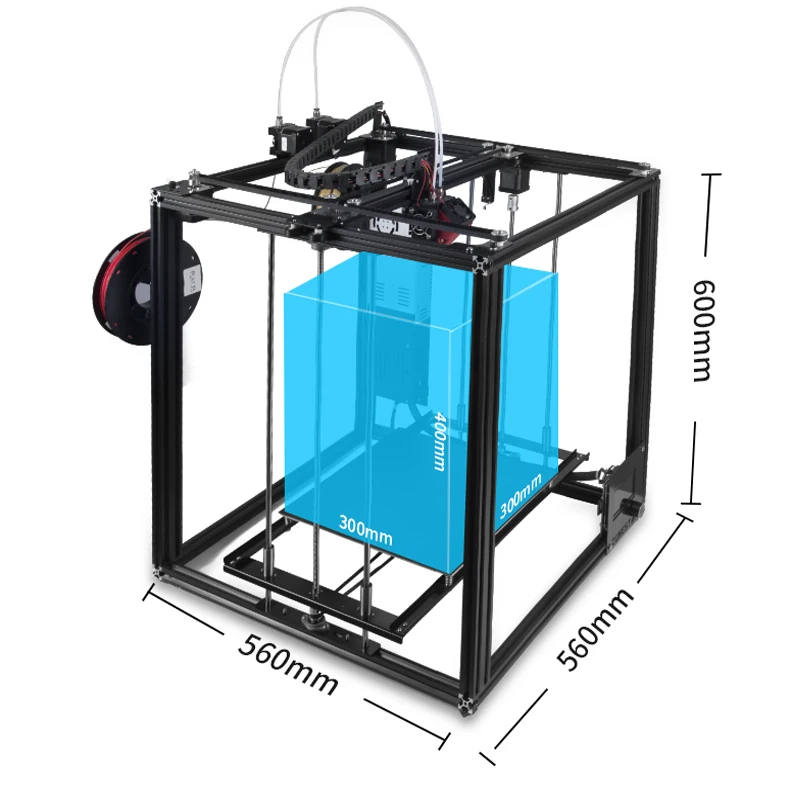
Today, we are tending to print larger parts (up to 12”x12”x 22.75” in the case of the EVO) for not only prototyping purposes, but also for applications such as jigs and fixtures. In other words, these parts must not only look good, they should also be large and functional. As large prints can take significantly more time, machine reliability and print repeatability is coming into sharp focus in the next cycle of additive manufacturing.
While we still use support structures for overhanging model geometry, support generation has matured significantly.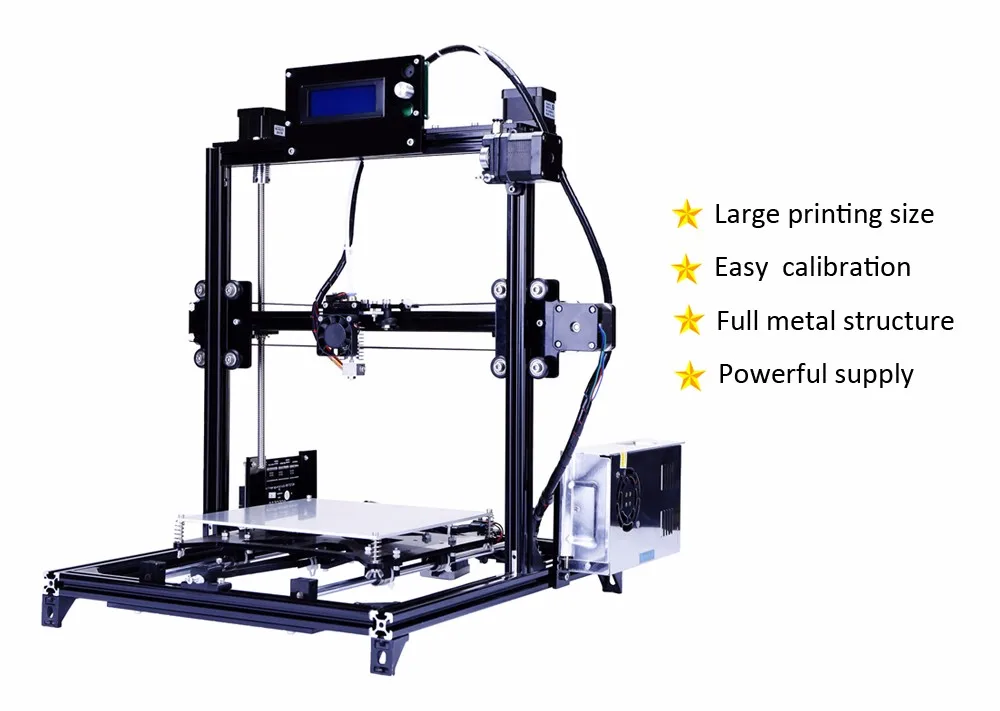 It is now possible to use one material for both print and support material. Today’s same-material supports, such as those generated in Apex software, are easily removable from the main part and leave little to clean up after the print. This tends to play a significant role in the generation of larger models where fine details (less than .5mm) are not as critical as overall appearance, print time, and functionality
Dissolvable support has also matured with the advent of materials such as Hydrofill. This type of support dissolves in warm water rather than by using chemicals. As with traditional additive manufacturing, these dissolvable supports are extruded from a secondary nozzle. The advantage over less user-friendly support materials of the past is that Hydrofill is safe to work with, environmentally friendly, and compatible with most printers.
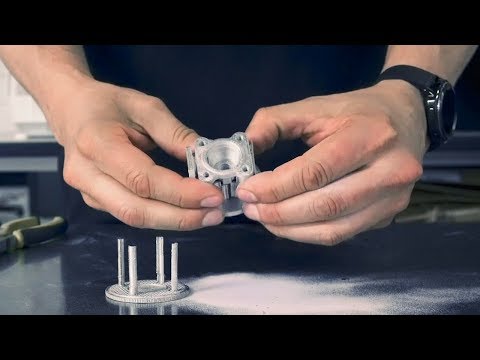
When and Where to Use Soluble Support MaterialCases where soluble support material like Hydrofill really shine are with prints that feature internal geometry or extremely delicate features.![]() Since single-head support material must be taken out by hand (usually using a set of pliers, etc.), there may be internal features that are completely inaccessible with a hand tool, and thus unsuitable for single-head support.
Since single-head support material must be taken out by hand (usually using a set of pliers, etc.), there may be internal features that are completely inaccessible with a hand tool, and thus unsuitable for single-head support.
Conversely, as long as there is an entry point for water, soluble support may be dissolved out, without the use of hand tools. For delicate models (ie characters, architectural, etc), you may have features — such as fingers — that are extremely gentle and can be easily broken if too much force is used with a hand tool. Models that are suspended within each other, have internal threading, and moving models can also be more easily printed with a soluble support structure, and some models can only be printed this way.
With the introduction of this water-soluble support material, the process of creating soluble support has become easier than ever before. The cost of the extra equipment needed to dissolve the material is eliminated, and the safety is no longer a factor as these materials (like Hydrofill), are usually completely non-toxic and safe for the environment.
However, keep in mind that soluble support is usually more costly than printing with a single material. The cost of dedicated support materials is usually 1-2 times that of the main printed material (i.e., ABS). Those of us familiar with 3D printing understand that models are frequently iterated at least 2-3 times and as such, consideration must be given to the cost of using this more expensive material in your workflow, at least during the initial stages. Accordingly, it is wise to make sure your print will benefit from using soluble support material.
Ease of UseWhile a few desktop 3D printers, such as the EVO and Axiom, utilize soluble support material well, adding a second material of any type to a 3D printer introduces another layer of complexity to the print.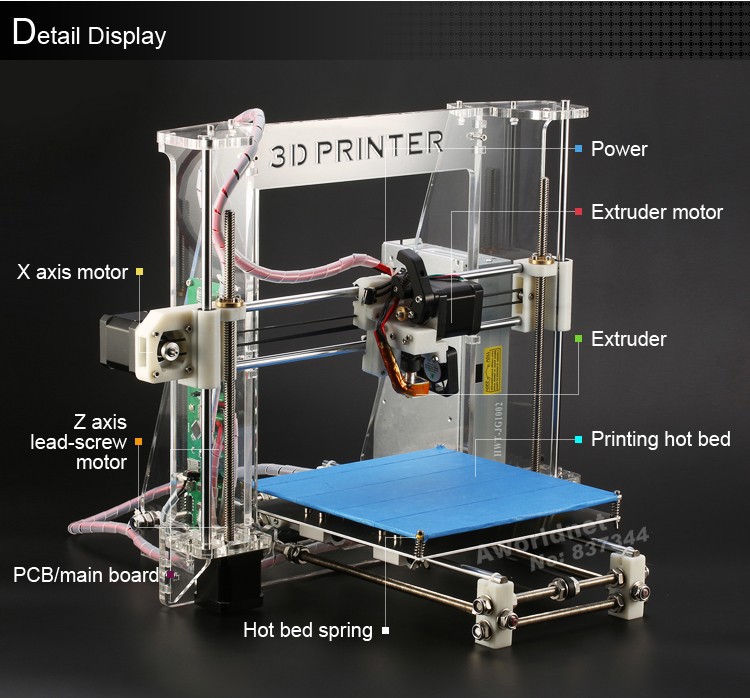 With more complexity comes more possibility of error. Specifically, two heads now have to work together to build the part correctly (vs. a single-head print). If either head jams, it can cause the entire print to fail. Failures in dual-head prints are frequently more costly than single-head failures because of the added cost of the secondary support material. In addition, by using two heads most of the time, a prime or wipe tower will be used to create a purge for one head when the other is printing. Creating the prime tower adds complexity and significant time to the print.
A job that may take only 3 hours in single-head printing mode, may take twice as long using primary and secondary extruders. In addition to adding prime towers as set forth above, soluble support material is generally more delicate than conventional materials and therefore tends to be printed at a slower speed. Also, it will frequently be printed at thicker infill rates requiring further time.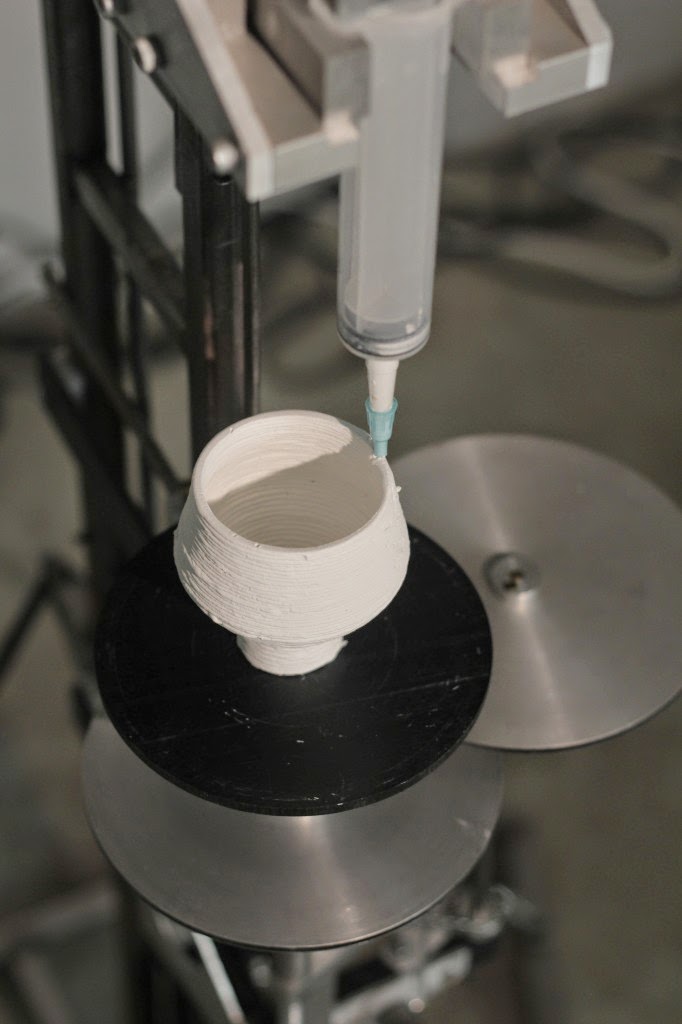 Build time will also increase because the dual print heads will need to switch for most every layer, such switching including prime cycles for both nozzles. Conversely, harder and more easily workable base materials such as ABS can usually be printed with single-head support quickly because the settings for Airwolf printers are optimized to print ABS as fast as possible in a reliable fashion.
If the objective is a final prototype for a presentation to potential investors or upper management, soluble support may be beneficial, at least for the final iteration, as you will have a cleaner surface where the primary material is mated with the support structures. However, when using materials such as ABS, a bit of light support sanding could make nearly as nice of a part in far less time. Further, it must be remembered that the dual-head print will still need at least a small bit of post-processing to optimize the clean mating surfaces.
StorageSoluble support material such as Hydrofill, usually dissolves by soaking the part in hot water for several hours.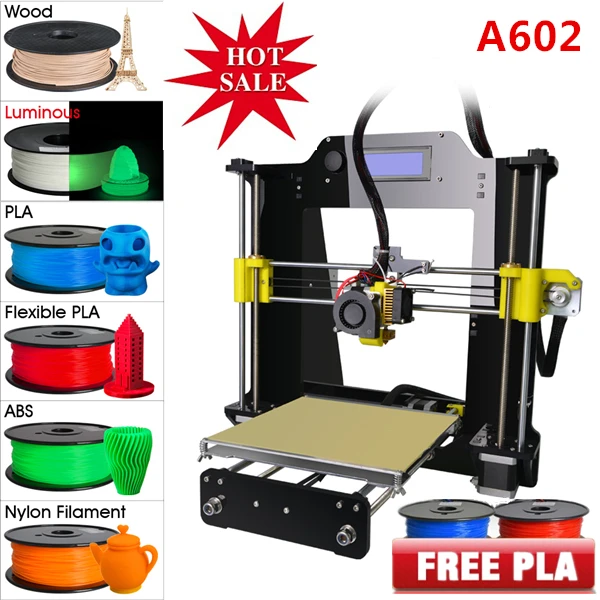 Agitation and heat will generally speed up the process. Since these materials are developed to work this way, they are susceptible to moisture from the surrounding air and can degrade if not properly re-packaged after use. This can be a costly mistake with a $100+ roll of material. Proper handling and storage techniques are needed when using these materials. However, with single-head printing, no extra material is needed. This eliminates the issues that can arise during storage, the cost of storing filament correctly, and the space it takes up in the workplace. Generally with either material, if it kept inside an enclosed printer like the EVO, the filament will tend to stay dry as the chamber is heated.
While dual-head prints have reached a level of quality that is accepted in the industry, a single-head print, using intelligent single-head support structures, such as those generated in Apex, can also achieve very high quality. Things like chamber temperature and bed temperature can be optimized for that one material, rather than possibly compromised for two different types of materials.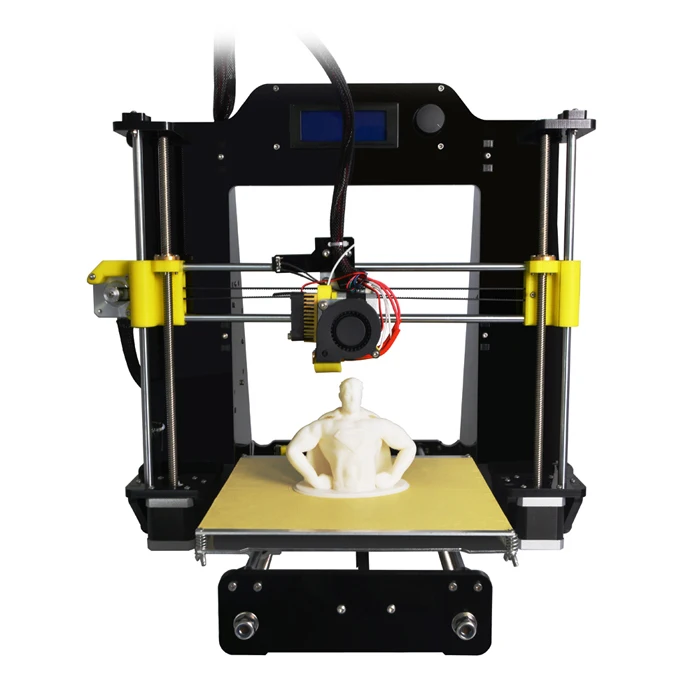 Any time a second head is introduced, it is usually using a different material and will need different, or slightly different settings to work properly. This complexity can lead to poor quality prints if settings are not correct.
Many machines have complex dual-head systems that tilt or close up an inactive nozzle to prevent it from dripping filament. While these methods try to prevent the two print heads from contaminating each other, they also add more complexity to the hardware, and in most cases can cause reliability issues. The best way to prevent material contamination within a dual print is to work with the correct settings, especially if the manufacturer provides software with presets for their machine (Airwolf 3D has many dual-head presets written into APEX).
Single-Head Support StructuresAs a general rule, single-head support structures come with more benefits than drawbacks. Our experience is that most users who purchase a dual-head printer don’t often use the second head for support.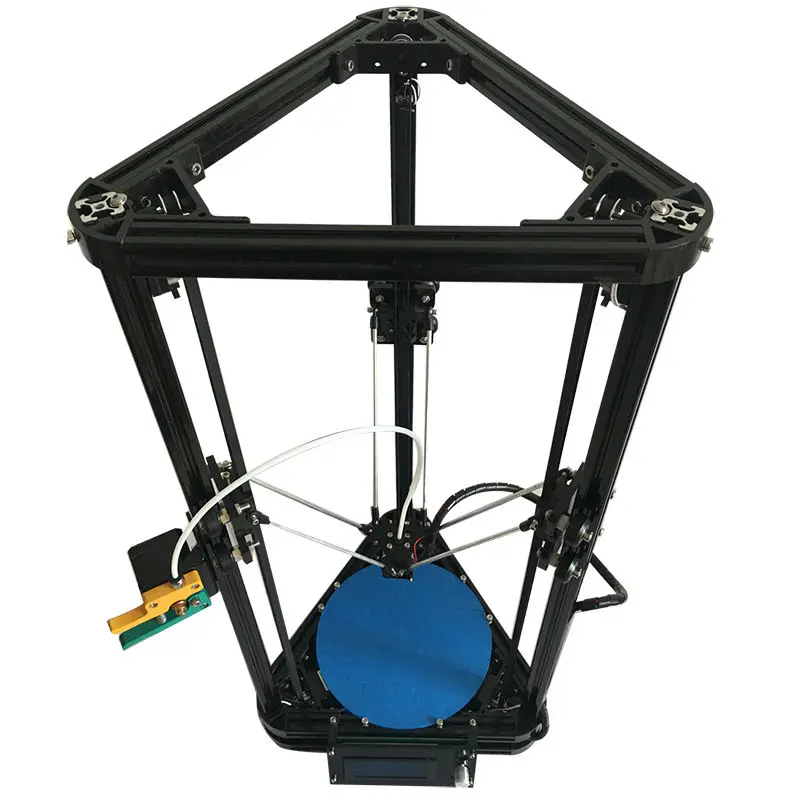 However, dual-head printers are very useful for optimizing workflow by printing with different settings for primary and secondary nozzles. For example, with the EVO and Axiom Dual Direct, users can place different size nozzles on different print heads and use optimized settings for each. Apex allows users to select nozzle sizes and thus allows one printer to print a part in two completely different ways from primary and secondary heads (i.e., fast with a 1.0mm nozzle on one head, and slower and more precise with a .35mm nozzle on the other).
Single-head support structures have also greatly improved over the past few years, mostly due to software development. For these supports to be broken off easily, but also have the ability to leave somewhat clean surfaces, the software has to be able to not only create the support where needed but also set the spacing correctly for it to be broken off with little effort. When printing large models, single material support tends to work well as most imperfections arising from support material tend to be overshadowed by overall part appearance.
Having the ability to use different support patterns is also becoming common practice. In this case, for example, the single-head support structures utilized in APEX printing software use the “line” pattern. This only lays support structures down in one direction — enabling the user to more easily remove the structure. For soluble printing, the “Grid” pattern is used in order to provide more support for the print (since it will not be removed by hand).
ConclusionThe ability to use a secondary head for creating soluble support structures remains a powerful tool in the belt of the creator. Featuring the ability to support inaccessible part geometry and to minimize post-processing time, dual soluble support will continue to be a staple of FDM additive manufacturing. However, single-head support needs to be factored into more purchasing, design, and manufacturing considerations. When it comes to repetitive iteration, experimentation, and large part making, the cost and time efficiencies associated with same-material support are worthy of consideration.
This white paper discusses the options and process involved in the use of support material in FDM additive manufacturing. Read this white paper to learn:
- When and where to use soluble support material
- The pros and cons of same material support
- The pros and cons of soluble support
Reading time: 15 minutes
Related Video: HydroFill Water Soluble Filament
Related Equipment: EVO 22 PRINTER
Related Materials: HYDROFILL SOLUBLE SUPPORT
Original Article: 3D PRINTING WITH SUPPORT MATERIAL
What is support material in 3D printing
Support material is an auxiliary material used in 3D printing to build complex objects and increase the quality and stability of construction. Without the use of support, 3D printing of models with cavities, overhanging structures, complex detailing, thin walls or floors, and other complex elements is impossible.
Support serves as a kind of temporary foundation for the printed product. Layered construction assumes that each next layer of the product relies on the previous one. In the case when the design of the product does not provide support under the first layer in one place or another, support comes into play.
Support serves as a kind of temporary foundation for the printed product. Layered construction assumes that each next layer of the product relies on the previous one. In the case when the design of the product does not provide support under the first layer in one place or another, support comes into play.
Complex geometry detail before and after removal of support.
Complex geometry detail before and after removal of support.
Benefits of using support material
- Ability to print more complex objects (than without support).
- High accuracy and stability in the construction of complex and small elements (does not allow them to "disperse", deform under the weight of the following layers).
- Significant reduction in CAD file constraints (slopes, wall thicknesses, corners, cavities, etc.).
How to determine where support is needed?
The software provided with all professional 3D printers does this automatically. You just need to upload a file in STL format, and the program will independently calculate where the use of auxiliary material is necessary for high-quality construction. It is worth noting that most software also allows the user to edit the number and location of auxiliary structures.
Model placed in virtual print chamber
Model in the virtual print chamber with automatically calculated support
Model placed in the virtual print chamber
Model in the virtual print chamber with automatically calculated support
In addition, the program calculates the amount of support material required before printing.
In addition, the program calculates the amount of auxiliary material required before printing.
Types of support materials
Mechanically removed
Excess material is broken off, sawn off, scraped off. The simplest type, usually used in cheap desktop printers that work with plastic. In this case, the support is the same material from which the model itself is built. But, in order to facilitate its subsequent removal and reduce the consumption of model material, the support is built more “sparsely” compared to the object itself. It has a much lower density and strength, only sufficient to temporarily support the weight of the object being grown.
Manual support removal process video
Manual support removal process video
Soluble
Auxiliary material dissolves in a special liquid. This method of removing support, for example, is used in Stratasys' uPrint SE professional plastic 3D printers. Advantages: withstands significant loads and temperatures, dissolves without damage to the base material.
Soluble
Auxiliary material is soluble in a special liquid. This method of removing support, for example, is used in Stratasys' uPrint SE professional plastic 3D printers. Advantages: withstands significant loads and temperatures, dissolves without damage to the base material.
In the photos you can see the whole process of calculating, building and removing the soluble support material. 3D printer - uPrint SE Plus. Dissolution time - 1.5 hours.
Lost wax
Melts and flows out at low heat (well below the deformation temperature of the main product).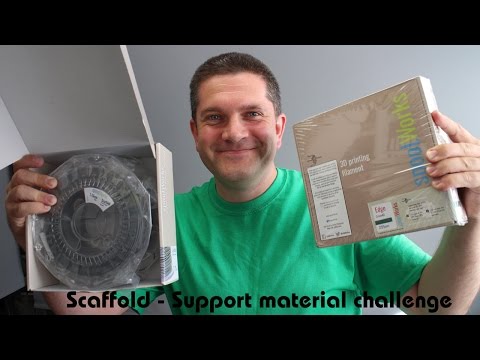 Usually has a wax base. Advantages: delicacy, accuracy of application. Used in photopolymer and wax 3D printers of the ProJet series by 3D Systems.
Lost-wax master wax and after removal
Lost wax master model and after removal
Washable
Special gel-like material that can be washed out of the master model with warm water. Advantages: simple removal process, high construction accuracy, does not damage the model material when removed. Used in photopolymer 3D printers of the Objet series from Stratasys.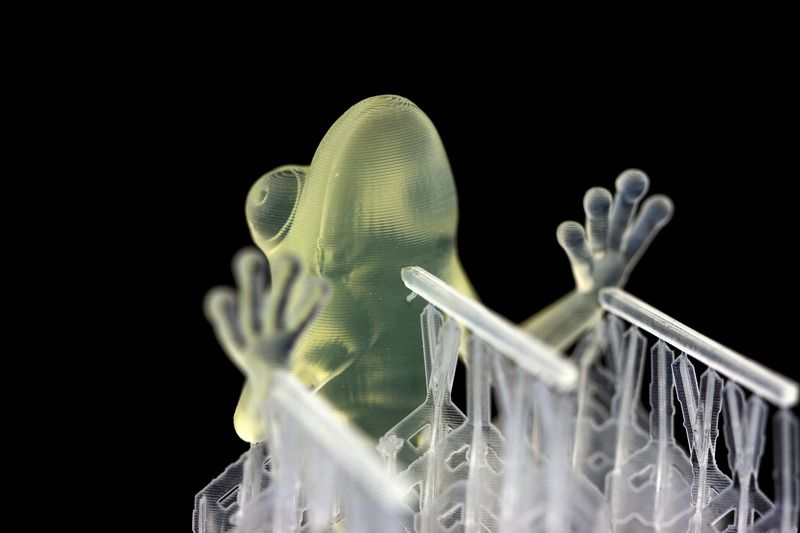
Washable
Special gel-like material that can be washed out of the base model with warm water. Advantages: simple removal process, high construction accuracy, does not damage the model material when removed. Used in photopolymer 3D printers of the Objet series from Stratasys.
Model before printing
Model in build chamber with support material
Finished model after removing support material
Model before printing
Model in build chamber with support material
Finished model after removing support material
9005 Powder support We should also mention powder 3D printing technologies (CJP, SLS, SLM). Here, the same material acts as auxiliary and main. However, that part of the powder that was "auxiliary", after cleaning, can be reused as the main material. Due to this, such technologies are practically waste-free.Powder support
We should also mention powder 3D printing technologies (CJP, SLS, SLM).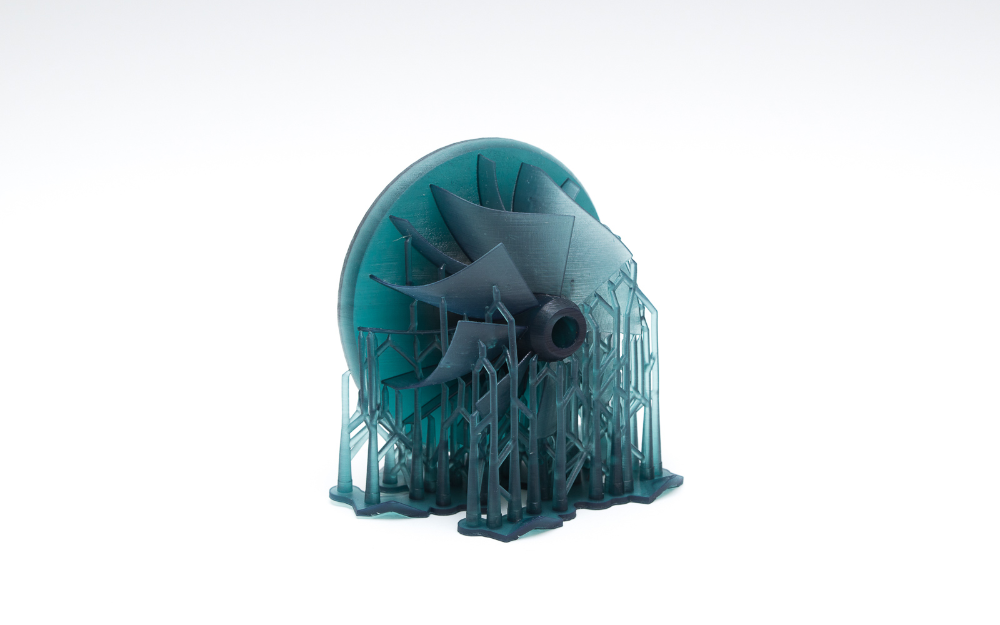 Here, the same material acts as auxiliary and main. However, that part of the powder that was "auxiliary", after cleaning, can be reused as the main material. Due to this, such technologies are practically waste-free.
Get advice on choosing a 3D printer
Call 8 800 333-12-82
Write to WhatsAppLeave a request for a call
Come to our demo hall
Learn moreI confirm the accuracy of the information I entered and agree to the processing of my personal data in accordance with the privacy policy and user agreement.
A brief excursion into 3D printing methods / Sudo Null IT News
My previous related posts:
First 3D printing event in the Netherlands
3D printing event (end)
New budget 3D printer
To answer frequently asked questions, I will describe here popular 3D printing technologies - printing with molten plastic, powder, photopolymer, laser sintering.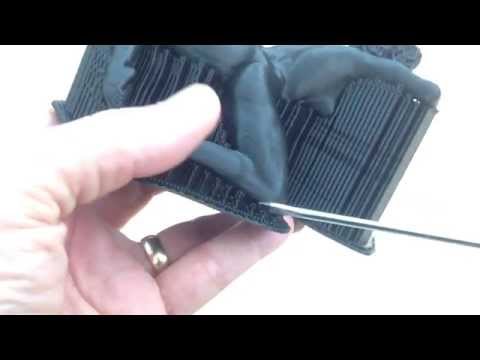 Of course, this information is not the ultimate truth. This is the picture that has developed in my head today from various sources.
Printing with molten material (plastics, chocolate)
This is the most popular method among amateur devices. Its essence is simple. Can you imagine how a glue gun works? A plastic rod is pushed from one end of the gun, and at the other end it is heated to a fluid state and squeezed into the gluing site.
The printer is a machine with 3 axes. The print head is fixed on the machine's coordinate system. When it moves along the X/Y coordinates, the molten plastic is squeezed out of a thin (0.3-0.5mm) nozzle and solidifies. After printing one layer, the printer changes the Z coordinate (lowers platform / raises head) and prints the next layer.
Difference between printers
The main difference between printers is how 3-axis movement is implemented, how the material is fed, whether the table is heated or not, whether printing is supported by 2 materials.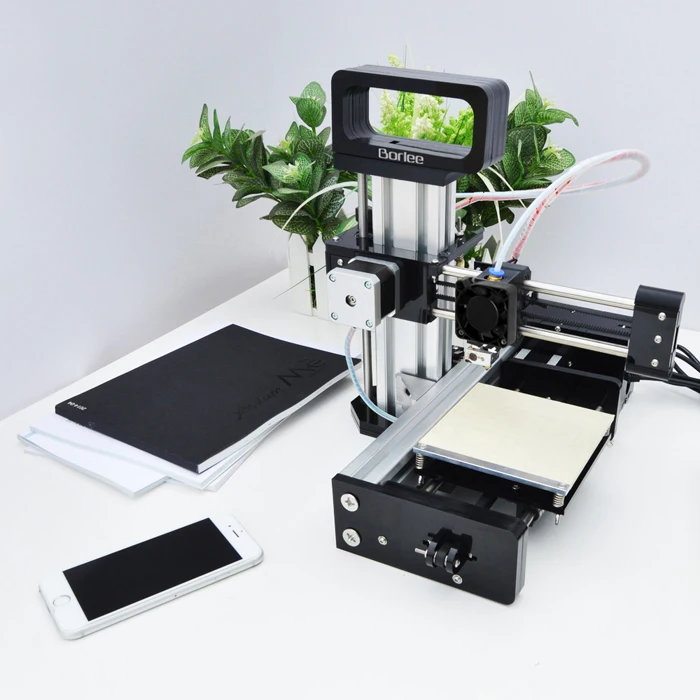
Most printers of the RepRap family move the head only along the X axis. The platform with the object moves along the Y axis. The structure of the print head and the drive along the X axis move along the Z axis. Due to the movement of such a mass, accuracy and print speed suffer.
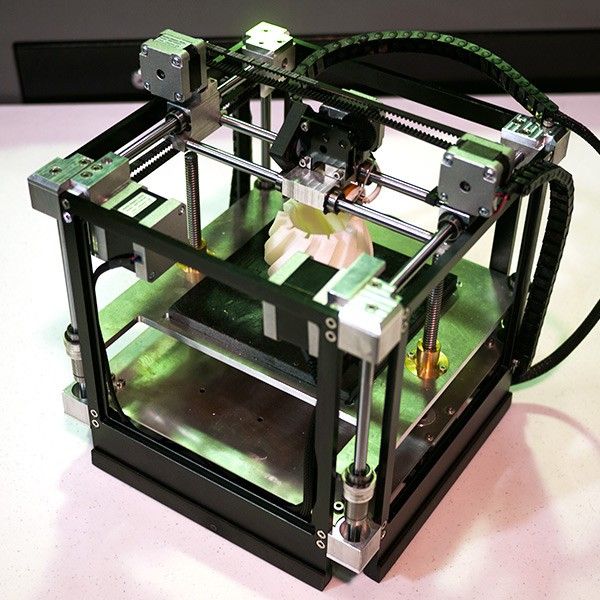
In Ultimaker and the latest version of Makerbot lit with great fanfare at CES 2012, the print head moves along two axes (X/Y) at the top of the machine, and the platform with the product descends gradually down (along Z). This achieves high quality and print speed, which can be up to 10 times higher than that of Mendel.
In addition to the classic schemes of machine tools inherited from CNC, there are experiments with delta robots.
Plastic
Various plastics are used for printing. The most popular are ABS, from which most toys are made, and PLA, a biodegradable plastic used for packaging and disposable tableware. In addition, special types are used that dissolve in water (PVA) or a special solvent.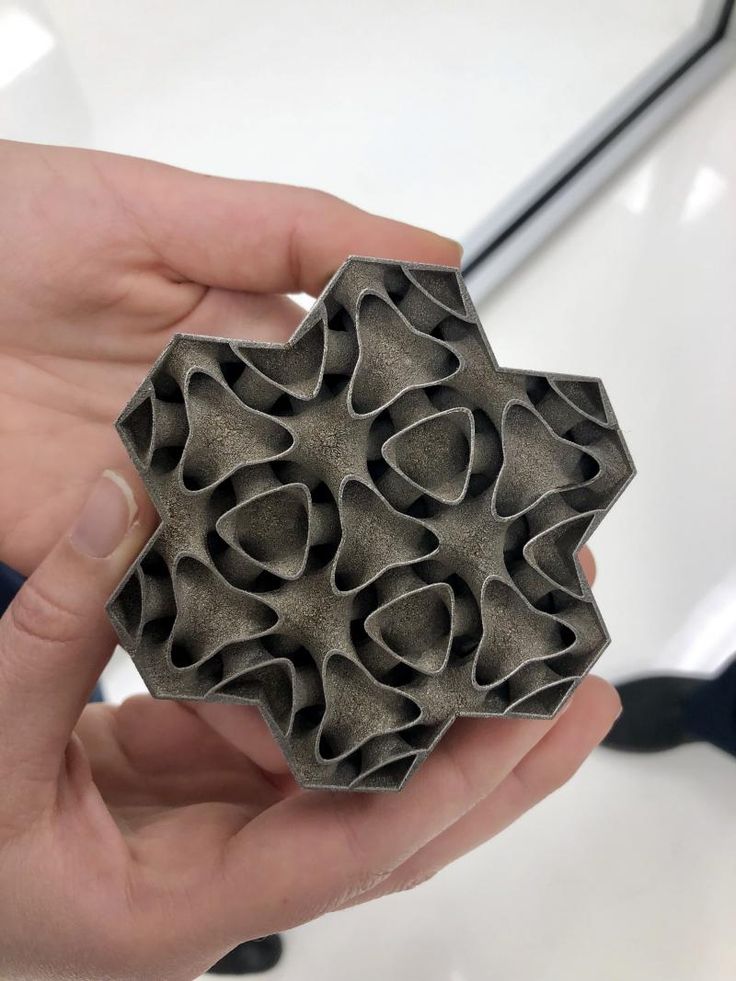 With such plastic, auxiliary structures can be printed, which are removed at the end. The black plastic in the next photo is such an auxiliary material.
Dual-extruder printer is used to print in two colors or single color with support material. To date, this technology has not yet been worked out in amateur printers. The STL format, chosen as the standard by hobbyists, does not support multiple colors. But the devices are already available, so these problems are already in the process of being solved.
Plastic for printing is sold in coils in the form of a rod of various diameters at a price of about $ 40-60 per kg, water-soluble is more expensive (9$0). Different types of plastic (and other materials such as chocolate) have different operating temperature ranges. A temperature sensor is used to maintain the optimum temperature.
To ensure printing accuracy, the part must not move from its place, therefore it is made so that it sticks to the surface of the platform.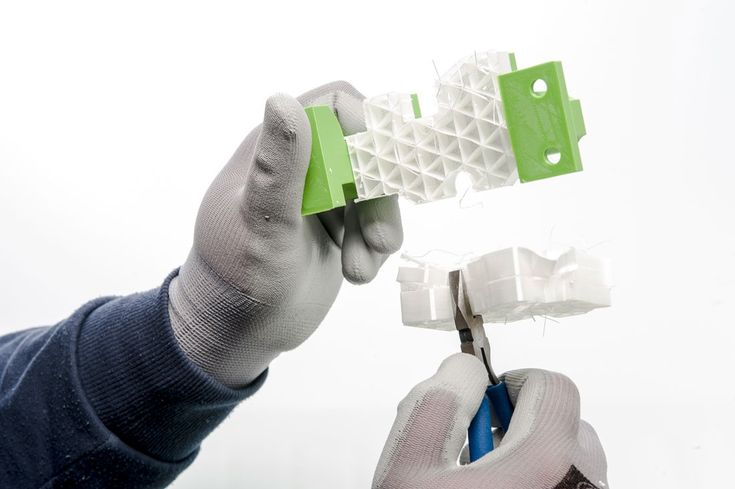
Since the plastic part is printed for a long time, it cools unevenly. Layers printed earlier cool earlier. Therefore, the part tends to deform - to bend. On the one hand, the adhesion must be strong enough to prevent the part from tearing off the platform when cooling, on the other hand, it must be weak enough so that it can be torn off by hand at the end of the process without damaging it.
It is for this that the platform for working with ABS plastic is made heated and a thermal tape (kapton tape) is glued onto the platform, and for working with PLA plastic, masking tape is glued onto the platform (blue in the picture above). In professional printers, the process generally takes place in a closed box, where a high temperature is maintained, ensuring slow cooling and better plastic adhesion. So tape is another consumable for 3D printing.
Powder printing
This technology is used in ZCorp's professional printers.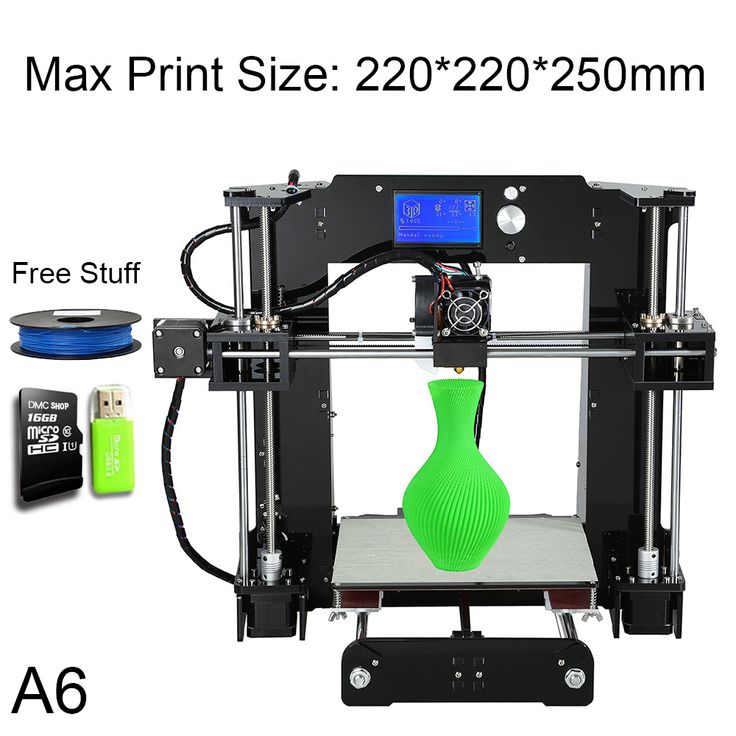 It allows you to print with high resolution in several colors at the same time. The essence is simple - a finely dispersed powder is poured in a thin layer, leveled, then the head goes and, like in an inkjet printer, pours the powder with a binder colored in the desired color. Then everything repeats - a layer of powder, alignment, binder. At the end, the remaining powder is blown out and you're done. Additional material to support hanging elements is not required here - its role is played by powder, which evenly fills the container and serves as a support for subsequent layers. Printers cost from $15k (monochrome ZPrinter 150), color ZPrinter 250 - from $25k.
In addition to plastic filler, happy owners play with other materials. I heard about the use of ceramics and metal. After annealing, a ceramic or metal product is obtained, respectively.
Laser sintering
Almost no different from powder printing. Only instead of a print head, a laser sintering powder is used instead of a binder. They sintered a layer, poured a new one, sintered - poured, etc.
The Bristol branch of the famous aerospace and defense company EADS baked a bicycle using this technology.
These openwork objects are also made using this technology.
In the same way you can make products from refractory materials. Only the laser needs more power.
In 2011, Markus Kaiser made a splash with his solar 3D printer project. Instead of sintered powder, he used sand, which he collected right there in the desert. Instead of laser beams, he used a large Fresnel lens, which concentrated the sun into a point and melted the sand. The author of the project himself acted as a filling and leveling device :) The coordinate system of the printer and the computer were powered by solar batteries. The result is a bowl like this:
Video of the whole process:
Photopolymer printing
The principle of operation is simple - we project a slice of the model onto the resin, it freezes where it was lit. Raise the model and add resins, highlight the next cut, and so on.
This printing method is also found among hobbyists and in laboratories due to the simplicity of the device and the accuracy of the result. Here is the device diagram:
There is a cuvette with a photopolymer and a glass bottom. On this bottom, the projector projects the image from below. The software switches images on the projector (sections of the object) and gradually raises the glass platform on which the object grows. As the photopolymer is consumed, it is added to the cuvette. From above, the apparatus is usually closed with a cap that does not transmit a certain spectrum in order to avoid parasitic illumination.
Here is the work of such a homemade printer:
An example of an object printed on such a printer:
There are many different photopolymers. They cost differently, react to different wavelengths of light, and have different activation times. Therefore, when creating a printer, it is necessary to select the material and the lamp for illumination.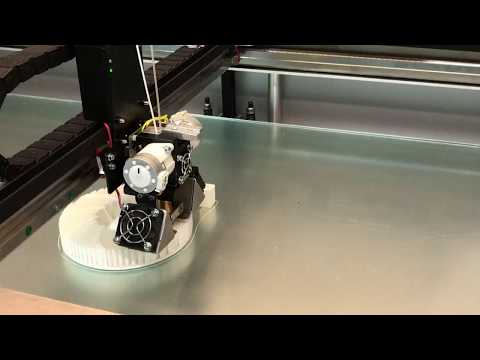 Instead of a projector, you can use a laser (a flashlight with a narrow beam) and a scanning system. Then the cut will need to be drawn with a laser, as in laser sintering. If I'm not mistaken, then the consumables for the top printer cost about $300 per liter. But the community interested in building such printers also found a cheap option - about $ 20 per liter. Community, various information on photopolymers, projector, printer, etc. can be found here - 3dprinter.wikidot.com
nano-cemms.illinois.edu - here, with the help of a series of videos, the 3D printing process in the laboratory is literally assembled on the knee. The polymer is poured into a glass and a conventional projector illuminates the polymer from above through a mirror. The platform on which the object is grown is attached to a small tripod and lowered into the glass. Manually on the projector, the pictures of the slices change and the platform gradually lowers. At the end of the process, the object is immersed in resin.