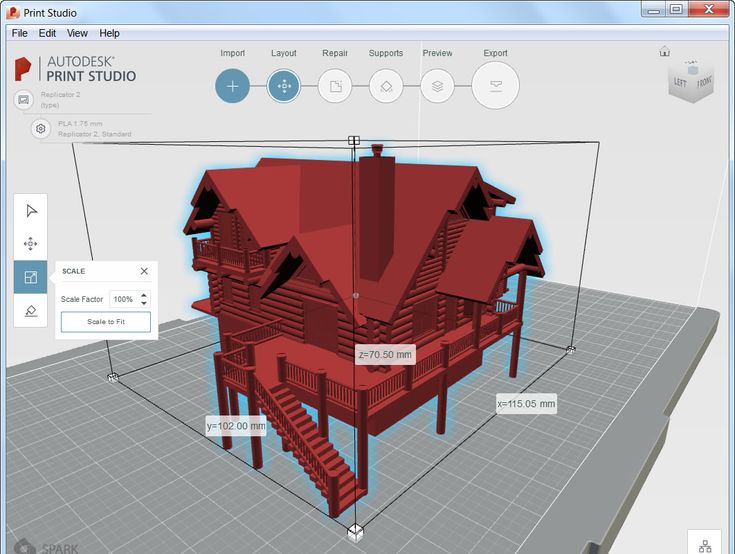
Autodesk 3d print
What is 3D Printing? | 3D Printing Software
What is 3D printing?
3D printing, also called additive manufacturing, is a family of processes that produces objects by adding material in layers that correspond to successive cross-sections of a 3D model. Plastics and metal alloys are the most commonly used materials for 3D printing, but it can work on nearly anything—from concrete to living tissue.
Featured 3D printing software
What is 3D printing used for?
Efficiently make one-off parts and create highly complex geometries that are only possible with 3D printing.
-
Prototyping
3D printing has long been used to quickly create prototypes for visual aids, assembly mockups, and presentation models.
Learn more
-
Lightweight parts
Fuel efficiency and emissions reductions are driving the need for lightweight parts via 3D printing in aerospace and automotive applications.
Learn more
-
Functionally enhanced products
3D printing removes many of the constraints imposed by traditional manufacturing processes that prevent engineers from truly designing for optimal performance.
Learn more
-
Custom medical implants
To achieve osseointegration, manufacturers are using 3D printing to precisely control surface porosity to better mimic real bone structure.
Learn more
-
Toolings, jigs, and features
3D printed composite tooling and machining fixtures are often cheaper and faster to produce, and conformally cooled inserts for injection molds can dramatically reduce cycle times.
Learn more
-
Metal casting patterns
Combining 3D printing with metal casting bridges the gap between generatively designed parts and proven manufacturing approaches for large metal objects.
3D printing processes & materials
Understanding the different additive manufacturing processes
Explore different additive manufacturing processes and technologies to help you find the right one for your workflow.
Learn more
What materials can be 3D printed?
Using the right material for your 3D printed project can make or break a product. This article will cover what materials can be 3D printed.
Learn more
How is 3D printing software used?
-
Granta
Mexico City start-up disrupts medical-implant manufacturing
Mexico City start-up Granta is changing medical implant design and fabrication for patients who suffer head trauma.
Read story
Image courtesy of Granta
-
Airbus
Airbus bionic partition
Airbus uses generative design and 3D printing to create a strong yet light cabin partition for the A320—and takes the first step toward the plane of the future.
Read story
Image courtesy of Airbus
-
Stanley Black & Decker
A computer designed Stanley Black & Decker’s new tool
Using generative design and 3D printing, Stanley Black & Decker’s Infrastructure Innovation Center is exploring new approaches to creating high-performance industrial tools.
Read story
Image courtesy of Stanley Black & Decker
Future of 3D printing
-
What does the future of 3D printing look like?
3D printing has come a long way from the early days of desktop figurines. As technology continues to evolve, the future is brighter than ever.
Learn more -
How 3D printing is revolutionizing the medical industry
Amidst a global healthcare crisis, 3D printing has become a flexible solution to modern medical challenges.
Learn more -
The future of additive manufacturing in aerospace
Learn about how aerospace companies are buying into additive manufacturing and what it means for the industry’s ongoing success.

Learn more
3D printing tutorials
-
How to SLICE 3D Prints with Fusion 360
Fusion 360 can slice models for 3D printing, without the need to save the file as an STL. In this tutorial, we'll take a design model into the Manufacture workspace. From there, we'll slice it, simulate the 3D print, and save the Gcode.
Watch video
-
Fusion 360 Additive for your Ultimaker 3D printer
This video details the FFF workflow along with tips and tricks to utilize Fusion 360 Additive FFF for a Ultimaker 3d printer.
Watch video
-
Fusion 360 for 3D printing FDM technology workflow
Learn more about the design process using fused deposition modeling (FDM) 3D printing technology through the power of a very flexible modeling workflow in Fusion 360 software.
Watch video
3D printing & sustainability
How sustainability and Fusion 360 can help you save money and the planet
Find out how you can use Fusion 360 software to drive efficiencies and innovation in your processes that will benefit your bottom line and the planet.
Learn more
Three environmental considerations for the FFF 3D printing process
Every manufacturing process, including FFF 3D printing, has an environmental impact. Learn how to reduce your parts' environmental footprint.
Learn more
Do your actions match your ambitions for success?
Get the right tools to achieve your new possible. Extensions amplify the functionality of Fusion 360 by unlocking advanced capabilities for machining, additive manufacturing, generative design, nesting, and fabrication. Discover Fusion 360 extensions.
Try Extensions
How long has 3D printing technology been around?
3D printing is much older than you might think! The first patents for an additive manufacturing process are dated all the way back to the 1970s. The first true additive manufacturing patent that led to a product is dated to 1984. The first real-world applications of additive manufacturing are in the dental industry, printing out masks of teeth as a replacement for plaster casting from molds.
What are the benefits of 3D printing?
3D printing is a rapid prototyping process, mass customizable manufacturing process, and a technology that enables the creation of complex geometries previously not possible through other manufacturing processes. It’s also a digital manufacturing technology that requires no tooling changes for revised parts, which means there’s no downtime between product revisions or manufacturing entirely new products.
How much does it cost to 3D print something?
3D printing a part is a combination of the material you wish to use, and the volume. Because 3D printing can output using a plethora of plastics and metals, the cost of a part can vary dramatically depending on what you are using, but it can be more affordable per part than other processes.
What 3D printing services does Autodesk offer?
Autodesk offers Netfabb as a dedicated additive manufacturing prep, analysis, and simulation tool, as well as Fusion 360, which has a dedicated additive manufacturing space, marrying design, engineering, simulation and manufacturing all together.
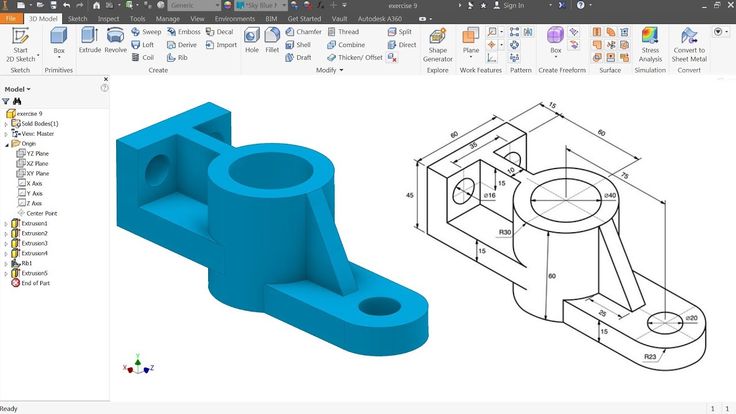
Fusion 360 is an excellent choice for creating CAD models for 3D printing. It allows you to create not only “prismatic” models such as gears or brackets, but it also allows you create more “organic” models using T-Splines, including characters, plants, and vehicles. You can use Fusion 360 to create and then edit your objects for 3D printing. Bring in models from other software and make modifications, such as de-featuring them by removing small features or blends. Fusion 360 can export as an OBJ or STL file format that is read by most 3D printing software. It also has the ability to print directly to your 3D printer. In addition, Fusion 360 even allows you to edit mesh or STL data that is brought in from a laser-scan or other source. Before printing, you can reduce or increase the surface count, edit out features, fill holes, etc.
CAD 3D printing software allows you to conceptualize, design, and optimize your models for fitting production technologies
Free resources for 3D printing
-
Additive manufacturing resource center
Access a variety of resources designed to help you identify how you can add value to your products with additive manufacturing.

-
Learn how to use Tinkercad to model, align and group parts, cut holes, add custom text, and specify dimensions. Tinkercad allows you to export and download designs for laser cutting and 3D printing to send designs to Autodesk® Fusion 360.
-
Learn how to take your ideas to reality through the use of design in Fusion 360 software, and how to utilize 3D printing to manufacture your idea.
-
Get product updates and enhancements, useful Fusion 360 tips and tutorials, roadmap updates and community stories.
-
Stay current with the latest in 3D printing trends and Netfabb software updates.
-
Learn how to print a PPE face shield in under four minutes and large-scale additive manufacturing.
Ember 3D Printer Review 2022
4.1
See Price
3D printers vary wildly in terms of quality. Here’s the thing, though: because 3D printing is the new “big thing”, there are plenty of expensive models that aren’t worth their price tags. Today, we’ll be taking a look at one premium printer to see if it’s right for you and your business.
We’ll be examining the Ember. This is a printer with serious credentials, having been created by Autodesk, a company well-known for its modelling software. Let’s just hope it lives up to the hype. Take a look below for our at-a-glance guide to the Ember’s tech specs:
| Printer Type | SLA |
| Supported Materials | Various resins |
| Connectivity | USB, Ethernet, WiFi |
| Print Speed | 18mm per hour |
| Build Volume | 2.5 x 1.5 x 5.2” |
Table of ContentsShow
Design
Aesthetically, the Autodesk Ember has everything you’d expect from a high-end 3D printer. There’s the ubiquitous rounded edges, for instance, the sleek black and silver contrast, and of course, an LCD screen.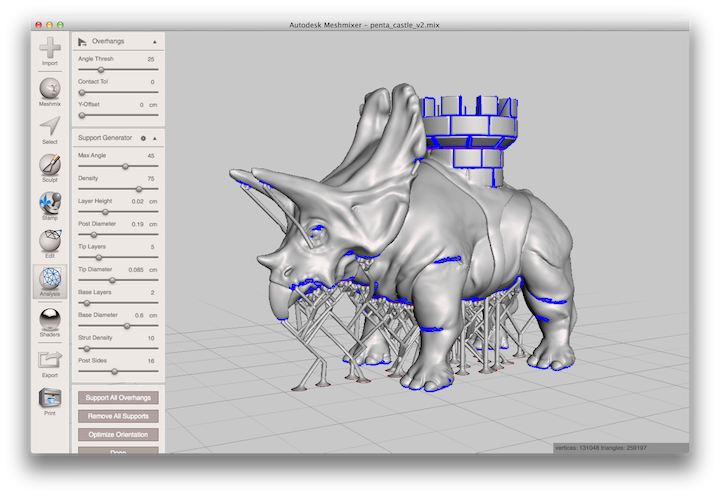 However, as this is an SLA printer, instead of an FFF one, all of the printing takes place in an enclosed chamber.
Note the extremely simplistic interface. You can, of course, send models across from a PC, but any manual tasks are performed using the wheel on the printer’s front face. We really like that this model shows a timer, since it takes the guesswork out of printing and lets you better plan a day’s production.
Now, one thing that instantly jumps out is the small build volume. This could be a problem given the cost of SLA resins compared to traditional filament. However, it appears that the Ember is designed for small-to-medium scale mass production. In other words, it lets you build lots of little things very quickly, instead of taking hours to create standard-size objects.
Printing
You can expect a higher print quality from the Ember for the simple reason that it uses photo-sensitive resin instead of filament. However, even compared to other SLA printers, the overall quality is excellent. There’s minimal material waste, edges are clean, and even complex structures come out camera-ready.
Everything about this printer hints at a production-line mentality: just take the low build volume, high speeds, and quickly interchangeable resin trays, for instance. Best of all, everything about this printer is open-source. This means that you can easily modify or optimize the internal workings and use whichever resin you find works best for a given task.
Let’s be clear, though: while the Ember produces highly-detailed models, it’s primarily designed for fast prototyping. As such, if you’re looking to create hundreds of identical, consumer-ready products, you might need some form of post-processing team in place. For the most part, you’ll be fine, but over time, small variations are unavoidable. This is true for any printer, not just the Ember.
Features
The Autodesk Ember is not a 3D printer that offers a million different features. Instead, the majority of its more advanced functionality takes place automatically. For example, it prints in a way designed to put as little stress on your prints as possible. This leads to fewer mistakes, fewer failed prints, and ultimately, saves you time as well as money.
You’ll notice that this is a particularly fast printer. It has a speed of 18mm every two hours, but the main advantage is that all parts of a build are created simultaneously. As such, you can print multiple items at once, as long as they fit in the build area. This is only possible via SLA printers – if you attempted it with a standard 3D printer, and the base layer warped, every item would be ruined.
There’s certainly a lot to like here. The Ember allows you to send jobs via any Spark application, features a build head designed for quick and simple calibration, and uses only the highest quality components. Of course, this has implications on the product’s price…
Cost
Even when it was released in 2014, the Autodesk Ember was not cheap. Now, even after it’s been officially discontinued, the price is just as high as ever, at around $7500. Autodesk does still sell various resins for it, but ultimately, you’re at the mercy of a third-party reseller, which obviously makes buying several Embers difficult.
Of course, there’s no need to purchase official Autodesk resin. If you find a less expensive material that’s of an equally high quality, you can definitely use it. The question, however, is whether your business can afford to use a four-year old printer in the first place. If you have the technicians required for servicing, there’s no problem, but otherwise, you may have difficulty when problems arise.
Simply, if your design department only needs one 3D printer for prototyping, the Ember would be a strong choice. If you’re looking to purchase several, however, you might want to consider getting something a bit more modern, if only for the safety net that an official warranty would provide.
Support
Despite not selling the Ember anymore, Autodesk maintains a highly active community forum full of tutorials, troubleshooting advice, and material guides. The site claims to offer online support, but this page doesn’t work, presumably as the printer is no longer manufactured. There’s also a blog but this hasn’t been updated since 2017.
Realistically, you’d have to find a reseller offering at least a one-year warranty. This is what Autodesk used to offer, although it could be argued that this is a little short, especially considering the price of the printer itself. If you don’t have specialized, experienced technical staff, you’ll have to face the fact that the majority of your support will be given by other users, not necessarily professionals.
Preparing models for 3D printing within a single product Autodesk Netfabb
Before proceeding to get acquainted with the declared program, let's say a few words about 3D printing.
3D printing is the process of creating three-dimensional objects on a 3D printer by printing material in layers based on a designed 3D model.
The Autodesk Netfabb program was created to prepare and simulate the 3D printing process, this article describes its main features.
- Geometry creation
There are two ways to get a model into Netfabb to prepare it for 3D printing: creating geometry directly in the complex using Fusion 360 cloud-based CAD or importing from other programs.
Fusion 360
The Ultimate and Premium versions already include Fusion 360, the Standard version must be purchased separately. With Fusion 360, the user has extensive modeling capabilities: free, surface, solid, parametric, mesh - as well as analysis and calculation tools, built-in Generative Design technology and CNC production preparation tools.
Import
More often than not, Autodesk Netfabb imports models. Design results from conventional CAD are uploaded to Autodesk Netfabb for further work. Here are some examples of CAD files supported by Netfabb directly in source format: Autodesk Inventor, Catia, Rhino, NX, ProEngineer, Autodesk Alias, and others. Geometry from other programs can be easily imported into Autodesk Netfabb using one of the many popular neutral file formats supported by the product, a partial list of which can be seen in the picture above.
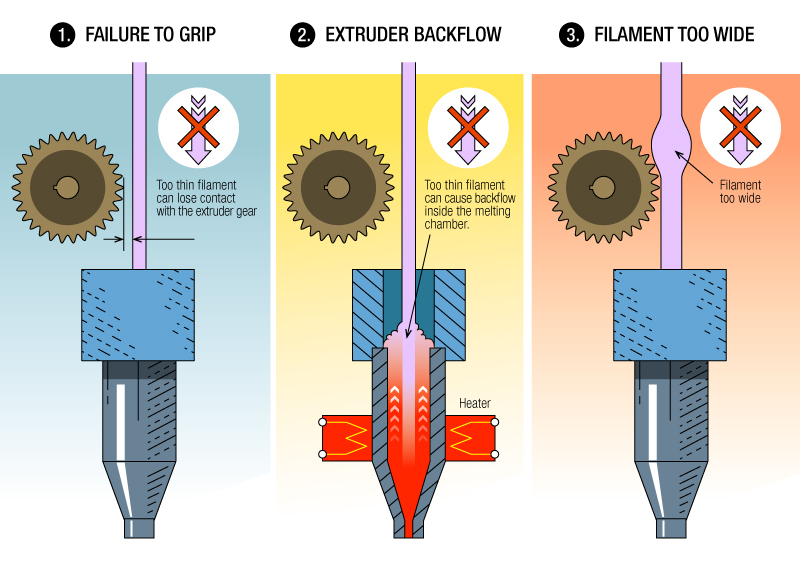
As for neutral file formats, their undoubted advantage is the support for many different 3D systems. But the downside of this popularity is that each program handles them differently, which can lead to various errors or inaccuracies when importing geometry. Of course, such geometry must be corrected before being sent to print. Autodesk Netfabb allows you to do this both manually and largely automatically.
Netfabb got direct access to Autodesk cloud storage and collaboration. The user shares a link that opens through the browser, and in any corner of the planet, another user will see the design solutions of colleagues.
- Optimization methods
- Lattice structures
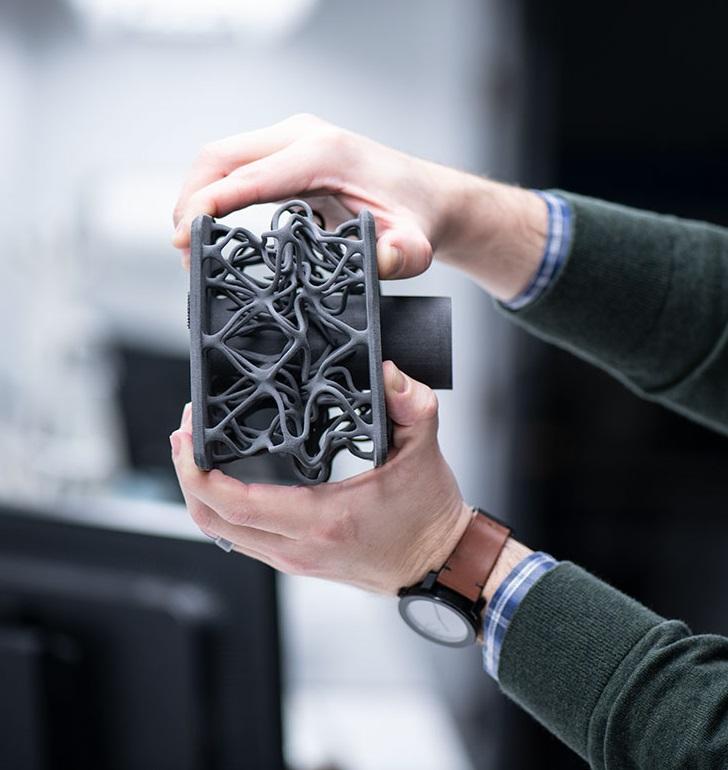
The main and most common optimization method is based on the fact that the internal volume of the model is filled with lattice structures. The concept of lattice structures is quite extensive, they can be both compounds of simple elements, and surface elements and their combinations. There are a number of built-in fill structure types, and there is an editor that allows you to generate new structure types. As a result, the model is lightened, the internal volume is filled with a weightless, but at the same time strong lattice, which is printed faster than monolithic volumes.
- Optimized variable density lattice structures
Netfabb also includes functionality to optimize a model with a lattice internal structure, resulting in the model becoming a system of shells of variable thickness, filled with lattice structures of variable density, optimized for the loads acting on the design model. Thus, the model is not only optimized for weight, but also provides the necessary strength within the specified limits.
- Topology optimization
Optimization is based on the Autodesk Nastran solver, which calculates and removes zones in the designed part that do not contribute to the required strength, which makes it possible to lighten the final design.
- Generative Design
The user sets the general parameters of the designed part: search areas for a constructive solution, obstacle areas, fixed elements and zones, etc. In the given parameters, the program itself will suggest several forms of parts. The user will be able to choose the optimal form that meets the necessary requirements. This method calculates in Fusion 360.
- Preparing to print model
- Part location
Autodesk Netfabb automatically selects the optimal position of the part in the workspace of the selected printer. The user sets the criteria for the optimal location of the model and the settings for its allowable change, after which the program will offer several optimal options, and the user will be able to choose the most suitable one.
- Creation of supports
The program can automatically create a support system of different types, for different technologies.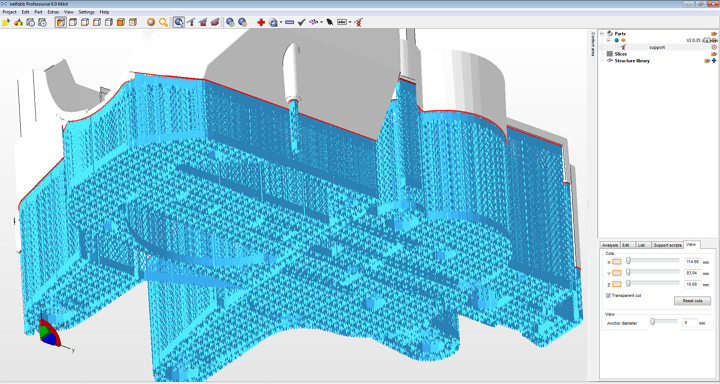 Supports are edited for different requirements, and parts can be automatically updated as the position changes. Finely customized support types can be saved as a template for later use in other projects.
- Automatic packaging
Used when it is necessary to maximize the load on all equipment in production, increase the print speed and the number of manufactured parts. With this functionality, the working space of the printer is filled as densely as possible with a multitude of simultaneously printed parts. In doing so, Autodesk Netfabb will automatically enforce user-specified restrictions and seeding rules
- Extensive machine library
Autodesk Netfabb is connected to a large number of machines. The program knows almost all the most common machines on the market - this applies to the working space and the printing technology used. If, nevertheless, the used machine is not in the library, the user can set its parameters manually.
- Trajectory Fine Tuning Utility
Any 3D printer is essentially a CNC machine, but only with an additive tool. The utility offered by Autodesk Netfabb allows you to edit control programs for the printer in a visual form at a low level, including using the built-in programming language - LUA Scripts.
- Print analysis
3D printing, especially from metals, is a very expensive and time-consuming process, during which the user may encounter a number of problems:
- inaccurate 3D printing;
- fragility of materials;
- repeated adjustment of models and unsuccessful attempts to print;
- errors are detected too late.
To eliminate these problems, Netfabb Simulation module is designed, which:
- simulates printing from metals;
- predicts possible problems;
- visualizes strains and stresses;
- compensates for deformations;
- protects the printer from damage.
- Print Processing
Netfabb's Fusion 360 solution includes a powerful CAM module that allows CNC pre- or post-machining of parts, further expanding the scope of this software package for additive manufacturing preparation.
In conclusion, we note that Autodesk Netfabb has three versions, a visual comparison of which is shown in the picture below. Each user will be able to choose the appropriate version, based on a number of proposed features.
3 Useful 3D Printing Applications in Fusion 360
Additive Assistant tool for Fusion 360
You've probably already explored the 3D printing capabilities of Fusion 360, and if you haven't, you're missing out. From FFF printing to metal powder additive manufacturing, Fusion 360 tools are evolving at a rapid pace, with even more new features coming towards the end of the year. Today, we're sharing three useful 3D printing apps available on the Autodesk App Store to help you take your additive manufacturing work to the next level.
Fusion 360 FFF Post Configurator
Download here
What it is: is an application that allows you to create and configure FFF post processors.
Who: for anyone who wants to customize their device to print using preset custom messages.
How it works: you can easily load custom settings for printer platform temperature, heat-up timeout, fan speed and other options. Since the result of the configurator is a traditional JavaScript post-processor, advanced users will be able to modify it.
Addition: Check out the application's tutorial for more useful information about its features.
Autodesk Netfabb® for Autodesk® Fusion 360™
Download here
What it is: If you want to seamlessly transfer Fusion 360 models to Netfabb, this application will make the process as easy as possible. In addition, with it you will be able to send all print settings to Netfabb and Netfabb Simulation, including printer selection, support data and placement of parts on the platform.
To whom: Of course, this application is for those who already have a Netfabb subscription. However, if you are using Fusion 360 and want to take your AM work to the next level, Netfabb is the perfect companion tool, providing many advanced features and capabilities for AM. Imagine that you started setting up metal powder printing with the Fusion 360 Additive build extension and manually edited the supports in Netfabb. With this application, you can easily transfer all your data from one program to another.
Addition: If you want to learn more about Netfabb, visit the product page on our website and don't forget to watch the video below.
Additive Assistant Tool
Download here
What it is: We've been saving the best for last. Additive Assistant Tool allows you to analyze models without leaving Fusion 360: the application analyzes overhang angles, potential distortion and stability problems, can determine the size of the part, and also talk about the impact of its production on the environment.
How it works: Download the application, select the object you want to analyze, and the tool will automatically highlight problem areas that need your attention or need to be changed before being sent to print.
For whom: Any specialist will confirm that the human factor does not disappear with age and experience. The Additive Assistant Tool is a must for anyone new to additive manufacturing in order to understand what pitfalls to avoid, as well as experienced users. Often there are situations when 3D printing is used to create a prototype, and in the future the real product will be produced in a completely different way. In these situations, the Additive Assistant Tool will help ensure that the part prints with as few problems as possible.
Addition: The Additive Assistant Tool is useful if you need to determine where to add supports and modify part geometry to avoid deformation. The application gives a clear visualization of problem areas, which allows you to quickly eliminate them.