3D printing photogrammetry
Photogrammetry: What is it and How is it Used in 3D Printing?
3D printing news News Photogrammetry: What is it and How is it Used in 3D Printing?
Published on May 30, 2022 by Madeleine P.
Photogrammetry is a technique for obtaining reliable data from real-world objects in the their natural state by creating 3D models from photographs. 2D and 3D data is extracted from an image and, thanks to overlapping photos of the object, building or terrain, is converted into a 3D digital model. This makes it possible to capture large objects, even landscapes, that would otherwise be impossible to scan. Photogrammetry is therefore often used by surveyors, architects and engineers to create topographic maps, networks or point clouds.
The role of photogrammetry is very important especially in topography. There are many advantages of photogrammetry when compared to classic topographical tools. For example, photogrammetry is both faster and more agile when it comes to data collection. It is also possible to get renderings of difficult to access terrain, especially nowadays, when the use of drones in photogrammetry makes it possible to reach all kinds of places. All the details of the terrain can be continuously mapped through the obtained photographs.
One of the uses of photogrammetry is in the world of archaeology (photo credits: PAR – Archaeology and National Heritage)
Photogrammetry’s Use in 3D printing
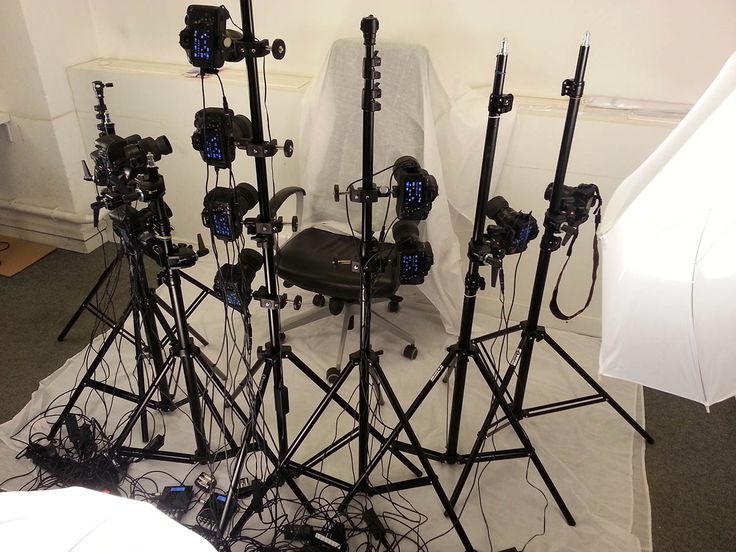
As we mentioned at the beginning, photogrammetry is the technology that allows us to create 3D models of real objects from photographs. The process is as follows: a series of photographs are taken around the object and then, using specific software, these are converted into a 3D model. By taking photographs (or videos) of the object from different perspectives and under constant lighting, the specialized software is able to find representative or characteristic points of the model that are repeated in all the photos. In addition, with a couple of photographs we can create the so-called stereoscopic effect which is necessary to infer the height of any object on the earth’s surface based on the shadows cast by each object, which allows us to increase the accuracy of the scan.
Using key point extraction techniques, the software is able to infer the distance of the points through the separation between them in different photos, thus creating a point cloud of characteristic points. Finally, this point cloud is converted into a mesh, which can be processed or cleaned for 3D printing.
Photogrammetry carried out with drones (photo credits: Geomatic)
These days, there are a lot of possible applications for any 3D scanning technique, but photogrammetry is especially useful, as it does not require specialized tools and anyone can do it with just a cell phone and a computer. However, what is usually necessary is powerful hardware: most photogrammetry programs require a computer with enough capacity to process the images and generate the 3D scanned model.
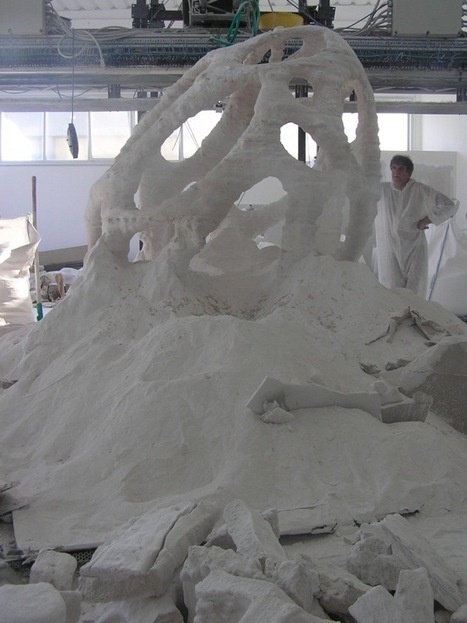
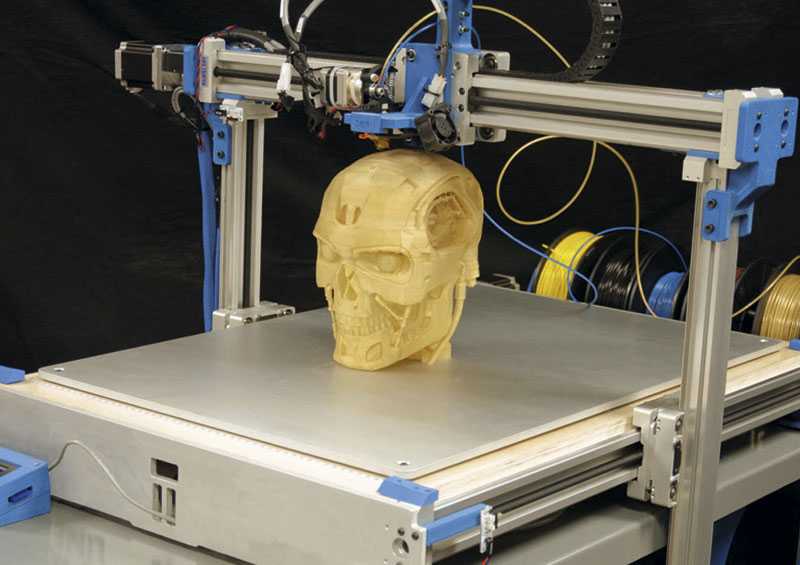
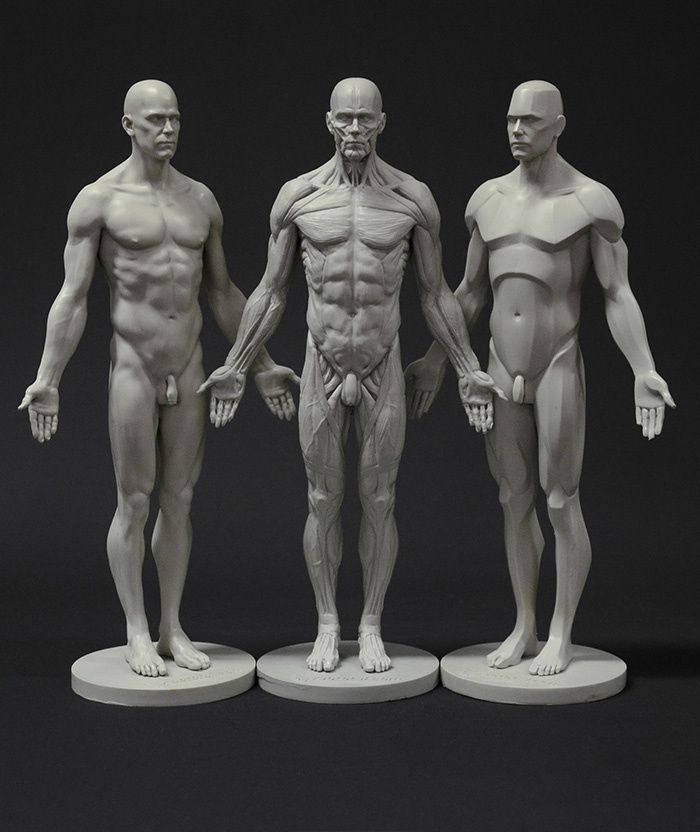
Some of the common uses of photogrammetry are the scanning of sculptures: first the desired model is digitized with photogrammetry and later, with 3D printing, we proceed to obtain a miniature or full-scale model of it. Another use of photogrammetry is the scanning of industrial parts: many times we want to repair some equipment or element of which we are missing a part or it has broken. This is very common in the car market, where often stratospheric prices are charged for certain structural or bodywork parts due to their limited availability. Thanks to photogrammetry we can scan an original part with high market value, and proceed to replicate it by 3D printing, getting an exact copy of the original for a much lower price.
The Different Software
Nowadays, we can find different types of photogrammetry software. Of course, there are commercial solutions that are ideal for industrial and engineering applications. But there are also a large number of programs available to download for free where you will only need a camera or a phone to take pictures and, if you have access to a 3D printer, you can even print your models afterwards.
If you would like to learn more, be sure to check out the list we compiled of the best photogrammetry programs available, selected and sorted alphabetically. In it we showed you the best photogrammetry programs available: from free programs such as Blender to paid professional software to create more accurate 3D models, such as ZBrush.
Image of a castle using the OpenMVG photogrammetry program (photo credits: Open MVG)
What do you think about photogrammetry? Would you use it for your 3D printing projects? Let us know in a comment below or on our Linkedin, Facebook, and Twitter pages! Don’t forget to sign up for our free weekly Newsletter here, the latest 3D printing news straight to your inbox! You can also find all our videos on our YouTube channel.
Photogrammetry - 3D scanning with just your phone/camera
Have you ever wished that you could easily transfer a real object into a digital file? The technology is here, but most of us simply do not have access to high-end 3D scanners that can reconstruct the digital geometry of a physical model. Not to mention that some objects can be way too big for any traditional 3D scanner.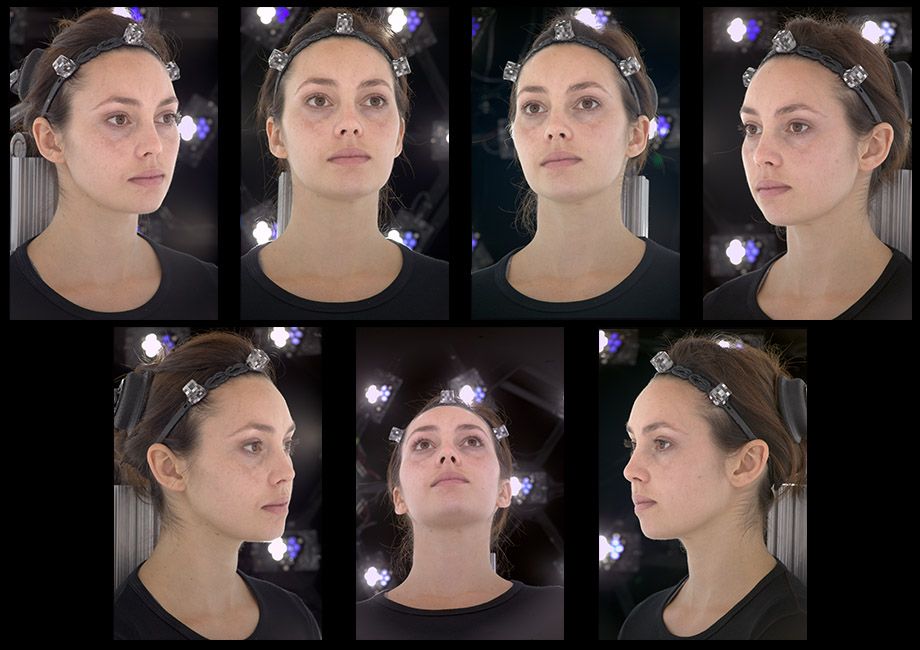 However, there is another, much cheaper way to create 3D models corresponding to real-world objects.
What is photogrammetry?
Photogrammetry (or SFM – Structure From Motion) is a process that estimates the three-dimensional coordinates of surface points using pictures of a single physical object taken from different angles. At least that’s the oversimplified one-line explanation. You take a bunch of pictures of the object from all possible directions, then you use these photos as an input for a specialized software. This software will look for features that are visible in multiple pictures and try to guess from which point was the picture taken. Knowing the camera positions and orientations, it creates a 3D point that corresponds to the 2D feature on the photo (basically a pixel). Ideally, you’d get a finished 3D mesh as an output. But often it might be better to process the reconstructed points into a mesh manually for much better results.
Software
The list of available photogrammetry software is pretty long. The problem is that most of the programs are either very expensive or limited in features in the free version. Some programs even offer cloud-based computation, which is handy, but further increases the cost.
We tried to pick the best free software:
- Colmap (Win/Mac/Linux) – will be used in this article
- 3DF Zephyr (Win) – Free with the limitation of max 50 photos
- Visual SFM (Win/Mac/Linux)
We will also need some kind of software for post-processing of the output data. The choice is pretty easy here – Meshlab.
The computation is fairly demanding on the hardware. Running it on an old laptop might not be feasible as the computation times would get extremely long. Many applications also depend on the NVIDIA CUDA interface (Colmap), which does not run on AMD graphics cards.
Taking pictures for photogrammetry
Obviously, you’ll need a camera. A smartphone camera will work just fine, but if you have a DSLR, it’s even better. If you’ll be using DSLR, crank the aperture to at least 7-8 to increase sharpness and to avoid shallow depth of field.
You’ll want to capture at least 20 pictures. During our testing, we often shot 50-80 pictures to capture every detail. Keep in mind, that some pictures might get discarded if the program doesn’t find enough similarities with other pictures.
- Move around the target object in circles. Do not move the object or its surroundings between pictures.
- Overlap! You want to have each part of the model captured by at least 2 pictures. Ideally, you’d have about 60-80% overlap in succeeding pictures.
- Avoid hard shadows, use diffuse lighting or take the pictures outside on a semi-cloudy day.
- The object should make a significant portion of each image.
- Avoid moving targets (e.g. pets, unless they are sleeping).
- Avoid very glossy or transparent targets. (More on this later)
Ideal targets for photogrammetry are textured or rough items (statues). If it’s an option, you can cover glossy or transparent objects with powder (flour) to avoid reflections. Or cover the glossy surface with a painters tape.
Advanced users can also capture a video of the target and then convert it into individual frames. In this case, keep the shutter speed high (e.g. 1/80) to avoid blurry frames.
Reconstructing geometry from photos
We suggest creating a folder that will hold all the files for a single reconstruction. Inside that folder create another folder called “Photos” and place all your pictures here. Quickly go through the photos and delete any blurry ones. We’ll be using Colmap on Windows 10 for the reconstruction.
- Launch Colmap using Colmap.bat
- From the top menu choose Reconstruction – Automatic reconstruction
- Set the Workspace folder, this folder will be used for storing reconstruction calculations and the output mesh
- Create another directory next to the Photos folder for this purpose
- Set the Image folder the Photos folder containing all your pictures
- You can leave the Vocabulary tree empty, alternatively, you can download and use one from this download page
- Keep the Data type as Individual images or change it to Video frames if you created the pictures from video
- Change the quality to Medium
- You can try High quality, but in our experience, Colmap crashes very often with this setting
- Leave other settings with default values and hit Run
- This process may take anywhere from 5 minutes to seemingly eternity depending on the number of photos and specs of your PC
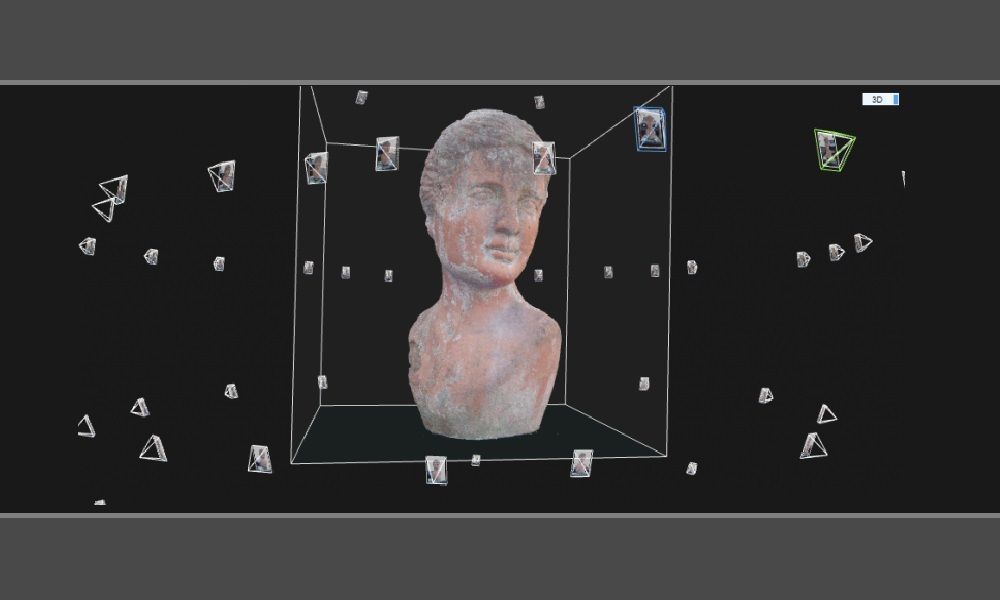
When Colmap finishes the reconstruction, you’ll be presented with a reconstructed view of the scene and estimated positions of the camera.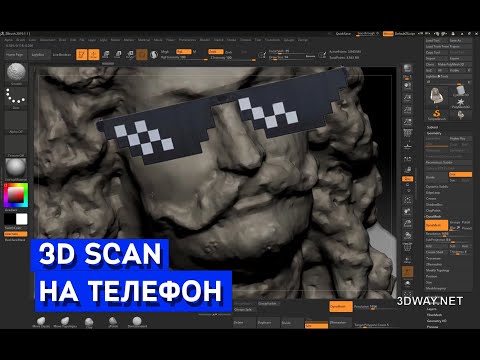
Colmap set-up and finished view of the reconstructed scene
Colmap output
As an output Colmap creates 2 files that we’re interested in, fused.ply and meshed.ply. You’ll find them in a subfolder in the workspace folder you created before (Workspace folder/dense/0/). Meshed.ply is, as the name suggests, an already triangulated mesh. Colmap isn’t the greatest at creating meshes from the tracked data, but if you want to save yourself some work, the mesh is definitely usable. PLY can be easily converted to STL in Meshmixer or Meshlab, for example. However, it’s not a good idea to try printing this mesh directly. All meshes created by 3D scanning or photogrammetry usually contain a lot of errors and lack the flat base that could be easily placed on the print bed. Follow our guide on repairing corrupted 3D models and cutting models to learn how to fix these problems. Also, keep in mind that the scale of the scanned object will be pretty much random, so adjust it accordingly.
The second file is the more interesting one. The fused.ply file contains a so-called point cloud. It’s just a set of points in space, no triangles and therefore no mesh. We’ll have to create the mesh ourselves, it’s an extra work, but the result is usually much better.
Creating mesh from point cloud data
- Open Meshlab, Select File – Import Mesh and choose the fused.ply file
- You’ll be presented with the captured scene made from 3D points
- Pick the Select vertexes tool from the main toolbar (top) and use it to select all points you wish to delete
- The tool works as a box selection, hold down the left mouse button to create a selection
- You can hold Ctrl to add more vertexes to already selected ones
- Click on the Delete vertices button in the main toolbar.
 Selected vertices will disappear
 - Repeat steps 3-4 until you’re left with just the points you want to use for creating the mesh of the scanned object
- Select Filters – Remeshing, Simplification and Reconstruction – Screened Poisson Surface Reconstruction
- The Reconstruction Depth has a major effect on the final result. Values between 13-15 usually look the best and take a reasonable time to compute
- Other settings usually work best at default values, but feel free to experiment with them
- Hit Apply to create a Mesh
- The edges of your model will usually end as a weird shape or even curl up and create a huge blob.
- Similarly to selecting and deleting vertices, you can do the same with triangles using the Select in triangular region and Delete faces tools from the main toolbar
- Select File – Export Mesh
- If you want to be able to share the scan in digital form with the texture, use formats such as PLY, 3DS or OBJ
- For 3D printing pick STL
Tips for improving your reconstructed model
Here are some more tips to get rid of some imperfections and to improve your reconstructed model in Meshlab:
- Smooth your model from the menu Filters – Smoothing, Fairing and Deformation – Laplacian Smooth
- Try increasing the Smoothing steps value to 8-15
- You can repeat this process as many times as you like, however smoothing your model too much will get rid of valuable detail
- To get rid of extra faces often generated by reconstruction, you can choose Filters – Selection – Select Faces with edges longer than…
- Tick preview
- Change the Edge threshold value so the vast majority of the faces you want to delete are selected, but all faces you want to keep are still unselected
- If your model has a huge number of vertices and faces, it can be hard to work with, not to mention slicing, which would take forever.
 Decrease their amount using Filters – Smoothing, Fairing and Deformation – Quadric Edge Collapse Decimation
 - Set the desired number of faces
- Anything above 1 million faces is definitely overkill. Even 100k faces are usually more than enough
Examples
Statues
Statues are perfect for photogrammetry. Their surface is rough, unable to cast any reflections. There are lots of details and features to be tracked by the software. Statues are usually too big for traditional 3D scanners not to mention the inconvenience of carrying a 3D scanner outside and trying to set it up there. But with photogrammetry it’s easy, just grab your camera and start taking pictures. However, as they are usually placed outside, there are a few things to keep in mind. Try to avoid having moving targets in your picture. If there are people walking by, let them pass and in the meantime take pictures from the directions where people are not visible.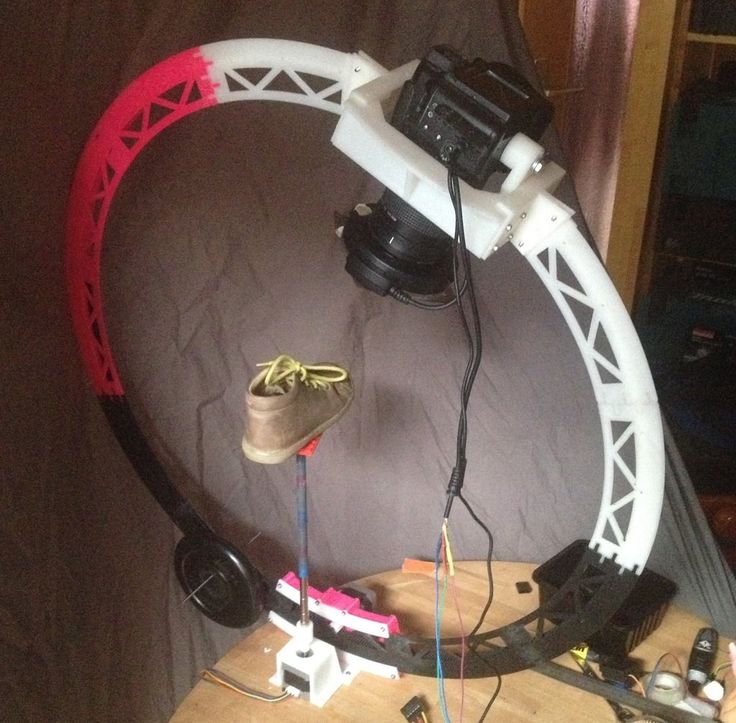 If possible, wait for a cloud to block the sun, so that there are no hard shadows.
The Sitting Woman statue by Václav Bejček from 1967, the reconstructed 3D model (check the 3D view on Sketchfab), and the printed version
Baby Groot
Scanning a 3D print might seem stupid, using the original STL file is obviously much better. But it’s a good benchmark of this technique, we can easily compare the reconstructed model to the original STL used for print. Another legit reason to use photogrammetry to digitize 3D print is if you hand painted it and want to share the model with the hand painted texture.
As you can see in the 3D view below, in terms of geometry, there is an obvious loss of quality. That said, most of the features were successfully reconstructed and with a couple of small touch-ups, the model would look pretty good. And the texture is a nice touch as well.
Press I and select Matcap to hide the texture and compare just the geometry of the models
Ping Pong Paddle – dealing with glossy surfaces
Reconstructing a ping pong paddle was pretty easy with one exception.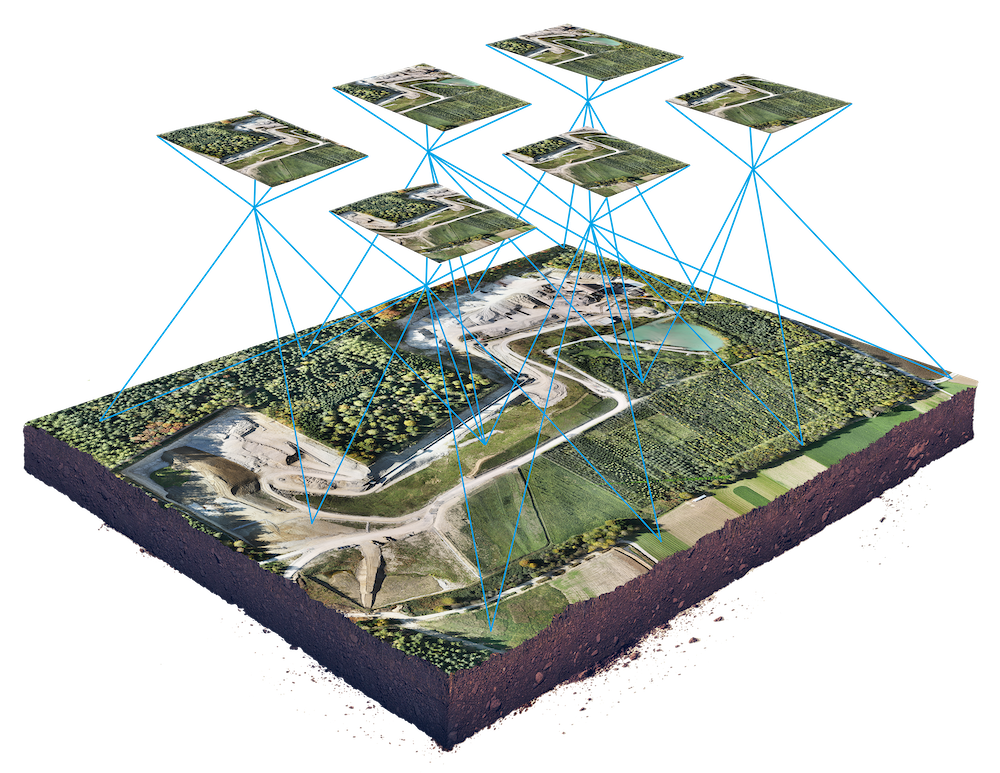 The two big surfaces (the ones that hit the ball) have no details to be recognized by the software and to make matters worse, they are glossy. As the camera circles around the paddle, the glossy surface changes in appearance and reflects surrounding light sources. This results in barely any points being reconstructed on this surface. This will ultimately lead to incorrect mesh shape. To prevent this from happening, some detail has to be added to these surfaces. That can be easily done with for example painters tape. Stick a few stripes of it over glossy surfaces to avoid reflections and create a matte textured look. In the 3D view, you can see the difference this quick hack made.
Glass – transparent surfaces
Similarly to glossy surfaces, transparent objects are a problem. Sharp edges may be captured by the photogrammetry software, but smooth transparent areas will be completely ignored, which will lead to incomplete data for mesh reconstruction.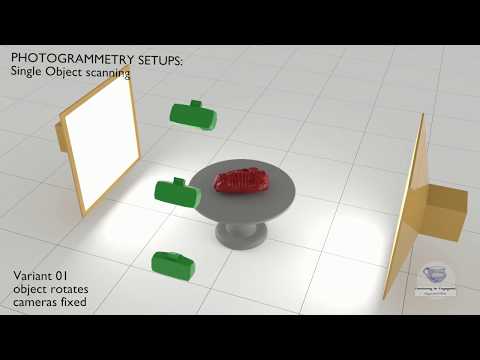 Again, you can use painters tape to cover these surfaces. Alternatively, you can use water dissolvable colors with a sprayer and dirty up the glass.
Conclusion
Meshes created by photogrammetry can easily outperform cheap 3D scanners. You can recreate huge objects that would be nearly impossible to capture with traditional 3D scanning tools. It’s extremely affordable and chances are that you already have everything you need for photogrammetry – a camera (smartphone) and somewhat powerful PC. And it doesn’t have to end with reconstructing a statue. Do you own a drone? Take a few pictures, reconstruct, and print your house. So…
Is photogrammetry a viable 3D scanning tool? Definitely YES. Should you print reconstructed models without any touch-ups? Probably not.
Just like any other 3D scanning technique, the final mesh won’t be perfect. Some areas might be missing details, flat surfaces may not turn out completely flat, the mesh may contain holes, non-manifold edges or other errors.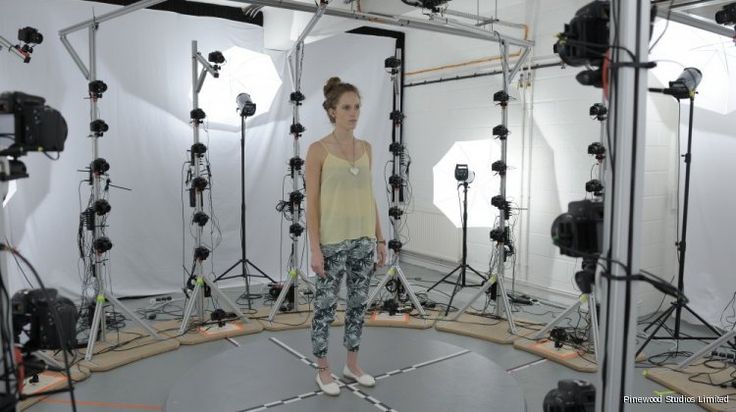 However, if you’re able to fix these problems, the final result will be well worth the time.
Sources
Schonberger, Johannes Lutz and Frahm, Jan-Michael, Structure-from-Motion Revisited. University of North Carolina at Chapel Hill, Eidgenossische Technische Hochschule Zurich.
All3DP – Autodesk 123D Catch Review
3D printing sculptures made easy with photogrammetry / 3d printing / 3Dmag.org
Today, there are many ways to get 3D models from real world objects, but many of them are not very convenient and cheap. For example, laser scanning of models can be messy and inaccurate, while new photogrammetry technologies show significant progress. In addition, recently Serbian researchers have shown that photogrammetry using relatively simple software and hardware can be of very high quality and extremely useful, especially in the restoration of sculptures and for the digitization of works of art.
The guys used Autodesk 123D Catch.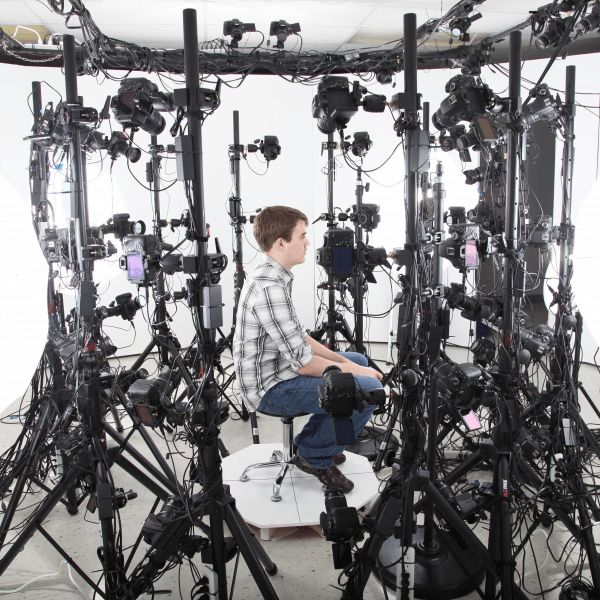 This software is available on tablets/phones and can recreate a model from photos taken from different angles. It uses photogrammetry to convert images into 3D data, while using the gyroscope on the user's phone to determine the required angles.
Researchers had to take 18 shots of the statue from all sides and 6 more vertical photos (if necessary, more can be taken to improve the quality). From these files, the software will be able to generate a 3D model in standard STL format. Then comes the turn of processing, adjustment and cleaning in the free software 123D Make.
The process is relatively easy, although getting the 3d model may require some work from the user. However, the results are very pleasing, given the simple technology, free software and a basic phone camera.
This method of creating 3D models will be useful in art, science and design. This is a growing area of research with great potential.
Related entries:
-
hedin
3d printing → Nanosculptures 0 -
just4fun
3d printing → Turning a song into a sculpture 0 -
just4fun
3d printing → Glossy 3D printing from MIT 0 -
just4fun
3d printing → Restoration of the doors of the Baptistery of Florence 0 -
just4fun
3d printing → 3D printed mummies are a hit at the museum exhibition 0
Only registered and authorized users can leave comments.
Best STL Files for Photogrammetry・Cults 3D Printer
Wreck of the Thistlegorm in the Red Sea
29.95 €
Chalk Lake Shark
1.95 € -fifty% 0.97 €
The Lord of the Rings - Minas Tirith
2.33 €
Crouching Gargoyle
Free
Owl 3D model 3D print model
2.99 €
Fairy Tree 9 Scanner Photogrammetric Scan0062
Free
Rock photogrammetry using Agisoft
Free
Me as Bernie Sanders
Free
Scan of the owl figurine
Free
Phone stand - Boku no Hero
1 €
Owl 3D model 3D print model
2. 99 €
99 €
Owl 3D model 3D print model
2.99 €
Owl 3D model 3D print model
2.99 €
Photogrammetric rotary sequencer MIGHTY-7200
9,36 €
Mushroom photogrammetry scans. High and low poly.
€4.65
Apple - Photogrammtetry
Free
TUMI
4,40 €
Apple - 3D Scan - Textured
Free
AFRICAN ART 5 (PHOTOGRAMMETRY)
5 €
AFRICAN ART 4 (PHOTOGRAMMETRY)
5 €
AFRICAN ART 3 (PHOTOGRAMMETRY)
5 €
Free photogrammetry
Free
African art object 2 (photogrammetry)
€0. 99
99
Disney: Toy Story REX Dinosaur (Photogrammetry)
€0.99
African art model 1 (photogrammetry)
0.99 €
Roman Marble Woman
Free
Feminine divinity
Free
Squatting Venus
Free
Female deity, Rhamnus-type nemesis
Free
Network of lovers
Free
Bulldog figurine
Free
Tower
3.04 €
Vysoke Volcano - Mikeno - Karisimbi - Republic of the Congo - Rwanda - Volcanoes of the World
2. 38 €
38 €
Volcano Nyamuragira - Republic of the Congo - Volcanoes of the world
2.38 €
Volcanoes of Muhavura - Gahinga - Sabinho - Rwanda - Uganda - Congo - Volcanoes of the world
2.38 €
Mount Nyiragongo - Republic of the Congo - Volcanoes of the world
2.38 €
Volcano de Fuego - Guatemala - Volcanoes of the world
2.38 €
Snäfellsjökull volcano - Iceland - Volcanoes of the world
2.38 €
Vesuvius - Italy - Volcanoes of the world
2.38 €
Mount St. Helens - USA - Volcanoes of the world
2.38 €
Mount Etna - Italy - Volcanoes of the world
2.