3D printing dual extruder
5 Best Dual Extruder 3D Printers in 2023
Dual extruder 3D printing machines can draw from two separate spools of build material simultaneously. They fall into three categories: dependent, IDEX, and ‘TRUE’ IDEX. The actual extrusion heads of machines are fixed together and print alternately, with the machine moving the active extruder to the point of printing. IDEX (independent dual extruders) move separately on the X axis and print duplicate or mirrored parts. “TRUE” IDEX units contain dual gantry systems that allow non-mirrored/identical parts to be printed, within limitations.
Dual extruders have several purposes. They can be used to: process complex models, make colorful prints, reinforce a polymer, or allow limited additional printing in the same session. To rank the best dual extruder 3D printers, one must consider the following criteria: table size, extruder temperature ranges, build speed, and price. Currently, the best dual extruder 3D printers are: Flashforge Creator Pro, Geeetech A20M, Sovol SV02, Qidi Tech X-Pro, and BIBO Dual Extruder 3D Printer. This article will discuss dual extruder 3D printers and suggest ranking criteria so you can judge which best suits your needs.
1. Flashforge Creator Pro
In the mid-level machine market, the Flashforge Creator Pro is often viewed as the best dual extruder printer. It is easy to set up, prints very well, and boasts a wide and versatile feature set. This machine excels at printing both bi-color models and single-material models with support structures or scaffolds. Its marketing suggests it can take many material types, but they’re limited by a maximum nozzle temperature of 360℃. The Flashforge creates its best results with ABS, PETG, and PLA/PLA+ with various fillers.
This extruder has an aluminum build plate and a very stiff frame which makes for a stable build platform. Its fully removable side, top, and front covers keep the print environment well controlled but allow easy access for maintenance and cleaning. It has the smallest build envelope in its class with a volume of 227 x 148 x 150 mm and it weighs in at 45 kgs.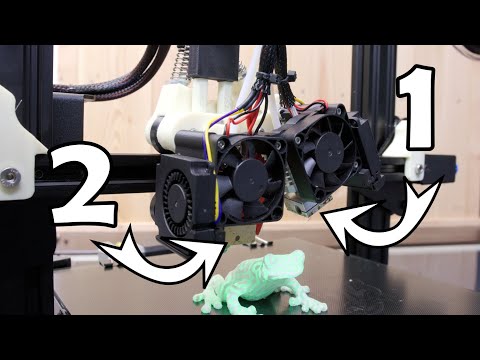 The build resolution is a fairly typical 100µm. The touch screen display, at 3.5” is small for comparable machines.
The MkII version of the machine offers IDEX print heads for an additional cost. Although this may benefit some higher volume users, this is not necessarily a must-have feature for lightly loaded machines and lower-volume users. The price for the Flashforge Creator Pro is around $399-639.
2. Geeetech A20M
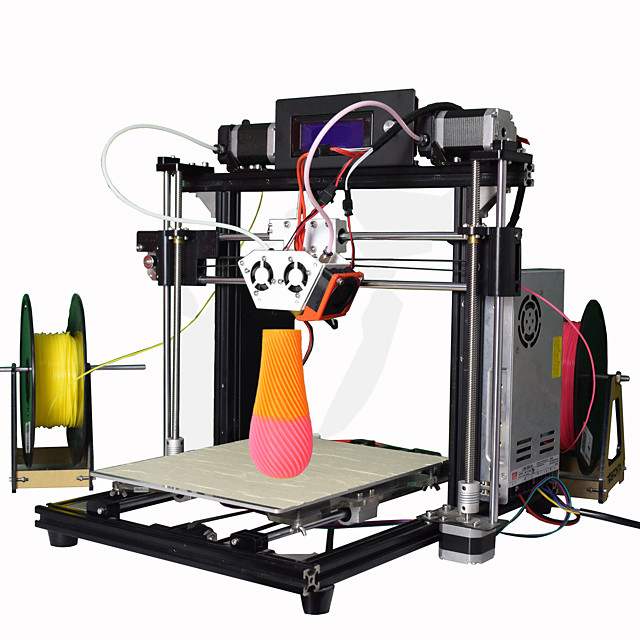
The Geeetech A20M is a leader in lower-price dual extruder 3D printers. It can save on costs by feeding two materials through a single extruder. An interesting additional capability is its dual-feed or color-mixing mode which presents the option of blending two filament colors to create gradients of their combination. The machine has a large table for its price bracket of $399. The build envelope is 255 x 255 x 255 mm, and the machine weighs 8.8 kg. It has a well-exposed print head that offers 360° ventilation.
The machine can handle limited power loss thanks to a resume function, although long delays that allow the model to cool are likely to produce disjointed parts.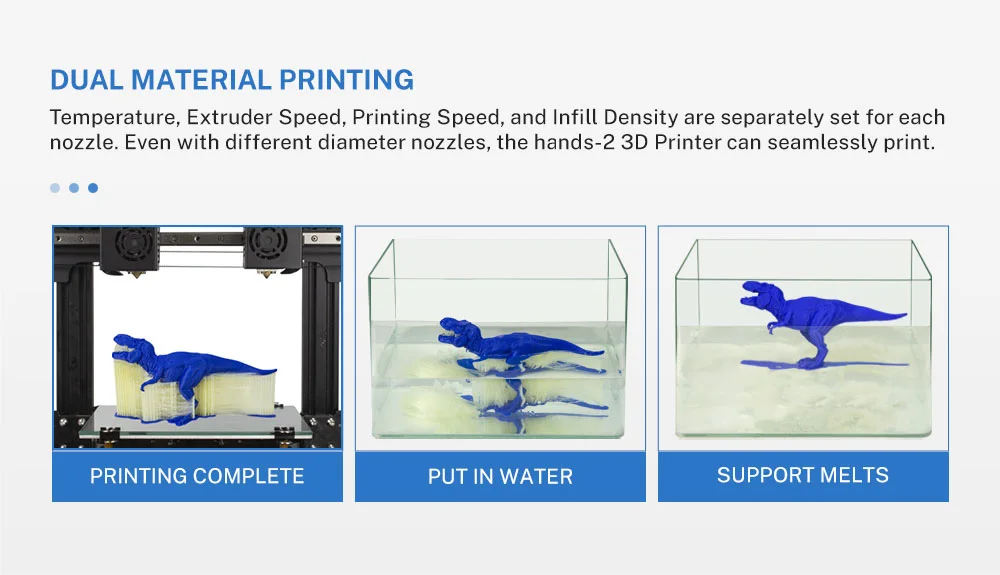 The Geeetech A20M offers a fairly typical 100 µm best resolution and can handle filament materials like: ABS, PLA, PLA+ wood fill, PVA, HIPS, and PETG.
3. Sovol SV02
The Sovol SV02 uses a similar dual-feed, single extruder setup as the Geeetech machines, resulting in a low price ($449) for a relatively sophisticated machine. The dual feed mounted on stepper motor drives allows filaments to be mixed, alternated, or used as build/support. Prints come out with nice surface finishes and excellent color transitions. These machines are easy to set up and are beginner-friendly. The 4.2” touch screen also sports an intuitive user interface and software that enables it to resume printing after a power failure.
The Sovol SV02 offers the usual 100 µm resolution, a 280mm x 240mm x 300mm build volume, weighs 12 kgs, and features an annealed glass build table. The design cites support for: PLA, ABS, HIPS, TPU, PETG, PLA, and PLA+. Machine upgrades are also available, including: a mixer extruder to improve its color gradients, touch-enabled bed leveling, and a magnetic-sheet build surface.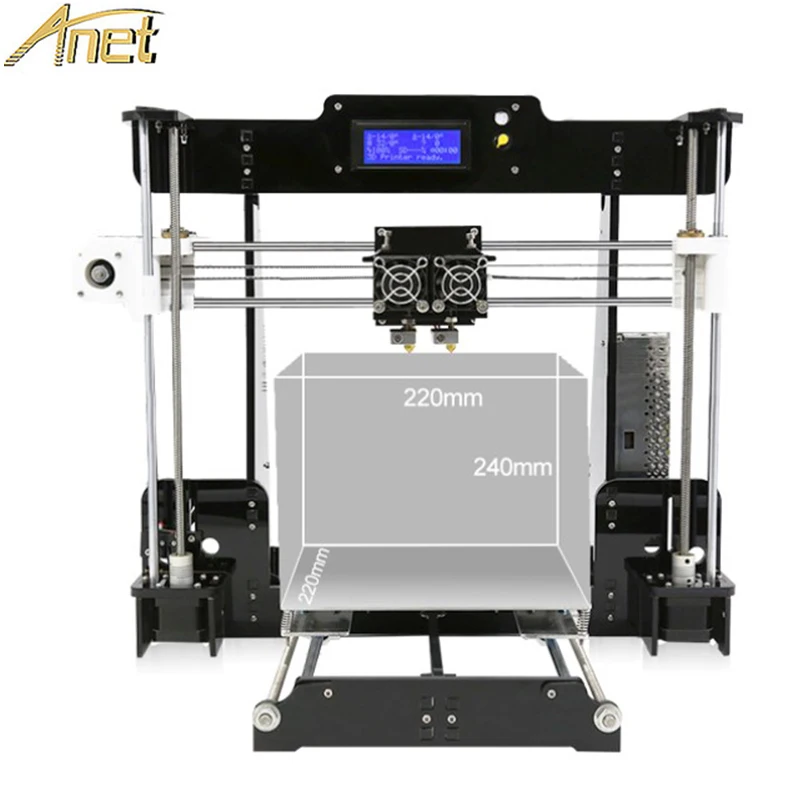
4. Qidi Tech X-Pro
The game-changing feature that sets the Qidi Tech X-Pro apart in its price bracket ($650) is the twin nozzle setup. This arrangement allows faster printing than single-extruder dual material machines; it can achieve speeds up to 150 mm/s. Other key selling points are its heated aluminum table, a flexible magnetic build plate, a printing resolution of 50µm, and a power-outage recovery function. It supports materials like: PLA, PLA+, ABS, HIPS, TPU, and PETG. The print quality is good. Users will find that they can push the limits, creating more challenging parts with nicer surfaces and fewer faults than with simpler machines. The build envelope is 230 x 150 x 150 mm and the weight is 18 kgs.
5. BIBO Dual Extruder 3D Printer
The BIBO has a chunky and homebuilt look but is known for being one of the more capable machines in its price range ($800). Its build volume is quite small at 214 x 186 x 160 mm and it weighs 16 kg. Its transport mechanism is well supported, resulting in a very stable platform. Print quality meets the most exacting criteria in terms of smoothness, clean curves, and low blemish count.
BIBO integrates a number of useful features such as: ‘assisted’ manual bed leveling, a filament present/absent sensor, a power outage resume function, Wi-Fi connectivity, a dual print/copy mode, an aluminum frame, and an annealed glass build table. The machine supports: ABS, PLA, PLA+ (including carbon fiber), TPU, HIPS, PETG, Nylon, and PC, printing them to a 50 µm build resolution.
What is a 3D Printer Extruder?
An FFF/FDM 3D printer’s extruder is its business end. It’s the device through which filament is fed and brought to the optimal temperature for layer construction. A mechanical feeder delivers the filament at the correct rate for the print setup, and an electrical heater melts the filament, which is then pushed through by the feeder and extruded to bond/merge with the previous layer.
The extruder moves in both the X and Y axes in some machines, whereas in others, the extruder moves only in the X and the build table moves in the Y. The end result in either way is that the extruder is positioned to ‘draw’ the 2D slices of a build. The extruder assembly then moves up the machine’s gantry in the Z direction to deposit the next layer, ultimately delivering a full 3D net shape. For more information, see our guide on 3D Printing Parts.
What is the Purpose of a Dual Extruder 3D Printer?
Dual extrusion serves several purposes:
- It can alternate or mix two colors to produce effects such as sudden or gradual color changes.
- Water-soluble support materials can be supplied through one extruder to support the actual build material when printing complex shapes.
- IDEX allows single-color builds with water-soluble support material OR two-color builds OR duplicate/mirror image tandem builds.
- 'TRUE' IDEX allows two non-identical parts to be built simultaneously, within certain limits.
What Are the Benefits of a Dual Extruder 3D Printer?
Dual extruders expand the capabilities of the machine by:
- Allowing the use of support scaffolds built from a water-soluble material, making their later removal much simpler.

- Creating simultaneous duplicate builds for increased productivity.
- Enabling dual-color and/or blended-color prints, depending upon the nature of the dual extruders.
How to Select the Best Dual Extruder 3D Printer
There is no single choice for the best dual extruder 3D printer. Each one fits different needs, so buyers must decide which of the following are most important to them:
- Dual material single extruder vs dual extruders
- Dependant vs IDEX dual extruders
- Enclosed vs open plan
- Table material – glass vs aluminum
- Table – heated vs unheated
- Quality of user interface
- Degree of user build/setup required before printing
For more information, see our guide on the Best 3D Printer Extruder.
How Can I Print Many Extruders at the Same Time?
Most slicer software packages can work in dual extruder mode while converting the 3D file into build instructions. In dependent machines with two extruders on a single head, the positioning of the extruders is not very critical. Machines with three or more extruders, meanwhile, can print multiple parts at the same time, but they need to be created as separate processes within the slicer software.
How Can I Convert my 3D Printer to a Dual Extruder?
Check with your 3D printer’s manufacturer for upgrade kits that can convert an existing 3D printer to a dual extruder. Upgrading may result in setup issues. Specifically, the second extruder’s exact positioning will be different and the second material may have different properties. The software needs to know how to handle both issues. Most slicer software will accommodate the second extruder while preparing the slices. Once the setup bugs are ironed out, the process should be quite repeatable in subsequent builds.
Are Dual Extruder 3D Printers More Efficient?
Yes, dual extrusion is more efficient, as it significantly enhances the print capabilities. It can also have a marked effect on model quality, cosmetics, and print speed.
Summary
This article presented the best dual extruder 3D printers, explained what they are, and discussed the features of each one. To learn more about dual extruder 3D printers, contact a Xometry representative.
Xometry provides a wide range of manufacturing capabilities, including 3D printing and other value-added services for all of your prototyping and production needs. Visit our website to learn more or to request a free, no-obligation quote.
Disclaimer
The content appearing on this webpage is for informational purposes only. Xometry makes no representation or warranty of any kind, be it expressed or implied, as to the accuracy, completeness, or validity of the information. Any performance parameters, geometric tolerances, specific design features, quality and types of materials, or processes should not be inferred to represent what will be delivered by third-party suppliers or manufacturers through Xometry’s network. Buyers seeking quotes for parts are responsible for defining the specific requirements for those parts. Please refer to our terms and conditions for more information.
Team Xometry
This article was written by various Xometry contributors.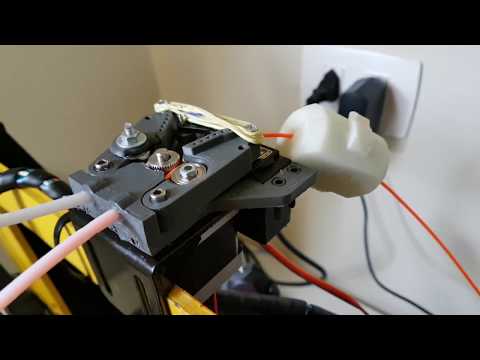 Xometry is a leading resource on manufacturing with CNC machining, sheet metal fabrication, 3D printing, injection molding, urethane casting, and more.
Dual Extrusion 3D Printers | MatterHackers
Whether you need to 3D print with two different colors, two different types of filament or support material for 3D prints that have complex geometries or overhangs, this collection of 3D printers fit the bill. Dual extrusion 3D printers can take advantage of the second material to create a scaffolding for the main 3D print, allowing for much more complex designs using PVA from a variety of manufacturers like Ultimaker, E3D, 3DFuel and more. Creators are also able to 3D print with an additional color or even another type of filament at the same time for endless possibilities.
Guides & Articles
How to Succeed with Quantum Dichromatic PLA Filament
Follow this guide for tips and tricks on how to get the best results when 3D printing with Quantum Dichromatic PLA filament.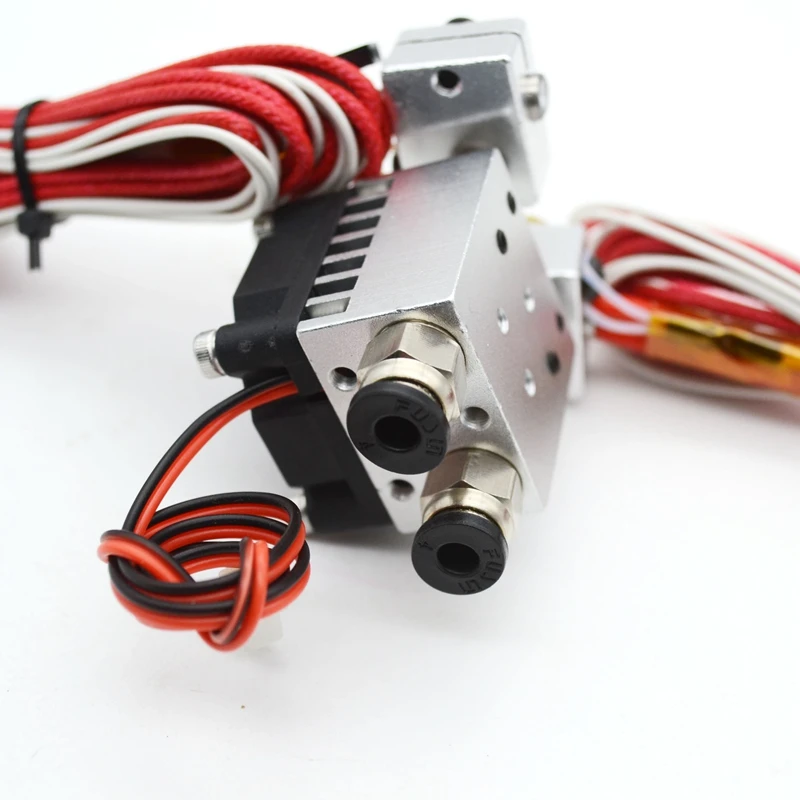
How To Succeed with LayerLock SLA Build Surfaces
Successfully achieve strong bed adhesion for Laser, DLP, and SLA resin prints using LayerLock SLA Resin 3D Printing Build Surfaces.
How To Build A Successful Makerspace
Find out the necessary components to create an effective space for your maker community.
How to Succeed When 3D Printing with Polypropylene
Successfully produce 3D printed parts out of polypropylene filament with these tips on achieving stronger bed adhesion and minimizing shrinkage.
Tech Breakdown and How to Succeed: Ionic Hybrid Support Material
Supporting engineering-grade filament has been difficult without a support material dedicated to higher temperature 3D printing. Ionic aims to solve that.
How To Succeed with OBC 3D Printing Filament
From Dow Chemical, OBC combines flexible and rigid into one unique material with properties of both.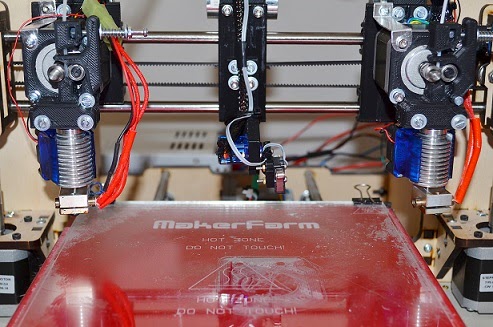
How To Succeed with LayerLock Garolite Build Surfaces
Successfully achieve strong bed adhesion for NylonX, NylonG, and standard filaments using LayerLock Garolite Build Surfaces.
How to Succeed with LayerLock Powder Coated PEI Build Plates
Powder coated PEI steel sheets are a great alternative build surface for strong bed adhesion. Here's how you can succeed using this durable build plate.
How To Succeed When 3D Printing With Nylon
Learn how to 3D print Nylon like a pro. Nylon is a stronger and more durable alternative to PLA or ABS and easy to 3D print with using these Tips and Tricks.
How To Succeed When 3D Printing With ASA Filament
Follow this step-by-step guide to learn how to print with ASA, the perfect material for any outdoor projects.
How to Succeed when 3D Printing with Polycarbonate Filament
Follow these helpful steps to start successfully printing with this extremely tough, professional grade material.![]()
How to Succeed with NylonX
NylonX has quickly become one of our favorite filaments for strong, durable, and ready-to-use parts. Here's an in-depth look at Nylon X, and some printing tips to get the most out of this great new material.
Why 2 extruders in a 3D printer? / Habr
Good afternoon everyone! In this article, we would like to talk about the issue that torments many customers when choosing a 3D printer with 2 extruders. Namely, which is better? What is more stable? Which 3D printer to choose? Why do dual extruder 3D printers alone cost significantly less, and what is the difference between them?
A bit of theory
First of all, let's start with the fact that by printing with 2 extruders (or 2-component printing), we mean the ability to print with 2 materials, for example, PLA (base material) and PVA (temporary support material removed chemically, using water in this case ).
It is possible to print in two different colors. But in practice this has not received any great distribution. The printing of complex models with dissolvable supports is in demand.
Therefore, you need to decide for yourself why you need a 3D printer with two extruders? For most tasks, it is enough to use a 3D printer with 1 extruder.
The use of a dual extruder 3D printer is a must when printing complex 3D models with dissolvable supports. Usually such 3D printers are chosen by manufacturing companies for printing geometrically complex prototypes or owners of 3D printers with 1 extruder who understand that they cannot realize with a 3D printer with 1 extruder.
But do all 3D printers with 2 extruders have the same capabilities? Or is it that the differences in design, and, accordingly, in price, are of decisive importance?
Consider different solutions for 3D printing with 2 materials on the 3D equipment market.
To implement this function, manufacturers use the following solutions:
Solution No.
 1
1 Use of 2 static extruders. As a rule, these are 2 hot-ends with two independent material feed motors. There are many options. But all of them, to one degree or another, repeat the solutions on the Makerbot Replicator 2, released in 2012.
There are several technical solutions, but they all have a common list of disadvantages and features.
Disadvantages :
1) Be sure to align both nozzles horizontally with respect to the 3D printer desktop. In other words, the nozzles of each hotend should be at the same height, ideally with an error of no more than 0.1 mm.
2) Using a utility tower (or similar) to clean the inactive nozzle from plastic drips (drop formation) before switching to the active mode for printing. Consider an example: if nozzle #1 prints a model with blue plastic, then in order for nozzle #2 to start printing white, the printer first needs to print the 1st layer of the tower with nozzle #2 to remove the remaining plastic, and only then move it to print the base model ( see picture). And so every switch. This greatly (at times) slows down the print speed, relative to the same model but when printing in 1 color. Moreover, there is a possibility of the collapse of the utilitarian tower (the layer did not fit well, or peeled off from the desktop) and, as a result, the marriage of the entire project.
3) No guaranteed result. Due to the complexity and imperfection of the extruder architecture. Large marriage rate. A nozzle that is currently inactive can leak plastic and ruin the part.
Advantages:
1) Low cost solution
2) Simplicity of design, as a result - high maintainability.
This variant has the lowest price and the lowest overall performance. The complexity of the settings, to obtain a high-quality result, makes this implementation option a testing ground for experiments at home. In a more or less intensive implementation of projects, this option is quite problematic.
Decision No. 2
Using a Diamond type extruder.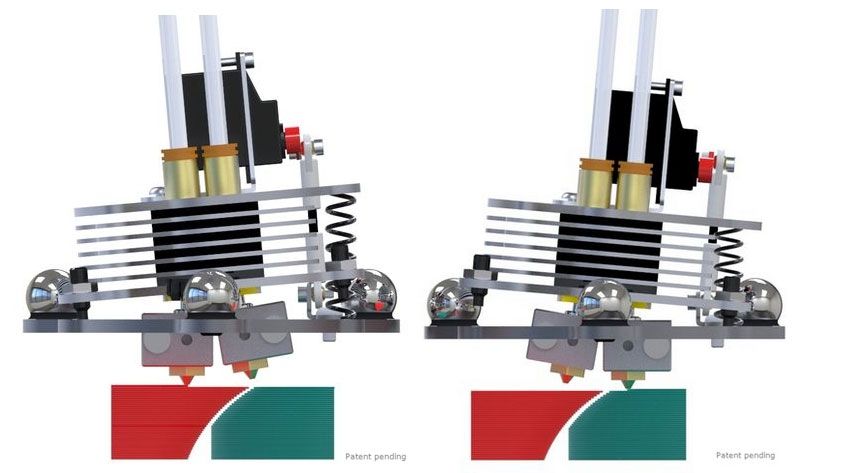 This type of extruder uses a single nozzle, and a radiator(s) (or cooling module) with multiple internal plastic passages.
Basically, this extruder is used for printing different colors. But this, as we already know, has not received much distribution in reality. Printing with solvent material will be somewhat difficult. Firstly, the base material and support material have different operating temperatures. This will cause some difficulties for quality printing.
And in any case, this design has almost the entire list of disadvantages, like the first option.
Only there is no point about the alignment of the nozzles - here it is one.
Disadvantages :
1) There remains the need to use a utility tower (or equivalents) to clean the nozzle from plastic drips (drop formation) before switching to another material. This "tower" is visible in the photo. This greatly (at times) slows down the print speed, relative to the same model, but when printing in 1 color. Here it will still probably take time to change the temperature of the nozzle, when changing the base material to supports. Or the possibility of poor-quality printing will greatly increase.
2) There is no guaranteed result. Due to the complexity and imperfection of the extruder architecture. Large marriage rate.
3) This type of extruder is equipped with Bowden-scheme plastic feeding. This entails difficulties (more often even the impossibility of printing with flexible plastics)
The advantages have also disappeared.
Such a solution is quite expensive. And it has a complex structure.
Advantages:
1) Better print quality than #1.
As a result, in the variant of printing with two materials with dissolvable supports, there are no special advantages over the first solution. But this option has a higher price.
Solution #3
Extruder designs where the currently inactive nozzle rises to avoid problems.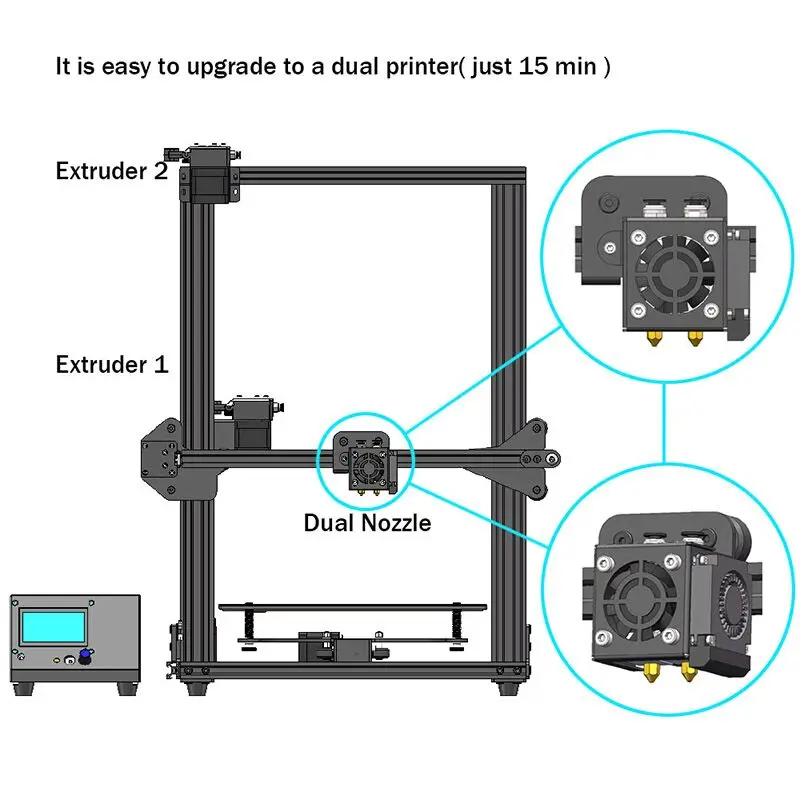 The most famous today, among serial printers, is the JetSwitch circuit.
Rotating nozzle system from PICASO 3D. There is one plastic feed motor, which facilitates the design.
The main feature is that one of the nozzles that is active at the moment is lowered to the working level by means of a rotary mechanism. The second is closed at this time, and no molten plastic flows out of it.
Advantages:
1) High print quality
2) There is no need to build a utilitarian "tower". Therefore, the switching time between extruders is short. The speed of printing with two materials is MUCH faster than that of options 1.2. Below is a comparison table from PICASO 3D.
Disadvantages :
1) A rather complicated design, and as a result, a high price.
There are several other types of extruders with lifting nozzles. All of them are united by one thing - a much higher print quality with two materials than the "classic" option No.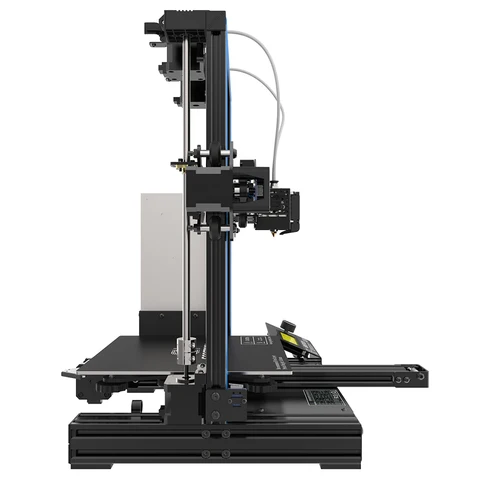 1. Yes, they all have a higher price, but the print quality is drastically different.
Terminals
The conclusions are as follows - by purchasing an inexpensive design, you save money, but spend many times more time on setup and printing itself. With the remaining risk of marriage, which reduces all efforts to zero. At the same time, the print result will still be worse than that of designs with lifting nozzles.
If you need a high quality result and the printing time of complex models is critical, then it makes sense to choose a model with lifting nozzles:
1) PICASO 3D Designer X PRO
2) Raise3D Pro2
3) Ultimaker 3
Creality Ender 3 Dual Extruder Options - All Your Best Options (& Pro/V2)
Contents
- Creality Ender 3
- Ender 3 Dual Extruder Options
- Mosaic Palette 2 / Pro 9014 Project
- Cyclops Hot End
- Proper Printing Mod for Ender 3 Dual Extruder
- Upgrading Ender 3 to Dual Extruder: Pros and Cons
- Before Installing Dual Extruder on Ender 3
- Be Confident and Safe!
- Get ready to roll up your sleeves
- Q&A
Creality Ender 3
Creality's Ender 3 series is one of the most popular budget 3D printer lines on the market today, and if you own one, chances are you already know why.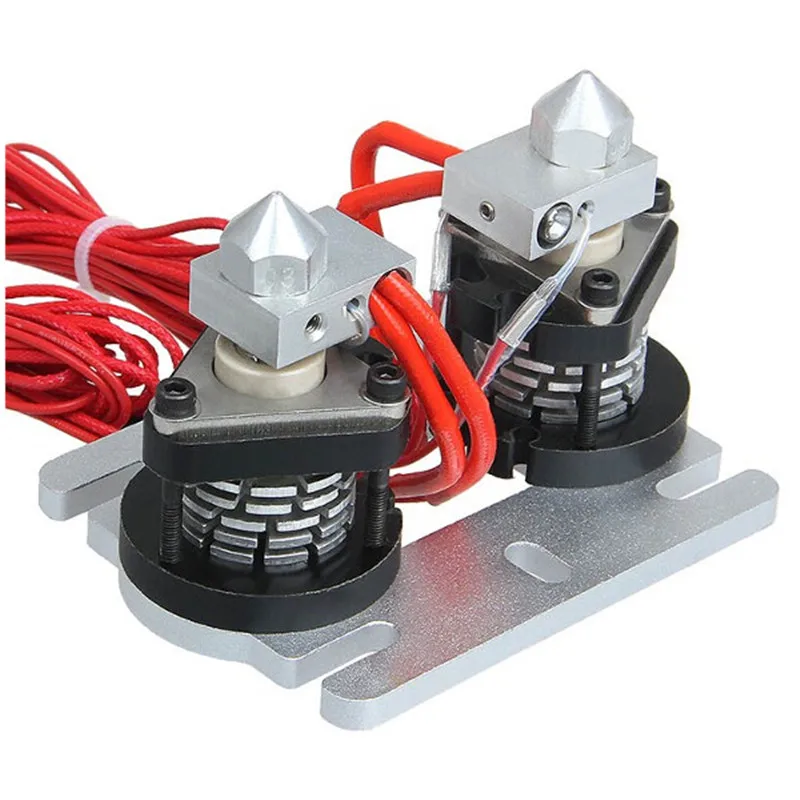 In addition to being unbeatable in price, they are easy to use, reliable and powerful enough for their range.
What's more, their openness makes them easy to modify, an ideal feature for today's craftsmen. One of the most popular upgrades for the Ender 3 is the upgrade to a dual extruder as this line only comes with a single extruder as standard.
It's easy to see why dual-extruder Ender 3 versions are popular. The ability to print with more than one type or color of filament at the same time makes prints superior and unique. Not to mention, using a stronger filament along with the main filament creates more reliable projects with less post-processing required.
The cost difference must also be taken into account. Installing a dual extruder on your Ender 3 will cost significantly less than buying a similar printer with a dual extruder already installed.
Standard dual extruder 3D printers typically cost around $600, which is three times the price of a standard Ender 3.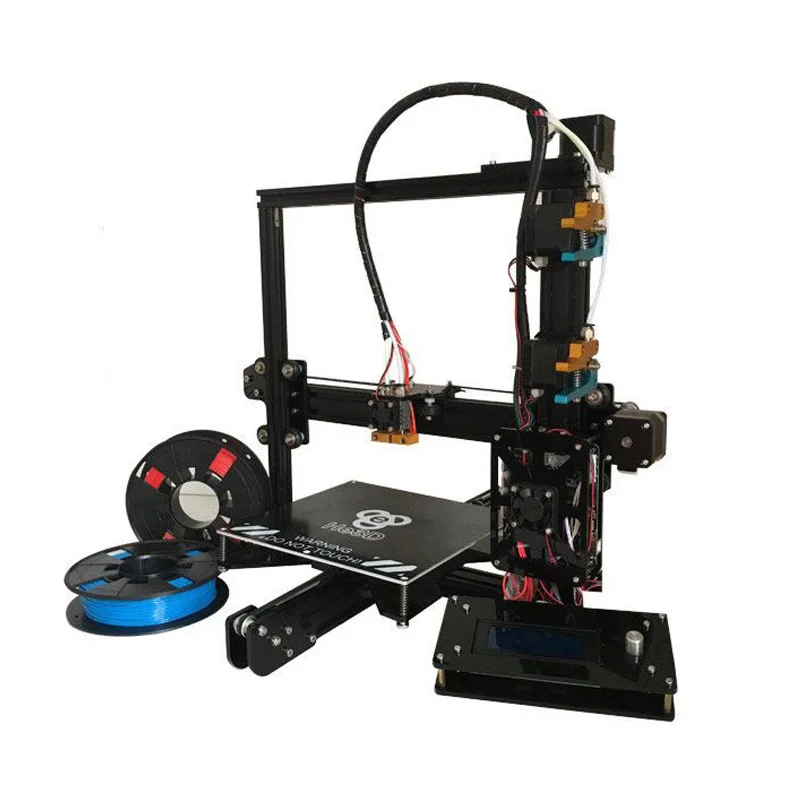
So how do you install a dual extruder on an Ender 3? What should I pay attention to before starting work? And what are the dual extruder options for which Ender 3 models?
Ender 3 Dual Extruder Options
The open source developer community for Ender 3 is huge, and there is no shortage of people with great ideas for modifying and upgrading Ender 3 printers with laser engravers, better bezels, and even advanced touch screens.
In this regard, it is quite understandable that you cannot immediately understand which printer is right for you. So here we take a look at some of the best and most reliable dual extruder Ender 3 mods you can check out today.
Mosaic Palette 3 / Pro
Price: $599-$799
While technically more of an honorable mention than a true Ender 3 dual extruder, the Mosaic Palette 3 and Palette 3 Pro are by far the easiest way to use the Ender 3 to create multi-color prints without the need for active modification of the printer.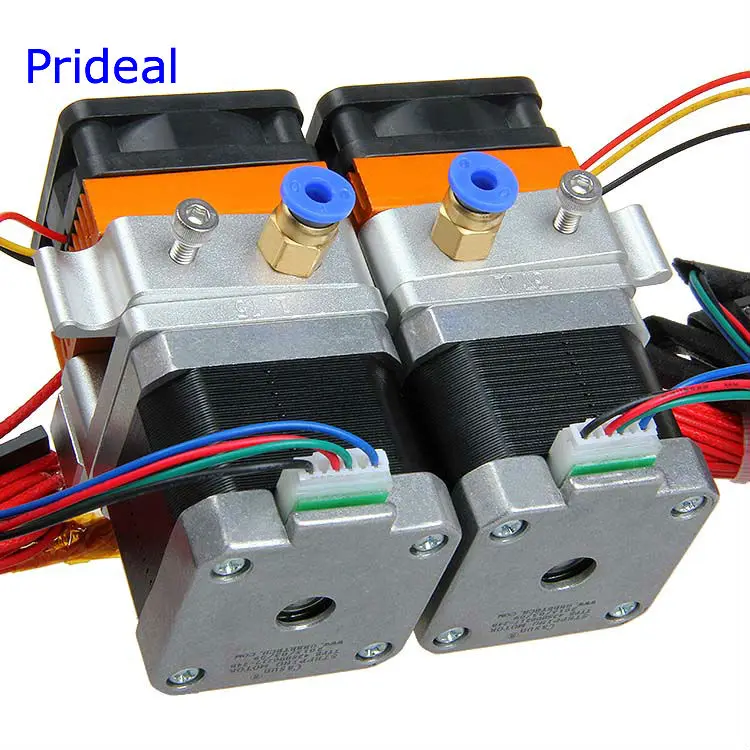
This is great news if you're unsure or for some other reason don't want to pick up Ender 3 tools, but still want to make prints using different colors and filaments.
Mosaic Palette models act as automatic switches, like changing the orientation of a railroad line to direct certain trains or uncoupled wagons in different directions. The Mosaic Palette models act as changers that swap up to eight different filaments per print and automatically manage each one.
Mosaic palette 3 1
The disadvantage is the cost. Priced around $700, these are not cheap machines. But if you're not very handy and have the money, this is the easiest way to hook up what you might call a "multi-extruder" to your Ender 3.0003
Project Chimera
Project Chimera, named after the Greek concept of animal fusion rather than ideological improbability, is the first great example of a DIY dual extruder that was designed for the Ender 4 but is still compatible with all Ender 3 models
Modification of the Chimera Project Ender 3 dual extruder, originally designed for the Ender 4.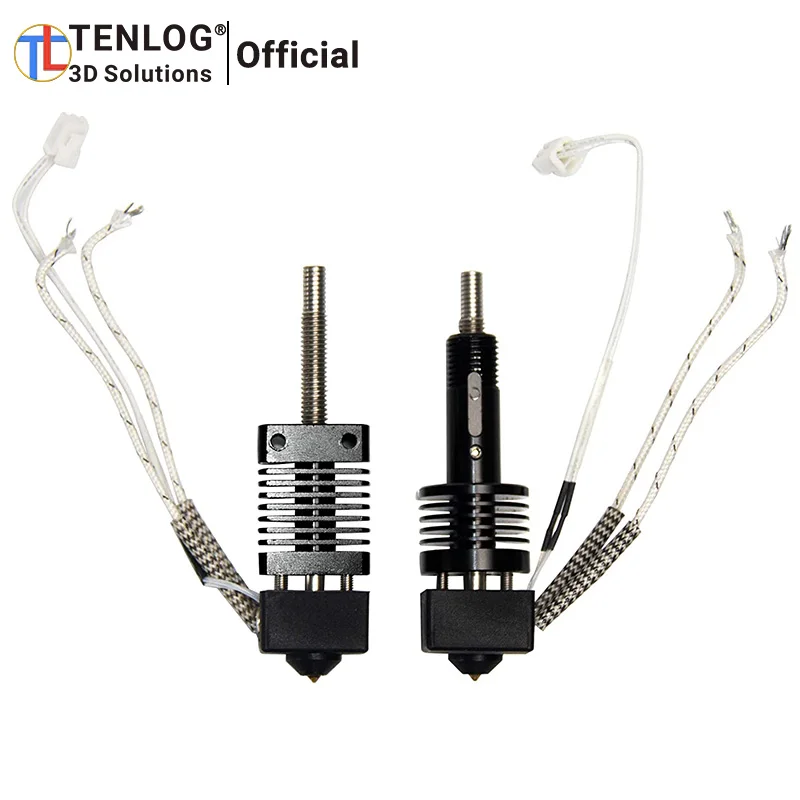
A standard dual extruder that is quite cheap to manufacture, the Chimera Project sits on a mount that you will have to print yourself. While this sounds like an extra step, don't discount how great it is to use your 3D printer to make your own custom modification parts.
Precautions and recommended equipment are laid out in such a way that even the most humble of beginners can easily figure out how it all works.
Regardless of your DIY experience, you'll need everything to run this Ender 3 & 4 Dual Extruder if you follow the instructions carefully and carefully.
Cyclops Hot End
Cyclops Hot End is the spiritual brother of Chimera. They can both be used with the same print fixture and both can alternate between different colors and filament types during the printing process. The Cyclops gets its name from the fact that it looks like a single extruder but has all the features of a dual extruder.
In addition to standard printing with multiple filaments, it can also mix filaments together. Although it looks more like a "filament control system" than a standard dual extruder, it does all the features you'd expect.
Instructions and files, as well as some assembly and usage tips, can be found here for free. This Cyclops seems like a reliable and very easy way to convert your Ender 3 into a dual extruder, unlike true Cyclopes, whose implied lack of depth perception probably makes them a lot less formidable than mythology would have it.
Ender 3 Proper Printing Dual Extruder Mod
Proper Printing has developed a unique dual extruder design that does not require a second servo. Instead, this very interesting and surprisingly clever design relies on a spring mechanism that allows the two extruders to switch smoothly, working like a dolly.
The extruders move in a slanted V shape, with only the active extruder parallel to the assembly, while the other, unused, is tilted to the side. This allows extruders to be used with the same servo instead of each one wasting time just waiting for their turn.
This minimizes assembly volume loss by saving space and parts in the design.
Known as "The Rocker" and available as printable files for as little as $3 on their site here, this is an absolute steal for something no Ender user should be without.
While it is claimed to work on any stock Ender 3 model (i.e. out of the box and without modification), it is not clear if it will work well with other 3D printers or more modern Creality Ender models.
Although since the $3 price is just files and instructions, you are free to experiment and tweak to see if The Rocker works with other 3D printers if you are confident and tech savvy enough to do so.
You can even change the design yourself if it doesn't work right away with the model you have in mind - that's the beauty of modifications!
Upgrading an Ender 3 to a Dual Extruder: Pros and Cons
Upgrading an Ender 3 to a Dual Extruder may seem pointless. One is more than two, which means it's better. But like most things related to 3D printers, it's not as easy as it sounds.
Dual extruders have a lot of advantages, but that doesn't mean there aren't any disadvantages. While not a one-way modification (meaning you can go back to a single extruder if you want), installing an Ender 3 dual extruder only to find out later that it wasn't worth the hassle would be a waste of time, money, and effort on your part. sides.
Equipping your Ender 3 with a dual extruder comes with some downsides that, depending on your desired goals, may not be worth the effort. So keep these points in mind before deciding whether or not to take out your toolbox.
Printing with several types of threads/filaments at once.
Multicolor prints are much easier and take less time because you don't have to constantly change filaments during the printing process.
You can strengthen prints with dissolvable threads such as HIPS and PVA to improve the surface quality.
Upgrading/modifying single extruder printers is often cheaper than buying dual extruder printers.
Twin extruders are bulky and difficult to handle and operate for beginners.
Not necessary if printing in one color is enough for you.
A lot more maintenance, care and cleaning is required to keep the dual extruder clean and functioning well.
Smaller build area due to larger extruder requiring more space.
Basically, a dual extruder requires a lot more work and maintenance to be used reliably than a single extruder. If you're aiming for reinforced and/or multicolor prints, then upgrading your Ender 3 with a dual extruder is a fantastic idea.
On the other hand, if you're happy with monochrome prints or you're not sure you can handle maintenance, it's best to stick with one extruder.
However, if you're willing to put in the effort and still believe you need a dual extruder on your Ender 3 despite all of these shortcomings, we'll help you move on.
Before Installing Dual Extruder on Ender 3
Ender 3 models come with single extruders by default.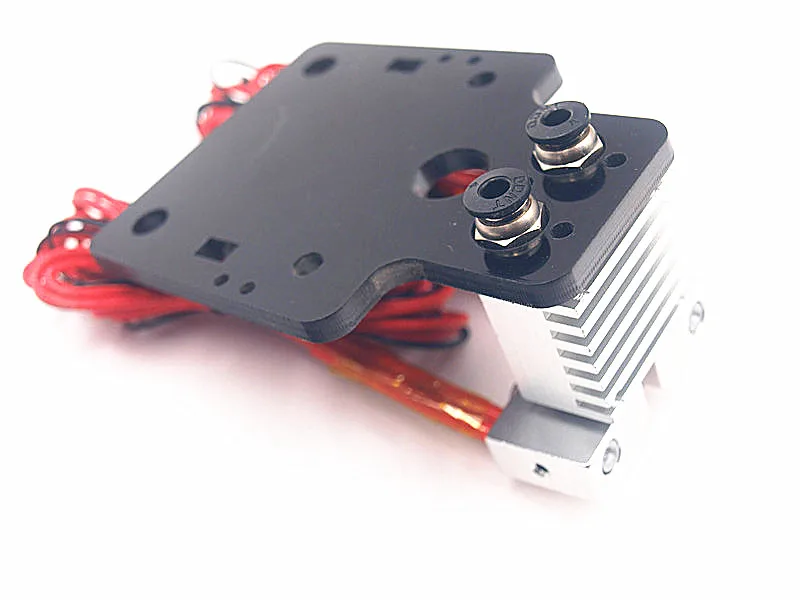 However, as we have already seen with the options for adding laser engravers, these are highly modifiable machines. This means that with enough knowledge and effort, you can equip your Ender 3 with a dual extruder.
Be confident and safe!
There is no official dual extruder extension for the Ender 3, so you'll have to put on your DIY hat. Remember that you will be dealing with mechanical parts that can get very hot, so make sure everything is turned off and unplugged before starting work.
Also, remember that you are working with moving mechanical parts and will manipulate them in ways they are not designed for, such as adding an extension cable to a standard outlet. Therefore, take the utmost care to protect yourself and the machine during operation. Always double-check equipment and instructions before starting work to move forward as confidently and safely as possible.
Because the Ender 3 is a modded model, you can be sure that you will be very careful when upgrading your model.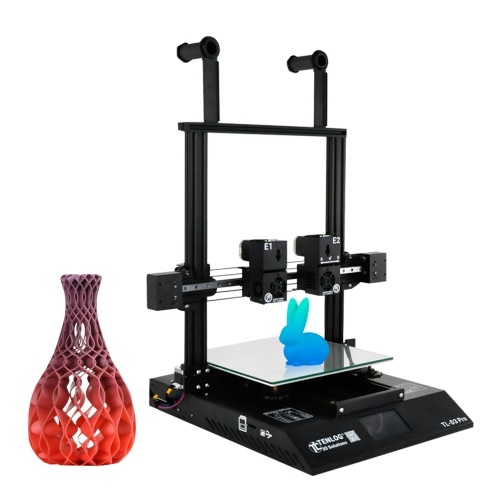 Removal and replacement of parts must be done with care to ensure the correct operation of each element. An incorrectly installed extruder can fail or fail in the middle of printing, increasing the risk of clogging, failure, and even fire.
Get ready to roll up your sleeves
Any third party modification of the device will require effort and know-how beyond what you will find in the instructions on the box. Mods done with user guidance and good explanation will be much more reliable than random selection of any old mod, but they all require at least some work on your part.
These mods are often much more complicated than just buying a new part and screwing it in, so read the instructions carefully and test before you actually start using your new mod. Attention to detail and precision in operation are a must before you're ready to plug in and start printing.
The main difficulty when installing your own dual extruder on the Ender 3 or any other 3D printer is the need for an additional servo.