3D printing data concerns
3D Printing: A Cybersecurity Concern
Skip to content
Cybersecurity
Posted by Goldberg Segalla
Additive manufacturing, more commonly known as 3D printing, is a process of making three-dimensional solid objects from a digital model. Additive manufacturing is already used in a number of critical fields, such as medicine, aerospace, civil engineering, and industrial manufacturing.
3D printers are often internet-connected, and increasingly open-sourced. And because of that, you can virtually 3d print pretty much anything through a 3d printing service.
Confidentiality and privacy concerns are the most direct consequence of a data breach involving a 3D printer. This could compromise confidential data such as schematics and software code for products. For example, an individualized medical device may contain personally identifiable information and a data breach may trigger security and privacy laws – think HIPAA, various data breach notification requirements, or even Federal Trade Commission actions. It is not difficult to appreciate how security of 3D printing has tremendous value in industrial additive manufacturing sectors such as aerospace, automotive, and defense.
To that end, the U.S. Department of Defense recently provided seed funding for the Digital Manufacturing Design and Innovation Institute (DMDII) to launch a “Cyber Hub for Manufacturing” intended to tackle the issue of cyber-espionage attacks against the manufacturing sector. While this effort is specifically geared toward compliance with DOD protocols, the cybersecurity practices have much broader applicability and constitute just one example of efforts to develop cybersecurity infrastructure around this emerging technology.
The product integrity issues, however, may be an even bigger concern than privacy issues. Creation of defects in products built by 3D printers as a result of a hack can have real-world effects in ways many other cyberattacks cannot. For example, if the digital file that includes the code from which the printer generates the physical object is corrupted, the ultimate physical product may fail. This failure could lead to injuries, property damage, litigation, or product recalls. Even worse, the defect in the product may not be immediately identifiable. It is essential that 3D printers and all connected devices have protections to secure both digital designs and code as well as the integrity of the physical product.
The challenges to cybersecurity protection of both the digital and physical sides of the growing additive manufacturing industry should be on the mind of those designing and making 3D printed materials; those incorporating 3D printed materials into their own products for sale or use; and insurers. Traditional product liability law could potentially even lead a court to find that a manufacturer or seller of a 3D printed product is strictly liable, even if it did not know or have reason to suspect a manufacturing defect.
These product integrity issues are certainly on the mind of cybersecurity professionals looking at these concerns. For example, researchers are hard at work developing systems to verify the integrity of 3D printed objects.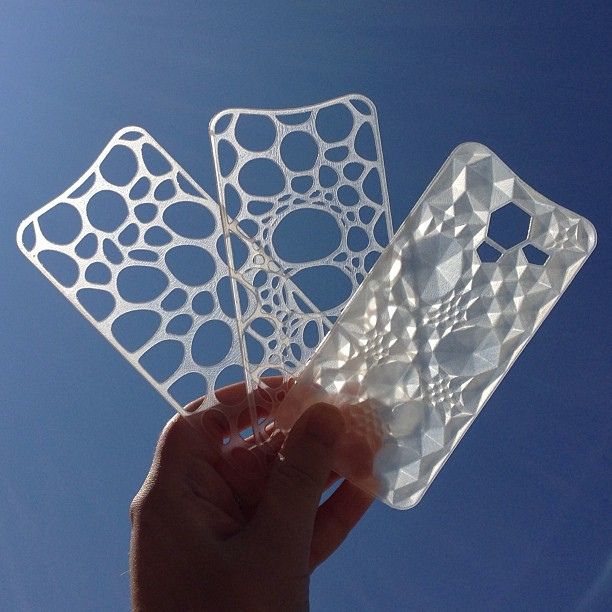 For example, a team of researchers from Georgia Tech and Rutgers University developed a three-layer system to verify that 3D printed objects have not been compromised by using acoustic measurements, printer component tracking, and detectable nanorods. Their system works independently from corporate computer networks to remove one of the major gateways to cybercrime.
At the very least, basic cybersecurity hygiene is critically important for manufacturers in the 3D printing space. Protecting 3D printing environments defends against a broad spectrum of other potential legal concerns including intellectual property, personal information, and product integrity. Those in the field should take heed.
3D printingcybersecurityFederal Trade Commission (FTC)
How 3D printing could pose a threat to your privacy
Skip to main contentTechRadar is supported by its audience. When you purchase through links on our site, we may earn an affiliate commission. Here’s why you can trust us.
3D printing was first employed as a fast and inexpensive way to create prototypes before manufacturing. However, in the past few years, 3D printers have become significantly cheaper and more readily available to the average consumer. These days, users around the world are taking advantage of 3D printers to create all kinds of different objects which can be purchased online or printed yourself if you have the necessary equipment and materials.
While 3D printing has tremendous potential when it comes to being able to create objects at home without the need to travel to a store, the technology could also pose a “grave and growing threat” to individual privacy due to the potential for 3D printed objects to reveal private information about individuals. TechRadar Pro spoke with Dr. James Griffin from the University of Exeter and Dr Annika Jones from Durham University to learn more about their research on the potential privacy threats posed by 3D printing.
- We've put together a list of the best 3D modeling software around
- These are the best all-in-one printers on the market
- Also check out our roundup of the best portable printers
How has 3D printing evolved over the last few years and how close is the technology to mainstream adoption?
3D printing has evolved exponentially, and is now reaching a stage where we can see people starting to use it in everyday activities. The mainstream technologies could still be criticised for being a bit basic, but extremely capable printers are dropping in price all the time. Don’t be surprised if within the next ten years, you have a fast 3D printer capable of printing complicated metal and plastic objects in your garage (and this time, it isn’t just hyperbole!)
(Image credit: Shutterstock)Why does 3D printing pose a threat to individual privacy and could it be more invasive to user privacy than the Internet of Things (IoT)?
3D printing doesn’t per se pose a threat to privacy (although we have heard [unsubstantiated] rumours of printers passing information about prints back to manufacturers). The issue we have raised is in the use of watermarks to reveal information about the activities of users. For example, a watermark embedded onto a 3D printed object could be tracked and traced through photographs online, e.g. through google image search. If this were, say, a piece of jewellery, it might be a way to track the movements of an individual; likewise, some 3DP implants could be traced through the use of x ray equipment. The files themselves could also be searched for online. The possibilities are, ultimately, endless.
Similar technologies can be employed by the IoT, indeed, there is some overlap. However, the interesting thing about 3D watermarks is that they could be on an analogue physical object, and they can be different for every single print. In effect, it could allow for a blockchain or Google search for physical objects – imagine that! As the IoT becomes more predominant, then these devices could recognise 3DP watermarks, in effect bringing together the 3DP analogue world and the digital world. If, as one would expect, 3DP becomes mainstream in the future, then we can see that the use of 3DP watermarks in conjunction with IoT could become rather common and a critical component in our everyday lives.
How can the origins of 3D printed objects be traced and would this be easy to do without technical knowledge?
Right now this is not so easy, but I am sure this will quickly change. There is a market incentive to implement watermarks into 3D prints – e.g. to find out how consumers use 3DP objects, in exactly the same way that online content providers use watermarks to know how their content is being used.
In summary - watermarks might assist governments in surveillance; they can assist companies to find out what consumers want; they could enable an individual to spy on another. We argue that we should be wary of some of the uses to which watermarks could be put.
However, there are some extremely beneficial uses. One which is becoming apparent through our research is that watermarks can be used in medical devices.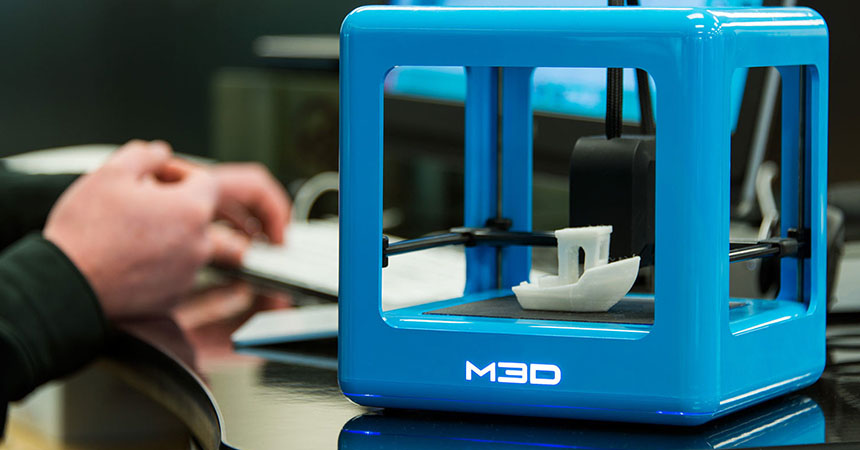 They could be used in ensuring the quality of the source materials, and they can be used to ensure the continued stability of a print (e.g. 3D printed organs etc).
Can you tell us a bit more about the 30 in-depth interviews you conducted with representatives from Chinese 3D printing companies?
We had funding from the UK Arts and Humanities Research Council, the Newton Fund and the Ningbo Science and Technology Bureau to carry out these interviews in China. This was achieved through the University of Nottingham’s Ningbo campus. We interviewed companies mainly in Shanghai and Beijing. Separately to this research, I have spoken to similar companies in the UK and the parallels in the concerns and issues raised was striking.
Are watermarking technologies currently being used in schematics for 3D printed objects uploaded to platforms such as Thingiverse?
Not to my knowledge, but watermarks can be platform agnostic. You could put a watermark into any file, without the knowledge of the platform.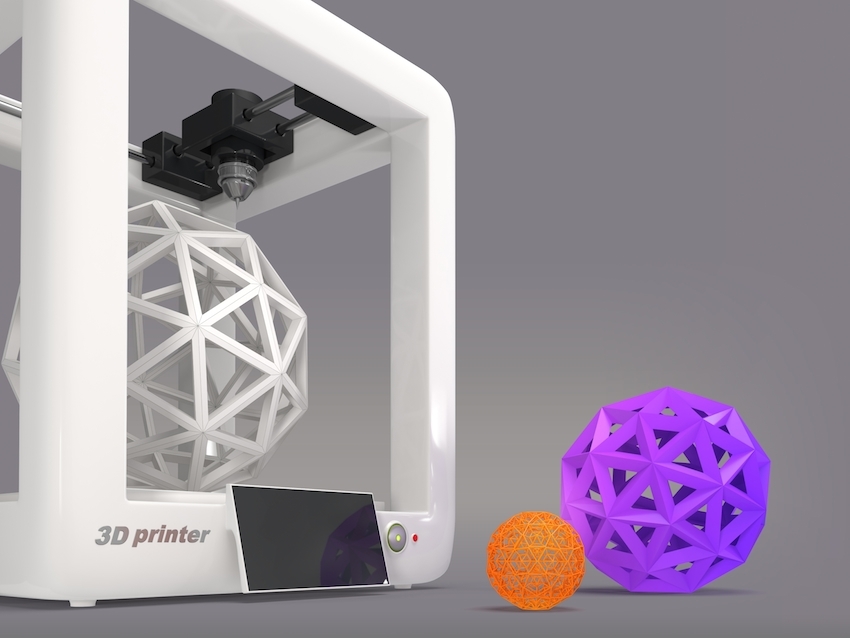 Platforms could take advantage of a watermark (e.g. for licensing purposes) if they so wish though.
What kind of regulations do you think should be put in place to protect the privacy of users when it comes to 3D printing?
Our main concern is to raise the issue. It would be great if regulation could be achieved without government intervention, but it might become necessary if these privacy issues become significant – which we think they could do, very quickly. Given the global nature of the Internet, it would be useful to have some guidance at international level, e.g. in a voluntary code which would be associated with a kitemark. The trouble with our current law is that there is protection (probably!) available for digital watermarks for copyright works, but that protection does not take into account privacy concerns. Indeed, it could be making matters worse by protecting privacy invading technologies. Similarly, the scope of the current law is likely to only cover copyright works, and not the more beneficial uses of watermarks in e.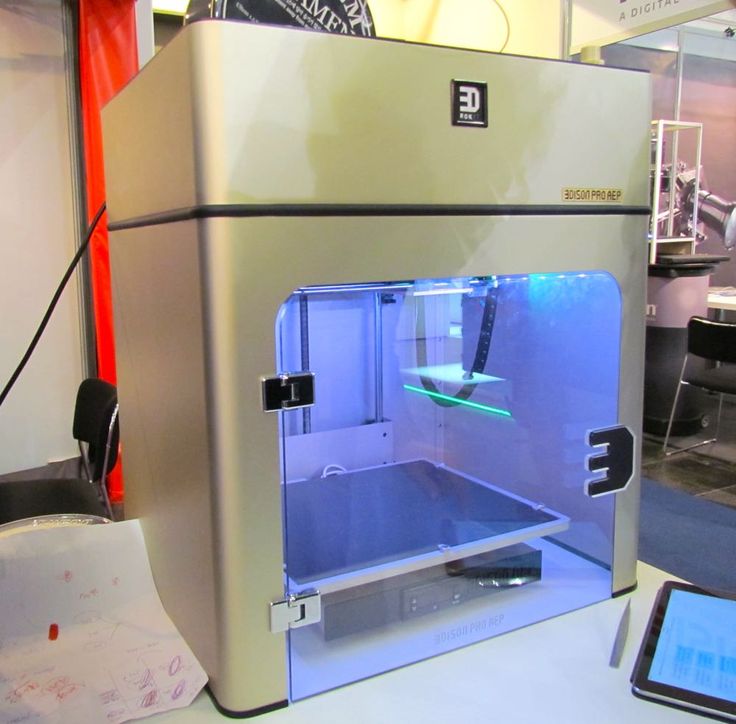 g. bioprinted technologies.
- We've also highlighted the best 3D printer
TechRadar is part of Future US Inc, an international media group and leading digital publisher. Visit our corporate site .
© Future US, Inc. Full 7th Floor, 130 West 42nd Street, New York, NY 10036.
The 20 Most Common 3D Printing Problems (Part 1)
Good afternoon dear 3D Today community! I would like to present you a translation of the article Troubleshooting Guide to 20 Common 3D Printing Problems, which will be divided into 2 parts.
Everyone has problems with printing. We had enough of them to analyze and find solutions for the 20 most common 3D printing problems. In this article, we share our experience and hope that now you do not have to spend extra time diagnosing and solving problems that have arisen.
If you cannot determine what the problem is, compare it with the description.
3D Printing Issue #1: Deformation - First Layer Peeling
Issue Description
At the base of the model, the print rises and does not stick to the platform. This problem can also cause horizontal cracks in the top sections of the printout.
Why did the problem occur?
Deformation of the print base is due to the nature of the plastic. ABS and PLA plastic cools very quickly and this is what can cause the first layer to come off.
Solve 3D printing problem: Printout warped
1. Use heated bed. The easiest solution to this problem is to use a heatbed and set the temperature just below the melting temperature of the plastic. If you set the temperature correctly, the first layer will not come off the platform. The printer bed temperature is often set automatically by the slicer. The recommended temperature for your plastic is listed on the side of the package or reel.
2. Use adhesive . If your printout is lifting around the edges, apply a thin layer of glue (or hairspray) to the platform to increase adhesion.
3. Try another platform. Change the platform to a platform with more adhesion. Manufacturers such as Lulzbot use a PEI (Polyetherimide) coating that provides good adhesion even without the use of glue. XYZPrinting Some printers include a few pieces of thermal tape for the liner. This is a good solution for cool platforms. Zortrax 3D opted for a different solution - a perforated backing to which the printout adheres, thereby relieving the user of the problem of warping the backing.
4. Calibrate the platform. Improper platform calibration can also affect the print quality of the first layer. Check the level of the platform and correct the height if necessary.
5. Increase contact between printout and platform. Often this problem also occurs due to insufficient contact between the model and the substrate. It can be easily corrected using the printer software by adding a skirt or backing.
6. Optimize temperature settings. If none of the methods worked, check the advanced settings of the printer software and the printer itself. Try increasing the platform temperature by 5 degrees.
7. Pay attention to the fan settings. As a general rule, the fans should switch to full power as soon as the print reaches a height of 0.5 millimeters, but you can increase the height to 0.75 millimeters to allow the layers to cool naturally.
8. Even if your printer has a heated bed, it is recommended that you use glue (or varnish) and constantly adjust the bed level.
3D Print Warping: Checklist to Avoid Problems
- Use Heated Platform
- Use Glue (Varnish) for More Adhesion
- Instead of Glass Platform, Use Kapton/Heat Tape/Adhesive/Varnish
- Calibrate Platform or substrate
- Adjust temperature and fan settings
3D printing issue #2: First layer misalignment (Elephant foot)
Problem description
The base of the model is slightly off.
Why did the problem occur?
Typically, the base of the model shifts due to the weight of the print, which puts pressure on the first layer when the lower layers have not yet had time to cool. Often happens with heated bed printers.
3D Printing Solution: First Layer Offset
1. Correct balance. To get rid of the problem of first layer displacement, the printed models must be cooled enough to support the weight of the entire structure. Here you should be careful: excessive hypothermia can lead to deformation of the first layer. Finding a balance is hard enough. Start by lowering the platform temperature 5 degrees (but no more than 20 degrees below the recommended temperature). If Bottom / Top Thickness is set to 0.6 millimeters, turn on the fan immediately at a height slightly lower.
2. Platform level. Most 3D printing problems are related to the wrong platform level. For each printer, there is a specific approach for platform level calibration. Check the manufacturer's recommendations to determine what you need. Print out a calibration cube and look at the quality of the plastic feed. The calibration cube will help you determine if the plastic has been laid flat, and if the nozzle is too close to the platform and scrapes the melted plastic, or too high causing the plastic to bubble.
3. Raise the nozzle. Raising the nozzle a little can often help. The main thing is not to raise it too high.
4. Smoothen the corners of the model. If all else fails, try chamfering the corners of the model base. Of course, this is only possible if you created the model yourself or if you have access to the source file. Start with 5mm and 45º bevel and experiment to get the best result.
First Layer Offset in 3D Printing: Checklist to Avoid Problems
- Balance Platform Temperature and Fan Speed
- Raise Printer Platform
- Check Floor Height
- Make model corners smoother : Other problems with the first layer
- Check the level of platform
- Check the height of the nozzle
- Clean the platform
- Use the adhesive 4: Offset layers in model
Problem Description
Layers shift in the middle of the printout.
The printer straps are not tight enough. The top plate is not attached and moves independently of the bottom plate. One of the rods in the Z-axis is not perfectly aligned
3D printing solution: Layers misalignment in the model
1.
 Check the belts. First of all, check how tight the straps are: they shouldn't hang loose, but they shouldn't be too tight either. If you pull on the straps, you should feel a slight resistance. If you feel that the top strap is tighter than the bottom strap, this is a sure sign that they are not tight enough.
 2. Check the cover. Check the cover, rods and other parts on top of the printer (if you have coreXY). Make sure all parts are properly fastened.
3. Check the z-axis screws. Many printer manufacturers use threaded studs more often than trapezoid screws, and while both do the job, the studs tend to bend over time. No need to disassemble the printer to check if the rods are straight. Simply use software such as Printrun to move the print head up and down. If one of the Z axis bars is bent, you will definitely notice it. Unfortunately, it is almost impossible to straighten a bent stud, but on the other hand, this is a great reason to replace old threaded rods with trapezoidal screws.

Supreme displacement: Checklist
- Check belts tension
- Check if the upper cover is moving
- Evil that the stilettos of the zis are even
description problems
Gaps in the model appear due to the fact that some layers are missing (partially or completely).
The printer was unable to produce the required amount of plastic to print the missing layers. In 3D printing, this problem is also known as under-extruding. The essence of the problem may lie in the plastic itself (for example, a different diameter of the material), in the coil, in the feed mechanism (extruder) or in a clogged nozzle.
Friction can cause plastic to get stuck. It could also be that the z-axis screws (studs) are not properly aligned with the linear bearings.
There may also be a problem with the screws (studs) in the Z axis and with the bearings themselves.
3D Printing Solution: Missing Layers
1. Mechanical Check . If suddenly you find missing layers in the print - it's time to take a little care of your printer. Start by checking the screws (studs) and make sure they are firmly attached to the bearings or clamps.
2. Check rod alignment. Check that all screws (studs) are aligned and not misaligned. Turn off the power and gently move the print head along the X and Y axes. If there is any resistance, then there is some problem. It is easy enough to understand what exactly the problem lies in - a slightly bent rod or bearings.
3. Worn bearings. Worn bearings make noise. You may also feel the rattle of the print head, while the printer vibrates slightly. In this case, turn off the power and move the print head along the X and Y axes to find out where the worn bearing is.
4. Check the oil. Remember to regularly lubricate the moving parts of the printer. Sewing machine oil is ideal for lubrication - you can buy it at any hardware store at an affordable price.
 Before applying oil, make sure the studs (screws) are clean. If the studs(screws) have dirt or print material residue, clean them.
 Then connect to the printer via a program (eg Pronterface) to move the printhead in X and Y and check that the studs are evenly lubricated. If you apply a little more oil, just wipe off the excess.
5. Underextruded . The last cause of the problem may be insufficient extrusion. There can be many solutions to this problem, and all of them are described in Section 9.
Checklist
- Check the printer mechanism to make sure the moving parts are tight.
- Recheck printer design and alignment
- Check for worn bearings and bent pins
- Use some oil to lubricate parts
3D printing issue #6: Cracks in tall objects
Problem description
Cracks on the sides of the model, most commonly in tall models.
The problem can occur unexpectedly, and most often occurs in large printers, especially if you do not monitor their work.
The material cools faster on the upper layers, because the heat from the platform does not reach the required height. Because of this, the adhesion of the upper layers is lower.
3D Printing Solution: Cracks in Tall Objects
1. Extruder Temperature . Start by increasing the extruder temperature - 5-10ºC is best. On the side of the plastic box you will find the highest temperature for plastic, try not to raise the temperature to this value.
2. Fan direction and speed . Double check your fans and make sure they are pointed at the model. If the direction is correct, reduce their speed.
Checklist
- Check the maximum possible temperature of the extruder and increase the current temperature by 10ºC in one attempt.
- Check the direction and speed of the cooling fans.

3D printing issue #7: Holes in the top layer
Description of the issue
Holes and gaps in the top surface of the print.
The two most common causes of this problem are improper top coat cooling and top coat not thick enough.
Solution to 3D printing problem: Holes on the top layer
1. Thread (filament) diameter . Often the problem happens with plastic with a diameter of 1.75 mm. Holes in the top layer are a problem with all 3D printers, but they happen more often with printers that use 1.75mm filament than with printers that print with filament larger than 2.85mm.
2. Check the location of the fan . Cooling can cause this problem, so check the fans first. When the printer starts printing, the fans are at their lowest speed or off. After printing the first layer, the fans start to work. Check if they start working and also check if they continue working when printing is finished.
If all is well, double-check if the direction of the fan is set correctly - they should blow over the model.
3. Set fan speed in G-Code. Another cooling issue is related to excessive plastic in the top layer. It must cool quickly so as not to fall between the already printed supporting elements. The fan speed can be adjusted with G-Code ( is usually G-Code for Fan On is M106 and M107 Fan Off ). Also set the fan speed to maximum for the upper layers.
For example, for a 1cm x 1cm cube, the height of the top layer would be 0.1mm. In this case, when generating a G-code through CURA for Prusa i3, the G-code indicates that the number of layers for the cube is 100. Considering that we specified heights of 0.6 mm for the top and bottom layers, it is worth editing the value to LAYER: 94
4. Increase the thickness of the top layer . One of the simplest solutions to the problem is to increase the thickness of the top layer.
In most applications, you will be able to adjust the thickness using the ‘Bottom / Top Thickness setting’ advanced settings. You need to increase the thickness of the top and bottom layers up to 6 times the other layers and up to 8 times for smaller nozzles and plastics. If the layer height is 0.1mm, then the height of the top and bottom layers should be 0.6mm. If there are still holes and bald spots in the top layer, increase the thickness to 0.8mm.
Cheklist:
- Use a larger diameter
- Mrive that the direction and speed of the fans are correct
- manually set the speed of fans
- increase the thickness of the upper layer
Description of the problem
Cobwebs or hairs appear between model elements when printing.
When the printer head moves across an open surface (without extrusion), i.e. from one object to another, the plastic flows out of the nozzle.
3D printing solution: Hairs, webs
1. Turn on retract . Retraction is an important factor for the quality of the finished model and can be enabled in the slicer. It functions quite simply and works by pulling the filament back into the nozzle before the head starts to move. The bottom line is that it prevents plastic from flowing out of the nozzle, which creates a "spider web" between objects.
2. Retraction activation in settings . Most apps like Cura offer pull activation in settings and this is set by default. However, if you want more options, you can customize them further. For example, you can set the minimum head path before activating retraction.
3. Minimum distance (mm) . If retraction is not working correctly, the easiest way to fix this is to reduce the minimum distance. Reduce it by 0.5mm until hairiness disappears. Activate retraction (retract) to increase the speed of printing.
4. Just cut them off.
Not the most sophisticated solution, but it has the right to life. Carefully cut the web.
Cheklist:
- Turn on pulling
- Set up the minimum distance before pulling
- Cut with a scalpel
Problem with 3D extruding
description of the problem. Description the extruder cannot extrude enough material (or cannot do it fast enough). This leads to the fact that the layers are too thin, unwanted bald spots appear in the layers or the layers are completely absent).
This problem has several causes. First of all, the thread diameter may not match the diameter set in the slicer. Also, the amount of extruded material may be lower due to incorrectly configured firmware. Another problem is that the nozzle can become clogged and this will cause under extrusion.
3D Printing Solution: Underextruding
1. Check filament diameter .
Start with the simplest solution - check the filament diameter settings in your slicer. If you are not sure about the filament diameter and the recommended temperature, check the information on the packaging.
2. Measure thread . If you still can't get the desired result and filament separation remains a problem, use a caliper to check the filament diameter. After measurement, adjust the settings of the slicing software. ( author's note - if you have a bowden hotend, then you need to unscrew the fitting from the hotend, enter the command (for example, in Pronterface) M302 : Allow cold extrudes and extrude a meter of plastic. If more or less is extruded, then you have an incorrect number steps per mm for the extruder If you have a direct hotend, then you need to unscrew the nozzle ( the nozzle can only be unscrewed when it is hot! ). It is also worth noting that even with the correctly set steps per mm value, when retracting, the distance traveled will be less than when extruding.
This is because more resistance is experienced when retracting )
3. Check print head . After starting printing, most printers lift the print head off the model base. Check if the nozzle is clean.
4. Set the extrusion factor to . If there is no difference between the actual extrusion diameter and the software settings, check the extrusion multiplier settings (or flow rate or flow compensation), they may be too low. Each slicing application solves the problem differently, but try increasing the ratio by 5% and restarting the print process.
5. Open the Edit Process Settings window in Simplify3D and go to the Extruder tab - the extrusion factor should be set to 1.0 which corresponds to 100%. Open the Material tab in Cura and increase the Flow settings (you may need to enable Flow in the Preferences window).
Cheklist:
- Check the diameter of the Philiment
- Use the caliper to double -check the diameter of the Philament
- Check whether
- EXTRICATION is 5% at a time
Description of the problem
Excessive extrusion means that the printer is supplying more material than needed.
This affects the fact that the printout has excess filament.
Solution to 3D printing problem: Overextruding
This problem is usually caused by the slicer's extrusion or flow ratio being too high.
1. Extrusion ratio . Open the slicer and check that you have selected the correct extrusion ratio.
2. Flow settings. If everything is correct with the extrusion ratio, reduce the Flow parameter in your printer software settings.
Checklist :
- Check if the extrusion factor is set correctly
- Reduce the flow settings of the filament
We are waiting for your comments on the translation.
Happy New Year everyone!
Troubleshooting 3D printing・Cults
This article should help you identify various 3D printing related problems. Find the image or description in this list that best describes the problem you're experiencing. We offer some tips that should help you solve this problem.
As you know, 3D printing is an empirical process and it is through mistakes that you learn to understand, set up and use your machine. With the help of this list, you should be able to resolve the major bugs. If you are still experiencing issues or have additional tips to add to this list, feel free to contact us and let us know!
#1 DroolingSymptom
Thin threads are woven into the gaps between different parts of the 3D printed part.Common Name: oozing
Possible Cause
Plastic continues to leak out of the head as it moves due to residual pressure in the heater and fluidity of the molten plastic.Suggested remedies
Increase filament retraction length in Slic3r, retraction distance in CuraEngine. Retracting the filament will cause the pressure in the print head heater to drop. The effect can be modulated by adjusting the retraction speed directly in the slicer.
Increase print head speed. This allows the melted plastic to spread less time and leave marks between the printed parts.
Reduce the extrusion temperature of your plastic. If it is too high, the plastic becomes more fluid and flows out of the extruder faster.
#2 It is collapsingSymptom
Collapse or poor quality of the overhanging surface, leaving small bumps.Common name: overhang
Possible cause
Plastic deposited on the periphery of the protrusion does not harden fast enough, so the deposited filament moves before it hardens. The phenomenon is repeated or emphasized from one layer to another.Suggested fixes
Vent the deposited plastic more efficiently, for example by adding a fan to the extruder or directly with a portable fan.
Create print supports under the overhangs.
Reorient the part to avoid overhangs.
#3 Flaky sides or topSymptoms
Contours not bonded well.
Flat surfaces are not completely covered.Possible cause
Not enough material is deposited. Too narrow, the deposited wires do not touch each other enough and therefore do not stick to the adjacent wire.
There is dirt in the nozzle, which prevents the passage of the melt.
The extrusion temperature is too low, the wire dries too quickly or shrinks and therefore does not stick to the adjacent wire.Suggested Tools
Calibrate the extruder to obtain the material flow according to the data received from the slicer.
Unlock the extrusion nozzle.
Increase extrusion temperature.
Increase the blending speed in your slicer.
#4 Not enough material on thin partsSymptom
The edges of a very thin area are not strong enough, there is not enough material.Possible cause
Recycling or reworking is not effective enough.
Incorrect filament solidification.
Slippage of the thread drive during retraction.Suggested remedies
Reduce the retraction speed and length while printing.
Increase "extra leg length when retracting" when using Slic3r.
Increase the spring pressure on the driven gear.
#5 BlistersSymptom
Blisters, mismatched geometry, such as small bumps that are seen mostly in areas with a small surface area.Possible cause
The filament is too hot during extrusion or the filament cooling system is not effective enough.Suggested media
Place more parts on the plate while printing. In this case, the nozzle will print more objects and therefore allow more time for the part to cool before passing over it again.
Improve the cooling of your 3D printed object by adding cooling systems.
#6 Thin walls delaminateSymptom
At a thin wall without filler, the threads diverge, they are not glued together on the sides.Possible Cause
The walls of your 3D print are too thin or not adapted to such a small size.Suggested tools
Draw thicker walls to adapt to the thread thickness.
In the slicer settings, specify a slug width that is a sub-multiple of the wall width while remaining consistent with the extrusion diameter and layer height.
Change slicer.
#7 Layer shifts horizontallySymptom
The layer is shifting in the X or Y axis (or both).Possible Cause
Print head or plate movement problem.Suggested fix
Decrease the acceleration on the axis that has the problem.
#8 Layers shift evenlySymptom
Layers almost always shift along the X and/or Y axis after a certain print height.Possible Cause
Head or plate offset failure due to overheating of motors going into safe mode.Suggested fix
Cool engines with cooling systems (fans).
#9 Corners curl upSymptom
Deformation in the Z direction during 3D printing. This figure increases in case of a strong overhang.Common name: curling
Possible cause
Poor curing, shrinkage effect due to temperature difference of the wire deposited on the previous cooled layer.Suggested Solutions
Increase slope in the 3D part to reduce overhang.
Further cooling of the deposited plastic using a ventilation system.
Add print supports to affected areas.
#10 Corners fall offSymptom
The corners of the printed object are peeling off the plate, creating an uneven base.Common name: warping
Possible cause
Poor fit between workpiece and insert.
Material shrinkage factor too high.
The first layer is not pressed enough against the board.Suggested remedies
Change media as PLA is less likely to warp.
Apply adhesive to the printing plate (glue, tape, varnish, etc.).
Correctly adjust the plate height before printing.
Apply a thinner first layer to further crush the deposited wire.
Add a bezel under the first layer.
Heat up the stove.
Clean and degrease the base.
Change the filling strategy. Fill the bottom concentrically instead of linearly, then fill the inside in a honeycomb pattern to avoid shrinkage.
Decrease the internal fill density of your 3D printed object.
#11 Extrusion density too lowSymptom
Incorrect material density.Possible cause
Material consumption too lowSuggested remedies
Unlock the extrusion nozzle.
Filament blocked upstream of extruder (e.g. knot in spool)
Check thread drive (e.g. knurled screw problem)
Corners #12 not forming correctlySymptom
The corners are not straight enough, they can even stick out and increase the size of the part.Possible Cause
Too much material is deposited in the corner because the nozzle slows too much as it passes through the corner.Suggested remedies
Intentionally soften the corner of the part in the 3D modeling software.
Increase the "jerk" on your 3D printer's axis control.
#13 There are black dropsSymptom
Burnt (blackened) plastic in some areas of the printed object.Possible Cause
Poor nozzle seal causing burnt PLA or ABS to drip around the nozzle.Suggested fix
Remove the nozzle and close it again.
#14 Layers poorly weldedSymptom
Part breaks at attachment point between two printed layers.Possible cause
Too much cooling, the deposited layer does not adhere well to the previous layer, because it was not hot enough during the deposition.Suggested remedies
Reduce fan speed during printing.
Increase the minimum print speed in the slicer.
#15 Bubbles form on the first layerSymptom
The first layer comes off the plate locally in the form of bubbles.Possible Causes
Moisture in the material that gradually evaporates on contact with the heating plate.
Insufficient heating plate temperature for the material being used.Suggested products
Store raw material rolls in a dry place, in closed packaging, with a desiccant bag.
Dry damaged material: place in a rotary oven at 40°C for approximately 3 hours. Be careful not to heat above 45°C or 50°C as this may cause the threads to stick together in the bobbin and even lose their cylindrical shape.
Increase the temperature of the heating plate.
Printing on tape or special adhesive.
#16 Fragile top and bottomSymptom
Horizontal sides too thin and brittle.Possible Causes
Insufficient material thickness above and below thin fill print. The laid threads have too few support points and break between the threading ribs.Suggested products
Place at least 2 or 3 fully filled layers ("Solid layers" option in Slic3r) for the "top" and "bottom" faces.
Increase the fill of your object.
#17 Hole tops collapseSymptom
Horizontal center hole top wires collapse during construction.Possible causes
Plumb line too horizontal.
Mismatch between nozzle temperature, wire cooling and speed.Suggested fixes
Reduce or eliminate this overhang area by modifying the 3D file geometry. An example is in the large hole in the photo, shaped like a drop of water, not a cylinder.
Add print supports below this area if the overhang is too difficult for the 3D printer.
Avoid too much slowdown in this area, even if the layer print time is short.
#18 Color or clarity variesSymptom
The color or transparency of the material changes in different areas during 3D printing.Possible causes
Different crystallization of the material due to different cooling rates. This may be due, for example, to the printing time of individual parts of the object or to the power of the fan.
Radiation from the nozzle can affect the thermal cycle of the previous layer and thereby change its appearance.
The applied layer is too hot because the underlying layer has not cooled down.Be careful, the physical-mechanical properties of the part can change depending on these differences in crystallization!
Suggested fixes
Better control of cooling with slicer settings: change fan power based on plate cooling time or slow print speed in proportion to plate surface.
Reduce extrusion temperature for faster and more uniform phase transition.
#19 Layers delaminateSymptom
Some layers are flexed and cracks appear between the different printed layers.Possible causes
Twisting phenomenon due to the effect mentioned in #9 the above happens between layers.
The wire cools too quickly at the exit of the nozzle, it does not weld properly with the previous layer.
Strong contraction of the material during cooling or phase change.
Some materials extruded at high temperature (ABS, PC...) may present a significant shrinkage phenomenon.Suggested remedies
Change the extrusion temperature.
Change the media.
Avoid blowing on a deferred wire, reducing fan power, or placing the printer in a draughty room.
Close the assembly area in a controlled cabinet at a temperature close to the glass transition temperature of the material.
#20 Drops appearSymptom
Drops of material are deposited at various points on the side surface of the 3D printed object.Possible Causes
Excessive extrusion when resuming extrusion after stopping extrusion when moving from one point of the part to another or when changing layers.Suggested Remedies
Some slicers have a setting that allows, after a pause in printing, to request that more be pushed in before resuming normal printing than was removed by retraction.
#21 Bowden extruder salivationSymptom
The Bowden extruder is either running too hard or not running enough. First impressions of your extruder are not great, too much extruded material, bridges between different areas in motion where extrusion should stop.Possible cause
Insufficient thread shrinkage to compensate for gap in Bowden tube. Depending on the diameter of the tube and filament, as well as the length of the body, the motor must draw a certain length of filament through the bends of the tube before the filament is drawn out of the heating head.Suggested fixes
Increase the "pull" distance in the slicer. The detail on the left was printed with 1.5 mm of indentation, which was clearly not enough. When the pull-in distance was increased to 6mm, the center part was printed. Too much shrinkage causes hot material to enter the thermal break, the temperature of the thermal break gradually rises, and the melting thread eventually gets stuck in the thermal break.Learn more
Description of the problem
The first layer does not look right, some fragments are missing. There are unnecessary lines at the bottom.
Why did the problem occur?
These 3D printing problems usually indicate that the platform level has not been set correctly.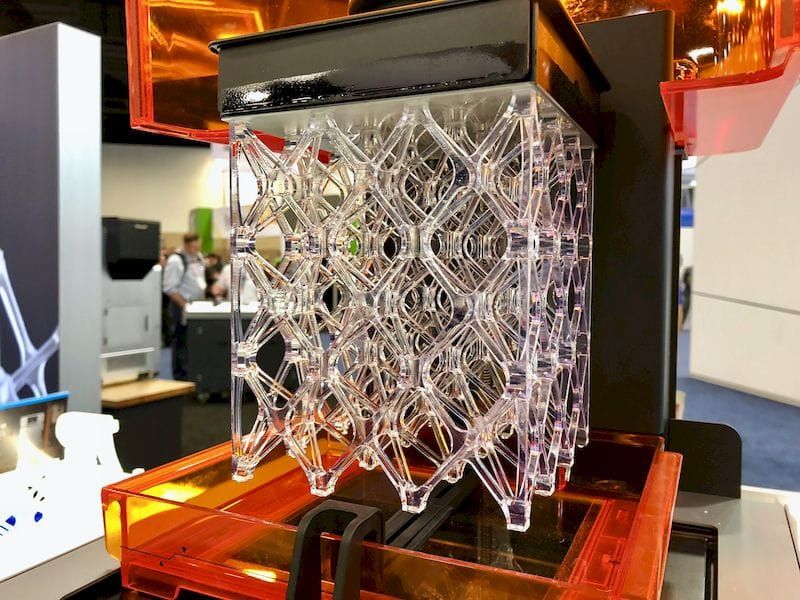 If the nozzle is too far from the platform, unnecessary lines often appear at the bottom of the printout or the first layer does not stick. If the nozzle is too close to the platform, this can cause formation bubbling.
Also note that the platform must be clean. Fingerprints on the platform may cause the first layer to not adhere to the platform.
3D printing problem solution: Other first layer problems
1. Set the platform level. Each printer has its own platform level configuration process. For example, the latest Lulzbots use auto-calibration, while Ultimaker offers step-by-step manual calibration. But to set up the Prusa i3 platform level, you will need to spend a lot of time studying the issue.
2. Set nozzle height. If the nozzle is too high, the plastic will not stick to the platform, if too low, the nozzle will scrape the printout.
3. Clean the platform. Be sure to clean the printer platform regularly, especially if you are using adhesive.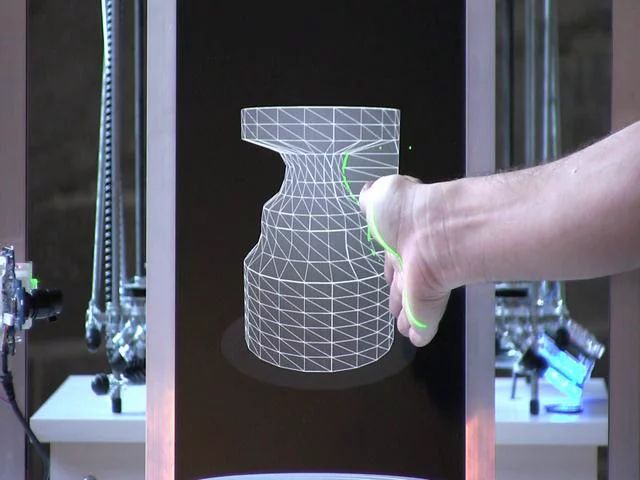 Fingerprints, dust and adhesive residue affect how well the model sticks to the platform.
4. Use glue (varnish). Apply a thin layer of adhesive to the platform to increase the adhesion of the model to the platform. Remember to clean the platform regularly as excess glue can cause the opposite effect.
5. Use textured underlay for non-heated printer platforms.
Other problems with 3D seal: Cheklist to avoid problems