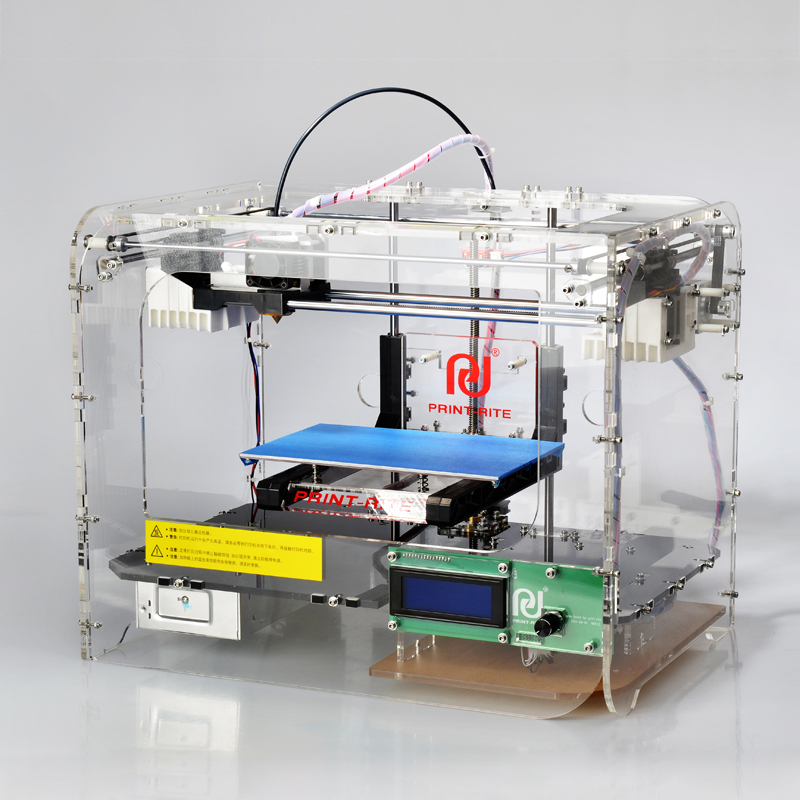
3D printing clear plastic
Can You 3D Print Clear Plastic
Many consumer products, from cell phone cases to kitchen appliances, use transparency to help with both functionality and appearance. But unlike other materials traditionally used in prototyping – foam, clay, fabric – fully transparent materials can be difficult to manipulate.
Now that 3D printing has been identified as a solution for design problems, you might be wondering if you can 3D print transparent materials the same way you can print opaque plastics and photopolymers.
The short answer? Yes!
Multi-material 3D printing technology makes creating custom translucent and transparent parts easier than ever. Read on to find out more about transparent materials, how 3D printing them works, and possible applications.
What's the difference between transparent, translucent, and opaque materials?
Opaque materials entirely block the passage of light, meaning nothing can be seen through them. The majority of materials, like colored plastics, wood, and metal, are opaque.
Translucent or semi-transparent materials allow some passage of light, but you usually can’t see clear shapes through them. Examples of common translucent materials include wax paper, sheer fabric, and frosted glass.
Transparent materials allow enough light to pass through so that objects on the other side of the material can be seen clearly. Clear glass, water, and cellophane are all examples of common transparent materials.
Designers use all of these types of materials – and every opacity in between – for product development. Certain applications may require semi-transparent materials, while others might need fully transparent components.
How can you 3D print transparent materials?
As with most 3D printing methods, it truly depends on the application. For rough prototypes or tooling, one option is FDM technology and transparent filament. With extensive sanding and/or coating, a degree of translucence can be achieved.
However, for high-fidelity models or final use parts, a smooth finish and true transparency may be required. Photopolymer materials like Stratasys VeroClear™ and VeroUltraClear™ are engineered for a smooth finish and high light transmission for excellent clarity.
Can you 3D print acrylic?
PMMA, also known as acrylic, is a transparent thermoplastic often used as a more durable alternative to glass. For 3D printing, VeroClear and VeroUltraClear simulate the physical properties of acrylic, and can be combined with thousands of opaque color options for a full range of colored transparencies.
VeroClear offers similar mechanical properties to acrylic, with good strength, stiffness, and impact resistance. VeroUltraClear provides excellent, improved clarity and a lower yellow index for truly transparent parts.
3D printed fish.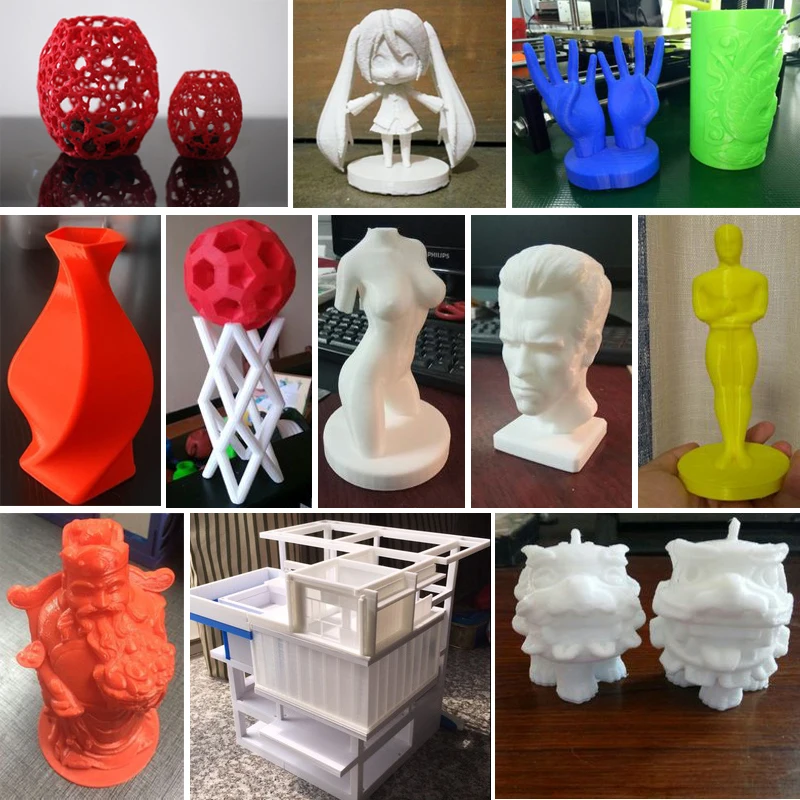
What are practical applications for transparent materials?
Consumer products.
For consumer products, the applications for 3D printed transparent materials are endless.
Incorporate transparency into prototypes for cosmetics packaging, kitchen products, and food and beverage containers. Tinted transparent components help build up model realism, helping designers see their ideas become reality.
Medical devices.
For models that need to simulate glass or clear polymers for eyewear, VeroClear and VeroUltraClear are ideal choices. Nidek Technologies, an Italian company specializing in ophthalmology R&D, used VeroClear to prototype a special new optic device.
Medical models.
For surgical training or preparation, anatomical models with transparent components or walls are useful when studying complex anatomies like vascular systems. Clear 3D printed materials allow the creation of custom, transparent geometries, opening up a range of possibilities for medical research and patient care.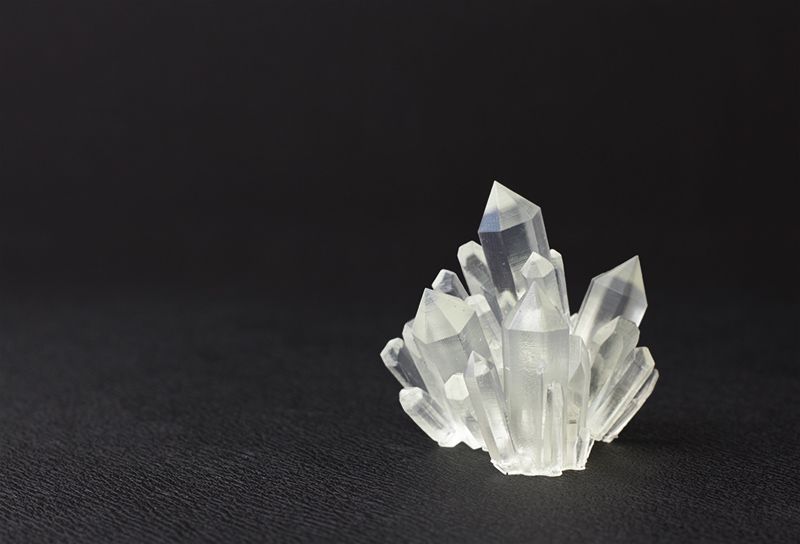
3D printing clear plastics can provide a whole new way of designing, whether for consumer products or medical research. With the ability to create fully custom transparent parts, you can create models that show internal mechanisms, accurately represent a final product, or allow for functional, real-world testing.
To learn more about what you could do with transparent 3D printing, visit the material pages for VeroClear and VeroUltraClear.
How to 3D print clear plastic parts
3D printing offers unparalleled freedom when it comes to the appearance of the objects you print. It’s possible to change the color, texture, size, and shape of your print, just by changing what material you use. There is one material property that is often overlooked, however, and that’s transparency.
Whether you need a part to be clear for functional reasons, or you just want something that looks nice, it’s good to have the option of printing clear parts. Read on to find out how you can do so.
Is it possible to 3D print clear parts?
The answer to that is yes, and… maybe. Depending on your definition of clear and whether you’re willing to do some post-processing.
While it is possible to print an object using the right material and settings and then pull a translucent print off the build plate. You’ll have to do some extra work if you’re hoping to print anything that is perfectly transparent.
In order to understand why that is, we should talk about what we mean when we use the words transparent and translucent.
What is the difference between a transparent print and a translucent one?
There is a whole bunch of science around what makes something transparent or translucent but for the purposes of this article, transparent is what you’re probably thinking of when you imagine a clear material like a glass window or a flawless crystal. It lets almost all visible light pass through it. A translucent material is instead one that lets only some light through and is therefore not perfectly clear, like a stained-glass window or the lenses of your sunglasses. Any material that lets no light through whatsoever is opaque.
When it comes to 3D printing, these terms are often conflated, and it is standard in the industry to label 3D printing filament and resin with translucent properties as ‘transparent’ despite it being very difficult to get perfectly transparent prints with them. In order to follow those naming conventions, when talking about materials with translucent properties we will refer to them as transparent.
Most of the time, when you try to 3D print using a transparent filament, particularly with an FFF printer, your prints will end up looking cloudy. Depending on your settings, you will probably still be able to see some light pass through them, but they will be translucent at best.
This is because a 3D print is made up of lots of layers of material stacked on top of each other. The small gaps and irregularities between these layers refract and scatter light, preventing it from passing through. Luckily, there are ways of reducing and possibly even eliminating this issue.
How do you print clear parts?
To get the best clear parts, there are three areas that are important. The material used, your slicer settings, and post-processing.
Materials for printing clear parts
When it comes to printing both translucent and transparent parts, there are two very different material categories you can use. The first is thermoplastics using an FFF printer. And the second is resins using an SLA or PolyJet/MultiJet printer.
As a rule of thumb, resin and resin-based printing technologies give you the most transparent parts. However, getting good prints with resin can be a more difficult and much messier affair. Polyjet/MultiJet printers are also astronomically more expensive than FFF printers.
Thermoplastics have the advantage of being accessible, requiring less cleanup, and coming in a wide range of options. Some of the FFF materials that can be printed transparent are:
PLA
PLA is one of the cheapest and most used FFF materials. It is possible to find transparent PLA and in fact, when it first came onto the market, most PLA was transparent. However, it is difficult to get clear prints with PLA, and the other materials mentioned are normally a better option if you’re looking to get the clearest prints possible.
PETG
If you are looking for an easy and affordable way to get translucent prints without post-processing, PETG is your best bet. Transparent PETG is easy to find and it prints better than transparent versions of PLA and ABS will. Post-processing is still required if you want an actually transparent final print, however.
CPE/CPE+
Both CPE and CPE+ can be found in transparent varieties and CPE+, in particular, is suited to being printed transparent as it can be more easily post-processed with heat treatment due to its higher heat resistance. It also had good mechanical properties which makes it a good option for functional parts.
PP
Polyproylene is another material with transparent filament options. PP is a little more expensive than other options but it is possible to get decently translucent prints using it and it also has some specific mechanical properties that the other materials mentioned don’t have, making it appropriate for certain functional parts.
ABS
ABS is common, affordable, and comes in transparent varieties. The downside of ABS is that it’s harder to print than PLA and PETG as it requires an enclosed printer and, similar to PLA, the prints you get off the build plate are unlikely to be especially transparent. The one major upside that ABS has is that it can be vapor smoothed using acetone. We will talk more about vapor smoothing in the post-processing section.
PVB
PolySmooth is a PVB-based material made by PolyMaker that is easy to print and has mechanical properties similar to PETG with the added advantage that it can be vapor smoothed with isopropyl alcohol in a manner similar to how ABS is smoothed with acetone. PolySmooth is more expensive than ABS but it’s easier to print and isopropyl alcohol is much less dangerous to work with than acetone making the smoothing process easier and safer.
Which settings to use for printing clear parts?
The settings you need to tune and tweak for printing clear parts are mostly the same you need for getting a good print in general.
Different materials and printers will also have different requirements but there are some of the settings that you should pay special attention to. Most are relevant for FFF printing. They are:
Infill percentage
There are two options for infill percentages. 100% or 0% (for any infill pattern except lightning). 100% percent will create clear solid objects and is the best option for functional parts. However, for large parts, the amount of filament used will be high. The alternative is to use no infill and a wall that is a single line thick That will create a hollow object with very little material to displace light passing through it. The downside is that many objects will not be able to be printed without infill. Any other infill percentage will create complex internal structures that will reflect light and make the print less transparent.
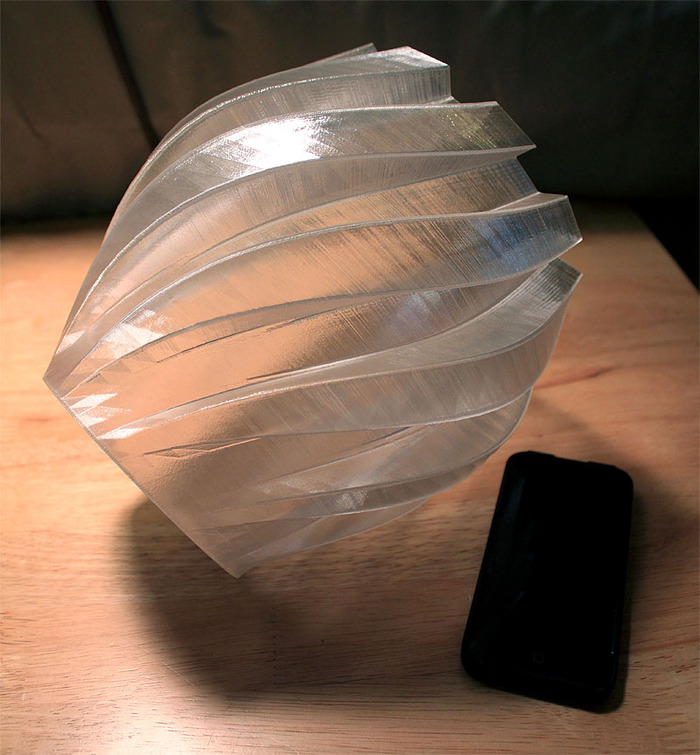
Spiralize outer contour (vase mode)
Vase outer contour is a setting that enables smooth printing of objects with a single wall thickness. It turns the print into one continuous print path which means there are no retractions between layers and therefore no Z seam. This can be perfect for making thin translucent parts like a lampshade.
Layer height
Changing your layer height will change how translucent your parts are. As a rule, low layer heights create smaller gaps between layers which creates clearer parts. This is also the only setting in this list that is also relevant to resin printing. As with FFF, a lower layer height is usually best. For FFF printing, there is one exception when larger layers are better. That is when using vase mode with a single line thick wall. In that case, larger layers and even a larger nozzle size will often result in a clearer part.
Temperature
Temperature can have an effect on clarity. A higher temp will help your layers fuse more completely resulting in more clarity but once the temp gets too high your material will bubble or even burn as it leaves the nozzle resulting in a less transparent part.
Extrusion rate
Increasing the extrusion rate slightly above 100% can prevent under extrusion and help fill in the gaps between layers better leading to clearer prints. If you increase the extrusion rate too much you will get over extrusion which will have the opposite effect.
How to post-process a 3D print to make it transparent
Post-processing is the magic step that, in the right circumstances, can turn a cloudy underwhelming print into one that’s crystal clear. In most cases, a bit of post-processing will at least help. Some of the techniques you can use include:
Sanding and polishing
Sanding a print is one of the most straightforward way to smooth out the layer lines that stop a print from being transparent. However, you will need to use an extremely fine grit of sandpaper and ideally even polish to get a perfectly smooth surface. This is also very difficult to do on parts with complex geometries. It’s also worth mentioning that you should wet sand PLA or any material with a low thermal resistance to stop the heat created when sanding from damaging the part.
Clear coating
When done properly, clear coating a 3D print can be transformational. A clear coat is a transparent layer of paint that, when applied, sinks into the layer lines, filling them up and giving the part a smooth finish. If all of your settings have been dialed in and the right material was used, a clear coat can be the difference between a translucent part, and a transparent one.
Vapor smoothing
Vapor smoothing is the process of using either acetone (for ABS) or isopropyl alcohol (for PVB) to ‘melt’ the outer layer of a print thereby smoothing out the layer lines that prevent a print from being transparent. Vapor smoothing can be a difficult process to get right as overexposing a part can actually cause the part to melt completely.
With practice, this can be a great technique for improving the transparency of your parts. Be aware though that vapor smoothing can be dangerous (especially when using acetone) so you should only do this in a controlled environment and when using the appropriate safety precautions.
Temperature treatment
It is possible to fuse the layer lines of a print by exposing the outer surface of
the print to heat. The principle is similar to vapor smoothing except using
heat instead of a chemical reaction to melt the surface of the model. This can
be done with a heat gun and works particularly well with temperature-resistant
materials such as PETG and CPE+. This is extremely difficult to do reliably with
materials that melt quickly like PLA as you can easily deform your print by
accident.
What are the applications for 3D printed clear parts?
The uses you can find for clear 3D printed parts are limited only by your imagination. Here are some possibilities to get you started:
Scientific Research
Custom transparent parts have various uses for scientific research. For example, researchers at Cardiff University have used 3D printed parts to study microfluidics in a way that is cheaper and more flexible than traditional alternatives would provide.
Visual prototypes
Visual prototypes are an important part of the rapid prototyping process and the more accurate they are, the more useful. If you are working on a product with transparent parts, being able to print those parts and have them look exactly how you want them to can be extremely valuable.
Household decorations
Why not spruce up your home with some fancy new lampshades or vases? With 3D printed transparent parts, you can decorate your home exactly how you want it with parts that not only look good, but are functional too.
Art projects
3D printed transparent and translucent parts open up a whole new world of artistic opportunities. One example is lithophanes. Lithophanes are made by varying the thickness of an object so that when a light shines on it, an image is revealed. It’s possible to create lithophanes with
Do-it-yourself lightsaber or choosing transparent plastic for 3D printing Bringing what we see on the big screen to life in a believable way requires a lot of trickery, and with limited resources and budgets, creative skills are sharpened to the limit.
PapaTony's Shield&Hammer team offers their own solution to the task of making a lightsaber.
One of the rare materials is transparent tubes. They can be obtained in advertising workshops, where light structures are made. We conducted an on-duty call to all those involved in such a case within a radius of 500 kilometers around Krasnoyarsk. All that they could offer us was the certainty that some factory would put the required pipe into the production plan and it might be delivered in 3-4 months. Plus prepayment. Obviously not our choice.
Decided to do everything by hand. nine0003
In general, we did not make a Jedi sword, but the design is similar. So, to create a luminous blade, you need a strong transparent plastic.
For tests, we took materials already known to us and decided to master new ones:
- Natural PLA is a material widely known to everyone working with 3d printing. Differs in ease of the press, high rigidity.
- Natural Watson (SBS) is a very popular thin-walled plastic. The ease of post-processing to give the product evenness and transparency has made this plastic the best choice for creating vases/bottles/dishes/lamps, etc. They are easy to print with moderate softness. nine0018
- Natural PETG is a material that has recently gained popularity. It has excellent interlaminar adhesion. Practical experience with him is not enough, we will catch up.
- Transparent ABS is a very mysterious material. Natural ABS is ivory white with a slight warm yellowish tint.
 Apparently, transparency is achieved by adding some substance. According to the manufacturer, printing and processing is no different from regular ABS.
A printer with a print height of 1 meter was also not found, and there was not enough time to assemble my own. Therefore, a test for bonding strength was added to the test for the strength of the structure itself.
Printing was done with the following settings:
- The print and bed temperatures for each material were selected closer to the upper limit of the manufacturer's recommendations - this way there is a higher probability of obtaining a stronger adhesion of the layers
- Nozzle 1.2 mm, layer 0.6 mm, extrusion width 2.4 mm. Print mode - spiral vase. nine0018
- Airflow is switched on from 3 layers even for ABS - there is a risk that a thick layer of plastic will not have time to cool and the structure will float.
- Print speed 15 mm/sec — you should not rush when printing such objects, the lower the speed, the better the sufficiently thick plastic layer cools down.
- Model - a simple cylinder with a diameter of 30 mm and a height of 200 mm (print height of the vast majority of popular printers).
PETG looks the most transparent in appearance due to the excellent adhesion of the layers. Next comes Watson. ABS and PLA are tied for third place. nine0003
Since the print height of the printer is not enough for a more or less decent sword, it remains only to glue:
- PLA - with dichloromethane.
- Watson - solvent or xylene (let's try both options).
- PETG - no solvents were found, so we will use cyanoacrylate (aka superglue).
- ABS - acetone.
When printing with a spiral vase, the tubes are smooth on one side, with a step on the other:
It is not necessary to cut the step - it is great for joining the two upper parts of the tube:
Cyanoacrylate hards due to moisture in the air, to accelerate the process, the moisturizer was included:
Ready for tube tests:
To begin with, all gluings were tested for static load. A package with dumbbells weighing 2 kg was suspended from the center of each rod.
PLA turned out to be the most rigid, 60 cm of the tube practically did not bend:
ABS confidently holds 2 position on the deflection
Petg slightly lags behind ABS
, Watson behaves softer than all
To evaluate the strength in the dynamics, we decided to break the trumpets of Sinai-a training sword sword for kendo.
All specimens withstood at least one well placed impact. The fragments were collected for study.
PLA parted along the seam in the first place of gluing, broke near the seam in the second:
Watson is split and broken:
PETG is half split at the joint, half cracked:
ABS is split at the bond. At the point of impact, a change in the transparency of the plastic is visible:
Subtotal: all plastics held up with dignity. To be honest, I expected that everyone would break with one blow.
Based on the test results, we chose transparent ABS in our project - in case of breakage, it is easily and quickly glued with acetone / dichloromethane and perfectly processed (were sanded so that the light from the LEDs was more uniform). nine0003
The resulting sword is:
A little about lighting. The problem with LED strips, and LEDs in general, is pointiness. Without tricky tricks it is impossible to create the effect of a uniform glow in any type of plastic:
However, if you add a frosted tube to the center, the lighting is evened out
. nine0003
Transparent ABS was a pleasant discovery for me - it retained the qualities of conventional ABS (easy to process, high strength, solvents available, high temperature resistance, great printing experience with this material) and at the same time expanded the boundaries of the material.
Thank you for your attention, and may the Force be with you.
Transparent 3D Printing Guide
Stereolithography (SLA) 3D printing can produce transparent objects that, after some post-processing, become optically transparent. nine0003
Formlabs' latest stereolithographic 3D printer, the Form 3, improves the transparency of models by using an elastic resin reservoir that reduces forces on the model, resulting in smoother, more transparent parts. 3D printing on a Form 3 in Clear Resin is a great way to produce parts that require light transmission and, with the right post-processing techniques, transparency.
The following processing methods can be used to 3D print transparent parts for a variety of purposes, from optical devices to light guides and fluid elements. Techniques range from quick solutions to obtain sufficient transparency to specialized techniques for creating optically transparent parts. nine0003
Clear and transparent 3D models are ideal for creating transparent prototyping elements, showing internal cavities and details, making LED housings or windows.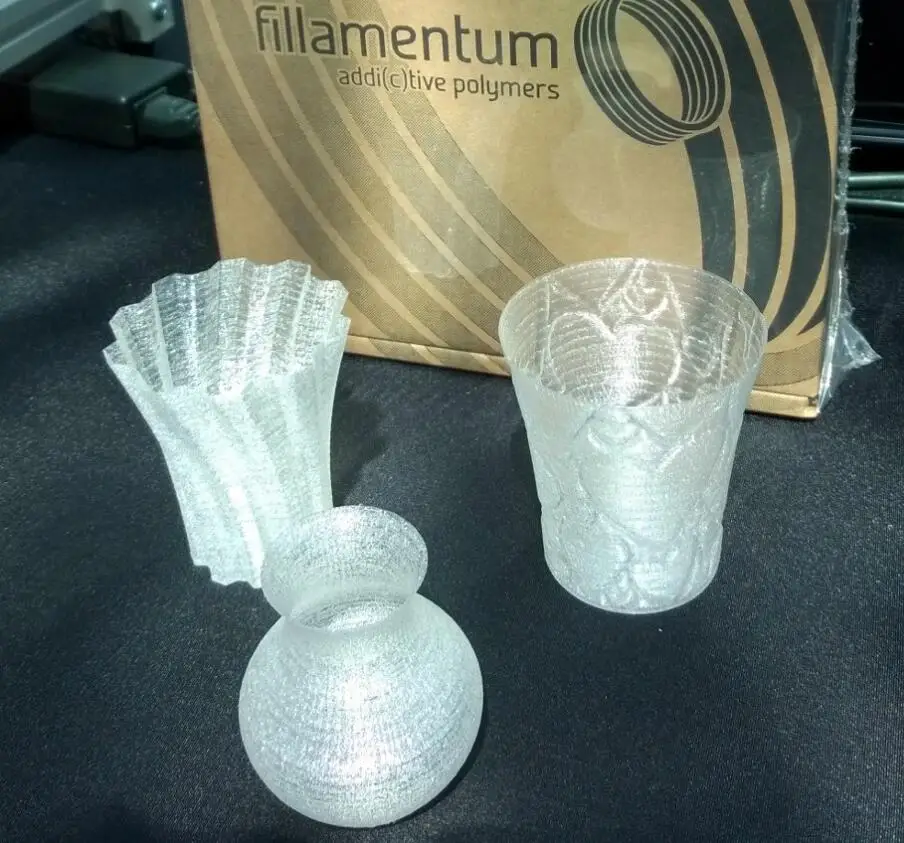 Formlabs and our customers have used Clear Resin to create an optically clear 100% 3D printed camera lens, Times Square Fresnel lens tiles, light guides, prisms, millifluidic devices, and more.
Formlabs application engineer Amos Dudley designed and 3D printed a lens for a fully 3D printed camera. nine0162
Curious to see with your own eyes what a transparent SLA 3D printed part looks like? We will send a free transparent 3D printing sample directly to your office.
Request a Free Sample
We have tested several post-processing methods for 3D printed Clear Resin parts. In this article, we will cover hand sanding, spray clear coating and resin impregnation. Each treatment option requires a different amount of effort, depending on the required degree of transparency and surface quality. nine0003
Application for : Hand sanding and polishing can be effective on simple shaped models with few fine details, but not very suitable for complex shaped models. With this method, it is very difficult to achieve complete optical transparency.
Hand sanding will require you to sand with very fine grit sandpaper, but with some effort you can sand and polish the parts to the transparency of a magnifying glass. However, it is very difficult to completely remove all the layer lines with manual processing - if you turn the part at a slight angle to the light, you can notice micro-scratches. nine0003
Instruction : Use sandpaper to smooth the surface, then polish the part with acrylic cleaner and a microfiber cloth.
With approximately 3000 grit sandpaper, transparent SLA 3D printed parts become glossy and very smooth to the touch. After sanding with 12.000 grit, they reflect light. Try different sandpapers and abrasive sheets from 400 to 12,000 grit in 200 increments. Before moving on to the next grit step, slowly and carefully clean the lens and remove scratches from the previous level of sanding. nine0003
Our support site offers a simple, step-by-step manual sanding guide that includes an acrylic spray finish.![]()
If all you need is translucency, mineral oil will suffice to create a smooth surface and hide light spots.
We have tested various polishing methods for transparent 3D models, from hand sanding and spray coating to resin impregnation. nine0162
Application of : Spray coating is a quick and easy way to improve the transparency of details without significantly reducing detail. The method is effective for all types of models, since it is possible to spray the coating on complex-shaped parts, which can be difficult to grind and polish.
Clearcoat application helps to hide layer lines and protect parts from UV exposure which can cause yellowing and unintended final cure. If you require a smooth, glass-like surface, hand sand and polish before coating; the more thorough the sanding before applying the clear coat, the better the clearness. This extra step is great for post-processed prototypes that look like completely transparent plastic, such as packaging, bottles, and microfluidic devices. nine0003
Statement : A variety of aerosols can be used to apply a clear coat, from inexpensive sprays to products that require a separate facility and tools.
- General Purpose Clear Spray Paints: : Ranges from good, very inexpensive options like Rustoleum Painter's Touch 2X to affordable high quality sprays like Spray Max 2k Clear Glamor.
- Automotive sprays : Products such as Lesonal Universal Clear, a high solids acrylic urethane clear coat, give a very good glossy effect. They are designed for air drying and stoving and require a spray gun and free space to spray. A base coat must be applied before applying Lesonal Universal Clear and similar aerosols.
Coat a clean, dry model already rinsed in isopropyl alcohol (IPA). Do not finalize the model before spraying as this may cause yellowing. Air dry the model. Once it is completely dry, apply two to three coats of spray in a dust-free environment. nine0003
For a fee, a coating such as Lesonal Universal Clear can be applied at a bodyshop. In most cases, bodyshops use a volatile solvent such as naphtha to clean and prepare the surface of the model prior to spraying.
For the Times Square installation, Window to the Heart, Formlabs and Aranda/Lasch spray-coated the tiles with Lesonal Universal Clear in the body shop.
Application of : This method is best suited for cases where very high transparency of parts is required and can only be applied to flat or nearly flat surfaces such as lenses or "windows" into the interior of the part.
Resin immersion produces very smooth details with crisp and sharp surface reflections.
The method can be used to increase the smoothness of parts printed with other SLA materials, although it may reduce detail. nine0003
Instruction : Apply Clear Resin to the part using a syringe or by dipping the part into the resin, as desired.