Grease 3d printer
3D printer lubrication: Everything you need know
Consumer 3D printers are delicate machines crafted from metal and plastic. And as such, they are best kept in correct working order through routine servicing, cleaning and maintenance. In this article, we will be looking at a very important aspect of 3D printer maintenance: Lubrication.
Disclosure: This post contain affiliate links, we may earn advertising commissions for sharing products we know and love.
The parts that needs to be lubricated on a 3D printerIn a nut-shell, all the parts that move against another surface require at least some lubrication in order for the printer to operate smoothly, without friction-related wear and operational errors.
Most important of all, is the Z-axis threaded rod and nut used to move the print-head in terms of height from the print bed. The other lubricant hungry parts are the X-Y guide-rails for the print-head and print bed, as well as the bearings fastened along the railings for movement.
Almost all consumer 3D printers have a metal-on-metal contact on the Z-axis between the rod itself and the nut. Whereas the X-Y guide rails are generally made from metal, the surface of bearings used tends to be of varying types. This may lead to either kind of contact, either metal on metal, or plastic on metal.
The type of contact dictates the kind of lubricant that would be effective.
Suitability of lubricants for 3D printersThe suitability of a lubricant for 3D printers depends on two things:
- How well it prevents direct metal-on-metal or plastic-on-metal contact; and
- How it affects smooth movement of the parts
A heavy lubricant would create a thicker barrier between the contact layers and would stay intact under heavy load. However, heavier lubricants also have a tendency to inhibit movement. Whereas a light lubricant is great for movement, but it does not provide the same sort of protection as a heavy lube does.
For 3D printers then, a goldilocks solution becomes necessary. The ideal choice should bend towards lightness for smooth movement under load.
Should you use WD-40 on a 3D printerStandard WD-40 is more akin to a solvent, and NOT a proper lubricant. Nor should it be used as such. It is designed to eat through rust and inhibit further rusting. Its use on 3D printers has been known to cause irreparable damage to rods being eaten away over time due to excessive misuse of this multi-product.
With that out of the way, let’s look at the different types of lubricants that do work.
Best lubricants to use and the parts of the 3D printer to use them on:1.
PTFE lubricantPTFE (Polytetrafluoroethylene, also known as TEFLON) lubricants are the ideal lubricant for 3D printer parts such as threaded rods for X, Y or Z axis. PTFE lubricants are available in oil, grease and solvent (dry) bases.
Depending on the particular requirements, any or all of the above 3 form lubricants can be used. However, go with oils whenever possible. PTFE has one of the lowest drag coefficients of all the available lubricants and is suitable for both plastic-on-metal as well as metal-on-metal contacts. Drag coefficients is a measure of how high or low the surface friction of a compound is.
Super lube lubricantThe most popular brand of PTFE lubricant that is often used amongst the 3D printing industry is known as Super Lube, an ISO grade synthetic lubricant with multi-purpose applications. The PTFE particle containing in Super Lube adheres to any surface the oil comes into contact with. The particles helps to prevent corrosion (rust) and wear from friction.
The Super Lube we use on our printers, seen here: Super Lube with PTFE, is usually quite affordable and also contains PTFE.
Another type of lubricant often containing PTFE is Lithium Grease lubricant. Lithium grease, referred to as white lithium grease, is another lubricant commonly applied to 3D printer rods and guide rails. It is generally made with lithium soap and some other mixture of oil and additives.
2.
Silicone lubricantSilicone lubricants are a popular choice as they are readily available, non-toxic, and easy-to-use. Most silicone lubricants are silicone oils. Greases are available, but oil-based silicone lubricants are by far the most popular. The silicone lubricant by Super Lube seen here: Super Lube silicone lubricating grease, is also a good choice. It also contains PTFE.
While silicone is a good choice for plastic and rubber surface contacts, it can also be used for plastic or rubber on metal contact.
Silicone lubricants are not, by any means, suited for metal-on-metal contact. So, while depending on the exact make of the XY axles/guiderails, this lube may or may not be used. For the Z-axis, this lubricant is simply not suited at all.
3.
Graphite powder lubricantGraphite powder lubricants are also suspensions, in either oil, grease or solvent bases. The most popular graphite-based lubricants are easily the dry lubricants, available in volatile solvents. Graphite itself is a good lubricant. Graphite further helps in the process by adding strength to the lubricated parts. It should be note, however, that graphite powder can penetrate plastic parts and may cause weakening in those joints of the 3D printer.
Graphite powder lubrican. Photo credit: RUIVALAFurther, its carbon black color, as well as electrical conductivity means that it should only be used where the black coloring is not an issue, either aesthetically or in terms of color contamination of a part during printing. It’s also important to make sure that it is not used in any place with direct or indirect contact with the wiring or electronic circuitry of the 3D printer.
4. Molybdenum Disulphide (MolyD) lubricantMolyD is not electrically conductive. In all other respects, however, it is very similar to graphite lubes. While MolyD is used by some 3D printer users, it is by no means a popular choice owing in part to its increased price as compared with other lubes, and also because like graphite, this solid additive may weaken plastic parts of a 3D printer.
WS2 is not a general consumer-grade lubricant. This is purely due to the fact that it is very expensive. WS2 was developed by NASA to provide the best possible lubrication to its space bound equipment. It is one of the few compounds to have a lower drag coefficient than PTFE.
While it is not a necessity to use such an expensive lubricant, for the prosumers out there who want to take care of their 3D printers in the best possible way, WS2 is probably as good as it gets.
Oils VS grease VS dry lubricantsOil based lubricants are often touted as the ideal form of lubrication. They are not as heavy as grease and are not as light as dry (solvent-based) lubricants. And in many ways, this is true. Oil based lubricants come with a variety of additives, such as the solid lubricants discussed above as well as anti-corrosion, water, dirt and oxidation resistant agents. Oils are not as bad as grease in picking up stray particles such as dust and UFPs from the ambient surroundings, but they still can accumulate their fair share of goop on the shafts.
Grease on the other hand, is the worst offender when it comes to creating a dirty mess over time. Properly applied grease, however, will also provide the smoothest operation of all three bases. Lithium grease with PTFE is also the most suited for relubricating bearings when needed.
Lastly, are dry lubricants. Dry lubricants are solid lubricant particles suspended in alcohol or a similar spirit. They are available either in spray cans or can be “painted” on the parts. Dry lubricants completely eliminate the issue of lubricants collecting dust, dirt or UFPs on the 3D printer rods.![]()
PTFE dry lubricants are quite popular as they provide great lubrication without the mess of oils or greases. Dry lubricants need to be reapplied more often because of the lack of tackiness that oils and grease provide. They also are slightly more expensive, but not egregiously so. Dry lubricants also are often combined with dirt, corrosion and oxidation resistant compounds in spray can form.
How to lubricate a 3D printerNo matter which lubricant one chooses, the lubrication process remains unchanged:
- To start off with, thoroughly clean the 3D printer rods or guide rails, and any other moving parts, such as belts, that need lubrication. It is a good idea to clean the system with rubbing alcohol with a cleaning cloth and paper towels. Acetone is not recommended as it is corrosive and eats through plastic like acid. For the threaded rod, use a toothbrush with rubbing alcohol. Wait for everything to dry.
- Next, apply the lubricant directly on the surface at equal distances, like putting a drop at every 5 or 6 inches or so, taking care to not apply too much the first time.

- Spread the lubricant evenly with an applicator or a rubber glove. It is better to not use your bare hands, as an additive in even a nontoxic lubricant may cause some irritation.
- Once applied, move the parts either manually or via the motor controls of the 3D printer. “Jog” the printhead along the complete length of the axes a few (2-4) times to make sure that the lubricant is spread out evenly and gets into all the nooks and crannies.
- If at this point, you can visibly see the lubricant, then it is probably excessive. Too much lubricant will also strain the motors by inhibiting movement of the parts, so clean any excess off with paper towels or a cloth.
- Rerun the printer along its axes to make sure that everything is still smooth as required.
As is evident from the above instructions, the most difficult part of lubricating a 3D printer is selecting the right lubricant. Many 3D printer manufacturers nowadays offer maintenance guidance, including what lubricants are best suited. As a best practice, try to check with the manufacturer’s support page or the manual that came with the 3D printer.
Still, it is equally true that manufacturer recommendations are often designed to cater to the lowest common denominator of potential customers. So, if you want to experiment with giving your printer a more comprehensive servicing, that will serve you well in the long run.
As mentioned above, old grease that’s been applied and expose to the environment tend to collect dust and debris. Ideally, you will want to clean and reapply lubrication every so often depending on the type of environment.
Though it may be excessive in most cases to reapply lubrication each month, doing a monthly preventative maintenance check is not a bad idea. If a printer is making a squeaky sound while it runs, then the next lubrication application is obviously past due. We hope that this little guide helps in making that monthly servicing for your printer that much simpler and more beneficial.
Tags: 3D printergraphite lubricantLithium GreaseLubricantsMaintenancePTFESuper Lube
How to Lubricate Your 3D Printer Like a Pro – Best Lubricants to Use – 3D Printerly
Being able to maintain your 3D printer properly with care usually involves lubrication in the moving parts of your machine. Light machine oils or silicone lubricant is widely used in the 3D printing world.
This article will be a guide on which lubricants are popular to use with 3D printers, and what techniques people use to get the best results. Keep on reading through this article to get the up-to-date advice on 3D printer maintenance.
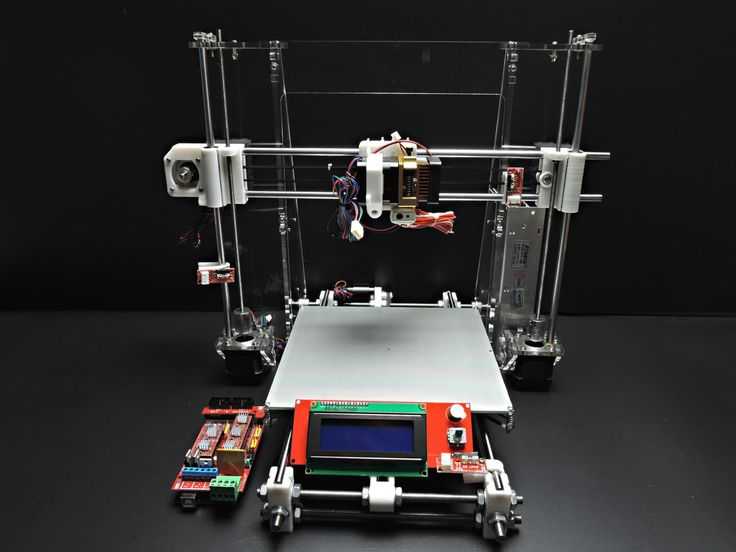
What Parts of a 3D Printer Needs to Be Lubricated?
Simply put, all moving parts, i.e. any surface that moves against another surface needs to be lubricated to have a smoothly working printer. In all of this, the following areas of a printer have to be lubricated from time to time.
The X, Y and Z axis: these moving parts of the 3D printer determine where the nozzle is moved to, and so they are constantly being moved around.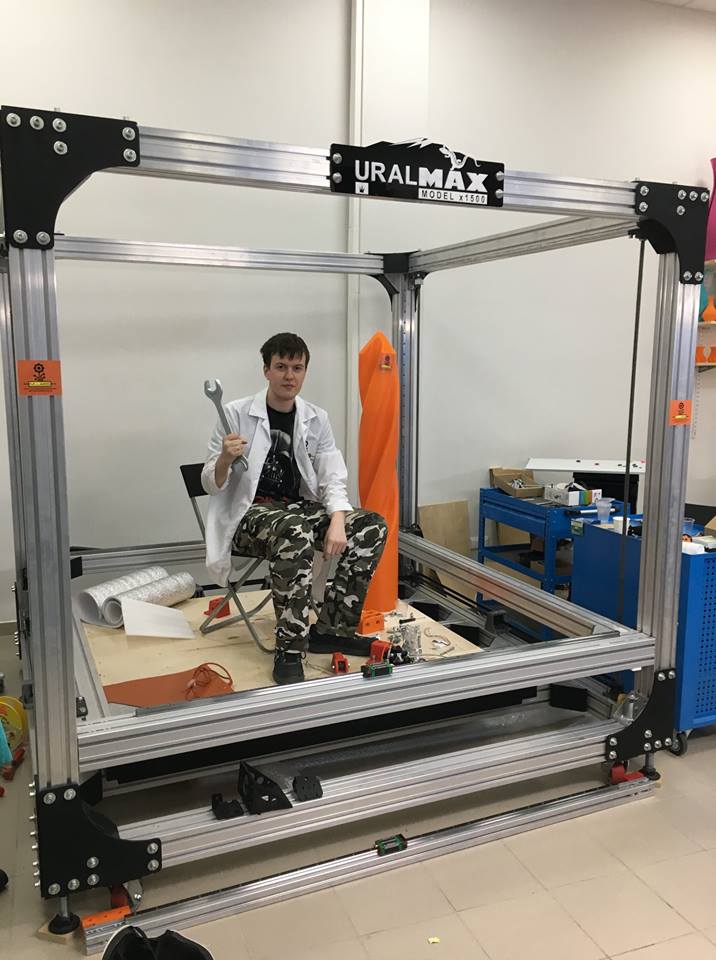
The Z-axis which moves vertically and the X and Y which moves horizontally are constantly moving when the machine is on. Wear and tear may occur if they are not lubricated regularly.
These coordinates determine the position of the hot end nozzle, which is moved around by different rails and driving systems.
Guide rails: these help to support the Z-axis as they move. The bearings on the railing can either be metal on metal or plastic on metal.
Many 3D printers will use simple threaded steel rods or lead screws, which are essentially extra-long bolts. These parts also need to be lubricated.
Stepper motors don’t need any maintenance or lubrication since they are a brushless motor which doesn’t have brushes that need to be replaced or anything.
How Do You Lubricate & Maintain a 3D Printer?
No matter the kind of lubrication being used, the steps to carrying out the lubrication is the same. Follow these steps for correct lubrication of your printer.
The first step in lubrication is cleaning. Clean all parts that require lubrication thoroughly. This will ensure that remnants of former lubricants do not get it the way when you are applying the new one.
You can use rubbing alcohol to wipe down moving parts such as the belt, rods and rails. Do not use acetone as it is corrosive and may likely eat through the plastic. Give the parts some time to dry out from the alcohol.
The next thing is to apply the lubricant. Depending on the type being used, space out the lubricants at equal distances and take note not to apply too much of it. With the aid of an applicator, spread the lubricant.
It’s a good idea to use some rubber gloves while you do this so the lubricator doesn’t touch your skin since some lubricants can cause slight irritation.
Once the lubricant has been totally spread on all the moving parts, move the parts from one side to the other to ensure that there is no friction. You can do this manually or make use of the motor controls located in the 3D printer.
Make sure you cannot see excess lubricant while moving the parts because this usually indicate that you have applied too much lubricant. This can do the exact opposite of what it’s supposed to do and make it hard for the parts to move.
If you noticed that you have applied too much lubricant, gently wipe off the excess with paper towels and run the parts along its axes again to make sure everything is smooth.
Find more information about how to lubricate your 3D printer in the video below.
Best Lubricants You Can Use For Your 3D Printer
As easy as lubricating a 3D printer is, the difficult part is figuring out the right lubricant to select. Of course, many new 3D printers now come with maintenance tips and advice on what lubricants to use.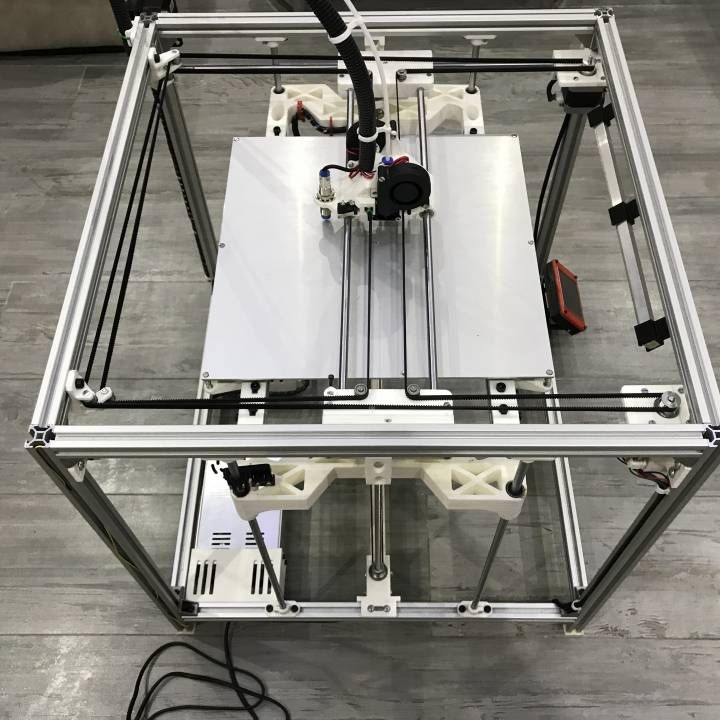
If you do not have this information about your printer, you can visit their website to ensure that you are using the right lubricant. The following are the best printers for your 3D printers.
Super Lube 51004 Synthetic Oil with PTFE
Many 3D enthusiasts use a great product called Super Lube Synthetic Oil with PTFE, a staple lubricant for your 3D printer.
It is a premium, synthetic oil with suspended PTFE particles that bond to surfaces of moving parts providing protection against friction, wear, rust and corrosion.
Product that contains PTFE are types of lubricants which are solid substances usually suspended in a medium such as alcohol or any other similar spirit. They can be sprayed on the printer parts that needs to be lubricated.
The viscosity is similar to that of cooking oils such as canola or olive oil. It adheres to almost any surface and prevents dust and corrosion of metal parts.
3-In-One Multi-Purpose Oil
Another great option that is used in the 3D printing community is the 3-In-One Multi-Purpose Oil.
One user who purchased this oil used it for their motors and pulleys, and it quickly solved their issues. The value of the product is one of the highlights because it is very affordable while getting the job done.
This oil is actually used in the manufacturing of some 3D printers because it works so well, and can even give immediate results for noise reduction. Another benefit is how there is little to no odor unlike some other lubricants out there.
You can also use it successfully on your linear bearings for great results in your prints, while giving extra life and durability to your 3D printer. Most experts recommend using oil regularly for maintenance.
Get yourself some 3-In-One Multi-Purpose Oil from Amazon today.
White Lithium Grease LubricantYou’ll hear plenty about White Lithium Grease if you are looking for a suitable lubricant for your 3D printer, or even other general items that require some maintenance. Permatex White Lithium Grease will work very well for lubricating your machine.
It is an all-purpose lubricant which has metal-to-metal applications, as well as metal-to-plastic. Moisture isn’t a problem for this lubricant and it can easily withstand high heats too.
Permatex white lithium grease makes sure that surfaces and movements are friction-free, allowing you to get that top quality from your 3D printer. You want to use it all around your 3D printer, especially on the lead screw and the guide rails.
You can also use it with door hinges, garage doors, latches and much more.
The White lithium grease is a great, weather-resistant lubricant, and it can also be easily removed and replaced when it’s time to replace it.
Many people who chose this lubricant over something like WD40 saw amazing results, especially to stop squeaks and screeches that occur.
If you are getting vibrations or feedback from the joints in your Z-axis, you can see much better elevation control after using this grease.
Get yourself some Permatex White Lithium Grease from Amazon.
DuPont Teflon Silicone Lubricant Aerosol Spray
Silicone lubricants are more popular among 3D enthusiasts as they are cheaper, easy to apply and non-toxic. A great one to go for which is easier to apply than the lubricants above is the DuPont Teflon Silicone Lubricant Aerosol Spray.
One user described this silicone spray as exactly what they needed for their 3D printer. This clean, light-duty lubricant is excellent for all types of materials and provides a great protection, as well as lubricant for your machine.
It helps prevent rust and corrosion too.
Get the DuPont Teflon Silicone Lubricant Aerosol Spray from Amazon.
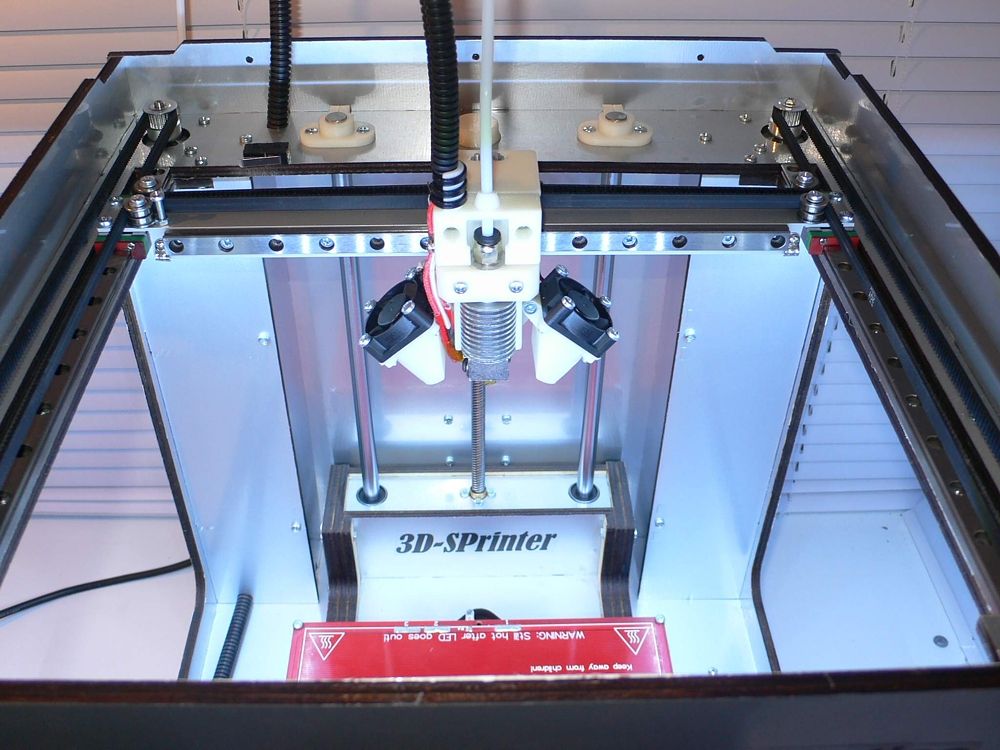
Grease for rail guides, personal experience
Personal diaries
A long way of designing and modeling, economic calculations (the budget was very limited), reading articles on kinematics and electronics led me to the conclusion - you need to make a good 3D printer right away, so that later you don’t have to finish it.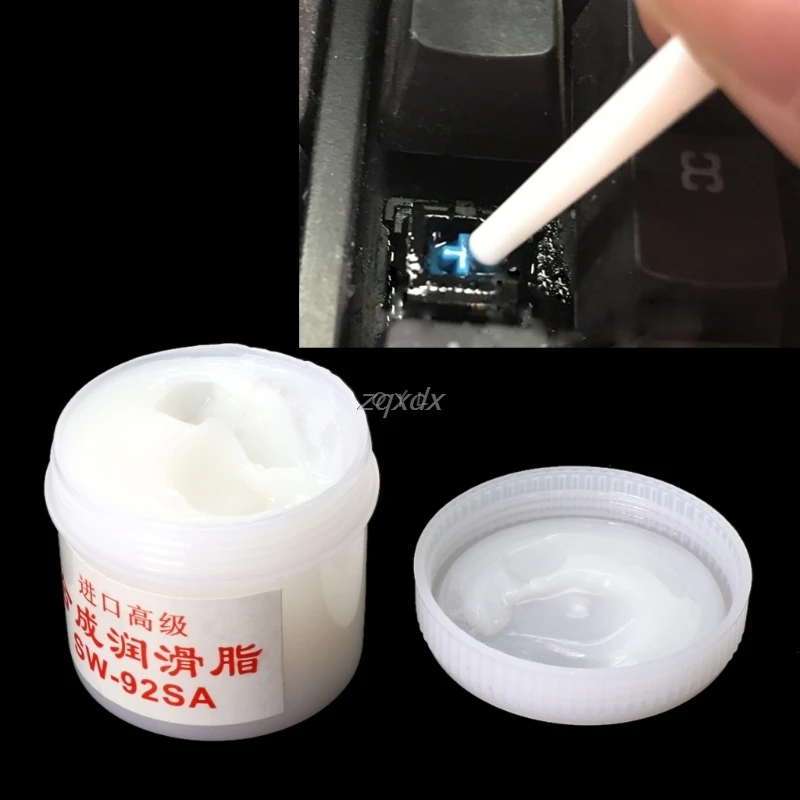 But there will be an article about the printer later. nine0003
In general, I made a 3D printer on rail guides 250 mm long and MGN9H carriages according to the H-bot scheme, working field 200x200x220, bowden. I read a lot about the poor quality of cheap rails, but still took the cheapest ones - obviously assuming their rapid wear and initial curvature.
And so it happened, two of the three rail guides came in satisfactory quality, one was completely crooked and the carriage stuck. I straightened it out as best I could, sanded the grooves for the balls with a fine-grained emery wheel and put it on the X axis.
It is worth saying that despite the poor quality of the guides, I have never had problems with the mechanics of the printer and their effect on print quality.
During the operation of the printer, after about 20 hours of printing (printed rarely and for a short time), bounces began to appear on idle or fast movements of the head along the X axis - the result that was expected for me initially. At the same time, I lubricated the rails with liquid silicone, such as the universal PMS 200 or a cheap silicone spray. But I didn’t like it - there is an effect of a lubricated surface, it remains for a long time, but dust settles on open areas and the lubricating properties are “so-so” for the rail. nine0003
I tried lithol - I didn’t like it, it’s dirty, sticky, and the balls inside the carriage practically don’t roll, but just rub against the rail guide, it’s thick, viscous.
I experimented with a few more lubricants obtained from friends - I didn’t like anything.
And now the denouement!
Once I was driving a car with my wife along a country road, I smelled the smell of burnt pads sneaking into the salon, I stopped - that’s right, the caliper piston jammed (apparently the anther was torn, or it was damaged during the last replacement, everything inside was rusted). nine0003
I studied the issue, got consumables for the caliper, new pads, and also bought grease for the pads, caliper piston and caliper guides.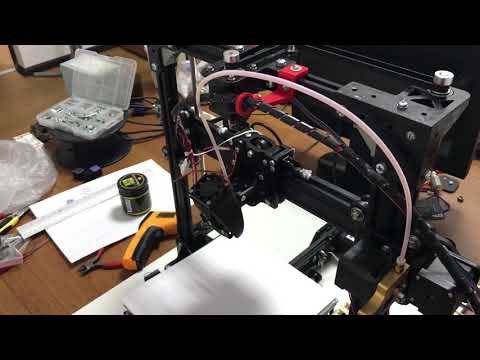 I repaired everything myself safely, but different lubricants remained - let me think on a printer on rails.
Tried two:
one pink noneme, came with anthers - did not fit very well, but still worked better than everything I smeared with before;
the second MC 1600 universal for calipers in a yellow doy bag, I bought it for a penny, just to have it - and now I really liked it! He smeared the rails with a thin layer, drove the carriages back and forth, and removed the excess. When printing, the chatter is gone! At all! If you remove the belt and move the printing head slightly behind the bowden, then it (the head) quickly starts to roll along the rails. nine0003
In general, this is how I accidentally found the ideal lubricant for myself for cheap MGN9 rail guides.
I have been using it for three months, I recently lubricated it for the second time, although there was probably no need for this - the lubricant does not go anywhere, does not dry out, does not lose its original properties.
Maybe not suitable for high-quality rails, I don't know. All of the above is just my successful experience
Follow the author
Follow
Don't want to0003
9
3D Printer Maintenance / Articles
Share:
Source:
ATECO - specialized lubricant for 3D printers
Such machines require some maintenance from time to time, which may not be obvious to a 3D printer newbie. It is recommended that the printer be serviced at least once a month. With intensive use (for example, 24/7 printing), perhaps even more often. nine0003
This short post has organized and selected the main activities that will allow you to keep the printer in proper quality.
Checking bolt connections Cleaning fans and electronics Checking belt tension
0095
Keys M6, M8 and M10
Klyuchister M2 and M3 Spatula Brush and brush
Wire brush lubricant (I, for example, use silicone lubricant)
needles for cutting nozzles (are included .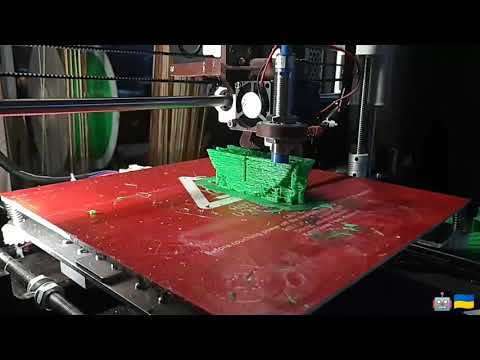 Ordinary needles of small diameter can be used instead with less convenience
Paper towels
1. Bolt test
First of all, unplug your printer. This will allow you to move the extruder along the axes without the risk of damaging the motors, as well as eliminating potential hazards when cleaning electronics.
Printing vibrations loosen bolted connections. It is logical that in order to maintain high print quality, the nuts sometimes need to be tightened.
It's best to start with the bolts that hold the base:
nine0003
Then check the screws holding the motors:
With the base and motors out of the way, check the bolts on the X-axis:
Finally, make sure that the pulleys on the motor shafts are properly tightened:
2 As a rule, this leads to a deterioration in the cooling capacity of the fan, which, in turn, leads to sad consequences for the electronics. nine0003
First remove the fan from the plastic frame - this will make it much easier to clean. Then, using a brush, clean the blades on both sides.
Now it's the turn of the electronics. There is no need to disconnect all the wires, but when cleaning, be extremely careful and careful not to accidentally damage any element of the board.
Now clean the extruder fans. To do this, move the carriage to the extreme right position and carefully remove the left extruder. Remove the radiator along with it. Clean them with a brush in the usual way. nine0003
Before you go further with the brush, pay attention to the inside of the extruder (since you removed the fan anyway). Most likely it will be in the dust or the remnants of the material, mercilessly ground by the pressure wheel. If so, clean the area with a small brush:
Now that you have cleaned the inner chamber, return the fan and heat sink to their rightful place. Remember that the fan with the sticker must face towards the extruder, otherwise the airflow will go in the wrong direction. The front fan does not need to be removed for cleaning - just gently clean it between the blades. nine0095
3. Belt tension check
Using the printer for a long time can cause the belt tension to loosen significantly. Check - if this is the case, then simply tighten the tensioner bolts:
4. Lubrication and cleaning of guides and studs
Both the guides and studs in the Z axis should always be clean and well lubricated - this is almost guaranteed to get rid of unnecessary vibrations and annoying squeaks. nine0003
Let's start with the guides. First, clean them with a paper towel. After removing all the dirt, take a clean towel and, dropping lubricant on it, wipe the smooth guides properly.
After the smooth guides have been cleaned and oiled, brush over the running pins. Then lubricate all the nuts on the Z axis transmission rod. Don't forget the cylindrical flanges as well.
5. Glass table cleaning. nine0068
If you use varnish as an adhesion promoter, you may notice that over time the old layers of varnish combine into bizarre bumps that can seriously damage the first print layer. Also, sometimes pieces of plastic from a previous print (for example, raft elements) may remain on the platform.
The easiest way to clean a glass table is to place it under running hot water and work with a spatula for a while. The table itself, of course, must first be removed from the printer. nine0095
6 . Nozzle cleaning.
A step that is considered quite dangerous - hundreds of thrown "hot ends" are proof of this.
The hot end is the part of the extruder where the plastic filament is directly heated and extruded. Sometimes, for various reasons, the nozzle becomes clogged, which leads to incorrect operation of the printer.
The first thing to do is unscrew the protective element surrounding the hotend (relevant for the gefeshi). Then, power on:
Now, using the LCD screen, return the carriage to the “home” position. (Menu > Control > Move axis > Auto home).
After that, you need to move the extruder to the point 100.0 mm X and 160.0 mm Z. This position provides the most free access to the hot end. This is done effortlessly through Jog mode in the same menu as auto home.
Now we need to unload the filament (Menu > Control > Filament > Unload). nine0003
At this point, the nozzle starts to heat up, so be careful not to touch it to avoid injury.
After removing the plastic thread, insert the cleaning needle into the nozzle and move it up and down for a few seconds. The extruder itself must remain warm.