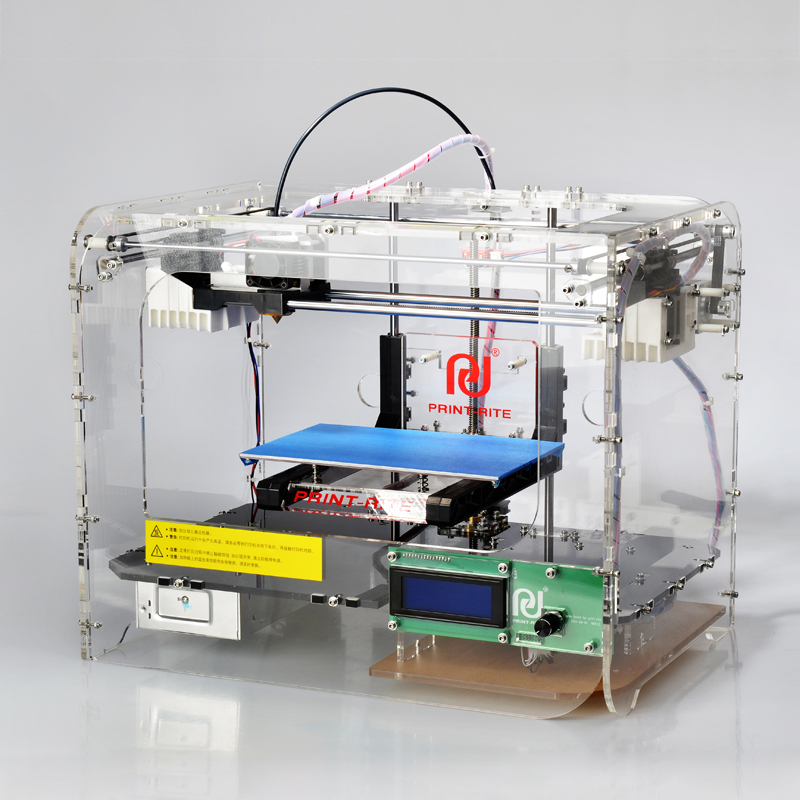
3D print shrinkage
PLA, ABS & PETG Shrinkage Compensation in 3D Printing – A How to – 3D Printerly
Although 3D printing produces pretty detailed models that look almost identical to the CAD image, the dimensional accuracy and tolerance aren’t perfectly identical. This is something called shrinkage, which happens in 3D prints that you probably don’t even notice.
I thought about just how much shrinkage occurs in 3D prints, an ideal question for those who want to create functional objects that require tight tolerances, so I decided to find out and share it with you guys.
In this article, we’ll cover what shrinkage is, how much your 3D prints are likely to shrinking by, and some good shrinkage compensation to use.
What Is Shrinkage in 3D Printing?
Shrinkage in 3D printing is the reduction in size of the final model due to temperature changes from the melted thermoplastic, to the cooled extruded material layers.
During printing, the extruder melts the printing filament to create the 3D model, and the material expands during this process. After layers start to cool right after being extruded, it causes the material to increase in density, yet reduce in size.
Most people won’t realize that this is happening until they have a model which requires a little more dimensional accuracy.
Shrinkage is not a problem when printing aesthetic models like artworks, vases, and toys. When we start moving to objects that have tight tolerances like a phone case or a mount connecting objects together, shrinkage is going to become an issue to solve.
It occurs in almost every 3D printing process due to the temperature variations involved. But the rate at which it occurs varies depending on a few factors.
These factors are the material used, temperature, printing technology, and curing time for resin prints.
Out of all of these factors, perhaps the most important factor affecting shrinkage is the material used.
The type of material used will have influences on how much the model will shrink.
The printing temperature and cooling speeds are also important factors.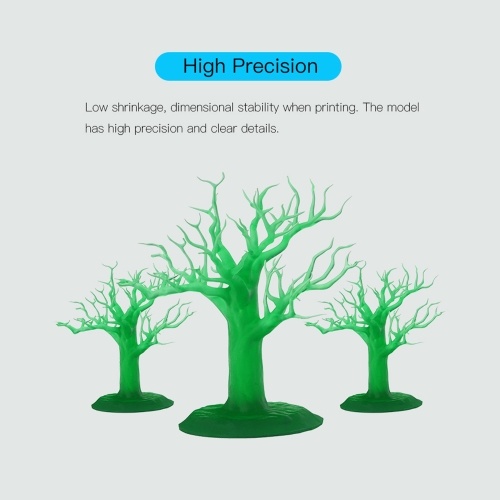 Shrinkage can occur if the model is printed at a high temperature or cooled too fast, meaning that higher temperature plastics are more likely to shrink.
Rapid uneven cooling can even lead to warping, which can damage the model, or ruin the print altogether. Most of us have experienced this warping, whether it comes from drafts or just a really cold room.
Something that helped with my warping that I recently implemented is using a HAWKUNG Heated Bed Insulation Mat under my Ender 3. Not only does it help with warping, it also speeds up heating times and keeping a more consistent bed temperature.
Finally, the type of printing technology used also determines the extent of shrinkage found in the model. Cheaper technologies like FDM usually cannot be used to make high-quality parts with tight tolerances.
SLS and metal jetting technologies justify their high price tag by producing accurate models.
Luckily, there are plenty of ways to account for shrinkage, allowing us to produce dimensionally accurate parts without too much hassle, though you need to know the right techniques.
How Much Do ABS, PLA & PETG Prints Shrink?
Like we mentioned earlier, the rate of shrinkage depends heavily on the sort of material used. It varies from material to material. Let’s take a look at three of the most widely used 3D printing materials and how they hold up to shrinkage:
PLA
PLA is an organic, biodegradable material also used in FDM printers. It is one of the most popular materials used in 3D printing because it is easy to print with and also non-toxic.
PLA suffers from little shrinkage, hearing shrinkage rates of between 0.2%, up to 3% since it’s a lower temperature thermoplastic.
PLA filaments do not need high temperatures to be extruded, the printing temperature is around 190℃, which is smaller than that of ABS.
Shrinkage in PLA can also be reduced by printing in an enclosed environment or simply scaling up the model to compensate for shrinkage.
This works because it reduces those rapid changes in temperature, and reduces the physical stress on the model.
I think these shrinkage rates depend on the brand and manufacturing process, and even the color of the filament itself. Some people found that darker colors tend to shrink more than lighter colors.
ABS
ABS is a petroleum-based printing material used in FDM printers. It is used extensively because of its high strength, heat resistance, and versatility. It can be found in anything from phone cases to Legos.
ABS does have a really high shrinkage rate, so if you need dimensionally accurate 3D prints, I’d try to avoid using it. I’ve seen people comment on shrinkage rates being anywhere from 0.8%, up to 8%.
I’m sure these are extreme cases, and you would be able to reduce that with the right setup, but it is a good show to illustrate how bad shrinkage can really get.
One of the main ways to reduce shrinkage is to print at the right heated bed temperatures.
Using a correctly calibrated heated bed helps with first layer adhesion and also helps to prevent the bottom layer from cooling too much faster than the rest of the print to avoid warping.
Another tip for reducing shrinkage is to print in an enclosed chamber. This isolates the 3D print from outside air currents ensuring it does not cool unevenly.
The enclosed chamber keeps the print at a steady near plastic temperature until printing is completed, and all sections can cool at the same rate.
A great enclosure that thousands of people have used and enjoyed is the Creality Fireproof & Dustproof Enclosure from Amazon. It keeps a constant temperature environment and is very easy to install & maintain.
On top of that, it provides more safety in terms of fires, reduces sound emissions, and protects from dust build up.
PETG
PETG is another widely used 3D printing material due to its phenomenal properties. It combines the structural strength and toughness of ABS with the ease of print and no-toxicity of PLA.
This makes it suitable for use in many applications requiring high strength and material safety
At 0. 8%, PETG filaments have the lowest shrinkage rate. 3D models made with PETG are relatively dimensionally stable when compared to others. This makes them ideal for making functional prints that have to conform to somewhat strict tolerances.
To compensate or reduce shrinkage in PETG prints, the model can be scaled up by a factor of 0.8% before printing.
How to Get the Right Shrinkage Compensation In 3D Printing
As we’ve seen above, shrinkage can be reduced in several ways. But, the fact remains that no matter how much is done, shrinkage cannot be eliminated. That’s why its good practice to try and account for the shrinkage when preparing the model for printing.
Getting the right shrinkage compensation helps in accounting for the reduction ins size of the models. Some printing software comes with presets that automatically do this for you, but most of the time, it has to be done manually.
Calculating the sort of shrinkage compensation to be applied depends on three things, the material being used, the printing temperature, and the geometry of the model.
All these factors combined will give an idea of how much the print is expected to shrink and how to compensate for that.
Getting the right shrinkage can also be an iterative process, otherwise known as simple trial and error. The rate of shrinkage might even vary across different brands of the same type of material.
So, a great way to measure and quantify shrinkage is to first print a test model and measure the shrinking. The data you get can then be used to create an mathematically-sound shrinkage rate compensation.
A great way to measure shrinkage is by using this Shrinkage Calculation Object from Thingiverse. One user described it as “One of the best general calibration tools around”. Many other users share their thanks with the maker of this CAD model.
The steps are as follows:
- Print the test part using your filament of choice, and slicer settings you intend to use.
- Measure and input into the spreadsheet (mine is shared at https://docs.
 google.com/spreadsheets/d/14Nqzy8B2T4-O4q95d4unt6nQt4gQbnZm_qMQ-7PzV_I/edit?usp=sharing).
 - Update slicer settings
You want to use that Google Sheet and make a new copy that you can edit yourself from fresh. You’ll find the instructions on the Thingiverse page for more details.
If you want a really accurate compensation, you can actually run the iteration twice, but the maker says that just one iteration was enough to get them within a 100um (0.01mm)tolerance over a 150mm part.
One user said he simply scales his models to 101%, and it works pretty well for him. This is a really simple way of looking at things, but it can be successful for quick results.
You can also make use of a setting called horizontal expansion which adjusts the size of your 3D prints in the X/Y dimension, to compensate for changes in size as the model cools and shrinks.
If you are creating the models yourself, you can adjust the tolerances on the model itself, and with more practice, you’ll start to be able to guess the correct tolerances per your specific design.
PLA, ABS, and PETG Shrinkage: Everything You Need To Know
Although it’s hard to notice, your 3D print doesn’t come out with the exact dimensions as your STL file. Whenever this happens, we call it shrinkage. Because the shrinkage is only a few millimeters, it’s typically hard to miss.
If you’re printing something to put out on display, some mild shrinkage shouldn’t raise any concerns.
But, shrinkage becomes important if you need the measurements of your print to perfectly match those of your CAD model, for example when printing prototypes, phone cases, or precise miniatures.
In this article, I will unpack the meaning of shrinkage and explain how it occurs. I’ll also talk about how much PLA, ABS, and PETG usually shrink. Lastly, I’ll offer a few tips on how you can compensate for shrinkage whenever you print.
Table Of Contents
- What Is Shrinkage In 3D Printing?
- How Shrinkage Occurs
- What Causes Shrinkage In 3D Printing?
- Printing Temperature
- Cooling Speed
- Printing Technology
- The Filament Used For Printing
- How Much Does Each Filament Shrink?
- PLA
- ABS
- PETG
- How To Compensate Against Shrinkage
- Sources
What Is Shrinkage In 3D Printing?
Shrinkage refers to a reduction in the size of a 3D printed object. When molten 3D printing filaments cool down, they contract, and the print becomes slightly smaller. Although the filament expands under heat, it eventually shrinks due to the drop in temperature when it leaves the printer’s nozzle.
Shrinkage is a common issue because FDM 3D printers have to melt plastic to create the print.
So what happens as a 3D print undergoes shrinkage?
How Shrinkage Occurs
Shrinkage all comes down to the chemical properties of the filament used to print. Filaments are thermoplastics, so they melt when heated and solidify when cooled.
When the melted filament is deposited on the print bed, the outside temperature makes it cool. Like most materials, the object will contract slightly via thermal contraction as the temperature drops.
Unfortunately, the shrinking process also causes warping in your 3D prints, especially when working with high-temperature filaments.
Warping occurs due to filaments cooling too quickly – that’s why printers typically have a heated bed to cool slower, and enclosures for better heat maintenance. Warping isn’t really a problem with PLA, but is with ABS and other higher-temperature filaments.
Now that we know what shrinkage is, how does it come about?
What Causes Shrinkage In 3D Printing?
Shrinkage is caused by different factors, including:
- Printing temperature
- Cooling speed
- Printing technology
- The material used for printing
Printing Temperature
Every filament has its ideal extrusion temperature, which is vital to achieving successful results. PLA prints at 180 to 230°C. ABS’ printing temperature is slightly higher at 210 to 250°C, while PETG extrudes between 220 and 250°C.
In addition to the printing temperature, some 3D filaments need a heated printing bed to prevent warping and provide extra adhesion.
Filaments that print at higher temperatures generally shrink more than those that print at lower heat – for example, ABS shrinks more than PLA.
Cooling Speed
As mentioned, shrinkage happens at the cooling stage of the printing process. The ambient temperature can also make or break the geometrical accuracy of your print. If the freshly printed object cools down too quickly, it’ll experience much more shrinkage than when it cools down in an enclosure.
Printing Technology
The type of printer largely determines the amount of shrinkage to expect in your mold. While FDM printers are affordable and easy to use, other technologies such as SLS printers are far better for performing under strict tolerance expectations.
The Filament Used For Printing
While the above factors significantly contribute to shrinkage in 3D prints, the major culprit is the type of filament you choose. Let me explain why.
Every filament behaves differently when cooling. As it cools down, shrinking will only happen once the temperature drops below the glass transition temperature.
Before a thermoplastic melts, it reaches its glass transition temperature, where it changes from its original rigid state to a rubbery material.
During cooling, the liquefied filament’s temperature will drop to the glass transition temperature. At that point, the model is not as brittle as the final print, but it’s not exactly a liquid either. This is where shrinkage begins.
As a result, shrinkage is much more common in filaments with a high glass transition temperature.
To sum it up, since glass transition temperatures vary across filaments, one filament might shrink more than another. In some cases, different brands of the same filament will have different shrinkage rates. Additionally, ambient temperature and the rate of cooling may not be the same whenever you print, adding to the variation in shrinkage percentages.
Let’s have a look at the numbers.
How Much Does Each Filament Shrink?
PLA
Polylactic Acid (PLA) is one of the most widely used 3D printing materials. It is biodegradable, non-toxic, and obtained from renewable sources like corn starch.
With a shrinkage rate of 0. 2% to 3%, PLA is one of the filaments less prone to shrinking. This is because PLA is a relatively low-temperature filament, printing at a nozzle temperature of around 180 to 230 degrees celsius.
Printing with PLA doesn’t always require a heated bed, but using one goes a long way in reducing warping.
The idea is to set up a strong base layer that will hold the entire print. Therefore, keeping the bed temperature at about 50 degrees celsius will keep the lowest layer nice and strong for the rest of the model to sit on.
ABS
Acrylonitrile Butadiene Styrene (ABS) was one of the first 3D printing materials to be used in the industry. Its high tensile strength makes it a sought-after filament for making rigid, long-lasting objects and toys.
However, ABS has one of the highest shrinkage levels at up to 11%. The amount of shrinkage heavily depends on how the filament was manufactured, its brand, and sometimes color.
Slicer settings are often set to account for ABS shrinkage, with around a 2% increase in size often used among hobbyist makers.
Many variants and combinations of ABS are used today. Here are some of them and their range of shrinkage.
| ABS Variant | Minimum Shrinkage (%) | Maximum Shrinkage (%) |
|---|---|---|
| ABS – Acrylonitrile Butadiene Styrene | 0.7 | 1.60 |
| ABS High Heat | 0.4 | 0.9 |
| ABS High Impact | 0.4 | 0.9 |
| ABS/PC Blend | 0.5 | 0.7 |
| ABS/PC Blend 20% Glass Fiber | 0.2 | 0.3 |
| ABS/PC Flame Retardant | 0.3 | 0.6 |
(Source: Omnexus)
Besides requiring higher print bed and nozzle temperatures, ABS is notoriously sensitive to temperature changes during the printing process. It also cools much slower than PLA, so it requires steady temperatures. Otherwise, a sudden fluctuation in temperature may create a deformity in the printed object.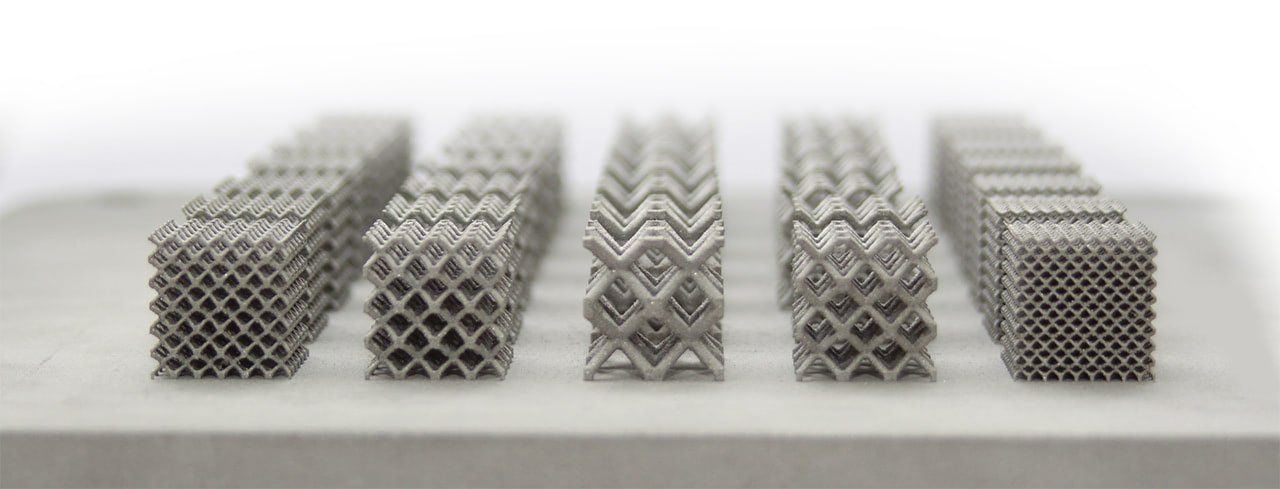
To ensure your ABS prints don’t shrink too much, it’s necessary to regulate the temperature as you print. The best way to do this is by printing inside an enclosure. The enclosure keeps the heat around the mold uniform while blocking out external cold air.
PETG
Polyethylene terephthalate glycol (PETG) is a high-performance filament that delivers a unique mix of high tensile strength, chemical resistance, and non-toxicity.
Like PLA, PETG is one of the least susceptible filaments to shrinking. With an average shrinkage rate of only 0.6%, the material is ideal for making detailed models with accurate dimensions.
As we’ve seen, shrinkage is second nature to thermoplastics. Since we cannot do away with it, the best solution is to plan for it in our designs through shrink compensation.
How To Compensate Against Shrinkage
If you want to reduce shrinkage in your 3D models, scale up the dimensions of your design by the shrinkage rate of the material you’re using to print. To calculate the shrinkage rate, compare your 3D model’s dimensions with those of the image in your software.
The shrinkage rates provided earlier can serve as a guide on what to expect. But as mentioned earlier, different brands of the same filament can have varying degrees of shrinkage, owing to additives and color differences.
So a sure-fire way of getting the desired measurements in your print is to actually know the amount of shrinkage you’re working with at your setup.
To find the shrinkage of the filament you’re working with:
- Select a particular filament and print your model.
- Using a digital vernier caliper gauge, measure the dimensions of the finished model and record them down.
- Subtract each measurement on your object from its corresponding value in the 3D model.
- Multiply your results by 100% to get the shrinkage rate.
You can also reduce the amount of shrinkage in your prints by tweaking a setting called Horizontal Expansion. This slicer setting lets you configure a compensation value for the 3D object. In other words, it allows you to print a slightly larger figure so that you get the desired dimensions after it shrinks.
Compensating for shrinkage is usually not a one-off attempt. You’ll have to test out a couple of prints before you figure out the correct values to use to offset shrinkage changes. Still, it’s an excellent way to get pinpoint accuracy on your 3D prints without spending a fortune on high-end printers.
Sources
- Omnexus: Shrinkage
Other related articles:
- How to anneal your 3D prints for strength
- 3D prints warping or curling? – Why It Happens and How to Prevent It
- What is the difference between TPE and TPU flexible filament?
- How to improve PETG adhesion so it sticks to your print bed
REC Wiki » How to deal with warping in 3D printing
Any manufacturing process that involves cooling polymers or metals will experience material shrinkage, be it plastic injection molding, metal molding or 3D printing. In this article, we will share tricks to help combat the unwanted effects of shrinkage - deformation, cracking and peeling off.
When it comes to deformation in plastic injection molding, engineers must consider cooling rate, pressure, and fill rate. Deformations in sheet metal work are eliminated by annealing, corner geometry and special welding techniques. In 3D printing, shrinkage occurs when earlier and later layers cool at different rates. nine0003
Leaky deformations are fraught with both problems with dimensional accuracy and aesthetic defects. When large area layers cool and contract, they can displace model elements. Such defects can often be seen with the naked eye, and in severe cases, shrinkage can lead to surface distortion and dislocation of seats and technical holes in printed parts.
Example tearing off and twisting due to severe shrinkage
In fact, shrinkage is inevitable in 3D printing, only it manifests itself in different ways depending on the geometry of the models, printing modes and materials used. For this reason, shrinkage should be taken into account even at the stages of designing and preparing models for 3D printing.
In this article, we will share shrinkage control tips not only for FDM 3D printing, but for many other additive manufacturing methods.
3D printing and cartoons have something in common
The layer-by-layer 3D printing process is somewhat similar to cinemagraphs. This is such an old method of animation when individual frames are drawn on sheets of paper and then stacked. If you scroll through them quickly, the drawings begin to move. In order for the animation to be smooth, each frame should flow into the next with minimal changes.
The same principle applies to FDM 3D printing and many other additive manufacturing methods. If the design of a 3D model lacks "fluidity", and even more so if the geometry "jumps" a lot from layer to layer, you need to try to smooth the process either by changing the design or changing the orientation of the model on the desktop. The smoother the transition from one layer to another, the better. The product will come out not only more aesthetically pleasing, but also geometrically more accurate. nine0003
Most slicers allow you to preview the model building layer by layer before generating the G-code. Take this opportunity, and if you notice sharp changes in the contours of the layers, make the necessary changes to the shape of the model, or try to rotate it so that the transitions are smoother.
Strive for organic shapes
3D print organic, bionic structure on the stereolithographic 3D printer
You have probably noticed from various illustrations that professional 3D printing often uses bionic elements, that is, inspired by nature: for example, angular and flat shapes are replaced with structures similar to tree branches.
This is no coincidence, because replacing corners with fillets is one of the simplest and most effective methods of dealing with shrinkage. This contributes to a smoother transition from layer to layer, as described above. Rounding the corners inside the model is most important, but if the design allows, you can also round the outer corners and surfaces. Even small roundings can greatly affect the result. For example, a fillet with a radius of 0.15 mm is enough to relieve stress from the edge. The higher the radius, the better, as long as it does not affect the wall thickness. Take a cue from melted candles - this is a great example of natural geometry. Actually, this is why topological optimization algorithms in generative design generate structures similar to trees or corals - in nature, perfectly flat surfaces and sharp corners are extremely rare. nine0003
Corners and wall thicknesses
Example of deformation and delamination
Right angles on parts usually lead to abrupt changes in cross-sectional area, which is undesirable. Whenever possible, try to replace right angles with two or more, for example, two 45-degree angles.
Another good idea is a uniform wall thickness. If the walls narrow or thicken rapidly, this will result in both a dramatic change in area and uneven cooling, which can lead to deformations and even cracking. If walls of different thicknesses are regulated by design, try to at least round the corners. nine0003
How thick should the walls be? The answer depends on the material, geometry, and process, but the starting point is a thickness of 1% of the largest dimension of the product itself - length, width, or height, whichever is greater. This rule should be applied to products larger than 75 mm, but less than 250 mm. If the part is smaller, increase the relative thickness, and if it is larger, decrease it. If we are talking about a fragile part, it is better to ignore the rule in the direction of thickening the walls.
Model orientation
Twisting example
In many cases, unwanted shrinkage effects can be mitigated by reorienting the model on the worktable. For example, it is often more profitable to print more or less flat parts not flat, but at an angle. Imagine the part in the shape of the letter H: when the printer prints the legs and reaches the jumper, there will be a sharp drop in the cross-sectional area, and after shrinkage the jumper will bend the legs. If the model is tilted on its side, the transitions will be smoother, which means that the risk of deformation will decrease. The angle of inclination depends on the part: it is not necessary to tilt by 45 degrees, 10-15 degrees may be enough. The downside is that tilted 3D printing can increase the visibility of layers and the amount of material used to build support structures. Some technologies, such as selective laser sintering, do not require the construction of supports, and therefore the method of reducing shrinkage due to optimal orientation in such technologies is widely used. nine0003
Thermal chambers and adhesives
In addition to the design and orientation of the model, compliance with the temperature regime, auxiliary structures and adhesive agents - glues, varnishes and special coatings on the tables - help to combat deformations. It all depends on the plastic for 3D printing. For example, polylactide (PLA) has a very low shrinkage, and besides, a low melting point, so heating the stage and using a heat chamber when working with this polymer is contraindicated. But it also happens the other way around: another popular plastic for FDM 3D printers is acrylonitrile butadiene styrene (ABS), and it just causes a lot of trouble with shrinkage, leading to deformations, cracking in layers, and even tearing off models from the tables. nine0003
Using ABS as an example, here are some solutions to combat warping:
1. Before printing, clean the platen with isopropyl alcohol. If necessary, especially if you are going to print large items, apply an adhesive.
There are many options: it can be glue (specialized composition, glue stick or PVA glue solution), hairspray, a solution of ABS itself in acetone (the so-called ABS juice). The adhesive must be applied in a thin, even layer. nine0003
2. Use a heat chamber if possible. Many FDM 3D printers have enclosed chambers to help stabilize the background temperature. In most cases, these are passive chambers, that is, the air inside is heated by a table and a hot end, but there are also active, temperature-controlled options with separate heaters and sensors that allow you to maintain the set temperature.
In extreme cases, you can make or even buy a box that covers the entire printer. The task of thermal chambers is to keep the printed model in a more or less evenly heated state until the end of the work, so that it can cool entirely, and not in layers. This, in turn, helps to achieve more uniform shrinkage and thus avoid cracking. nine0003
3. Use heated platform. If heat chambers can still be dispensed with, stage heating is almost always necessary for ABS 3D printing. Shrinkage of the first layers, responsible for adhesion to the work surface, will lead to at least twisting of the corners, and in the worst cases, to the separation of the model from the table.
The adhesive agents mentioned above help to some extent to combat this, but the heating of the table also plays an important role. Use a combined approach: apply an adhesive coating and heat the stage to about 100-100°C to work with ABS (other polymers require different temperatures). nine0003
4. Reduce the risk of slipping from the table by using auxiliary structures - rafts and brims. Rafts are separate layers of an increased area, on top of which the product is printed, while brims increase the area of the first layers of the product itself.
Rafts and brims are removed after 3D printing. This increases the cost of both consumables and post-processing, but on the other hand, the risk of tearing off the model and deformation due to twisting of the layers is significantly reduced - rafts and brims will be deformed, and the model itself will retain its shape. nine0003
The ideal option is to use all four solutions at the same time. You can learn more about adhesion enhancement in the article at this link.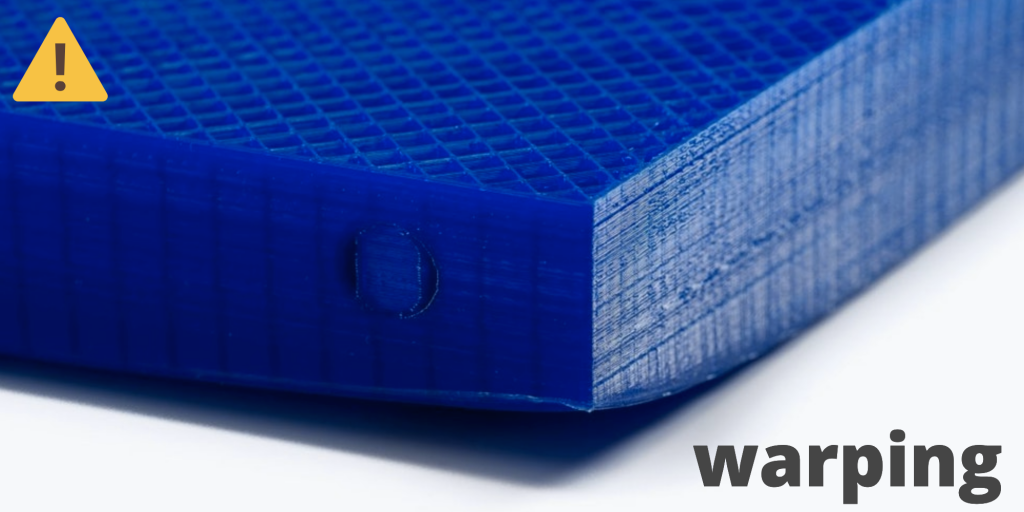
Plastic shrinkage during 3D printing
Hello dear. All owners of 3D printers are familiar with the situation when the printed part is peeled off the table and folded. At the same time, for different plastics, this problem manifests itself in different ways. Why are some materials more susceptible to this problem, while others are not so capricious? What factors affect this? Let's figure it out. nine0003
Video on this topic at the end of the article.
All of the following is the result of my reflections, somewhere justified, and somewhere voiced at the level of "I think so." Therefore, do not take everything you hear as 100% truth. criticism in the studio.
The ultimate cause of bending and peeling of the workpiece from the table is the internal stresses that occur in the material. Why do they arise? Here it should be said about such a thing as thermal expansion.
Almost any material expands when heated and contracts when cooled. The magnitude of this expansion and contraction for each specific material is characterized by the coefficient of thermal expansion (CTE). The greater the CTE value for a material, the more it expands and contracts with temperature. Here is a table with some of the materials widely used in 3D printing: nine0003
I did not include the maximum number of materials in the table, but only those, based on which I will draw some conclusions later in the text.
The mechanism of internal stresses due to thermal expansion can be demonstrated as follows:
The figure shows schematically the stacked layers on a table without heating, and on the left is a graph of the temperature change (schematic). As you can see, the temperature of the first layer is 20°C - the layer has already completely cooled down. For simplicity, we take the temperature of the upper layer equal to the temperature of the nozzle – 210°C. Horizontal arrows in each layer show the direction of shrinkage of the material during cooling. The bottom layer is the coldest, so it has already “sat down” the most. The top layer is the hottest and therefore the widest. nine0003
The following process is obtained. Each layer after laying cools down and shrinks in the direction of the arrows. But since the layers are sintered together, then, sitting down, each new layer pulls the previous one a little (like a bowstring stretches its shoulders). And since the tension from shrinkage occurs only on one side, the layers are bent into an arc.
Here we can assume that the obvious reason for the bending of the part seems to be a large value of CTE. But I don't think so. Yes, a large CTE makes a significant contribution to print distortion, but there is one problem... Let's take another look at the CTE table and compare ABS and PLA. These two plastics require radically different printing conditions. PLA plastic can be printed without heating the table at all. As can be seen from the table for ABS, the CTE is greater, but it is no longer at times.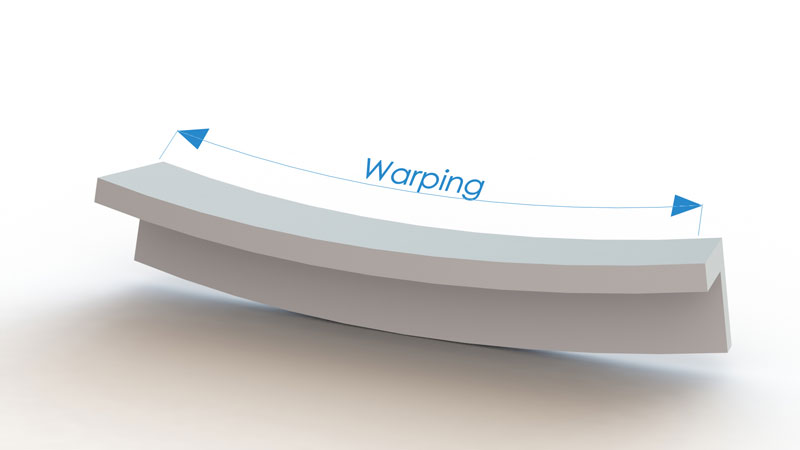 In my opinion, such a difference in the amount of thermal expansion is not enough to explain such a different behavior when printing. For this to be so, the CTE must differ for these materials by several times. nine0003
To try and explain this, I'll add another column to the table that lists the glass transition temperatures:
The glass transition temperature is the temperature above which polymers are in a plastic state. This means that under any force impact on the material, it is deformed plastically. To put it simply, at a temperature above the glass transition temperature, the material behaves like plasticine.
How does glass transition temperature affect internal stresses? And it is very simple, until the material has cooled down to the glass transition temperature, internal stresses do not appear. During cooling, the laid material is deformed plastically up to the glass transition temperature due to shrinkage. Having passed this temperature further, the material can already be deformed only elastically.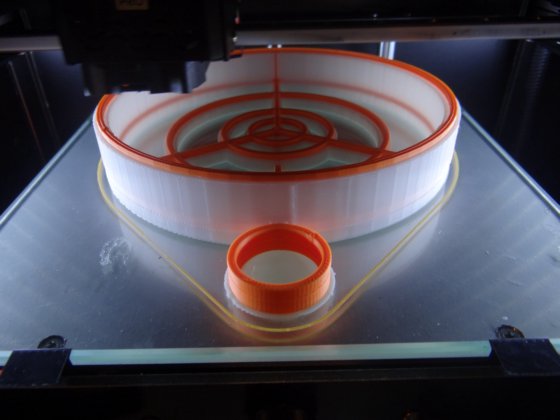 nine0003
It turns out that the main contribution to the appearance of internal stresses is made by the temperature range from room temperature to the glass transition temperature. And here we see a significant difference between ABS and PLA. For PLA this range is 38 degrees and for ABS it is 85 degrees. ABS plastic begins to accumulate internal stresses after cooling down to a temperature of 105°C, and PLA plastic begins to accumulate stresses only from a temperature of 58°C.
This significant difference in glass transition temperature and increased for ABS plastic coefficient of thermal expansion make this material much more capricious in printing compared to PLA.
The table also shows values for PETG. We see that its glass transition temperature is higher than that of PLA, but the CTE is lower. The increased glass transition temperature is partially offset by a reduced CTE, so this plastic is more capricious than PLA, but not as much as ABS.