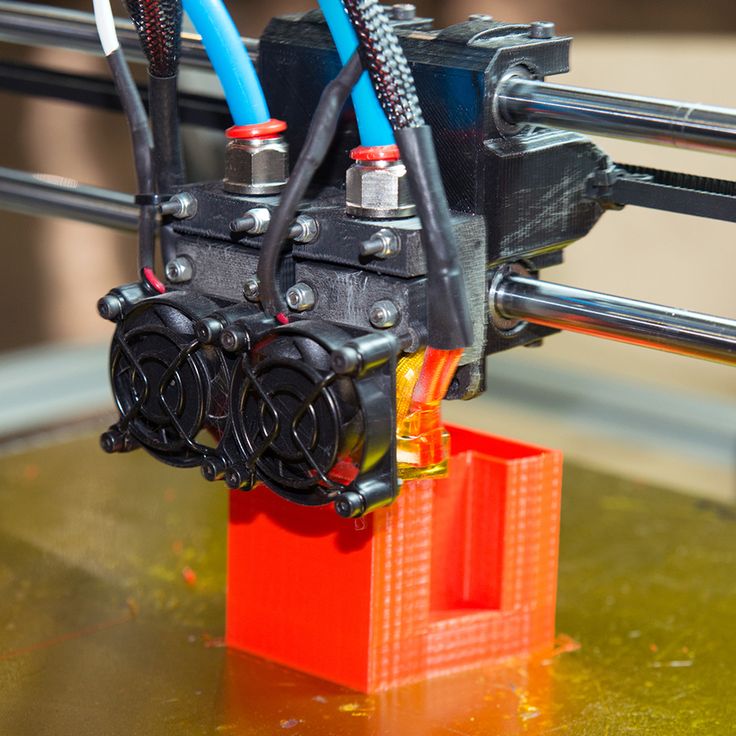
3D printer fine detail
Best 3D Printers for Small Parts & Fine Details
- Author
- Recent Posts
Martin
Martin has a M.Sc. in physics and has gained many years of experience in industry as a lab manager and quality assurance manager. He has now tested dozens of 3D printers and is happy to share the collected experience with each new article.
Latest posts by Martin (see all)
Disclosure: Links marked with * are Affiliate Links. I earn from qualifying purchases if you decide to make a purchase through these links – at no additional cost for you!
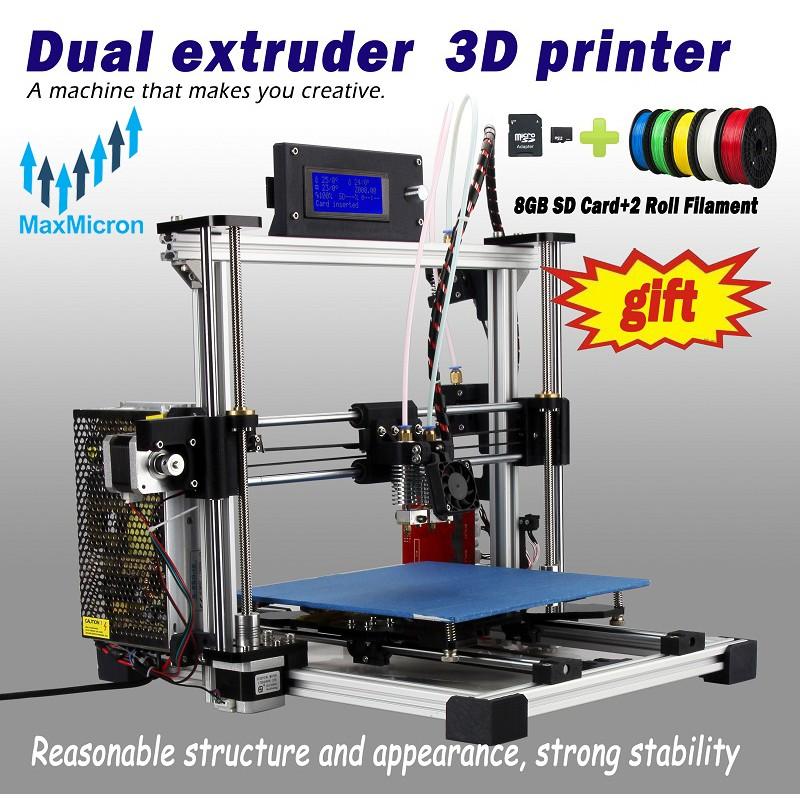
3D printing has not only become popular in recent years, but there are also more and more affordable devices on the market. Spare parts for the household, car and workshop, toy figures and small works of art are created at home at the desk with the help of freely available CAD programs and the 3D printer. So far, so normal. But often the quality is not right.
So-called FDM printers are very widespread. The devices sometimes output quite rough components that are simply unsuitable as spare parts or in model making. SLA/DLP technology promises filigree printing results that are exact and, above all, have a smooth surface. How exact it has to be depends, of course, on your needs.
Resin: For impeccable results and smooth surfaces:
- Beginner: Anycubic Photon*
- Advanced: Formlabs Form 2*
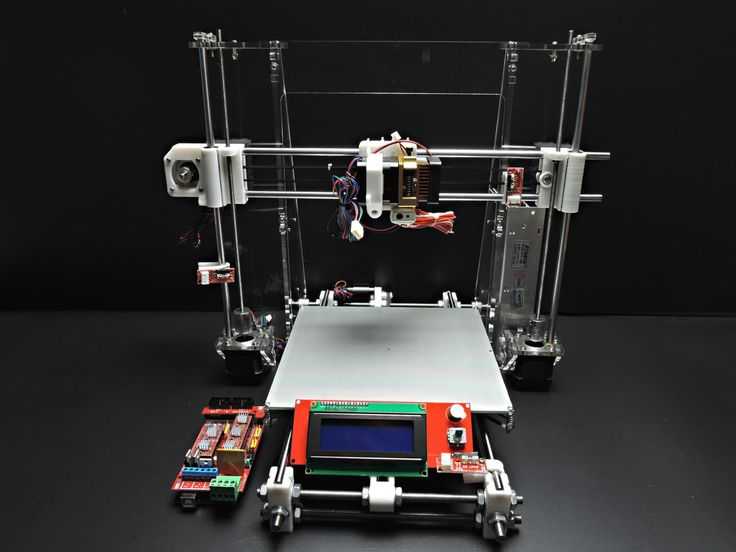
FDM: Simple operation with somewhat rougher surfaces:
- Beginner: Creality Ender 3*
- Advanced: 3DWOX 1*
Table of Contents:
- 1 FDM or SLA/DLP?
- 1.1 FDM works with filament
- 1.2 SLA/DLP creates detailed resin parts
- 1.3 FDM for beginners?
- 2 How detailed do you want it to be? FDM printer for model making
- 2.1 Finer details: SLA printer
- 3 The Best 3D Printers for Small Parts
- 3.
 1 Creality Ender-3
 - 3.2 Anycubic I3 Mega
- 3.3 Sidewinder X1
- 3.4 3DWOX 1
- 3.5 Anycubic Photon
- 3.6 Formlabs Form 2
- 3.
- 4 Create 3D Models: 3D Scanner, Software or Photogrammetry?
- 5 Conclusion: FDM Printers are Often Sufficient
FDM or SLA/DLP?
These are two fundamentally different technologies that not only work with different materials but also build them up in different ways. The extremely different results in terms of detail and fineness of the components can be explained by these differences.
FDM works with filament
PLA, ABS, PETG or Nylon*? These and many other polymers can be processed with 3D printers using FDM technology. FDM stands for Fused Deposition Modeling. This printing process is also sometimes referred to as FFF (Fused Filament Fabrication), which means roughly the same thing.
The 3D printer is fed with a roll of filament-formed plastic, which is melted in the device. The device outputs the melted material in layers, placing layer upon layer on top of each other to build the model. The finer and thinner the layers are dispensed, the smoother the surface will be later and the more details can be worked out.
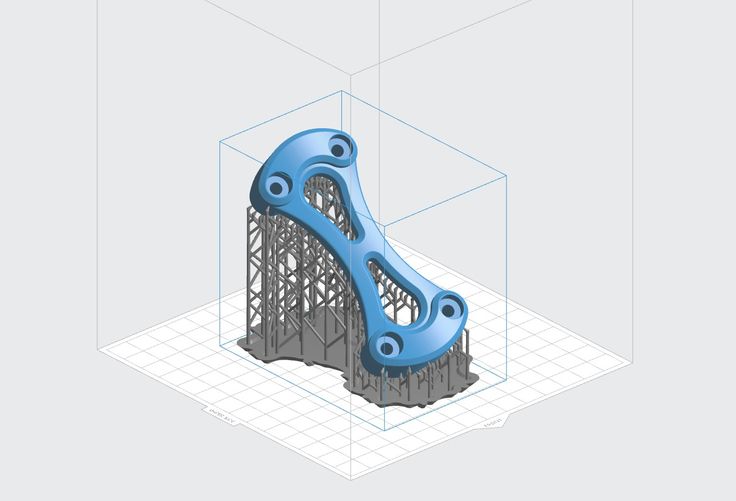
The plastics harden when they slowly cool down. To prevent this from happening too quickly, one sometimes works with a heated printing plate or even a heated, closed printing chamber. Nevertheless, it can happen that the filament pulls threads in empty spaces between two individual parts, edges are not printed cleanly or components even collapse. Supporting structures are also necessary for filigree components and must be considered in the design.
How easily these structures can be removed later depends on the shape of the component – but this also contributes to uneven surfaces. Because wherever a structure has been removed, this leaves traces.
Some plastics are better suited for fine details than others because the plastics liquefy better, cure more cleanly, become harder overall or can be printed in extremely fine layers.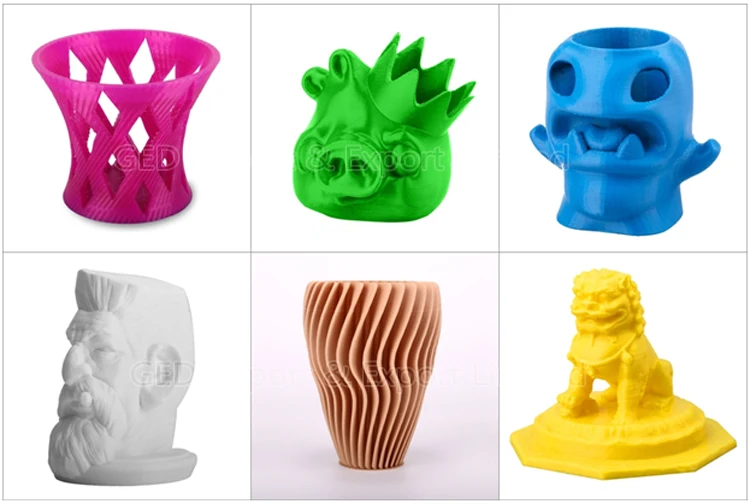 Nevertheless, you can always see the individual layers in the finished model. Some filaments allow subsequent smoothing with acetone or another chemical.
SLA/DLP creates detailed resin parts
SLA technology allows for highly accurate, isotopic, and waterproof models. Stereolithography is the longest-used 3D printing process to date. Here’s how it works: A liquid resin made of photopolymer contains a workpiece that is gradually lowered. A laser moves step by step over the starting material, which hardens the desired shape via exposure. For filigree structures and extremely smooth surfaces, this is the preferred process.
3D printers for home use that work with the SLA process are equipped with a resin tank. You fill the resin, i.e. liquid synthetic resin, from the supply bottle into the tank for each printing process. After printing is complete, you can filter the remaining material and return it to the supply bottle – it is not lost.
Resin printing processes are used for the manufacture of precision-fit hearing aids and dentures as well as for functional components, prototypes and extremely delicate models. Components with high precision are also preferably produced using this process.
FDM for beginners?
There are a few reasons that speak more in favor of a 3D printer with FDM technology for home use. SLA printers, as already mentioned, work with synthetic resin. The material is highly toxic and can enter the body through contact with the skin – this should be avoided at all costs.
Anyone working with synthetic resin must wear disposable chemical-resistant gloves, chemical safety goggles and respiratory protection. The vapors of the synthetic resin must not be inhaled. So the infernal noise generated by the resin printer during work seems almost unimportant. Only when completely cured (i.e. after post-treatment under the UV lamp) is the material no longer toxic.
The second point that speaks against resin printing is the effort. These printers have to be cleaned. The material remaining in the tank must be filtered and filled back into the bottle. Material residues and cleaning agents must be disposed of properly.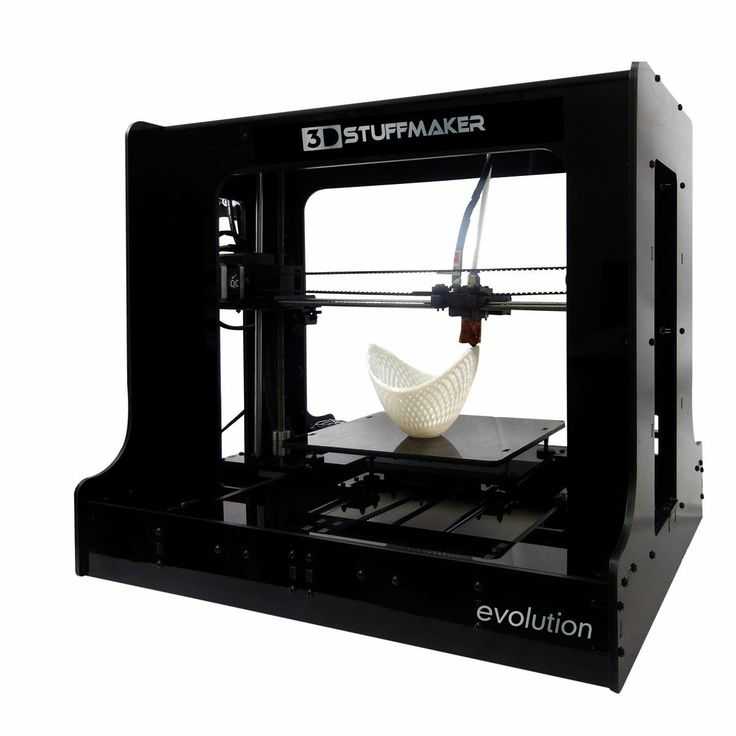 All of this costs time and requires professional expertise.
And a third point speaks against resin printing: Equipment and materials are cost-intensive. Whereas with FDM printing you only have to pay for electricity and filament, with resin printing you also have to pay for protective goggles, respiratory protection, gloves and cleaning agents.
Those who have not been involved with 3D printing for so long will be able to familiarize themselves with the subject more easily with the help of a filament printer. This is because FDM devices are safer to use and much less complicated. Depending on the printer used and the filament selected, the level of detail achieved by an FDM printer is usually sufficient for home use.
How detailed do you want it to be? FDM printer for model making
What at first sounds like a nice gimmick is actually a very important application for 3D printing: Both for RC model making and for model trains, cosplay and similar applications, the individual parts are taken from the 3D printer. Since the requirements in model making are not always the same, it is worth taking a closer look at the subject.
Which applications require which accuracy? And above all, which 3D printers come close to meeting the requirements? You can almost watch the market for 3D printers grow at the moment, with new manufacturers appearing seemingly every day. Many of them come from China, and often the print quality is not convincing. However, some devices have been on the market for so long that they have been extensively tested for one application or another. We rely on this experience here.
In RC model making, it has to be reasonably accurate, but the details of the printed parts are not that fine. The FDM printing process is completely sufficient for RC model making. However, you should try out which filament has the important properties for you and meets your requirements, because the plastics differ greatly.
Beginners usually work with PLA because the filament is forgiving, inexpensive and made from environmentally friendly material.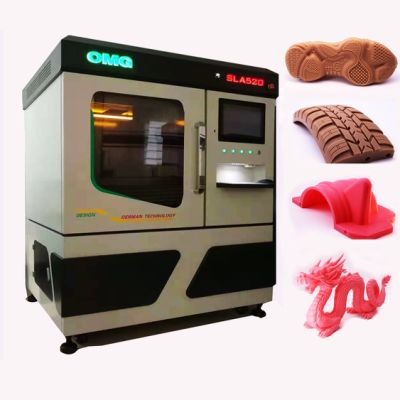 ABS is considered similarly beginner-friendly.
Finer details: SLA printer
For miniatures, dioramas, architectural models and other applications, it simply has to be finer than the FDM printer can manage. Then a resin printer is the right choice. If you don’t want to mess around with the resin yourself, you can use an online printing service.
This is not only available for FDM technology, but also for other printing processes. Especially for people who do not print so often themselves, who have children or pets, this is a sensible alternative to their own resin printer.
The Best 3D Printers for Small Parts
The best tips are of no use if you don’t know what the individual printers really do. From the experience reports of other 3D fans and experienced model builders, you can find out which printers are really good with details, which ones work rather roughly, and above all, how good or bad the operation is.
The majority of people get along very well with FDM printers because for normal use the less expensive and easier to use devices are perfectly sufficient. Those who occasionally want to print finer parts can either familiarize themselves with his/her device and the different plastics (especially the material makes a lot of difference), or use a professional printing service for the few parts. On the other hand, if you really want to print fine details and the smallest parts often or all the time, you are better off with a DLP or SLA technology printer.
The ratio is somewhat unbalanced, which is why more FDM printers are presented than resin printers. By the way, one does not exclude the other: The relevant forums and communities let slip that many people will eventually purchase a DLP printer as a secondary device for the fine parts. Target group: architects: Architectural models in scales from 1:50 to 1:1000 naturally place very high demands on a 3D printer’s attention to detail.
Everyone has to decide for themselves whether having their own device in the office is a good idea. After all, printing costs not only money, but also time and nerves. If you don’t want to invest your valuable working time in working with the printer, you should outsource the creation of models for your customers to a 3D printing service. The devices that come into question in terms of quality and scope (keyword: size of the print space) for architectural models usually cost four- to five-figure sums, are very large and uninteresting for the hobby sector. Therefore, they are not considered in this article.
Creality Ender-3
Creality’s Ender-3* is great for most hobby applications and concept models, and presentation tools. The printer works with filament and comes as a kit, so you get to assemble your device yourself first. The price-performance ratio is excellent.
Ender 3*Check Price at:
Amazon*
3DJake*
The device is extremely affordable and popular. The setup is done quickly, the printer is equipped with a 24 V print bed that heats quickly. It works with a Bowden extruder, but it can also process flexible materials.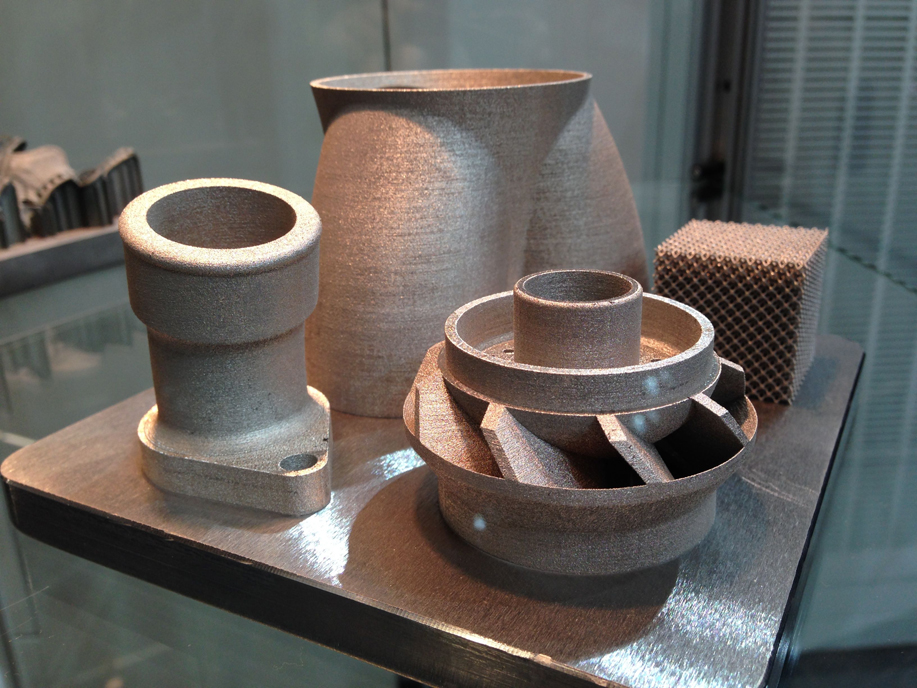
Material change and color change are possible. The project is open source and comes from China. This means that you can modify your 3D printer with the appropriate knowledge and thus achieve an even better print quality. The device works very accurately and, above all, quietly. The details in the print are fine enough for tabletop figures – but small grooves are still visible. What also speaks for the printer: The device is so popular that you can quickly find help in case you encounter a problem.
Anycubic I3 Mega
The I3 Mega from Anycubic* already costs a bit more than the Ender 3, works very well with various plastics and comes as a kit. It is well suited for printing illustrative samples, hobby and concept models, and presentation materials. This printer is also very popular and easy to use. The 3D printer is delivered partially assembled, so you don’t have to do much yourself.
Anycubic i3 Mega*Check Price at:
Amazon*
Pleasant is the touchscreen menu navigation, which is intuitive to use.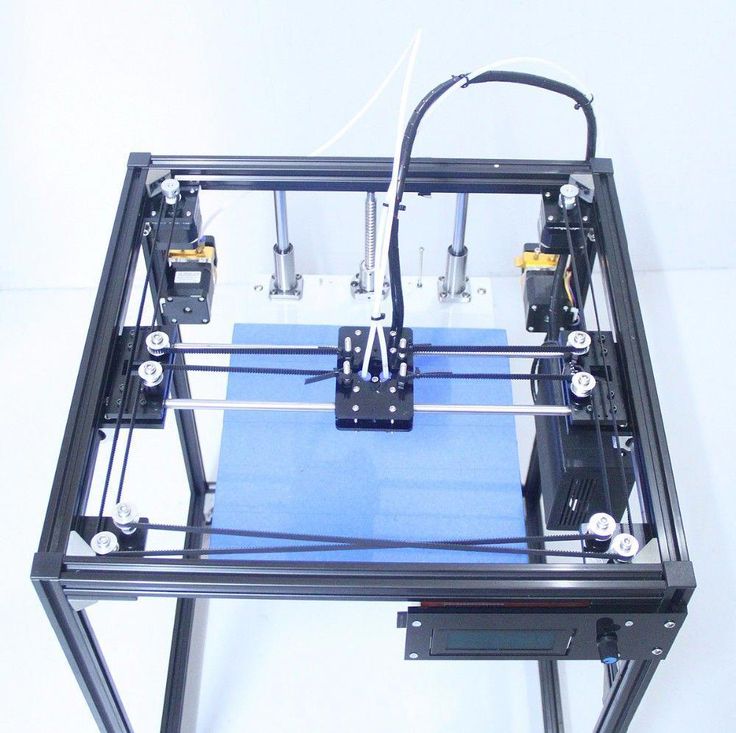 The surface of the build plate on this device carries a special coating from which the models are very easy to detach after building – with excellent adhesion during printing. The device operates quietly and quickly, works reliably, but cannot be used well for flexible materials with Bowden extruders.
In case of problems, the large community of Anycubic I3 Mega fans on the Internet is happy to help, and customer support is also available.
Sidewinder X1
The Sidewinder X1* is also very affordable and suitable for home use, samples, models and presentation tools. The kit is delivered partially assembled, numerous tutorials and instructions for the assembly circulate on the web. The print volume is pleasant: the device allows 300 x 300 x 400 millimeters. The print quality is good, the device is solid and surprisingly well-made.
Artillery Sidewinder X1 V4*Check Price at:
Amazon*
3DJake*
The solid construction also allows high printing speeds. The Sidewinder X1 is equipped with a direct-drive extruder, so flexible materials can also be used well. Since the print bed can deform at higher temperatures, some users retrofit their own build plate made of cast aluminum with a silicon carbide surface.
The touchscreen allows easy operation, and the calibration of the print bed is simple. In addition, the device supports all currently available slicers. The printer is very fast, but this leads to vibrations on the device. This can mean qualitative sacrifices in the printed object, but it does not have to. This printer is also quiet and works extremely detailed and especially clean in the details. It is a good choice for model makers, cosplayers and architects.
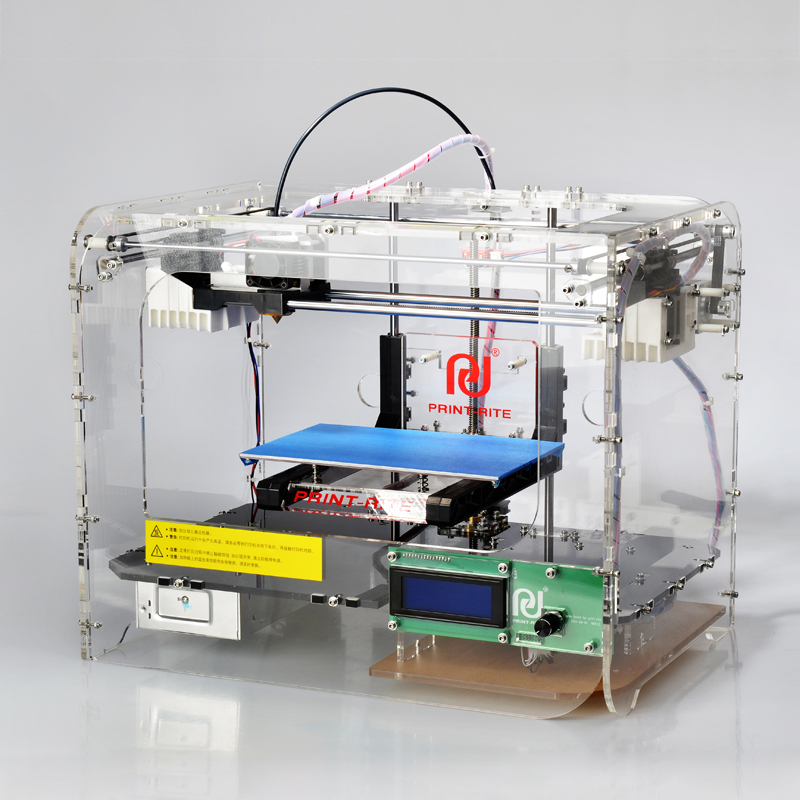
3DWOX 1
Sindoh is the name of the manufacturer of the 3DWOX 1*, another FDM printer. The device is well suited for hobby and home applications, and can print hobby models with just as much attention to detail as objects for research and education. However, the device is not as inexpensive as the previously presented printers.
Check Price at:
Amazon*
The device comes from South Korea and is praised by 3D printing fans as well as professionals for its excellent print quality. Unlike the models presented here, the 3D printer has a closed printing chamber that filters exhaust air with a HEPA filter. A live webcam sits in the print chamber and helps monitor all operations with the associated app. There is even a function for nozzle cleaning while still printing. The material selection is unlimited, open filament can be used just like the conventional cartridges.
The touch display makes for easy operation, but Sindoh uses its own slicer. The device is relatively quiet in operation, excellently manufactured and, above all, stable. For detailed, fine print objects, this 3D printer is a good choice.
Anycubic Photon
With a price comparable to the Ender 3, the Anycubic Photon* is one of the most affordable models available. The resin printer is just as well suited for detailed small objects, for concept models and art objects as it is for presentation tools and hobby applications. The desktop device uses an LCD as a light source and is therefore so much cheaper than SLA printers. Nevertheless, the print results are comparable in terms of fineness and accuracy for details.
Check Price at:
Amazon*
3DJake*
The Photon from Anycubic is almost beginner-friendly in terms of operation, and most importantly, it comes as a ready-made device. So nothing more needs to be set up. The printer achieves resolutions of up to 0.047 millimeters in X and Y, and up to 0.025 millimeters in Z. This is much finer than any FDM printer would allow. However, the print speed is not that great, the device is very slow – normal for DLP printers.
The printing speed always depends on the layer thickness. If you print small parts in series, the printer is faster than an FDM printer, because a complete layer is always exposed at once. So you pack your model (if it fits in size) ten times next to each other, and the printer does all ten models on one layer at the same time. The printer is popular, and the user community is just as happy to help with problems as customer support.
Minus points: The build space for the Anycubic Photon is relatively small, working with resin places high demands on safety and hygiene, and the models have to be reworked. Nothing works here without gloves, safety goggles and respiratory protection. After building, the models must be cleaned with isopropyl alcohol and cured under UV light.
Formlabs Form 2
Things get even more professional with the Form 2 from Formlabs*. The 3D printer is a good choice for illustrative samples, concept models, art objects, presentation aids and even templates and molds. However, it is not as cost-effective as the Photon – in fact, it costs several times as much.
Formlabs*Check Price at:
Amazon*
The SLA printer produces the objects from the synthetic resin by means of a laser and delivers good and even very good results. The objects are extremely delicate, accurate and smooth. At the same time, the printer also has a stable design, works reliably and is easy to use. Not so pleasant is the small print volume, and the implications of resin printing along with the safety requirements are also unpleasant.
In addition, Formlabs’ Form 2 does not allow the use of third-party materials. The resin from other suppliers is certainly usable, but the print quality suffers extremely. The customer support is positively highlighted.
Create 3D Models: 3D Scanner, Software or Photogrammetry?
The 3D models for what is printed have to come from somewhere. Numerous models that other users have created are circulating on the Internet on the relevant platforms. If you don’t want to use this, you can build the model yourself digitally using a freely available program such as Tinkercad, Onshape or Fusion 360. Tinkercad is considered a solution for beginners and can be used intuitively; other CAD programs are more difficult to use.
But there is also the option of printing from “real” models. 3D scanners are available, simple devices are available in the three-digit dollar range. The sky’s the limit, and you’ll find scanners on the market for five-figure sums. Before printing, several steps are necessary. The original has to be scanned and then processed by software. This is not easy and does not always lead to the desired result. An alternative for non-reflective surfaces is photogrammetry.
It is important to know that the 3D printer can only produce clean details and very delicate, small parts if the template is correct – so a lot depends on the CAD software and the operator.
Conclusion: FDM Printers are Often Sufficient
Of course, there is no one best 3D printer for small parts and fine details. Depending on how delicate you want the print to be, how much money you want to invest and what previous knowledge you have, different devices will come into question for you.
Disclosure: This website is the property of Martin Lütkemeyer and is operated by Martin Lütkemeyer. Martin Lütkemeyer is a member of the Amazon Services LLC and other Affiliate Programs. These are affiliate advertising programs designed to enable websites to earn advertising revenue through advertising and linking to Amazon.com and others. Links marked with * are affiliate links.
Which 3D printers print the most detailed parts?
3D printing fine details on a part, model or object can be achieved by using a printer with the ability to print at a low layer resolution. We’re not talking about microscale and nanoscale 3D printing, but we are talking about the ability to print at a layer height down to 25 micron. At this resolution, ultra-precise features can be printed.
Layer resolution isn’t the be all and end all specification when it comes to detail, however, because some 3D printers actually perform worse at extremely low resolutions than they do at a standard layer resolution. Sometimes, the best way to get a detailed but accurate part is to compromise and settle for 100 micron resolution.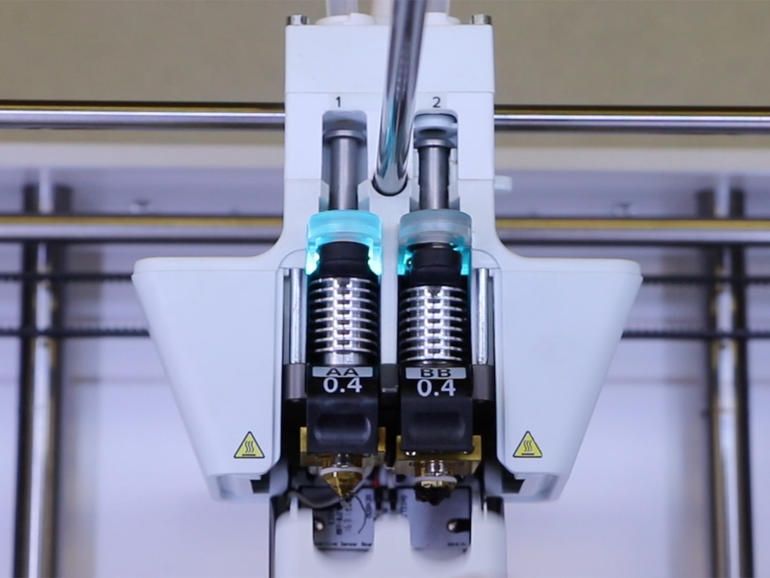 At this resolution, parts will still appear stunning to the human eye with plenty of detail packed in.
If you are interested in buying a 3D printer that can print extremely detailed parts or you are interested in which 3D printers print the most detailed parts, below we have listed what we believe to be the best of the best right now in the desktop class.
Formlabs Form 2The Formlabs Form 2 is a stereolithography (SLA) 3D printer. It 3D prints models from a tray of UV-curing resin down to a resolution of 25 microns, and its performance at this resolution is exceptional. Having used this printer extensively at its lowest resolution setting, we would honestly say that it is more accurate than any FFF desktop 3D printer available. Even parts, models and objects printed at a resolution of 50 or 100 micron look amazing.
The Form 2 is ideal for use within industries like dentistry and jewellery. To give you an example, Dr. Michael Scherer uses his Form 2 to fabricate surgical guides.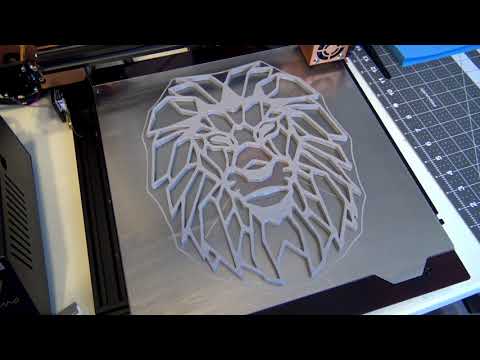 Dr. Scherer scans his patient’s mouth, creates an STL file, sends that file to print and then lets his Form 2 3D printer create a detailed model for him. He also uses oral scan data to accurately 3D print retainers and aligners and crowns and bridges for his patients.
The Blueprinter M3 is a Selective Heat Sintering (SHS) 3D printer (a similar process to SLS and a cost-effective alternative). The M3 has the benefit of being able to print parts without the need for support structure. This means you can create parts, objects and models that you perhaps couldn’t with a stereolithography or fused filament fabrication 3D printer. The layer resolution goes down to 100 microns with the M3, yet complex details and ultra-fine details really come through the thermoplastic powder, so looking beyond the official resolution and spec sheet is recommended.
We have dubbed the Blueprinter’s printing process as ‘free form’ because it’s seriously impressive how it prints parts without any support structure whatsoever. You really can print complex shapes that can’t be printed on other 3D printers. We also like the fact that this printer is environmentally-friendly (the thermoplastic powder can be reused, so there’s no waste) and we love the fact that this printer is so easy to use. You simply load STL files into the web-based Blueprinter software.
Zortrax Inventure
The Zortrax Inventure is a Layer Plastic Deposition (LPD) 3D printer. It can print at a layer resolution of 90-400 microns. This printer is a good compromise if you don’t have the budget for a Blueprinter because it boasts a dissolvable support system, allowing you to 3D print parts that you perhaps couldn’t with a FFF or SLA 3D printer. The Inventure would be ideal for printing complex parts that would ordinarily involve difficult removal of support structure.
The Inventure achieves this system by way of two extruder heads; one dedicated to the primary filament (Zortrax Z-ULTRAT Plus) and one dedicated to printing PVA, which is water soluble and non-toxic. With ULTRAT-T Plus, you can print complex parts and even moving mechanisms in one piece.
Ultimaker 2+The Ultimaker 2+ is a fused filament fabrication (FFF) 3D printer. It boasts the best layer resolution on our list, with the ability to print at a layer resolution of 20 microns. New for 2016, this printer also boasts a swappable nozzle system giving you a high level of control over print detail and print speed. You can switch between 0.25, 0.4, 0.6 and 0.8 mm nozzles quickly and easily.
The Ultimaker 2+ also offers greater consistency than its predecessor, the Ultimaker 2, thanks to a revised airflow system with new fan caps that distribute air more evenly over the nozzle for smoother prints. Our tests have shown that the Ultimaker 2+ prints fine details extremely well at a layer resolution of 100 microns. Its performance tails off somewhat below this, however, and so for the best results we recommend a 100 micron resolution setting, with this being the best compromise.
Transparent 3D Printing Guide
Stereolithography (SLA) 3D printing can produce transparent objects that, after some post-processing, become optically transparent.
Formlabs' latest stereolithographic 3D printer, the Form 3, improves model transparency by using an elastic resin reservoir that reduces forces on the model, resulting in smoother, more transparent parts. 3D printing on a Form 3 in Clear Resin is a great way to produce parts that require light transmission and, with the right post-processing techniques, transparency. nine0003
The following processing methods can be used to 3D print transparent parts for a variety of purposes, from optical devices to light guides and liquid elements. Techniques range from quick solutions to obtain sufficient transparency to specialized techniques for creating optically transparent parts.
Clear and transparent 3D models are ideal for creating transparent prototyping elements, showing internal cavities and details, making LED housings or windows. Formlabs and our customers have used Clear Resin to create an optically clear 100% 3D printed camera lens, Times Square Fresnel lens tiles, light guides, prisms, millifluidic devices, and more. nine0003
Formlabs application engineer Amos Dudley designed and 3D printed a lens for a fully 3D printed camera.
Curious to see with your own eyes what a transparent SLA 3D printed part looks like? We will send a free transparent 3D printing sample directly to your office.
Request a Free Sample
We have tested several post-processing methods for 3D printed Clear Resin parts. In this article, we will cover hand sanding, spray clear coating and resin impregnation. Each treatment option requires a different amount of effort, depending on the required degree of transparency and surface quality. nine0003
Application of : Hand sanding and polishing can be effective on simple shaped models with few fine details, but is not suitable for complex shaped models. With this method, it is very difficult to achieve complete optical transparency.
Hand sanding will require you to sand with very fine grit sandpaper, but with some effort you can sand and polish the parts to the transparency level of a magnifying glass. However, it is very difficult to completely remove all the layer lines with manual processing - if you turn the part at a slight angle to the light, you can notice micro-scratches. nine0003
Instruction : Use sandpaper to smooth the surface, then polish the part with acrylic cleaner and a microfiber cloth.
With approximately 3000 grit sandpaper, transparent SLA 3D printed parts become glossy and very smooth to the touch.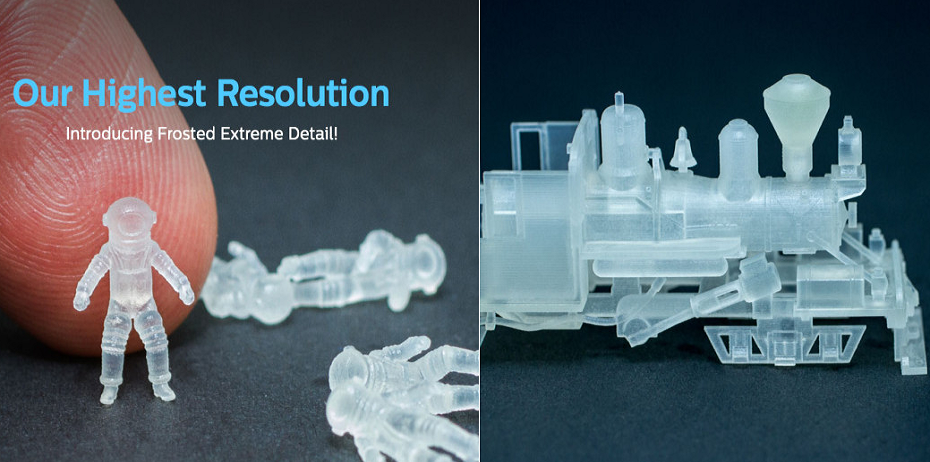 After sanding with 12.000 grit, they reflect light. Try different sandpapers and abrasive sheets from 400 to 12,000 grit in 200 increments. Before moving on to the next grit step, slowly and carefully clean the lens and remove scratches from the previous level of sanding. nine0003
Our support site offers a simple step-by-step manual sanding guide that includes an acrylic spray finish.
If all you need is translucency, mineral oil will suffice to create a smooth surface and hide light spots.
We have tested various polishing methods for transparent 3D models, from hand sanding and spray coating to resin impregnation. nine0012
Application of : Spray coating is a quick and easy way to improve the transparency of parts without significantly reducing detail. The method is effective for all types of models, since it is possible to spray the coating on complex-shaped parts, which can be difficult to grind and polish.
Clearcoat application helps to hide layer lines and protect parts from UV exposure which can cause yellowing and unintended final cure. If you require a smooth, glass-like surface, hand sand and polish before coating; the more thorough the sanding before applying the clear coat, the better the clearness. This extra step is great for post-processed prototypes that look like completely transparent plastic, such as packaging, bottles, and microfluidic devices. nine0003
Instruction : A variety of aerosols can be used to apply a clear coat, from inexpensive sprays to products that require a separate room and tools.
- General purpose clear aerosol paints: : The selection ranges from good, very inexpensive options like Rustoleum Painter's Touch 2X to affordable high quality aerosols like Spray Max 2k Clear Glamor.
- Automotive sprays : Products such as Lesonal Universal Clear, a high solids acrylic urethane clear coat, give a very good glossy effect.
 They are designed for air drying and stoving and require a spray gun and free space to spray. A base coat must be applied before applying Lesonal Universal Clear and similar aerosols.
Coat a clean, dry model already rinsed in isopropyl alcohol (IPA). Do not finalize the model before spraying as this may cause yellowing. Air dry the model. Once it is completely dry, apply two to three coats of spray in a dust-free environment. nine0003
For a fee, a coating such as Lesonal Universal Clear can be applied at a workshop. In most cases, bodyshops use a volatile solvent such as naphtha to clean and prepare the surface of the model prior to spraying.
For the Times Square installation, Window to the Heart, Formlabs and Aranda/Lasch spray-coated the tiles with Lesonal Universal Clear in an auto body shop.
Application of : This method is best suited for cases where very high transparency of parts is required and can only be applied to flat or nearly flat surfaces such as lenses or "windows" into the interior of the part.
Resin immersion produces very smooth details with crisp and sharp surface reflections.
The method can be used to increase the smoothness of parts printed with other SLA materials, although it may reduce detail. nine0003
Instruction : Apply Clear Resin to the part using a syringe or by dipping the part into the resin, as desired. The viscous polymer will fill in the delaminations and scratches present on the part, forming a completely smooth surface.
The resin layer should be as thin as possible while still eliminating layer lines. Remove all bubbles with a syringe. Completely cure the part using the appropriate parameters, then repeat the process on the other side, both dipping and final curing. nine0003
Lens subjected to a 3-step polymer immersion procedure, final result on the left.
The polymer immersion process slightly changes the focal length of the lenses. Formlabs Applications Engineer Amos Dudley designed and 3D printed a lens tester to create a fully 3D printed camera.
With the Form 3 Stereolithographic 3D Printer, you can create crisp and fully transparent 3D models at an affordable price with minimal post-processing. nine0003
Check out our white paper, , for a detailed overview of SLA ecosystems and a step-by-step 3D printing workflow.
Would you like to see the resulting quality with your own eyes? Request a free transparent model sample.
Request a sample printed in Clear Resin
Using a 3D printer in layout
3D printing
Subscribe to the author
Subscribe
Don't want
23
Article applies to printers:
WANHAO Duplicator 5S MINI Good afternoon, today I want to talk about the process of creating a model of a small cottage. In my opinion, the layout allows a deeper analysis of the volume of the structure, making it possible to examine it from any angle. And also to imagine the movement inside the object, to feel its space more fully. This is important when demonstrating the project to the customer.
This layout is not commercial, it was made for myself as a test sample. nine0003
It was decided to make the model collapsible so that each floor could be viewed separately. Layout scale 1:100. The long side is about 17 cm. The model from Archicad was adapted for printing, the detailing was simplified. Each level was printed on a Wanhao 5S mini and then spray-painted with acrylic paint. The model was printed with 20% infill. Furniture is partially arranged in the layout, but the result of its printing is not yet perfect. We managed to print sofas, armchairs, fireplaces turned out well, but there is still work to be done with cabinets and open kitchen furniture. Experience has shown that it is better not to make hanging planes, since the printer cannot make long bridges without supports. nine0003
The windows in this layout were made collapsible, consisting of 2 parts, which are installed from the outside and from the inside with a snap. They were printed at 98% of the actual size of the model, to be installed in empty openings, from gray plastic on an Aurora printer. The height of the windows is 2 cm.
I can't say that the result is completely satisfied yet, we will experiment further, there are almost no problems when printing large elements, but we still need to work on fine detailing. :)
Follow the author
Subscribe
Don't want
23
Article comments
More interesting articles
eleven
Follow the author
Follow
Don't want
Introduction
So, good day to all! This is my second post...
Read more
eleven nine0003
Follow author
Follow
Don't want
Dear friends!
The eve of the winter holidays is a great occasion to thank.