3D printing classes toronto
3D Printing - Digital Media Experience Lab
The Digital Media Experience Lab provides all TMU students with access to 3D printing at no cost.As soon as you have completed 3D Printing Certification Levels 1 and 2, you will be able to book the 3D printers at the DME.
DME 3D Printing Certification requires that you:
- Watch the 3D Printing Certification 1 video and take notes (23 minutes).
- Pass the 3D Printing Certification 1 quiz (5 minutes)
- Watch the 3D Printing Certification 2 video and take notes (20 minutes).
- Book and pass the in-person 3D Printing Certification 2 test (30-45 minutes).
After you have met the above requirements, you will then be ready to use the 3D printers at the DME. You’ll then receive a link to book the printers (pro tip: bookmark it for later!)
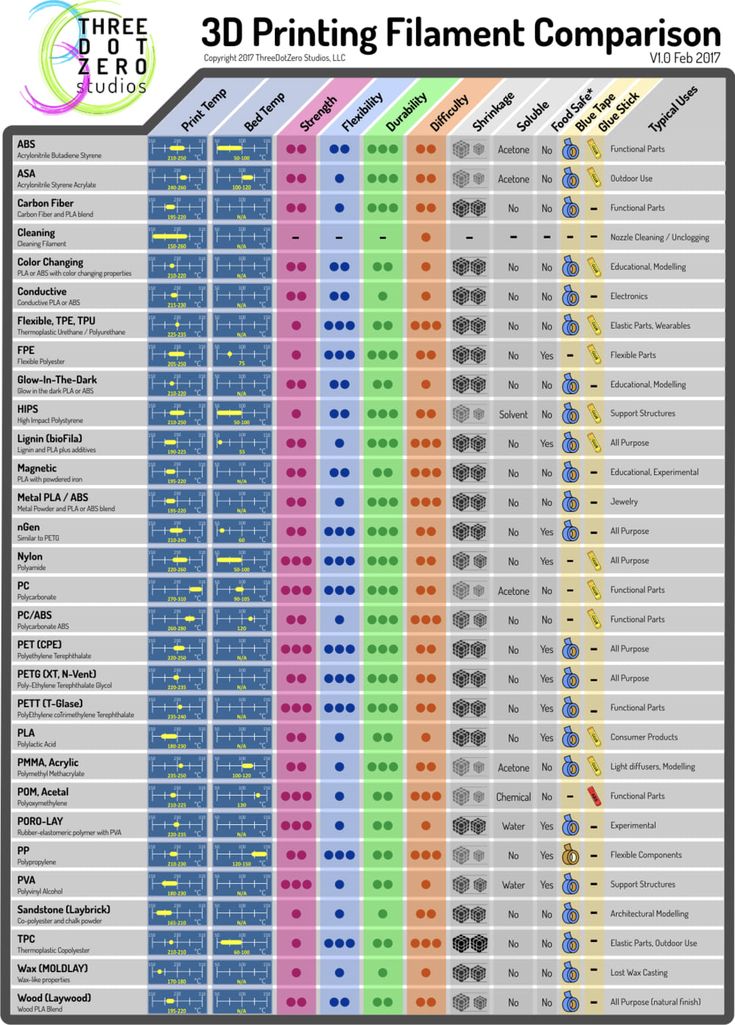
3D Printing FAQsHow much does it cost to print at the DME? TMU students are not charged any fees to 3D print at the DME. As long as you fall within the rolling credit guidelines below, the TMU Libraries will subsidize all PLA filament costs for our users.
How long can I print for? The maximum amount of time a single print can take is 6 hours (hard limit), and you can submit up to 12 hours of prints for approval at a time. The DME runs on a rolling credit system of 12 hours. For example: If you have a booking for 4 hours, you have 8 hours left of time credit. Once you complete the 4 hour print, your time credit will be back to 12 hours.
How long will my print take? This depends on many factors. However, you will learn how to get a print time estimate by following the training in Certifications 1 and 2.
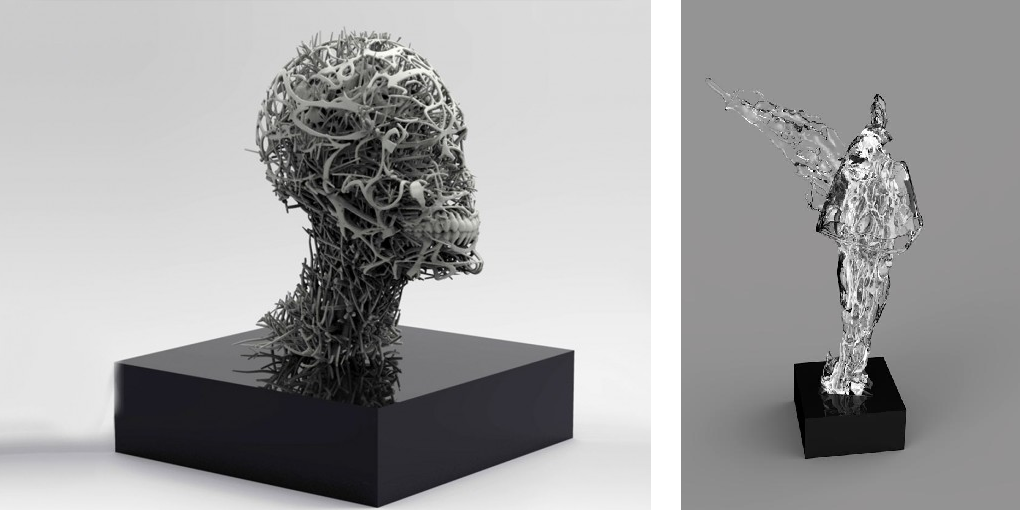
What am I allowed to print? You can print anything you would like, with the exception of phone cases, cannabis paraphernalia, weapons (of any kind), and anything deemed offensive at the discretion of the DME staff.
Do I have to stay the whole time? You only need to stay for the first 20 minutes of your print.
Can I choose the colour? Filament colours rotate at random, and availability of any colour is not guaranteed. Check in with a DME advisor to see what colours are available before you book a print at the DME.
Can I bring my own filament? Although this may change in the future, we generally cannot print in other filament types. At present, the DME only prints PLA filament, either in black or white. Students are only permitted to use these pre-loaded filaments at our printing stations.
Are there any exceptions to the time limit? Unfortunately we have a hard limit of 6 hours per print.
Can I print multiple things at the same time? The DME accepts one print at a time. You may only print one object on the bed at a time. However, you may make multiple copies of this item, up to the 12 hour rolling credit.
What happens if I miss my 3D printing booking? If you are more than 15 minutes late for your booking, your booking will be automatically canceled and the time will be available for another student to book. We ask that students cancel their bookings beforehand if they cannot make it.
Additional questions can be directed to James Loney, DME Coordinator.
5 Best 3D Printing Courses, Training & Classes in Toronto [2023]
3D & Animation courses
Contents
Description
3D printing (possibly including 3D modeling) is intended to provide the means to promote the educational use of 3D modeling as well as 3D printing.
Why this course?
These will help you, among other things, to explore the possibilities of 3D modeling as well as 3D printing.
To make it easier for you to find your best 3D Printing training in Toronto, a global team of 10+ experts has compiled this list of 5 Best 3D Printing Training, Courses, classes, certifications, tutorials and programs in Toronto for 2022.
5 Best 3D Printing Courses in Toronto for 2022
3D Printing Fundamentals (George Brown College, Toronto)This training is an introduction to the world of 3D printing, a field that has grown in popularity over the years and is still growing, as more than 40% of products used worldwide have 3D printing at some point in their process.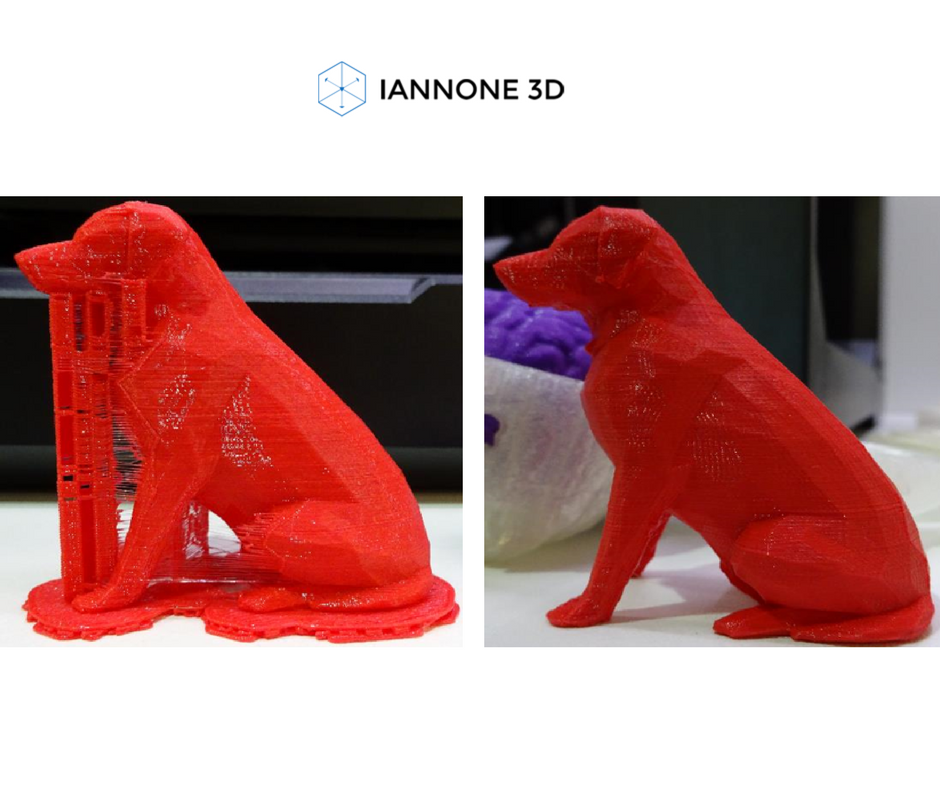 Every day, technology is much more accessible and manufacturing industries around the world are using this type of printing.
In this course, you will acquire the knowledge necessary to develop your skills to learn the basics of 3D printing so that you can use the machine independently and solve any problems you may encounter in terms of mechanics and/or software.
Level: Beginner
You can Sign Up Here
3D Printing Training in Toronto (NobleProg, Toronto)
Getting into 3D printing can be a real adventure! Technologies are varied, 3D printers are numerous, 3D software is sometimes very technical, it is not easy for a novice to find his way around.
In this onsite or online training, you will learn, in the most simplified way, how to use a 3D printer as well as how to design your own proper 3D models.
Duration: 7 hours
Level: Beginner
You can Sign Up Here
3D Printing and Part Design (Centennial College, Toronto)
In this 3D Printing and part design program, you will find three very informative courses. Each of them will help you master the field of 3d printing.
By the end of these courses, you will know the fundamentals as well as the advanced skills of 3D printing, be able to create 3 Dimensional models of any mechanical component and assembly, know Solidwork software essentials, upgrade your industrial skills, and much more.
Level: Beginner, Intermediate, Advanced
You can Sign Up Here
3D Printing at Idea Lab, Part2 (Face to Face) (Humber Libraries, Toronto)
In this workshop, you will learn as a beginner the use of 3D printers, identify the basic settings, be guided throughout the process so that you can use the machine independently, and be able to solve common errors that come into account when using a 3D printer.
Duration: 60 minutes
Level: Beginner
You can Sign Up Here
Additive Manufacturing and 3D Printing (Mohawk College, Toronto)
In this program, you will learn from experts, throughout five courses, what you need to be able to master manufacturing and 3d printing.
Designed for industry professionals and manufacturers, this is the perfect training to excel in this field and become yourself a master by the end of this program.
Level: Advanced
You can Sign Up Here
Usually at the end of such courses
you’ll know how to:
- Explain what a 3D printer is
- Using orthonormal markers
- Using Tinkercad to model an object in 3D
- Convert a file to the 3D printer format
The Bottom Line
These best 3D Printing design Training, Courses, classes, certifications, tutorials, and programs in Toronto for 2022 training offer you several training possibilities depending on your level and your objectives. Do not hesitate to contact them by filling out an information request form to obtain more information.
Show More
3D Printing Lessons. Printing thin-walled models from 3Dtool / Habr
Good day!
As always, our clients help us with ideas for articles. Today we will print an egg. On its example, we will test the built-in function Slic3r , which for some reason few people mention.
The egg needs to be printed not simple, but durable, with minimal plastic consumption and quickly.
It will later be suspended from the ceiling by a hook at the top. The bottom of the egg will be the front part, up with the hook - rough, because it will hang high and the upper part will not be visible. It is possible to print an entire egg loop down with supports at the bottom, but printing and removing the supports will take time.
For this task, we chose the Hercules 2018 3D printer - this is a very versatile 3D printer, as it can print all types of plastic and has a large working chamber.
Therefore, we cut the egg into 2 parts, at the same time add a loop at the top. After printing, we will glue the top with dichloroethane.
Now you need to work out the print mode. The part with the eyelet is printed without problems on the standard mode with a 0. 5 nozzle, so we will select the mode for the large “half”. The complexity of printing lies in the fact that: firstly, if you print an egg without filling, at some point the walls will have nothing to catch on in the upper part, and they will start to fall down and holes will turn out. Secondly, to improve the quality of the surface, the height of the layer in the upper part of the egg, where the angle of inclination of the perimeters begins to decrease rapidly, will need to be reduced.
Let's start with the usual settings without using a tambourine.
Since the model should turn out with even walls without waves from accelerations, we will not print at exorbitant speeds. Speed no more than 50 mm/s.
Method #1 - PLA, 0.5 nozzle, 2 perimeters, 10% infill, layer height 0.2mm-0.1mm. Speed 50mm/s, extrusion width on infill reduced to 0.35mm as infill in this case is only used to support the walls at the top where the perimeters are printed at an angle. Printing time 2h 26m, plastic volume 22.7 cm3.
Method #2 - 0.5 nozzle, 2 perimeters, Only Infill where needed 10%… Speed 50mm/s, infill extrusion width reduced to 0.35mm, layer height 0.2mm-0.1mm . Printing time 1h 31m, plastic volume 14.2 cm3.
Method #3 - 0.5 nozzle, 2 perimeters, no fill, using the built-in slic3r (Slic3r Prusa Edition) function Ensure vertical shell thickness (slic3r automatically adds support perimeters in places where walls can fall down), layer height 0.2mm-0.1mm, speed 50mm/s. Print time 58 minutes, plastic volume 9.4 cm3.
Table for understanding the relationship between print time and plastic volume.
In terms of print time and plastic volume, the third option suits us. We try.
Option Ensure vertical shell thickness managed to support perimeters in this case, but bumps appeared on the walls.
In addition, closer to the top, the speed in manual mode was reduced by 20% due to the fact that the angle of inclination of the perimeter printing began to decrease and the walls at a speed of 50mm/s did not have time to harden and bent.
It turns out that in order to get even walls in places where the perimeters are printed at an angle and a flat top, we need to reduce the speed so that the plastic has time to cool, and add infill so that there are no gaps on the inclined surfaces. We will not reduce the speed and add filling for the entire model, this is already too much. In order to slow down the speed on certain layers and add padding where needed, we'll use Slic3r's built-in modifier feature.
A modifier is a surface that is used to apply settings to certain parts of the model. I will write more about how to use modifiers in the next article.
In the meantime... double-click on our model, the Settings window appears. Press Load modifier… and load the pre-modeled surface (we have a cylinder).
Where the model intersects with the modifier, the main settings of the model will be overridden by the settings of the modifier. To set these settings, you need to select the modifier (cylinder) in the window or in the list and click on the "+".
In our case, we reduce the printing speed of the perimeters, add infill and print one layer of fill before filling (Solid Infill every ...) so that the infill has something to hold on to. In order to determine on which layer to print a solid fill, we first generate the code, look at the number of the layer from which the filling starts printing in RepetierHost, and set the previous layer, we have 285. We reduce the printing speed of bridges so that the solid fill layer is printed "in air" without interruption.
We put it in print.
Print time 1 hour 10 minutes, plastic volume 9.8 cm3. Due to the slowdown in printing speed, the plastic changed color a little, but the layers turned out to be smoother than in the previous version, the walls without bumps, the top without gaps.
Of all the options in terms of time, volume of plastic spent and print quality, the last method, using a modifier, came up to us.
All of the above are just methods that we think are useful to you. How to print depends on the complexity of the part and the desired result.
Catalog of 3D printers: https://3dtool.ru/category/3d-printery/
Don't forget to subscribe to our YouTube channel
(New videos are released every week).
3D printing lessons. Saving plastic when printing non-functional models from 3Dtool / Habr
Good day to you, 3Dtool company! This time we decided to figure out how to save plastic when printing non-functional models, i.e. models whose strength characteristics do not matter.
When printing, for example, souvenirs, layouts or interior items, we can save time and plastic by reducing the percentage of internal filling or wall thickness. But there are cases when there is a specific task - to print a part with the minimum possible amount of plastic. For example, printing master models for casting. These are the parts for which only the outer shell is needed, and the less plastic is inside, the easier it will be to burn it out of the mold. Those who are in the subject will understand, and those who are not - soon we will publish an article about the process of casting from master models from PLA.
For example, we took the model from here.
And we need to print it with minimum wall thickness and minimum infill.
3D printer for experiments - Hercules Strong.
The first thing that comes to mind is to put 1 perimeter and 0% infill. And there are rare cases where it works. With us, as always, everything is more difficult. There are places in the model (marked in red in the figure) where the angle of inclination of the wall does not allow printing it in one perimeter - the thread will simply fall down.
So let's go from simple to complex. To begin with, we will make 3 perimeters and try to print only the “shell” of the model, but what if it works out.
Nozzle 0.5 mm, layer height 0.2 mm.
40 minutes and 6.9 cu. see
Sending to print.
As expected, the threads sagged in difficult places and holes appeared in the walls of the model.
It seems impossible to do without an internal filling that will keep the perimeter threads from sagging. But we need, as we remember, to minimize the amount of plastic. Therefore, we will use the Only infill where needed option. This option allows you to build infill only where it is necessary to support overhanging walls at a certain angle. Slic3r itself analyzes the geometry and determines where it needs to line up the infill, so this option does not always solve the problem.
But we'll try anyway. Set up Slic3r and count.
44 minutes and 7.4 cc of plastic. Let's try to print.
There are fewer defects this time, but they are there again. Therefore, in this case, this method did not work.
Thinking further.
The only option left is to use padding. In this case, setting the extrusion width will help us save money. Since we only need filling so that the sheer walls have something to hold on to and not fall down, the quality and strength of the filling does not matter. Therefore, we take and unscrew it to a reasonable minimum. For example, 0.15 mm
As we remember from previous publications, when changing the extrusion width, Slic3r changes the density of the infill mesh, so don't forget to check this parameter!
Here are the settings we got:
Nozzle 0.5 mm, layer height 0.2 mm, infill 5%, extrusion width on infill 0.15 mm. Since the filling grid is very dense, we will reduce the number of perimeters to 2. This will save both printing time and plastic.
Print time just over an hour, 6.3 cm3 of plastic! We print.
The model was printed at the end of the working day, so for the sake of curiosity, we broke it down to see what it was all about.
The photo shows that the filling is printed with a thin web, extrusion breaks in some places. But nevertheless, this thin mesh is enough to hold the overhanging walls.
The model was printed without defects in 2 perimeters. We did not save time, but the main task - to print a master model for casting with a minimum of plastic - was successfully completed.