3D printing arduino projects
7 of the Coolest 3D Printed Arduino Projects
You can make some really cool things with an Arduino. And you can make some really cool things with a 3D printer. What do you get when you use them both? Some extremely cool things!
Here are seven projects that you can 3D print and power with an Arduino (and, as a bonus, a 3D printer that you can make with an Arduino).
With 3D printing, you can take your robot builds to the next level. Take, for example, this quadruped robot that looks like something from a sci-fi movie.
It’s built from 38 3D printed parts and is controlled using an old PlayStation controller. Each leg is equipped with three servos, giving it three degrees of movement: forward and back, up and down, and a bend at the joint. What this all means is that this four-legged robot can move in any direction.
With most of the hard coding work done for you, it’s just a matter of assembling the robot and uploading the correct files. But of course, this is easier said than done—luckily, the project guide (linked above) has everything that you need to build this awesome creation.
3D printing Arduino projects have pushed electronic hobby makers to make even more amazing designs and this cyborg prosthetic hand is one of them.
The 3D-printed arm has quite a nice design. On the outside, it looks like prosthetic arms that we’ve seen in real life, while on the inside its hollow body allows room for electronics. The Arduino Uno powers this creation and following the assembly of the 3D printed parts, you just need to upload the code from the project page.
Other parts you will need to include are some servos, wires, and nylon string. The latter is used in this case to move the fingers. It’s these kinds of projects that might just make a difference in the world!
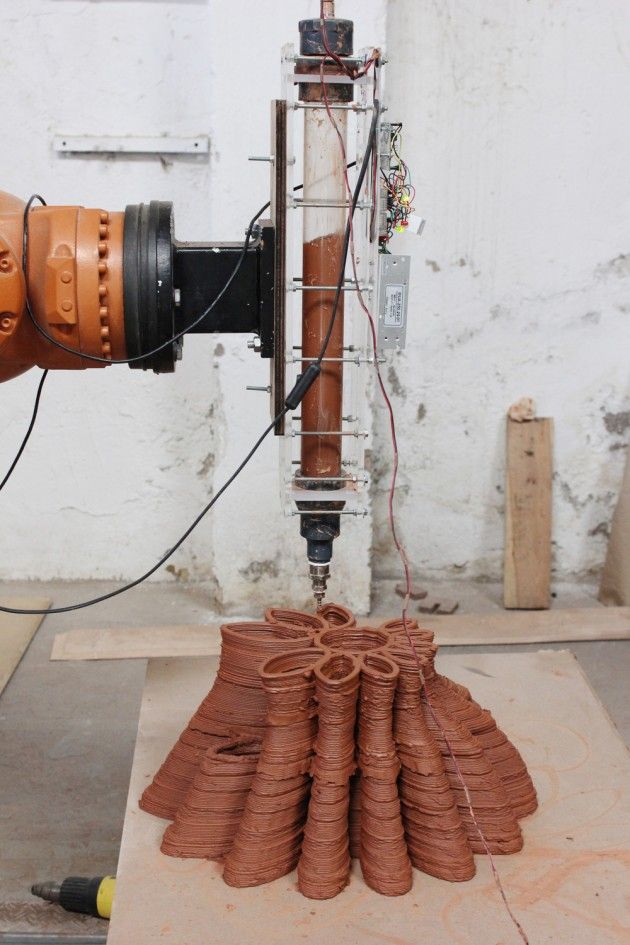
Inspired by the human body, this creator set out to design the ultimate 3D printed muscle and bones set. When slotted together, these artificial muscles and supporting bone structures can move with incredible flexibility. Because it's designed to be modular too, you can create whatever robot you can imagine out of these parts!
Each 3D printed muscle is shaped like the omega symbol and can easily slot together with identical shapes, supported by 3D printed bone structures. Running through all these shapes are thin plastic tubes, essentially creating a pneumatic system that can be controlled with a microcontroller.
Included in the project guide is a tutorial for an air pressure controller. Use this alongside your Arduino to build a robot with up to 90 degrees of rotation. With a little creativity, it's a project that has a lot of possibilities!
Two of the most popular things in the geek world right now are 3D printing and drones. Why not combine the two to make a 3D-printed quadcopter drone?
By using an Arduino Nano, several affordable PCPs, a NRF24 for radio transmission, alongside motors, propellers, and a number of other parts, you can build your own little quadcopter. You might have some of the parts you need hanging around if you have an Arduino starter kit, but the rest can be bought online with ease.
You'll need to do a lot of wiring to get everything attached to the frame, but creator Yue Beifong will walk you through it with pretty clear explanations of what you need to do.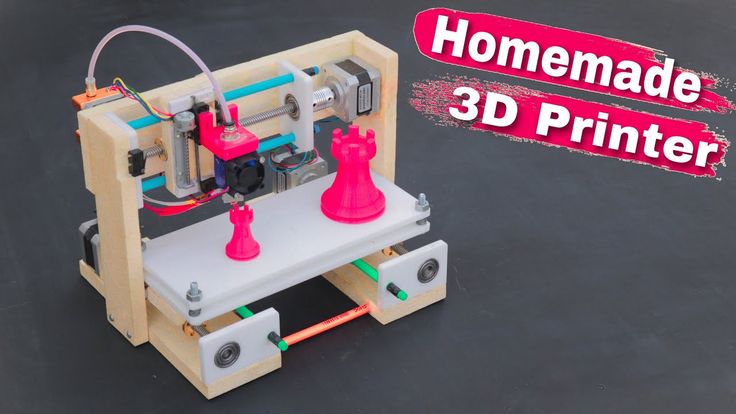 The project includes the 3D printer files, so you'll just need a printer to get everything to work.
For this project, you'll need more parts than the previous two, including a bunch of LEDs, capacitors, an oscillator, transistors, and an AC mains switch and connector.
The result, however, is one of the coolest lamps that we have seen.
Once you've collected the various parts, you'll need to use some basic electronics skills to wire up the 3D printed double-helix to a rotating motor, like one from a microwave. The full guide (linked above) takes you through each step in detail. When you're done, you’ll have a rotating strand of glowing DNA!
A word of caution: because this one involves mains power, be extra careful when you're working on it!
Pip-Boy from Fallout 4 has been a popular DIY build ever since fans got a first look at it!
It requires quite a few unique parts, including a gyroscope, power pack, a capacitive display with driver board, flashlight, pressure sensor, methane sensor, and a multi-part 3D printed case.
You'll need to make a custom I/O board to get this project working, but in the detailed guide (linked above), the steps for making it are very clear. If you are after a later version of the Pip-Boy, you can also have a look at this YouTube video which covers a beautiful 3D printed design with great painted details.
It's a pretty involved project, but it absolutely can't be beaten as a Halloween costume, cosplay accessory, or conversation piece!
If you're trying to build your own personal makerspace, a CNC mill is a great addition. The project page notes that it's accurate enough to cut and drill circuit boards, so it should be good for any milling project you want to take on. It requires a large number of 3D printed parts, so you may want to consider using a printing service, but it wouldn't be too difficult to print your own.
You'll also need quite a large selection of parts, including a lot of fasteners, some bearings, a relay module, and DC connector, some metal parts for the surface, and an Arduino to run everything.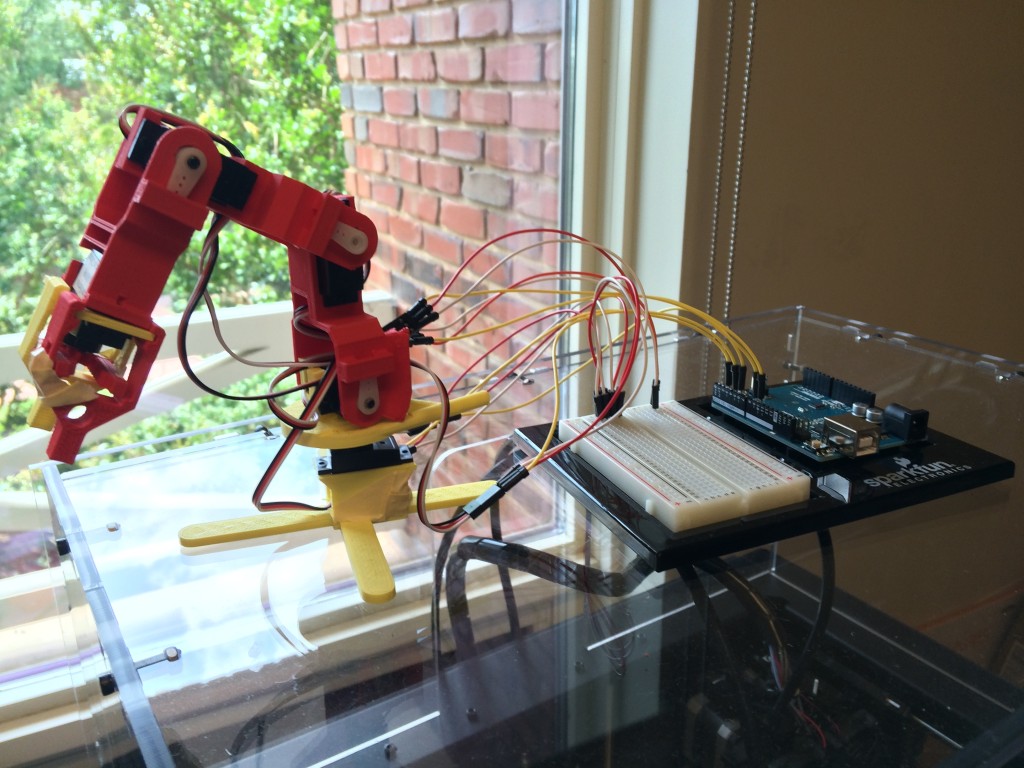 It's quite a project, but then again, having your own CNC mill is quite a handy thing!
Don't Have a 3D Printer? Build One!
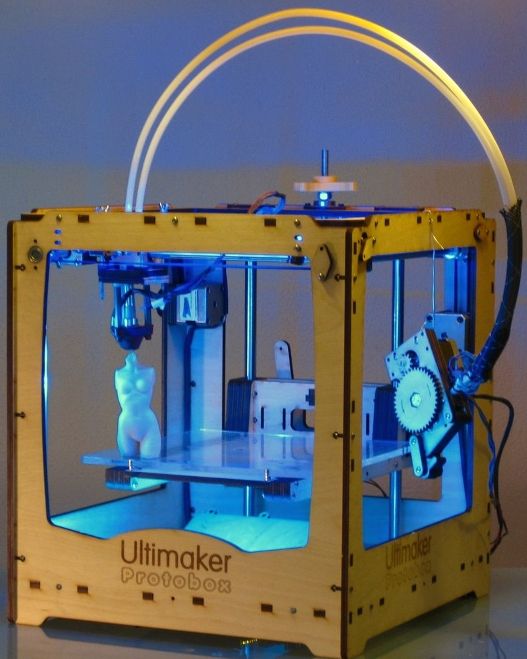
If you don't have a 3D printer, there are still a few options for getting the 3D printed parts you'll need for these projects. You could borrow a 3D printer, use one at a local makerspace, or use a 3D printing service. Alternatively, you can even build an Arduino-powered 3D printer for $60!
The EWaste 3D Printer is a micro printer and might not be big enough to print the parts for some of the larger projects above. But it's a really great home project that is affordable and environmentally conscious, as it uses mostly recycled computer parts.
You'll need a couple of old CD or DVD drives, a floppy disk drive, a small stepper motor, a power supply, an extruder, and a few extras, but overall it’s a surprisingly simple project.
You'll need to do quite a bit of calibrating and basic electronics work, but the end product is fantastically functional for what it's made out of.
Build Your Next Arduino Project with 3D Printing
Combining 3D printing and Arduino is a no-brainer, and the projects above should give you a good idea of the limitless potential that it provides. Whether you have your own 3D printer, you use someone else's, or you use a 3D printing service, you can build your own project from start to finish.
35+ Awesome Arduino Projects with DIY Video Instructions
Welcome to my collection of Arduino projects. As a maker, techie and mechatronics engineer I’ve been using Arduino for more then 8 years. Arduino is an incredibly versatile microcontroller with limitless possibilities for developing electronics applications and prototypes.
We can use Arduino for simple tasks such as controlling LEDs and DC motors, to controlling real CNC machines and robots. That’s right, in the following list I will share my Arduino experience with you. You will find Arduino projects for beginners and more advanced projects for Arduino enthusiast.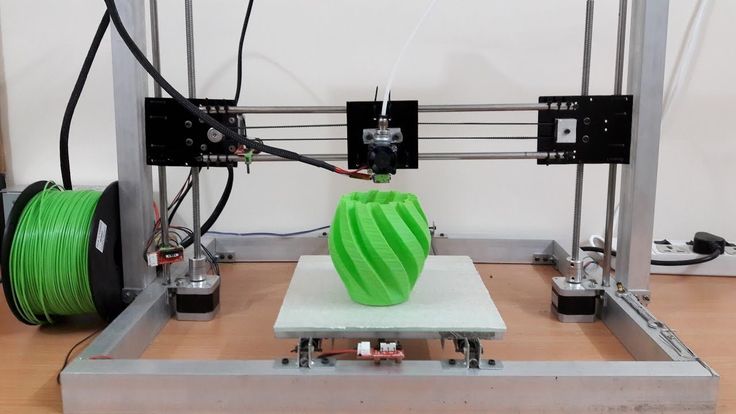
Even if you are just getting started with Arduino, you don’t have to worry about that. Each of the following DIY Arduino projects is covered with detailed step by step tutorial on how to do it yourself and includes circuit schematics, source codes and videos.
Using the comments section below, you can also suggest your ideas, as well as discuss anything related to these Arduino projects. I will continuously update this article with all new stuff that I make. Last update: February 2022.
Robotic Arduino Projects
As an Arduino enthusiast, I found making robots with Arduino to be most fun for me. There is so much to learn from them as a maker and an engineer. So, here are my Arduino projects related to robotics so you can learn too.
Arduino Robot Arm
When it comes to automated manufacturing, robot arms play big role with so many applications. They are often used for welding, assembling, packing, painting, pick and place tasks and much more. This Arduino project is actually a robotic arm made out of 3D printed parts, servo motors joints and controlled using an Arduino Nano. What’s even cooler we can control the robot arm wirelessly via a smartphone and a custom build Android application.
The robot arm has 5 degrees of freedom, so we need 5 servo motors, plus an additional servo for the gripper mechanism. For the communication with the smartphone we use the HC-05 Bluetooth module.
Difficulty: Intermediate
Mecanum Wheels Robot
The following project is one of the coolest Arduino project in this list. It’s an Arduino robot car which instead of normal wheels, it employs omnidirectional wheels or mecanum wheels which enable to robot to move in any direction.
The wheels are attached on four stepper motors which are individually control. By rotating the wheels in certain pattern, they exert diagonal forces due the diagonally positioned rollers on the circumference of the wheels, and so they can move in any direction.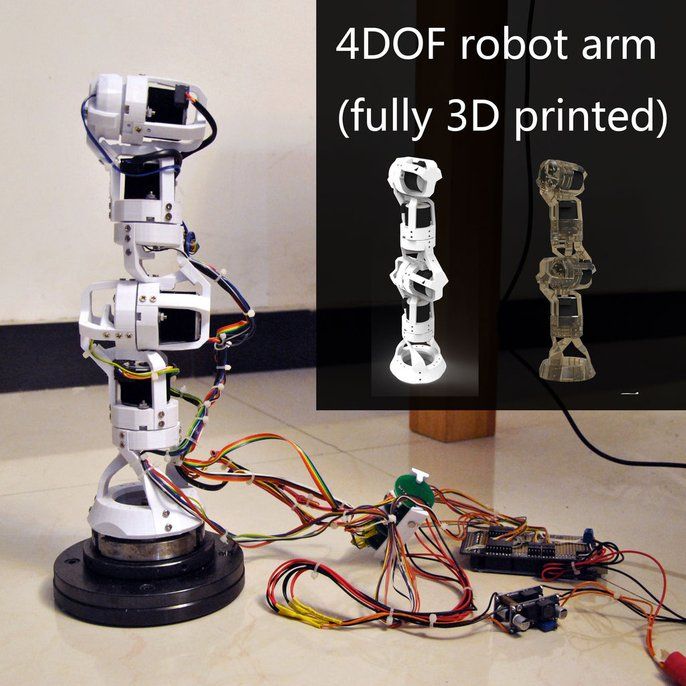 The robot car can be remotely controlled either vie Bluetooth communication and an custom build Android application. Also, we can control it using an DIY RC transmitter with the help of the NRF24L01 transceiver module.
Difficulty: Advanced
Arduino Robot Arm and Mecanum Wheels Platform Automatic Operation
Here’s an upgraded version of the previous mecanum wheels robot project. On top of the platform I added the DIY Arduino Robot Arm project mentioned above and now they can work together.
As the robot uses stepper motors for the wheels and servo motors for the robot arm, we can precisely control them using the custom build Android application. What’s even cooler, we can record the movements of the robot and then the robot can automatically repeat them.
Of course, as for any of my Arduino projects, the Arduino code, the custom build Android application, as well as the 3D model files can be found and downloaded from the particular project article.
Difficulty: Advanced
See also: What are the Best Arduino Starter Kits in 2022?
SCARA Robot – 3D Printed
SCARA robot or Selective Compliance Articulated Robot Arm is the most common and suitable option, when it comes to pick and place and small assembly applications, which require moving a part from point A to point B.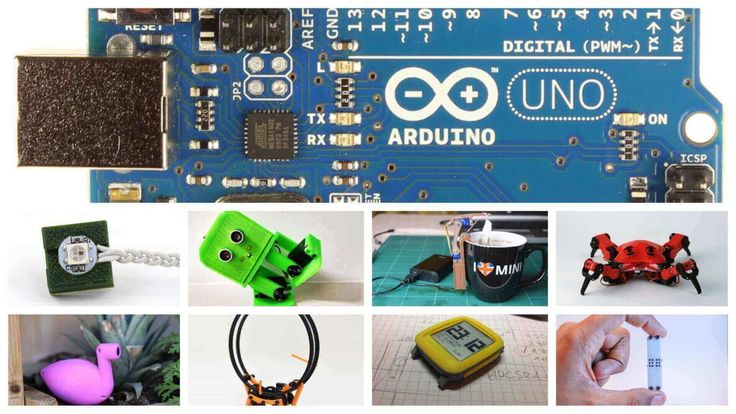
This Arduino based SCARA robot is a step-up big compared to the previous projects in every aspect. It has a better and more robust design with precisely controlled stepper motors and custom build GUI for controlling it.
As a controller it has an Arduino UNO board, combined with a CNC shield and four A4988 stepper drivers. It has 4 DOF, driven by four NEMA 17 stepper motors.
Difficulty: Advanced
Laser Engraving Robot
This and extension of the previous project or I converted my 3D Printed SCARA robot to work as a laser engraver robot. Instead of the gripper mechanism, here we are using a Laser module for engraving.
For controlling the robot we are using an Arduino Mega board in combination with a RAMPs board. This a popular combination used for 3D printing and it can be used for laser engraving machines as well. As for a firmware, we are using the Marlin 3D Printer firmware and the Repetier control software.
Difficulty: Advanced
DIY Mars Perseverance Rover Replica
Inspired by the NASA Mars 2020 mission and the successful landing of the Mars Perseverance Rover on the plant Mars, I build a 3D printed functional replica of it.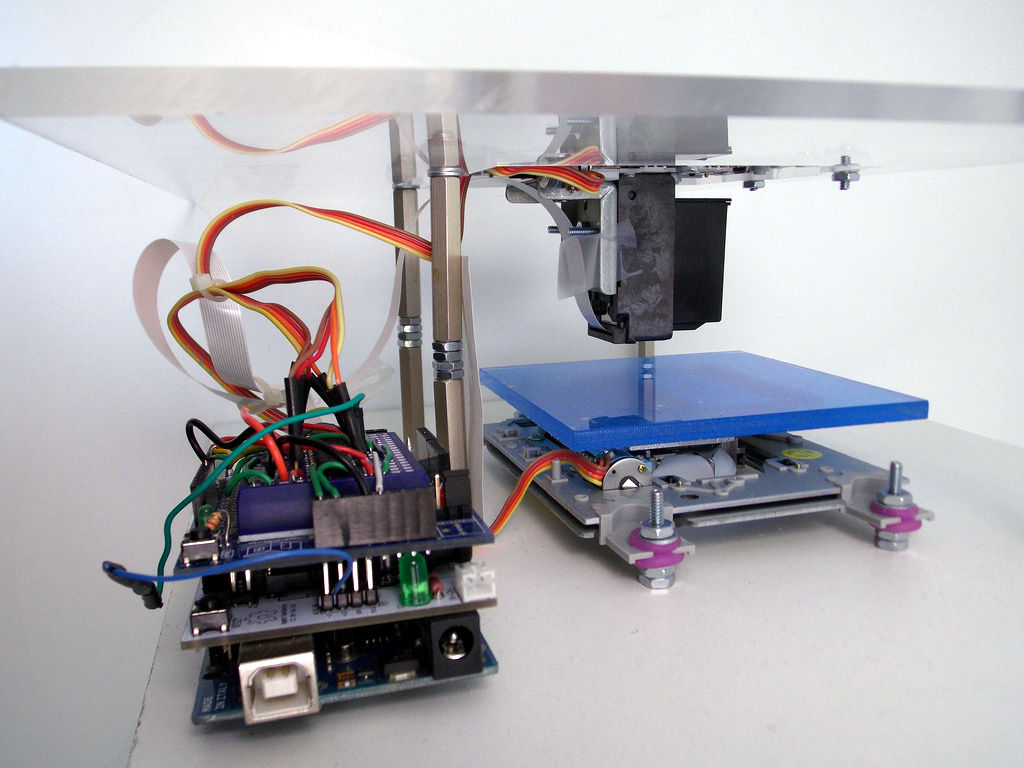 I designed this DIY 3D Printed Mars Rover in a way that it can be easily recreated by following the instructions in the tutorial.
The rover features a rocker-bogie suspension which allows the rover to run smoothly on uneven terrain, just like the real rover. It has six independently controlled DC motors for driving and four servos for steering, and it’s controlled using an Arduino MEGA board. There’s also an FPV camera located in the cameras unit of the rover which can by used for controlling the rover remotely. The remote control is done with the help of a cheap commercial RC transmitter and receiver.
Difficulty: Advanced
Arduino Hexapod Robot
Making biologically inspired robots is very popular among engineering students. This Arduino project is all about it, we will build a hexapod robot which features six legs, a tail or abdomen, a head, antennas, mandibles and even functional eyes. All of this makes the robot look like an ant.
Each leg have three joints, and for each joint we need a servo motor. That means that we need total of 18 servos for this project, and additionally 3 servos for the head movements and 1 servo for the tail. The brain of the robot is an Arduino Mega. We need MEGA because it’s the only board that can control more than 12 servos using the Servo library.
I also designed a custom PCB which acts as an Arduino Mega Shield so we can easily attach all servo connects. We can control the ant robot via Bluetooth and a smartphone, or radio communication. The ant also has built-in ultrasonic sensor in the head. With that it can detect objects in front, and it can even strike if the object is present if front of it.
Difficulty: Advanced
CNC Machines Arduino Projects
The following projects show how capable Arduino is. A CNC or Computer Numerical Control is an automated control of machines, like mills, lathes, plasma cutters, 3D printers and etc. So, using the Arduino as a controller we are actually able to build any of these CNC machines.
DIY Laser Engraving CNC Machine
For the project my goal was to build the simplest CNC machine with minimum parts possible and by using just a single power tool. On top of that, I wanted to use common materials or avoid 3D printers so I used MDF board for building the base frame.
The CNC machine is composed of just two linear rails which are secured to a base frame made of 8mm MDF board. For controlling it we are using an Arduino UNO board in combination with a CNC shield and two DRV8825 stepper drivers. As a tool it has an laser module attached so this machine is actually a CNC laser engraver.
Difficulty: Intermediate
DIY Pen Plotter with Automatic Tool Changer
A CNC drawing machine or a pen plotter based with automatic tool changer. An awesome way to draw anything in any color.
The idea for this Arduino project was similar to the previous one, to build a CNC machine using minimum parts possible. Here I used 3D several printed parts, and just two MGN15H linear rails for the main construction of the machine.
Difficulty: Intermediate
Arduino CNC Foam Cutting Machine
Building your own CNC machine might seem like a big challenge for many of you, but the following Arduino CNC Machine project shows that building a CNC machine is actually not that hard.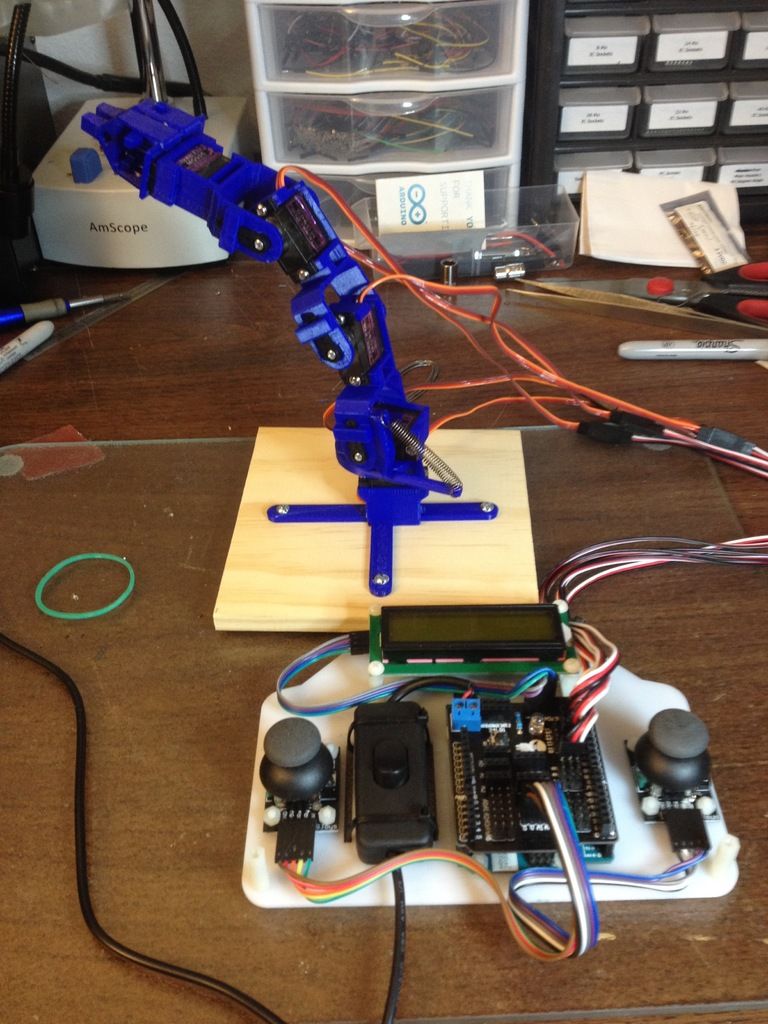
This CNC machine is actually a foam cutting machine. Instead of bits or lasers, the main tool of this CNC machine is a hot wire. It’s a special type of resistance wire, which gets really hot when current passes through it.
The hot wire melts the foam when passing through, and so we can precisely make any shape out the styrofoam.
Difficulty: Advanced
Arduino Wire Bending Machine
Controlling stepper motors using Arduino is without a doubt one of most satisfying thing for an Arduino enthusiast. There so many machines based on this motors, like CNC machines, 3D printers, various automation machines etc. This Arduino project is all about that. It describes how you can build such a machine. It’s a machine for bending wire, where with the help of stepper motors we can precisely bend wire and make various shapes and forms out of it.
The machine features three stepper motors. With the first stepper we feed the wire to the bending mechanism. Here we have another stepper motor used for the bending the wire at the right angle.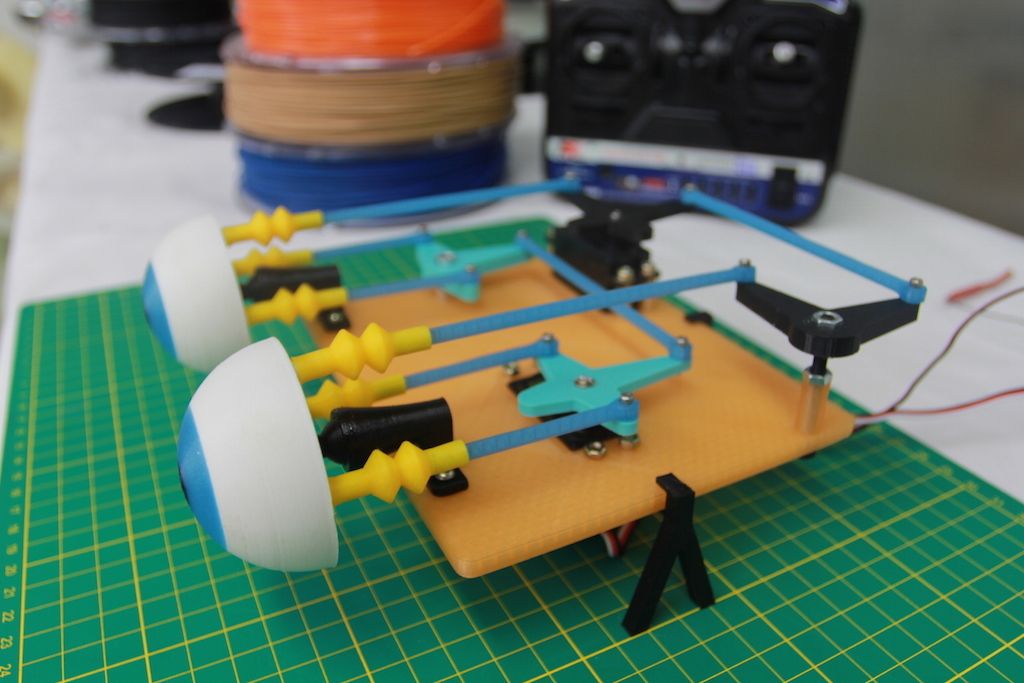 There’s also another stepper, for controlling the Z-axis. This stepper enables the machine to create three dimensional shapes. With this project we can also see how useful 3D printers are for Arduino projects of this type or for prototyping.
Difficulty: Advanced
Radio Control (RC) Arduino Projects
Controlling Arduino projects using radio devices is quite useful and fun at the same time. I have made several radio based projects.
DIY Arduino based RC Transmitter
Many Arduino projects that I make require wireless control and that’s why I build this Arduino based wireless radio controller. With this RC transmitter I can wirelessly control pretty much with a range up to 700m in open space. It features 14 channels, 6 of which are analog and 8 digital inputs.
The brain of this Arduino project is an Arduino Pro Mini board which is the smallest Arduino board. The radio communication is based on the NRF24L01 module, it has 2 joysticks, 2 potentiometers and 4 momentary push buttons.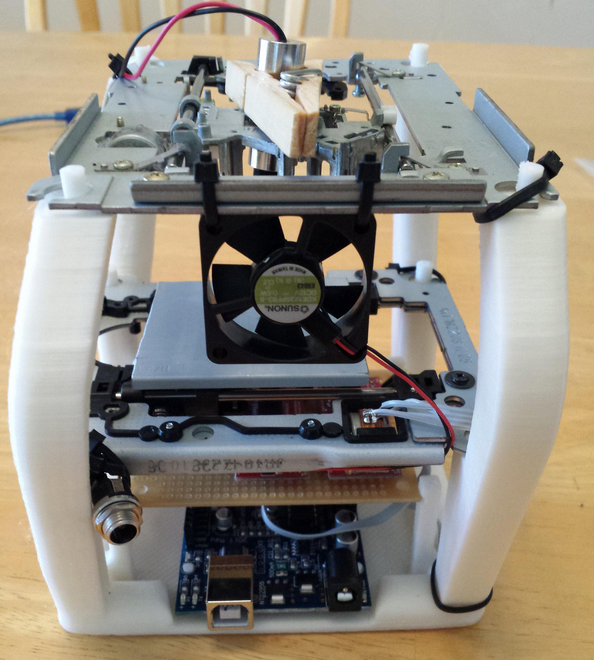 Also an accelerometer and gyro module which can be used for controlling things with just moving around or tilting the controller. I mounted all electronic components on a custom design PCB and made a cover out of transparent acrylic.
Difficulty: Intermediate
DIY Arduino RC Receiver for RC Models and Arduino Projects
This is a follow up project of the above one. Just like DIY RC Transmitter, this DIY Arduino RC Receiver can be used for many application. We can easily pair the two projects together and control anything wirelessly. Among others, I made an example of controlling a commercial RC car model using these DIY transmitter and receiver.
The custom PCB that I made uses the same NRF24L01 module for the radio communication. The controller is an Arduino Pro Mini and it features input/ output 9 channels.
Difficulty: Intermediate
DIY Arduino based RC Hovercraft
The following Arduino project is a great example of utilizing the DIY RC transmitter from above. It’s a 3D printed hovercraft which I entirely designed on my own, and of course, the 3D printing files are available for downloading. The hovercraft uses two brushless motors, one for creating an air cushion for the lift, and the other for generating thrust or moving forward.
For the wireless control we are using the NRF24L01 module, which accepts the data coming from the RC transmitter. Then using the Arduino and two ESCs (Electronic Speed Controler) we control the BLDC motors speed. On the back side of the hovercraft there is also a servo for controlling the rudders, or for controlling the steering. I must say that driving this DIY hovercraft is so fun.
Difficulty: Advanced
Arduino RC Airplane
Anyone who had a chance of playing around with some RC airplanes knows how cool and fun it is. It’s even cooler and more satisfying if you build the RC airplane on your own. The following project steps the satisfaction up even further, because here I will show you how to build your own RC airplane which is 100% DIY build. Also, we have a 100% DIY radio control system based on the Arduino.
The airplane is entirely made out of Styrofoam and what’s cooler, the shapes are made with the help of my DIY Arduino CNC Foam Cutting Machine, a project already mention above. The radio communication is based on the NRF24L01 transceiver modules. For that purpose, I used my DIY Arduino RC Transmitter and DIY Arduino RC Receiver.
Difficulty: Advanced
Arduino Robot Car Wireless Control
This Arduino project is an extension to the previous one, and here we will learn how to wirelessly control the Arduino robot car.
You can choose one of the three different methods of wireless control explained in this project, or that’s the HC-05 Blueooth module, the NRF24L01 transceiver module and the HC-12 long range wireless module. Additionally you can learn how to make your own Android app for controlling the Arduino robot car.
Difficulty: Intermediate
Arduino Wireless Weather Station
This Arduino project idea is rather practical because it features indoor and outdoor temperature and humidity measurement.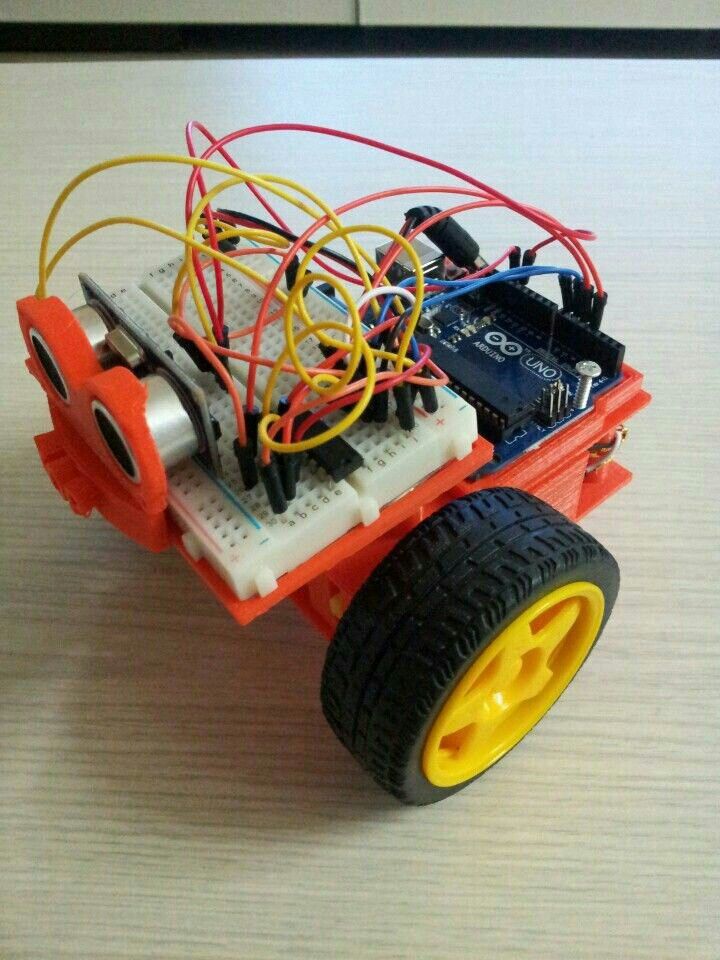 It is based on the DHT11/ DHT22 sensor, the NRF24L01 transceiver module for the wireless communication and the DS3231 RTC. For the display we can either use 16×2 character LCD or a 3.2 inches TFT touch screen.
The outdoor unit can be powered with batteries and the indoor unit with an AC adapter. The outdoor unit measures the temperature and the humidity and sends the values to the main indoor unit. Here these values are printed on the LCD along with the data and time values from the DS3231 RTC module.
Additionally, we can use SD Card module for storing the data onto Micro SD card.
Difficulty: Intermediate
Motors Control Arduino Projects
Controlling motors using Arduino is actually quite easy, and there are some many interesting projects with can make with Arduino and motors.
Arduino Camera Slider with Pan and Tilt Mechanism
Camera slider are great for capturing cinematic shots, and having pan and tilt system on top of it even further increase the possibility to capture better shots.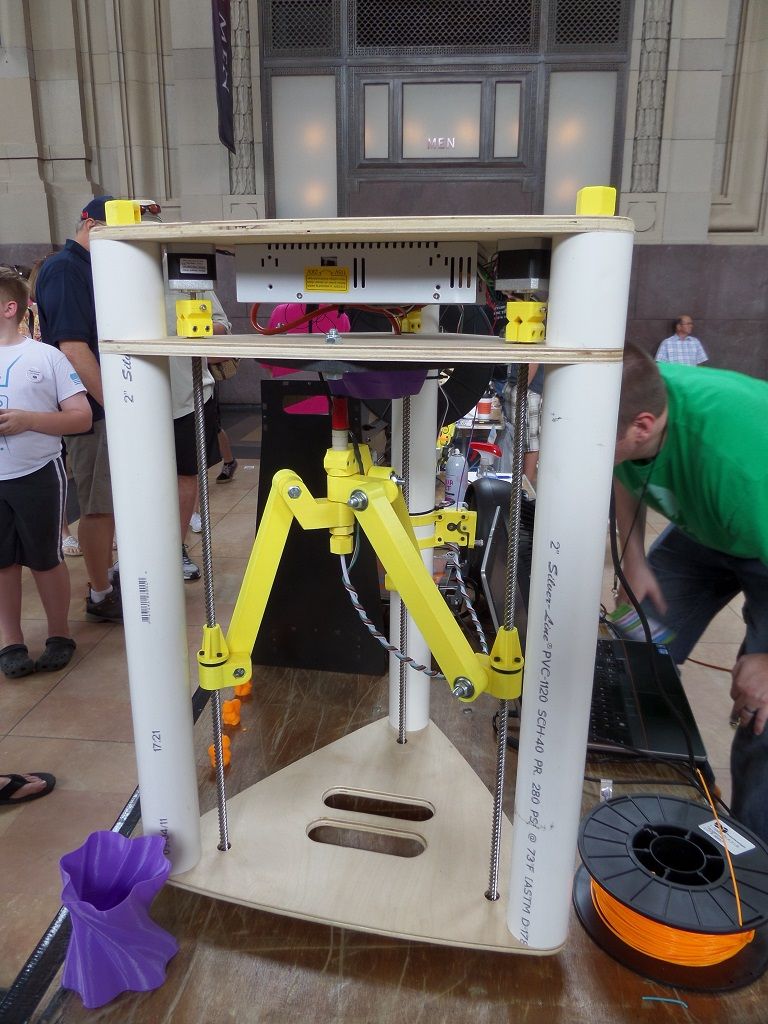 In this project I will show you how you can build your own one, which costs way less then one found in the stores and still you can get great and super-smooth shots.
The slider has three NEMA 17 stepper motors controlled via the A4988 stepper drivers and the Arduino Nano board. Using a joystick we can control the pan and tilt movements and using a potentiometer we can control the sliding movement. With this DIY camera slider we can use the Set button to set two different IN and OUT points. Then the camera can automatically move from one to the other point.
Difficulty: Advanced
DIY Vending Machine
If you are interested in building something more complex with Arduino then this project is the one for you. Although complex, you could easily recreate it as there is a detailed step by step explanation on how everything works, including circuit schematics and source codes.
The structure of the machine is made out of MDF. For discharging the items I used continuous rotation servo motors, while for the carrier system I used two NEMA17 stepper motors. For detecting the coins the machine uses an infrared proximity sensor.
Difficulty: Advanced
DIY Arduino Gimbal / Self-Stabilizing Platform
The following Arduino project is a simple gimbal or a self-stabilizing platform. It can be used for keeping objects or the top platform level. The project is rather simple with just several electronic components.
Based on the MPU6050 orientation and its fused accelerometer and gyroscope data, we can control the 3 axes or servos that keep the platform level.
Difficulty: Intermediate
Arduino Robot Car
The combination of DC motors and Arduino is always fun, and so is this project. Here we will build our own robot car from scratch. The car will be powered with Li-ion batteries and two 12V DC motors, and controlled using the L298N driver and an analog Joystick.
Through this project we will also learn how H-Bridge and PWM motor control work.
Difficulty: Intermediate
Arduino Projects for Beginners
If you found the above projects a bit hard to start with, you can try the following projects which are good for beginners.
Arduino Radar (Sonar)
This is one of my most popular project and it’s really fun to build. The radar can detect objects in front of it and map them on PC screen using the Processing IDE.
For this project you just need two components along with an Arduino board, and that’s an ultrasonic sensor and small servo motor. The range of the radar can be adjusted to up to 4 meters with 180 degrees rotation.
Difficulty: Easy
Range Measurer and Digital Spirit Level
Here’s another project utilizing the HC-SR04 ultrasonic sensor. This time we will use it to make an distance meter which can measure distances up to 4 meters, as well as, measure square area.
The project also includes and accelerometer which is used for the digital spirit level function or for measuring angle. The results are displayed on 16×2 LCD and all components are attached on a custom design PCB.
Difficulty: Intermediate
Arduino Color Sorter
Sorting out objects or products by their color has an important real world application. These types of machines are often used for sorting fruits, seeds, plastics etc. The working concept of these machines is rather simple. All you need is a color detecting sensor and of course a system that feeds the object to the sensor and then sort it out.
In this project we will learn how to use a color detecting sensor along with the Arduino. We are going to be sorting out colored skittles but you can use the same sensor and method for sorting out anything else.
Difficulty: Intermediate
RFID Access Control System
RFID technology has wide range of applications and access control is one of them. We often encounter this in hotels for accessing our room or at work for checking in or accessing restricted areas.
In this project we will learn how to use the Arduino to make an RFID controlled door lock. The system consists of an MFRC522 RFID reader and RFID tags/ cards that are based on the MIFARE protocol.
Difficulty: Intermediate
Arduino Alarm System
If you ever thought of making your own security system then this project is a great starting point.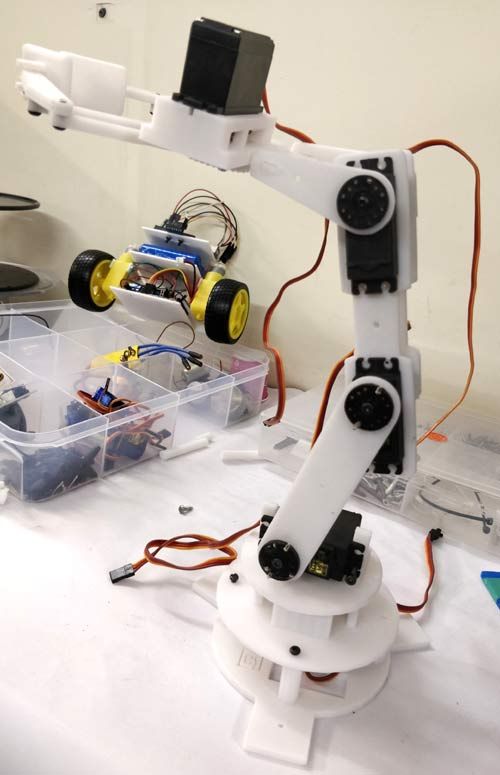 Here we will utilize an ultrasonic sensor for detecting movement.
If a human or object passes in front of the sensor, the alarm will be activated. For deactivating the alarm you will have to enter a password using a keypad.
Difficulty: Intermediate
Arduino LED Matrix Scrolling Text
In this project we will control LED Matrices using the MAX7219 driver. This driver can control up to 64 individual LEDs while using only three wires. Also we can connect up to 8 drivers in series and still using the same wires.
To make this project more interesting I also added an example where you can update the text on the LED matrixes through your smartphone using a custom-made Android app.
Difficulty: Intermediate
Arduino Game Project
This game project is based on the popular Flappy Bird game for smartphones. Using the touch screen we control the bird while trying to avoid the pillars.
For this project we need a 3.2 inches TFT Touch screen, an TFT Mega shield adapter and an Arduino Mega board.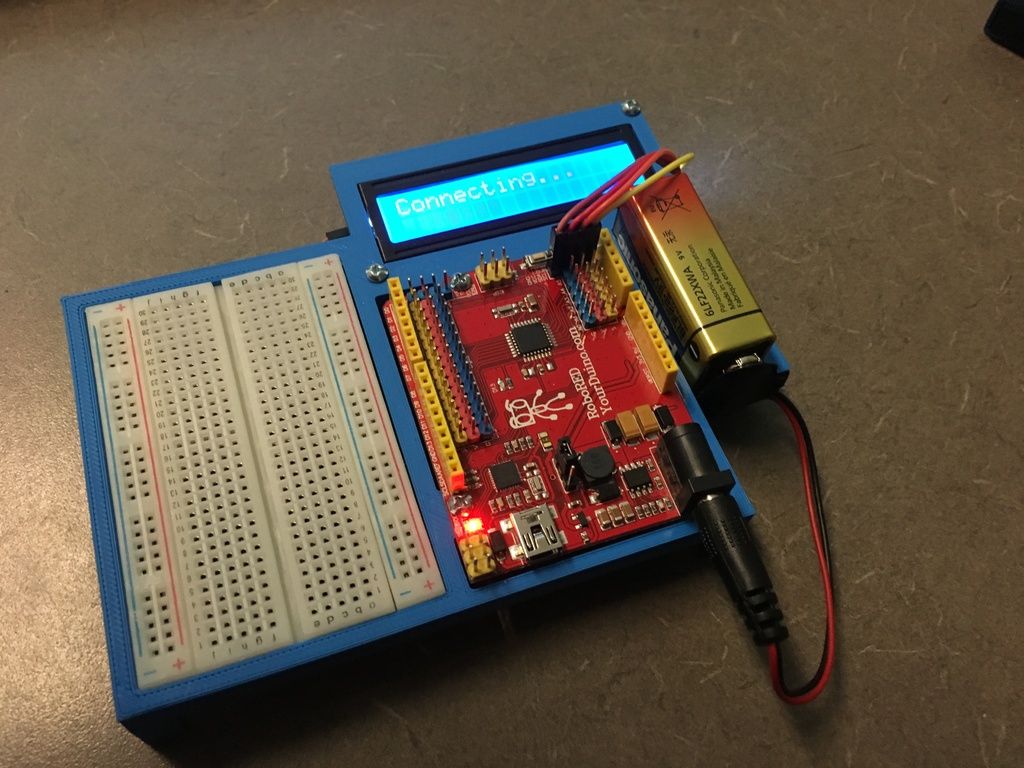 The code is a bit longer but everything is explained in details.
Difficulty: Advanced
Arduino Music Player and Alarm Clock with Touch Screen
In this project we will learn how to build our own music player. It features a touch screen, MP3 player, a temperature sensor and an alarm clock.
The code behind this project is a bit more complex with around 550 lines but everything is explained in details with comments for each lines. There is also a detailed video explanation for it.
Difficulty: Advanced
More Arduino Projects
Arduino Based Interactive LED Coffee Table
At first glance this table looks like a normal coffee table but once you turn on the power on it gets to a whole new level. The table has 45 sections which can glow in any color we want, plus it reacts on objects placed on top of it.
The heart of the table is an Arduino which controls the 45 WS2812B Addressable LEDs. The objects on top of the table are detected using infrared proximity sensors.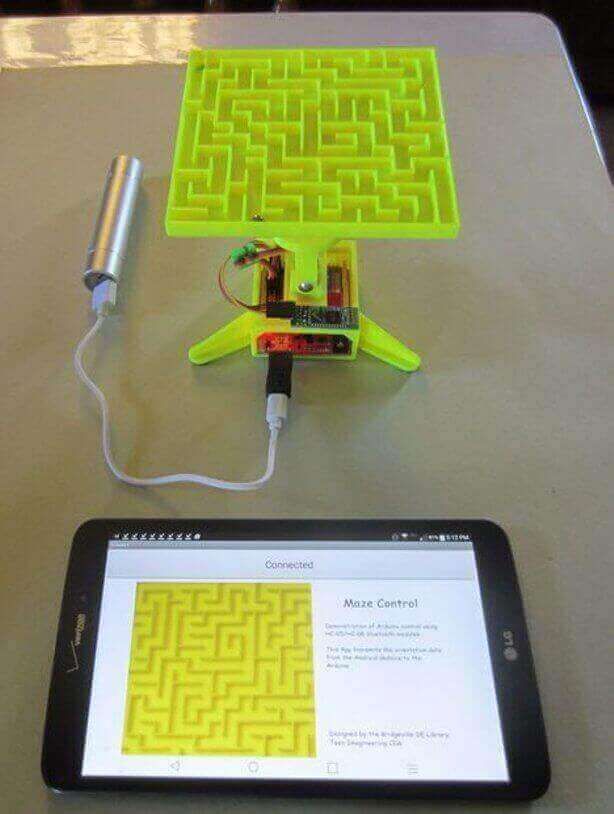 What’s even cooler it has built-in Bluetooth module which enables interaction with a smartphone for selecting the LEDs colors.
Difficulty: Advanced
DIY Air Quality Monitor
Monitoring the indoor air quality is very important as it can affect us in many way. If we have a poor air quality in the room we are staying, it can lead to tiredness, headaches, loss of concentration, increased heart rate and so on.
In this Arduino project we are building an Air Quality Monitor which can measure several important air quality parameters such as PM2.5, CO2, VOC, Ozone, as well as temperature and humidity. I designed a custom PCB on which we can easily attach the sensors we need and show the results on a 2.8 inches touch display. The device can also keep track of the sensors values from the last 24 hours.
Difficulty: Advanced
Arduino Projects Ideas
The following section of this article contains Arduino projects ideas based on my detailed tutorials on various sensors and modules, as well as your suggestions from the comments section below.
For each project idea I will point out the required components as well as the particular tutorial for each of them.
6-Axis Arduino Robot Arm with Cycloidal or Harmonic Drives as Joints
Building more robust Arduino based Robot arm which will employ either Cycloidal or Harmonic drives as joints.
Using my detailed tutorials how a cycloidal and a harmonic gearboxes work we can develop robotic joints which will have high torque and efficiency.
Cycloidal Drive working principle:
Harmonic Drive working principle:
We can use NEMA 17 or 23 stepper motors in combination with these drivers which provide high speed reduction ratios. As for controller we could use an Arduino Uno or Arduino MEGA board.
Difficulty: Advanced
Android Smartphone Controlled Power Outlet Using Arduino
Controlling your home power outlets via a smartphone is the first step in home automation. You can easily make your own Arduino controlled power outlets utilizing the knowledge you can get from my Arduino tutorials.
For this project you just need two components along with the Arduino board. An HC-05 Bluetooth module and a 5V Relay module for which I already have detailed tutorials. For powering the Arduino and the relay you can use 220/ 110V AC to 5V DC converter.
Using your smartphone you can connect and control your power outlet via Bluetooth. You can either use some already made apps for controlling Arduino from the Play Store or create your own custom made app. In this way we can also control the power outlets through voice control commands.
Difficulty: Advanced
Home Automation Arduino Projects
Home automation is one of the most popular Arduino projects nowadays. The goal of this project is to remotely control anything in your house like lights, appliances, temperature, security devices and so on, with a single device or your smartphone.
In order to make such a project we need decent amount of knowledge in Arduino. The following home automation concept that I suggest is based on my detailed Arduino tutorials for various sensors and modules.
So the idea here is to have a master unit which includes a touch display, and several slave units which will execute commands coming from the master. As for the wireless communication we can use the NRF24L01 radio frequency modules. Each slave unit can have various functions like, temperature monitoring, power outlet control, lights control, security alarm and so on.
Of course, there are endless possibilities and combinations for building a home automation system using the Arduino board. You can always change and add more devices. You can also make a Bluetooth communication so you can control all of this using your smartphone etc.
Difficulty: Advanced
Arduino Gesture Control
The idea for this project is to remotely control an Arduino project using hand gestures. Let’s say we want to control the Arduino Robot Car that we mentioned above. So instead of the joystick we will use an MEMS module for the control.
We can use the GY-80 module which features an accelerometer, a gyroscope and a magnetometer.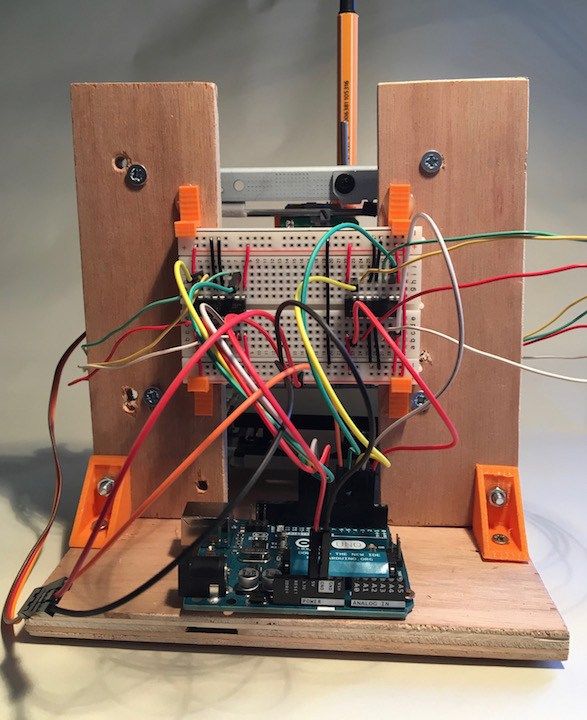 Then the data we are getting from these sensors to control the steering of the robot car. As for the wireless communication we can use the NRF24L01 transceiver modules.
You can also check my Mechatronics Final Year Project where I used a similar method for controlling a 3D model in Matab Simulink.
Difficulty: Advanced
Feel free to ask any question in the comments section below and don’t forget to suggest some more Arduino projects.
5 Coolest Arduino 3D Print Projects
You can do some really cool things with Arduino. And you can make some really cool stuff with a 3D printer. . What do you get when you use them both? Some very cool stuff. Here are 5 projects you can 3D print and power with an Arduino (and, as a bonus, a 3D printer you can make with an Arduino). Check them out and post your favorites in the comments below!
The two most popular things in the geek world right now are 3D printing and drones. Why not combine them to create a 3D printed quadcopter drone? Using a radio, compass, motors, ESCs, propellers, and a host of other parts, combined with an Arduino frame and 3D printing, you can build your own little quadcopter.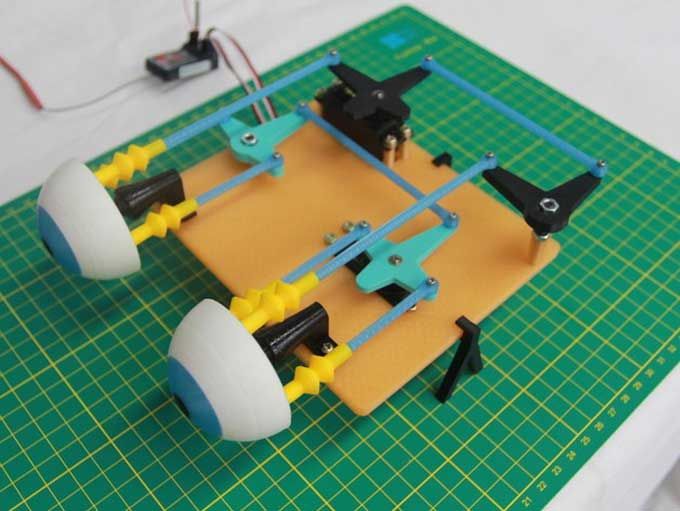 You may have some of the parts you need if you have an Arduino starter kit, but the rest can be easily purchased online.
You'll need to do a lot of wiring to attach everything to the frame, but Nolan5454's instructions will walk you through this with pretty clear explanations of what you need to do. And it includes 3D printer files, so you just need a printer to make it work. When it's all together, you can control it via GPS or FM transmitter.
Robots Arduino robots are a lot of fun and you can get a lot of cool kits to make them. But if you want to do it all yourself, this set of instructions from davidhrbaty will help you 3D print this little guy and you can plug in an Arduino Nano to make him run. The robot can be controlled by IR remote control, automatically by obstacle detection, or in "monitoring mode" which uses an ultrasonic sensor.
In addition to the body print, you will need an Arduino Nano, some servos, an IR receiver and remote control, an ultrasonic sensor, a speaker, and some AAA batteries. Luckily, almost all of these items are almost guaranteed to come in the starter kit, so you probably already have them. After that, you just need to quickly print and set up the motors.
I must say that this is probably my favorite project of all. It's like a weaker version of a lava lamp (didn't think you'd ever heard that, did you?). For this project, you will need more parts than the previous two, including a set of LEDs, capacitors, an oscillator, transistors, as well as a power switch and an AC connector. Since this requires mains power, be especially careful when working on this!
After you have assembled the various parts, you will need to use some basic electronics skills to connect the double helix double helix plate to a rotating motor such as a microwave oven and connect the mains power. eLab's Instructables walks you through each step in detail. When you're done, you have a spinning strand of glowing DNA!
And if you like the idea of making your own lava lamp, you can do that too.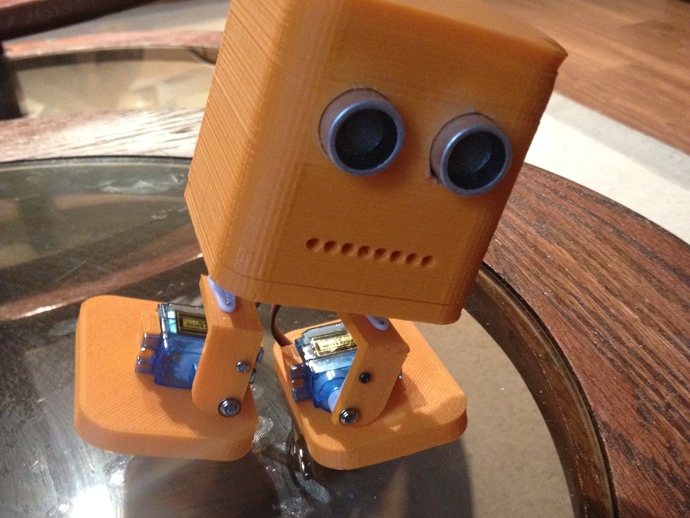
This project, and a few others like it, have been making the rounds since Fallout 4 came out, and you can see why: it's a really cool little gadget! This requires quite a few unique parts, including: a gyroscope, a power supply, a capacitive display with a driver board, a flashlight, a pressure sensor, a methane sensor, and a 3D multi-component housing.
You will need to build your own I/O board for this project to work but at page Instrumentables in Sweatman there are clear instructions on how to do this, as well as a very detailed step by step guide for all other steps. This is quite a complex project, but it cannot be beaten as a Halloween costume, cosplay accessory. , or part of a conversation!
If you are trying to create your own creative space. Like , a CNC mill is a great addition. Liquid Hand Wash notes in Instructables that it is accurate enough for cutting and drilling PCBs, so it should be suitable for any milling project you want to do.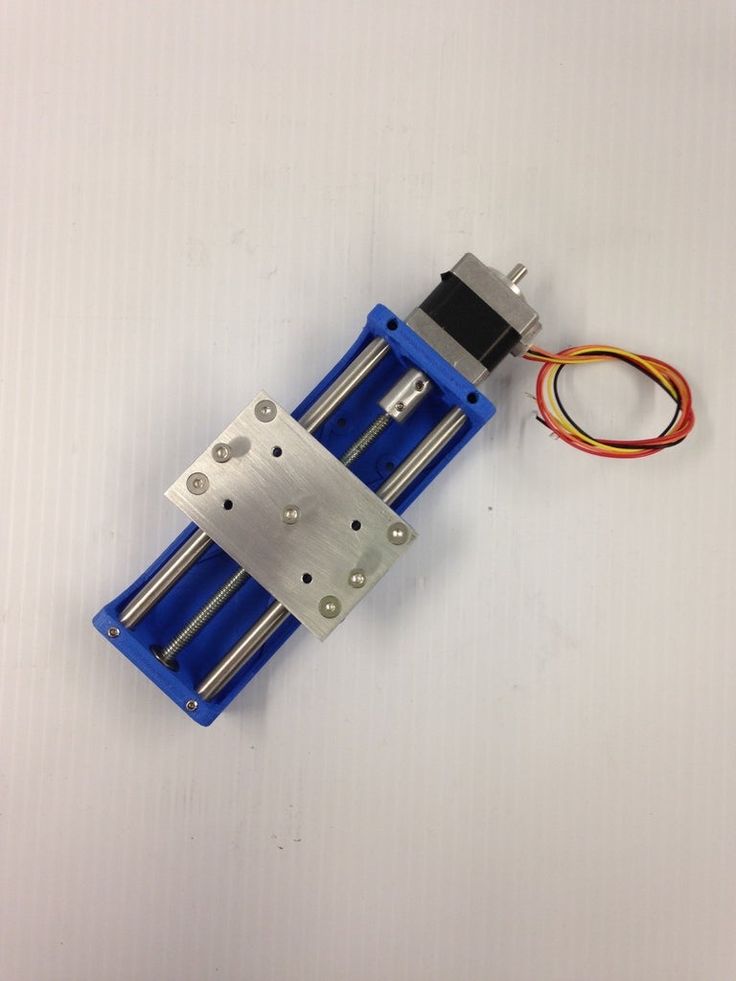 This requires a large amount of 3D printed parts, so you might want to consider using a printing service, but it won't be too hard to print your own.
You'll also need a fairly large selection of parts, including lots of fasteners, some bearings, a relay module and DC connector, some metal parts for the surface, and an Arduino to run everything. Some of the part links don't work in the Instructable, but they should all be easy to find. This is a real project, but again, having your own CNC mill is very convenient!
Don't have a 3D printer? Build One!
If you don't have a 3D printer, you have several options for getting the 3D print parts you'll need for these projects: you can buy an affordable one, borrow one, use one at your local makerspace local hackerspace local hackerspace , use a 3D printing service, or if you really want to make it yourself, build it yourself. You can even build an Arduino 3D printer for $60!
This particular 3D printer, the $60 EWaste 3D printer, is very small and might not be big enough to print parts for some of the larger projects above, but it's a really cool home project, very affordable and environmentally friendly safe as it uses mostly recycled parts. You'll need a couple of old CD or DVD drives, a floppy drive, a small stepper motor, a power supply, an extruder, and a few extras, but this is actually a surprisingly simple project.
You will need to do some work with calibration and basic electronics, but the final product is surprisingly functional for what it is made of.
Your Favorite Arduino 3D Printing Projects
Combining 3D printing and Arduino is a breeze, and the projects above should give you a good idea of the limitless potential this combination provides. Whether you have your own 3D printer, you can use someone else's, or you can use a 3D printing service, you can build your project from start to finish.
What is your favorite 3D Arduino project? Share links to new ones so we can check them out!
Image credit: AlexLMX 3d printer via Shutterstock
What are the best Arduino and 3D printer programming projects you can do yourself? List of 2020
If you are a electronics enthusiast and anything related to programming, you need to know that Arduino 9 tool0058 is is currently used in almost all , and it is nothing more than Open source software and hardware is very simple.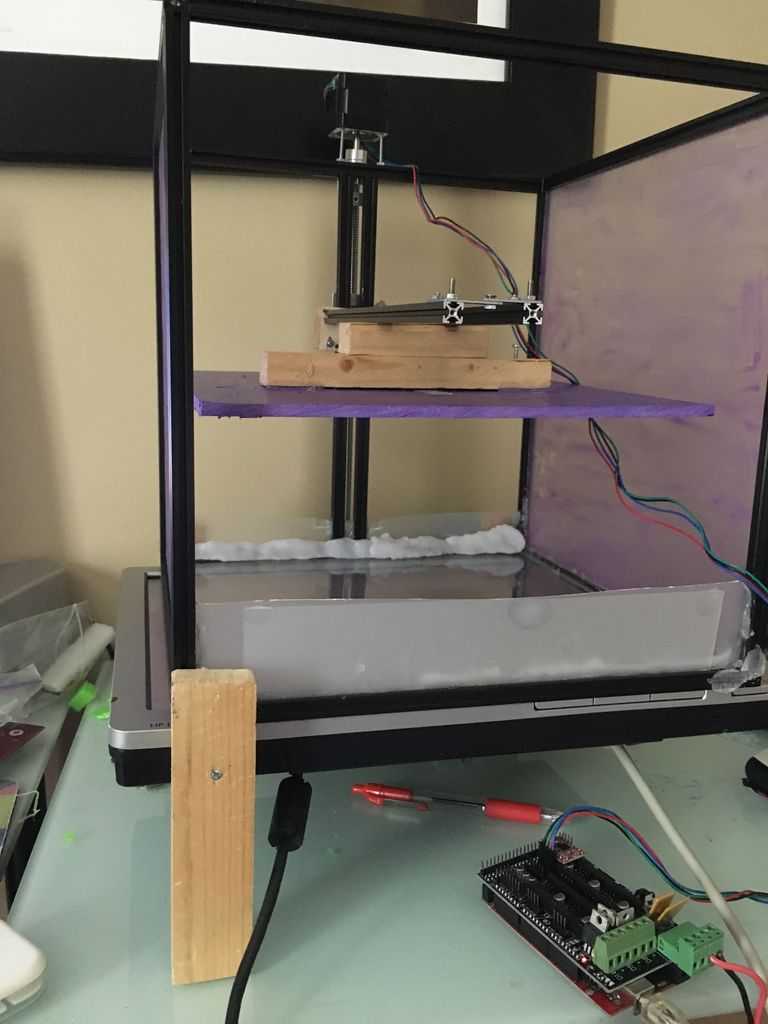 to use , it is designed to produce kits based on microcontrollers that serve to make digital devices and interactive objects.
All these projects that can be developed thanks to this map can detect and control objects in the physical world . Although it may seem quite complicated to create, the truth is that with an Arduino , you won't have a and you don't need much to complete each of your projects. Also, this microcontroller works great with 3d printers, because it was built with that in mind.
Therefore, thanks to this table, you will have the opportunity to create a large number of designs that can be 3D printed from the house of , which is really amazing. Here's how we'll show you here what are the best projects that can be programmed at home with Arduino in 3D, for that, detail everything we will explain to you in the post below.
List of the best projects to program with Arduino and 3D printers
Currently, you will have the opportunity to find a large number of arduino projects that you can 3D print , and the versatility that this program offers you is quite wide, so you can program hundreds of activities into it. Here is how we show you list 9 here0057 best Arduino and 3D printer projects you can make at home.
To do this, follow everything we will teach you below:
Build 3D Printed Lego LED Lighted Bricks
You should start by mentioning that this creation is one of the easiest you can make on Arduino, so its difficulty level is quite low, in this case you will be able to turn your 3d printer into factory Lego house Lumineuse . To do this, you just need to follow a few steps that will show you how to perform the printing procedure. bricks LEGO . To do this, you must have Arduino Materia 101 3D Printer .
With this type of printer you will be able to include in your projects a very large series of different models, in addition, the creation of these lego bricks is ideal for all those users who are new to 3D printing world, so here you can start to see how impression combine with Arduino programming.
Thirsty Flamingo - Humidity Level Sensor
As in the previous case, this is a fairly simple procedure to follow, so it is also recommended for users who are just starting to use the Arduino platform and combine it with 3D printing. Therefore, be able to create Thirsty Flamingo will help you control the moisture levels of your plants , which is ideal for use in your home gardens.
It should be noted that all works through the circuit, it can be a bit difficult for people who do not have enough knowledge, as well as updated wiring diagrams and codes, but if you master all this, you should not have any obstacles or problems.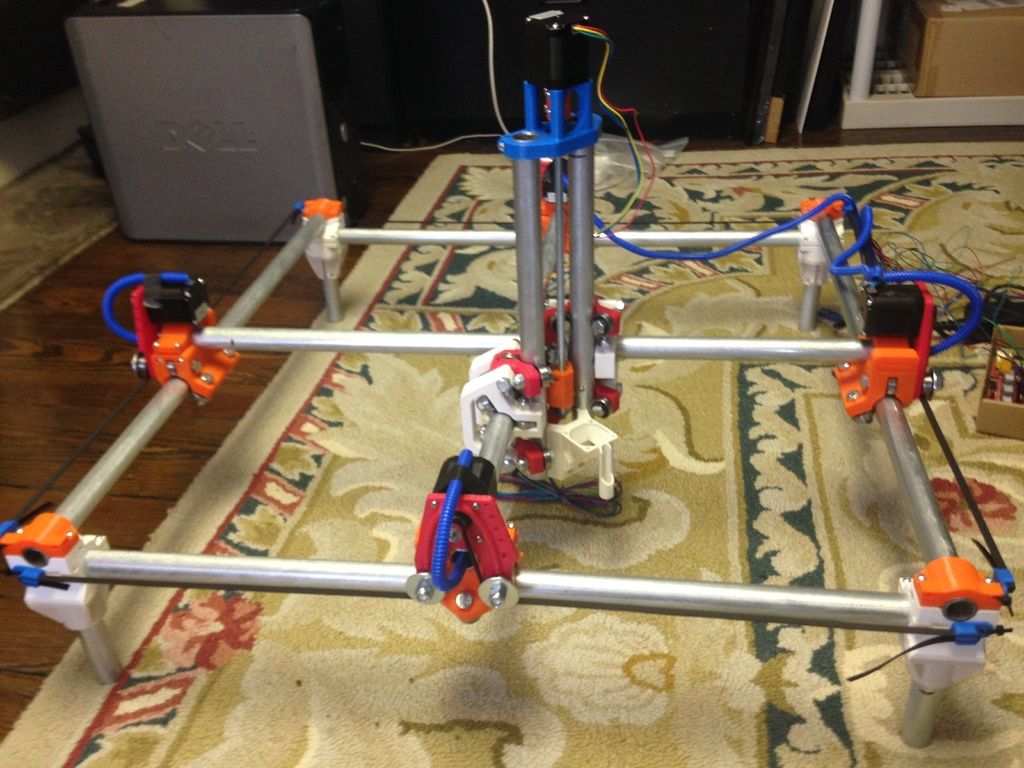
Le Thirsty Flamingo is a model that is printed in just two parts, allowing battery case and circuit board. When the project is complete, simply place it in the cymbal and it will make sounds when the humidity levels are too low, allowing you to be very attentive to whatever happens with these variables.
3D Printed Moon Phase Clock
To develop this project, if you need a little more complexity than the two mentioned above, in this case moon phase clock has become one of the most elaborate Arduino projects, is perfect for users who want to develop this type of home activity without being an expert.
This moon phase clock for the most part has some very interesting features, here is how it integrates variables such as alarm clock, thermometer, lamp mode, hygrometer, date and accurate moon phase simulation. Therefore, if you are just beginning to understand that 3D printing world, we recommend that you try to create this type of clock.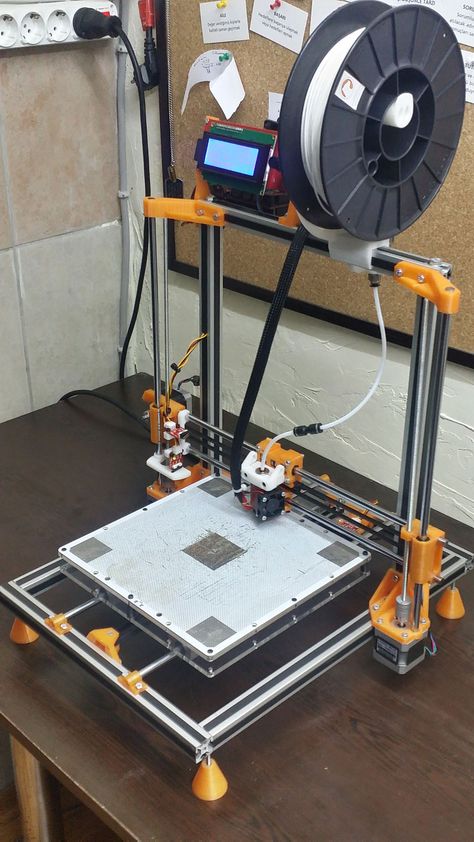
Chronio - Energy Saving Smart Watch
If you like the idea of building a watch on this platform, you can also create a 3D printed low energy smart watch . All this consists of DIY project created for users with intermediate level or beginner who is starting to enter the world of Arduino. Making it watch called Chronio is a bit simpler than the previous one.
Thanks to this, you will be able to create a very useful item laptop, although it should not be mentioned that it does not have Bluetooth or Wi-Fi connection, over Chronio can show you the time. It even has a simplified version of Flappy Bird, which will give you a great experience with it.
Tito 3D printed robot Arduino
You must have heard of Otto's robot, known as Arduino compatible dance robot toy that you can 3D print.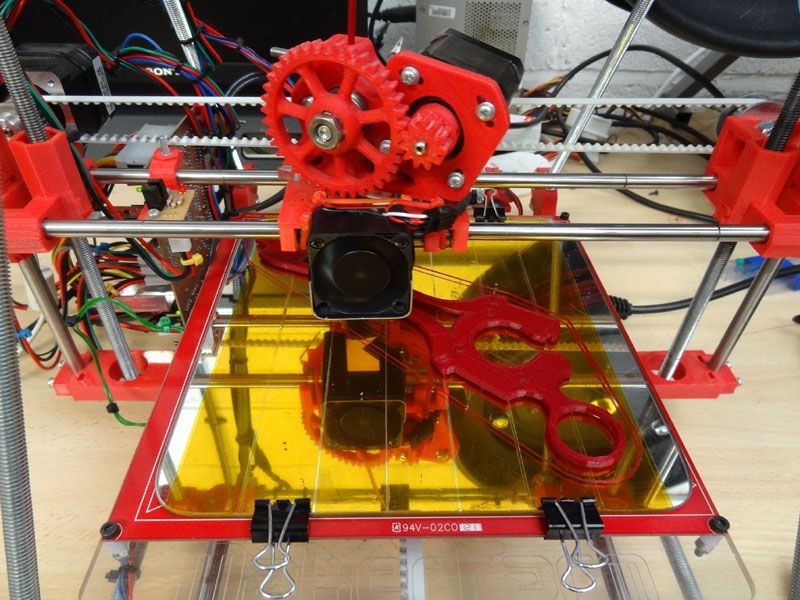 However, you should also know Tito, the predecessor robot, can be very easily built from the comfort of your home by simply using the - plate of the Arduino mold and 3D printing.
TiTo is open source robot, so any user can develop it without difficulty. It is dedicated to all beginners starting in this world electronic programming, more advanced users will be able to play with the design and structure of TiTo . Therefore, making this toy robot would be another one of the alternatives that you can create at home.
Nerd's Electronic Bones
's Electronic Bones are undoubtedly one of the best projects you can do with this platform, but they require enough time to create them because it can take several hours of work, despite this, it is considered a fairly simple project for beginners.
With these electronic dice, you will have the opportunity to impress all your friends and family , you can even earn money from it if you decide to sell it. All this can be achieved with the Arduino Nano and a 9 volt battery, unlike conventional bricks, you don't have to throw them to play with them, just press the button , so random number will appear in this one. A great alternative to start changing the way you play dice.
3D Printed Maze
If you are one of those who love to play Mazes, you can start using this project designed by innovative Teen Imagineering Club. In this way, you will be able to control the maze by yourself by tilting smart mobile device , all this is possible thanks to to code Arduino and Android app which will work hand in hand.
The idea to bring this project to market was to demonstrate how the arduino board can be connected to the android smart mobile device, thus offering a different way to work with this platform. Fortunately, thanks to the generator 3D maze available Thingiverse you will have the opportunity create your own labyrinth It should be noted that the level of difficulty of this type of programming is considered intermediate.
Electronic Braille Reader
As in the above project, this requires medium difficulty so it obliges the person to have prior knowledge to prepare it. And it is that while the digital transition is happening and continues to evolve, for many users it is really difficult Read and write Braille using new technological devices.
The idea behind all of this is to make it easier for braille readers to read and write braille readers, making this use more efficient for blind people . This is a project that users can create at home and use for a good reason.
"UPDATE ✅ Do you want to create an Arduino project with 3D printers and are you looking for it?" ⭐ LOG IN HERE ⭐ and learn all about SCRATCH! ✅"
Without a doubt, the part that can be more difficult is the installation of 40 micromotors step by step, so it will take a lot of dedication and effort, but in the end everything will be rewarded. And it is thanks to this device, created through Arduino and 3D printer, it will be possible to improve the quality of life of all people with visual impairment .
Humidifier
We continue to work on projects that require medium preparation, in this case humidifier, that will allow you to automate and control your home even more . Currently considered one of the Arduino projects le most requested and completed, with which you will have the opportunity to create a home humidifier that you can connect via the Internet to control through the MediaTek cloud sandbox.
The purpose of all this is to determine when the humidity is low in the study area, and spray automatically the specified area to rise and set the correct humidity level , all this allows the atmosphere of your home to be correct, pleasant and undamaged .
Bluetooth Virtual Reality Headset
To complete this list, we present you with a project that you can do at home , but it will require a person Advanced level on the Arduino platform, because it requires a lot of complexity, which a novice in the field may not be able to handle easily.
This project aims to help you to be connected to your mobile phone without having to hold it in your hands, which is a very good idea for the vast majority. To do this, what is reality headset virtual 3D printing must be created , it will be equipped with everything that is in everything bluetooth device is high class and can therefore be used through technocentric glasses.
this virtual reality activity goes not only require deep knowledge of the subject, but you also have to invest in about 50 euros. It's all about knowing how to connect Bluetooth module, RGB LED and small speaker to Arduino board. All this will allow you to achieve the desired results.
Tips for Improving Programming Efficiency with Arduino Independent Projects
Without a doubt, as with any other program, it is important to keep in mind a few tips that will help you be much more efficient when programming each of your independent projects, all of which will allow you to shoot the best use of the Arduino platform. .
Here's how we're going to teach you a few tips you can consider:
Arduino boards are great for learning and experimenting
This programming and development platform offers a wide range of options for different types of tasks, so users can enjoy all the ease of use that the Arduino has to offer and be able to get the most out of it. each of their projects. Typically microcontrollers of this type usually offer relatively short to-do lists, therefore greatly reduced.
Therefore, all users who intend to focus on these types of IoT design and IoT, all arduino boards can be portable, but the cards will fit better due to their small physical size. in Arduino mini silver and Adafruit Trinket Gemma.
Keep the code clean and tidy
One of the most important secrets that will allow you to be more efficient in preparing your projects be able to store your own code, neatly and in a logical order. Clean code contributes to reduced development time , fewer bugs, better maintainability and easier extension.
Therefore, when you are working on the Arduino it is recommended to stop from time to time and rewrite and order different parts of your program, which will allow you to have better structured and cleaner code.