3D printer wavy walls
pla - 3D printing problem: waved walls
Asked
Modified 4 years, 6 months ago
Viewed 16k times
$\begingroup$
The problem
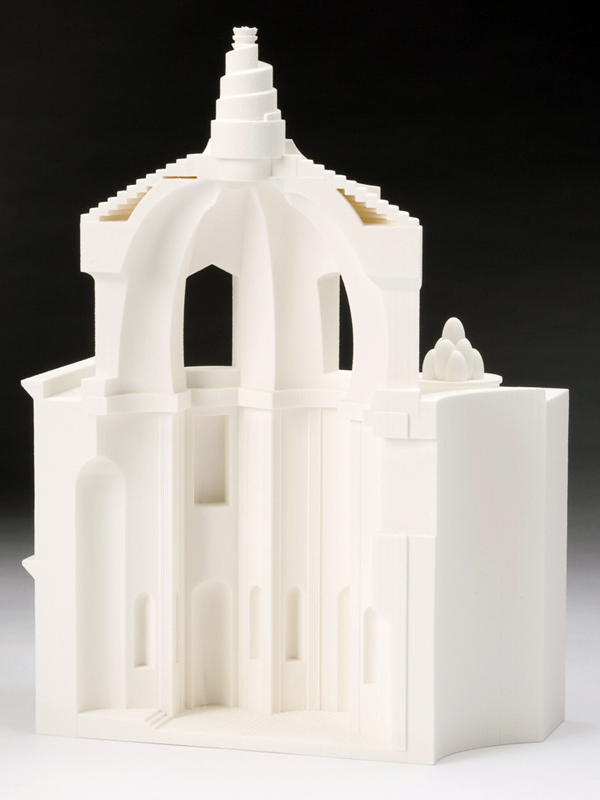
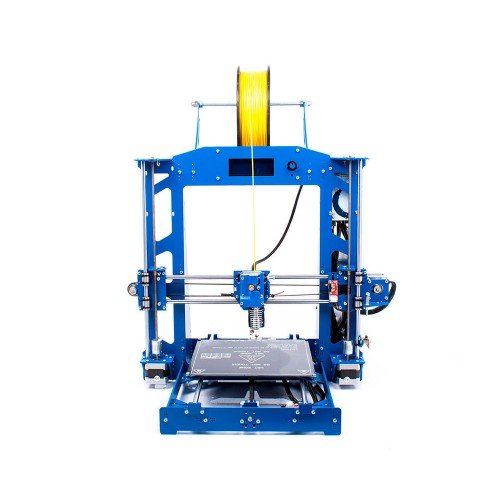
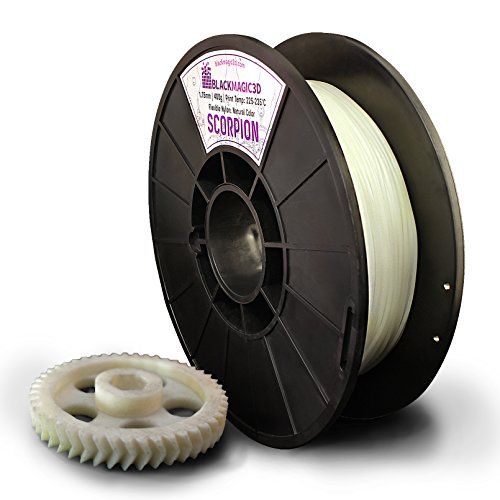
When I print with my mElephant 3D printer from Makeblock, the prints come out with waved walls like in the picture below. I am using PLA filament from https://makeblock.lt
What I tried
I tried changing temperatures 190-220, tried to change the flow rate. Also checked if the bolts are not lose. Everything seems good.
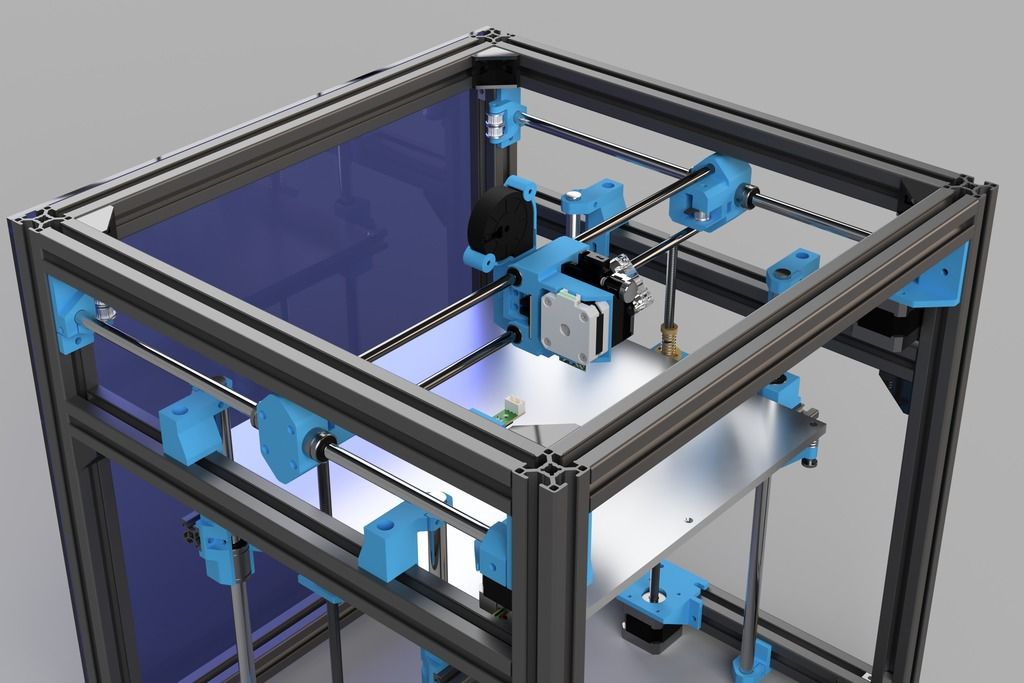
My printer
$\endgroup$
3
$\begingroup$
I had the same problem with ABS, but printing different test objects I found out that the distance between the wavy structures depends on the cross sectional area of the object. Printing the testcube in 70.1% (1/sqrt(2) times of the original size) takes half the time per layer and the distance between two grooves doubles. I was printing ABS with 0.1 mm layer height and the simple bang-bang heat bed controller. The temperature is clearly wandering for 4° with a period of aproximately 2.5 minutes, which corresponds to the groove distances. After changing to a PID controller for the heated bed the temperature stayed within 0.1°C and the problem was gone. Several hundredths of a millimeter thermal expansion of the heated bed can have substantial impact at 0.1 mm layer height!
You can enable the PID controller for the heated bed in Marlin or Skynet firmware by enabling (removing the //) here:
//#define PIDTEMPBED
and disabling (putting // at the beginning of the line) here:
#define BED_LIMIT_SWITCHING
in Configuration.h. Calibration of the PID controller can then be done with the GCODE Command:
M303 E-1 S90 C8
for 90°C.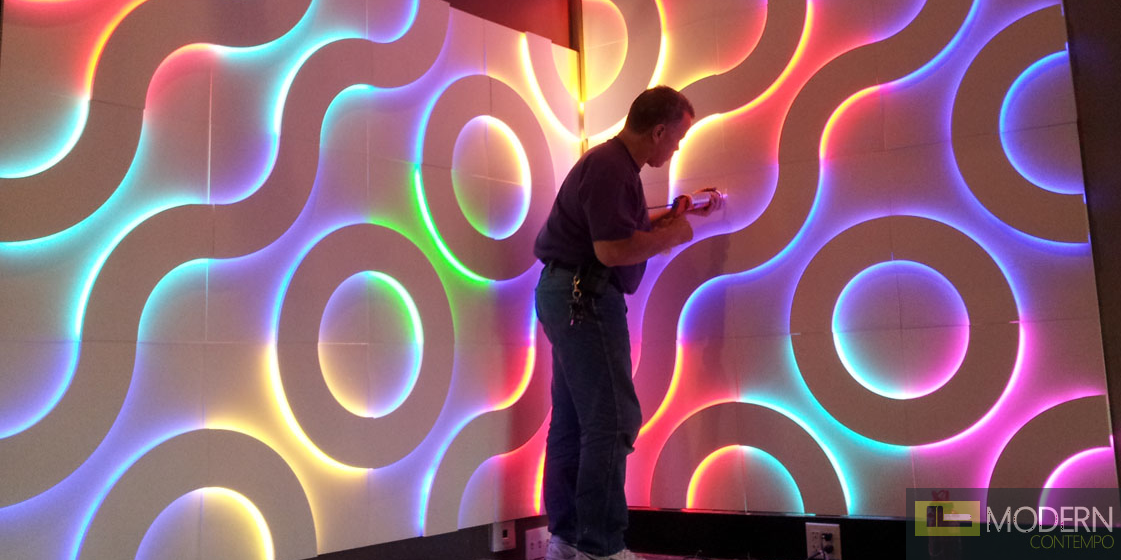 I had to preheat the heated bed before, otherwise the calibration would run into a timeout. The command will return parameters for the PID algorithm. The values can then be applied by the
M304 P579.01 I100.87 D586.0
GCODE command (here for example values). Everything can then be saved to the EEPROM with
M500
Bang-Bang controller:
PID controller:
$\endgroup$
1
$\begingroup$
Repeating patterns like that usually stem from issues in the Z axis. This is likely caused by bent screws which in turn cause the X axis to move around. Are the top of the threaded rods constrained? If they are, an easy fix may just be to let the top of the threaded rods float around by removing the constraint. Most Prusa i3's use 5mm threaded rod for the screws and 8mm smooth rod, does your printer use the same setup?
If your printer has 8mm (or 5/16") threaded rod you could try to get some that are straight or the better solution would be to get the 5mm threaded rods and just print adapters to hold the 5mm nut inside the trap. This would require new couplers (aluminum or rubber/plastic hose), 5mm threaded rods, nuts, adapters (printed) and a small change to the firmware. This works because the 5mm rod is more flexible than the 8mm smooth rod and less likely to force the carriage around.
If you already have the 5mm threaded rod/8mm smooth rod then I would look to make sure your X axis is tight and does not move around on the Z axis smooth rods.
This would be easier to point out if you include a picture of your printer.
Edit:
If your printer is the mElephant from Makeblock then I would try removing the bearings at the top that constrain the threaded rods and try the print again.
$\endgroup$
5
$\begingroup$
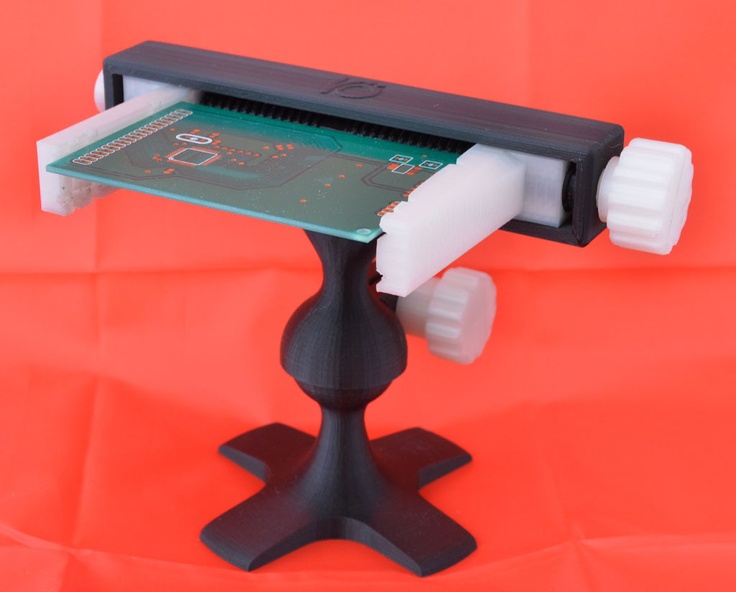
I have the same problem with a home made mini extruder. This happens only if the bearing stops rotating together with the extruder gear.
I notice that:
- The gear collects burrs of PLA while feeding, so reducing the traction to feed the PLA
- The bearing stops rotating when the pressure is too high or too low.
- The heat of chamber is too high and starts to smooth the PLA before arrives to the nozzle and needs to regulate the speed of the fan. This creates less force on feeding.
- The PLA has a mixture of ABS
- PLA has part hardened due overcooking, extremely dry, etc.
- The PLA have irregular diameters, for example is nominally 1.75mm but some sections vary 1.8mm or 1.9mm
- The nozzle starts to get cold due direct fan air flow. (maybe your main problem)
:) I've been a Quality Engineer for 20 years for plastic and metal processes, so I've had to analyze why I've had lots of problems, especially in cold weather.
I was thinking on buying a new extruder like you have, but if you have the same problem I do, the Extruder is not the problem. You need to check the points I described above.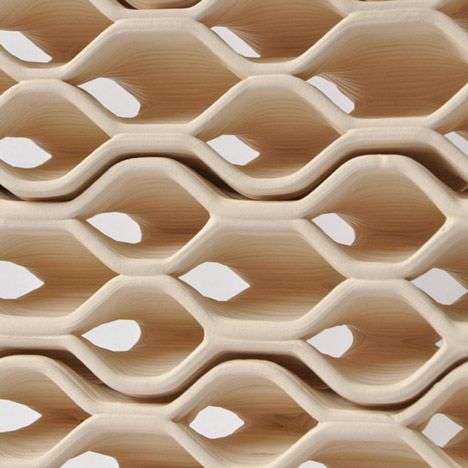
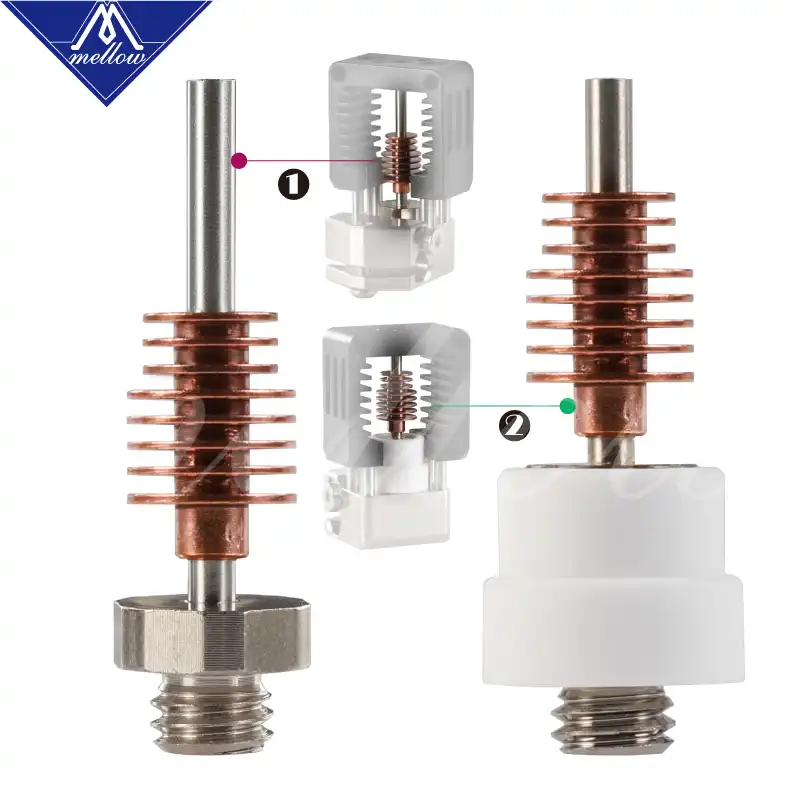
This is the extruder I have, http://aprendiendo.laconeccion.com/mini-extrusor-3dp.
$\endgroup$
$\begingroup$
Looks like something is catching on the z axis. A bent peice would likely cause much smaller deformations unless it was very obviously bent. Something could be loose, allowing the vertical play, perhaps the motor mounts.
More likely I think is a level-difference between the z-axis worm gears, possibly caused by an obstruction, lack of lubrication, or possibly even the wrong lubrication. That's where I would look. Further, since it's a very consistent pattern, my guess would be your issue can be isolated to the tops and bottoms of the z axis worm gears. Even if it's not the issues I think, the issue most likely located at the top or bottom.
$\endgroup$
$\begingroup$
I had a very similar problem once and the culprit was the relative position of the filament spool and the printer. The spool was standing on a coaster next to the printer and it turned out to be enough to create a pulling force on the filament. I have moved the spool to a shelf above the printer and the problem was gone.
However, your printer seems to have a way more rigid Z axis than mine, so it is unlikely the issue here.
$\endgroup$
$\begingroup$
Is your printer new?
It could be that the factory settings for the step number per millimeter or inch on the "Z" axis stepper motors. I personally have not had this problem however you might want to check out https://www.simplify3d.com/support/print-quality-troubleshooting/.
Hope this helps :)
$\endgroup$
print quality - Inconsistent layer widths and uneven outer walls
I have problems with layer widths and uneven outer walls on my 3D prints. Sometimes layers are squeezed and sometimes pushed outside. I noticed that these problems happen when there are retractions on layers. I don't have problems with round and simple objects without changes on layers or where all layers are identical.
I think that this can be linked with pressure in the nozzle or retraction. It looks like sometimes the pressure is too high and it's pushing too much filament and sometimes it's too low and it's not pushing enough filament. In this picture, layers in the first circle are squished in and it looks like there is not enough filament being pushed from the nozzle. In the second circle layer is pushed out and is wider than other layers. Looks like there is not enough filament being extruded at the start of the layer and too much being extruded at the end.
This problem happens always on the same layers, where there are some retractions on these layers. I tried to print the same objects multiple times and it always occurs on the same layers.
What have I did to fix this problem:
- calibrated e-steps and slicer flow,
- tightened belts,
- different slicers (Cura, PrusaSlicer),
- different filaments (e.
 g. PrusamentPLA),
 - disabled combing in slicer,
- printed with and without infills,
- different retraction distance (from 3 mm to 8 mm),
- different retraction speeds (from 20 mm/s to 80 mm/s),
- different retraction accelerations (from 500 to 1500),
- different hotend temperatures (from 200 °C to 230 °C),
- slow printing speed (up to 15 mm/s),
- calibrated K-factor (also tried many values from 0.0 to 2.0),
- calibrated junction deviation (also tried many values from 0.0 to 0.3),
- printed with and without cooling.
I think, that disabling coasting and changes in retraction settings helped a little, but not too much.
My setup:
- Ender 5, SKR mini E3 V1.2
- Capricorn PTFE Bowden tube,
- printing with PLA, but this problem also occurs with PETG.
The most similar issue I've found is this question, Inconsistent Layer Issues, but this didn't resolve my problem.
How can I get rid of inconsistency in layers widths and get smoother outer walls?
I calibrated K-factor with K-factor Calibration Pattern and discovered that lines are always thicker after retraction at the start of the line and thinner at the end of the line. Then I generated and printed test files to confirm this. My lines are always thicker at the start of the line and they get thinner later. This is the problem presented in the second picture.
I printed 3 cubes (dimensions of a cube: X=0.2 mm, Y=100 mm, Z=10 mm). This is the result.
This is the best representation of my problem. The order of printing was as follows: 1 -> 2 -> 3 -> 4 -> 5 -> 6 -> 1 -> 2 etc. There are under extrusions at the end of the second and third line (points 4 and 6) and under extrusion at the start of the first line (point 1). These under extrusions are before (points 4 and 6) and after (point 1) travel moves.
What can cause this problem?
(Solution available) Curvy walls with Ultimaker Cura
ultimaker-cura
I printed a 2x2x2cm test cube with Slic3r (left) and Ultimaker Cura (right) and my Prusa i3 derivative machine with tight straps. The print settings must be exactly the same (0.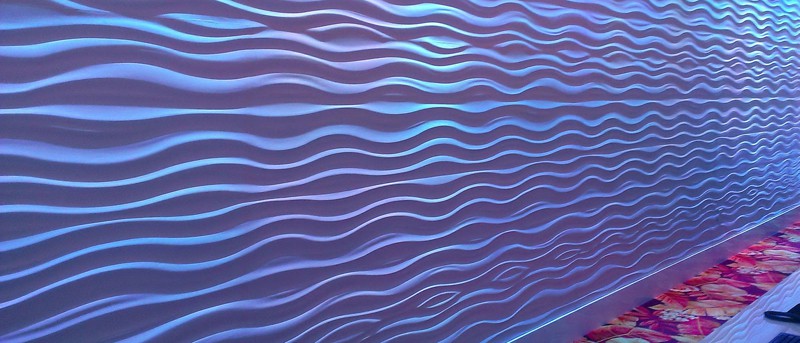 15 mm layer height, 40 mm/s outer wall speed, default accelerations/jerks). Although the top surface of Ultimaker's Cura cube looks much better than the Slic3r cube,
the latter has much flatter vertical walls than the former.
The front wall of the Ultimaker Cura Cube was printed from left to right, which could explain the wavy result as some kind of vibration caused by the sudden stop of y in the left front corner.
But what kind of environment could influence this? Should I try manually setting lower accelerations in Ultimaker Cura? @Thomas S.0002 This defect you see is called Ringing and is detailed here.
So these waves are visible when the print head suddenly changes direction in combination with high speeds and high accelerations. Since the amplitude of the waves decreases as you move away from a sharp corner, this is due to the print settings, and not to the vibrations transmitted through the belts.
Ultimaker Cura seems to have different settings than Slic3r, no other explanation as the hardware is exactly the same. Reducing the print speed and acceleration in Ultimaker Cura will reduce ringing defects.
, @ 0scar
▲ 5
These wavy lines can be artifacts caused by closely spaced fill, but they can also be resonant patterns caused by noisy stepper motors and tight belts. Since you said your belts are nice and tight, I would suggest reducing the tension on them and see what happens. I know some pundits say it's impossible to over-tighten timing belts, but I don't agree with that. The belts obviously need to be tight enough to prevent any free play in the system and you can have a lot of tension that you can use, but if you make them snug against the drum they will transfer engine vibrations to the assembly very effectively. plate (and on your models).
If your stepper motors are noisy, you may want to invest in some vibration dampeners. They can greatly reduce noise and vibration. Another solution would be to use more sophisticated stepper motor drivers like the TMC2100.
ReprapWiki: TMC2100
. @ Mick
▲ 0
It's hard to see under light and brilliant green, but try printing a more complex object like a regular XYZ cube. Does he look like this one? what does big waves mean after changing direction, but then they get smaller?
If so, it is "ringing" or "ghosting", which means that the acceleration you set is too high for the mechanics of your printer and the machine vibrates too much.
Does it look like this one? Does this mean that they are precisely aligned vertically and everywhere, and not just after a change of direction?
Then he does NOT call, he must
- belt too tight (almost always!)
- poor quality belt
- bad bearings or idler wheels (rare)
I had one too, and it was too tight. Loosen it, it can be a lot weaker than you think before you get in trouble.
Check how to fix evenly spaced vertical print pattern for more information on the second issue.
There is another potential cause of wavy walls, however I mention this for completeness, this is not the case in question.
If the waves repeat horizontally but are not vertically aligned and the extruder is direct driven, this may be caused by the problem explained in this video, which shows that dual direct drive gearing introduces intermittent changes in flow that are sometimes visible.
, @ FarO
How are the 3D printed houses?
The idea of 3D printed houses has been around for a long time. In this article, you will learn about the first projects of 3D printed houses, brought to reality.
Let's face it, 3D-printed houses are still quite the out-of-the-box trend. Although construction 3D printing has been in development for several years, it is only recently that some “real” projects have seen the light of day. We are still far from technology replacing traditional building methods. But with each new project, the technology is becoming more and more popular.
This is partly due to the many benefits of 3D construction printing. For example, the cost of a 3D printed house can be much lower than an equivalent house built in the traditional way. In addition, the cost of construction is also much less.
To interim fix the first results, this article will focus on some "first" 3-D projects. These buildings will always remain important to the construction 3D printing industry as they set the stage for future advances in the field.
Germany's first 3D printed house
Germany is a country often associated with cutting-edge engineering, so let's start our list with the world's first 3D printed house in Germany.
The house itself is located in Beckum, a city that is part of North Rhine-Westphalia, next to the Netherlands and Belgium. And that's important because it's the first 3D printed house to be fully certified to the national government's building codes. The implications of such an achievement are expected to pave the way for many other 3D printing construction projects in Germany as well as the rest of Europe.
The project is a collaboration between Peri, a German construction company, and COBOD, a Danish firm that specializes in 3D construction printing technology. Peri is a large corporation operating not only in Germany, but throughout the EU. They have many products, including scaffolding and formwork solutions, that every construction site needs.
Peri followed the construction 3D printing business for many years before acquiring a stake in COBOD in 2018 to further develop the technology. Both parties started building the house in Beckum just two years after the acquisition of the stake.
COBOD BOD2 Modular Concrete 3D Printer was used for a printing process that took just over 100 hours.
First privately owned 3D printed house in the US
There have been several 3D printed houses built in the US, but this is the first officially owned home, according to CNN. Alquist 3D has partnered with Habitat for Humanity Peninsula and Greater Williamsburg to design, develop and build the home.
From a distance, you might think that this is an ordinary house. However, as you get closer, the layered concrete structure of the walls reveals the building's secret: it's made using 3D printing.
Surprisingly, the concrete structure of this 1,200-square-foot home was completed in about 12 hours, significantly faster than traditional construction methods would have allowed.
Reportedly, the house was bought by April Springfield, who will live there with her son and dog. She purchased the house through the Habitat for Humanity housing program. Given that the goal of the non-profit organization is to make a positive impact on the global housing crisis, it makes sense to use 3D printing to create homes that can be offered at very affordable prices, thereby making many people's dreams of owning their own home come true.
The first five-storey 3D printed house
This project, made by the Chinese company WinSun, is a real record holder. It is a 3D printed five-story apartment building with a height of 10 meters, making it the tallest 3D printed building.
The building is located in Suzhou Industrial Park in Jiangsu Province in east China. It stands next to a mansion that was also built by WinSun using a concrete 3D printer.
Looking at WinSun designs, you can't help but notice that they look like they weren't even 3D printed. Typically 3D printed structures are gray in color and clearly show layer lines. But WinSun loves to add some color and make the walls smoother, making their projects more like the buildings we're used to. Although it is not stated how they do it, we assume that the workers manually level the walls.
First 3D printed biodegradable house
Most 3D printed buildings are made from some sort of concrete mixture. But this project is different. With the aim of creating housing solutions with virtually no environmental impact, the Italian company WASP 3D printed the Gaia house using soil and agricultural waste.
To create the perfect blend of wall materials, WASP partnered with Ricehouse, a company that specializes in the use of natural and agricultural materials such as clay and rice in construction.
The house is called Gaia because the soil is used as a binder in the walls. In fact, 25% of the mixture contains local soil as well as 10% hydraulic lime, 25% rice husks and 40% crushed rice straw (a by-product of rice production at harvest).
In addition to the mix of materials, innovations are also reflected in the design of the walls themselves. A special corrugated structure was used to provide ventilation on warm days as well as insulation during cold periods, virtually eliminating the need for air conditioning.
The Gaia house is indeed a small building of about 215 sq. m. ft. However, the wall printing only took 10 days, and the estimated materials cost is just under $1,000.
AirBnB's first 3D printed house
There are many different types of accommodations on AirBnB, but what about a 3D printed house?
The so-called Fibonacci House is the first 3D printed house to be booked through AirBnB. Given that it is located in rural British Columbia, this is a wonderful and exciting place to stay.
Although it may seem small, the house has a lot to offer. In fact, the internal area is approximately 375 square meters. feet, which is enough to accommodate up to four people.
The house's concrete walls were designed and printed by Dutch 3D printing firm Twente. 20 concrete parts were produced off site in just 11 days from material provided by Laticrete. The parts were later delivered and assembled at their current location.
So how much does a visit cost you? It's hard to tell if you're visiting AirBnB as there aren't any available places, but in 2021 Designboom said it was $133 per night.
The first floating 3D printed house
Prvok is not only the first 3D printed house in the Czech Republic, but also the first floating 3D printed house in the world, as it stands on a pontoon.
Scoolpt, a construction 3D printing startup, is responsible for this project, which took just 22 hours to 3D print the concrete structure of a houseboat.
Approximately 465 sq. feet of living space divided into a bathroom, bedroom and living room with kitchen. And while weight isn't usually discussed in the context of houses, given that this one stands on water, it's interesting to note that Prvok weighs 43 tons, according to its creators.
Since the house is separated from the ground, it has a built-in recirculation shower and tanks for drinking and service water. All things considered, the house should last at least 100 years.
Europe's first inhabited 3D printed house
Even in the last few years, 3D printed houses have mostly been showcases designed to showcase the possibilities of the technology. Most have no record of anyone actually driving into them. That changed back in 2017 when the couple moved into a 3D printed house located in Nantes, France, making the Yhnova house the first of its kind to be inhabited in Europe.
The house was created as part of a project between the University of Nantes and the Nantes Laboratory of Digital Sciences. And besides the main claim to fame, a very interesting aspect of the project is the specific technique used in its construction, which came from BatiPrint3D. Instead of 3D printing a concrete structure, the manipulator created wall shells from polyurethane, a material used for insulation. Later, these membranes were filled with concrete.
In total, it took 54 hours to complete the 3D printing phase of the construction process. However, it took a little over 4 months to complete the construction. This was mainly due to the fact that the roof, doors, windows and installations were made using conventional means. But it doesn't help that the Yhnova isn't all that small, with about 1,025 feet of interior space.
India's first 3D printed house
India's first ever 3D printed house was built back in 2020. The project was carried out by a construction 3D printing startup called Tvasta, which was founded by graduates from the Indian Institute of Technology in Madras. In fact, the campus of the institute in Chennai was chosen as the site for construction.
The significance of this project lies in its impact on the housing crisis worldwide and in India in particular. The ability to build such a structure in a matter of days and for a minimal fraction of the cost of a standard equivalent home demonstrates the possibility of greatly reducing the country's housing crisis.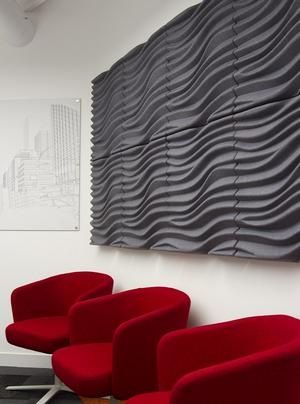
The internal area is 600 sq. m. feet, which is distributed in a simple layout with one bedroom and a combined kitchen and living room.
The concrete structure of the house was 3D printed off site and the pieces were later transported and assembled on campus. The foundation, meanwhile, was built using the conventional method of pouring concrete into the ground.
Africa's first 3D printed house
Back in 2019, the construction of Africa's first 3D printed house by Spanish firm Be More 3D began in the Moroccan city of Ben Guerir. The project was born out of the group's participation in Solar Decathlon Africa, an event that requires members to design and build homes powered only by the sun.
For their application, Be More 3D made a 345 sq. feet, which was printed in about 12 hours. This feat earned them first place and the title of Most Innovative Startup.
Be More 3D didn't stop at Africa, it later created Spain's first 3D printing house and also developed its own concrete 3D printer in partnership with several corporations working in the automation and materials industries.