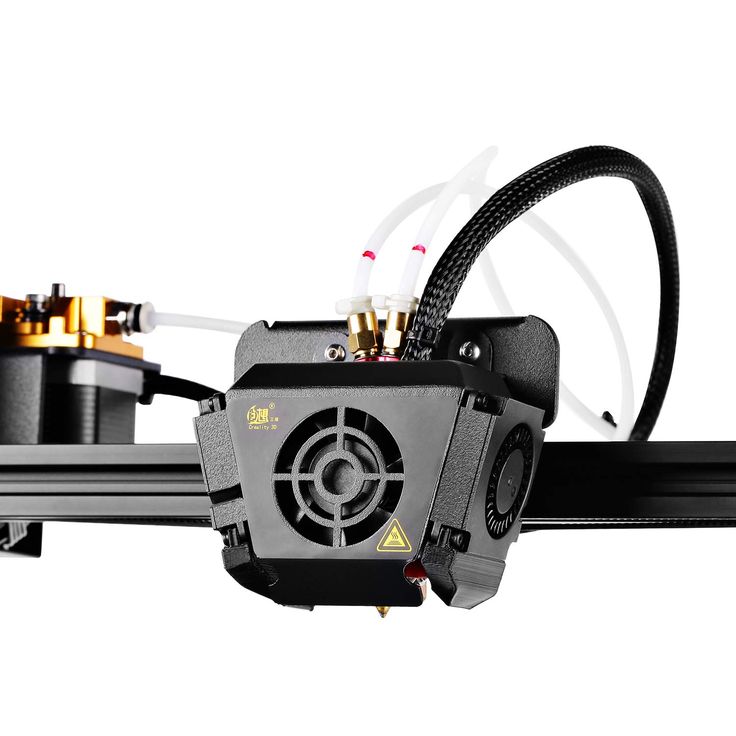
Extrusion rate 3d printer
How to Get Best Flow Rate (Extrusion Multiplier) for 3D Printing – 3D Printerly
The Flow Rate, also known as the extrusion multiplier is an important setting that can help you with getting better 3D prints. This is measured in a percentage, so the default is 100%, but you can adjust this in certain situations. I decided to write an article about how to get the best extrusion multiplier or Flow Rate for 3D printing.
It’s pretty simply to understand and use to your benefit once you get the basics down, so keep reading to find out.
What is Flow Rate in Cura?
The Flow Rate is a setting used to adjust how much material is placed down from the nozzle. Normally, Cura calculates the amount of material to fill the exact space within the line’s width and similar gaps. Increasing the Flow Rate will place more material down, while decreasing it will place less material down.
The Flow Rate values can be used to compensate for a fault in your extrusion pathway due to something like a partially clogged nozzle, or when your filament has varying diameters.
There are various parameters under “Flow” that you can adjust such as:
- Wall Flow
- Top/Bottom Flow
- Infill Flow
- Skirt/Brim Flow
- Support Flow
What Should Your Flow Rate Be? How to Calculate Flow Rate
Your Flow Rate should be at 100% in most cases. If you do experience issues with not extruding enough filament or too much, you want to change other settings such as printing temperature, printing speed, and line width. Calibrating your extruder steps is another important thing to do to ensure good filament extrusion.
Some users suggest that adjusting Flow Rate values should be a last resort to any printing issues you are experiencing. Regardless of whether you are using an Ender 3, Prusa i3 MK3S+, or an Anycubic Vyper, your Flow Rate is usually stable.
If you do want to change your Flow Rate, it’s usually in the range of 90-110%. A small change to the Flow Rate can make a significant difference to your models. I do suggest that every try this out themselves so they can see the differences.
Take a model and print a few of them using different Flow Rates so you can see the direct impact. You can use values such as 90%, 95%, 100%, 105% and 110% then compare the models.
I have seen some cases of people adjusting Flow Rate to account for using a different filament, though you can have separate profiles for different filament types.
A key settings that affects the Flow Rate is your printing temperature. The higher your temperature, the more the filament will be able to flow through the nozzle since it melts more. Optimize your printing temperature can reduce the need to adjust your Flow Rate.
Check out this video by CNC Kitchen that shows the influence of temperature and print speed on the Flow Rate.
A really good extrusion test is the Part Fitting Calibration file by MEh5D from Thingiverse. It’s simply an S-Plug that you 3D print and try to plug together. Once you’ve calibrated your extruder steps and line width, you should be able to put the pieces together easily.
The Flow Rate can also be adjusted to get a more precise fit. The designer mentioned that the print bed not being level is another key reason why the plug might not fit, since the bottom layers would squish and cause inaccuracies.
You can also make use of a setting called Horizontal Expansion, an Experimental setting in Cura, to change the size of the holes in your model. One user used a value of -0.15mm and it worked great to make the plug fit together.
Another thing you can do is to print a hollow cube and measure the walls to see how accurate they are. You can then adjust the Flow Rate based on your measurements. Check out the video below by 3D Printscape on calibrating your Flow Rate using this method.
Another important thing you can do is to measure your filament in multiple places and enter the average value into your slicer. Some filaments don’t have the most accurate tolerances so it can alter how much material is being extruded, leading to dimensional inaccuracy.
How Do You Increase/Adjust Flow Rate in Cura?
You can increase the Flow Rate in Cura by changing the flow value in settings. You just have to find the Flow Rate using the steps outlined above and put in the value.
To adjust the Flow Rate value in Cura you simply need to search “Flow” using the search bar to get the appropriate setting where you enter the appropriate value.
Check out this video by Hard Firm Soft tries to investigate how adjusting Flow Rate affects the print’s measurements and surface quality.
They suggested that making your extruder wall 120% your nozzle opening and increasing the overlap between walls and skin could help get better Flow Rate values for adjusting. This would mean using a 0.48mm line width for a 0.4mm nozzle.
Similarly, if you want to adjust your Extrusion Multiplier in a software like PrusaSlicer or Simplify3D, you simply find the setting and adjust the number beside it.
Here’s where you can find it in PrusaSlicer, under Filament Settings.
Best Flow Rate for PLA
The best Flow Rate for PLA filament is 100% in most cases. If you do find under or over extrusion in your 3D prints, you’ll want to calibrate your e-steps and printing temperature before you start adjusting Flow rate. If you do adjust Flow Rate, it’s usually between 90-110%.
One user mentioned that they don’t adjust their Extrusion Multiplier much after they find a value that works for a specific filament and 3D printer.
They gave an example saying they might find that 0.93 (93%) works well for PLA on one 3D printer, then they might adjust it by 0.01 (1%) for a specific part, but not very often.
In their opinion, calibrating the e-steps isn’t always a good idea based on what 3D printer you are using. A 3D printer like the Flashforge Creator Pro has a more commercially-made feel to it, and the e-step values are known and calculated.
There is some truth to this because many 3D printers come with the e-steps not properly calibrated. Another thing is, you might end up changing extruders which means you’ll want to freshly calibrate your e-steps.
I wrote an article called How to Calibrate Your Extruder E-Steps & Flow Rate Perfectly that goes into more detail.
Best Flow Rate for PETG
The best Flow Rate for PETG filament is also 100%. Some users have used Flow Rates between 95-100% to get good results from under extrusion. It’s better to solve under extrusion through proper calibration of the extruder steps though. You can adjust the Flow of other parameters to improve certain sections.
One user decided to adjust their Bridging Flow to 80% and had success with creating better bridges in their 3D prints. The reason behind this is that less material means that the cooling fans can cool it quicker, leading to more stability as a bridge.
Another user also tried adjusting their Bridge Flow Rate to 95% with PETG, but it made it harder to bridge as it broke in the air. It really does depend on your specific setup, 3D printer, and environment. The most important thing here is to do testing and see what works for you.
You can check out the video below by The 3D Print General who does several PETG print tests using Cura. He used both a Bowden and Direct Drive 3D printer, testing angles up to 60°, while using a 100% Flow Rate.
Filament Extrusion Rate - Promega
Promega
M3D HomeGithub RepositoryParts Store
Search…
Welcome!
Getting Started
Beginner's Guides
Advanced Guides
Your Printer & Filament Settings
Printer Settings (Default)
ABS-R Filament
PLA Filament
Filament Extrusion Rate
How To Mix
How To Properly Apply Elmer's Glue
Documentation
Repair & Maintenance
How To Troubleshoot
Changelog
Your Printer's 3D Parts
Quad
Setup Guide
M3D Community
Active Community Support
How To Contribute
Community Guides
Community Slicer Settings
Add-Ons
Powered By GitBook
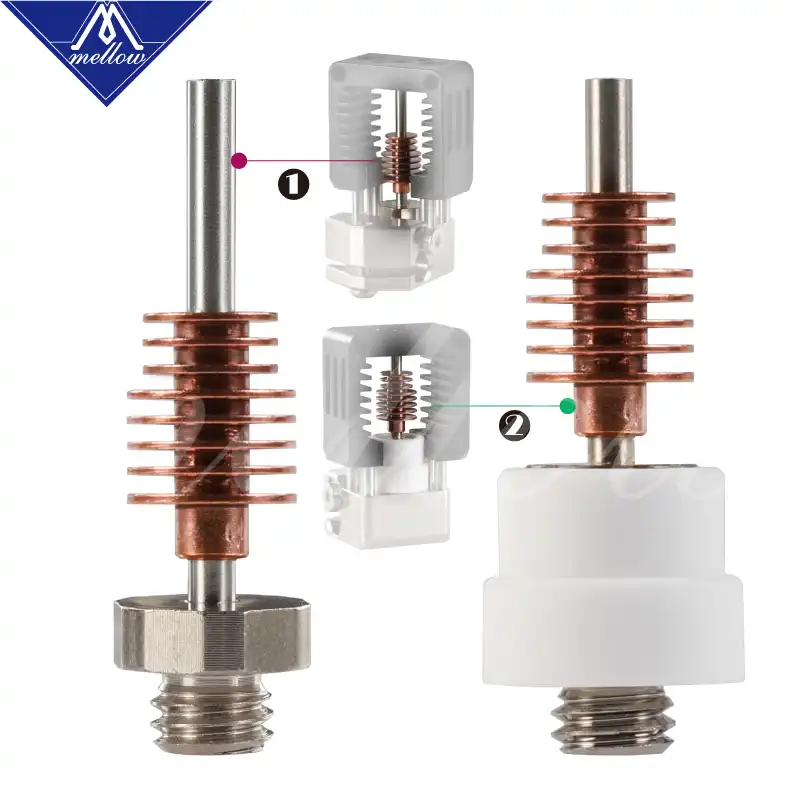
The extrusion system on the Promega is designed to print at specific speeds at certain temperatures. 3/s. This number can change significantly depending on your printer and slicer settings and material.
Calculating the flow rate of your extruder is typically very easy. The equations you can use to calculate filament flow rate depends on your print settings and whether you are printing or not. Follow the Extruding in Air section to calculate the flow rate while extruding filament in the air and the Printing Flow Rate section in order to find the filament flow rate while printing.
Extruding in Air
When the extruder is printing filament into air, we can assume that the printer is creating a steady stream of filament at a slightly larger diameter than the diameter of the nozzle. If the extruder is not skipping, you can use the feedrate of the extruder move and the cross-section of the filament to calculate the flow rate. 3/s. If you find your extruder skipping or notice print quality problems, do a filament flow calculation to determine the extrusion rate you are printing at. The extrusion rate of the Promega can be increased significantly depending on material, printing temperature and other factors. Feel free to experiment and push the printer to its limits! But remember to calculate the filament flow rate to determine whether your goal is realistic.
Previous
PLA Filament
Next
How To Mix
Last modified 4yr ago
Copy link
On this page
Calculating Filament Flow Rate
Extruding in Air
Printing Flow Rate
Promega Flow Rate
In search of the holy grail or how to find the maximum speed of 3D printing.
How to do a quick extruder performance test? How to find the maximum print speed on an FDM printer? What is the best print speed? How to find the optimal print speed? Why is the extruder throat clogged, did I put everything together correctly? How to quickly print on a 3D printer? Why is the filament wrinkled in Bowden? Why does the extruder chew on the filament?
About the main thing
Only three parameters are responsible for the maximum print speed on an FDM printer:
- Printer specifications are how fast it can move the printer.
 You can learn them from the user manual, so the study of mechanics is not considered here - your printer will not be able to move the print head faster than it is physically capable of.
 - Extruder performance - whether the extruder is able to melt enough plastic to produce a line of a given height and width at a given print speed. This is an important parameter that depends on the design of the heating block, the standard E3D V6 melts less plastic than VOLCANO, but, as practice shows, there are no problems in the vast majority of cases, since on standard nozzles with a diameter of 0.2 to 0.6 mm you you will encounter another main reason for not being able to increase the print speed, namely:
- Maximum nozzle output!
Yes, the most critical point on the way to print speeds is precisely the performance of the nozzle - the amount of plastic that it can pass through itself without damaging the thread, without clogging the extruder, etc.
It is the nozzle output that is the overall output of the entire extruder, which affects the maximum line speed.
So, the output of the extruder is equal to the output of the installed nozzle.
How does it work? (short retelling, no details)
For those who are more interested in watching and listening - here is the video.
For those who are not interested in the details and who want more action immediately, without reading abstruseness - a link to an Excel spreadsheet.
- Pre-configure the flow (number of motor steps per mm), there are a lot of instructions on the Internet, I won’t write here - let’s assume that you have the flow set up.
- Uploading an excel spreadsheet.
- Enter the diameter of your nozzle, the diameter of the filament used, the height of the print layer in the fields marked in yellow (do not touch anything else!).
- In the bottom table you get the filament feed rate into the extruder and the length of extruded filament sufficient to print a line with a given width and height for 3 minutes at the specified print speed.
- Heat the extruder to the required temperature, and extrude the resulting length of the filament through the slicer at the selected feed rate (namely, the feed rate, not the print speed, do not confuse!).
Extruder sticking? Filament does not gnaw? Is the diameter of the extruded thread equal to the diameter of the nozzle? Throat not clogged? Does the filament wrinkle in the Bowden tube? Does the heating unit successfully melt plastic? Does the diameter of the extruded filament match the diameter of the nozzle?
Excellent! Go to the next line of the table and extrude the plastic at the next feed rate. As soon as the problems start - you have reached the performance limit, print at the speed that was successfully tested last, for example, if the plastic bites at a print speed of 70 mm / sec, but everything was fine at a speed of 60 mm / sec - print at a speed of 60 mm \sec. You have found the maximum possible print speed with your nozzle, on your plastic, with your print temperature and your layer height.
That's all, if you did everything right, it means that I helped you. You can leave thanks in the comments and / or donate using the details on the profile page, I won’t be offended :).
But what do not need to do is send me curses without reading the article until the end , if something did not work out.
If you have read, but do not understand - I'm waiting for your questions in the comments, I'll try to answer.
If you have read and understood, but have your own opinion - also write constructive criticism in the comments, it will be useful to everyone.
How does it work?
And here are the details of the study, for people who are interested in the details.
To print at a given speed, we need that the volume of filament supplied of a given diameter (1.75 mm or 3 mm) be equal to the required volume of the printed line . We know that a certain amount of plastic is required to build a line, equal to Volume of extruded plastic (OP) = line height (HL) * line width (SL) * line length (DL) , where Line Width(WL) is the diameter of the nozzle used, and Line Height(WL) is the height of the printed layer. The volume of extruded plastic (OP) is a tabular value and is constant regardless of the material used, it is determined only by the height, length and width of the printed line, for ease of use, these data are dynamically calculated in the Excel table attached by reference at the end of the article.
Knowing the volume of plastic (OP) per second of time 93 filaments per second of time, which is equal to a filament feed rate of 3.3 mm/sec.
If the nozzle copes with the extrusion of a given volume of filament, no excess pressure is created in it, no excess plastic is ejected from the melt zone into the throat (there is no plug in the barrier), there is no jamming or jamming of the filament, and the thread squeezed out by the nozzle does not deviates from the specified diameter, which means that the selected maximum print speed (as well as the filament feed into the extruder) can be used in printing.
Actually, this is the answer to the question of what maximum print speed your extruder can support, on a given type of plastic, height and line width, at a given temperature.
The nozzle is the bottleneck of the whole system, even if the heating block is able to melt a lot of plastic - you will not be able to successfully extrude it if the nozzle does not allow it.
Many problems and questions may arise, but there is only one answer - the extrusion speed is greater than the throughput of the nozzle - it is necessary to experimentally (using the table) determine the allowable maximum printing speed and not exceed it.
The test can be carried out for each type of plastic you print with - their physical properties are approximately the same from type to type. I indicated at the very beginning how to use the table at the link at the end of the article - use it. I hope this helped you.
Important: if you experiment with different layer heights without changing the nozzle diameter, you will find the following: The change in layer height is inversely proportional to the printing speed.
And it's true, how many times you reduced the height of the layer - so many times you can increase the speed of printing! This is a consequence of the fact that the maximum allowable volume of extruded plastic does not change. Unfortunately, another conclusion follows from this - as you increase the height of the layer, you will be forced to reduce the speed.
Important: If the filament is extruded with a larger diameter than the nozzle, reduce the print speed, do not try to reduce the flow rate in the slicer!
The slicer initially sets the amount of extruded filament required to print the line, and changing the setting will create underextrusion. Forget about slicer flow control (the topic of a separate article) - slicer flow control is necessary in exceptional cases, and believe me, your case is not exceptional, since the flow is perfectly controlled by the feed rate and setting the number of microsteps of the extruder motor (if the flow is configured incorrectly).
Thank you for reading the article to the end, I'm waiting for constructive criticism in the comments, I'll try to answer it.
P.s. It may turn out that the extruder is assembled correctly, the parameter of the number of extruder steps is adequately set, but the diameter of the extruded thread is smaller than the diameter of the nozzle. This means that the extrusion speed is insufficient and the molten plastic flows out under its own weight faster than it is fed. You need to increase the print speed or lower the temperature. I had the same problem with flex printing.
Link to table here.
Finding out the maximum feed rate of the extruder
Technician
Allows you to calculate the maximum print speed based on the thickness of the layer, the width of the extrusion and the diameter of the bar.
In addition, it will allow you to adjust the optimal current for the extruder motor. So that it does not overheat unnecessarily, and does not miss steps.
So:
- Bought a printer
- Installed a new hot-end, extruder or nozzle of a different diameter.
- We would like to adjust the optimal current on the extruder motor
We follow a simple method:
We extrude a 50mm bar in several stages. Each time we increase the feed rate until we hear the crunch of the gear slipping on the bar.
Or the knock of skipping steps if the current is adjustable.
You need to watch carefully, some designs skid silently.
Need to extrude 20-40cm of bar. I don't think it's much at all.
Step by step instructions in the calculator.
I will only add that in most cases you can start with the F300 speed. But if you have a weak extruder, then less. The extruder must of course be calibrated before doing so.
We sent a command and carefully look at the gear, and then at the extruded "sausage". If there was no slippage, and the extruded bar is smooth and uniform, then we increase the feed rate F by 60 (by 1 mm / s)
- G01 E50 F300
- G01 E50 F360
- G01 E50 F420 and so on until we stall
Do not forget to clean the gear with a brush after each approach.
Once the maximum throughput has been determined and calculated, the optimal extruder motor current must be adjusted.
This time we press each time at the obtained maximum speed, adjusting the current on the motor in such a way as to be on the verge of breaking the steps.
If you have TMC series drivers and are connected via UART, it is incredibly convenient to do this without leaving your computer.
It is sufficient to set the current with the command M906 T1 E800 before extrusion, substitute the desired one instead of 800.
There is absolutely no need to increase the current if the gear and hot end cannot go faster .
The picture shows the approximate consumption of plastic with a 0.6mm nozzle for a full setting, including motor current. And by the way, the Brass heating block allows you to feed about 100mm / min faster than aluminum, of the same design.
Like this: https://3dtoday.ru/blogs/mcpaul/malogabaritnyy-latunnyy-nagrevatelnyy-blok-otrezayu-lishnee
Subscribe to the author
Subscribe
Don't want
12 9005 more interesting articles
Dmaw
Loading
25. 10.2022
2109
12
Subscribe to the author
Subscribe
Don't want
This problem has been known for a long time, but I didn't know about it. I'll tell you my story, how I helped a friend burn...
Read more
APToni
Loading
11/01/2022
927
ten
Subscribe to the author
Subscribe
Don't want
Installing Klipper on a Debian 11 machine.