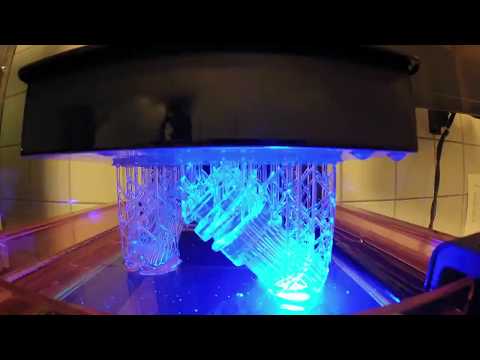
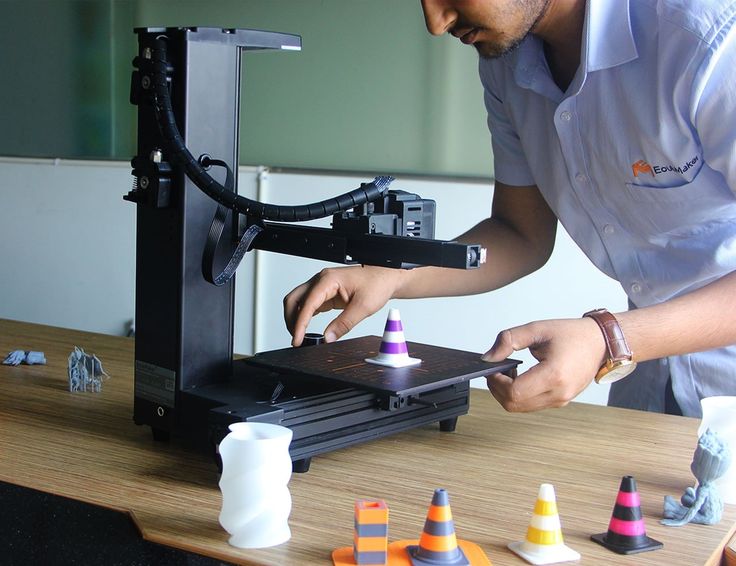
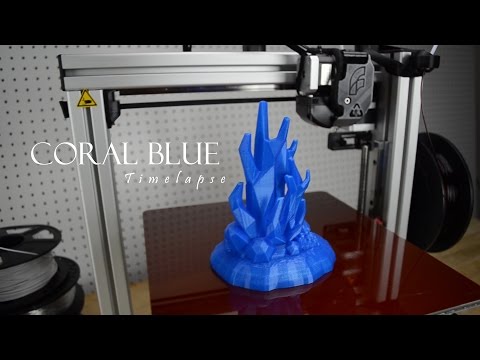
3D printer time lapse
How to Create the Best 3D Printing Time-Lapse Videos With Octolapse
By Ravi Singh
Using time-lapse videos to show off your 3D printing process is second to none. Here, we'll teach you how to do it with Octolapse.
Octolapse is an OctoPrint Server plugin that you can install to create those awesome stabilized 3D printing time-lapse videos where the printer nozzle stays in one place and the 3D printed object seems like it's growing by itself.
It's really fun with loads of customization options and presets that can further enhance the time-lapse videos of your 3D prints. Below, we'll detail everything you need to do to get started.
Things You Will Need
You will need the following to get started.
- An OctoPrint Server installed on Raspberry Pi. You may also use an old Android device as an OctoPrint server.
- A camera module for Raspberry Pi.
You may also use an HD or 4K USB webcam for recording high-definition time-lapse. Android users can use the built-in front or rear cam to record the time-lapse.
Install the Octolapse Plugin
After setting up your OctoPrint server, check the printer connectivity and follow the steps below to install the Octolapse plugin.
- Open and login to the OctoPrint server, and then click the Settings (wrench icon).
- Click Plugin Manager > Get More and then search for the Octolapse Plugin.
- Click on Install to proceed.
- After the Octolapse plugin is installed, close the Plugin Manager and restart the OctoPrint server using the Restart Now button at the top right. Click Confirm when the prompt appears, and then wait for the reboot.
- Click Reload Now after 1-2 minutes. This will load the OctoPrint server web interface.

At this point, we have successfully installed the Octolapse plugin.
Set Up Octolapse for Your 3D Printer
Once the camera is detected and selected under Octolapse, continue following the below steps to configure the Octolapse plugin for your particular 3D printer. We will set up Octolapse for the Ender 3 V2 for this guide.
Here are the instructions:
- Click the + icon in the Printer section and then enter your printer details, such as name and description.
- From the Make option, choose the brand and model if listed. You will see a prompt at the top right to overwrite the settings; click OK. This will load the pre-configured 3D printer's settings and click Save. However, if the model you use isn't listed, keep it as Not Selected.
- In the Slicer Type, choose the slicer you use.
- Launch your slicer program and then manually copy the values to the Octolapse Extruder settings.
 Then click Save.
 - Keep all settings as default, and then make sure you have selected the right camera.
Connect the Camera
After installing the Octolapse plugin on our OctoPrint server, we need to connect a webcam or Raspberry Pi camera to the Raspberry Pi. Once the camera is connected via USB or camera port, click the Octolapse option and select the webcam or connected camera from the drop-down.
Using Octolapse on Android With Octolapse
If the video quality is low resolution, you can edit the camera properties to increase the resolution. Alternatively, you can install Octo4A or OctoPrint for Android app on your old or retired Android smartphone to run the OctoPrint server and record the Octolapse (time-lapse) videos using the high-quality smartphone camera.
After installing the OctoPrint on your smartphone, follow these steps:
- Start the OctoPrint server and then visit the IP address at port 5000.

- Make sure the printer is connected to the OctoPrint server running on your Android via USB OTG. Then, follow the steps discussed earlier to install the Octolapse plugin. The steps remain the same.
- Once installed, go to the Settings on your OctoPrint for Android app and turn on Enable camera server.
- Tap on the Camera source and select the camera you want to use for recording the 3D printing time-lapse (Octolapse) videos. You can also choose the resolution.
- You may also lower the FPS to save the battery on your Android device. Otherwise, use a USB with Power Delivery when using OctoPrint for Android.
- Finally, disable the autofocus settings and open the web interface on your PC.
Make sure to test the camera and add it to Octolapse. Go to Settings > Octolapse and click on Camera to access the settings.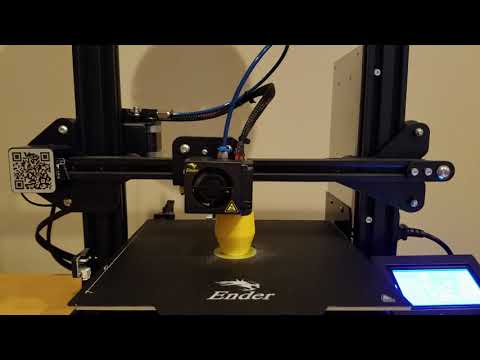
You may edit the default webcam settings or add a new camera. Click on Test Webcam to ensure the camera server is up and running.
Add Script to Your Slicer
If you use Cura, Creality3D, or any other slicer, make sure to add the script to your printer settings in the slicer program. The steps to add the script in Cura and Creality3D slicer are as follows:
- Open the Cura or Creality 3D slicer and go to Settings.
- Choose Printers > Manage Printers and select your local 3D printer.
- Click Machine Settings. In the Start G-code section, paste the following code at the top.
; Script based on an original created by tjjfvi (https://github.com/tjjfvi) ; An up-to-date version of the tjjfvi's original script can be found ; here: https://csi.t6.fyi/ ; Note - This script will only work in Cura V4.2 and above! ; --- Global Settings ; layer_height = {layer_height} ; smooth_spiralized_contours = {smooth_spiralized_contours} ; magic_mesh_surface_mode = {magic_mesh_surface_mode} ; machine_extruder_count = {machine_extruder_count} ; --- Single Extruder Settings ; speed_z_hop = {speed_z_hop} ; retraction_amount = {retraction_amount} ; retraction_hop = {retraction_hop} ; retraction_hop_enabled = {retraction_hop_enabled} ; retraction_enable = {retraction_enable} ; retraction_speed = {retraction_speed} ; retraction_retract_speed = {retraction_retract_speed} ; retraction_prime_speed = {retraction_prime_speed} ; speed_travel = {speed_travel} Once added, click Close > Close.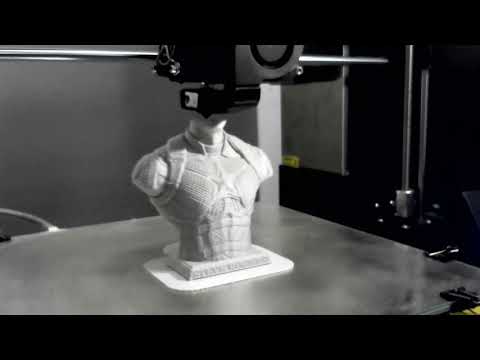
Now, you can start slicing the 3D object you want to print and upload the G-code to the OctoPrint server for printing.
Record Time-Lapse With Octolapse Automatically
Now, whenever you start printing via the OctoPrint Server, the OctoPrint displays or previews the snapshot plan. It tells you where the print head will be when the Octolapse takes the snapshots.
Click Accept and Continue.
This will start the 3D printing process and OctoPrint will begin taking the snapshots. It will combine these snapshots to create a seamless time-lapse video of your 3D-printed object.
When the printing is complete, click the Videos and Images… button to download the time-lapse video created by Octolapse.
Upgrade to a DSLR for 4K Time-Lapse Videos
No matter which webcam you use on your Raspberry Pi OctoPrint server, the quality cannot come close to the OctoPrint for Android (unless you have an ancient Android device with a low-res camera).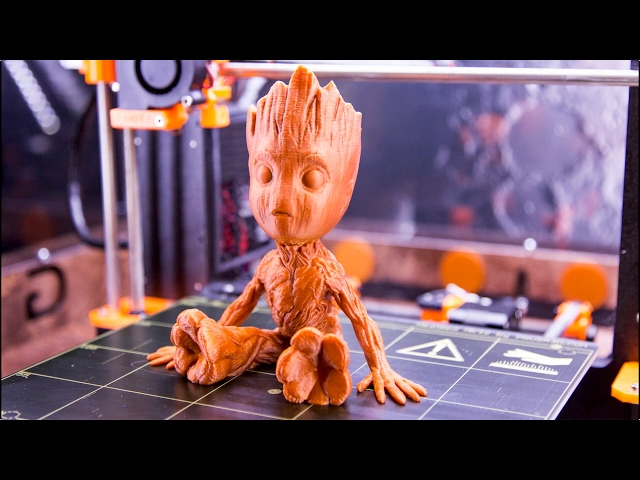
However, you can connect DSLR or mirrorless cameras to your Octolapse via a USB connection and use it with Octolapse to take snapshots and create professional-looking time-lapse videos that are perfect for YouTube, TikTok, or Instagram.
Learn How to Make a 3D Print TimeLapse – Phone or Camera – 3D Printerly
Many people wonder how to create those awesome timelapse videos that they may have seen online, and it isn’t as hard as you think. If you want to learn how to make some cool 3D print timelapse, you are in the right place.
Keep on reading through this article to learn how the experts make time lapses that you can be proud of.
How to Make Smooth 3D Printing Time lapse with a Phone or Camera
To make a timelapse you’ll need a digital camera or phone, a printer, a remote shutter, a mount to hold the remote shutter, a trigger, and video editing software.
First, you will need to set up your printer, preferably in a dark area in your workstation. This is because it is more controlled and will prevent flickering.
Next, you need to print the mount that will hold your shutter in place if you’re using a digital camera or earphones if you’re using a smartphone for taking photos. You also need to print the trigger that will be placed on the print head.
Mount all the printed parts onto your printer. Position the remote shutter for the camera on the 3D printed mount. For the smartphone, position the earphones on its 3D printed headphone mount.
Mount the trigger in the right place on the print head so it can move and press the shutter or the button on the earphones each time it goes to the stop position.
Place the camera or smartphone, whichever is taking the timelapse, in a suitable position. There should be no obstructions so it can take the photos seamlessly.
On the printers LCD, determine where the exact position the print head should be in (the stop position) before any photo is taken. Calibrate the printer to a position where the trigger mounted on the extruder clicks the remote shutter or button on the headphones.
Inject the correct gcode into your slicing software to enable the print head to stop after every layer is completed in order for a photo to be taken. The gcode also specifies your 3D print timelapse interval.
The end result will be a compilation of photos that you can stitch together using a video editing software to turn your still photos to a timelapse video.
For a more detailed explanation you can check out this video.
How to Make a 3D Printing TimeLapse with OctoPrint (Octolapse)In this method, you get your 3D printer timelapse using a Raspberry Pi and the OctoPrint software.
OctoPrint is a remote control and monitoring software that you can install on Raspberry Pi. On the other hand, OctoLapse is a plugin that creates stabilized time lapses of your 3D printer in action.
First, download the latest OctoPi program and install it to your Raspberry Pi. Connect the Raspberry Pi to the 3D printer via USB and power it.
Install the OctoLapse plugin by clicking on the Octoprint settings icon, navigating to the plugin manager and installing it. You will need to restart the OctoPrint software before you can start using the Octolapse plugin.
Get a webcam e.g. a Raspberry Pi camera and hook the other side of its cable to the Raspberry Pi to get a working webcam stream.
3D print a camera stand, glue it to a sturdier pedestal and position the camera properly to get a good stream image. Also, adjust the focus of the camera.
You can adjust the OctoLapse 3D printing settings, to set your desired 3D print timelapse interval.
Upload the gcode locally to the OctoPrint software and hit print. You will notice that the OctoLapse 3D printing software will work fine.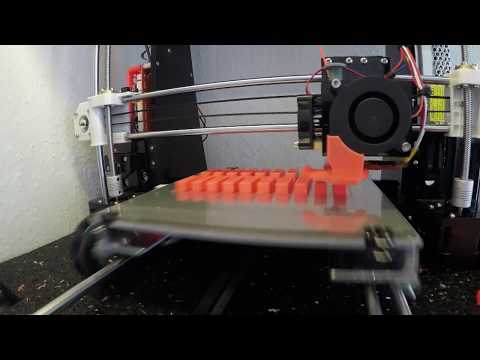 It will move the print head and bed to a fixed position after every layer for the camera to take a picture.
After the print is complete, the OctoLapse 3D printing software spats out a complete video file that you can download.
For a more detailed explanation of using OctoPrint to create 3D printing time lapses, have a look at this video.
How to Use Resinlapse to Make Resin Time Lapses
Filament 3D printers get most of the attention with time lapses because they have had more time to be fine-tuned, though resin time lapses are starting to make their way into the field.
One of the simplest ways that you can capture a high quality resin 3D print timelapse is to use a product called Resin Lapse, made by Uncle Jessy, a well-known YouTuber.
You can find the Resin Lapse product on Uncle Jessy’s Resin Lapse Big Cartel page for just $20 at time of writing.
Along with the Resin Lapse, you’ll need your resin 3D printer of course, along with a camera that supports a TRS shutter release and a decent video editing software.
You’ll usually find that most Canon cameras have this needed shutter release.
To start off, you need to take the photosensitive end of the resin lapse and insert it into an opening on your resin 3D printer. This is to enable it to trigger the camera to take a photo each time a layer of your print is processed.
Next, you insert the other end of the resin lapse cable into your camera. Place the camera in a stable position where it can capture the perfect view during the printing process.
After getting everything into place, start your resin 3D printer. Each time your printer finishes a single layer, the camera takes a picture. This process is perfectly synchronized.
You can then use a video editing software to stitch the images together to form a Resin lapse.
Example of video editing software that people use? Should be in the video guide I’m guessing.
To get a more detailed explanation of this process check out this video.
Best Camera for Time LapsesCanon EOS 77D
This camera is a beast when it comes to creating smooth time lapses.
The Canon EOS 77D has an optical viewfinder which enables you to view what you want to photograph exactly as the camera sees it in different lighting conditions. You can view your 3D prints with minimal lag and glare because this camera gets it in focus quickly.
When it comes to capturing images, the canon EOS 77D offers high speed continuous shooting. It can capture as much as 6 frames per second. It will not miss any moment in your 3D printing process.
It has HDR movie and timelapse movie modes. The latter takes photos for a long period of time and stitches it together to form a single high-speed video.
The former captures under-exposed and exposed images and blends them into a more detailed video. This feature will ensure that the timellapse on your 3D printer, whether it’s a Prusa or Ender 3D printer be excellent.
If you don’t have a workstation with optimal lighting conditions, then the anti-flicker shooting function will come in handy. It will enable you to take continuous shots without disparities in color or exposure since the camera compensates for flickering light.
For powering the camera, you have a DIGIC 7 image processor which will provide high quality and detailed results even in bad lighting conditions.
One satisfied customer from Amazon was impressed with how fast the camera captured images. She said that she was able to take 10-12 shots of her kids in a few seconds by just pressing the shutter quickly.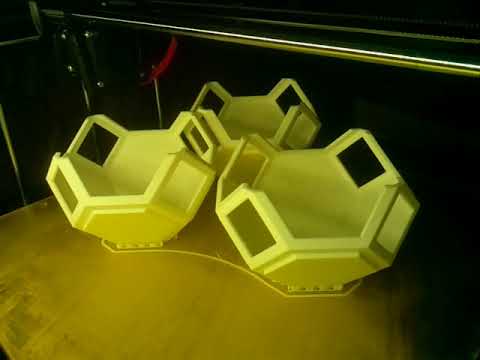
Another user ranked the Canon 77D over the Nikon especially when it comes to the autofocusing system. This enable to capture detailed images of his car without any flickering.
An Amazon user gave it a five-star feedback and said that it had a better sensor, resolution and CPU as compared to other cameras in the market. One person even won awards through using this camera, so that definitely counts for something!
You can get the Canon EOS 77D from Amazon today.
(There is a solution) Will 3D printing multiple copies at the same time save time?
diy-3d-printer
I'm wondering - of course, if the 3D printer's table is big enough - printing multiple copies of the same print can save me a significant amount of time in a small production line, eliminating minor losses such as setup time , post-processing time, etc.
for example, if my print takes 10 hours, will it take 2x longer to print 2x copies at a time, increasing linearly, or will it be much less?
@Mehrad, 👍14
Talk
7 answers
Best answer:
▲ 11
Actually no. It will take a little longer for each addition. You also have a point of failure where you are knocked down and all prints are destroyed.
The fastest way to print multiple objects is to print one at a time. In fact, slic3r allows you to do just that with its sequential printing feature.
The reason is that the time it takes to go up 0.5mm, move a few mm to the next object, drops 0.5mm back.. Repeat for inner shells, outer shells, fills.. all add time. It doesn't seem like a lot until you've done it 14,000 times.
In the case of your example, this would be negligible. In more complex or well-spaced prints, it has a different story.
For extra extra speed, look into PLA loss casting...
, @ StarWind0
▲ 2
The percentage of production improvement generally depends on the size of the printed products. Unfortunately, it is volatile enough to make it difficult to give a precise answer.
Consider one single print. I am using my printer as an example. Other printers may have similar sequences. Printing has started and the table should be up to temperature. Once the set level is reached, the print head(s) must also reach temperature. Ignoring for the moment the duration of the print, it is then considered that the printer bed must cool down in order to release the print.
If you have ten items to print, you'll get nine times the time shown above. This can take up a significant amount of production time.
On the other hand, ten prints instead of one won't be of much use over time. You may lose some time in post-processing if you have stringing between elements.
Another complication is directly related to printing quantities. If you have one print failure, you've lost that time. For example, one print might take 18 minutes. Twelve minutes after printing, you have a clogged nozzle and have to stop working. This is an unfortunate loss.
With ten prints on the table, you print for two hours and fail. Much worse is the loss of time and productivity.
Obviously, it would be preferable to have a properly functioning printer and be able to work with confidence that these failures will not occur.
Hobby grade printers can't provide this level of confidence, but industrial/commercial grade printers should, further increasing the time it takes to print multiple items on a table.
If you have hot swappable plates, perhaps combined with the ability to preheat the incoming platen, you save time. I don't know enough about commercial grade printers to suggest such a feature exists. My printer table is attached with magnets and could be hot-swapped if I was careful. The table will begin to cool down quickly, making the preheated plate even more valuable. Instead, I'll just print a few articles and hope for the best.
, @ fred_dot_u
▲ 5
Yes and no. It depends.
For FDM printing, the print time in general scales linearly with the number of objects. However, some printers have a "minimum layer time" which prints smaller layers more slowly so that each layer takes at least this minimum time. This gives the seal enough time to cool.
Since the model shown in your example is quite small, it is likely that it will reach the minimum layer time. This means that printing one copy will take exactly the same time as printing two copies, which will take exactly the same time as printing three copies, until you reach the minimum layer time. At this point, adding more models will simply add some constant number of minutes to your print time.
If the model is large enough that the minimum layer time is not a factor, then printing objects one at a time is generally faster because you save on moves between layers of two objects (and also results in better printing, since moving between objects can leave stringing behind them).
This only applies to FDM printing. For DLP printing, the print time for a (set of) models only depends on their total height and therefore the number of layers required, since each layer takes the same amount of time regardless of the amount of material printed. So the times for 1, 2, 3,...n models are exactly the same.
There are many other types of printing in which the number of layers is much more important than the amount of material used, such as inkjet binder, SLA and SLS, in... there, as a rule, some time the cost of the material is printed, but The main factor in print time is the number of layers (and for SLS, the amount of time it takes for the volume to cool down after each print, which is quite significant.).
, @ Tom van der Zanden
▲ 8
Printing multiple parts of can save you time.
The issues other posters point to are all great, but one factor that was neglected is the time it takes for you to clear the build plate and restart printing.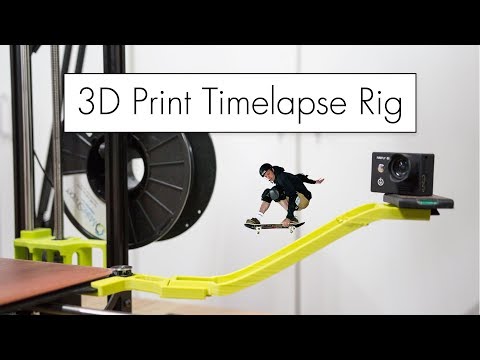 I found that for small parts (less than 1 inch cube) printing multiple parts at once was more convenient and minimally fast. Much of the time saved came from the fact that I could leave the printer for a few hours and work on other tasks without having to babysit the printer and wait for it to finish each part. I printed about 100-200 pieces this way. I ended up losing one "batch" when one part broke off and started causing problems, but I found it was a small price to pay for being able to do a lot of other things.
Everything will depend on the criticality of your deadline for completing the parts. If you're doing the giggle details and don't need them to be done immediately, then I'd say one at a time. Less risk of breakage, less wasted materials and time is not super critical. If you are producing parts for a prototype product that needs to be tested in the field for several weeks, I would choose small batches of a few parts. This will give you more time to work on other things, less exhaustion, and you can check in from time to time to see if everything is in order, usually by doing nothing, assuming everything is going well.
, @ Diesel
▲ 0
Actually the answer is yes and no. So I had to print 12 identical little objects for a science experiment. It's just that I made some stones from domes with some offset edges, anyway, the minimum wall width of my printers is 0.5 mm. The volume of the objects was 2 cm3. The first print failed because they were detached, but then I connected 12 items with hardened 1x1x5mm cylinders in a blender and ran them through my cutter and they printed with no problem. After that I just cut off the cylinder and was ready to go. Just make sure your object is connected at every point facing each other. Based on your picture, it should be related something like this:
, @ Collin Elliott Clark
▲ 1
It usually takes more than time to complete the actual prints due to additional moves, but this saves you time in one important way: if you trust your printer, you can run a large batch and then just to leave . Instead of returning every hour or so, you can return after a few hours or at night.
So batch printing can allow you to put more items through the printer in the same amount of time.
, @ Joel Coehoorn
▲ 0
This will save you machine time too if done right.
Simplify 3D has a setting that allows you to make multiple layers at the same time; like most slicers. So if a part is 10 cm high, you can set it to go to the next one after 10 cm. The machine will then build each one in turn on the build plate in sequence. You won't have to remove parts very often, and the machine won't have to spend time warming up after each print. If it's not done correctly, like moving from one part to another for each layer, then yes it will require a lot of slow retractions and z-axis movements, which will cost you more overall time.
, @ user77232
3d printer maintenance
3DPrintStory 3D printing process 3d printer maintenance
3d printer, like any other piece of equipment, needs maintenance. And if you haven’t done it until today, it’s better to start right after reading this short article.
I won't categorize maintenance into daily, weekly, or monthly because each of you types at a different rate. For someone, a 3d printer can stand turned off all week, while for someone it works 24 hours a day. Therefore, to a greater extent, you yourself have to determine how often you will carry out maintenance on your 3d printer.
Have you ever heard of preventive maintenance? This is one of the pillars of the concept of general equipment care, the essence of which is that after the equipment has been used for a certain period of time, preventive inspections, various types of scheduled repairs and revisions are made, excluding the possibility of equipment operation in conditions of progressive wear. So you and I, as owners of one piece of equipment or a whole fleet of 3d printers, must track down the precursors of major malfunctions - whether it is extraneous noise during printer operation or an unscrewed screw.
Technical inspection of the 3d printer
Therefore, the first thing we will talk about today is the control and inspection of the 3d printer components to identify deviations that lead to breakdowns, which in turn can lead to equipment downtime. What should you pay attention to first of all?
Extruder. It is worth checking it for leakage of the plastic melt and the nozzle-cylinder interface, so the accumulation of polymeric material can form either from above or below the heating block. In case of detection, at least pull the nozzle, or rather, disassemble and clean all elements from polymer material. By noticing the leaking nozzle in time, we can prevent the failure of the thermistor heaters.
From the extruder, move on to inspecting the kinematics. First to the shafts. Be sure to control the appearance of wear on the shafts, as it often happens that the user does not notice that the linear bearing is wedged, and corresponding marks, scuffs appear on the shafts. Up to a certain point, or rather, depth, they can be removed by grinding, and then not. Therefore, the sooner such wear is diagnosed, and the linear bearing is replaced, the less likely it is to get an expensive shaft replacement.
Just like shafts, belts are subject to wear. This can be either wear on the working surface of the belt or damage to the cord. In any case, during the inspection, check the condition and tension of the belt. Why tension? Because once you pull the belt, you can break the integrity of its cord. Naturally, such a belt will need to be changed. If you notice the wear of the belt in time, you will have time to order it and the 3d printer will not stand idle, waiting for the spare part to arrive.
Since we are talking about belts, it is worth checking stepper motor pulleys along with them. Namely, whether there is no idle rotation. If necessary, tighten the lock screws. Always check the kinematics of the 3d printer for any play. For the most part, play will affect the quality of the surface of the printed product, but this check should not be neglected. Take the carriage and move your hands to a break, try to pull it. If you do not notice characteristic knocks, then everything is in order. If you notice, then check the tension of the screws. Axes misalignment during 3D printing can also lead to both linear bearing failure and high shaft wear.
| |
You should also check if the fan for blowing the 3d printer board and the extruder heatsink is working. I understand that in some models of 3d printers, the manufacturer did not worry about ease of maintenance, but this should not be neglected, as overheating can lead to failure of the stepper motor drivers.
If you have something to add to the inspection list, write about it in the comments, and we will go directly to maintenance.
3d printer maintenance
What actually needs to be serviced?
Let's start with cleaning. More specifically, from cleaning the filament feed mechanism. There are several ways to get it contaminated. You can get rid of one of them very easily by installing a so-called filament filter. It is a box with a sponge placed inside, which is designed to clean the bar from accumulated dust and other contaminants. A very simple thing. Link to the 3d model on Thingiverse. If you have a bowden extruder, you can clean the filament feed tube from dust by simply blowing it.
Your 3d printer table also needs to be kept clean. I periodically wipe it with a cloth dipped in acetone. It is better to do this procedure with a glove in order to avoid skin contact with acetone.
The table lift screw also needs to be cleaned of dust and dirt before being lubricated. As for the lubricant itself, I read a lot of opinions on this matter and came to the conclusion that the best choice is ordinary Litol-24. I use it both for lubricating screws and for lubricating linear bearings. We lower the table down, apply lubricant to the screw above the nut, then raise the table to the upper end position and apply lubricant from below the nut and drive the table again. Then, if excess grease has formed, remove them.
Also take the time to extruder. Clean the model fan and radiator from dust and dirt. The best way to do this is with a vacuum cleaner. In my 3d printer, the manufacturer did not bother about the ease of removing the extruder, so this procedure is quite time consuming.
Pay attention to the shafts. If your linear bearing seals are working well, then you should see a buildup of dust mixed with grease in the end positions of the axles. It is worth deleting it as it accumulates. The easiest way to do this is with a paper towel.
Moving on to the lubrication of linear bearings. In theory, they should be stuffed with the right amount of grease at the factory. Moreover, this basic packing is calculated for the entire life of the bearing, but whether the Chinese do it or not is unknown. When I bought linear bearings, I found that they are only covered with a liquid lubricant to prevent corrosion, so it’s better to remove and stuff the same lithol inside, because it doesn’t make sense to smear it on the guides, since the seals will simply remove it and nothing will get inside.