3D printer time lapse gun
Timelapse Of The 3d Printed Gun Being Printed.
- by: Caleb Kraft
Once the DoD requested the 3d printed gun files be removed from the internet, a couple things happened.
- The Streisand Effect went into full force. The file was shared all over and can still be found easily.
- I suddenly realized that I was going to be printing a 3d printed gun and doing another article on it even though I had just written an opinion piece about how I don’t care.
I’m not above admitting that it is childish of me. I was told I couldn’t have this thing and suddenly I knew I had to make it. I see it with my kids all the time. Toys can sit in a corner collecting dust for ages, but the second it is in threat of being removed, they have renewed interest, at least for a few minutes.
I figured, if I’m going to be childish about it and print a gun that a) won’t work because I don’t have the right printer, and b) I won’t use anyway because I don’t generally play with guns, I might as well make a fun timelapse video of the more recognizable parts being made.
It initially seemed like it was going to be quick and easy. However, I quickly found that just printing this thing was going to be a time consuming and frustrating task.
1. the scale on the individual files was way off.
I suspect this has something to do with the printer it was designed for. It seemed very close to being 1 inch = 1 mm. Not a completely uncommon problem. Manually resizing got some files to look right, but I found many simply wouldn’t resize.
2. Almost every single item had errors.
If you’ve done 3d printing, you’ve found that a model can have all kinds of issues that will stop it from printing correctly. I found every single item for the gun had errors. I actually learned a lot about how to repair non-manifold items from this exercise, so it was good in the end.
Some items, like the hammer and the hammer springs simply would not print. I ran them through systems to repair them and fix errors. It would say that everything was fixed, but when I tried to “slice” them for printing, the software would crash. This means that my gun is incomplete. It has no hammer. Not really that big of a deal to me.
the whole gunNote that it is missing the hammer mechanism. More on that later.disassembled trigger spring. Cool design, I might use this idea for something else later black: initial print with errors. Red: fixed print. the gopro fell into the printer stopping it from moving the bed correctly. You can see the top two layers are shifted about an inch. The rest of that mess is just support material I was ripping out. The hammer that refused to print correctly despite repeated repairs.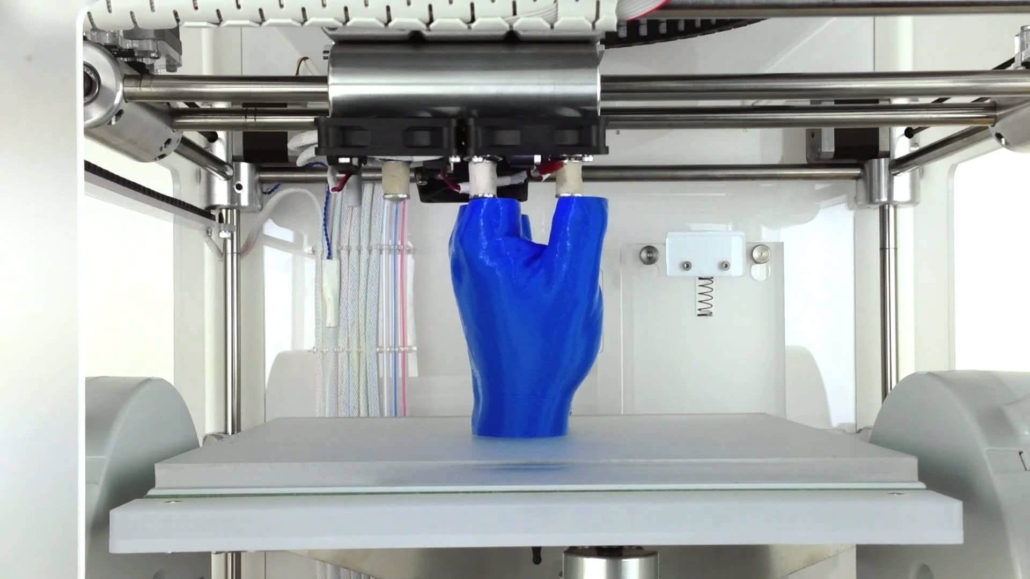 what the hammer was supposed to look like. the spring that crashed my slicing program every time I tried to prepare it for a print.
 Do I care now?
Nope. I climbed to the top of the fridge and got my cookies. I’m a happy child. The reality is that a zip gun is still cheaper, easier, safer, and more reliable. Here’s an example.
I 3D-Printed a Glock to See How Far Homemade Weapons Have Come
ST. AUGUSTINE, Florida — The fully-automatic “Scorpion” submachine gun can burn through a 30-round clip of 9mm ammo in a matter of seconds with one steady pull of the trigger. It looks, feels, and shoots just like a factory-made gun—except part of this one came off a 3D printer.
According to the Scorpion’s maker, the material used to 3D-print the frame (the heart of the gun, where the metal barrel and other parts all come together) is actually “on par or stronger” than the off-the-shelf equivalent. I’d never fired a full-auto weapon before—let alone one made partly of plastic—and when I took aim and squeezed the trigger, the Scorpion unleashed a wild spray of bullets that missed my target and thumped into a mound of dirt behind the firing range.
Advertisement
The Scorpion was one of many jaw-dropping weapons on display in late June at a Florida event dubbed the “Gun Maker’s Match,” the first-ever shooting competition exclusively for home-assembled firearms. Except for the machine gun, which requires a special federal license, these are a species of “ghost gun,” meaning there are no serial numbers and thus no easy way for authorities to track down the owner or manufacturer.
The shooting contest was put on by a non-profit called Guns For Everyone National, with help from the digital gun building collective Are We Cool Yet? or AWCY, which has been pushing the envelope of what’s possible with 3D-printed arms.
To meet these gunmakers and get a true sense of what 3D-printed guns are capable of these days, I decided to enter the shooting contest in Florida—and build my own ghost gun.
Although the technology has radically evolved in recent years, the best-known 3D-printed gun is still The Liberator, the first one ever created, in 2013. A single-shot, snub-nose pistol, The Liberator resembled a postmodern “Saturday night special,” something just as likely to blow your hand off as fire an actual bullet. These days, beyond the Scorpion, AWCY has created and released plans for a 3D-printed “battle rifle” and under-barrel flare guns that are just a few millimeters away from the military’s “RAMBO” model 3D-printed grenade launcher.
Advertisement
News
People Are Panic-Buying Untraceable ‘Ghost Guns’ Online in the Coronavirus Pandemic
Tess Owen
The most common and controversial ghost guns cost a few hundred dollars online and come “80 percent” finished in a box with all the necessary tools. The sudden proliferation of these cheap, mail-order ghost guns has prompted alarm among law enforcement nationwide. Nearly 24,000 “privately made firearms” were recovered at crime scenes from 2016 to 2020, according to a recently leaked Department of Justice report, and the number of cases where felons and other “prohibited persons” were found with such guns doubled in a single year.
Ghost guns have also turned up in the hands of white supremacists and far-right extremists. A self-proclaimed Boogaloo Boi pleaded guilty last month to possession of 3D-printed machine gun parts and a homemade silencer. The DOJ report, issued June 22 and verified by The Trace, warned of individuals with “racially or ethnically motivated violent extremist ideologies” sharing 3D-printed machine gun files.
Advertisement
To meet these gunmakers and get a true sense of what 3D-printed guns are capable of these days, I decided to enter the shooting contest in Florida—and build my own ghost gun.

Only ten states plus Washington, DC, have local laws that attempt to regulate ghost guns. They are virtually unregulated federally, but the Biden administration has proposed new rules that would require serial numbers on certain unfinished parts and restrict mail-order kits, which the president singled out in an April speech at the White House.
“The buyers aren’t required to pass a background check to buy the kit to make the gun,” President Joe Biden said. “Consequently, anyone from a criminal to a terrorist can buy this kit and, in as little as 30 minutes, put together a weapon.”
But building a 3D-printed gun from scratch, as I learned, takes a lot longer than half an hour. And while there’s evidence of extremists and criminals seeking to exploit the untraceability of ghost guns, there is also a nerdy group of designers and tinkerers who insist they are strictly abiding by gun laws and enjoying a “very loud” hobby.
Shopping for the Ghost Gun
Having never owned a 3D-printer or a gun, I started as a blank slate. Rob Pincus, a personal defense instructor and gun rights advocate, agreed to lend expertise and a 3D-printer. He warned the printing and building process would take at least two days, which he said contradicts the notion that it’s easy for people who want to misuse guns to simply 3D-print one.
“You have to want to do it this way,” Pincus said. “I don't know who the person is that falls into the weird zone where they don't want to buy a gun, they can't buy a gun, but they really want a gun and this is the path of least resistance, as opposed to finding somebody to buy a gun for them or buying a gun illegally out of somebody's trunk somewhere.”
Advertisement
My initial aim was to build AWCY’s Scorpion, which can be legally 3D-printed and assembled in semi-auto (one bullet per trigger squeeze) in most places. But Pincus dashed my Scorpion dreams.
For one thing, it takes multiple days of 3D-printing to make one, which was time I didn’t have before the match. There’s also a shortage of ghost gun parts on the internet—in part due to a recent buying spree amid the Biden’s administration efforts to tighten the laws.
Without metal parts, the Scorpion would not work. While 3D-printed plastic is strong enough to serve as the frame of the gun, it won’t hold up as a barrel or bolt. It would also be illegal, since federal law requires guns to have at least one metal component.
The author's 3D-printed Glock 19 9mm pistol with the words "Ghost Gun" on the grip. (Photo by Keegan Hamilton / VICE News)
“You need the metal parts,” Pincus told me. “Technically, could you build one out of all plastic? Yes. Is it going to be reliable and awesome? Probably not.”
I ultimately settled on the Glock 19, as its essential parts were readily available online. The barrel, slide, trigger assembly, and other metal bits cost around $320, shipped directly to the gun range in Florida hosting the match, along with a $23 spool of PLA+ filament. That plus a standard 3D-printer and a couple boxes of 9mm ammo was almost all I needed.
Printing the Gun
The Glock design, along with plans for hundreds of other guns, is accessible through a website called DEFCAD. It’s hosted by a company called Defense Distributed, led by Cody Wilson, inventor of the first 3D-printed gun. The files can be found elsewhere online, but Wilson’s site makes the repository easy to browse in a store-like user interface, and users must pay a $50 annual membership for access.
For years, the U.S. government tried to limit sharing of 3D-printed gun blueprints through the State Department’s powers over international arms exports. Wilson fought back on First Amendment grounds, and in April the Ninth Circuit Court of Appeals issued a ruling that indefinitely lifted restrictions on publishing 3D-printed gun blueprints.
Advertisement
When I asked Wilson if U.S. authorities could ever hope to totally block the files from being shared online, he replied: “The government should invent a time machine and kill me seven years ago. It's far too late now. The equipment—the 3D printing, it's so cheap. You can make anything. You can design anything.”
For years, the U.
S. government tried to limit sharing of 3D-printed gun blueprints through the State Department’s powers over international arms exports.
Wilson is a polarizing figure in the gun world. In 2018, he was arrested and accused of sexually assaulting a 16-year-old girl he met through SugarDaddyMeet.com. He pleaded guilty to injuring a child, a third-degree felony, and received seven years of probation. In addition to hosting 3D-gun files, Wilson also sells a machine called The Ghost Gunner, which helps convert unfinished parts into AR-15s and other guns.
“The files are literally everywhere in a perfect fluid explosion on the internet,” Wilson said. “It's not supposed to be legal, and yet we found a way to make it legal.”
To get the files from Wilson’s site, I had to verify my identity and sign up for a membership, bringing the total gun budget to just under $400, still cheaper than a brand-new Glock. But when my frame came off the printer (a 16-hour process), there were a few glaring differences. For one, mine did not have a serial number; instead it had the words “Ghost Gun” literally printed on the handle. It was also rough around the edges, not yet ready for the metal parts to be inserted.
Advertisement
It took another four hours and change to sand down the plastic using metal filing tools, a drill, and an electric Dremel grinder. Pincus patiently guided me as I stumbled through the process, which was harder than it seemed on the instructional videos I’d seen on YouTube. The finished product was white on the bottom (my “Ghost Gun”-emblazoned frame) and black on top, with a factory-made barrel and slide. Pincus assured me it was safe to test fire.
Shooting the Ghost Glock
On the shooting range, the plastic ghost Glock felt heavy in my hand. There are videos of 3D-printed guns splintering into pieces during test fires, and I was a little nervous as Pincus coached me on posture and grip. I squeezed the trigger and the first round pinged off a metal target 15 yards away. The gun worked, but not perfectly. All the grinding to make the metal parts fit together caused a jamming issue. More work with the Dremel tool helped, and after several more test fires, Pincus deemed the gun ready for competition.
The match in Florida drew around 50 entrants, almost exclusively white and male, with a couple dressed in full-camo. The mood was more carnival than militia gathering, with everyone gawking at each other’s guns and some online-only friends meeting face to face for the first time. There were multiple contest categories, ranging from kit guns to weapons entirely 3D-printed with homemade metal components. Contestants were judged on a combination of speed and accuracy, maneuvering through courses and shooting at stationary targets.
Advertisement
“This is really what we want to be the first of many celebrations of what I call a freedom hobby,” Pincus said, addressing the crowd. “For some of us, it's, ‘Hey, I want to make my own gun. I don’t want the government involved. ’ For some of us, it's ‘I want a custom gun that has my logo or my name or my grip angle or whatever’... for other people, it's, ‘I want to create designs that never existed before and share them with all of Earth.’”
Leading the push to create wholly unique 3D-gun designs is Darren “Derwood” Booth, a chain-smoking West Virginian who told me he likes living in a rural area because he can step out his front door and test-fire new designs whenever he pleases. His latest work is called the King Cobra, which is virtually indistinguishable to the untrained eye from a factory-made assault weapon. A 9mm “pistol caliber carbine” like the Scorpion, the King Cobra is totally original and homemade, emblazoned with a skull and lightning-bolts symbol Derwood borrowed from Quentin Tarantino’s film “Death Proof.”
Rob Pincus (right) and Xander Guetzloe, a moderator of the group Are We Cool Yet?, address the crowd at the "Gun Maker's Match" shooting competition in Florida in June 2021. (Photo by Keegan Hamilton / VICE News)
Derwood posts his files online for anyone to download or modify, and says he does not profit from his work. “I haven’t ever made a dime off of it,” he told me. “I've invested thousands just in the hobby, but no, I haven't made a red cent.”
Derwood’s designs are showing up all over the world, including in countries where 3D-printing now threatens to undermine strict gun control laws. His work was the basis for another “pistol caliber carbine” called the FGC-9 (short for Fuck Gun Control 9mm), wielded last year by an anonymous masked man in a documentary about the rise of 3D-printed guns in Europe.
Advertisement
“I’m not so happy with that,” Derwood said. “Because, hey, they have laws over there. Obey your local laws. I’m not encouraging anybody to do anything illegal.”
Art That Can Kill
Some plastic gunsmiths argue their work is shielded not only by the right to bear arms but also the First Amendment’s right to freedom of expression, since their guns are works of art. The group AWCY, which organized the Florida shooting contest, handed out stickers with the silhouette of their 9mm Scorpion and the motto “Art is not meant to be contained. ”
”
Xander Guetzloe, a moderator for AWCY, brought a Scorpion to the Florida match that he modified to make it look like the barrel spits fire from a dragon’s mouth.
“Art is in the eye of the beholder, right? This is just a way of expressing ourselves,” Guetzloe said. “It's freedom of expression in a much louder way.”
Guetzloe estimated that AWCY has about 500 members, with 200 actively working on gun design projects in the group’s online forum. The members, he said, include “lawyers, technical writers, plumbers, electricians, just a little bit of everybody,” each lending their own expertise.
AWCY’s aesthetic is vaguely hipster and intentionally low-brow, with guns modified to look extra phallic or with Nerf-style neon colors. They tease new 3D-gun file releases on a well-curated Instagram feed, often finding inspiration in classic weapons that have cult followings. Guetzloe, who has a day job in IT, worked on creating a 3D-printed CETME, a “battle rifle” that’s seen combat in conflicts around the world.
Advertisement
“Art is in the eye of the beholder, right? This is just a way of expressing ourselves,” Guetzloe said. “It's freedom of expression in a much louder way.”
When I pointed out that most art isn’t also a deadly weapon, Guetzloe replied, “It could be used for harm. But I feel like most people that are going to do that are going to go out and steal one. The amount of effort that you put into these, you're not going to do that just to go and do someone harm.”
Even after 22 hours of work, my gun didn’t work properly. At the competition, it jammed repeatedly, and I was unable to finish round one of the contest. Pincus suggested swapping on a Glock-brand slide and barrel, which he had on hand. The factory part plus a little bit of gun oil made all the difference.
I loaded a clip into the gun and racked the new slide, which smoothly locked into place. Taking aim at a target, I squeezed off a few rounds in a row. The spent shell casings popped out of the chamber and were instantly replaced by fresh bullets; my semi-automatic gun finally worked semi-automatically. To test what it could do, I unloaded the rest of the clip rapid-fire—boom-boom-boom-boom. There were no jams. It worked (almost) like a real Glock.
Law Enforcement Isn’t Thrilled With 3D Guns
Making a fully-functioning semi-auto handgun from plastic and a few metal parts, it turns out, is totally legal (at least in Florida), but there are other applications for 3D-printing beyond guns that are troubling for law enforcement. Federal gun laws are enforced by the Bureau of Alcohol Tobacco, Firearms, and Explosives (ATF), and it’s the explosives aspect of the agency’s mission that is increasingly overlapping with 3D-printing.
John “J.D.” Underwood, the special agent in charge of the ATF’s National Center for Explosives Training and Research, told me that 3D-printed land mines are already a possibility. He showed me a 3D-printed “bomblet,” which could be attached to a drone and dropped from the sky. Such devices, he said, have already been used against U.S. troops in the Middle East.
Advertisement
“Nobody or anything's stopping somebody from making this in the United States today,” Underwood said, holding up the miniature plastic bomb in his hand.
When I asked Guetzloe, the AWCY moderator, about the group’s 37mm launcher, he told me the sole purpose is for firing signal flares. But the under-barrel tube version looks very similar to the military equivalent, a 40mm grenade launcher adapted by the Army for 3D-printing in order to save taxpayers money by lowering production costs.
Underwood was impressed with the designs on display at the Florida shooting match, and he stressed that the ATF has no problem with law-abiding gunmakers using 3D-printers.
“As long as they're used for their intended purposes by people that legally can have firearms, I don't have an issue with that,” he said. “It's when people use those firearms for criminal purposes, that's when it becomes a problem. ”
”
Last December, ATF agents raided the offices of Nevada-based Polymer80, the largest ghost gun company and seller of a popular “Buy Build Shoot” kit. No charges were filed and no employees were arrested, and the company continues to advertise pistol kits, though all the options are currently out of stock.
Advertisement
Polymer80 also faces civil lawsuits, most recently from two Los Angeles County sheriff’s deputies who sued the company for selling an “untraceable home-assembled” Glock kit that was later used by a gunman who seriously wounded them in a Compton shooting. The deputies allege the company “purposefully sold their products without markings to make it difficult for law enforcement to trace the firearm.”
“Untraceable ghost guns are now the emerging guns of choice across the nation.”
The gun control group Everytown Law is also suing Polymer80 and other ghost gun makers. One case, which also involves the city of Los Angeles, accuses the company of creating a public nuisance and violating California’s business code. According to the LAPD’s chief, 700 ghost guns seized in the city last year were made from Polymer80 parts, including more than 300 in South LA, where homicides have been on the rise.
“Untraceable ghost guns are now the emerging guns of choice across the nation,” LA City Attorney Mike Feuer said when announcing the lawsuit in February. “Nobody who could buy a serialized gun and pass a background check would ever need a ghost gun. Yet we allege Polymer80 has made it easy for anyone, including felons, to buy and build weapons that pose a major public safety threat.”
Advertisement
A Polymer80 spokesperson did not respond to requests for comment.
The company’s website states there is “a strict policy against selling 80% lower receivers to persons known to us to be convicted felons or otherwise prohibited persons.”
It also says building a gun from a kit provides customers with “a fun learning experience and a greater sense of pride in their completed firearm.”
Melting the Ghost Gun
I’d be lying if I didn’t say I was slightly proud (and more than a little terrified) of my ghost Glock. I somehow ended up taking third place in the 3D-printed pistol category. Just like me, some of my competitors seemed to spend more time behind a computer screen than at the firing range. I was told some shooting clubs prohibit ghost guns or 3D-printed guns, making it difficult to find a place for target practice. And reliability was clearly an issue, as many people—even the most advanced builders—suffered malfunctions and jams. The guns may look badass, but they don’t yet quite stack up evenly to the real thing.
But as 3D-printing technology improves, making a 100% DIY ghost gun will become easier and easier. Even if there's a ban on “80 percent” kits, anyone with access to a printer, a few hundred dollars, and some free time will still be able to crank out a semi-auto pistol, one with no paper trail to identify the owner. In the eyes of Pincus and others at the shooting match, this is actually a good thing.
“I know this is counterintuitive for a lot of people, but the more people who have guns, the more normal gun ownership is, the more responsible the community will be and also the more educated the community will be in judging responsibility,” Pincus said. “I don't think everybody should have a gun. I think everybody who wants to be a responsible gun owner should have that option.”
Since I live in California, one of the states that regulates ghost guns like other firearms, I would need to register my gun with local authorities. Such laws, however, have done little to contain ghost guns. Last week, the city of San Francisco sued three companies that sell do-it-yourself ghost gun kits, alleging they target buyers who are banned from owning guns and want to evade background checks.
“Ghost guns are a massive problem in San Francisco—they are becoming increasingly involved in murders, attempted murders, and assaults with firearms,” said San Francisco District Attorney Chesa Boudin. “We know that the rise in gun violence is connected to the proliferation of, and easy access to, guns that are untraceable, guns that are easier to obtain by people who would be otherwise prohibited by law from getting them.”
I have no interest in owning a handgun—let alone one with “Ghost Gun” on the handle—so I decided to melt down the frame and return the gun to its original form: molten plastic.
Miguel Fernández-Flores contributed reporting.
Simple 3D printing timelapse. Webcam, computer and printer only. (Not a manual, more like a sketch)
Why do I need to buy a RASPBERRY to shoot 3D prints?
We have a computer, a printer and a webcam - isn't that enough?
Enough, and now I'll tell you how to organize shooting for printers with MARLIN firmware with only a computer and a webcam.
Strictly speaking, time-lapse can also be shot on a mobile phone, such a mode has long existed in many modern smartphones, but for the needs of 3D printing, this is not a very successful idea, since the picture will turn out to be too jerky, especially when shooting with prush.
So a regular camera will not suit us, unless it can work in webcam mode when connected to a computer, like many modern cameras. A modern camera capable of working in webcam mode is the best webcam.
Raspbery and OCTOPRINT - although they are of higher quality, they are complicated, expensive and redundant for a simple time-lapse, so I'm not even going to consider them. I note that a two-megapixel camera, and in modern models with a higher resolution, is a good plus for Raspbery's karma.
Everything should be easier.
We will need:
- Printer with MARLIN installed
- Any available computer with WINDOWS
- USB webcam
- USB cable to connect the computer to the printer manual editing of the g-code
- A program that receives commands from the printer and forms a picture. (download link)
On the last point, I didn’t find such a program on the Internet, I had to sketch it myself, brazenly stealing from free access the first code I came across to work with the DIRECTSHOW library.
The original webcam program was written in C#, using WPF, which I'm not good at, so I apologize for the somewhat clumsy interface.
However, if you have the desire and ability, then the original project is in the same place, by reference, you can rewrite it for yourself. And if I have time and desire, I will probably finish my WPF education and rewrite it in a more convenient version.
All
Next, we need to cut the printed model in the slicer, adding the command M118 SMILE to the code before each layer change - this command sends the specified message via the serial port to the computer, and the program reads it and takes a picture from the camera.
In order not to edit the code manually, you can use the capabilities of the slicer, for example, for Simplify3D, you need to add the line M118 SMILE to the script Layer changed .
Copy the cut code to the card, connect the printer and webcam to the computer. Download the program and unpack the archive.
Program settings:
Go to the folder Resources and in the file SerialPortSettings.txt write down your printer connection parameters, com port number, transfer speed, Databits value, according to the instructions for your printer.
Save the file and run the program WebCam.exe .
Here the antivirus may swear at you, because I am an unknown publisher, and the program requires access to the webcam, but I can assure you that there is nothing malicious in the program, it just reads data from the COM port, webcam and writes images to folder Photo inside the program directory.
An exception can be set for Anti-Virus.
The source code is at the link, you can check, rewrite, modify, in general, you can do anything with the code. =)
If you wrote down the port settings correctly, the program will start without warning about the unavailability of the printer.
Otherwise, if the printer is not connected or the port settings are incorrect, the program will be able to record timelapse only by timer. We set the switch to record at the command of the printer, press the "start recording" button, and start printing from the flash drive.
Each print layer will be photographed, numbered and placed in the Photo folder in the program directory.
Well, then, in any available editor, be it Photoshop or OpenShoot Video Editor, open the resulting files as a sequence, set the number of frames and export the video.
Time lapse is ready.
That's all for me, I wish everyone a clean print, to be continued.
Traditional video:
p.s.
The purpose of this article was to give a fresh idea for the implementation of timelapse, without complex and expensive equipment.
What attracts me to the solution is that it is possible to connect any webcam, including a video camera or a camera capable of working in webcam mode, and receive frames on any computer.
Of course, anyone can adapt the process of taking a picture from the camera on command to any available language, system, etc.
Do whatever you want - the printer transmits the command, the computer reads, the camera shoots.
Instructions for creating time-lapse prints on a 3D printer
- many photos
- Video
- automatically
- Video editor
- Special program
Many professional 3D printing studios and even amateurs post beautiful videos where an object magically appears out of nowhere. Those who understand even a little about 3D printing understand that this is really just a time-lapse filming of the printing process. But almost no one thinks about how such videos are made. In fact, creating a time lapse is very simple, it does not require special skills of the operator and editor, and all you need from the equipment is a 3D printer and a smartphone. Next, we will walk you through all the details of creating timelapses and look at mistakes that can be easily prevented even before creating a timelapse.
What is time lapse?
Before you start creating a timelapse, you need to understand what it is. Many people are under the misconception that this is just a speeded up video. In fact, this is a special shooting technology in which photographs are taken at regular intervals, and then they are combined into one video on a computer, where each photo will be a separate frame. Unlike video acceleration, this method allows you to reduce the file size, while increasing the quality of the resulting time-lapse, because we do not shoot a long video, and then throw out unnecessary frames. Everything happens the other way around: we immediately shoot only those frames that will make up the video. And the increase in quality is achieved by creating individual photos, not video, for which high-quality shooting requires expensive equipment. Almost all modern smartphones have a high-resolution camera that allows you to take high-quality photos, but at the same time does not allow you to shoot high-resolution video due to memory speed limitations or low processor power.
How to create a timelapse
Important clarification: As we understood from the previous paragraph, a time-lapse consists of separate frames, which are then combined into one video. But no one forbids shooting “the old fashioned way” using the video acceleration method. For simplicity, hereinafter, fast-paced shooting will also be called time-lapse.
The process of “making” a time-lapse is divided into two stages: shooting the material and processing it. Later in this article, we will look at various options for the implementation of these two stages. As an example, we will use the video and photos of printing a small puck on the Raise3D E2 printer.
Survey methods
Different shooting scenarios may use different equipment. Often, a regular smartphone is enough, on which you may need to install a special application. But to achieve maximum quality, it is better to use a professional camera.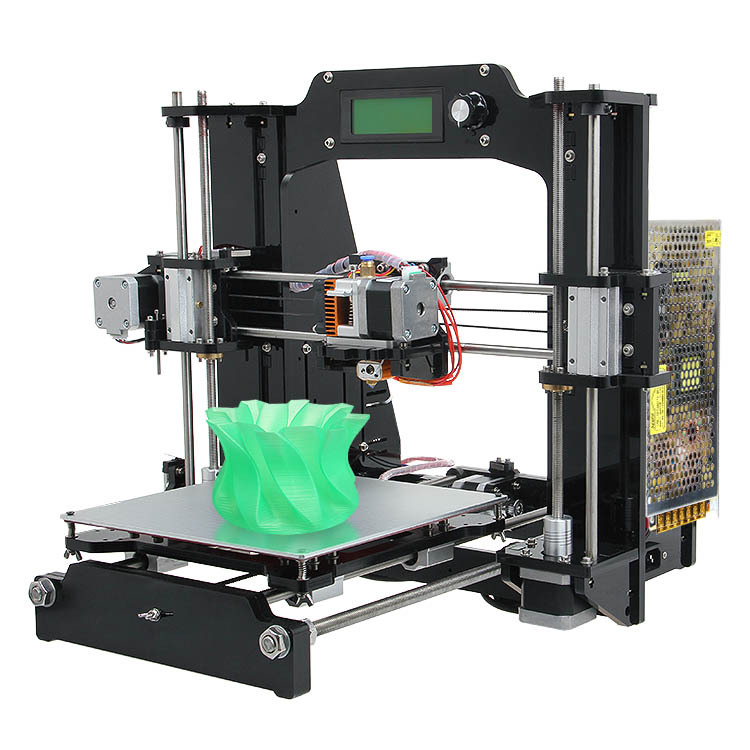 Also, do not forget about the battery charge in any of the devices used, especially when shooting models that take more than 1-2 hours to print. To create a high-quality time-lapse, you need to set the camera in such a way that the highest point of the model falls into the frame. This can be easily done by placing an object of similar height on the printer table. Do not forget about the light: if there is no special artistic intent, then it is best to place the light source behind the camera, at the height of the table, so that there are no unnecessary shadows and the model is evenly lit. As a result, the frame should look like the photo below.
Lots of photos
This method is what is meant by the word "timelapse". To do this, you need to create photos at regular intervals. Many cameras (including action cameras) and smartphones have this feature. After installing the camera and starting printing, you can start shooting. To calculate the appropriate interval between photos, you can use a simple formula:
interval = print time / (video time * frames per second)
Here video time is the length of the video received, and frames per second is the number of frames per second of the video received (usually 24, 30 or 60 fps). Note that all times in this formula are in seconds. For example, to get a video of 30 seconds in length when shooting a print of 1 hour (3600 seconds) at a frequency of received video of 30 frames per second, you need to set the interval equal to 3600/(30 * 30) = 4 seconds between photos. It should be borne in mind that when shooting with this method, the printer carriage will be visible in the frame, which means that as a result it will constantly flicker in the time-lapse. This can degrade the quality of the final result, especially on small models. To avoid this problem, you can use the following method.
Video
This option is the easiest to perform: start shooting video at the moment you start printing. Consider the need for a large amount of free space on the drive where the file will be saved. The advantage of this method is the ability to select certain frames where the caret will not block the model. To do this, before printing, you need to edit the Gcode so that with each change of layer, the carriage moves away from the part. You can read more about editing Gcode files in the article on our website. But extracting individual frames from a video in this way is an extremely time-consuming process.
Fun fact: blogger GreatScott did an automatic photo of the model without the carriage hanging in random places by modifying the printer firmware and the Gcode print file. The essence of the method is that with each layer change, the carriage drove off to a special point, thereby pressing the limit switch, which in turn activated the camera and it took a photo.
Automatic
This method includes both the shooting of the print and the processing of the resulting photographs immediately after its completion. It is only available for smartphones and some action cameras. In fact, it is a fully automated method of taking many photos, because you only need to turn on the shooting, and the camera or smartphone will combine everything into a time-lapse video. Therefore, there is no need to process the received material. Processing methods After receiving the "raw" material, it is necessary to edit it on a computer. In the case of using video, everything is relatively simple, but to process a large array of photos, you need to use special tools and programs. Video Editor When shooting a large video, you only need to speed it up. For example, in the Sony Vegas video editor, you need to insert the video into the timeline and, holding down the ctrl key, move the right edge of the video to the left. When the edge starts to move, you will notice a zigzag. This means that you are doing everything right.
Processing methods
After receiving the "raw" material, you need to edit it on a computer. In the case of using video, everything is relatively simple, but to process a large array of photos, you need to use special tools and programs.
Video editor
When shooting a large video, you only need to speed it up. For example, in the Sony Vegas video editor, you need to insert the video into the timeline and, holding down the ctrl key, move the right edge of the video to the left. When the edge starts to move, you will notice a zigzag. This means that you are doing everything right.
An example of accelerated video on the timeline in Sony Vegas
If you used the method of taking many photos, then you need to select the file item in the top menu, then import, then multimedia. A file selection window will open. Select all photos and under the file browser window you need to check the box “Open sequence”. You will have another window where you can change the frame rate if necessary.
Creating a time-lapse from a photo using Sony Vegas
Special program
These programs exist for both smartphones and PCs. They are intended only for creating time-lapses, so you will not be able to trim the resulting video or change the frame in them.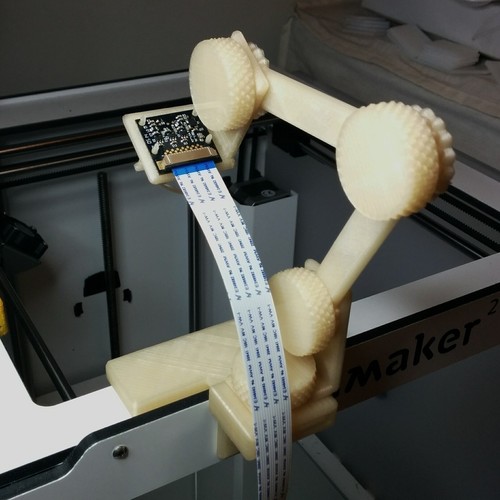 For example, you can use the Time-Lapse Tool on a computer. But on smartphones, it makes more sense to use automatic time-lapse apps like Time Lapse Camera. They have an intuitive interface that even a child can understand.
Major errors and solutions
Often errors relate to the wrong frame and lighting. If the model is closed by the carriage most of the time, then the only way out is to install the camera at table level. This can severely limit the height of the model being filmed.
Wrong shooting angle
Correct shooting angle
If strong shadows are visible on the model, which you need to get rid of, then you can use a table lamp aimed directly at the model.
If strong vibrations are visible after combining the photo into a time-lapse, then the camera moved during the shooting. In some cases, this is caused by vibrations that the printer creates. To solve this problem, you need to securely mount the camera to the printer.
Example of camera shake
Summing up
As you can see from this tutorial, making a time lapse is very simple. The only difficulty will be the choice of equipment for shooting. Do not forget that the main stage is shooting the model, and the stage of processing the received frames is secondary, because if you shoot well right away, then you won’t need to process the video much. Also pay attention to the first frames that the camera or smartphone will take, because they can immediately determine the success of the selected frame and lighting. If you are going to time-lapse a large model, it is best to first make a simpler time-lapse of a small model so that if any errors occur, they can be immediately prevented. Although you can shoot a time lapse using any printer, open frame printers, that is, those that do not have any panels, are best suited, as this gives a large variation in free frames.


