3D printer stress test
Best Test Models for 3D Printing
You can end up in one of three situations that require using test models for 3D printing. First, when using a new printer. Second, when checking out a new type of material. Third, when testing the properties of a familiar type of material to find the limits of its strength. In this review, we will talk about the seven test models we find most useful or interesting.
Read the article below to learn more.
Source: help.prusa3d.com
1. 3D Benchy
3D Benchy is the most popular 3D printing test model. This tugboat figurine perfectly shows the abilities of FDM 3D printers of any price range. 3D Benchy will help you find the parameters that need to be set to get perfect prints.
Source: thingiverse.com
Using 3D Benchy for test printing allows you to see how good a printer will be at creating curved surfaces, inclined elements, arcs, and holes. The model is available in different versions, including a multi-color one. Printing standard-sized 3D Benchy will take approximately an hour — knowing this will help to determine the level of efficiency of a printer.
Download the model from Thingiverse.
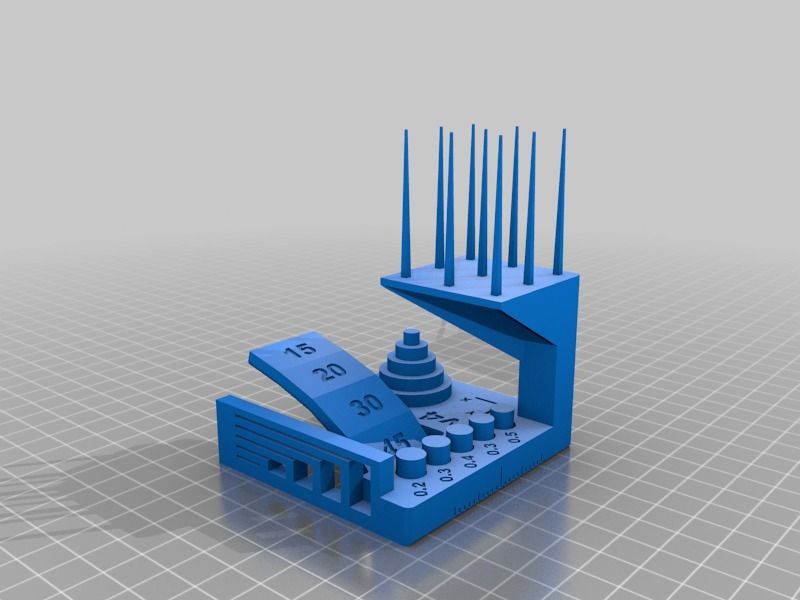
2. “All in One” 3D Printing Test
A complex 3D printing test model will allow checking the quality of resulting overhangs, bridges, as well as extrusion stability and changes of stringing (spaghettification) and it depends on temperature.
An important advantage of this model is an inclusion of an instruction that describes the ways to solve potential problems.
Source: thingiverse.com
The pros of this project include the ability to check how thin walls, hollow cylinders or overhangs will look, as well as how their quality will depend on speed, temperature and cooling settings.
Download the model from Thingiverse.
3. XYZ 20 mm Calibration Cube
The main purpose of the XYZ 20 mm calibration cube is to find out how the extruder’s movement depends on the steps of a stepper motor. This 3d printing test model helps ensure that the distance of 20 mm on a drawing translates to 20 mm in a printed model. The calibration cube will also allow us to find out how extrusion and print quality depend on the nozzle temperature.
Source: thingiverse.com
Download the model from Thingiverse
4. Compact Temperature Calibration Tower
This temperature calibration tower showcases a 3D printer’s abilities to utilize the same with different temperatures. The model demonstrates the quality of overhangs and tunnels, as well as how good the printer is at producing curved elements.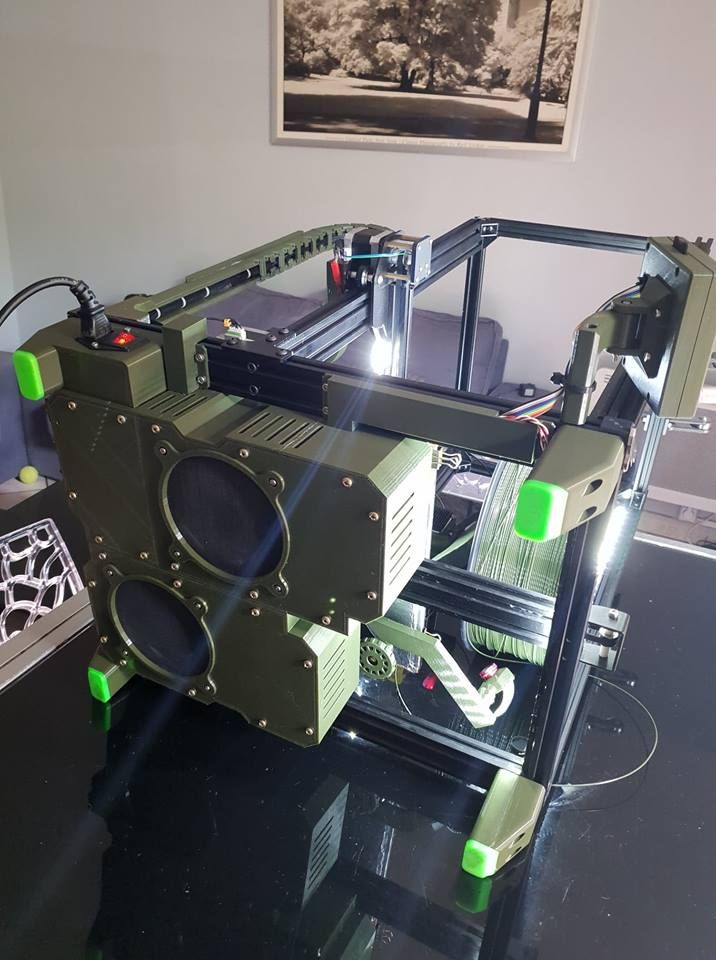
Source: thingiverse.com
This simple tool makes it easier to find the abilities of the materials that weren’t used before or were only printed at a certain temperature. It’s important to keep in mind that the printing temperature for each element must be set in slicing software or manually using G-code.
Download the model from Thingiverse
5. Open-Source Assessment Model
Source: github.com
3D printing test model by Kickstarter and Autodesk was developed with the consideration of the experience of using other testing models. This one can be considered multi-purpose. It includes bridges, overhangs, small details, and the elements to access the dimensional accuracy of 3D printing. Before printing one should keep in mind the size of an overhang at the upper level. This means that a user should know the temperature at which the model will not deform.
Download the model from Github
6. Quick Stringing Test
When printing complex models without knowing about the properties of a filament and a printer, one can encounter an issue called stringing or spaghettification: it’s when extruder motion stretches the filament, creating thin threads in the air.
Source: thingiverse.com
It is caused by a filament leakage when the extruder is inactive. Filament retraction function is used to avoid it. The correct retraction level should be based on extruder head movement speed, nozzle temperature, and filament properties.
This test model is used to quickly check if the printer is set up correctly. If there are no strings between vertical pyramids, then the parameters are set correctly. If the horizontal filament lines are present, then some parameters are set incorrectly and should be changed.
Download the model from Thingiverse
7. PolyPearl Tower
Another way to test printing parameters is the PolyPearl Tower. The features of this complex model allow one to check the quality of bridges, curves, overhangs, to see if there’s some stringing and find out how rigid the model is. The model can be used for stress-testing to find out the physical limits of a filament with a certain temperature and printing speed.
Source: thingiverse.com
Download the model from Thingiverse
Conclusion
3D printing test models can save the time and resources of a user. They don’t take longer than an hour to print, their quality shows whether the printing parameters were set correctly or need to be changed. Users can easily change the settings of a 3D printer if needed.
Buy a 3D printer and 3D printing materials at Top 3D Shop — and get officially distributed products with a warranty, service, and technical support.
Top Ten Calibration Prints for Your 3D Printer
Get the most out of your 3D printer with these calibration tests which are designed to reveal small adjustments you can make to get your 3D prints to really shine.
Updated on November 9, 2022
by
MatterHackers
With this set of 3D models, you can fine-tune your 3D printer to optimize your it's capabilities and get the best 3D printed parts possible. Let's dive in!
Jump To:
- Vertical Surface Test
- Horizontal Finish Test
- Dimensional Accuracy Test
- Overhang Test
- Bridging Test
- Negative Space Test
- Retraction Performance Test
- Support Material Test
- Full Bed Dimensional Accuracy Test
- Z Wobble Test
- Squareness Test
- Download Calibration Models
Vertical Surface Test
This test is designed to look for "ghosting" or “ringing,” where features echo and ring out along vertical surfaces.
As the print head makes a quick movement, it can oscillate, which creates a ring effect.The oscillations diminish on longer lines and the vertical surfaces clear up until a sharp turn is made again.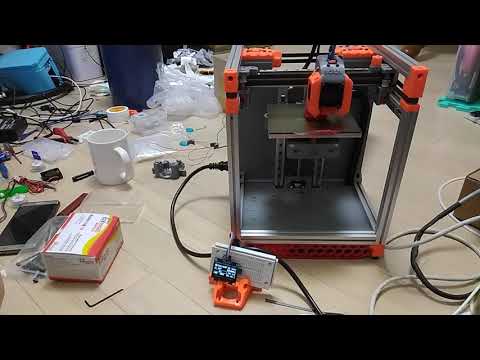 Ghosting can come from a lack of rigidity like a loosely mounted hotend or a wobbly frame, springy belts, printing at high speeds with a heavy direct-drive print head, a bed that isn't rigidly mounted, or firmware settings for acceleration or jerk that are too high for what the printer can achieve.
Some printers can handle high jerk and acceleration, where others will falter and show significant error because of it.
Vertical Surface Test
Horizontal Finish Test
With three different sections - flat, slope, and domed - you are able to see any sort of artifact or ridges from where the perimeters start and end. The more noticeable these points, the lower the score.
Cleaning this up depends on slice settings about perimeters, like start and end overlap, overlap percentage, and where the seam (start/end point of each outer perimeter) is located.
Horizontal Surface Test
Dimensional Accuracy Test
When you're printing coasters and keychains, it doesn't really matter if a part is 0. 2mm too wide, but for multi-part prints that need to fit together, the accuracy of each part is very important to keep things fitting properly. Slots for connector pieces can be just fine off of Printer A but too tight to use from Printer B, or holes for nuts and bolts are supposed to allow for easy installation, but require unnecessary force to assemble.
The second level of this pyramid is supposed to be 20mm wide and deep, and loses points based on the average deviation from 20mm; if the average deviation is between 0 and 0.1mm, a full 5 points is earned. If the deviation is between 0.1mm and 0.2mm, 4 points are earned, and so on.
If you get a bad score, you should run through a calibration sequence for your extruder, making sure that your e-steps are accurate. You can find a helpful guide on how to do that here.
Dimensional Accuracy Test
Overhang Test
This test is designed to see how well the printer can cool down the hot plastic as it is extruded; the better the cooling, the cleaner the bottom surface is.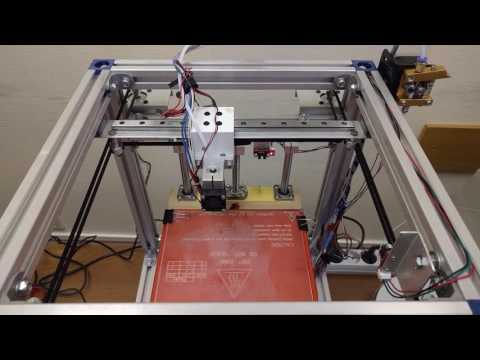 Printing speed does affect cooling, so the lower the print speed, the more time for freshly laid down filament to cool before the next layer is ready.
A small print with high print speeds is going to need much more cooling than a large print at slow speeds since material will have only a very brief amount of time to cool enough to solidify.
It is important to consider that the type of fan used for layer cooling (axial vs radial) and the direction your fan outlet is facing will impact how well an overhang is printed, so it would be wise to print this test rotated every 90 degrees to see if some faces fair better than others. You might even consider a new ducting for the cooling fan to try and direct the airflow toward the part.
Drooping, curling, and hanging filament all lower the score, especially when the lower angles have difficulty.
Overhang Test
Bridging Test
Most slicers have the ability to detect bridging, which is where filament needs to cross an unsupported span. Usually the slicer will turn up the layer cooling fan, slow down the print speed, and change how the this section is printed so the span is efficiently crossed with long strands rather than small zigzags.
This bridging test piece tests a bridging condition, but most models won’t have bridges this obvious or long. You can expect to see some minor bridging over holes in the side of a model, over grooves, or over slots for inset nuts.
You get 1 point for each clean bridge.
Bridging Test
Negative Space Test
Much like the dimensional accuracy test, it's important that negative space is accurately replicated. When you're trying to insert screws cleanly without drilling it out or threading the plastic, it's important to know how much extra space you need to model into your part to accommodate. In general, when I need to insert an M3 bolt, I'll model a 3.2mm hole to make sure it slides in easily.
In general, if you precisely calibrate the steps/mm for the extruder, start and end overlap, and seam alignment, you can push out all 5 pins without much force. If there's difficulty removing any of the pins, there’s still something that needs to be calibrated out to achieve tighter tolerances. One point is earned for every pin that can be pushed out.
Negative Space Test
Retraction Performance Test
This test is hard to quantify the difference between a 4 and a 5, but the main thing this is looking for is retraction optimization. This is one of the toughest slice settings to calibrate due to just how many factors affect retraction, like the number of retraction settings, and even things like layer cooling, print speed, extruder style, or even your extruder's ability to extrude and retract without chewing the filament.
Retraction Test
Support Material Test
Whether you're using a dedicated support material like PVA or HIPS or you're using a single extruder printer and using the same material as your support material, it's important to have your support settings calibrated. Same material supports are printed with what's called an "air gap" where the print head rises above the print to create a slight gap between the roof of the support and the bottom of the printed part, giving the filament extra time to cool and droop onto the supports, preventing them from permanently adhering to each other. That air gap is something that needs to be optimized; too small and the supports adhere to the finished print, too large and the bottom surface will be really stringy and droopy until it can recover.
Dedicated support materials produce a bottom surface finish almost as clean as the top surface, because they are printed without an air gap since they can be dissolved away. The test model has separate sections for intricate supporting and a flat bottom surface, because an air gap optimized for one may not be enough for the other.
Support Test
Full Bed Dimensional Accuracy Test
While the dimensional accuracy test checks the accuracy of a fairly small part, this test checks accuracy across the entire bed.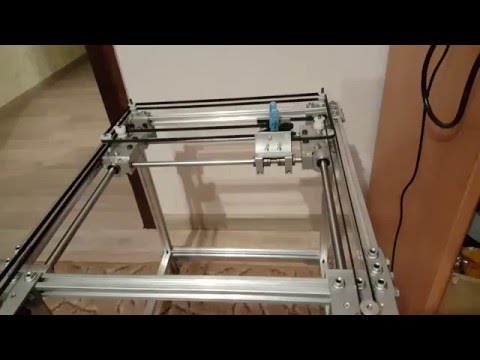 A small error in the dimensional accuracy test will compound into a larger discrepancy across the bed, which is 10 times longer than the first test. The smallest difference in expected vs actual measurement just means that any multi-part prints are going to skew depending on the orientation the part was printed in.
Full Bed Dimensional Accuracy Test
Z Wobble Test
Unlike every other test, which uses a scale to grade the proficiency of the 3D printer, this test is simply a pass or fail. The tower has a wide brim to make sure it is well adhered to the bed, and to ensure that any sort of issue in the walls of the tower comes from the printer's structure, and not because it tipped off of the bed. If there is any wobble, it should be cyclical and repeat with a period identical to the pitch of the lead screw attached to the Z axis. If the lead screw had an 8mm pitch, then you should see the pattern repeat every 8mm.
A key thing to watch out for is to make sure that your Z axis is properly constrained and not over constrained. Properly constrained means you have smooth rods, linear rails, or extrusions with V-slot wheels making sure that the Z axis only moves on Z and doesn't shift around. Rods, rails, and wheels should be tensioned or secured so that they don't wiggle or move when the Z axis is raising or lowering. Over-constrained is something like installing bearings at the top of the leadscrews in a support bracket. This is actually counter intuitive, because no lead screw is perfectly straight and adding that bearing causes a deflection in the lead screw. There should in general only be two part interacting with the lead screw: a coupler that attaches it to a motor (or be part of the motor) and a lead screw nut, anything else is overconstraining it and can hurt print quality more than help.
Z Wobble Test
Squareness Test
This test was developed to make sure that the printer's X and Y axis are assembled square with each other; this test will determine if the printhead moves on X, does it move a marginal amount on Y as well, or vice versa. Using an angle gauge, you will measure each of the five squares and determine how far off each corner is from 90 degrees. The further off from 90, the lower the printer's score.
Squareness Test
These are the top ten ...really 11 prints because there's just no way to cut out any one of these, they all serve a very specific purpose that without them you're missing some element of troubleshooting and calibrating your 3d printer to perform at its absolute best. And these are the tests that we run to make sure that the printers that we work with are running at their best as well, so I hope that with these calibration prints you’re better equipped to help calibrate your own 3D printer and getting it to perform at the best that it absolutely can.
All of these calibration prints, collected by Make, can be found in one place on Thingiverse here:
https://www.thingiverse.com/thing:2755063
Happy calibrating!
Article Tags
- 3D Printing
- Firmware
- 3D Design
- MatterControl
- Press Releases
- Small Business
- Automotive
- E3D
- Jewelry Making
- Engineering
- Entertainment Industry
- MatterControl Touch
- ESD Materials
- NylonX
- BCN3D
- Open Source
- Crafty Pen
- Digital Fabrication Anatomy
- How To
- Hardware and Upgrades
- Tips and Tricks
- Weekend Builds
- Top Ten
- Education
- Tech Breakdown
- Women in 3D Printing
- Project Ideas
- Advanced Materials
- Reference
- Pulse Dual Extrusion
- Product Spotlight
- Aerospace
- Jobs
- Military & Government
- Multi-Tool Machines
- Getting Started
- Healthcare
- How To Succeed With Any 3D Printing Material
- Creality3D
- Architecture
- 3D Printer Reviews
- Hacker of the Month
Related Products
View all related productsstress test for Prism Uni, as well as mutually exclusive paragraphs
Prism Uni came to me in the spring, but for all this time there was no suitable project on which it would be possible to thoroughly drive it. But I found the task myself, remembering that I have an old Soviet kart on which there was an eternal problem with the air filter, or rather, the lack of a normal opportunity to fix it to the carburetor.
Small nulevichki for motorcycles with a diameter of up to 7-8 centimeters in practice turned out to be a dull shit due to the fact that the engine is near the ground, and you had to ride wherever you have to (Karting, as a sport in the Crimea, could hardly hold out in Ukraine, but with the advent of Russia generally sank into the abyss of anal occupation and ceased to exist because the military airfields were once again tightly occupied by the military, and there were no other tracks.Except for the Crimea GP track, where its owners made such prohibitive prices for holding competitions that even the majors who competed on the 'elite' maps wished I wish them success in carrying out at least one stage ...). nine0003
Due to the nature of the two-stroke engine, which spits the mixture back into the filter, after 5-10 minutes of riding, this led to the fact that such a filter, being small in volume, got wet and dusted so that the engine could no longer breathe. Attempts to screw on a native motorcycle filter or a piece of a canister with pantyhose failed over and over again, and constantly fell off during movement due to the lack of the ability to properly fix them. As a result, riding without a filter sentenced the motor to a macaque, which, after disassembling it, was swept into a bucket on aluminum. nine0003
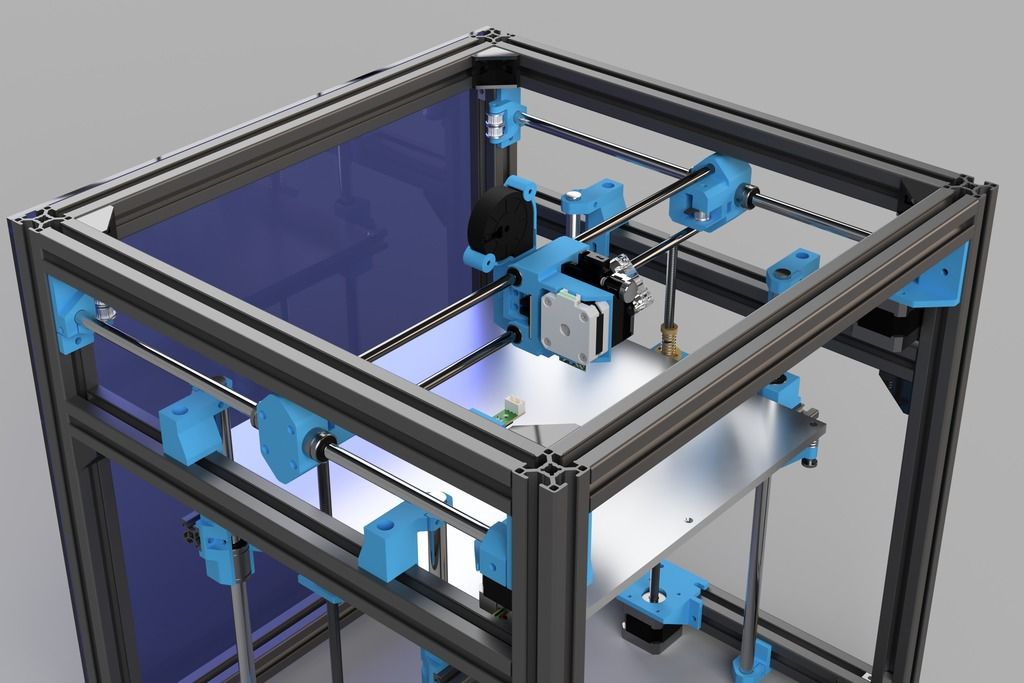
The kart was fitted with a new 'Voskhod 3m-01' motor lying around, but due to a filter problem it was left for almost a year in the far corner of the garage. One fine summer day, when my kart caught my eye, and at home there was an opportunity to solve this problem in the face of Prism Uni, an African developer spoke in me, who issued a technical task for the mountain to create a mount for a large-volume air filter. As a starting point, a nulevik for cars with a volume of about 1 liter was chosen. After taking the dimensions, I modeled the following mount:
Dimensions 165 x 200 x 180. The mount was then cut to be printed without support.
Further printing. But first, digression and talk about mutually exclusive paragraphs of .
For a short time using an FDM printer, I developed a postulate that I use when printing: 'FDM printing is affordable, crappy, but not hopeless'.
I'll try to explain.
1. Lack of standardization of consumables today. nine0003
It would seem that the ability to print with different materials is a definite plus, but the fact that printing characteristics, such as ABS, can vary significantly from manufacturer to manufacturer is a huge minus. Hence a lot of questions about how best to print this or that ABS, etc.
2. problem of delamination, sticking to the table, shrinkage.
There is no unequivocal decision on this issue either. What works for some doesn't work for others.
Based on the first two points, when working there is a feeling that it is almost necessary to check with the lunar calendar, finding out that today it will be better to print REC on beer or Bestfilament on hairspray. nine0003
3. Post-processing, looking at which the whole FDM print becomes like hammering nails with a microscope. Here you have the removal of supports, and acetone baths and other delights.
4. Toxicity.
Of course, FDM rear printing will not kill you right away, but the safety of printing in an apartment for health raises doubts, to put it mildly. No one has conducted a study of the air in a closed space, for example, after 10 hours of printing, where ventilation is excluded, since the same ABS is afraid of drafts, as well as the impact of such printing cycles on health in the long term. Many Chernobyl liquidators also did not feel harm during the liquidation, but this does not mean that their health was not harmed. And it is unlikely that anyone will give their child milk from a glass smoothed with solvent. At the same time, some payers write in their books that PLA adheres well and is smoothed out by dichloroethane, only mentioning its high toxicity. I'm embarrassed to ask why you do not propose to smooth PLA with plutonium? I think radiolysis would have coped no worse, but its dangers can be mentioned in passing.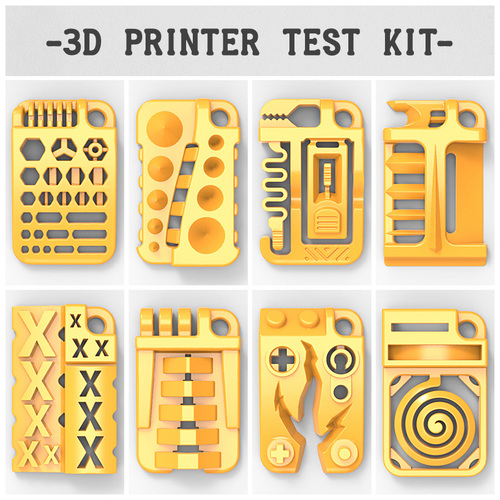 Why, you give the 'Mayak' plant and dichloroethane baths to the apartment of every juvenile engineer d#lb@%b@! nine0003
From all this follows the main mutually exclusive paragraph called 'home 3d printer'.
'Home 3d printer' is essentially a CNC machine, which, whatever one may say, is not (at the moment) a Plug & Play device that requires some kind of engineering approach and understanding of ongoing processes, as well as very often fine tuning. You can use a conventional printer without delving into the essence of its work, but you will not get such a number with a 3D printer. ABS, solvent, dichloromethane/ethane, acetone and acetone baths somehow don't go well with the word 'homemade'... So, from the criteria by which a device can be called homemade, one can single out only the availability of FDM printers to the consumer. From here, I would like to convey a warm hello to marketers who substitute concepts, record wonderful promotional videos that each of their prints is perfect and everything is just like twice two, as well as to those consumers whose expectations did not coincide with reality because of this. nine0003
digression: Your opinion may not coincide with mine and I respect it, but my opinion has developed for me and I do not impose it on anyone, but simply share it.
So, let's continue...
As a result, printing was a stress test for Uni and took about 48+ hours.
Note that the printer did not pass the stress test. When printing, one of the details was the fan responsible for cooling the hot end. The reason for this was soldering the fan wires without cutting them. As a result, the soldering ended up in the channel in the most mobile place, which eventually led to its fracture. The issue was resolved fairly quickly by disassembling, replacing the wires and soldering them in a fixed place. nine0003
Therefore, if you are the owner of the first versions of the printer and set the printer to night printing, and in the morning the apostle Peter woke you up, then perhaps the reason for this was a fiery holocaust on an apartment scale arranged by your printer due to soldering in the wrong place. But seriously, there is a chance that one day either the cooling fan or the blower fans may stop. Therefore, if your eyes are not afraid, and your hands are not out of your ass, then strike a preemptive strike and replace the wires. Fortunately, the printer is as simple as two pennies, and 3DQ mechanical and electrical instructions were posted even here. And the last thing I don't like is the unfortunate airflow ears that catch on the paper clip holding the glass if the printer prints near the edge. But a new airflow is already in development, so we are waiting for STL. Otherwise, a normal budget printer for its tasks, provided that you understand its capabilities. nine0003
By the way, I printed Filamentarno (I think Watson would be no worse) and so far I like this plastic the most. Very low shrinkage, good adhesion and its flexibility forgive many table sizing errors. And when it came time to glue the parts, another plus appeared in working with this plastic. I did not like all the options for gluing offered on the Filamentarno website, but I modified one according to the principle used in working with ABS. I dissolved the plastic from the failed print (when the fan became) in solvent in this proportion until I got a gel-like mixture. Such a Filamentary Juice. And it’s a pleasure to glue large areas on them. The solvent is less volatile, which means it allows you to slowly apply the juice to the surface without worrying that, as in the case of ABS, the acetone will evaporate before you have time to smear the surface. The solvent is quite smelly and the gluing process once again confirmed the conventionality of the name 'home 3D printing'...
Since the base of the mount will come into contact with gasoline, and I don’t know how Filamentarno will behave with prolonged contact, and also that the part is glued (although this turned out to be an exaggerated fear), it was decided to make a casting of the base from molded plastic:
Molded plastic and Filamentarno are tightly glued together with superglue.
Next comes assembly:
And installation:
That's it.
8 test print models
Test models for 3D printers are required for:
- When you bought a new printer and need to test it on your favorite media
- When you have purchased new media and need to check the print specifications
- When you have been using a material for a long time, but do not know its tensile strengths
We will talk about the 8 models most used for testing in 3D printing.
1. 3D Benchy
3D Benchy is one of the most popular 3D printer test models. The boat figurine perfectly demonstrates the capabilities of FDM printers in any price category. Such a model will help you determine exactly the settings you need to set in order to get the perfect 3D print.
Printing 3D Benchy - will allow you to see how the printer copes with the "rendering" of curved surfaces, inclined planes, arcs, holes. The model is available in several versions, including multi-color. It takes approximately one hour to print a standard size 3D Benchy. nine0077 Download model on Thingiverse
2. All-in-one 3D printer test
A comprehensive test model for a 3D printer will allow you to check the quality of printed overhangs, bridges, extrusion stability, the possibility of “snot” and the dependence of the result on temperature. An important advantage of this model is the instructions for it, which indicate potential solutions to various problems.
Quite a complex model in terms of setting all the parameters, but it's worth it, try it. nine0077 Download Thingiverse model
3. XYZ 20mm Calibration Cube
The main purpose of the XYZ 20 mm calibration cube is to establish the dependence of the movement of the extruder on the step of the motor. A test model for a 3D printer helps to make sure that 20 mm in the drawing corresponds to 20 mm of the printed product. At the same time, the calibration cube helps to establish the dependence of the degree of extrusion and print quality on the temperature of the extruder. nine0077 Download model on Thingiverse
4. Matter Hackers' Mascot Phil A. Ment
This is a small astronaut figurine that has elements designed to test 3D printing.
These are small inserts, small relief details, overhangs, vertical and horizontal cylinders, fillets, chamfers, lintels and a perfectly domed helmet.
A feature of the model is the ability to obtain accurate data for different dimensions of the printed product. nine0077 Download model on Thingiverse
5. Smart compact temperature calibration tower
The calibration scale demonstrates the capabilities of the 3D printer when printing at different temperatures with one filament. The test model clearly shows the quality of overhangs, lintels, tensions, and the product can also be used to judge the ability of a 3D printer to print curved surfaces with a certain plastic. nine0077 A simple and intuitive tool allows you to find out the possibilities of materials that have not previously been used in work or printed with only one temperature.
It is important to consider that the print temperature setting for each signed element (floor) must be set in the slicer or manually in Gcode.
Download model on Thingiverse
6. Open-Source Printer Evaluation
This is a universal print model from Kickstarter and Autodesk. It was created taking into account the experience of using other models for testing. It contains bridges, overhangs, fine detailing and elements for assessing the spatial accuracy of 3D printing. nine0077 Download model on Github
7. Economical Stringing Test
When printing complex-shaped objects, without knowing the capabilities of the filament and the printer, the user may encounter stringing (from string - string), and in Russian simply “snot” - when plastic reaches for the extruder, forming thin plastic fibers in the air. Such “snot” appears when the extruder is idle. To avoid this, the retract function is used - the retraction of the filament during idle movement. Correct setting of the retract level requires consideration of extruder speed, extruder temperature and filament properties. nine0077 This test model is used to quickly check the correct setting of the 3D printer. If the strings between the vertical pyramids do not form, then the settings are correct. If horizontal plastic filaments appear, then some of the 3D printing parameters should be changed.