3D printer smooth surface
How to Get a Smooth Surface With 3D Printing
Parts with a smooth surface finish are often required in 3D printing. This characteristic may be a functional requirement for the end-use of a part or an aesthetic requirement. Applications in which smoothness may be a functional requirement include mating parts, moving parts, stress/load-bearing surfaces, etc.
Although 3D printing is usually a layer-by-layer process, additive manufacturing technologies are capable of printing relatively smooth surfaces. However, the smoothness of finished 3D printed parts depends on the printing process, the material, the post-processing operations and other secondary factors that will be related in this article.
3D printing technologies with a smooth surface finish
Because of the layer by layer printing involved in FDM printing and the diameter of the nozzle, FDM doesn’t always produce a very smooth surface finish. However, modern industrial FDM machines are capable of much finer surfaces. SLS, MJF, and DMLS produce a grainy surface as a result of the powdery nature of the raw materials used in these technologies. Regardless of 3D printing technology, a smooth surface can always be achieved in printed parts, using post-processing operations.
There are several 3D printing technologies capable of producing smooth as-printed parts. Those are explored below.
SLA 3D printing
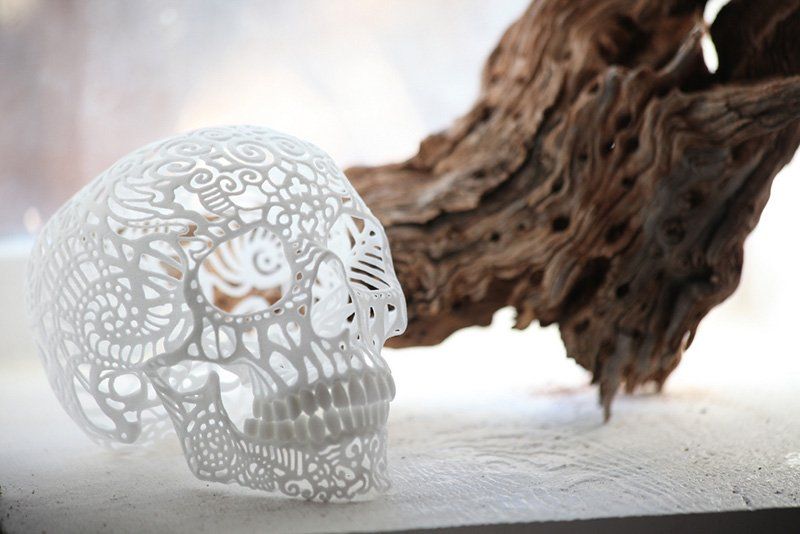
Stereolithography 3D printing produces parts with the highest accuracy and smoothest surface finish among all 3D printing technologies. Although it is a layer-by-layer process, the raw material is usually in resin form and solidifies to give a smooth surface.
Polyjet 3D printing
Like SLA, Polyjet prints photopolymers. Most Polyjet parts are ready to use as-printed in terms of look and feel. The main reason for this smoothness is the combination of ultra-thin layer printing and high-quality resin.
Carbon DLS
Carbon DLS uses resin materials like polyurethane. The surface finish of the 3D part produced with this method is as smooth as glass. This process produces impeccable parts that can replace prototypes from MJF or SLS. In addition to a high-quality surface finish, Carbon DLS produces external and internal details perfectly.
3D printing materials with a smooth surface
Material consideration for smoothness typically goes together with printing process consideration, as, in most cases, the process is a far more significant factor. Thermoplastics, thermosetting resins, photopolymers, and polyurethane are typically 3D printing materials with a smooth surface finish.
But it is important to note that smoothness is rarely the only criteria for selecting materials. Other considerations like strength, heat resistance and accuracy are also considered.
Improving smoothness with post-processing
Post-processing is the most effective way of guaranteeing a smooth surface finish in 3D printing. In most cases, post-processing can be used to achieve smoothness in a part, irrespective of the material or the technology with which it was printed.
There are various post-processing methods that are not all suitable for all parts. Part geometry and material are the two biggest factors that influence post-processing techniques. Note that the different methods will deliver different textures and appearances.
Bead Blasting
The bead blasting technique involves spraying a pressurized stream of tiny beads of media (plastic or glass) from a nozzle onto the surface of the part. This removes the layer lines leaving a smooth finish. In addition, the end product resembles a uniform matte finish. Bead blasting is done in a closed chamber. Plastic bead blasting is more common for 3D printed parts. The finishing technique works with most FDM-printed parts and materials.
The plastic media is usually made up of finely reground thermoplastic particles; the abrasiveness can vary from harsh to mild. Another popular material used in bead blasting is baking soda.
One of the advantages of bead blasting over sanding is speed. The process takes about 5 to 10 min for a part. However, the duration will depend on the part size. Another advantage of bead blasting is the preservation of the part’s dimensions.
Vapour Smoothing
The industrial vapour smoothing device operates through a multistage process. It lowers the pressure within the sealed chambers containing the 3D printed parts. Then, a heated tray at the bottom receives the pumped solvent, turning it into vapour.
An air-circulation system pulls the resulting vapour and circulates it around the surface of the part, causing condensation on the surface. This melts away the surface of the printed part, leaving a smooth surface. The precise control of the airflow and temperature allows for desired results without over smoothing.
This process takes about three hours to completely smoothen the printed part regardless of the quantity or size. Also, safety is paramount as the chamber must be locked during operation to create a vacuum. The condensed and unused solvent drops to the bottom of the tank for reuse.
Vapour smoothing can cater for parts made with ASA, ABS, and other high-impact polystyrenes. However, polycarbonate and other polymers that melt under the solvent can get smoothened. Acetone is an example of a solvent that works in vapour smoothing.
Vapour smoothing is commonly applied in consumer products. The process does not significantly impact the dimensional accuracy of the 3D-printed part. Furthermore, the parts could be made ready for coating or filming with bead blasting.
A disadvantage of vapour smoothing is its lack of versatility. The process cannot accommodate more materials like sanding or bead blasting.
Comparison of MJF Nylon PA12 parts: as printed (left) vs. black spray painted and vapour fused (right)Tumble Finishing
The tumble finishing technique, also known as tumbling or rumbling, is usually used on relatively small parts. Some of the most common, large tumblers are capable of finishing parts of 400 x 120 x 120 mm or 200 x 200 x 200 mm.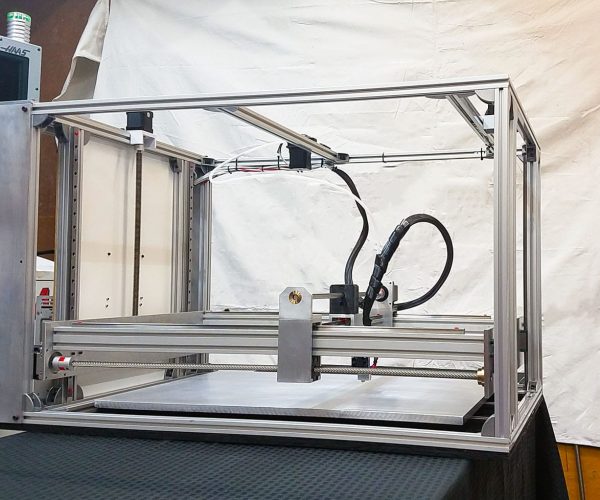 It is very effective for parts that contain a high percentage of metal powder.
In just an hour of polishing, the smoothness of metallic prints can be exponentially increased. The tumbling process uses a horizontal barrel filled with parts, media, water, or any other materials. A vibrator rotates the barrel, causing the media (stones) to continuously brush the parts and progressively smoothen them.
Comparison of SLS Nylon PA11 parts: as printed (left) vs. tumbled finished (right)Sanding and polishing
Sanding is the process of progressively removing a very thin layer of material to expose a smoother one underneath. A rough surface simply means that some points on the surface are more elevated than others. Sanding is the process of evening out the surface using relatively rough materials such as sanders or grinders.
It can be carried out by hand or with the use of belt sanders and is done progressively. Sanding is most often paired with polishing.
One of the shortcomings of sanding is the difficulty in smoothening small, intricate geometries.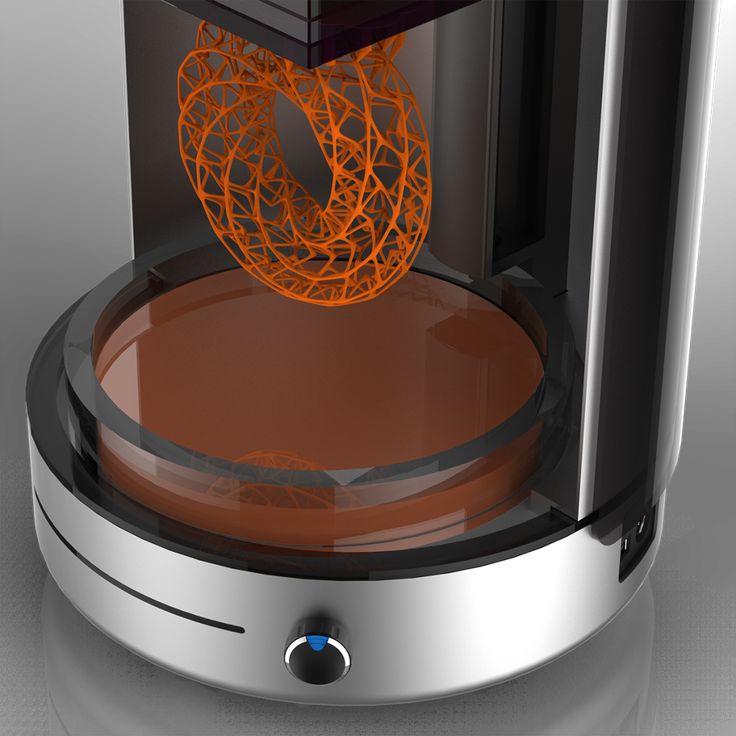 Also, sanding may also affect a part’s dimensions. When very tight tolerances are required from the 3D parts, sanding may not be the best option. Consideration must be made during part design concerning the amount of material that will be removed by sanding.
Comparison of post-processing options for a smooth surface finish in 3D printing
| Post-processing | Suitable 3D printing technology | Advantages | Considerations |
| Bead Blasting | SLS, MJF | • Preservation of the part’s dimensions | • Requires the use of extra materials |
| Vapour Smoothing | MJF, SLS | • Shiny surface | • Lack of versatility |
| Tumble Finishing | DMLS, SLS, MJF | • Good for small parts | • Size limitations for large parts exist • Time-consuming |
| Sanding and polishing | FDM, DMLS | • Good for bumpy rough surfaces • Polishing can produce a shiny surface | • Affects the part’s dimension • Not suited for parts with high tolerances • Not suited for parts with intricate geometries |
Factors affecting part smooth surface during printing
The following are some of the factors that influence the smoothness of a 3D printed part during printing.
Extrusion Rate
This factor applies to only printing technologies that print via extrusion, such as FDM. Over extrusion could occur if the printer extrudes excess material than is needed. The resulting print will have each layer projecting from the surface as irregular forms. A simple remedy to this is to adjust the extrusion rate. The same goes for under extrusion.
Material Overheat
When printing with FDM technology, the heating temperature and the cooling rate play vital roles in the surface quality of printed parts. It is important to achieve the appropriate balance between them. Remember the printed plastic can form different shapes before it cools. Always set the printer to the appropriate temperature for the material being printed.
Ghosting/ Rippling
The defect caused by this appears as waves on the surface of the printed part. It occurs when the printer is moving at a faster pace than it can handle the vibrations from the moving parts. This defect is most common in FDM printing where the machine vibrates as the nozzle deposits material.
To avoid this, keep your moving motors well lubricated and balance any shaky parts.
Conclusion
Achieving smoothness in 3D printed parts depends on various factors. These include printing technology, materials, and printing techniques. In most cases, the desired surface smoothness can be achieved using post-processing operations.
Xometry Europe offers fast, reliable, and highly accurate 3D printing services with these technologies and materials. Through our Instant Quoting Engine and our network of over 2,000 manufacturers, we ensure that you experience a seamless part production process, from quoting to doorstep delivery.
How to Get Perfectly Smooth PLA 3D Prints – Clever Creations
Are you interested in smooth PLA 3D prints but aren’t sure where to start? You’re not alone! PLA smoothing is one of the most common concerns among 3D printing enthusiasts who want glossy prints without the hassle of working with ABS.
While you won’t find a direct equivalent of ABS acetone smoothing for PLA, there are several other methods you can use to achieve a smooth outer surface on your prints. Whether you just don’t like the 3D printed look, want to sell your 3D prints, or need a smooth piece for certain applications, PLA smoothing is fast and easy.
In this article, you’ll find the most common products and techniques used in PLA smoothing, how to use them, the benefits and disadvantages of each method, and when one method should be used over another.
What is PLA Smoothing?
PLA smoothing is the process of removing the visible layer lines that are generated on 3D printed parts during the printing process. A smoothed 3D print becomes just that: smooth. The outside of the print loses the 3D printed look and appears more like injection-molded plastic.
PLA is one of the most common 3D printing materials available because it is easy to use, cheap, and readily available. PLA prints at a low temperature and does not have a strong tendency to warp (unlike ABS filament), making it a good choice for beginners.
Recommended:
PLA vs ABS: Which Filament is Better?
There are many methods to achieve a smooth look on PLA prints, and they usually require either by removing the excess plastic that causes the visible layers or filling in the tiny gaps between the layers with some sort of brush-on coating. Each method has its pros and cons and some are better for certain projects than others.
Why Smooth PLA 3D Prints?
There are several reasons for smoothing PLA 3D prints, but the most common one is aesthetic. Many enthusiasts don’t like the lined look of 3D prints and would prefer to remove them. This is especially true if they are making money with their 3D printer by selling 3D prints, since their customers may not appreciate the rough texture.
You also may need to fill in or remove your layer lines for certain applications. For example, if you are using the print as a master for making a silicone mold, you may want to smooth it so the texture isn’t transferred and so that casting materials like resin end up being glossy instead of matte.
Some of the methods used for smoothing PLA prints, like epoxy coatings, also make your prints more resilient. The coatings seal the layers and protect them from moisture and dirt. This is especially helpful if you plan to use your prints outside. Even sanding and spray painting your prints gives them more water and heat resistance.
An additional benefit of epoxy coatings is that they can help make your PLA food safe.
Methods to Smooth PLA Filament Prints
XTC-3D
XTC-3D is a high-performance two-part epoxy resin coating formulated to smooth 3D prints. Epoxy resin generates heat as it cures, so typical epoxies can warp 3D prints made from low-temperature materials like PLA. XTC-3D is formulated to cure at a lower temperature, so it won’t damage your prints.
Like most resins, XTC works by mixing the dormant resin with a proportionate amount of hardener. Once the hardening agent is added, the resin will go from liquid to solid within a certain amount of time. While it’s still in its liquid phase, you can paint a thin layer of it on your print and let it cure.
Resin coats like XTC are a great option for smoothing 3D prints because they are relatively simple to use and produce great results. The resin coating fills in the layers and adds a glossy shine. You can even sand and paint the resin coating as needed to easily achieve the look you want.
Epoxy resins should be handled with care and proper personal protection equipment. Always use XTC-3D in an area with good ventilation (while ideally wearing a respirator) and wear protection like latex or nitrile gloves and goggles to protect your skin and eyes. Be sure to check the product’s MSDS for more information on safe handling.
XTC-3D - High Performance 3D Print Coating - 6.4 Ounce Unit
1,328 Reviews
Check PricePros:
- Paints on easily
- Clear glossy finish
- Protects your prints
Cons:
- Expensive
- Fumes while uncured
3D Gloop
One of the most versatile 3D printing products you can buy, 3D Gloop is an adhesive meant for coating the print bed and gluing 3D printed parts together. However, it also works well as a brush-on coating to smooth PLA, ABS, or PETG 3D prints.
Unlike resin formulas like XTC-3D, you don’t need to mix or otherwise prepare 3D Gloop—you can brush it on in thin layers directly from the bottle and let it dry. They have formulas specifically made for different types of filament, so make sure you are using the PLA product for smoothing PLA parts.
3D Gloop does produce a lot of fumes while in use, so always use it in a well-ventilated area or with a respirator. You should also wear gloves and goggles and try to avoid direct contact with your skin (and be sure to wash it off quickly if skin contact does happen). If you also resin 3D printing, you might already have this equipment at hand.
Recommended:
Resin vs Filament 3D Printers: What’s the Difference?
Pros:
- Easy to use
- Versatile
- Made for 3D prints
Cons:
- Hazardous fumes
Sanding and Painting
Image: AxeCatAwesome via Reddit
Sanding PLA can give great resultsThe easiest and most common way to smooth PLA 3D prints is to sand and paint them. This process is the most time-consuming, but it yields excellent results when done thoroughly. With sanding, you are physically removing the layer lines, whereas with other methods, you are filling them in.
Sanding and painting will give you the most control over your finished piece. If you want to 3D print a helmet or create 3D printed cosplay armor, this is the method to go for.
To sand a PLA print, start with a rough quality sandpaper like 100 grit and sand down all the layer lines and areas you want smooth. Use the next size like 200 grit to sand it again, and keep repeating the process while you work your way up to finer sandpaper sheets.
Image: 3D Printed Props via Youtube
Make sure you don’t skip grits when sanding PLAYou can keep sanding until you reach 2000 grit paper for a very smooth 3D print surface, but this may be more than you need for your print. If you plan to prime and paint your piece, you likely won’t have to go that high. Assess your print after each grit and stop when you reach the texture you want.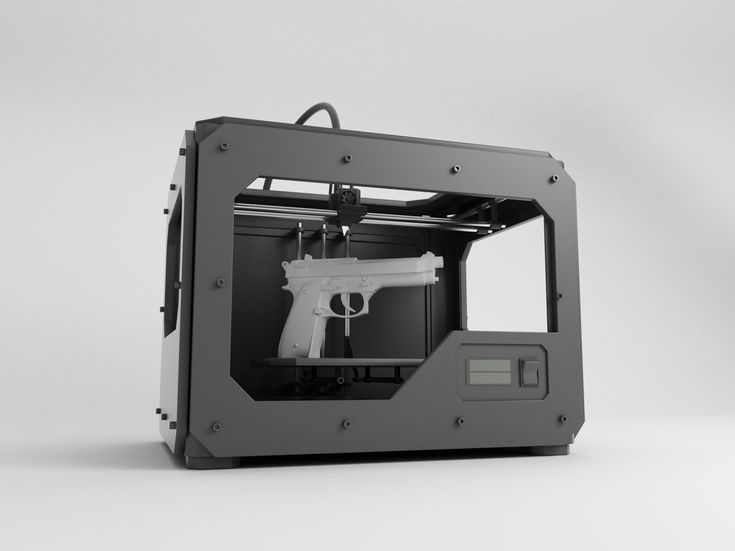
You can use a wood filler or other filler primer before sanding to fill in some of the layers. This will cut down on a lot of the sanding needed and give your print a nice surface texture for holding paint.
From there you can paint your print as needed using whatever type of paint you prefer. Spray paint works well for large prints, while gloss paint adds shine to your new smooth surface.
Keep in mind that wet sanding (using wet sandpaper or keeping your print submerged in water while sanding) is best for PLA prints since it keeps the friction from melting the plastic and keeps you from inhaling the dust particles from the PLA. It can take a while to finish using this method, but it holds paint very well and looks great.
3M 88619NA 99419 Sand Paper, 9" x 11"
175 Reviews
Check PricePros:
- Gives you the most control
- Most affordable option
Cons:
- Time-consuming
- Takes a lot of effort
Heat Gun
Image: Tinkerine via Youtube
Be careful not to overheat your PLA prints when smoothing with a heat gunIf you want a non-chemical method that doesn’t require quite as much elbow grease as sanding, you can try using a heat gun. This method can be very effective at smoothing 3D prints when used correctly. However, it is rather difficult to do without accidentally melting your prints (especially ones made from PLA), so be sure to practice on failed or broken prints first.
Smoothing a PLA 3D print with a heat gun melts the outside layers of plastic just enough to remove the layer lines and give the print a shiny gloss. You carefully move the heat gun around the print, never staying on one area too long in order to heat the whole print evenly. When the surface of the print looks wet, you can turn off the heat gun and let the print cool.
This is a helpful technique to quickly get a smooth, shiny look with a tool you might already have on hand. Since it’s so difficult to get consistent results, this method is probably best kept as a last resort or when the results don’t matter as much.
Wagner Spraytech 0503008 HT1000 Heat Gun, 2 Temp Settings 750ᵒF &...
Check PricePros:
- Quick
- Uses a common tool
- Gives a shiny surface
Cons:
- Hard to do well
- Results are inconsistent
PolyMaker PolySmooth PVB Filament
Image: Polymaker
Printing under similar settings and conditions as PLA, PolySmooth is a special low-temperature filament that can be smoothed with isopropyl alcohol. For fans of the ABS acetone smoothing, this is one of the closest equivalents you can get to that process with PLA or PLA+ filaments.
PolySmooth is easy to use. It prints at a low temp like PLA and doesn’t require a heated bed or 3D printer enclosure. You can spray alcohol onto your finished model and have a smooth print within minutes. The alcohol breaks down the outermost layer of plastic, leaving behind a shiny and smooth surface similar to that of a vapor-smoothed ABS.
Image: Polymaker
You can also use the PolyMaker Polysher to smooth 3D prints. Similar to a wash station for resin prints, the Polysher machine evenly coats the prints with vaporized alcohol. You can set the start and end times for the Polysher, ensuring smooth 3D prints every time.
While you don’t need to purchase the Polysher to use PolySmooth, it is a good way to automate the smoothing process if you have a lot of prints to do. It gives more consistent results across many prints.
Polymaker PolySmooth PVB Filament 1. 75mm 3D Printer Filament Green...
276 Reviews
Check PricePolymaker Polysher - Post Processing Device to Smooth Print Surface...
276 Reviews
Check PricePros:
- Prints like PLA
- Safer than vapor smoothing
- Uses isopropyl alcohol
Cons:
- Costly
Chemical Smoothing
If you are wondering if there are chemicals available that smooth PLA similar to how acetone smooths ABS, the short answer is yes. There are some chemicals like ethyl acetate that can vapor smooth PLA, but they are not ideal for many reasons.
We also don’t recommend using them since they are highly toxic (especially when vaporized), expensive, and difficult to source. Ethyl acetate in particular poses a significant health hazard if inhaled and is highly flammable.
With products like PolySmooth on the market, you can already smooth 3D print layer lines without needing to use hazardous chemicals.
Abrasive Smoothing Methods
Abrasive smoothing methods like tumbling and sandblasting are another possibility to smooth 3D prints. These methods are fairly versatile because different tumbling media and blasting mixtures will give you different results.
However, the processes tend to work best with metal-filled PLAs. Regular PLA prints have mixed results. Sticking to the best PLA filament brands does help get better results.
Recommended:
The 10 Best PLA Filaments for 3D Printing
Tumbling 3D prints has been met with limited success. Vibratory bowls tend to work better than rotary tumblers. Using an actual tumbling media instead of the cheaper options like steel nails/shot or walnut shells also gives more consistent results.
Tumbling regular PLA prints usually softens the layer lines but doesn’t completely remove them. Metal and wood-filled PLA filaments, on the other hand, tend to have better results in a tumbler and look nicely polished and smoothed from the process.
Sandblasting is another option for smoothing PLA prints that offers varied success. Like tumbling, how efficient sandblasting is depends on the media used. Using fresh sand produces the best results. Like with tumbling you usually won’t completely remove your lines, but it will make them less noticeable.
Frequently Asked Questions
What is the best way to smooth PLA prints?
The “best way” really depends on what you’re trying to accomplish with your finished print. If you just want it to look nice and smooth with minimal effort, XTC-3D resin coating is probably your best option. However, this adds another layer of materials on top of your print, so if you plan to paint it afterward, you will lose your small details.
If you want more control over the detailing of your smoothed prints, sanding is the best method to use. Since you are doing the process by hand, you have the most control over where the sandpaper goes. This method is best when used on prints that are going to be painted after.
Finally, for a quick smoothing effect that still leaves most details and doesn’t require much time, using PolySmooth filament instead of your usual PLA is a fast and easy way to get smooth results, so this will be the best option for everyday prints or when you need to smooth many prints quickly.
How do you smooth PLA without sanding?
To smooth 3D prints without sanding, you can use a liquid coating or filler primer to fill in and seal the layers. XTC-3D and 3D Gloop are the best choices for this, but there are other products available as well.
You can use the heat gun method detailed in this article, but that one takes quite a bit of practice to use well and doesn’t always produce consistent results.
Can you acetone smooth PLA?
No, acetone does not react with PLA plastic in the same way it does ABS, so it will have little to no effect on your 3D print. ABS is acetone soluble, meaning it will break down in acetone. PLA has few chemical reactions (and even less so that work like acetone and ABS), so finding a chemical smoother is not feasible.
If you want the experience of printing with PLA and the easy smoothing of acetone, you’ll need to buy PolySmooth or some other filament made for easy post-processing.
Can you smooth PLA with heat?
Yes, you can use heat to smooth your PLA parts, but your results will vary since it is very easy to damage your prints this way. The best way to heat smooth 3D prints is to only heat the outermost layers of plastic. Being too aggressive will also melt or warp the inside layers, causing the print to deform.
Heating the print in an oven or similar appliance often results in uneven heating. Your prints can overheat or burn in some areas while other areas haven’t even started to smooth. This is because the heat is coming from a static source, so it doesn’t distribute evenly within the oven.
Image: Tinkerine via Youtube
Your results with smoothing PLA in an oven will varyUsing a heat gun gives you more control to evenly heat the print and overall better results than a static heat source, but even that produces inconsistent results. More aggressive heat sources like an open flame almost always damage the prints, even when they can be moved around.
Does isopropyl smooth PLA?
No, isopropyl alcohol (IPA) will not smooth PLA. However, you can get the desired results with Polymaker’s Polysmooth. This is a special PLA filament that has been treated to be more responsive to IPA.
Can you vapor smooth PLA?
Yes, technically you can smooth PLA 3D prints using a vapor deposition process, but the chemicals required are not safe for human exposure.
How do you smooth a 3D printed figure?
There are a few ways to smooth out a 3D printed figure. One is to use sandpaper to lightly sand down the rough edges. Another is to use a heat gun to slightly melt the edges and give them a smoother appearance.
You can also use chemicals like acetone or XTC-3D to smooth out the surface of the print. Whichever method you choose, make sure to take your time and be careful not to damage the figure.
Finally, the best way to create a smooth 3D printed figurine is by using resin 3D printing instead of FDM printing. There are plenty of 3D printers for miniatures that work well for this purpose.
How do I get a smooth finish with PLA?
There are a few things you can do to get a smoother finish with PLA. First, make sure your printer is calibrated correctly, for example by using a temperature tower to set the right temperatures. This will help ensure that the layers are printed evenly.
Second, use a higher-quality PLA filament. Some brands of PLA filament are known for having a smoother finish than others.
Recommended:
The 10 Best PLA Filaments for 3D Printing
Finally, try using a different nozzle size. A smaller nozzle size (and thus smaller layer heights) will result in a smoother finish.
Final Thoughts
Whether you enjoy the cleaner look of finished prints or need a smooth surface on your prints for functionality, you have several options for making your PLA prints look amazing.
Smoothing layer lines from PLA isn’t as easy as some other 3D printing materials, but there are several methods and products available to help you do it as painlessly as possible. From brush-on epoxy resin products that fill in layers to special filaments to basic sandpaper, there is a smoothing method that works for most projects.
Do you still have questions about smoothing PLA prints? Let us know in the comments!
How to achieve a smooth surface of a 3d model using Cura Ironing (smoothing)
3DPrintStory 3D printing process How to achieve a smooth surface of a 3d model using Cura Ironing (smoothing)
Hello everyone. In this article, I will review the slicer function Cura - Ironing , which in English means Smoothing .
The reasons for the roughness of the top layer
With each new layer, the 3d printer nozzle rises to a predetermined height. As you know, we choose the layer height based on the quality requirements of the finished product and the nozzle diameter. So, the layer height is always less than the nozzle diameter, which is necessary for good interlayer adhesion. If we take into account that the height of the layer is 1-2 tens, and the diameter of the extruded rod for the nozzle is 4 tens, it is from 0.42 to 0.48 millimeters, which is related. with the so-called end effect, then with an increase in the diameter of the extruded profile at the outlet of the forming tool, in our case, the nozzle, it becomes clear that the filament thread after fusing onto the previous layer is no longer a circle, but a rectangle or an oval. This leads to the fact that adjacent lines at the junction with each other form irregularities and roughness on the surface of the finished product. To avoid this unpleasant effect, the function of smoothing the top layer, called ironing, will help.
It works as follows. On the top layer, the nozzle almost completely stops feeding the material and instead, acting like a hot iron, melts and smoothes the surface of the product, as a result of which the top layer of the model should turn out to be smooth. Naturally, this function can only work on models with a flat top layer.
In order to activate this function, we must go to the preferences tab, configure Cura, then go to settings and in wall section enable all functions with the word ironing. We click close and we see that all the parameters we activated appeared in the wall settings tab.
Cura's main parameters for smoothing the top layer
Let's figure out which parameter affects what. First of all, we activate the smoothing function. Next, you should choose whether the nozzle will smooth only the last layer, or all the upper layers of the part. There are two types of smoothing here - either zigzag or concentric. Choose what you like best. There is no significant difference between these types of smoothing.
Next is a function of the distance between nozzle passes. The standard value - 0.1 mm - provides the best surface quality, but at a small loss of time. The optimal value for a 0. 4 mm nozzle that I found is 0.3 mm. With it, the quality does not deteriorate, and compared to a distance of 0.1 mm, we save a little on 3d printing time. If you set the value to 0.5 mm, then gaps between nozzle passes are visible.
Next comes the flow. The default value is 10 percent at nozzle idle. The extruder still feeds some material to fill the voids. I ran tests. The results are in the figure below. The results show that the best surface quality is achieved with a flow rate of 20 percent. If the material flow is completely turned off, this will lead to a gap between the nozzle passes, and if the feed value is increased by 30 percent, then there is an overflow of plastic and sagging on the top layer.
Next function indent. It is necessary in order not to smear the boundaries of the upper layer beyond the perimeter of the product. I recommend setting the value to one nozzle diameter.
And finally, the last option is the smoothing speed. At high speed, the material will not have time to melt and you will not see an improvement in the quality of the top layer, so I recommend setting this value within 25 millimeters per second for PLA plastic, and about 15 millimeters for ABS. As for the ABS plastic, the top layer smoothing feature works just as well with it, but the effect is slightly smaller, although there is an overall improvement in the top layer.
In general, if you want to achieve a good quality top layer when 3d printing, be sure to turn on the ironing feature in your Cura slicer. I hope this material was useful to you. Share your experience with Cura's top layer smoothing feature in the comments.
How to smooth 3D printing?・Cults
Objects created with a 3D printer don't always look as good as they should. Even if visualization of 3D printed parts is usually acceptable, this may not be enough if the object is for sale or display. Some people just want a perfectly smooth and shiny surface for 3D printing. Fortunately, it is possible to achieve this level of perfection with the help of some suitable tools. This guide will show you how to smooth out ABS and PLA 3D prints for the best results.
The FDM 3D printer opens up endless possibilities for creating PLA 3D prints. However, parts may be printed with bad layers that need to be removed. If you want to give your 3D printed parts a shinier look, there are some easy ways to align your 3D printed PLA.
Use spray paint and polyurethane
The sanding method used to be the most common technique for leveling 3D printed PLA. Today there are new alternatives. You can use spray paint mixed with polyurethane to line up 3D printed PLA parts. To do this, you need to purchase the right tools:
- spray paint,
- polyurethane,
- fan for drying parts.
The smoothing process is one of the simplest. First of all, it is necessary to clean the product so that dust or other dirt does not linger on the surface of the object. Use a spray can to cover the 3D print with a layer of paint. Then a layer of polyurethane can be applied to the part. Be very careful and place the freshly coated 3D print under a fan to speed up the drying process .
After a few minutes, you will find that the mixture of polyurethane and paint starts to fill in unwanted holes and imperfections on your PLA 3D print. Once completely dry, the part can be recoated with the mix to remove any remaining surface imperfections. This method is less tiring than sanding.
Opt for XTC-3D Clear Epoxy
Although highly effective, using a mixture of paint and polyurethane to line a room can be too messy for some people. There are other alternative methods for anti-aliasing PLA 3D printing. Transparent epoxy resin XTC-3D has been specifically designed to align PLA 3D parts for an optimal finish . The product consists of two bottles that need to be mixed for 3D printing.
Remember to mix the product well and follow the instructions correctly. Using a brush, apply the resin to the printed parts. The dried product will harden into a smooth transparent layer. PLA 3D printing becomes smoother and shinier. XTC-3D can also be mixed with dyes and stains if you wish to color your parts. You can also add effects such as metallic highlights or palettes.
Use 3D Gloop
This adhesive has been specially developed for smoothing PLA 3D prints. 3D Gloop can be used for various purposes. To smooth out a 3D print with this product, simply apply it to the printed part with a brush. It works like the XTC-3D, except it only has one bottle. This is a great advantage if you only want to use a small amount of glue. However, 3D Gloop is not without flaws. The product contains a number of toxic components. It should be used in a well ventilated area.
Acetone is a chemical stripper used by professionals to sand and clean certain materials. Due to its high toxicity, it should be handled with care in a well-ventilated area. Acetone can be used to level ABS 3D printing.