3D printer reviews australia
The Best Cheap 3D Printers for 2022
While we'd hesitate to call 3D printing a mature technology, you might say it has reached its teenage years. Through their first decade-and-change, 3D printers have come down in price, grown easier to set up and operate, and become more reliable. And you may pay less than you expect: Many once-high-end features have migrated down to inexpensive models.
PC Labs has been reviewing 3D printers since 2013. Today, the state of 3D printing is strong, but that wasn’t always the case. For the first several years, it was often an adventure getting one of these printers up and running, let alone successfully through our testing regimen. Issues with filament-based—aka fused filament fabrication (FFF) or fused deposition modeling (FDM)—printers were abundant.
Filament feeders had to be coaxed into delivering filament from the spool to the extruder. Print beds had to be manually aligned. The extruder or hot end had to be positioned just right to minimize the gap between the nozzle and the build plate (the flat surface on which the object is printed). Objects frequently stuck to the build plate, and required careful, sometimes unsuccessful, efforts to pry them off. These and other issues required painstaking effort to resolve, often combined with calls to tech support.
Not so much anymore. While they can still be rebellious at times, 3D printers have grown up a lot, and achieving the 3D printer basics has gotten a lot less likely to end in a shouting match over small things. And they've gotten a lot more affordable, too, for curious DIY-ers and hobbyists to try.
If you're in the market for a beginner or low-cost 3D printer, it's important to know how lower-end models differ. Read on for mini-reviews of the top budget 3D printers we've tested. After that, we go into more detail on understanding the 3D printer specs and tech relevant to beginning buyers. Ready to take the plunge? Read on.
How to Buy a Cheap 3D Printer
The biggest changes to 3D printers over the last few years have come to the cheaper models.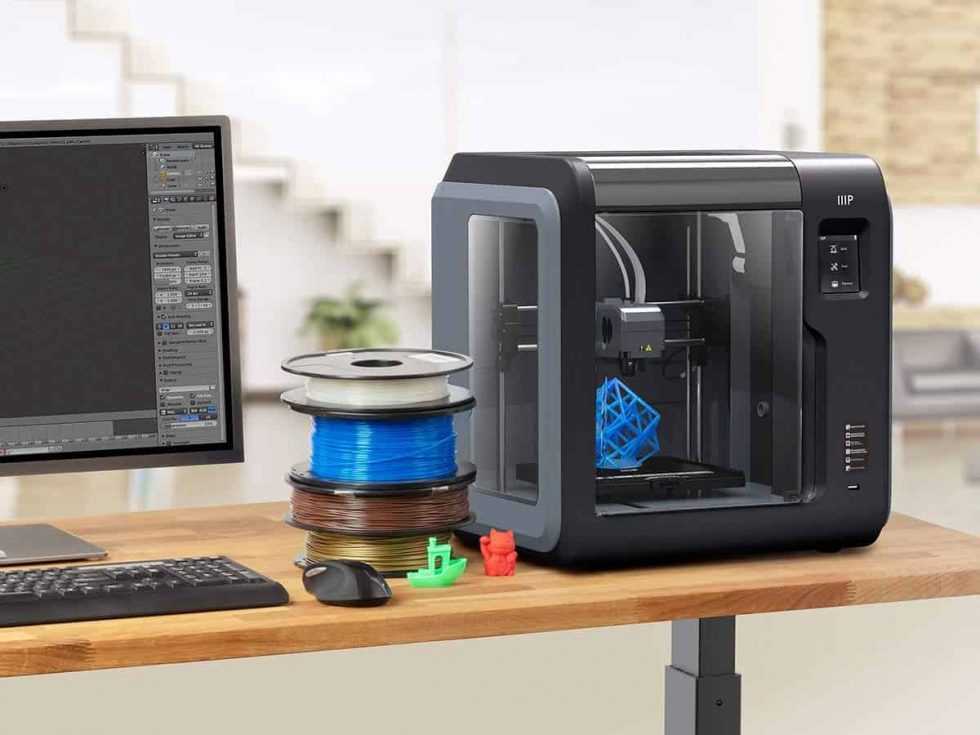 Nowadays, many of those classic, ornery 3D-printing issues have been resolved (most of the time, anyway), even for consumer and bargain-priced 3D printers. Automatic print-bed leveling is the norm, and you can usually remove 3D-printed objects from heated and/or flexible build plates with a minimum of coaxing. And most 3D printer manufacturers have either developed and refined their own software, or have adapted an open-source printing platform such as Cura.
What separates more expensive 3D printers from cheap ones ("cheap" defined as $500 or less, for the purposes of this article) is often a select group of features. These include the build volume, the type of frame, the varieties of supported filament, the software, and the connectivity mix. Let's run through those in turn.
What's the Right Build Volume for a 3D Printer?
A 3D printer’s build volume is the maximum dimensions (HWD) of a part that it can print. (We say “a part” because a 3D-printed object can consist of multiple parts that are printed, then glued or otherwise pieced together. ) While the smallest build volume of any 3D printer we have tested is 3.9 by 3.9 by 4.9 inches, we consider any build volume smaller than 6 by 6 by 6 inches to be small, any between that and 10 by 10 by 10 inches as medium, and any printer with at least one build dimension of more than 10 inches as having a large build volume.
As a general rule, inexpensive 3D printers have small build volumes, while more expensive ones have larger build volumes. This depends in part on the type of printer. Closed-frame 3D printers—and most semi-open models, which have a rigid top, base, and sides but are open in front and, often, back—tend to have small build volumes, while open-frame printers, lacking as rigid a physical structure, often have relatively large build volumes for the price. You'll want to weigh the build volume against the kinds of objects you will print.
Should I Get an Open-Frame or Closed-Frame 3D Printer?
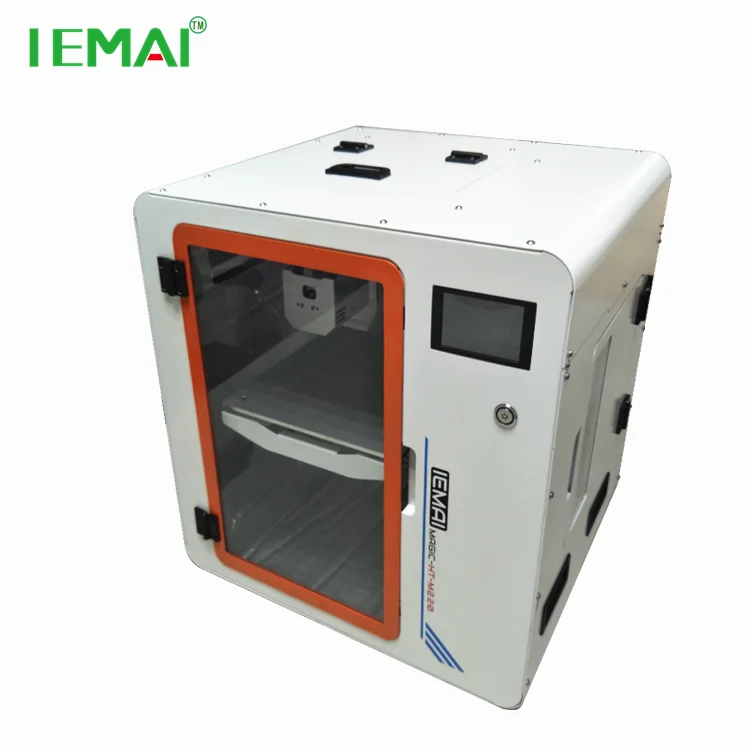
Which brings us to the frame "form factor" question: open-frame versus closed-frame. Closed-frame 3D printers are boxlike devices, with a rigid base, walls (with a see-through door in front), and top. Among their advantages? They muffle the operating noise, as well as reduce the odor from melted filament (which is potentially an issue with ABS plastic), and they provide some protection for people or pets who might inadvertently touch the hot extruder. A downside: They tend to have smaller build volumes than open-frame 3D printers, which have fewer (often, no) walls to constrict them.
Low-cost 3D printers include both open-frame and closed-frame models, as well as a few stereolithography printers. If a relatively large build volume is a priority, you’re likely to get more bang for the buck with an open-frame model. Open-frames do have some clear downsides by definition: They tend to be noisy, emit odors when certain plastics are melted, and provide little protection for someone who might touch the hot extruder.
Also, recognize some potential negatives of open frames, depending on the model.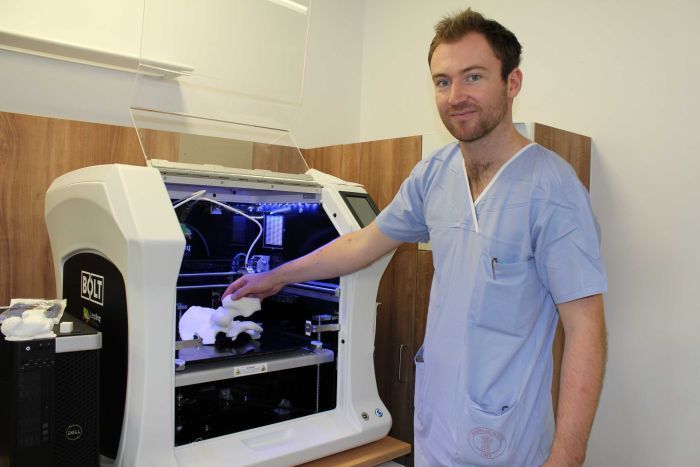 Some require assembly, being essentially kits, and most require more setup care than a closed-frame printer, plus more maintenance to keep them running smoothly. Still, these very traits should not deter—and may even appeal to—hobbyists and DIY folks.
What Should I Look for in 3D Printer Software and Connectivity?
Gone are the days when tinkerers had to cobble together several different programs to get a 3D printer to run. Manufacturers either include their own 3D printing program or modify an existing platform such as the open-source Cura.
3D printing software performs three main functions: processing an object file (resizing, moving, rotating, and in some cases duplicating it), slicing it (into virtual layers, based on your chosen resolution), and printing it. These are almost universally combined into a seamless process. Some high-end printers have software that supports a wider range of settings you can tweak, but even the basic suites work at least reasonably well.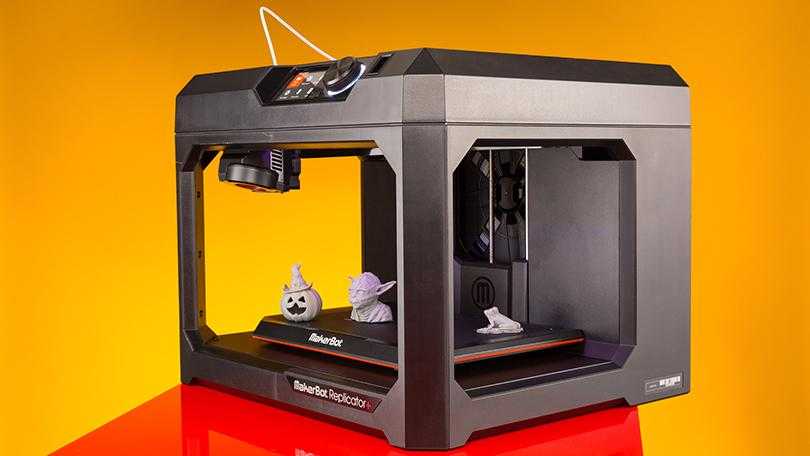
More likely to vary among the cheaper set is the array of connection options from model to model. Nearly all have a USB Type-A port to fit a thumb drive for printing from document files. Most also have a USB Type-B port for connecting directly to a computer, and some offer Wi-Fi, too (or as an alternative), while a handful let you connect via Ethernet to share the printer across a local network.
Some printers support storing 3D files on an SD or microSD card (which may also contain the printer’s system files). Most 3D printer manufacturers (even the discount ones) have a mobile app to launch and monitor print jobs, and a few provide access to cloud services from which you can print.
While high-end 3D printers tend to have an abundance of connection choices, discount models vary widely in their choices. Some are generous and some are basic, so it pays to assess what a given model offers.
What Should I Look for in Filament Support?
Filament support tends to be a key area that separates the cheaper models from the higher-end ones. (See our guide to understanding 3D printing filaments for more particulars.) Inexpensive 3D printers tend to support a limited number of plastic filament types, some of them only PLA and/or ABS.
PLA (polylactic acid) is a biodegradable, plant-based polymer, while ABS (acrylonitrile butadiene styrene) is the same tough plastic that Legos are made from. Objects printed from ABS are durable and nontoxic, though the material can be tricky to work with. ABS can emit an acrid, unpleasant odor during printing, and the bottom corners of objects being printed with it have a tendency to curl upward a bit, especially if you are using a non-heated print bed. This can lead to unsightly prints, and/or prints prematurely pulling off the build plate, ruining them.
Many entry-level and low-price 3D printers stick exclusively to PLA. If you want to experiment with a larger variety of filaments—which include water-soluble filament, wood- and metal-laced composites, and both tough and flexible varieties—you may have to pay more, although a few discount models support a wide range of materials.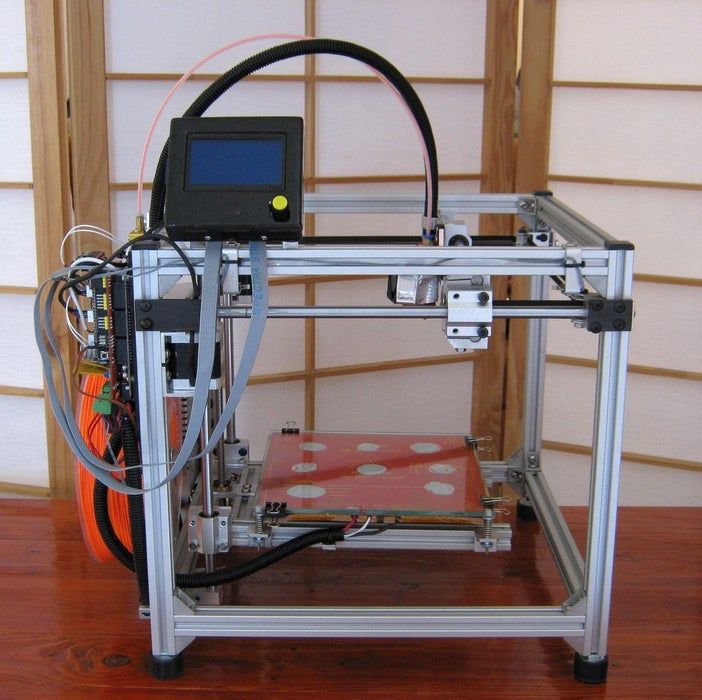
Should I Consider a 3D Printing Pen Instead?
Although they aren’t printers per se, inexpensive 3D pens are close kin to 3D printers—using the same filament types and a similar extrusion system—and we include them in the 3D printing category. Rather than tracing out a programmed pattern, you use the 3D pen much like a normal pen, except that you draw with molten plastic. You can trace a pattern or draw freehand, and even draw in three dimensions as the plastic quickly solidifies and hardens once extruded.
Most 3D pens cost less than $100, and some cost $50 or less. At a glance, 3D pens may appear to be toys, but some artists and craftspeople have taken to them, as it is possible to make quite complicated and beautiful objects with them. If your aim in 3D printing is something closer to freehand design and free expression than computer-centric, structured, and repeatable output, you might give one a try.
So, What Is the Best Cheap 3D Printer to Buy?
Buying a budget 3D printer needn’t mean a world of sacrifice. Plenty of capable and reliable models sell at less than $500, and while they may not be as feature-rich as their more expensive cousins, there's no sense in paying for things you don’t need.
Many casual 3D-printing experimenters will be fine with printing over a USB cable or from a thumb drive, and sticking to PLA may be the best choice for a starter 3D printer. If you focus just on the features you want, you may be pleasantly surprised at what you find. Below, check out a spec breakdown of the best under-$500 3D printers we have reviewed, paralleling our picks above. Also, for a look at the broader market, see our guide to our favorite 3D printers overall.
Creality Ender-5 Pro - Review 2022
The Creality Ender-5 Pro ($382), which comes as a kit, is a bit larger than many budget 3D printers we've reviewed, but its box-like open frame has a sturdy feel that belies the price. The printer takes a few hours to build, but the process is pretty straightforward. The Ender-5 Pro supports multiple filament types.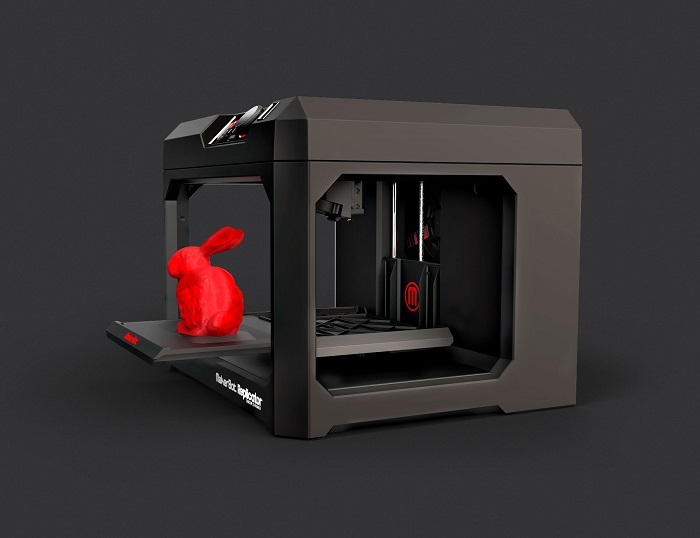 Its main issue is one we've seen with other 3D printers that lack automatic bed-leveling—it can be a pain to set the extruder nozzle the proper distance from the print bed at each corner and keep it calibrated should it come out of whack. But if you're willing to take on that chore, you'll have yourself a 3D printer capable of making reasonably large prints of above-average quality.
An Open-Frame Kit
The Ender-5 Pro is an open-frame, filament-based (FFF) 3D printer that's on the large side for its budget ilk, measuring 21.7 by 19.1 by 20.7 inches (HWD) and weighing 26 pounds. The frame is mainly built of matte black aluminum beams, which you bolt together during setup. This boxy structure feels stabler and more substantial than the arch-like frame of Creality's Ender-3 V2, which is bolted to its base on either side.
The build area of the Ender-5 Pro is 11.8 by 8.7 by 8.7 inches (HWD), taller than that of the Ender-3 V2 (9.8 by 8.7 by 8.7 inches) and both wider and deeper than the Editors' Choice award-winning Original Prusa i3 MK3S+ (9. 8 by 8.3 by 8.3 inches). The Prusa comes in both preassembled (which we reviewed) and kit versions, the latter priced at $750, nearly twice as much as the Ender-5 Pro.
At the front of the base are a slot for a microSD card and a micro USB port. The included memory card comes with an adapter that fits a USB Type-A port on your PC, where you can prepare files for printing in Creality Slicer or Cura (more below).
Putting the Ender Together
Building the Ender-5 Pro took several hours but wasn't difficult; I'd call it a slightly easier task than assembling the Ender-3 V2. The job involves bolting the vertical beams (a.k.a. extrusions) to the base, which supports the print bed and holds the motherboard and power supply.
You then span the extrusions at the top with additional beams that you bolt into place. Around the back, you bolt the Z-axis assembly, which controls the print bed's vertical motion, at the top and bottom. The extruder is suspended on a carriage that spans the width of the printer and moves forward and backward as well as from side to side by means of a system of motors, belts, and rubber wheels. The filament spool holder is bolted to the right rear vertical beam, and the LCD to the right edge of the printer at the front.
The backlit LCD is not a touch screen; it has a knob that you turn to scroll through menu items and press to make a selection. It proved easy to use in my testing. The screen is wider than the LCD found in the Ender-3 V2, which is an improvement; the latter's 15-character limit often truncated filenames. The Ender-5 Pro's screen displays 20 characters, giving you a bit more room to work with.
The printer has nearly a dozen cables that power and control the motors, extruder, and end stops, and they have to be attached to the proper connectors. Creality does well in labeling both the cables and connectors. Most of the components are at the top of the printer with the motherboard and power supply are at the bottom, so you must take care to keep the long cables out of the way (mostly at the rear or on the side). The printer comes with zip ties for this purpose.
When I finished the wiring and turned the printer on, power seemed to be flow where it was supposed to, though I noticed one oddity: When I used the LCD to bring the extruder to its home or default position (0,0,0 in Cartesian coordinates), the extruder moved to the right rear corner of the print bed. On every other 3D printer I've used, the extruder homes to the front left corner. I painstakingly rechecked the cables and connectors in of fear that I had gotten a wire crossed somewhere, but didn't find anything amiss.
Confused, I did a Google search on homing the Ender-5 Pro's extruder, only to learn that other users had noted the same issue but it wasn't a problem—the extruder by default does home to the right rear corner. Some third parties offer custom firmware fixes so it homes to the front left, but the printer works fine even with its peculiar homing convention. Just be aware that an object being printed may appear to be rotated 180 degrees from how you saw it in your slicing software's preview.
The Print Bed: Doing Your Level Best
As with many other 3D printers that rely on manual bed-leveling, the leveling process—adjusting the distance between the extruder and build plate so that it's the same at all four corners of the plate—is simple in theory but more dicey in practice. Bed-leveling is accomplished by placing the extruder above a corner and turning a knob beneath the corner until the extruder and build plate are so close that you can slip a thin card between the two with slight friction. You repeat the process for each corner, then recheck in case adjusting one corner threw the others out of whack. When all four corners are at the proper distance from the build plate, you're ready to print.
The Ender-5 Pro is different than other 3D printers I've encountered in that the extruder assembly remains at the top of the printer. When printing begins, the build plate is immediately below it, and as the object is printed layer by layer, the build plate slowly descends. I'm not sure if it was because of this peculiar configuration, but I had trouble getting the extruder and plate the proper distance from each other. One or two corners would align well, but I couldn't get the other two aligned properly. Before I could get the extruder and build plate close enough to one another, the knob would reach a point where turning it further didn't bring the components any closer together.
I left a message with Creality to see if the company could offer a solution, but before I heard back I decided to try leveling the bed once more. This time it aligned well, and soon the Ender-5 Pro was printing like a champ. When it came time to print our exacting geometric test object, I decided to relevel the print bed to ensure the best quality—3D printers tend to lose their alignment over time and need to be readjusted.
I set all the corners as described above, and they seemed to be in the proper position, so I launched the print. However, I then committed a cardinal sin of 3D printing: before the initial layers were printed, I turned my back and started doing something else.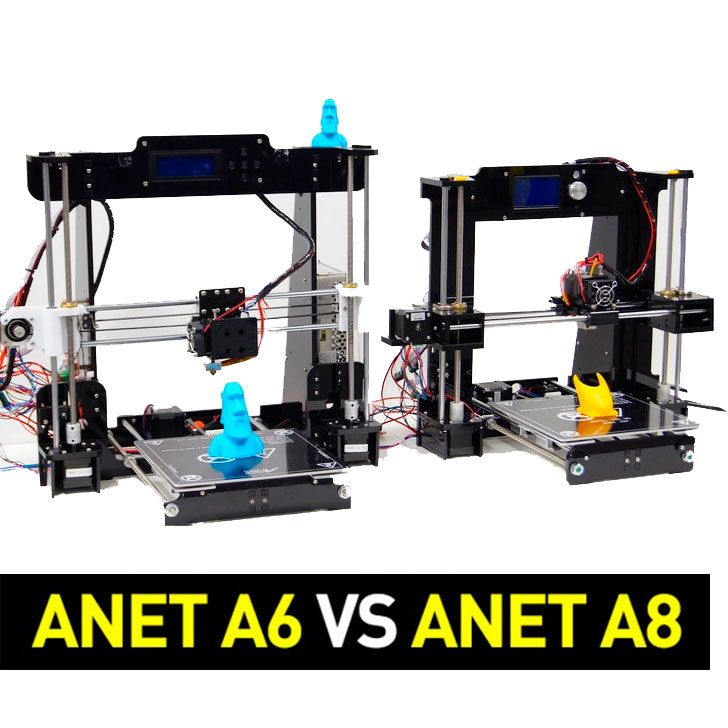 (Once a 3D print is in progress, you needn't monitor it constantly, but you should at least make sure that the first few layers adhere to the print bed properly.)
Sure enough, by the time I looked back at the Ender-5 Pro, the extruder nozzle had torn through the magnetized top layer of the print bed, effectively ruining it, and had even made an indentation into the glass print bed below. Clearly, the nozzle and print bed were too close together in the center of the bed, even though the corners had appeared properly aligned.
Filament Support and Software
The Ender-5 Pro base model comes with a 200g spool of PLA filament, though the kit is frequently sold bundled with additional filament spools. Although the included spool is relatively small (you may want to order at least one larger spool at purchase time), it holds considerably more filament than the starter coils included with many 3D printers, including the base Ender-3 V2. The Ender-5 Pro supports PLA, ABS, PETG, TPU, and wood composite filaments. Creality sells black, white, and gray PLA filament in 2-kilogram spools for $49.99; at this writing, they were discounted to $41.99, and color PLA filament was about the same price.
The SD card that comes with the Ender-5 Pro includes Creality Slicer 4.2, the company's own 3D printing software. The app is very similar to Cura, the open-source software now managed by Ultimaker which is included with the majority of 3D printers we test. In preparing files for printing, I mostly used Creality Slicer, though I processed a couple of files with Cura (using the latter's settings for the Ender-5, as the Pro isn't yet included in Cura's pull-down list of printers). Both programs are easy to use, and the basic process is the same.
You load a file in a 3D object format such as STL, OBJ, or 3MF. An image of the object you wish to print appears onscreen in a representation of the print bed. By clicking on the image, you can move, scale, rotate, and otherwise manipulate it. The Print Settings menu lets you tweak resolution and infill, adding support structures, a brim, or a raft. Clicking a Custom button gives you a wider range of options. When you've tweaked the object to your satisfaction, you press the Slice button, and the software maps out the layers to be printed based on your resolution (quality) and other settings and tells you the estimated print time. You can then save the file in GCODE format to your PC's hard drive or SSD or a removable drive.
Testing the Ender-5 Pro: Above-Par Print Quality
I used the included PLA spool for my testing. Based on the eight completed test prints made from object files processed and sliced in Creality Slicer and Cura, the Ender-5 Pro's overall print quality is above average for an under-$500 3D printer—even at the 200-micron resolution I used in testing—and slightly better than that of the Ender-3 V2. Prints were generally smooth, with no signs of ropiness or missed layers.
I noticed no significant issues in our test prints. A couple of small objects showed some spurious, thin filament "hairs" extending between portions of the prints; this is a common issue with FFF printers, and fortunately these strands are easy enough to clip and sand away.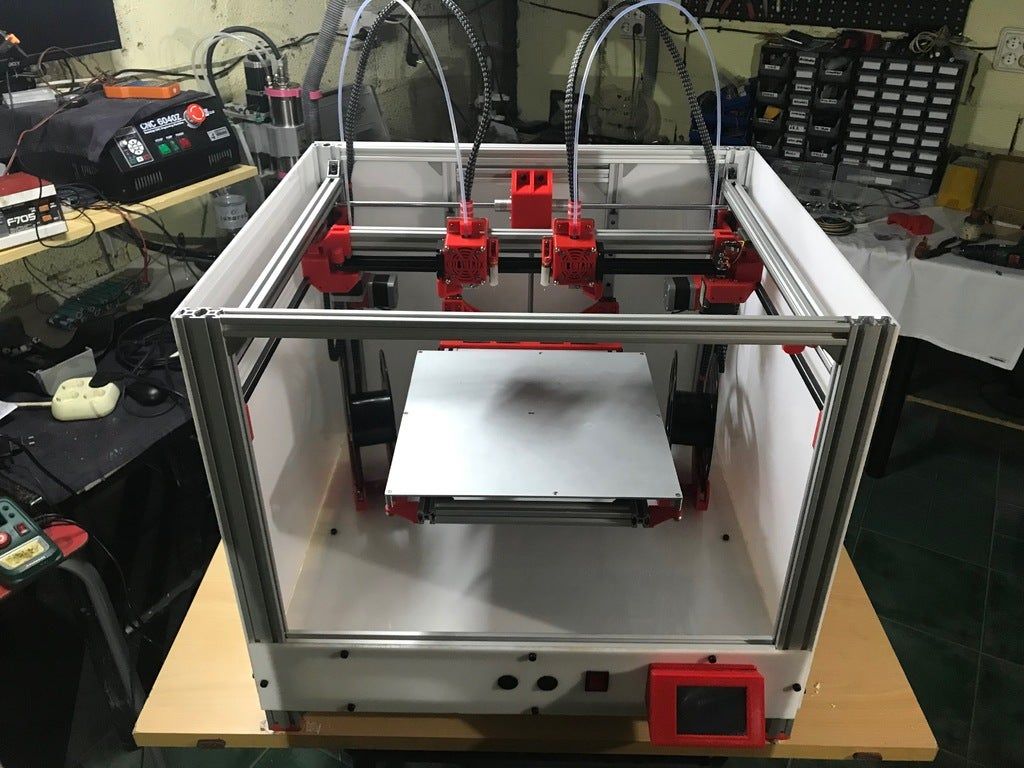
Verdict: Does the Ender Justify the Means?
The Creality Ender-5 Pro has a large build area considering its low price. As a kit, it takes a fairly easy few hours to assemble. Its print quality tops that of many 3D printers in its price range. Its main flaw is that, as with many printers limited to manual bed-leveling, getting and keeping the print bed properly calibrated can be a headache.
Printers with automatic bed-leveling avoid these issues, but bring their own tradeoffs. The Monoprice Mini Delta V2 requires no calibration and provides quick, consistent printing, but it has a very narrow build area. The Prusa i3 MK3S+ is available fully assembled and requires no calibration, but it costs nearly a grand. The Original Prusa Mini kit requires that you run a calibration routine, but it's otherwise pretty much set-it-and-forget-it, though its build area is smaller than the Ender-5 Pro's.
With its box-like open frame, the Ender-5 Pro feels a bit chunky, but also seems sturdier than the arch-like Ender-3 V2.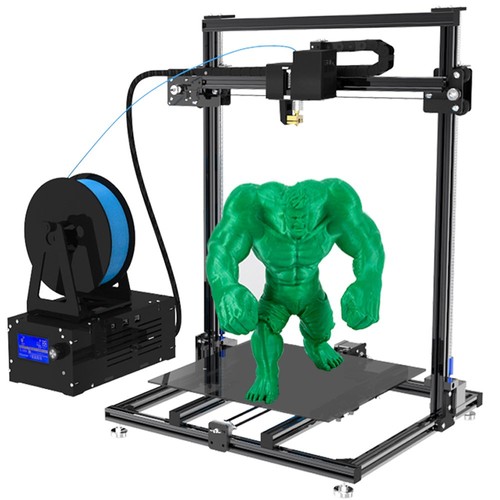 Although I can't say for sure that the Ender-5 Pro's added stability is responsible for its slightly better print quality, it does churn out good-looking prints, and that counts for a lot, if you're willing to fiddle.
3d printers. Overview of achievements in 2013 / Sudo Null IT News
Prostheses for humans and animals, 3D printing of space structures, food and shoes, improved printing accuracy, new materials, new software.
A bunch of projects on crowdfunding platforms.
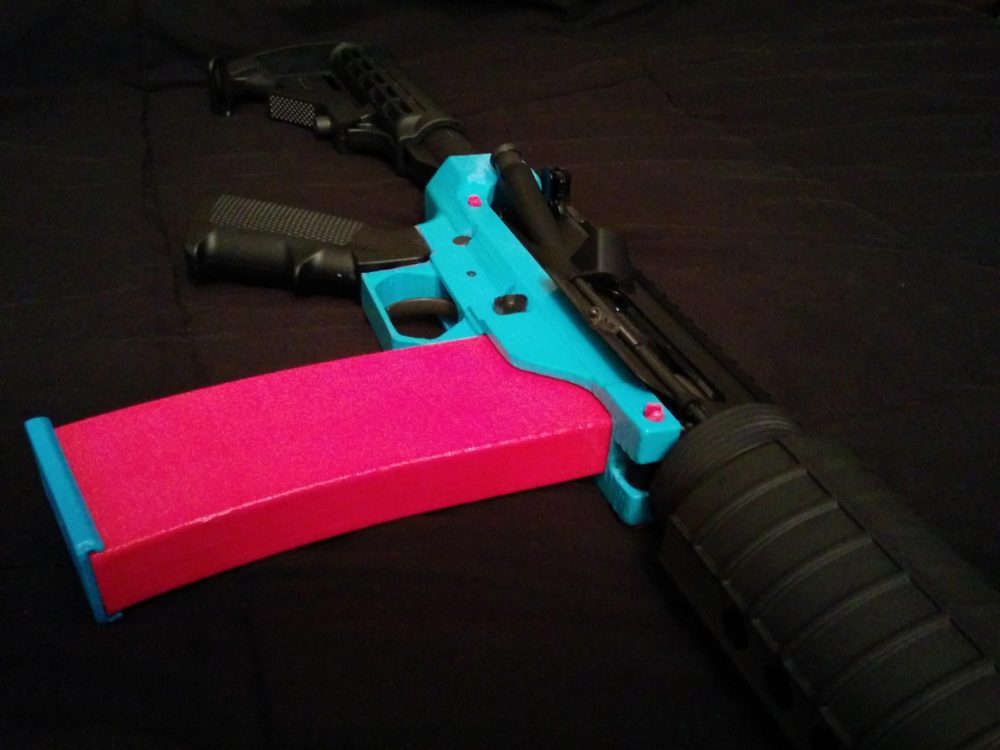
Well, pistols, where would we be without them.
China, Japan, Australia, USA, Netherlands, Africa and Haiti, 3D printing seems to be everywhere in the world.
In 2014, 3D printing will go into space.
(Review of achievements in 3D printing 2012 here)
We read what we achieved for 2013 under the cut ( 54 photos ).
January
The Chinese printed a 5 -meter whole spare part for the aircraft from Titan
more pictures
The laser 3D printer
Technology of selective laser sintering in the action of
Parts smaller
are used, in which they are used by the detachable 3d printed
Hackerspace BioCurious offers a do-it-yourself bioprinter based on HP 5150 inkje
(the first inscription where instead of ink is "E. coli")
The European Space Agency is conducting experiments to build a shelter on the moon using a 3D printer
one and a half ton building block
February
A team of scientists from Scotland, for the first time, using a 3D printer, print three-dimensional tissue from stem cells
Article PDF
3D printed Urbee 2 is ready for production
change the way we make most things in a different way”
In February, there was a buzz with 3doodler, a 3D pencil that can “draw in the air”.
In just a few hours, they raised over a million dollars on Kickstarter.
Articles on Habré about this:
With the 3Doodler pen, you can draw three-dimensional objects directly in the air
Our answer is 3doodler. Assembled in 20 minutes
3Doodler is in a hurry to you! (Bonus: clone review)
In November, the "pencil" was delivered to Russia - the first (and last) review
Scientists printed an artificial ear
original article
Nike presented the world's first boots printed on a 3D printer
4D printing.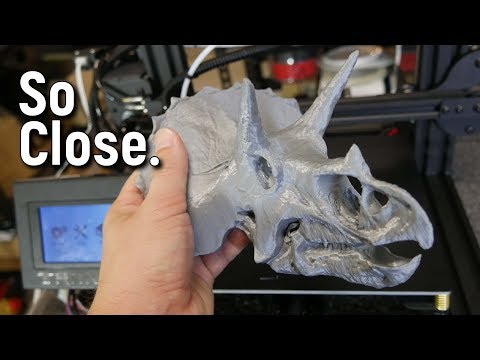 Self-transforming objects
TED 4D Printing Video
March
The government of Singapore intends to invest $500 million in the development of the 3D printing industry.
3D printing makes it possible to create low-cost implants taking into account the anatomical features of patients
83-year-old inventor won $40,000 in a competition for his "do-it-yourself" extruder
April
Oxford University scientists say their 3D printer is capable of creating materials with some of the properties of living tissue0018
A 3D scanner capable of obtaining images from a distance of 1 km has been created
The Chinese government intends to invest $6.5M in the development of 3D printing technologies
GE prints fuel injectors for aircraft engines in two days
Printed ear capable of capturing radio frequencies
NASA awarded a $125K grant to develop a 3D food printer for astronauts who will fly into deep space
Saved life to the child, printing the trachea
NASA plans to send a 3D printer for the ISS in August 2014
The Japanese printed a carbon bunny the size of a
Chinese showed the largest detail for a combat aircraft, printed on 3D Printing Printing Printing Personnel 9000
June
British government invests £14. 7m in 3D printing projects
'artificial bone' made from polymers 22 times stronger than composite component
Microsoft built support for 3D printers in Windows 8.1
A foot was printed for a wounded duck
July
MIT develops software that makes it easier to work with composite materials
British children will learn robotics and 3D printing from the age of 5
Telegraph article
August
3D printed rocket engine passed NASA test, which was the starting point for many innovations to reduce the cost of spare parts production
Melbourne scientists have proposed a technology that allows you to grow your own cartilage for the knee joint from stem cells using a 3D printer
MIT scientists have developed a lightweight structure, the smallest details of which can be 3D printed and assembled like a Lego constructor. The intended use is in the construction of aircraft, spacecraft, dams and bridges.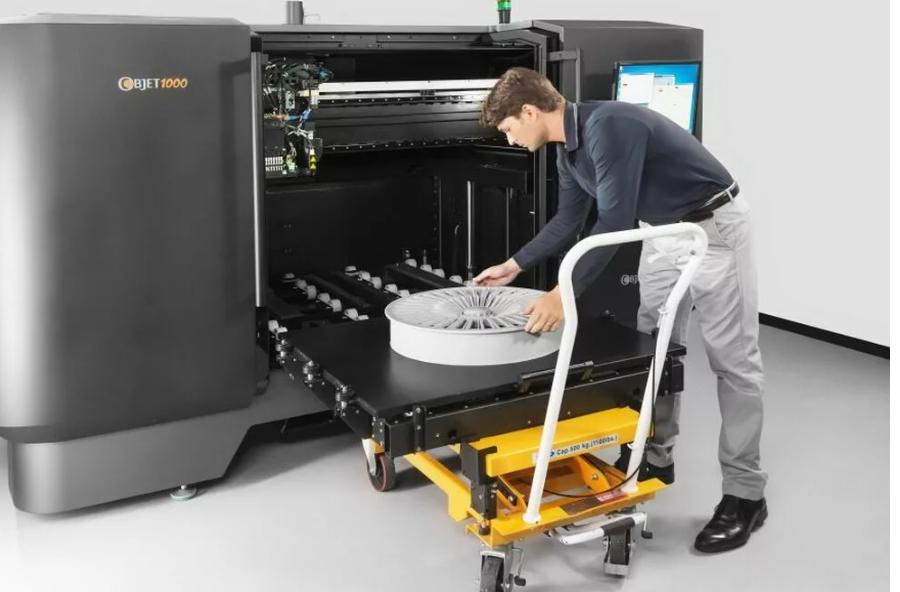
The world's first full-scale architectural installation Echoviren
September
Breakthrough technology - printing with dissimilar materials, both organic and inorganic materials: ceramics, metal, plastic and even biological cells
Developers from Disney introduced software that will allow you to create and print mechanical toys on a 3D printer
$100 3D printer - The Peachy Printer0003
Scientists from the Netherlands using a 3D scanner and 3D printer created reproductions of paintings by Rembrandt and Van Gogh
October
UK provides £500K grant to equip 60 schools with 3D printers
HP plans to enter the 3D printing market in mid-2014
Scientists have discovered that natural components (vitamin B2) can be used in the 3D printing process to create implants
Haiti has a 3D printer
Microsoft came up with a technology that can turn any smartphone into a 3D scanner
November
A program for encrypting 3D models was released
Gelatin bioink for printing organs
The world's first fully metal 3D printer 9008
Scientists printed 20 layers of liver tissue that lived for 40 days0003
Desktop metal 3D printer
Progress in the manufacture of lithium-ion batteries using 3D printers.
Batteries can now be smaller than a grain of sand and thinner than a human hair. They can be used in implants and insect robots.
December
$1,500 metal 3D printer
BioPen surgical 3D printer lets you "print" tissue during surgery
President Epson: “At home 3D printing there is no big future”
Australian engineer invented a system of detecting and eliminating errors of the 3D printer
News
Subscribe to the author
sign up
16 900 900 900 900 900 900 900
Chris Barr, an engineer and blogger based in Adelaide, Australia, has developed a 3D printer error detection system. According to the developer himself, this device can be useful for minimizing errors caused by overheating of stepper motors, belt slippage and unsuccessful filament layering.
One of the most common problems that users (especially owners of inexpensive 3D printers) face is layer misalignment.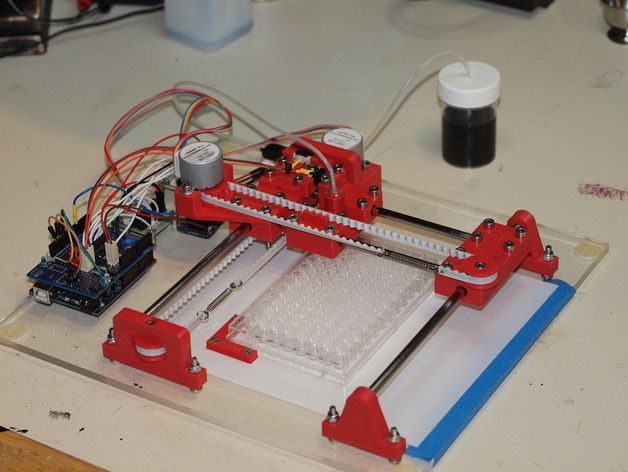 This phenomenon occurs when the printhead stepper motors "skip" a step. This error is caused by various factors, including excessive voltage, insufficient lubrication, or running the 3D printer at too high a speed. In any case, shifting layers is a serious problem, because of which it is often necessary to redo all the work.
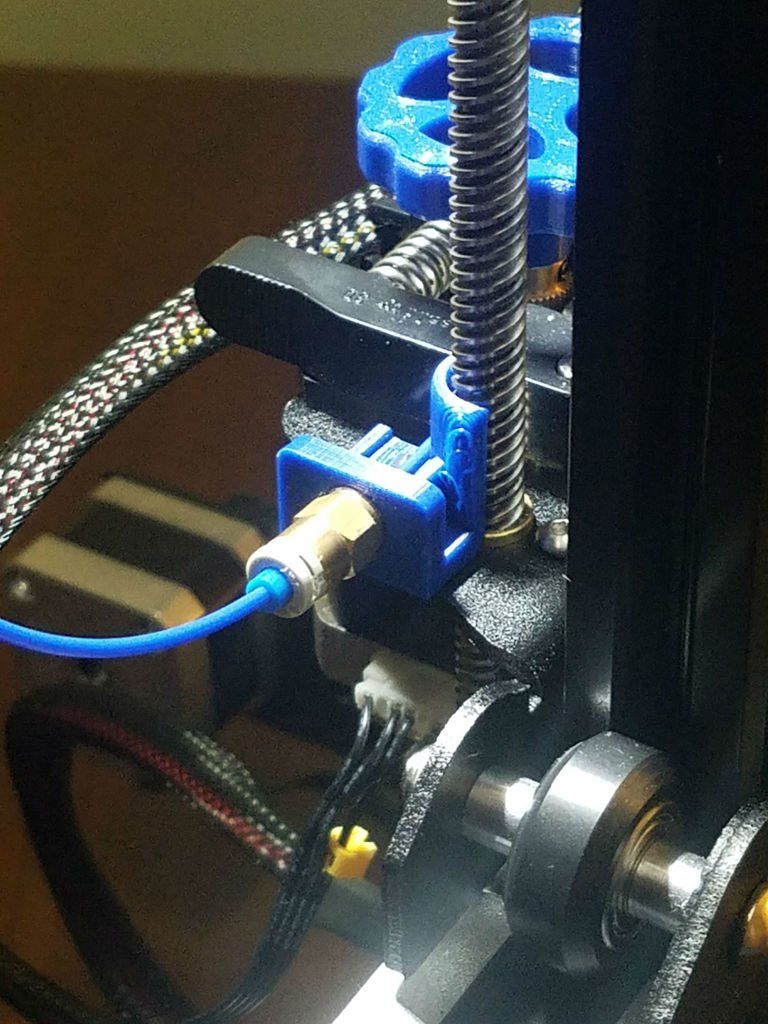
The easiest way to avoid such errors is to quickly adjust the 3D printer or change the print settings to less demanding ones. Some 3D printers are equipped with cameras and alarm systems that immediately notify the owner if the printing process goes wrong. But Chris Barr wanted to challenge himself and solve the problem of 3D printer errors in a more drastic way. After a bit of experimentation, a technical expert invented the simplest system for detecting and correcting errors in a 3D printer, where a magnetic encoder is responsible for tracking the movements of the print head.
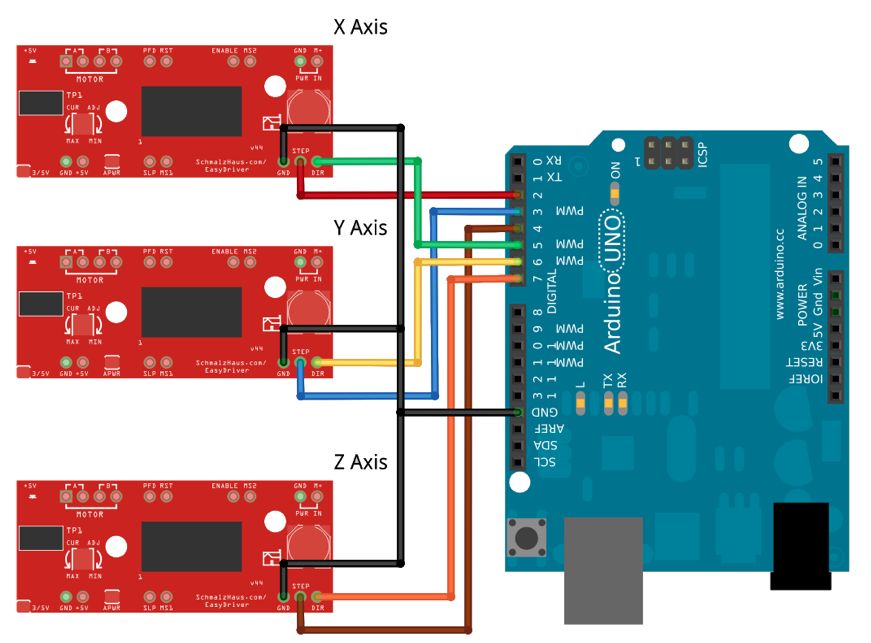
The Barr Error Detection System consists of an AMS AS5311 linear magnetic encoder IC, a PCB, and an ATmega328 microcontroller for position tracking and I2C communication. The engineer redesigned his Marlin 3D printer to fit the system. In the video he posted, you can see that the system does an excellent job with the task and successfully returns the head to a given trajectory if it suddenly tries to make a mistake. Barr deliberately interferes with the printhead, but it invariably returns to its proper position and resumes work.
Yes, there are some errors that a 3D printer can fix itself, but the Barr system seems to be a good solution when it comes to layer offsets. Although it does not help to create products with a perfectly smooth surface, it will definitely come in handy in the manufacture of prototypes, some minor parts, etc.
In his video, Barr demonstrates a completely unrealistic situation: hardly any of the users dare to hold the print head with their hands. He also claims that his system can help prevent errors caused by the following conditions: stepper motors overheating, print head jamming during printing, and belt stretching or slipping. Depending on the depth of each of these problems, more serious troubleshooting may be required, but the Barr system may well be the first handy tool to help a 3D printer deal with the simplest errors.
Source
Follow author
Follow
Don't want
16
More interesting articles
9
Subscribe to the author
Subscribe
Don't want
Scientists of Sechenov University, Baikal Institute of Nature Management, Siberian Branch of the Russian Academy of Sciences...
Read more
5
Follow author
Subscribe
Don't want
Compared to traditional casting, 3D printed sand casting has several advantages.