3D printing molds for chocolate
How to Create Custom Chocolate Molds With 3D Printing & Vacuum Forming
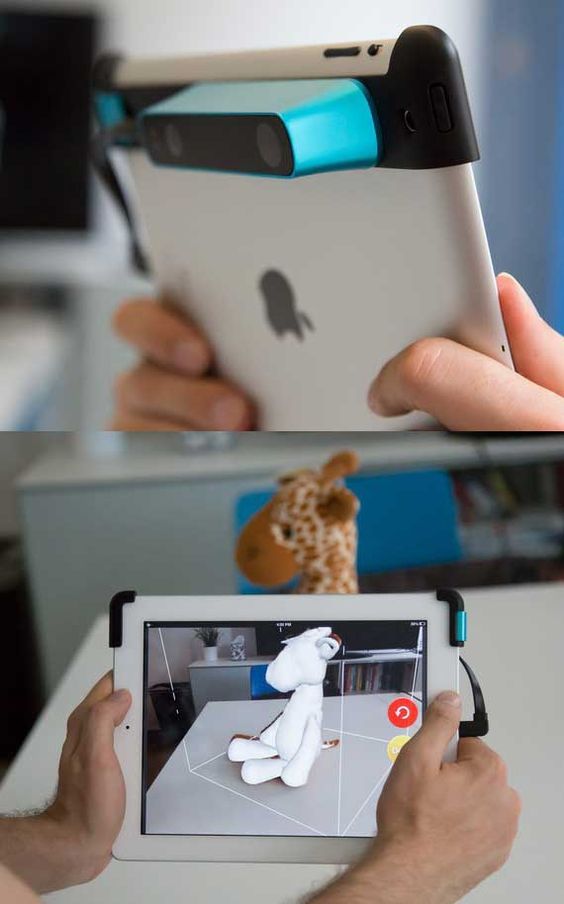
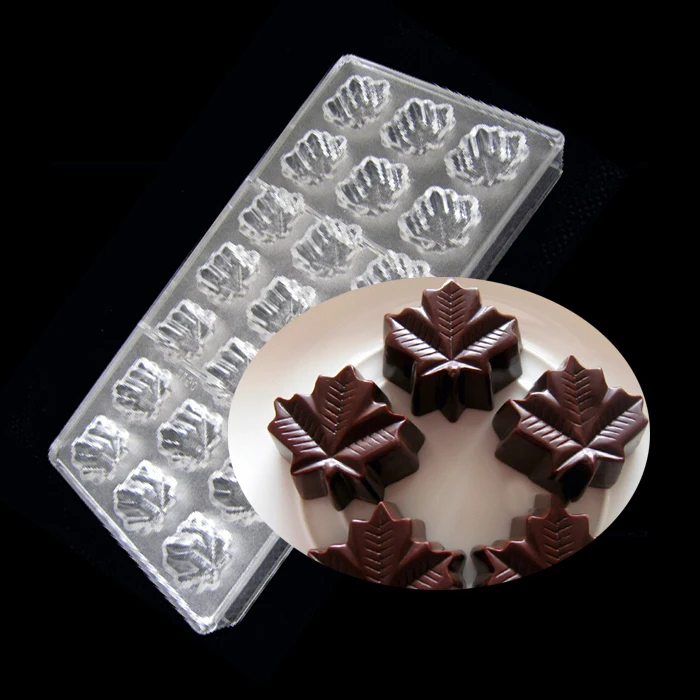
The most common way to make chocolates and confections is to use pre-made silicone molds, which are filled with molten chocolate and cooled. By designing and 3D printing custom chocolate molds, it’s possible to add a level of detail and customization that was previously only available to skilled artisans. The tools and techniques for creating 3D printed food molds are easy to master, and the results are often stunning.
Custom molds for chocolate, candy, and other types of confectionary must be food safe, flexible, and, ideally, reuseable. While prints made from stereolithography (SLA) resins aren’t suitable for directly molding foods, an SLA 3D printer is the perfect tool to create mold negatives, which can be vacuum formed using food-safe plastic.
Read our guide for an introduction to food safe 3D printing, food safety considerations for 3D printing, and a variety of methods to produce food safe products with common 3D printing technologies.
White Paper
Download our white paper to learn about six moldmaking processes that are possible with an in-house SLA 3D printer, including injection molding, vacuum forming, silicone molding, and more.
Download the White Paper
The following items are needed to create custom, food-safe molds through 3D printing and vacuum forming:
- Formlabs Form 2 or Form 3+ stereolithography 3D printer
- Formlabs High Temp or Standard Resin
- Thermoforming machine and food safe HDPE sheet (0.015 in)
- Couverture chocolate
With 3D printing and vacuum forming, you can make your own intricate chocolates.
The first step is to design the mold. For our Valentine’s Day-themed chocolates, we’re molding two designs: a flower and an ornate egg. You can use almost any model, so long as it has a flat surface that can sit flush with the a vacuum forming machine. Vacuum forming is a process where a plastic film is heated and pulled against a mold by a vacuum. The most successful models won't have undercuts, which can trap the mold in the vacuum forming sheet. If you’re not an experienced CAD user, lithoforms are a great way to easily create 3D models from 2D images that you or your customers can design.
If there are concave regions in your model, printing or drilling 1 mm holes at the lowest point in the region will help the vacuum forming process pick up the most possible detail from your print.
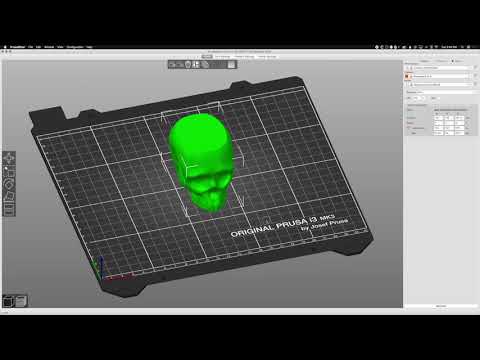
Print the mold in a rigid material. Formlabs High Temp Resin is ideal for printing vacuum form molds; it will not deform or degrade with exposure to heated plastic, even after multiple uses. Standard Resin will also work, though it may degrade over time if used repeatedly.
Sample Part
Curious about SLA 3D printing, but haven’t tried it out yet? We’ll ship a free 3D printed sample part to your office.
Request a Free Sample Part
Vacuum form the mold using food safe plastic such as high-density polyethylene (HDPE).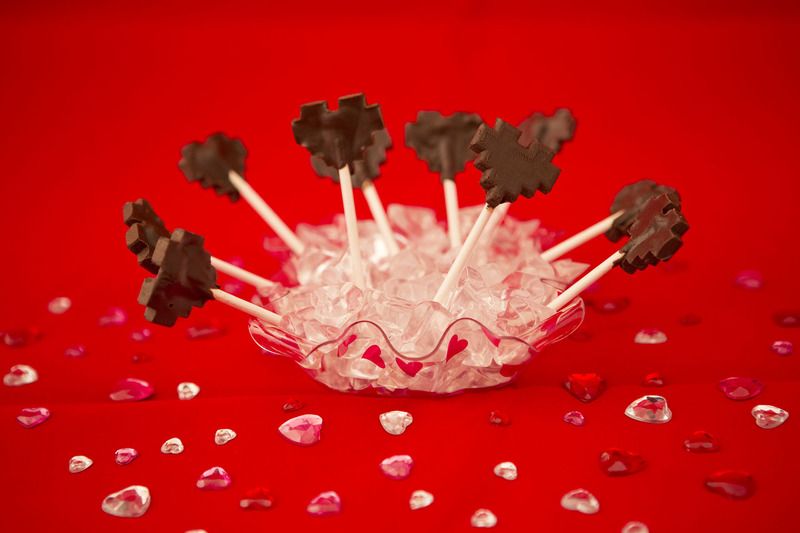 For the mold to be flexible, the plastic sheet should be around .01 in thick. There are many options for thermoforming machines, ranging from cheap and small, to large units with a lot of space.
Vacuum form the mold using food safe plastic such as high-density polyethylene (HDPE).
If your goal is to create a reusable mold rather than a unique one-off, you can easily increase the size of your batches by vacuum forming multiple prints simultaneously to make a large multi-mold tray.
White Paper
Download our white paper to see how to create complex molds with 3D printing fast and learn about tips and guidelines that you’ll want to follow when preparing your mold parts.
Download the White Paper
Wash the mold with soap and water. Wiping the interior surface of the mold with a small amount of canola oil will help clean it of any debris, and help the chocolate release from the mold.
Temper the chocolate and pour it slowly into the plastic shell.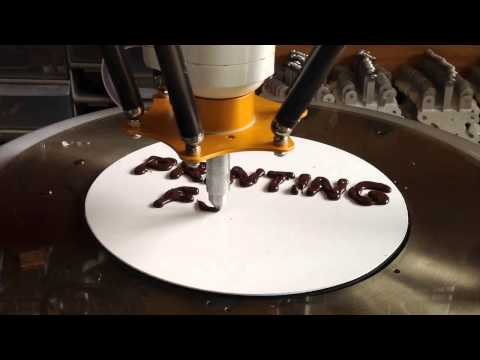 While the chocolate is still liquid, tap the mold lightly on a table to give the open tops a flat surface. Place the chocolate in the refrigerator to cool and harden.
Carefully remove the chocolate by flexing the mold. Use gloves when handling chocolates to avoid melting them.
We used the Form 2 to 3D print a custom box for our chocolates, using red colored resin that we dyed.
You can also use 3D printed thermoform molds to make custom sculpted chocolate packaging, customized packaging trays, as well as other products, like artisanal soaps, which can be poured and solidify at room temperature.
We used the Form 2 to print this Valentine’s box using red colored resin, and printed another thermoform mold for the plastic tray that holds each customized chocolate in place.
Like thermoforming, injection molding and casting can open up a wide range of material possibilities alongside your 3D printer. Watch our webinar, Making Molds with 3D Printing, to learn more about these techniques and design guidelines for each.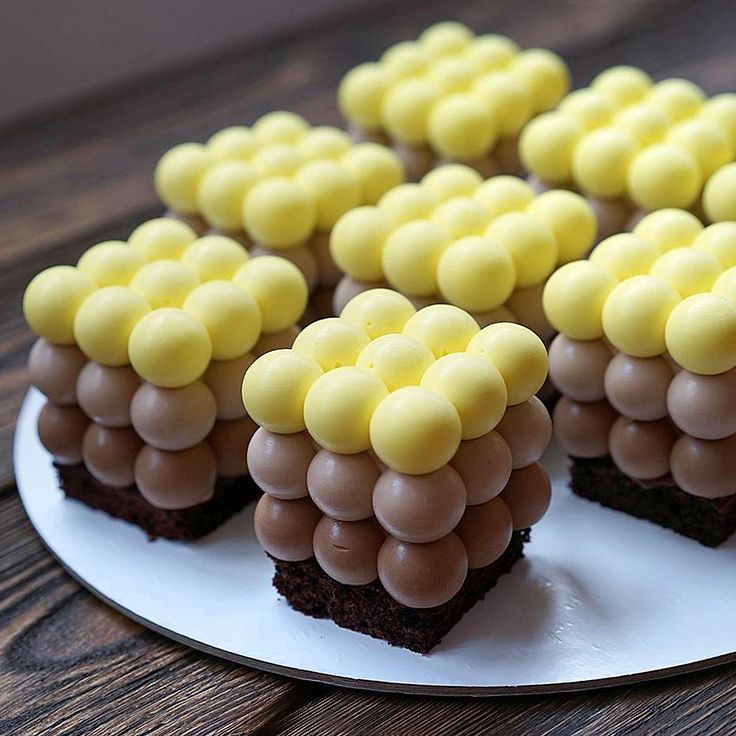
Watch the Webinar Now
Creating Chocolate Molds with 3D Printing and Vacuum Forming
Vacuum forming is quickly becoming a popular method for creating chocolate molds with fine detail, especially in combination with 3D printing. The process involves heating a sheet of food-grade plastic on a vacuum former until it is soft and pliable and then using a vacuum to pull the air out and suck the plastic onto a 3D printed shape. The thermoplastic form is then cooled and hardened, and the mold is released.
Once the mold is finished, it can be used to form chocolate pieces of various shapes and sizes and can be reused over and over again.
Vacuum forming is a great way to create custom chocolate molds for any occasion. With a little practice, you can design molds that are both intricate and impressively detailed.
Today we want to share a project from one of our customers who used his Ultimaker 3 Extended 3D printer in combination with the Mayku FormBox vacuum former to design unique and detailed chocolates of a historical building to share at a family reunion this summer.
Getting Started with 3D Printing and Vacuum Forming
3D Universe customer Herb Weiner got started with 3D printing in 2013. He had used his 3D printers for tools, repairs, and knick·knacks but felt it was high time to apply 3D printing to his favorite food: chocolate!
While there are now 3D printers that are specially made to work with chocolate, he didn’t feel like this was the best approach for what he wanted to do. Chocolate 3D printers are primarily for decorative applications, such as creating desserts and cake decorations, and he felt that producing molds for chocolate bars would be a better solution.
Herb was really excited when he heard about the Mayku FormBox, a machine that uses vacuum forming to produce food-safe molds from 3D printed models, clay, cardboard, glass, and other objects. He wanted to create a high-quality custom chocolate bar with attractive packaging.
The Saturday evening Talent Show to be conducted at an upcoming family reunion, provided the perfect excuse for Herb to get started. He decided to produce custom chocolate bars shaped like an 1892 farmhouse, the site of the upcoming reunion.
“The house is on a 5.32-acre lot in Dayton, Oregon, and was built in 1892. My wife’s parents purchased the house in September 1971, and their children (including my wife) went to school in Dayton. It was listed on the National Register of Historic Places in 1988,” he shared.
He used a recent photo taken by his wife, showing both the front and side of the house, but the addition on the right side was not part of the original house. Herb found a photo on the web showing the house at the time that it was nominated for the National Register of Historic Places, but that photo also included the addition.
Herb shared, “I wanted my model to reflect the appearance of the house prior to this addition but did not have any available photos to work from. My wife’s family reunion was held on that site at the end of July.”
In order to create the 3D printed design for his chocolates, Herb worked from some of the photographs of the old farmhouse that his wife had taken to create a design in Adobe Illustrator. He had to make some guesses about the original appearance of the house since he did not want to include the more recent additions.
The challenge was to include sufficient detail to ensure that the design would be recognizable but to avoid excessive detail that would be lost when casting a chocolate bar from a mold.
First, he created some software that allowed him to import the Adobe Illustrator artwork into OpenSCAD, the 3D parametric modeling software that he used to create the 3D model. OpenSCAD made it easy for him to change the depth and taper (draft angle) of the mold, the depth of the windows, the thickness of the lines, etc. In order to remove the chocolates from the mold, a slight taper is required – that is, the dimensions of the top must be slightly smaller than the dimensions of the base.
“Once I was satisfied with the OpenSCAD model, I exported this to STL. I imported the STL into Cura for slicing and 3D printed a set of four models on my Ultimaker 3 Extended printer.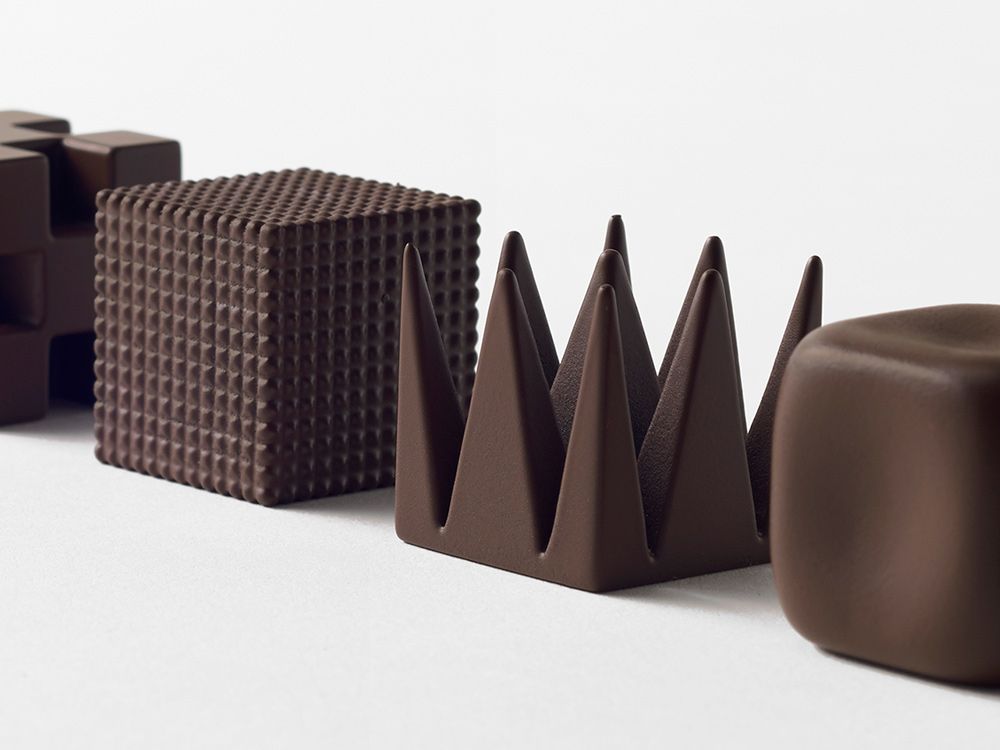 ”
”
Herb ended up with a 3D model that measured about 2.25 inches x 2.75 inches.
Creating Chocolate Molds with the Mayku FormBox
The food-safe Mayku Cast Sheets that Herb used to create his molds with the FormBox have a working area of about 8 inches square, so he was able to position four molds onto each Cast Sheet.
Since the molds created by the Mayku FormBox curve out slightly, he designed the molds to be deeper than necessary and then didn’t completely fill the molds with chocolate.
Making the Chocolate for the Mold
After melting and properly tempering the chocolate, Herb used a melamine spoon to scoop the chocolate into the molds. (The chocolate would harden too quickly when using a metal spoon.) Some chocolate inevitably dripped outside of the molds, but it was easy to break off these drips once the chocolate hardened.
He found it most convenient to work with small batches of chocolate – enough to make about eight chocolates at a time.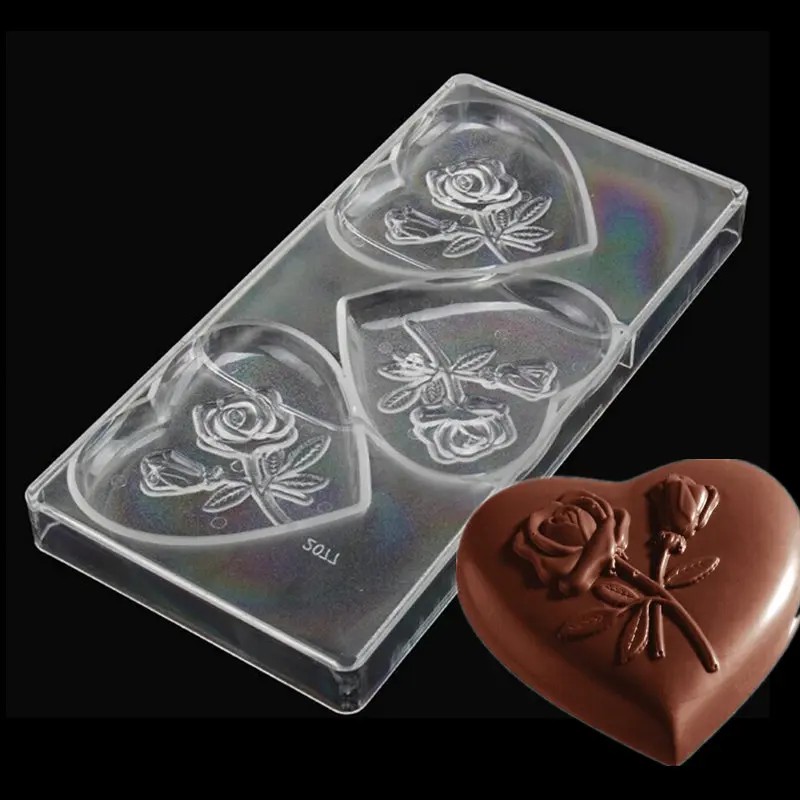
Once the chocolates were cooled, he placed them into individually wrapped vacuum sealed plastic and shared them with family at the reunion, and of course, they were a welcome surprise!
Herb shares, “The chocolates show evidence of being hand-made: there are slight differences in the thickness of each chocolate, and minor imperfections such as small bubbles. These should be referred to the complaint department.”
Please make sure to visit Herb’s original account of this experience on his website.
READ NOW
Learn More About the Mayku FormBox
For more information about the Mayku FormBox and how you can create custom chocolates, as well as prototypes, custom packaging, crafts, art projects for students, finished products, soaps, and even tasty treats for squirrels, please visit our website and check out some of our videos of our Creative Director Jen using the FormBox to make all kinds of things!
Making a silicone mold "Olympic Bear" for pouring chocolate using 3D printing.
All good mood friends! Today I want to share my experience in creating a 3D printed chocolate mold.
How it's done...
1) A master mold for silicone molding is designed in a 3D editor and printed on a 3D printer (the most interesting stage).
2) All details of the master form are processed with a file or a drill to make the forms smooth (the most hard labor stage).
3) Then the master form is filled with food silicone and it hardens (the most exciting stage).
4) Chocolate or baking dough is poured into the silicone mold (the most delicious stage).
So, let's start with the design of a master mold for silicone casting. First, we create in the 3D editor the figure that we should get at the output in the form of sweets. I have this figurine of the Olympic bear.
You can also make a chocolate bar as another example.
This figurine is embossed on the front side, smooth and flat on the back side. This is how chocolate should be.
In the silicone mold, this object must be concave so that the poured chocolate or dough will be a copy of our model. On one form, we will have three concave olympic bears connected to each other at the top with a 2 mm silicone layer. Even in this form there should be edges of 10 millimeters, so that it is easier to take and carry it by them.
Therefore, we are designing a tray-like figure with a side height of 2 mm, which will accommodate all three Olympic bears. The distance from each bear figurine to the sides is about 10 mm.
Silicone filled up to the edge of these edges will be the same 2 mm layer that connects the figures and serves for comfortable holding of the mold.
Next, we design the upper part, which lies on the tray and has protrusions in the form of bears. From the highest point of the figure of the bear to the very top edge of this part, there should be a distance of about 2 mm - these are the bottoms of the silicone mold.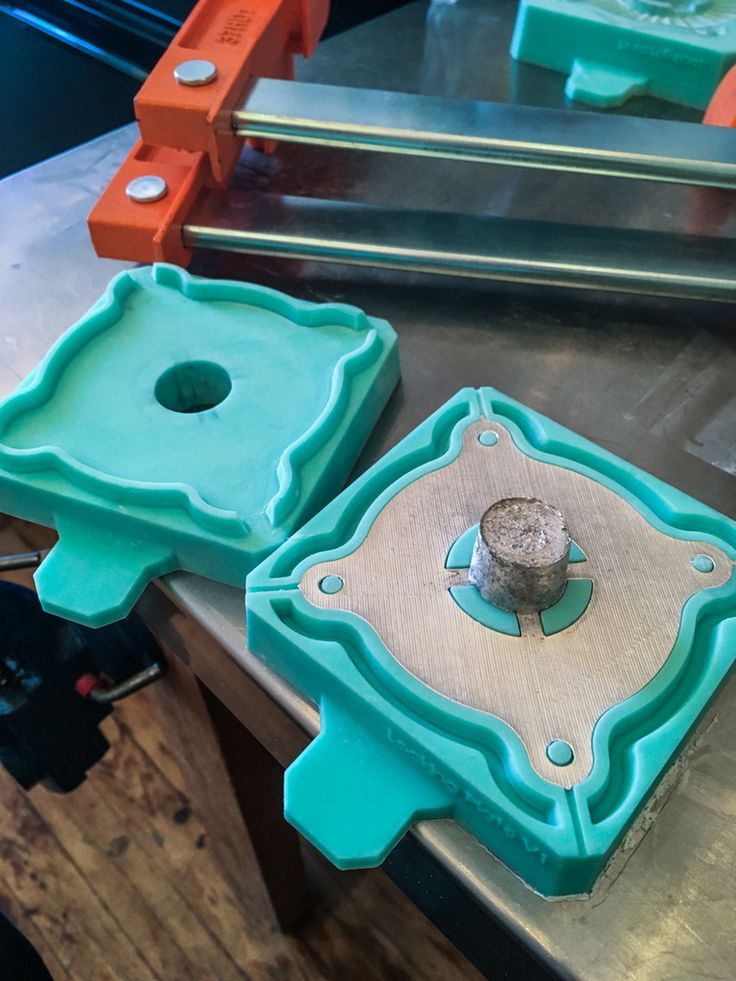
If we look at another example, with the master shape of a chocolate bar, then the tray is exactly the same, but the upper part is slightly different.
The master mold model is ready, it remains to be printed on a 3D printer.
But then the question arises! Do you print the figures of the bears and the tray at once as a whole or separately, and then glue them together? Of course, in a good way, it is better to print them immediately, then there will be no gaps between them. But then it will be very difficult to process the entire solid form with a file. And you will have to process it, since smooth forms do not come out from under the 3D printer. You can make chocolate with rough surfaces for yourself and not worry too much about it, but if you are making for a gift or for other people to order, you are usually very jealous of the smoothness of the forms. So post-processing is much more convenient if you separately print a tray, separately three figures of bears.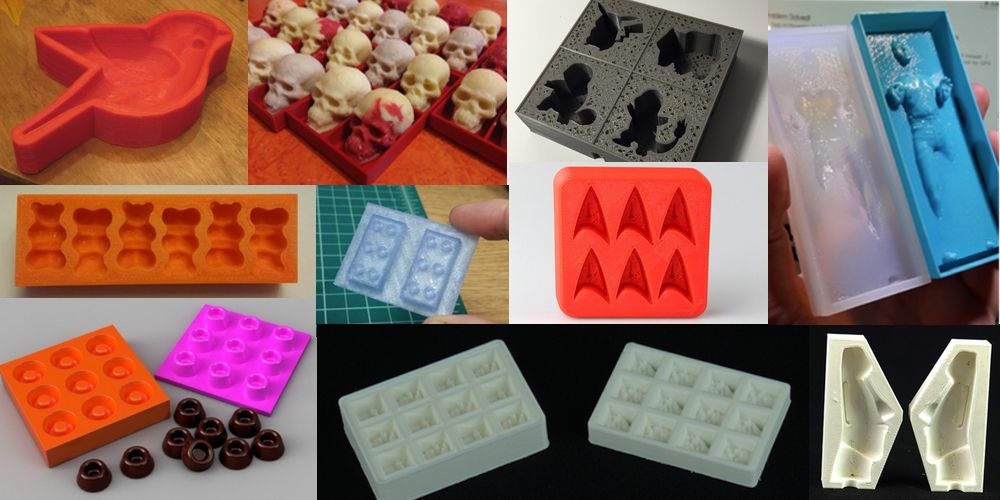 Sand each of them, and then glue to the right places. This is also convenient because the entire structure of the tray and three figures will be printed for several hours, and if the light is suddenly turned off or some other unforeseen failure occurs, it will be painful and insulting for the wasted plastic. And if they are printed separately, then the failure will occur on one part. It is easier to reprint it than the entire structure.
The next step, as an inquisitive reader understood, is post-processing. It is good to use PLA plastic - it is quite easy to grind. HIPS is even better - rub it a couple of times with a file and all the roughness is already smoothed out. Can be processed with a file or drill. Bear figurines need to be smoothed as best as possible, and the tray and the upper part, in principle, can not be processed, because their smoothness-roughness will not affect the chocolate in any way. Those who absolutely need the whole shape to be smooth will have to work on the upper part as well.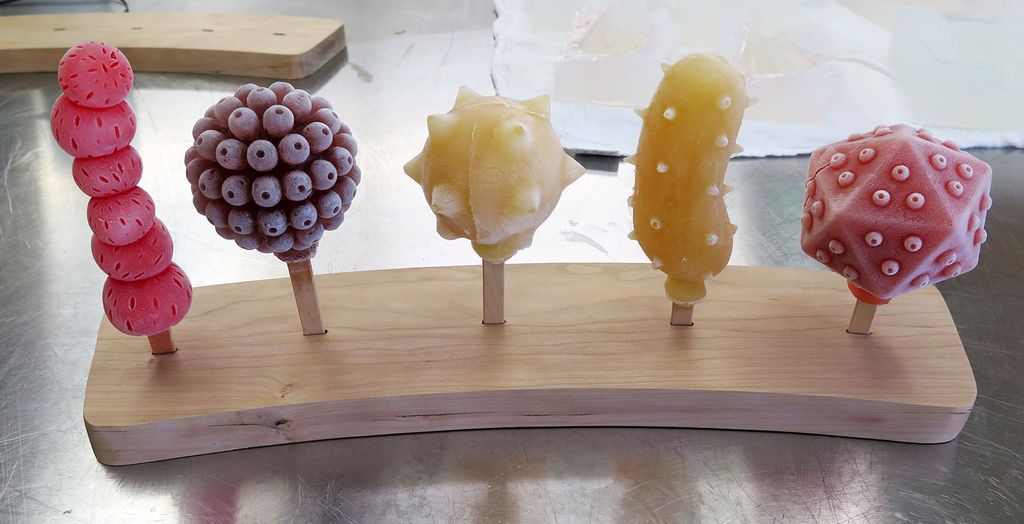 Then we wash off the plastic dust from the figures, which was formed during grinding. But this is not enough. All the same, small grains remain, and if silicone is poured now, then small specks of plastic will be imprinted into it. So I also soaked the brush in acetone and smeared all the surfaces that were being sanded. Acetone does not dissolve PLA or HIPS plastic, but it smoothes their surfaces and sticks together all the small particles. And if two surfaces of PLA plastic are lubricated with acetone, and then joined together, they can no longer be torn apart. So I used acetone to glue the bear figurines onto the tray. Then you need to wait for the time when the surfaces are completely dry and the acetone evaporates, rinse all the forms again and dry again.
The third step in this process is pouring the silicone into the master mold.
Silicone I bought food certified Penelast-750. It is not cheap, but it has all the necessary documents. With it, you need to buy a lubricant-wax, in order for the frozen form to better stick off the plastic. I have this Penta-126.
This silicone consists of two components that are mixed together in equal proportions. Then they need to be intensively mixed for 3 minutes. In a good way, then this mixture should be placed in a degasser chamber, a vacuum should be created so that all air bubbles come out and then poured into the master mold. These degassers are a bucket with a faucet and a glass lid. They can be found in online stores and bought. But those who do not have this camera, like me, for example, can resort to this method.
First mix a small amount of silicone - a tablespoon of each of the components and a thin layer, using a brush, cover the entire surface of the master mold. If bubbles appear somewhere, they will either burst immediately or be visible to remove them. Then wait 3-5 minutes for the thin layer to lightly set.
Mix some more silicone and fill it up to the level of the sides.
We wait another 3-5 minutes, put on the upper part of the master form and fix it with paper clips.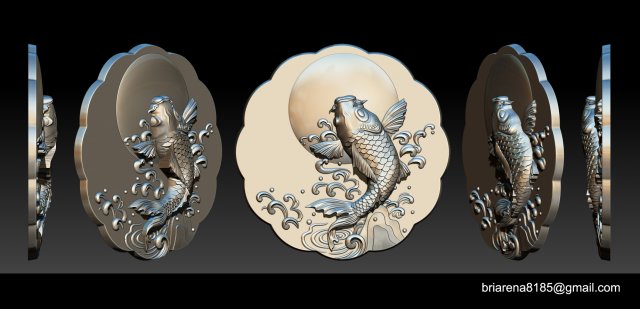
Mix the silicone and pour it into each of the three bear figurines to the end of the sides.
This whole mold should be cured for about a day, according to the instructions.
After 24 hours, we take out the mold and wash it. But the processes of the final formation of molecular bonds in silicone will continue for two more days. So, in a good way, you can use the form for its intended purpose only three days after pouring.
It's time for the most delicious step - pouring chocolate. You can buy ready-made chocolate and melt it in a water bath, but I prefer to make my own chocolate from cocoa butter, cocoa powder and powdered sugar. Powdered milk is used for white chocolate.
First pour 50% white chocolate, then 60% milk chocolate and finally 75% dark chocolate.
We got such delicious Olympic bears.
I also bring to your attention a more detailed video for the article:
All creative success and bon appetit!
3D chocolate printing: benefits and pitfalls
You are here
Home
Chocolate is a sweet, the first historical records of which date back to 350 BC. Already in those days they knew about the existence of cocoa and other chocolate drinks. Today, chocolate is not only a favorite sweet for many, but also a raw material for 3D printing.
Additive manufacturing has made a difference in many food markets, so it's no surprise that 3D printing has affected the chocolate industry as well. Companies such as Hershey, Nestlé, Mars Inc. and Mondelez International have been experimenting with 3D printing chocolate over the past few years. As a result, edible chocolate creations of art appeared on the market.
How it works?
Most chocolate 3D printers work with CAD files like other 3D printers.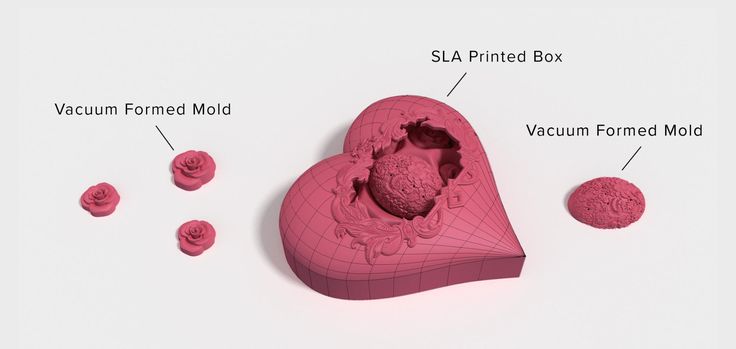 Instead of filament, chocolate 3D printers use a syringe filled with chocolate. The extruder head moves and deposits the molten chocolate in the desired shape in layers. Chocolate cools down over time and becomes hard. The syringe loading system is food safe, ensuring the safety of sweet raw materials.
Printing Difficulties
Resin is much easier to print than chocolate. The sweet mass has completely different melting and cooling properties, so melted chocolate cannot harden as quickly as plastic.
The type of chocolate used also matters. Milk, black and white chocolate have different viscosities. For best results, it is recommended to use high quality and tempered chocolate (such as Belgian dark). In some cases, makers add significant amounts of pectin to make 3D printing easier. Since chocolate cannot be rolled into a solid thread due to its too soft texture, the melted chocolate is stored in a cartridge and pressed with a syringe.
The main problem with chocolate 3D printers is temperature control.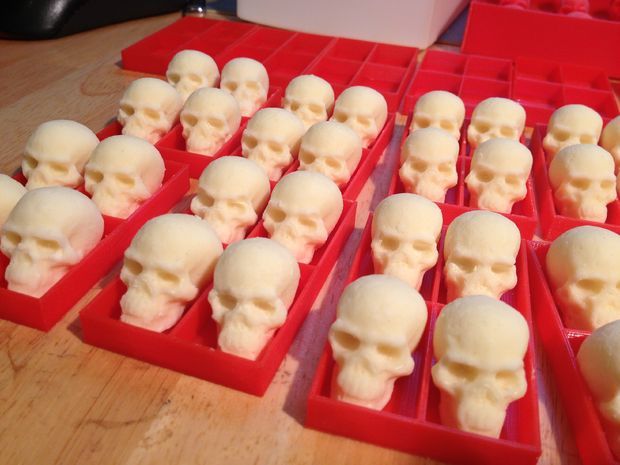 The printing process can take a long time due to temperature complications. The chocolate must be hot enough to melt, and at the same time, it must be cold and dry enough to retain its shape.
Advantages of
The first advantage is, of course, the ability to print sweets of any shape. In other words, additive manufacturing enables ultra-personalization of finished chocolate products.
3D printing makes almost any idea a reality. In this case, it is recommended to print not very large models. You should also avoid printing sweets with small details, too steep corners. Otherwise, the model will have to be edited. To print complex chocolate objects, you will need to slow down the print speed to give the chocolate more time to dry and harden.
Source
Tags:
3D printing chocolate, chocolate 3D printer, 3D printing, high quality and tempered chocolate, syringe filled with chocolate, Additive Manufacturing, Hershey, Nestlé, Mars Inc.