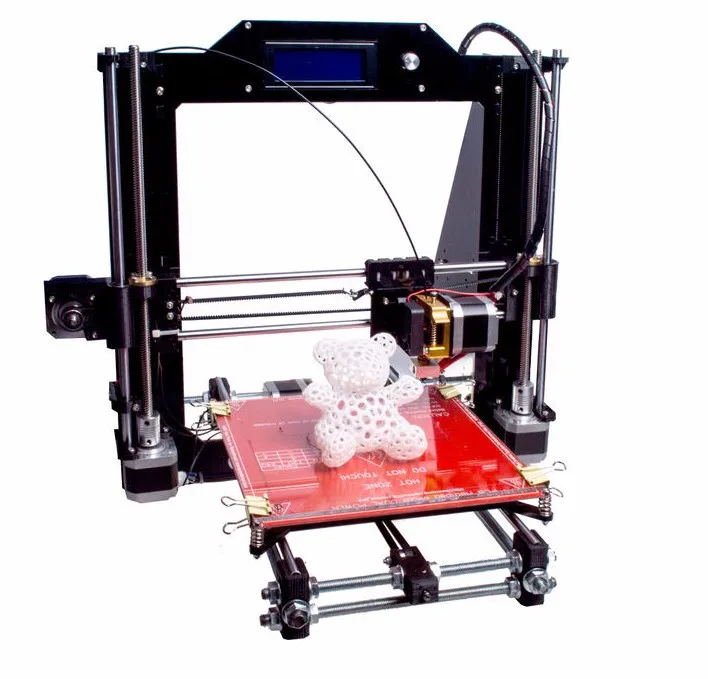
3D printer remove filament
How to properly change 3D printer filament?
Treat your printer nicely, and it'll print you nice models
When you are changing filament, did you ever experienced one of the following problems below?
- Filament stuck in the hotend.
- Need to use excessive force to pull out the filament.
- Having a hard time feeding the filament back in the right place.
- Having bad print result after changing filament.
If so. STOP! You are damaging your hotend. Not only you will have poor quality prints, one day your hotend will give up and stop extruding. I learned it the hard way and have to throw out few hotends. To avoid all this from happening all you need is to follow our step by step guide for changing filament. I promise you that you will be glad you take the time to read this article. This video show you how I change filament.
BotFeeder - How to properly change filament? 1280HD
Article you might be interested: How to properly print first layer?
Before you start you should have the below information and tools ready.
Information:
The extrusion temperature settings for both the current & replacement filaments (based on manufacturer’s recommendations)
Below is the BotFeeder temperature guide:
Material - Recommended Extrusion Temperature
- ABS - 150 to 260C
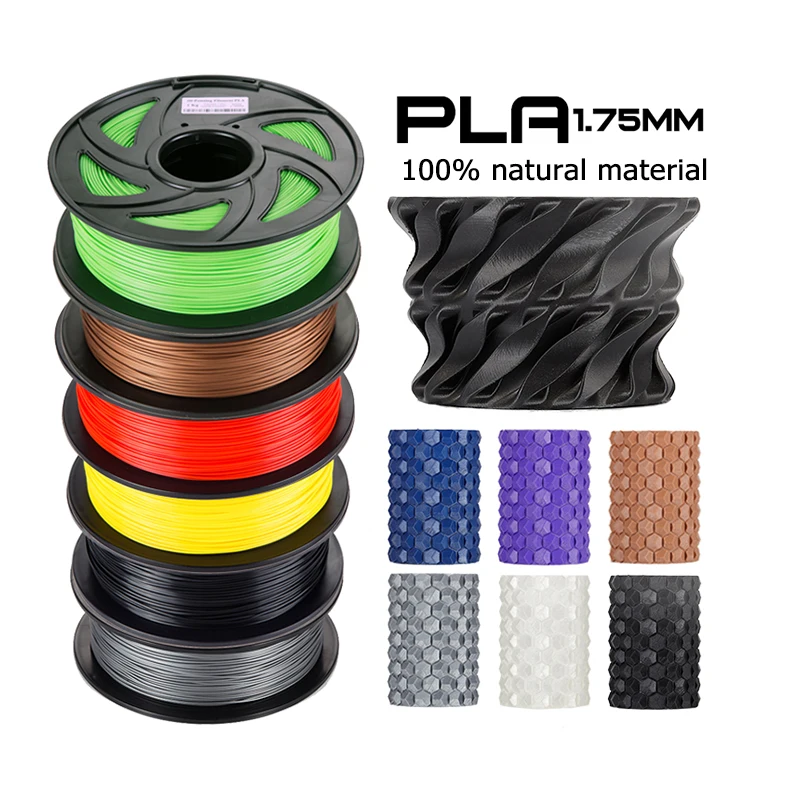
- PLA - 200 to 220C
- NEO-PLA - 188 to 200C
- Filaglow Glow in the Dark - 205 to 225C
- Filastic Flexible - 220 to 240C
- Filatron Conductive - 200 to 220C
- reFilactive Reflective - 230 to 240C
Tools:
- A pair of scissors
- A pair of tweezers
- Current filament
- Replacement filament
Removal of current filament
Step 1: Preheat your hot end based on the temperature guidelines of your current filament.
Step 2: Wait until the hot end heats up to the required temperature.
Step 3: Manually extrude a small portion of the filament.
- Unclamp the filament
- push the filament through the hot end until melted filament squeezes out from the nozzle.
 This process ensures easy extraction of the filament.
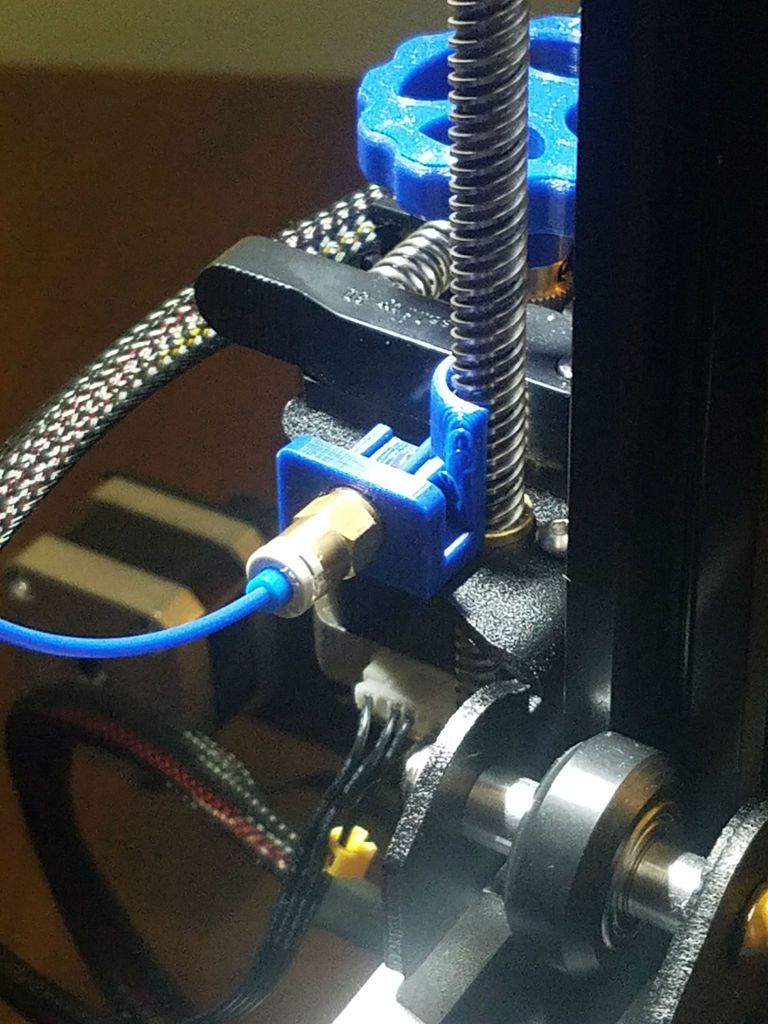
Step 4: Push down the coupling to release the filament from the hot end.
Step 5: Gently unplug the filament from the hot end.
Step 6: Clip off the blob-like end of the filament.
Step 7: Unwind the filament back to the spool holder.
- Unclamp the filament
- slowly wind them back on to the spool holder. Please note: secure the loose end at all times.
Step 8: Secure the loose end through the hole of the spool holder or by binding it with filament clip or tape.
Step 9: Remove the current spool.
LOAD REPLACEMENT FILAMENT
Step 1: Load the replacement spool on the filament slot.
Step 2: Preheat your hot end based on temperature guidelines of your replacement filament.
Step 3: Unclamp the filament and feed the filament through and up to the hot end.
Step 4: Prepare approximately 10cm of filament ready to be fed into the hot end.
Step 5: Wait until the hot end heats up to the required temperature.
Step 6: Start feeding the filament into the hot end until melted filament begins to squeeze out of the nozzle.
Step 7: Secure the coupling.
Step 8: Manually force down 3-4cm of filament through the hot end to flush out the old filament. Please note: flexible material may take more filament to flush out completely.
Step 9: Carefully clip off any excess filament from the nozzle with a pair of tweezers. Please note: do not touch the brass nozzle tip.
Step 10: Cool down your hot end.
Can You Leave Filament in a 3D Printer? – 3D Printerly
There are many factors that people think about when it comes to 3D printers, but leaving the filament in your printer isn’t usually one of them. It’s just a thing that clicks in your mind, which also happened to me, so I went and did some research to find the answers.
You can leave your filament in a 3D printer if the environment isn’t too humid or hot, otherwise, you can start to notice a decline in filament quality. Filament has a tendency to absorb moisture in the air, especially Nylon & Polycarbonate, so measure your humidity and try to keep it in a low range.
Even though many people leave the filament in their 3D printer without worrying it can negatively affect your 3D printing experience.
This article aims to inform you about what you can do to fix moist filament, storage options and other useful tricks.
Do You Have to Remove Filament After Printing?
Most people experience no serious problems after leaving the filament in the extruder.
However, there can be a few exceptions too. Whether to remove filament immediately or let it stay overnight, basically depends on the filament type. Several particular plastics such as Nylon will absorb moisture rapidly and get spoiled.
However, most others won’t go that bad so quickly. Hence, preferably in the case of Nylon, it is better that you remove it once you know you have finished using it for the day.
On the contrary, many people using other filaments do leave it overnight and face no issues, so maybe it isn’t as important as we think. I think you would start to see a gradual decline in print quality the more moisture your filament absorbs though.
Will Leaving Filament in a 3D Printer Damage It?
A 3D printer melts the plastic filament that has been loaded to create objects. Leaving filaments loaded inside a 3D printer for an extended amount of time will not necessarily harm the printer.
It may compromise the quality of the objects the printer will produce with that filament.
Leaving filaments loaded for a long amount of time will result in them turning brittle and producing low-quality objects, especially if they are hygroscopic (absorbs moisture).
Nylon is a type of filament that turns brittle quite fast whereas ABS can stay loaded for weeks and there won’t be a noticeable amount of physical change.
Hence, it depends on the type of filament being used and how long it stays loaded but not utilized. The finest option is to always secure your filaments in a vacuum bag after you have finished printing.
How Long Can You Leave PLA Filament Out?
Some filaments need storing away from moisture because they tend to absorb moisture. It results in them not printing well due to the high heat that the filament has to go through.
It can actually create air bubbles and lead to a popping sounds, which is common when you are 3D printing in a humid environment.
Most commodity filaments including ABS, PLA and also PETG do not suffer from this problem as such. According to some users, PLA can absorb moisture as well, however, in my experience, no such thing happened.
I basically believe that the physical conditions of the environment you store your filament in matters the most. If you cautiously keep your filament away from humid and moist environment nothing will get it ruined. It also depends on the filament brand you’re using.
According to most users, even with 40% humidity, their PLA filament was alright for up to 4 days. The filament might become a bit brittle but overall it is not very risky to leave it out there.
If you feel your filament is getting too brittle or unsuitable for use, you can always seal them up once they cool down in ziplock bags as they are vacuum-sealed.
Apart from that, comparatively PLA filaments are safer to leave out. PLA does not degrade as quickly and as noticeably as compared to other materials.
How to Fix PLA Filament Popping
This is a common grievance of most people especially who are beginners. If you notice popping or bubbling while printing, this is mainly because your machine is heating up too much and is boiling the plastic literally.
There are specific working temperatures for specific print materials which you shall carefully observe. If you firmly follow the working temperature guidelines, you won’t face this issue quite as much.
Moreover, the popping can also be a sign of moisture absorption. If the filament has absorbed too much moisture making it unfit for printing, you might notice popping there as well.
To solve this problem you just need to follow a few basic steps. For PLA filament popping, just make sure your working temperature should be in the range of 190-220°C.
You can also clean and check your nozzle. In addition, you also might want to try taking a closer look at your filament’s condition. If it’s too brittle, you can bake it at 60°C in the oven.
Also, if your filament is out for too many days and has absorbed moisture, you must replace it. Try changing the filament type or brand as well.
What Oven Temperature Should I Use to Dry Filament?
Different print materials have different bake temperatures. For ABS, it is suitable if you set the oven to about 65°C. Moreover, materials like PLA, the optimum temperature is around 50-60°C.
For PETG it’s advised to use the oven with the temperature around 65°C. However, for Nylon it’s better to have a bit higher temperature of 70°C.
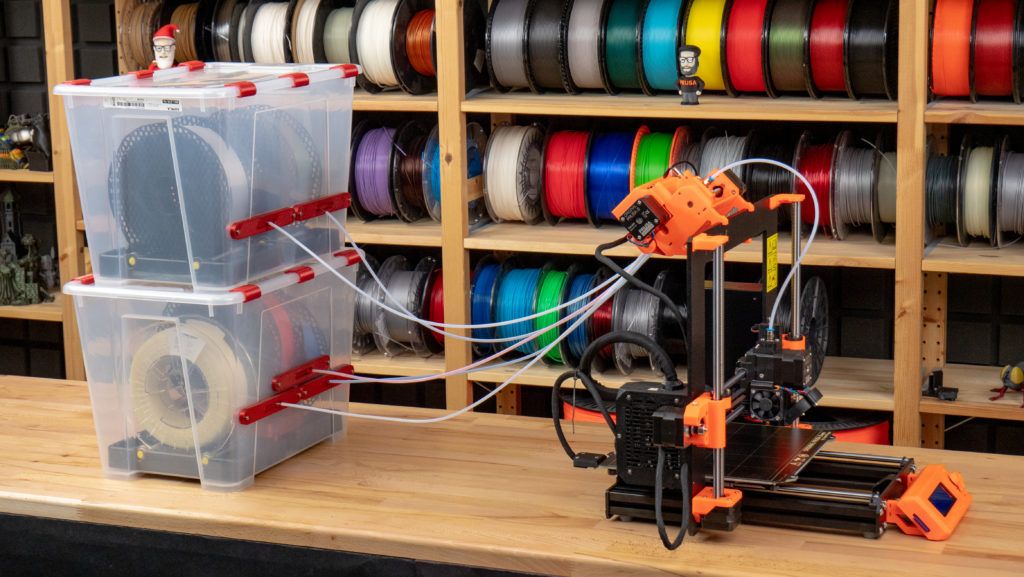
How Do You Store 3D Printer Filament?
To keep your printer’s filament in a better and durable condition, you must avoid its contact with air so it doesn’t absorb moisture. It is better not to leave it overnight or out in humid air. You can also store them in a ziplock bag once the filament has cooled down.
You can opt-in for an airtight container which has desiccants to absorb the moisture from the air. Some people get humidity sensors which tell them the level of moisture in the air within the container, so they have good gauge on the storage conditions.
How to Unload/Remove Filament From 3D Printer (Ender 3)
The simplest way to remove filament from your 3D printer is to manually pull it out while pressing down the extruder lever to loosen the grip. You can take the PTFE coupling from the extruder end to make removal a little bit easier.
It’s a good idea to first heat up the hotend then pull after it has reached temperature so it doesn’t get stuck within the nozzle, making it harder to properly pull out. If you get a blob that makes it hard to pull through, this is where you can take the Bowden tube off.
how to change, insert and eject
Modern 3D printing allows you to create objects and models of amazing complexity. However, the process requires experience and knowledge. Improper maintenance of the equipment, including changing the filament if necessary, may damage the device or result in loss of quality when printing products. In order to avoid such a problem, it is necessary to carefully study the nuances of the procedure before proceeding to change the filament. As a rule, for home 3D printing, plastic is used, which manufacturers have shaped into a filament, supplied in spools. It is about the replacement of this type of material that will be discussed in our article.
How to prepare the 3D printer for plastic replacement?
Since refilling is one of the most difficult tasks in 3D printing, it deserves more attention.
A key task for a user who needs to change the bobbin filament in their 3D printer is device preparation.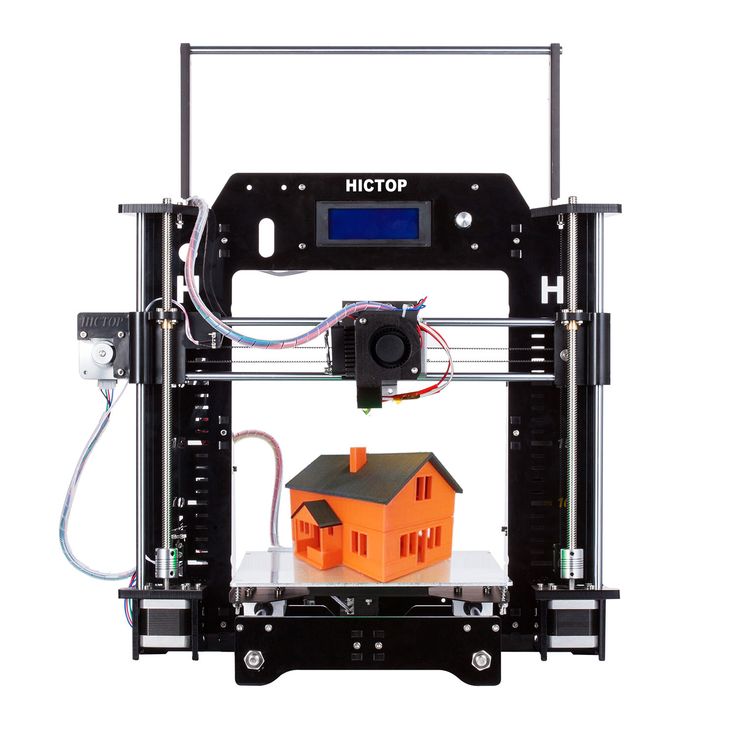 The printer must be prepared in a strictly defined order:
- First of all, make sure that the device is connected to the computer with a USB cable. It is necessary to check how tightly the cord is inserted into the input jacks, and then check the operation of the device and its “visibility” to the system.
- Use the control panel of the 3D printer to start warming up the device to operating temperature. It is almost impossible to remove the old filament from an unheated printer without damaging the mechanism.
- After the printer is warm enough, inspect the extruder outlet for visible damage and excessive drips, and prepare the necessary materials and tools for changing the spool.
How to remove the plastic?
When changing the filament, most of the breakdowns occur when the remnants of the old plastic filament are removed from the working head of the extruder.
IMPORTANT! Do not remove filament residue until the printer has warmed up sufficiently.
Otherwise, the operating mechanism may be damaged and print quality may be noticeably reduced.
In order to remove the filament from the extruder, you will need:
- Turn on the heat of the 3D printer.
- Wait until the desired temperature has been reached. The temperature regime parameters must be set based on the characteristics of the replaced and refilled materials. For example, ABS and PLA plastics have different melting points, so replacement must be done as quickly as possible. When exposed to elevated temperatures, PLA deforms quickly and can clog the nozzle.
- Next, if the installed software supports the reverse function, you must enable this option and wait for the thread to exit from the corresponding hole.
- If the software does not have a reverse function, you must manually clean the channel, cutting the old thread as close as possible to the exit hole and inserting a new one.
- During the run, the plastic from the old spool will gradually come out of the extruder nozzle and the new filament will take its place.
IMPORTANT! When old material is replaced by new material during a run, it is recommended to adjust the head heating temperature based on the characteristics of the new plastic.
Replacing plastic
In order to replace the old plastic filament in the extruder with new material, you must:
- Remove the remnants of the old filament.
- Set the extruder head to Maintenance mode.
- Remove the channel tube by pulling it up.
- Pull the filament rod out of the extruder head by pressing down on the presser and gently pulling the plastic filament up.
- Thread the end of the plastic filament from the new spool by releasing the presser and gently pressing on the end of the rod.
- When new filament is threaded into the feeder, the channel tube must be returned to the extruder.
- The final stage is the drawing of the filament. It is recommended to eject 30 to 50 units of material by warming up the printer to the required temperature and immediately removing the ejected material.
 You can perform this action from the control panel by selecting a command.
 - The signal that the replacement of the plastic filament in the 3D printer was successful will be the uniformity of the emitted material and the absence of streaks in the process.
Resuming work
In order to resume work after changing the filament spool, the 3D printer must be returned to its original position. To do this, you will need to reuse the RepetierHost control panel section and the Home command.
In the event that all actions have been performed correctly, printing can be resumed.
3D printing technology has opened up new possibilities for users around the world. But equipment that allows 3D printing requires careful setup and competent maintenance. Replacing the bobbin filament is an important step in the work. When changing the plastic thread, it is necessary to strictly follow the manufacturer's recommendations. This will avoid many errors that can occur due to incorrect plastic replacement, and poor quality printing later.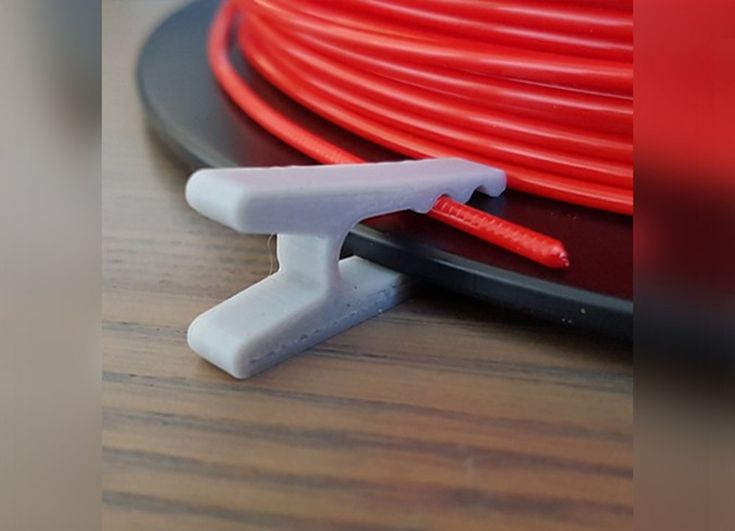
- May 17, 2021
- 7018
Get expert advice
Detailed 3D printer troubleshooting guide
Author Kirill Sokolov Reading 34 min. 61 views This is quite normal for a 3D printing course. With so many moving parts and settings to tweak, getting your 3D printer to work properly requires experience, knowledge of how 3D printing components work, and maybe even a bit of luck.
To do this. It's just that the process just got a little easier, we've compiled a list of the most common problems faced with 3D printing. For each problem, we will look at possible root causes and offer a series of solutions, from the simplest to the most complex.
Contents
- Printer does not print
- Possible causes:
- Troubleshooting steps:
- Bad first layer
- Possible causes:
- Actions to eliminate problems:
- Deformation
- Possible reasons:
- Tips for the search and elimination of faults:
- Combination and drops
- Possible reasons:
- tips for the elimination of problems:
- Poor connection and speeches
- Possible Causes:
- Troubleshooting Tips:
- Pads
- Possible Causes:
- Troubleshooting Tips:
- Curtaining supports
- Possible reasons:
- Tips for eliminating problems:
- Low resolution
- Possible reasons:
- Tips for the elimination of problems:
- Low accuracy of size
- possible causes:
- tips for eliminating non -tax Elephant Leg
- Possible Causes:
- Troubleshooting Tips:
- Missing Layers
- Possible Causes:
- Councils to eliminate problems:
- Dispensed layers
- Possible reasons:
- Tips for eliminating malfunctions:
- Country removal of prints
- possible reasons:
- Tips for eliminating circulations:
- Blamping noise or steam that leaves the nozzle .
- Possible Causes:
- Troubleshooting Tips:
- Closing Thoughts
Printer Won't Print
You sliced the model, loaded it into the printer, completed all calibration procedures, only to find that your printer either won't start, or does not squeeze out. The problem could either be due to incorrect initialization or something that is preventing your printer from extruding.
Possible causes:
- No filaments detected
- Nozzle clogged.
- The filament has broken inside the extruder.
- The thread is broken.
Troubleshooting steps:
- Thread not detected
In most cases, an empty spool of thread is hard to miss. desktop 3D printers, but some models have the filament encased in some sort of container or otherwise tucked away at the back to improve aesthetics. This should be the first step in dealing with a 3D printer that refuses to start printing - check if you have filament in the spool.
Some 3D printers also have fail-safe systems that can detect if you have filament. Your spool has run out of thread. They are useful for preventing wasted printing time if your filament runs out in the middle of a project. However, these sensors can also fail and falsely detect an empty spool of thread.
In this case, your 3D printer must have a failover override feature. You can use this feature so you can just print your next project, but you'll probably have to patch this failsafe system by the manufacturer.
- Clogged nozzle
Nozzle clogging can occur for several reasons: filament residue melting inside the nozzle, or impurities in the filament burning and solidifying. The residual filament inside the nozzle usually melts when changing from one filament to another.
Nozzle clogging does not occur suddenly. You can usually see signs of nozzle clogging affecting the quality of your prints. Common symptoms include insufficient extrusion, burnt bits of filament extruded from the nozzle, or very small nicks appearing on the walls of the finished print.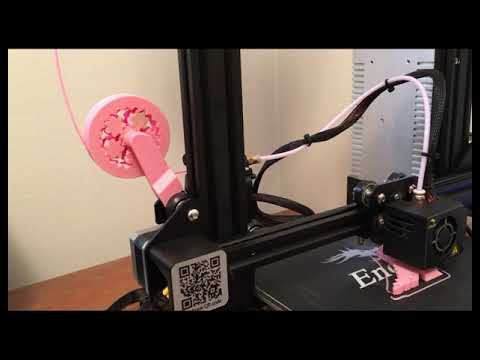 Eventually, filament buildup can cause the nozzle to completely block.
There are many ways to solve the problem of nozzle clogging, which we have already written about in a previous article. The difficulty of cleaning the nozzle will depend on how badly it is clogged. You may be able to melt the remaining filament by simply heating the nozzle, or remove any stubborn clogs by inserting a pin into the nozzle.
You can also cold draw the remaining thread. pushing a piece of nylon filament through the nozzle while it heats up to about 250 C. Although the nylon should remain fairly viscous at this temperature, all other filaments will already melt. You want some of the remaining filament to be squeezed out of the nozzle along with the nylon.
In the worst case, you may need to completely disassemble the nozzle and immerse it in acetone. . This may be necessary if the blockage was caused by burnt residual material or impurities. Simply soak the nozzle in acetone for about half an hour and make sure all residual acetone has evaporated from the nozzle before putting it back into the 3D printer.
- Broken thread inside the nozzle. extruder assembly
This problem usually occurs in 3D printers with Bowden extruders, but can also occur if the tension roller in the extruder is set too high. Naturally, a filament break inside the extruder will break during normal extrusion and may cause the printer to fail to start.
If your filament is getting stuck inside the extruder, the first thing you need to check is that the quality of the filament is good. Old or low-quality thread, as well as composite thread, can be extremely fragile. If your thread has an inconsistent diameter, this can also result in uneven tension on the idler roller. Try replacing the thread with a different one and see if the problem persists.
If the filament seems to break right where it meets the extruder gears, you may need to loosen the idler. Be careful not to tighten it too loosely as this can also result in poor extrusion.
Finally, make sure the print temperature is set to the correct value to avoid overstressing the extruder.
- Broken thread
Broken filament is another common result of excessive tension in the idler and extruder section of a 3D printer. What happens is that the teeth of the extruder gear cut the plastic off the filament. These bits of plastic then get caught in the teeth of the gear, effectively eliminating the gear's ability to "bite" into the filament. Over time, this will lead to serious extrusion problems.
The problem with cut filament is the fact that you will probably have to remove the extruder assembly just to gain access to the extruder gear. Next, you need to remove any stuck plastic filament inside the gear burners. It's not that hard, given that you remember how to put the extruder assembly back together. It acts as a physical base for the rest of your print and ensures that it is well anchored to the build platform. Depending on how well the first layer prints, this may also give you the opportunity to fine-tune your printer settings before the filament is wasted.
Possible causes:
- Wrong nozzle height setting
- Extruder requires primer
- Adhesion problems
Troubleshooting steps:
- Adjust nozzle height
Getting the right nozzle height is something that needs balance. You want the nozzle to be close enough to the ply to “squeeze” the filament a little and help tangle, but not too close to prevent extrusion. A nozzle that is too high will cause the filament to cool quickly and may lead to even more problems with adhesion to the layer.
A good rule of thumb to follow is to set your initial layer height to a fraction of your nozzle size. For example, setting 0f 0.3mm usually works for a standard nozzle diameter of 0.4mm. This can be easily adjusted using the z-offset value in your 3D printer settings.
- Level the bed
Any attempt to adjust the z-setting of the nozzle will be useless if the bed is not properly leveled. This is something you should do regularly, but it's especially important if you've just installed a glass build plate on your printer.
Some 3D printers have an auto leveling feature that only takes a few minutes. complete and take all the hard work out of your hands. Don't worry if you don't have this feature - manual leveling is easy and doesn't require any special equipment.
We have already covered the manual bed leveling procedure in some of our previous articles, but for convenience we will summarize them here. You just need to set the nozzle to its home or zero position and insert a thick index card between the nozzle and bed. The height of the bed must be adjusted so that there is minimal resistance between the bed and the nozzle. This needs to be repeated at various points along the platform, given that there are four adjustment screws on the print platform.
- Load extruder
Printing the perfect first layer can be challenging because extrusion problems usually occur on the first few inches of filament coming out of the nozzle. The optimum printing temperature may not have been reached yet, which may result in a mismatch between flow rate and extrusion performance.
An easy way to solve this problem is to "prime" the extruder by printing something else before the first layer. This is best done with a skirt - a thin line of fiber that mimics the outline of your design's base layer. It will sit outside of your actual first layer, fueling the extruder and also helping to slow down the cooling effect of the outside air.
- Use a heated print platform with the correct temperature setting.
Using a heated print bed brings many benefits to a 3D printing project, no matter what project you're working on or what filament you're printing with. The heated layer improves the adhesion to the layer and slows down the cooling of the filament, which also helps to avoid warping problems. You will inevitably need more power to run your heated bed 3D printer, so watch out for those extra costs.
Each filament material has an optimal print bed temperature range. We recommend setting the temperature at the lower end of this range and increasing it only when necessary.
- Use appropriate adhesive
In In most cases, a heated print bed does not completely solve the bed adhesion problem. A more reliable solution is one or two stamps of a heated bed treated with some kind of glue. There are several adhesive options, the best choice depends on the filament you are printing with and the temperature of the heated bed.
When applying liquid adhesive, be sure to apply them in a thin and even layer. There are also adhesive tape options that need to be glued in adjacent strips that do not overlap each other. Please note that applying adhesive to a heated bed can make the print so strong that it is difficult to remove.
Warp
Warp is a pretty much notorious 3D printing problem. If you're planning to print with filaments that print at 240°C or higher, you'll probably want to read this section. Solving the strain problem requires a combination of different strategies. Combine any of these methods to see what works for you.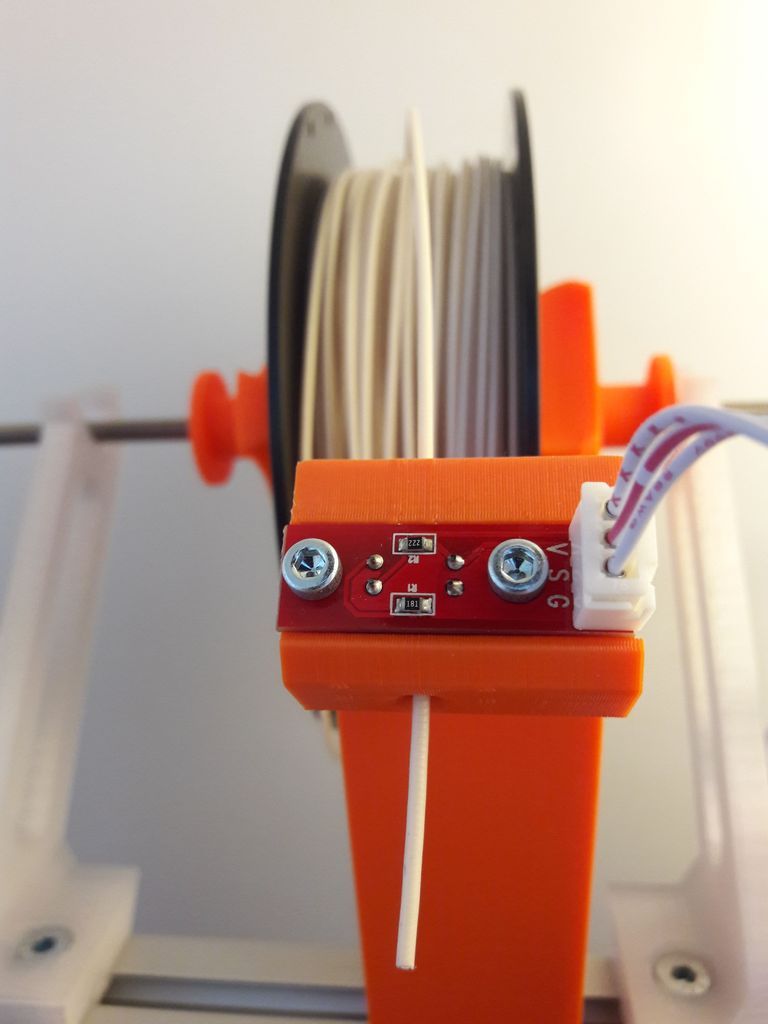
Possible causes:
- Fast cooling
- Poor layer adhesion
- Thermal stress accumulation
Troubleshooting Tips:
- Slow Cooling
The first thing to do when printing with warp-prone filament is to slow down the cooling of the filament as much as possible. To be clear, the molten filament begins to cool as soon as it exits the nozzle. Due to the elevated temperature of such filaments, this cooling is naturally very rapid and causes significant thermal contraction.
The first thing to do is to make sure that the cooling fan is on during the entire operation. project. However, the surrounding air is still much colder than the molten filament itself. To minimize the effect of convective cooling of the surrounding air, we recommend placing a shroud.
Some printer models come with built-in shrouds, but you can also make one from scratch. The fact is that the case creates a "pocket" in which hot air can accumulate. .
.
- Use heated coat AND apply adhesive
As we have already mentioned, the use of a heated layer helps a lot with the adhesion to the layer, as does the application of the adhesive layer. When working with thread that is prone to warping, both of these measures are necessary.
The heated bed not only improves the adhesion of the layer, but also stops the cooling process to the set temperature, thus reducing the development of heat stress. The heating effect cascades somewhat through the first layer and to the next pair of layers near the print platform, thus reducing the effect of cooling on print dimensional accuracy.
- Seal with raft or edge.
If you find that your print is still warping despite using a heated bed, adhesive and case without a cooling fan, the next option is to print with a raft or edge. This is an option available in most slicer software that effectively expands the "base" of your print, or the extent of the first layer.
Simply increasing the area of contact between the print platform and the first layer results in a significant improvement in layer adhesion. The downside of this measure is that you will use up more filament on your model than expected.
- Avoid accumulation of thermal stress
The development of thermal stress is a natural phenomenon that the filament material experiences when cooled. Instead of counteracting this, another viable strategy is to manage thermal stress so that it doesn't build up to the point where it causes deformation.
A good way to manage thermal stress is to remove sharp corners from your design in favor of rounded corners. This avoids the problem of thermal stress buildup that often occurs around these sharp corners. The result is a more even distribution of thermal stress, which will hopefully prevent warping.
This is probably the measure that requires the most work. Not all drawings can be quickly modified to remove sharp corners, especially complex ones with many edges. Even if it were possible, reworking this scope could significantly change the aesthetics of the 3D model.
Articulation, bumps and drops
This is the most common problem. called "stretching" because of the characteristic plastic strings it creates. Calling it by its alternative name - oozing - more accurately describes what exactly is going on that could be causing the problem.
Weeping or stringing usually occurs when some of the molten filament seeps out of the nozzle at times when the nozzle should not extrude. The strings are created by the movement of the nozzle as the thread oozes slowly. If the problem is severe enough, some of the filament may come out as drops. In any case, when this problem occurs, the visual appeal of 3D printing suffers greatly.
Possible causes:
- Print temperature set too high
- Insufficient retraction
Troubleshooting Tips:
- Enable Retract
Pulling in is your most valuable weapon against pulling. Enabling retraction causes the extruder gear to rotate in the opposite direction for areas of the project where the nozzle must move across the build deck without extrusion. In terms of internal mechanics, retraction pulls back a small portion of the filament inside the extruder assembly.
By doing this, you reduce the pressure on the nozzle section containing the molten filament. It also creates a slight vacuum effect to hold the thread in place. While gravity is still likely to beat this suction pressure, the retraction at least delays the inevitable so that the nozzle can move into the section where it needs extrusion to restart.
- Lower print temperature
As with most liquids, exposing a thermoplastic to elevated temperatures proportionally reduces its viscosity. This means that it flows more easily. Thus, at a higher printing temperature, molten plastic is formed, which will more easily flow out of the nozzle. If you're still having problems pulling in when pulling in, you might want to consider lowering your print temperature by 5 or 10°C. 0003
0003
Please note that a decrease in print temperature must be accompanied by a decrease in temperature. in print speed. This ensures that the filament receives the same amount of heat needed to completely melt.
- Increase driving speed
As we have already mentioned, filament leakage from the nozzle is unavoidable. The only thing you can do is either delay it or get the print head to its destination as soon as possible. By increasing the speed at which the printhead moves, you reduce the chance of filament bleed through in all the wrong places.
Theoretically, the print head should move at a speed of 300 meters. mm/s However, we recommend that you exercise caution and only increase the speed in increments of 10 mm/s. The print head of a 3D printer is quite heavy, and moving it too fast increases its speed. It can reach a point where it overshoots its target destination, leading to problems that are much more serious than stringing.
Poor connections and protrusions
Bridges and protrusions are elements of 3D printing that become more and more inevitable the more complex your design gets. As their names suggest, it's basically a part of a 3D model that doesn't have supports underneath it, but relies on the strength that the material develops as it solidifies.
Although bridges and overhangs can be a good design. elements, they are also inherently dangerous as they can break if not well designed.
Possible causes:
- Mechanical limitations
- Thread too heavy
- Print temperature too high
Troubleshooting Tips:
- Follow the 45 degree rule for tabs
Whenever you print a model with an obvious overhang, you must remember the 45 degree rule. This means that the protruding element can support its own weight, given that its angle relative to the vertical is less than or equal to 45 degrees. If you are designing your own 3D model, you can take this rule into account to avoid problems with collapsing ledges.
- Follow the 5 mm rule for bridges.
The 5mm rule is pretty simple - a 5mm or smaller bridge may not require external support. In a 3D printer, this is achieved by stretching the material across the gap. This tension allows for short webs with minimal sag. Bridges longer than 5 millimeters may require support structures.
- Use chamfer
If a protrusion greater than 45 degrees from horizontal is unavoidable, you can "cheat" the mechanical constraint by designing it with a chamfer. A chamfer is simply a series of corner segments that gradually become more horizontal, but never break the 45 degree rule. The chamfer changes the aesthetic of the design somewhat, but allows the inclusion of protruding elements without the need for support structures.
- Reduce print temperature
As we have said, a thermoplastic that is exposed to higher temperatures becomes more liquid, which means that it has less strength. However, the thermoplastic also regains this strength as it cools and becomes harder. When printing models with tabs and bridges, a good way to prevent them from shrinking is to let them cool as quickly as possible.
By printing in the lower temperature range for your filament, you will allow them to develop strength faster. Just be careful not to run into extrusion issues that will take us to the next pointer.
- Reduce print speed
Lowering the print temperature should be accompanied by a lower print speed. While this allows the extrusion to proceed normally, slower printing also gives the fiber of one layer more time to cool and strengthen before it has to support the weight of the next layer.
- Use cooling fan
This step hardly needs explanation - you want your thread to cool down and harden as quickly as possible. If you are printing a model with protrusions that could collapse, then set this cooling fan to maximum speed. You may want to refrain from the first few coats as adhesion to the bed may suffer from rapid cooling..
- Use supports
Although this is a fairly simple solution, adding support structures to the model is really the last option. Support structures can be added automatically using almost any slicing software, adding posts or trees under the model to prevent it from collapsing. This is a reliable solution for overhangs and bridges, and is almost reliable.
There are several reasons why support structures are not as convenient as they seem. They can use up a lot of filament and it will all go to waste - a bad move in terms of cost or excess waste. The supports are also very difficult to remove unless you have the ability to print with specialty media on a dual extruder printer. In some cases, the print itself may be damaged during the support removal process.
Pads
Pads are a particularly annoying problem because they only occur when the print is almost finished. This usually shows up as gaps, bumps, or roughness on the top surface of the print.
Possible causes:
- Deformation of the top layer
- Underfilling
Troubleshooting tips:
- Increase top layer cooling
In its essence, the pillow can be attributed to a phenomenon with which we are probably already familiar - deformation. The problem with top layer warping is that we don't have the advantage of a print bed to stick filament to.
The knowledge that deformation is taking place makes it counterintuitive to resort to refrigeration as a cushion solution. However, we rely on the filament gaining strength fast enough so that the warping effect does not lead to deformation. Some users even resort to using desktop fans to really speed up the cooling process of the top layer, often with great results.
- Reduce temperature and print speed on top layer
A more common solution to warping is to lower the print temperature, which can be set specifically for the top layer. This reduces thermal stress buildup for the top layer and hopefully allows enough time for the yarn to strengthen before warpage has any significant effect. Naturally, you'll want to slow down your print speed to avoid extrusion issues.
Although lower print temperatures also result in poor layer adhesion, this is not a big problem when you simply change the settings for the top layer.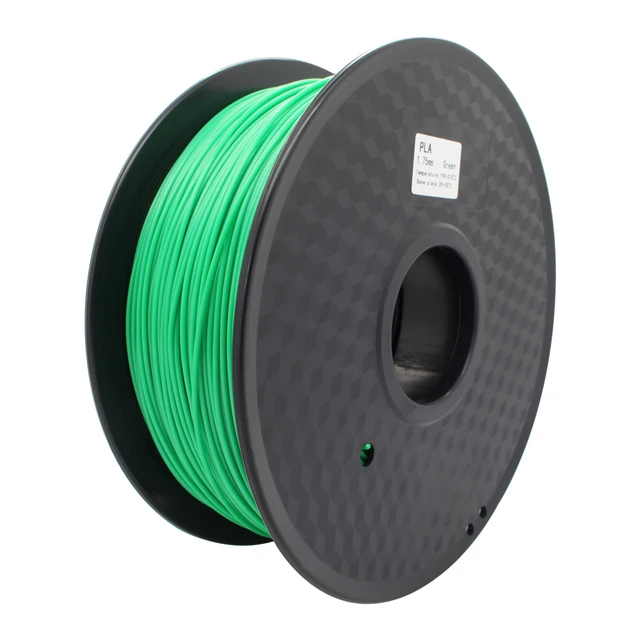
- Increase top layer thickness
This is a rougher approach to the problem - pouring more material into the layer so that it has better resistance to the deforming effects of thermal stress. Although you will inevitably need to use more material to print a thick top layer, this is still a more conservative option compared to the next element.
- Increase filling
Infill patterns play a huge role in determining the physical properties of hollow core 3D printing. In the case of the top layer, the infill also acts as a "print platform". ‘- continuous areas on which the material of the thread can stick. By increasing the filling density of the model, the top layer has better adhesion to the layer and reduces the likelihood of deformation.
Fill density of 12% is standard in most applications. If you have problems with your pillow, you can increase this value up to a maximum of 25%. Soft fibers (eg TPU) or fibers prone to deformation (eg ABS) are more likely to require more drastic measures.
The reason we consider this last option is because it can quickly increase both the amount of filament and the time it takes to complete a print. It also changes the physical properties of the finished seal, such as its weight and flexibility. If you have specific performance standards for your finished print, or if you have a lot of production s, then increasing infill may not be the best solution for you.
Roll-up supports
Supports are not a reliable solution for overhangs or bridges as you might think. When placing supports using the slicer software, you will be presented with several options for constructing the structure. Careful consideration of the load that the structure will support is required to determine which option is the most appropriate.
Possible causes:
- Wrong support type
- Excessive vibration
- Fragile thread
Troubleshooting Tips:
- Select the structure type that best suits your needs.

Structure types are pretty standard across different slicer platforms. Tree-type supports are used more often as they minimize the points of contact between the support structures and the actual 3D print, meaning they are easier to remove. However, they are only suitable for small ledges or ledges with a more organic shape.
Elements with a large projection are more compatible with lattice supports. These supports are more columnar but can also be printed with a different pattern. The mesh pattern is ideal in most cases as it provides the best mechanical support. A simple line pattern can be used for less demanding support requirements and is also slightly easier to remove. Another disadvantage of lattice supports is that they inevitably consume more filament material.
The height of the model also plays a role in determining which support to use. If the support structure is to be very high, it can also collapse if it does not have a thick and strong foundation.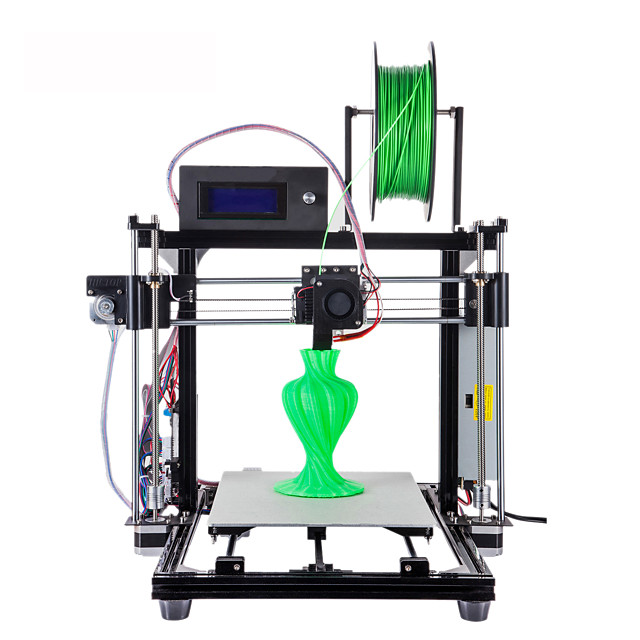 In this case, you may need to support the lattice in the form of a grid or a triangle.
- Reduce printer vibration
Support structures are mostly thin and tall columns, making them prone to breakage. This risk becomes much more noticeable if your 3D printer vibrates more than usual. It's hard to pinpoint the cause of excessive vibration - it could be something as simple as loose bolts or something as complex as stepper motors that need to be calibrated.
Excessive vibration can cause more problems such as layer mismatch, so it would be best to stop your project and work on a solution first. Tighten as many of these nuts and bolts as possible and try again.
- Use more flexible thread.
Since they are thin and tall, the main mode of failure of supporting structures is cracking. This means that you absolutely do not want to use flimsy thread due to the material or because the thread is quite old.
If you are still having trouble breaking the supports after using more To ensure reliable geometry or reduce vibration, you can try printing the same project with a different spool of filament. Use a fresher coil this time.
Low resolution
Resolution in 3D printing is difficult to determine because there are different parameters that affect the resolution in the X and Y axes than in the Z axis. In any case, the resolution of a 3D printer affects how well it reproduces small details of the model.
Possible causes:
- Deformation
- Nozzle size limitation
- Too fast printing
- Folding functions
Troubleshooting Tips:
- Use thread that is not prone to warping.
Unfortunately, thermal shrinkage is a natural part of 3D printing. and some things you just have to deal with. This can be problematic if you are printing a detailed model, as the compression process can greatly change the appearance of these fine details. The easiest solution would be to print with a filament that is not as prone to warping - any PLA or PETG based filament will do.
- Use smaller diameter nozzle
Replacing the standard nozzle with a smaller one can be the most important decision to achieve the best resolution for your 3D prints. Nozzle diameter is the limiting factor in the resolution of a 3D printer because it simply cannot reproduce details smaller than the nozzle size. Don't forget to change the layer height to a smaller number.
Replacing the nozzle with a smaller nozzle is a huge disadvantage - printing with thinner layers means your 3D printing projects will take much longer.
- Printing hot but slow
If you want your prints to be as detailed as possible, it seems like you're going to have to suffer a lot when it comes to printing. Even when using a smaller nozzle, it is often recommended to print slowly and at high temperatures. Reducing the extrusion speed can be difficult at high temperatures, so it would be better to slow down the print head speed.
Slow printing gives the fiber material more time to cool down. This allows better preservation of detail, as the elements do not change under the weight of additional layers. At the same time, printing at high temperatures improves filament flow - just beware of tension issues.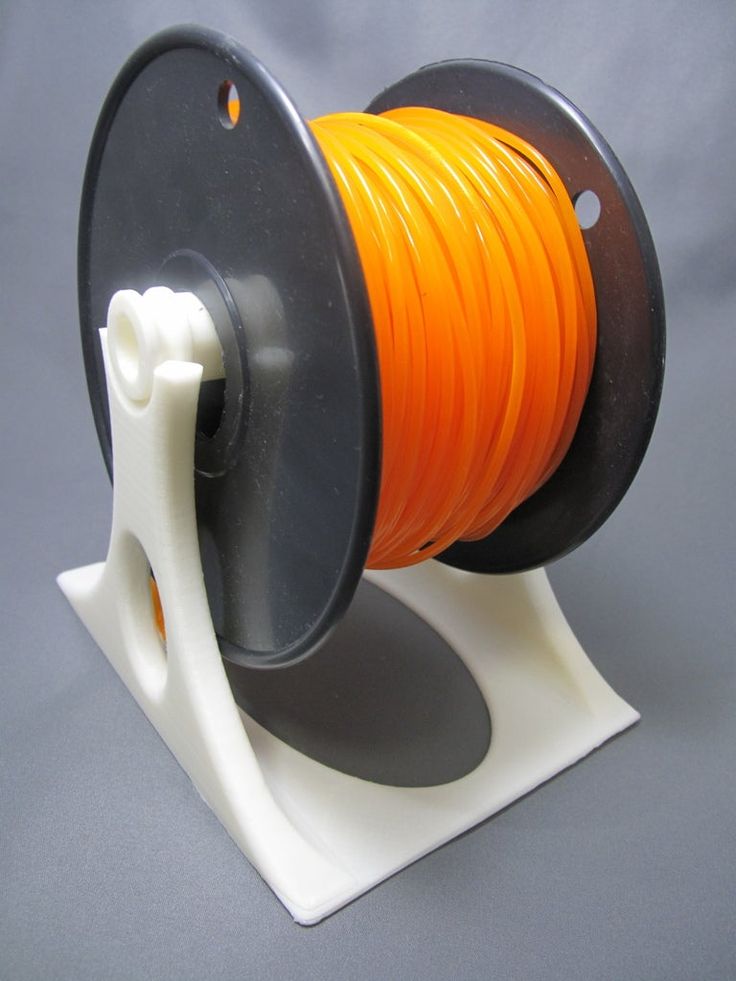
- Use support structures
Gravity plays a huge role in preserving fine detail, especially when these intricate patterns are found on protruding elements. The lack of support in these lugs will most likely cause small parts to sag as the filament cools, changing their appearance in more than subtle ways. If you want to print an extremely detailed model, you may have to bite the bullet and place as many support structures as needed.
Poor dimensional accuracy
3D printing prototypes The need for high precision measurements can be very challenging for FDM printers.
Possible causes:
- Printer frame not aligned correctly
- No Z tolerance
- Extruder requires calibration
Troubleshooting Tips:
- Make sure your 3D printer frame is perfectly aligned.
No matter how precise your slicer settings are, you will never get a perfect 3D print if you have trouble aligning with your 3D printer frame. This is a problem that often occurs in 3D printers that need to be assembled.
Frame alignment is one of the most important things to prioritize when building a 3D printer. Even a tenth of an inch misalignment can lead to quality problems later on. Our advice is to take your time fixing minor misalignments during assembly rather than suffering from poorly executed designs before having to take apart the entire 3D printer again.
- Enable shrinkage in z-axis
As already mentioned, shrinkage of the filament material is an inevitable phenomenon in 3D printing. Cooling the plastic will inevitably lead to thermal contraction. The molten filament is also a semi-liquid substance that tends to "flow" under the force of gravity. This combination of compressive forces means that the compression of the 3D printed design is more pronounced in the z-axis.
With this knowledge, it is wise to allow for a good tolerance in the z-axis at the design stage. Different filaments respond to thermal contraction to varying degrees. If you're aiming for accurate measurements, you'll want to add 3% to 5% to your model's dimensions.
- Calibrate extruder
When a model is processed by the slicing software, it breaks down the necessary steps needed to recreate that model and turns it into a series of commands that the 3D printer must follow, called g-code. This means that the geometry of the model is translated into commands that the 3D printer can understand.
One of the most important elements of the g-code is the number of "steps" that the extruder motor must take to extrude the filament. This is determined by calculating the length of filament needed to print the design and converting it to the number of steps using a pre-set calibration value.
The problem with using a calibration value is that the actual output of the extruder tends to change over time. This means that the actual length of filament output per step of the extruder motor may deviate from the calibration value, resulting in size errors.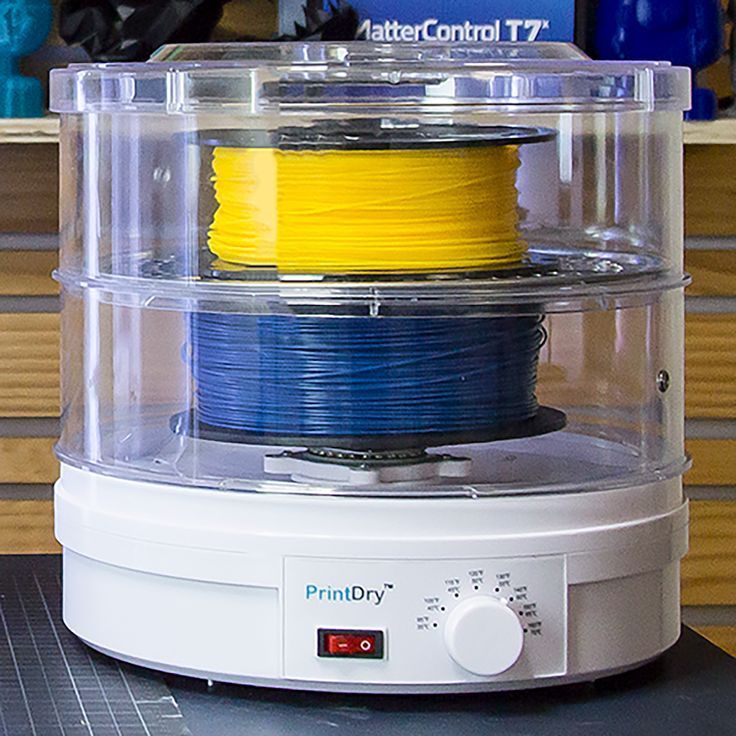 If you are sure that your printer frame is level and that you have included shrinkage in your 3D model, then you may need to calibrate your extruder.
We have already discussed the extruder calibration procedure in detail in a previous article. You will need to dive into your 3D printer's g-code to make the necessary changes. It's not as difficult as it sounds - g-code is not a programming language of the same level of sophistication as Java or even C++.
Elephant Foot
Elephant Foot is exactly what it looks like - a flared base layer that creates distortion in the first few layers of your print. It's not as big of a problem as warping, but it can be a problem if you're looking for perfect aesthetics.
Possible Causes:
- The print bed temperature is set too high.
- Nozzle too close to print bed
Troubleshooting Tips:
- Reduce the platen temperature.
The elephant's characteristic leg expansion occurs when the base layer is eventually forced to support the weight of the layers above it before it has a chance to cool and harden. If your bed temperature is set too high, then the fiber material simply won't get to harden and develop any strength.
The simplest solution for elephant foot is to lower the temperature of the bed in small increments - about 5 C at a time. Be careful when lowering the temperature too quickly, as you may run into warp problems.
- Increase nozzle height
If you are already at the lower end of the layer temperature range for your filament and are still experiencing elephantine feet, then you can try increasing the nozzle height so that the filament does not shrink as much. As with the temperature of the bed, you should do this gradually - about 0.1 mm at a time. Exceeding the z-position of the nozzle can lead to problems with adhesion to the layer..
- Level the print platform
If you can no longer lower the bed temperature and you are not getting any results Your print bed may be having a problem due to the nozzle height adjustment. Again, this is a topic we covered in an older article.
Leveling your print bed should result in a more consistent grip and cooling performance. Either way, bed leveling is something you should be doing to keep your 3D printer in top condition.
Missing Layers
Missing Layers can be one of those annoying 3D printing problems because you only seem to notice them after the project is complete. These layers are probably not "missing" per se, but uneven movement of the nozzle along the z-axis could lead to a clearly visible horizontal gap.
Possible causes:
- Temporary underextrusion
- Nozzle Z movement limited
- Incorrect layer thickness settings
Troubleshooting Tips:
- Perform a thorough mechanical check.
Missing layers can be a tricky problem to solve because it can happen for a variety of reasons. Whenever you find missing layers in a finished print, take it as a sign of regular mechanical checks on your 3D printer. In this case, you need to pay attention to all the components responsible for the movement of the print head in the z-axis.
This checklist for inspection should include the guide rod for z-axis movement (check for misalignment or deformation), the condition of the bearing between the print head and the rod (a worn bearing can cause vibration), and that there is enough lubricating oil to smooth out the movement. While you're at it, you can also perform the same checks for bars that control movement in the x and y directions.
- Make sure the layer thickness matches the full motor steps
This is something you may have missed, especially if you have changed different nozzles. Your layer thickness setting should always be a multiple of the full stroke of the motor, which you should be able to check with the 3D printer's g-code.
Missing layers due to this error should be easy to spot, as your finished print should end up missing multiple layers at fixed intervals.
- Insufficient extrusion test
The missing layer can simply be caused by temporary under extrusion. This is usually caused by a mismatch in filament diameter, which you should quickly check with a caliper. Unfortunately, this is a sign of poor quality filament, which means that you either need to discard the filament completely or just pull it tight until all the filament is used up.
Underextrusion can also be interrupted. be a sign of buildup in the nozzle, which can eventually lead to a clogged nozzle. If you notice skipped coats becoming more frequent, consider cleaning the nozzle.
Offset layers
Offset layers are easy to spot - they look like the print is split in half and the top half is slightly offset from the bottom. There are many possible causes for misaligned layers, but the most common causes are related to the print head.
Possible causes:
- Print head moving too fast
- Difficult to move in x and y directions
Troubleshooting tips:
- Reduce the print head speed.
The FDM printhead is quite heavy. When it moves, it carries a lot of momentum with it. By increasing the print head speed setting, this pulse is further increased.
The problem is that an object moving with a lot of momentum will also require a lot of power to stop it. This happens every time the print head moves from one position to another - it moves quickly and suddenly stops. When the print head momentum is too high, it tends to go beyond its target value.
If the print head exceeds the target even once, this will cause all subsequent layers to shift. Printheads do not have mechanisms to detect or correct errors at target locations.
- Mechanically check
If you're still unable to correct misaligned layers by slowing down the printhead, you may need to check all mechanical components involved in the x and y movement of the printhead. This includes guide rods, bearings, pulleys, and belts that connect the print head to the motors.
As with the missing layers troubleshooting guide, you need to check the bars for signs of mismatch. deformation, as well as signs of bearing wear. The straps should be tight, but not too tight. The pulleys should turn freely with little resistance. Applying lubricating oil to these components should also be beneficial.
Difficult removal of prints
Here is another one of those problems that can be frustrating because it can damage a project that has already been completed. While sticking the print to the bed is great at preventing warping, it's also possible for it to stick too much. In the worst case, you may damage the finished print or platform during the removal process.
Possible causes:
- Platen temperature too high
- Too much contact area between print and layer
- Nozzle too close to bed
Troubleshooting tips:
- Be patient
When your print seems to be stuck on the print bed, the first thing you need is patience. Perhaps your print just needs more time to cool. The filament material and print bed are made from materials with very different thermal contraction ratios, and it is this disparity in compression behavior that should cause the finished print to "pop" when it has cooled sufficiently.
Maybe your print needs a little push before it can be removed. The best tool for the job is a palette knife, which you can slowly but firmly insert between the base layer of the print and the layer.
- Cool
When it comes to removing the finished print, cooling is your best ally. Keep in mind that you don't have to stop at room temperature. If you have a glass print platform, remove it from the printer and put it somewhere else. Take a few ice packs and place them near the junction of the end and the finished print. Hopefully the extra thermal contraction will provide enough force to automatically remove the print.
- Use adhesive tape
Masking tape or kapton tape are two very good options for gluing bedding.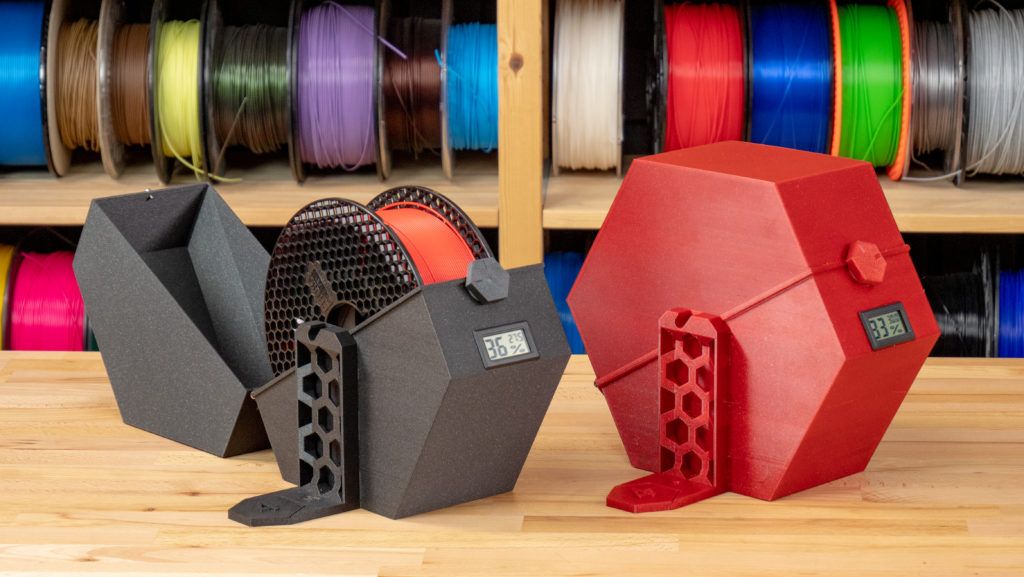 They are just as effective as any other liquid adhesive, but have the added benefit of being very easy to remove from the print platform. Simply remove the layer of tape from the bed and you never have to worry about damaging the bed or your finished print.
Of course, now you have to deal with the remaining tape. sticking to the underside of your print. You can remove this by soaking it in water or applying a small amount of a suitable solvent such as acetone. If all else fails, you can always brute force and sand them down.
- Reduce bed temperature
From In this step, we will look for ways to prevent the problem from occurring, starting with the temperature of the bed. Although the temperature of the heated bed is very helpful in adhesion and is probably the most useful tool for preventing warping, setting the temperature above the recommended values can cause the filament to adhere too strongly to the layer.
As a precaution, it is always recommended to set the layer temperature to the lower end of the recommended layer temperature range for the filament being used. Raise this temperature only if you experience warpage or other sticking problems.
- Increase nozzle height
Initial z-Nozzle setting deliberately set to a fraction of the layer thickness to create a "flattened" effect for the base layer. This is another effective method to increase bed adhesion. If you find that the print sticks too much, then increasing the initial z value by 0.1 or 0.2 mm should help reduce the problem.
- Make some holes in the base layer your model
This requires a lot of forethought, but if your model simply has too much contact area with the print bed, you can simply cut holes inside the base layer. This is probably only possible if you create your own model. By being creative, you can use this strategy without affecting the overall aesthetic of the model.
Popping noise or steam coming out of the nozzle
Popping sound The sight of steam coming out of the extruder assembly is likely to make you worry about damage to your 3D printer. In this case, stop printing immediately - the project you're working on is almost certainly corrupted already.
Possible causes:
- Wet thread
Troubleshooting tips:
- Dry floss before use
Wet filament is a mortal sin in 3D printing. Not only will you evaporate moisture from the hot end nozzle, but you will also get prints with visible notches and holes. Printing with wet filament can lead to more serious problems such as clogged nozzles and damage to extruder components.
To avoid printing with wet filament, make sure all filament spools are stored in sealed bags with a small amount of desiccant. This is not a reliable method. You may still need to dry the floss in the oven or in a special floss dryer before using it.
In any case, it is almost impossible to dispose of a wet filament print. It would be better to replace the coil with another one and start over.
Closing thoughts
When you buy a 3D printer, you only have to expect one thing: that you will spend a lot of time taking it apart, setting up components, tweaking settings, and doing trial and error.