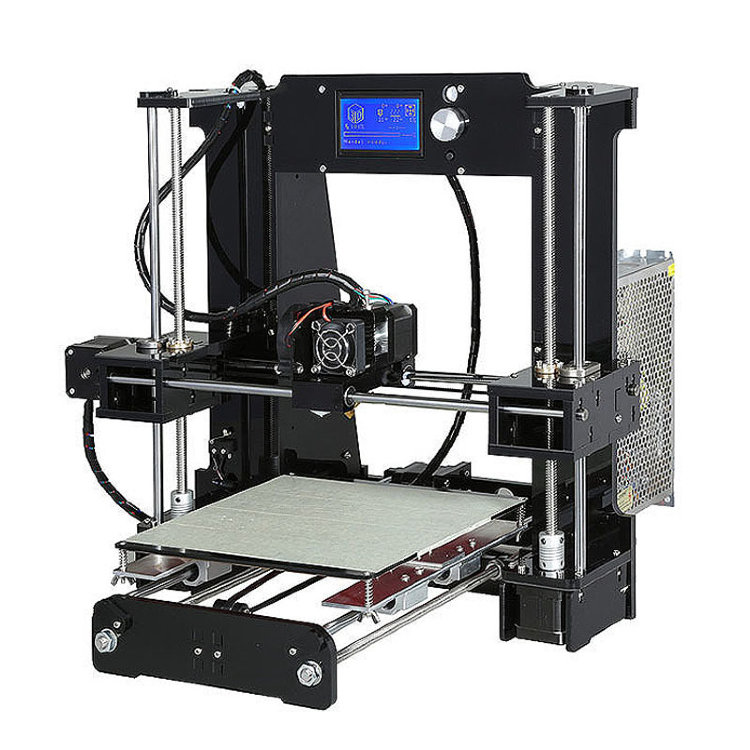
3D printing cleaning
Methods for Cleaning 3D Printed Parts
Time to read: 7 min
You’ve envisioned it, you’ve modeled it, and you’ve printed it. As it turns out, however, your newly printed prototype may need a bit more TLC before it appears, or functions as intended. 3D printed part finishing often involves a cleaning step to improve appearances or remove unwanted support material.
The purpose of this article is to investigate practical methods for cleaning up 3D printed parts, as well as the tools you should have at your workbench to make these processes as simple as possible. Even when outsourcing 3D printing to a partner such as Fictiv, you will likely want to perform some 3D printed part cleaning yourself.
Luckily, except for specialty appliances that can be used for dual-extruder printers with soluble support material, everything you need to get a great finish to your printed components can be conveniently found at your local hardware store.
Disclaimer: always utilize caution when performing 3D printed part cleaning. Always wear appropriate PPE to protect yourself when working with tools or chemicals of any type (for example goggles and gloves).
One of the most basic 3D print cleaning tools you should have in your 3D printing area is a simple putty knife. A putty knife can have many applications from the initial removal of a 3D printed part to the removal of residue from the print bed. For selecting, a putty knife, choose one with a thin, flexible metal blade to allow you to easily get between the plastic and the printer bed. This allows you to gently pry completed prints off the print bed while minimizing the risk of damage to the part.
Pro Tip: If you’re using a glass build bed with glue for adhesion, try placing your bed in the freezer for 15-20 min. The lower temperatures help to desolidify the bond of the PLA to the bed and your PLA part will pop right off!
Rough Cleaning and Part PreparationDepending on the type of part and printing method you’ve used, the first thing you’ll want to do is remove any support material adhering to the 3D printed part. There are several methods for removing this material.
If the printer you’re using creates part supports using a soluble material, soaking the part in hot water with a strong detergent (always following the manufacturer’s recommendations) for several hours, depending on the part size, may be sufficient for support removal.
A sodium hydroxide bath can also help dissolve support material such as HIPS.
Agitating the solution with a pump to ensure constant fluid movement over the surface of the part will also be important in processing these types of components.
Ultrasonic tanks are useful for cleaning soluble support material from complex components with a large surface area. These may clean components faster and with greater success than a simpler agitated bath because of the mechanical energy generated by the ultrasound waves. There are a variety of ultrasonic cleaners for 3D/resin printed parts. Ensure the ultrasonic cleaning chemical utilized will not attack the 3D printed base material, while effectively and completely removing support material.
Consult your 3D printer manufacturer or support material manufacturer for additional information regarding the necessary equipment or procedures to remove soluble support material from your 3D printed parts.
Single-Extruder SystemsFor single-extruder type 3D printers, where support material is printed using the same material that comprises the part itself, start by removing as much material as possible using your hands or a pair of needle-nose pliers.
Many common tools can be repurposed into 3D print cleaning tools. A small pair of flush-cutters, used for cutting wire, may also come in handy during this process.
Additionally, a small set of files and dental tools can help reach those nooks and crannies that are hard to reach. Or, even a rotary/multi-tool may be beneficial in removing excess support material. Try increasing the speed of the rotary tool before increasing the torque, as speed increases will yield better results. Rotary sanding tools are not recommended for PLA smoothing. When smoothing PLA, sandpaper with a manual approach is better.
Depending on your settings, the material, and the algorithms implemented in your printing software, the bulk removal of support material can be quite easy or possibly quite frustrating. So, patience and a desire to learn the optimal settings are key here.
Pro Tip: A simple handheld scratch awl can also be very useful for cleaning out small holes, channels, and crevices in printed parts.
Tackling the Crude ImperfectionsFollowing any major operations using pliers and cutting tools, many 3D printed parts will still have undesirable imperfections, including “strings” of material extending from the outer surfaces and rough edges where the support material has broken away from the part.
In these cases, consider carefully sanding the rough surfaces of the part using sandpaper. Start with a rough grit such as 150 to take care of major imperfections and work your way to 600 grit.
It’s worth it to use this sanding method as the finer paper generally isn’t suitable for treating coarse surface imperfections, yet coarse paper alone may leave deep scratches.
Wet-sanding plastic using 600 or 800 grit paper can produce a smooth finish on flat surfaces.
Pro Tip: Check out our Ultimate Guide to Finishing 3D Parts for more detail on how to create a perfect finish.
For more accuracy on smaller external features, use a set of micro files, often used for jewelry applications.
A rotary tool with sanding and polishing bits can also be very useful for hard-to-reach surfaces that require sanding.
Take care not to sand away areas of the part itself, particularly with electric tools! At high RPMs, you may risk slightly melting areas of the part due to heat generated from friction, so practice on spare parts first if possible.
For many engineers, cleaning your 3D printed parts can be time-consuming to get just right. Fictiv’s on-demand 3D printing services and network of highly vetted 3D printing operators deliver the highest quality parts that are printed, inspected, and ready to integrate into your next build or rapid prototyping cycle. To get an instant quote, create your free account here.
After you’ve taken care of the major imperfections, you may be left with areas of the part which have sand marks or other discoloration. Depending on the material, there are several ways of cleaning up these areas.
Heat GunA heat gun is a useful tool for very slightly melting the part you’re cleaning. This can be used to clean up the discolored patches of material you might find, for example, in PLA or ABS after a sanding operation.
Be very careful here as you can deform or melt away features in your part when using any form of heat treatment as the melting temperatures of some 3D printing filament can be relatively low. Apply hot air from the heat gun in a sweeping motion several inches from the surface of the component, checking to be sure you aren’t causing damage.
You might also consider experimenting with polishing bits, used for buffing ceramics or metals, to smooth out surfaces on 3D printed parts.
AcetoneFinally, for ABS parts, acetone can be used to create a smooth, glossy finish. When placed in a jar containing acetone vapor, the exposed surfaces of the printed part will dissolve over time, reducing the appearance of layer lines. Please note acetone is not a recommended PETG smoothing chemical.
Note that the surface of an acetone vapor-treated part will continue to dissolve for some time after it’s been removed, so it’s a good idea to practice on a few spare parts before trying this method on production components.
Also, be sure to follow standard safety protocol when using acetone. Only handle it outside or in a well-ventilated space as the vapors are harmful and keep it away from flame or excessive heat since it’s also very flammable. Refer to an acetone MSDS for more details.
Lastly, here’s a list of some of the recommended tools mentioned in this article to help you get started building your 3D part cleaning inventory:
- Wide and narrow flexible metal putty knives
- Needle-nose pliers
- Scratch awl
- A pair of small flush-cutters
- Sandpaper (150-800 grit)
- Micro file set
- Rotary tool with sanding/polishing bits
- Heat gun
- Acetone
- Wax carving tools
- 3D printed part cleaning can range from utilizing common tools for material removal, sanding/chemicals for smoothing, heat guns, or polishing bits. Generally, part cleaning includes mechanical removal, sanding, and polishing. Optimal methods depend on material usage. Always consult material-technical datasheets for information.
- PLA is a common filament and it is simple to clean with mechanical tools, files, heat guns, sandpaper, and polishing tools.
 Resin or a clear spray paint may be utilized for an even smoother, shinier finish.
 - ABS is another commonly used filament and it can be smoothed with a process known as vapor smoothing. This process involves suspending the ABS printed part above an ABS bath in a well-ventilated area for around 15-20 minutes. The vapors physically smooth the prints.
- Keeping your 3D printing bed clean is optimal for subsequent printing. Cleaning will depend on the bed material as some will be easily cleaned with IPA (PEI beds) or acetone (PEI beds) and others will need to be mechanically scraped (glass beds) with tools.
As always, feel free to reach out to the Fictiv Team at [email protected] with any additional questions!
How to Clean PLA, ABS & PETG 3D Printed Objects – Easy to Follow – 3D Printerly
When it comes to 3D printed objects and cleaning them, it can be quite troublesome if you don’t have the right techniques. If you want to learn how to properly clean your 3D printed objects, then this article is for you.
To clean PLA, ABS & PETG, you want to use a combination of removing support materials with your hands or a tool, along with cutting off small blemishes like leftover material and blobs on the print. You can then sand the prints down with low grit sandpaper, up to higher grit sandpaper, then polish.
Keep reading through this article for some useful tips and guidance on how to clean your 3D printed objects, whether it’s PLA, ABS, or PETG. You’ll also learn about the right tools to clean up your 3D printed objects.
How to Clean PLA, ABS & PETG 3D PrintsYou have just completed 3D printing one of your favorite models, and before you start using it, you see a need to smoothen and make it look cleaner. It can be tricky, but very easy.
Follow the steps outlined below to clean up 3D printed parts of the 3 most commonly used filament types.
How to Clean PLA & PETG 3D Prints
PLA is the most commonly used filament and cleaning it is a pretty simple job when you have the right tools and products.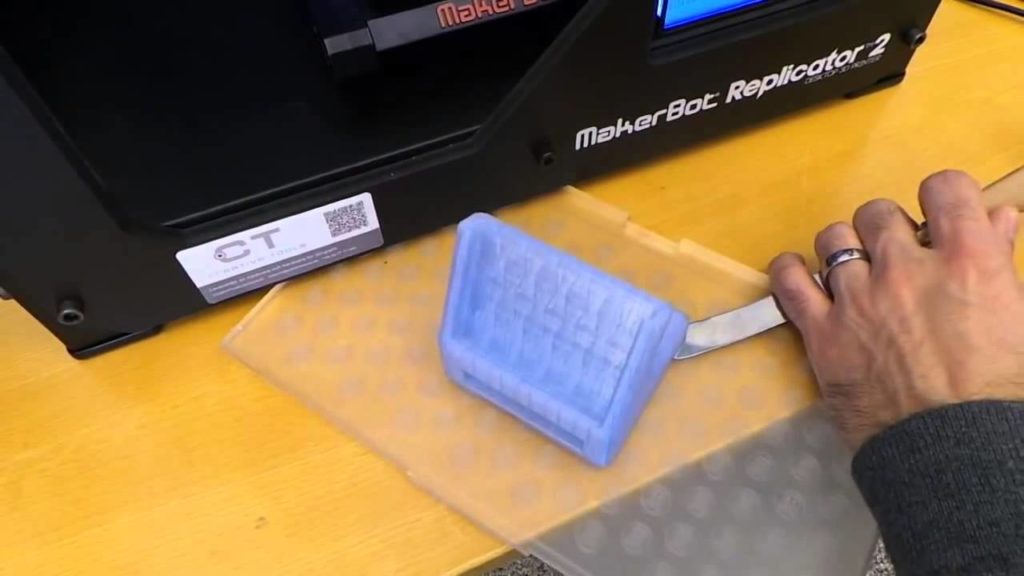
You’ll want the following:
- Flush Cutter
- Needle-Nosed Pliers
- A Needle File
- A Soldering Iron (optional)
- A Heat Gun
- Sandpaper
- Clear Spray or Polish
Once you have the right set of tools, we want to ensure our safety by getting some good protective equipment such as safety glasses, and a good pair of cut-resistant gloves like the NoCry Cut Resistant High Performance Gloves from Amazon. This protects our eyes from flinging parts, as well as our hands and fingers.
In terms of safety glasses or goggles, you can go with a simple one like the 3M Safety Glasses with Clear Frame from Amazon, which is made out of Polycarbonate plastic.
Once you have your glasses and gloves on, pick up your 3D printed part from the printer bed and examine if there is stringy filament and other supports used during the actual printing on it.
Most of the time, you can clear supports and stringy material with your hands, making sure to be gentle with the model. When you have good support settings, such as creating a gap between the top and bottom of the support and the model, supports should be easy to remove.
In terms of stringing, you can use good retraction settings, lower temperature settings, along with a filament that doesn’t string too much, PLA being one of them. PETG is known to be quite stringy if you don’t optimize your retraction settings.
You can follow How to Get the Best Retraction Length & Speed Settings to get some great retraction settings for your 3D printer.
For those supports or rafts/brims that are hard to remove, you can bring in your flush cutters to remove them, as well as needle-nosed pliers. Again, you want to be gentle with your model so you don’t remove any important features that are connected.
When you are cutting, it’s a good idea to cut away from yourself rather than towards yourself, as doing that can cause injury. After removing the bigger pieces, we can bring in our needle file or low-grit sandpaper to get rid of the smaller bumps and blobs on the print.
The Miady 120-3,000 Assorted Grit Sandpaper from Amazon is perfect for dry and wet sanding of 3D prints.
The sandpaper is great for surfaces which are larger and flat, while the needle file is great for those harder to reach areas, corners, and between smaller parts of the model.
The KALIM 10 PCs Mini Diamond Needle File Set from Amazon is perfect for this purpose.
Always be gentle while doing these parts and check the model often so you can see where your attention should be focused.
Doing this for the first time can be quite time-consuming, but after some more practice and experience, you can clean up your PLA models pretty quickly.
The heat gun is a great solution for getting rid of those stringy parts, as well as even smoothing over PLA & PETG in some cases to make the exterior shiny, though not completely necessary.
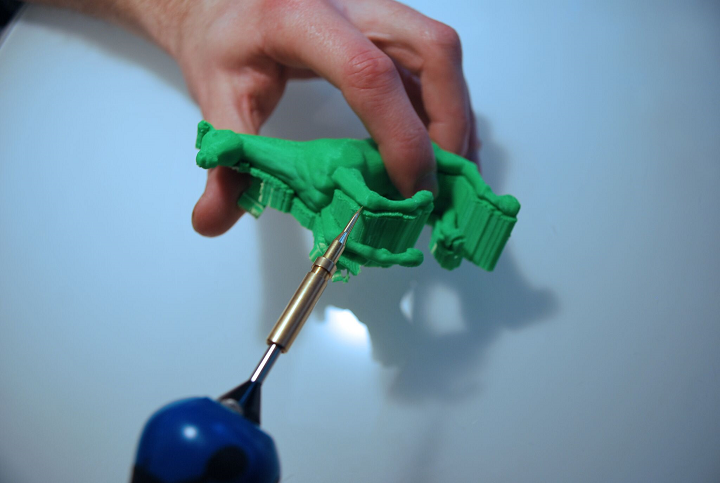
Some people make use of a soldering iron as well to smooth other parts of their print with more precision. With the right flat attachment, you can get some pretty great results.
The Vastar Soldering Iron Kit – Full Set from Amazon is a good solution which comes relatively cheap.
Check out the video below for a nice illustration on how it’s done. It’s great for getting those hard to reach spots on your 3D prints.
In terms of the heat gun, it takes a certain technique of waving over the PLA print rather than holding the hot air on the part. Doing this can make the PLA softer and deform.
After you’ve done these steps, you should have a model that is free of supports, blobs, and most other imperfections.
This is where we can start to clean up the model and make it look more professional. Get your sandpaper and start to sand around the model, starting off with a grit around 100-150. Sanding in a circular motion usually works best.
When it comes to sanding you want to start with lower grits which are rougher, then progress onto higher grits which are finer and allows for a smooth finish. If you want to really go the full mile, you can go from 100 grit to 3,000 grit for a glass-smooth finish.
You can even wet sand the 3D print for better results.
Now that we have a really smooth part, you can choose to apply polish or a clear spray solution to finalize the model.
A great spray coating that some 3D printer users have tried successfully is the Rust-Oleum Clear Painter’s Touch 2X Ultra Cover Can from Amazon. It works great as a clear gloss surface on your resin 3D prints to give it that extra shine.
Another product that can work well to give an extra gloss or polished look on your resin 3D prints is some Thirteen Chef’s Mineral Oil from Amazon, also made in the USA.
You can pour some of this oil onto a soft and dry cotton cloth, then rub it onto your 3D printed part in small circles until all the polish is rubbed into the surface.
Here’s a great video you can follow that teaches you how to clean up 3D prints.
Most other 3D printed materials are usually cleaned up using similar methods like Nylon, HIPS, and others.
How to Clean ABS 3D Prints
We can use pretty similar techniques to clean up our ABS 3D prints as the methods above, but there is a popular smoothing technique that works really well with ABS in particular, called ABS smoothing.
Once we’ve cleaned up our supports and other blemishes and imperfections from our print using the flush cutters and needle file, we can prepare to vapor smooth the ABS print. It saves us having to do the sanding and polishing like with PLA and PETG prints.
One of the best videos on how to do this is by Josef Prusa, which you can watch below.
You can easily buy acetone from a local store or you can find one online like the Pronto 100% Pure Acetone 16 FL. OZ. bottle on Amazon.
When you do acetone vapor smoothing on your ABS prints, you want to make sure you are doing it in a well-ventilated area because it is quite a harsh chemical.
All you need to do is pour some acetone into a container and have your ABS prints elevated above, in an enclosed box like a larger storage container. You want to make sure it is not airtight so there isn’t too much of a pressure build up.
The ABS print shouldn’t have direct contact with the acetone, rather smoothed by the vapors.
A good time for you to leave the ABS print to be smoothed is anywhere from 15-20 minutes.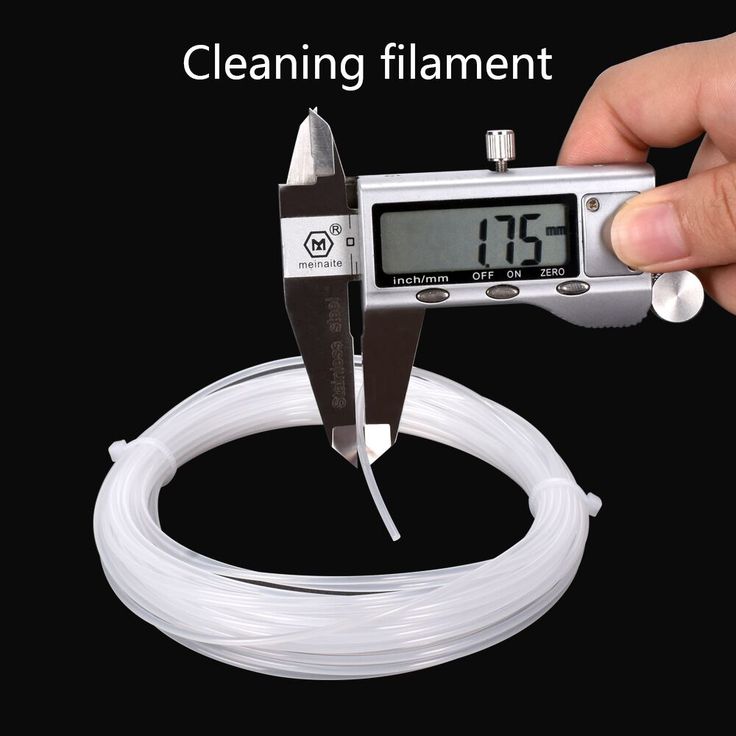 The print will be pretty soft after being smoothed so try not to touch the object, and leave it to dry with the cover off.
How to Clean Up 3D Printed Miniatures
One of the first steps for cleaning up 3D printed miniatures is to remove those supports. When it comes to these minis, supports are vital to creating those detailed prints since there are usually plenty of overhangs on the model’s design.
Before you even start printing your miniature, it’s a good idea to have a good wall thickness so when you are doing your sanding, you don’t sand too deep to the infill.
Being able to use the right techniques to remove supports is important.
You can follow the video below by 3D Printed Tabletop on how to remove tough supports on your miniatures.
I’d recommend getting yourself some Viseman 6″ Mini Needle Nose Pliers from Amazon for cleaning your 3D prints up. These are great at getting into those harder to reach areas, and have a nice grip for more comfort and efficiency.
Another product that I’d recommend getting for miniatures is a Xacto knife which is a handle that holes a sharp blade at the end of it.
The specific one that I would go for is the DIYSELF 20Pcs Xacto Knife with Cutting Mat from Amazon. It has thousands of positive reviews from users that love the product, and has really great value for the price.
Again, I’d recommend getting cut-resistant gloves while using this.
After getting rid of the larger parts, you want to dry sand using a low grit sandpaper, usually ranging anywhere from 60-220. After you have smoothed over and gotten rid of the main imperfections, you can start to wet sand from 120 grit up to 400.
The Miady 120-3,000 Assorted Grit Sandpaper would work really great for sanding miniature 3D prints.
Some users use a sandable primer+filler combination spray that can fill in those layer lines, to be sanded down again for a very smooth surface. The Rust-Oleum 2-in-1 Filler & Sandable Primer is a great choice that you can get from Amazon.
Z-Poxy is a product well-known in the miniature 3D printing niche that works pretty nicely to help provide a cleaner look to models. You can find the Pacer Technology (Zap) Z-Poxy Resin on Amazon.
It does a great job with filling in the gaps between layers to create a smoother and cleaner model. Some people would advise to mix the two-part epoxy with a few drops of isopropyl alcohol to thin out the solution.
When you apply the solution, it should be pretty thin and spread out on your model nicely. After the solution dries on your miniature, it thins out even more as it cures. It can be mixed in a small container and you need to work before it cures.
Once the mixture is together, it starts curing, but to fully cure it can take a few hours.
If you want a simpler solution, you can go for the popular XTC-3D Smooth-On 3D Print Coating from Amazon.
Best Tools to Clean Up 3D Printed Objects
One of the best sets of tools that you can use to clean up 3D printed objects is the HAWKUNG 35 Pieces 3D Printer Accessories Tool Kit on Amazon. It consists of:
- 1 Remover Scraper
- 1 Pair of Pliers
- 2 Tweezers
- 3 Cleaning Brushes
- 12 Clean Up Knives
- 15 Cleaning Needles
- Tube Cutter
You can clean up 3D printed objects very nicely with a combination of the pliers, tweezers, cleaning brushes and clean up knives. A lot of the print imperfections such as stringing, nubs from supports, and blobs can be cleaned up efficiently with these tools.
In addition to this, you can also get yourself an AFA Deburring Tool with Removal Blades from Amazon. This tool has a sturdy aluminum handle and a wide body style that is designed specifically for a strong grip.
Not only can you clean up your 3D prints with it, but it has a wide range of applications from removing burrs from several types of material such as plastic, metal, wood, and aluminum.
The blades that it comes with are highly durable, said to have a lifetime 80% longer than regular blades out there. It can even remove burrs from nylon and ABS 3D prints which are known to be tough plastics.
Investing into a solid diagonal cutter is a good idea when you get into 3D printing. The stock items that comes with your printer can get the job done, but they aren’t the highest quality.
The IRWIN Vise-Grip Diagonal Cutting Pliers from Amazon can quickly get rid of supports and other unwanted parts. Many of these tools have similar uses, so it’s up to you which you go for, though having a combination can be useful for the best quality prints.
If you want to move up levels for getting the best clean 3D prints, a popular tool that is used by experts is the Dremel 8220 12-Volt Max Cordless Rotary Tool Kit from Amazon. It is a great solution for cutting, carving, polishing, sanding, and even engraving your 3D prints.
How to clean the nozzle of a 3d printer: clean the extruder from plastic
The extruder nozzle is one of the most problematic parts in a 3D printer. It can easily get clogged or clogged. Poor plastic feed will affect the quality of the finished model. Print defects will occur. Sometimes the job is completely stuck as the printer needs a nozzle cleaning.
Main Causes of Extruder Clogs
Regardless of the type of print head, it can become clogged. The reason for this is the filament or dirt that accumulates inside the knot. Most often, the nozzle becomes clogged when the printer is not used correctly in conditions:
- Overload, when the device works for a long time without stopping.
- In dusty areas. Sometimes the printing device is placed in a non-residential room or workshop, where cleaning is very rarely carried out.
- Incorrect print settings. In particular, the use of an inappropriate filament or an erroneously set melting point.
In some cases, the design of the nozzle itself can cause frequent clogging. For example, when the printer comes with an initially defective extruder.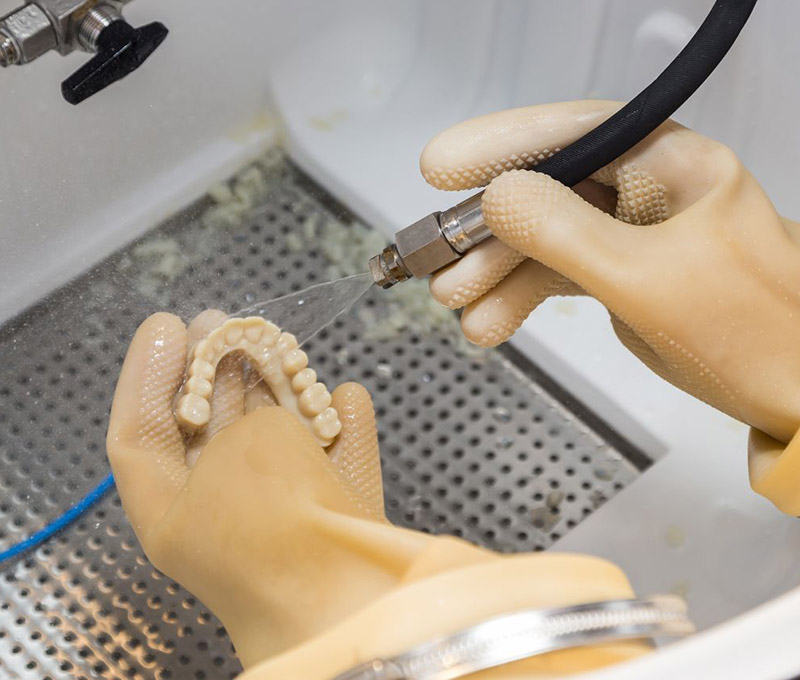 The geometry of the nozzle is broken. The device should be returned under warranty or the nozzle should be replaced separately.
Information! The filament itself can be the cause of litter. A common factory defect or a burr on the plastic can cause a cork.
Pieces of sintered filament
In any case, it is worth carefully studying the problem of blockage and only then proceed to prevention. If you are afraid to damage the device, it is better to take the printer to a service center.
Dust and debris trapped in the nozzle
The first cause is dirt or dust that has entered from outside. Most often, the nozzle becomes clogged with debris for a long time. Dirt can accumulate for months and even years. It sinters on the walls of the nozzle, plaque is formed. Over time, it can cause the filament to get stuck.
Extruder temperature too high
Beginner 3D makers find that an excessively high melt temperature will help avoid clogging problems. This is an incorrect judgment. When working at an elevated temperature, the plastic is instantly sintered right inside the assembly. Filament jamming occurs. A bottleneck is formed.
Therefore, it is important to follow the temperature regime recommended by the filament manufacturer. Sometimes this figure may differ slightly. Somewhere at +/- 5 ° С. It all depends on the printer model, as well as the extruder itself. The optimum melting point is found experimentally.
How to clean the 3D printer extruder: step-by-step instructions
You can clean the printer yourself, without going to a specialized workshop. There are several working methods by which you can clean the nozzle. Let's consider each of them step by step.
Clogged extruder nozzle
Manual
The roughest way to clean the extruder. Thin objects are used for it:
- drill with a diameter of up to 0.
 35 mm;
 - guitar string up to 0.33 mm in diameter;
- leg from a diode or transistor.
Special nozzle cleaning tool for different diameters
Cleaning algorithm:
- Shut off the 3D printer. Wait until the nozzle cools down a bit.
- Remove filament residue from nozzle tip.
- Drill or chisel the hole slowly with the tools indicated. Be careful not to make a hole too deep.
- Turn on the printer, feed the plastic to print.
- Repeat the procedure several times until the filament comes out in an even layer.
Some experts advise you to clean the nozzle while the printer is on. This can be done if the primary rubbish has been eliminated.
Attention! Do not use a screwdriver or drill! So you can miscalculate the force and go through the extruder, damaging the plastic capture mechanism. It is better to use a thin drill clamped in pliers.
Cleaning with a thin tool
Thinner
Sometimes mechanical cleaning is only partially helpful.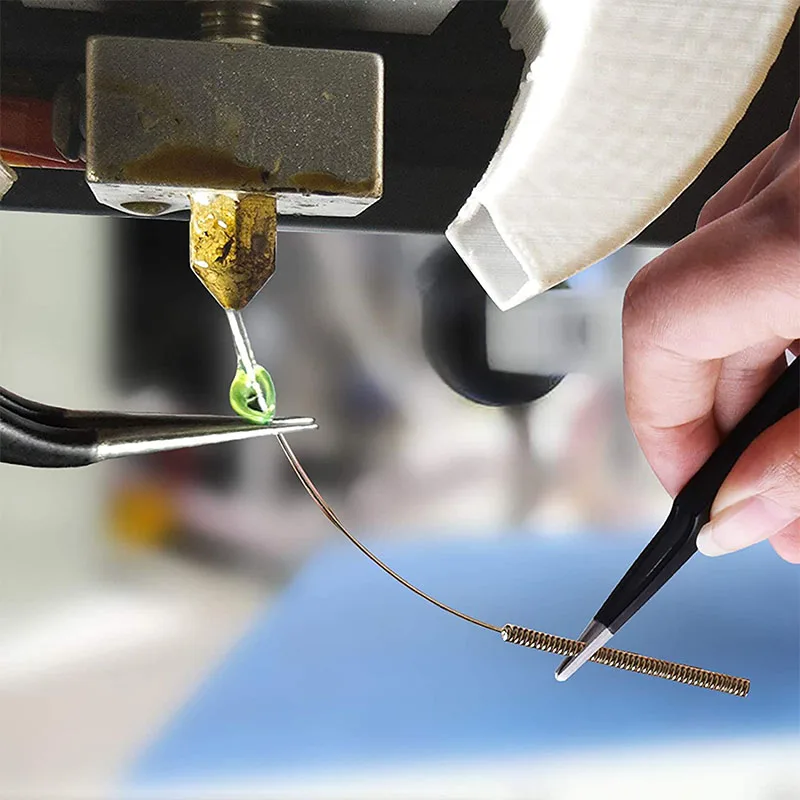 With a drill, you can remove the cause of the blockage, but there are still plaques or influxes of plastic inside the nozzle. This situation is often encountered when working with ABS. To remove the filament completely, you will need to clean the nozzle in an aggressive environment. For example, in acetone or dichloroethane.
Cleaning algorithm:
- Turn off the printer, let the extruder cool down a bit.
- Unscrew the nozzle, put it in a container with acetone or dichloroethane.
- Leave the part for 2-3 hours, then remove and clean the nozzle with a needle.
Screw the nozzle onto the print head. Throw out the plastic.
Important! Spare nozzles can be stored in a jar of acetone. In this way, they will always be ready for use without pre-cleaning.
Filament
Filament cleaning is one of the safest methods that does not involve intervention in the design of the extruder or partial disassembly of this unit.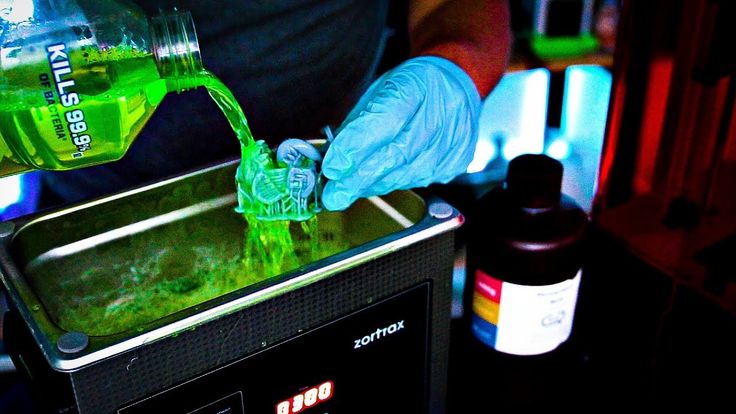 Two types of plastic are used to clean the nozzle:
- Filament with higher melting point. A reel with refractory plastic is placed in the printer. It literally pushes the cork out of the extruder.
- Cleaning plastic. It is usually sold in the form of short sticks or small coils. Its structure resembles nylon. Cleaning filament is the safest way to remove plugs in an extruder.
We recommend using the latter method as an alternative to manual or dry cleaning.
Carbon deposits on the filament
Prevention of clogging - expert advice
To keep the extruder and nozzle in good condition, it is worth following a number of rules:
- Use the filament melting temperature specified by the manufacturer.
- Perform regular printer maintenance. You can unscrew the nozzle once a week and leave it in a jar of acetone overnight. If the print device works almost every day, it is worth increasing the number of preventive cleanings to 2-3 times a week.

- Clean the area where the printer is located. Do a wet cleaning at least once a week.
The main thing is not to delay cleaning if the printer suddenly stops working.
Nozzle cleaning is an important and necessary procedure. It is carried out in critical cases, as well as in the form of prevention. The cleaning method depends on the availability of improvised tools or chemical cleaners. It is best to buy a few cleaning filament sticks so that the printer is ready for use in just a few minutes after removing the cork.
- March 14, 2021
- 4296
Get expert advice
How to clear a clogged extruder nozzle
A clogged extruder nozzle is a problem that inevitably needs to be addressed immediately, and this article will help you diagnose it correctly, as well as solve it in the simplest and easiest way.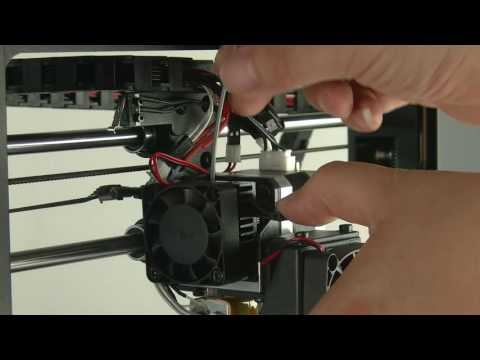
Drill set for cleaning the extruder nozzle in case of blockages.
Unlike many other problems that arise during 3D printing, nozzle clogging negatively affects not only the quality of the print result, but, more often than not, the ability to print at all. Let's take a look at the main causes of a clogged extruder nozzle, and how you can quickly and easily fix this situation.
- 1 Clog causes
- 1.1 Extruder temperature too high
- 1.2 Dust and debris caught in the extruder nozzle
- 2 Step-by-step solution to this problem
- 3 Expert comments (Mikhail Shchekochikhin)
Causes of clogging
Extruder temperature too high
When using PLA plastic, the optimal extrusion temperature can be between 160 and 220 degrees Celsius. Trying to print at too low a temperature will most likely result in no extrusion at all, but the reverse can become more problematic. In fact, if you are trying to print at too high a temperature for a given material, your filament may simply vitrify right in the extruder and thus clog it.
Vitrify - turn into a glass or vitreous substance, especially when exposed to high temperatures
Vitrification is a process that causes PLA or other plastics to become extremely hard and clog the nozzle.
The same is true for ABS, nylon, PVA and other plastics.
Dust and debris caught in the extruder nozzle
This often happens after a few jobs, as dust and other debris enter the nozzle along with the filament. Accumulating, they begin to clog the extruder nozzle. This debris can stick to the inside walls of your extruder and obstruct the flow of plastic, eventually clogging the nozzle.
Step-by-step solution to this problem
Cleaning the nozzle with a fine drill.
This problem is fairly easy to solve, but requires the right tools.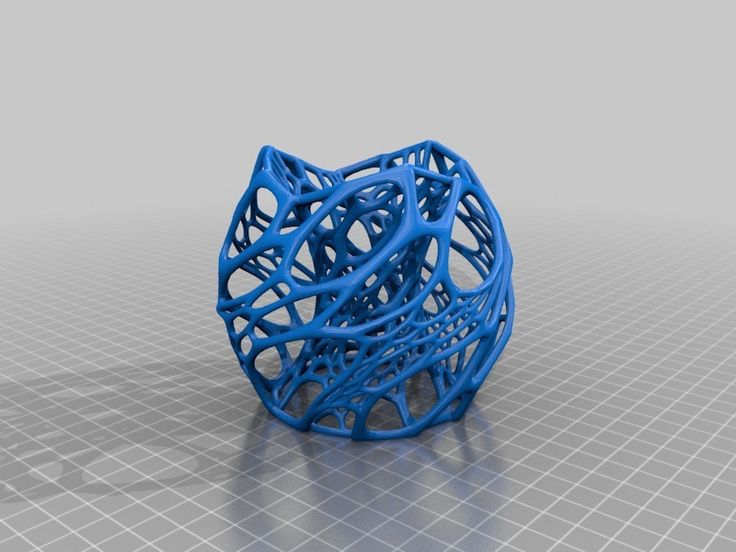
You will need a small <0.35mm drill bit or something else that can serve as a drill but is thin enough to fit into your extruder hole.
It is very convenient to use a 0.33mm thick guitar string for this purpose, which can be easily found in any musical instrument store.
Another alternative is to use resistor or LED legs, as they are thin enough to fit through the hole in the extruder nozzle.
- Remove any remaining filament from the extruder.
- Heat the extruder to the optimum temperature for the material.
- Insert a small drill bit into the nozzle hole and clean it of debris by turning the bit slightly (be careful not to break it!).
Now you can print again!
Comments of specialists (Mikhail Shchekochikhin)
The advice is necessary, but technologically incorrect.
The procedure is as follows:
- stop extruder
- clean the heated nozzle, preferably with special drill
- start the extruder so that the melt flushes the nozzle
- repeat this several times.
Learn more