3D printer heated bed temperature
PLA bed temperature & print temperature settings
Polylactic acid (PLA) filament is the most popular material for consumer FDM 3D printing, and there are a few reasons why this is so. For one, PLA is highly affordable, meaning users can buy in bulk and iterate designs over and over without worrying about wasted material. Another reason for PLA’s popularity is its printability at low temperatures: with a glass transition temperature of around 60 °C, PLA can be printed using moderate heat settings without high-end, high-temperature equipment.
That being said, finding the ideal PLA bed temperature and print temperature isn’t always straightforward. Although the material generally requires low temperatures, the ideal range can vary depending on the brand of filament and the type of 3D printing hardware. And, as with other filaments, printing below or above the optimal temperature range can lead to issues like under-extrusion or stringing. Furthermore, the particularly low melting point of PLA makes it susceptible to a range of temperature-related 3D printing issues even after it has been printed.
This article serves as an introductory guide to PLA bed temperature and print temperature settings. It suggests suitable temperature ranges, identifies symptoms of printing at too high or too low a temperature, and offers tips on discovering the optimal temperature range for your specific 3D printing setup.
One of the key advantages of PLA — especially for beginners — is its ability to be printed without a heated print bed. This makes it suitable even for low-cost printers without heated bed capabilities.
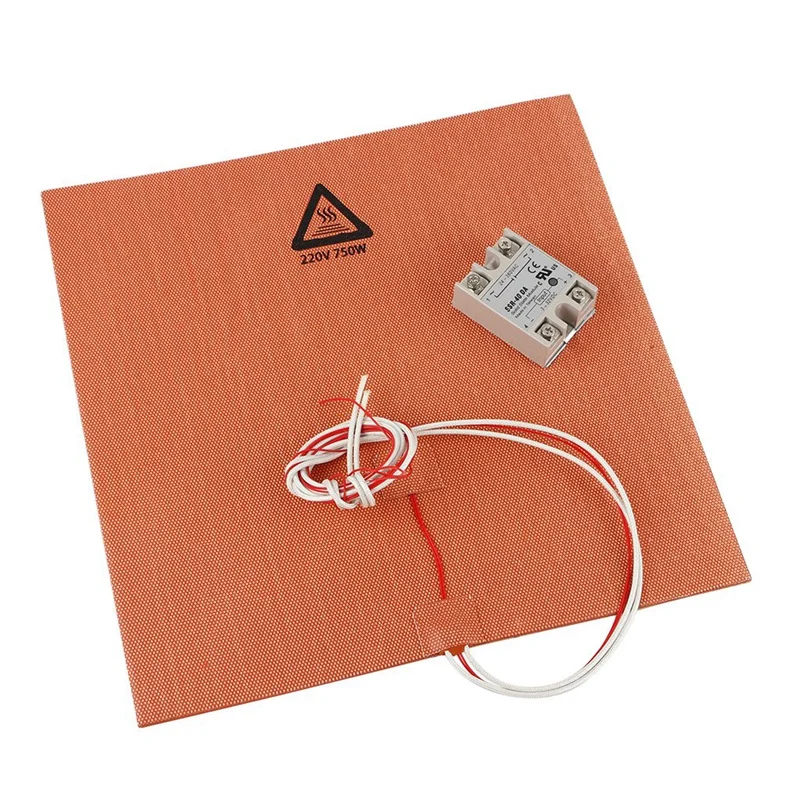
For FDM 3D printing materials generally, a heated bed provides some important benefits. Firstly, it helps with bed adhesion. When the print bed is hotter than the ambient temperature, it allows the first layer of extruded filament to stay soft for longer, giving more time for first-layer adhesion to take place. Additionally, when the heated bed is eventually switched off, the rapid temperature reduction can help facilitate part removal; in some cases, the finished parts will simply “pop off” the build surface.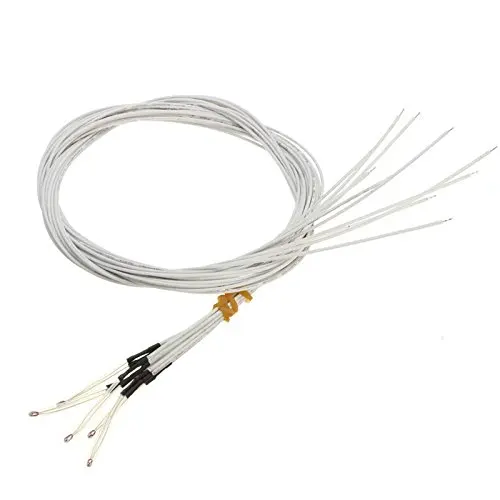 A heated bed can also improve print quality by reducing warping. Parts cool down slower, reducing the severity of contraction and curling.
The PLA bed temperature should be around 50 °C or off altogether
Due to its low printing temperature, PLA is actually fairly resistant to first-layer adhesion issues and warping, especially compared to common alternatives like ABS. However, using the heated bed of a 3D printer can sometimes lead to better results when printing PLA, especially when the room temperature is on the cooler side or when printing a particularly large part.
If using a heated build plate when printing PLA, a temperature of around 50 °C works best. Cura, the popular slicer application, uses a value of 60 °C on its PLA print profile. Here are some recommended PLA print bed temperature settings from a selection of material manufacturers:
MatterHackers Build Series PLA: 40±15 °C
Fillamentum Extrafill PLA: 55 °C
Ultimaker PLA: 60 °C
Note: the heated bed temperature is not the only factor that affects first-layer adhesion. The build surface is equally important: when printing PLA, glass coated with an adhesive like hairspray or glue stick provides good adhesion as well as good print surface quality on the bottom layer. Calibrating the bed level can also improve the adhesion of PLA printed parts on the printer bed.
When attempting to get the best results from PLA filament, the nozzle or hot end temperature is more important than the bed temp. The print temperature affects the print in several ways: higher temperatures improve material flow, enabling faster printing and good interlayer bonding.[1] However, too high a temperature can result in overly melted extruded layers which then sag and cause part deformation, in addition to other problems like material accidentally oozing from the nozzle. Using the lowest temperature you can get away with can therefore lead to the best visual results.
PLA requires a lower nozzle temperature than ABS or PETG
Compared to other thermoplastic printing filaments, PLA prints best at a moderate temperature, typically around 210 °C. To put that into perspective, that’s around 50 °C cooler than you would use for ABS and 30 °C cooler than PETG. The reason for PLA’s low print temperature is the very low (around 60 °C) glass transition temperature of the material.[2] However, the optimal printing temperature depends on a few different variables. These include the specific filament variety, the printing speed (faster prints require a higher temp), and the nozzle size (larger diameters need a higher temp).
Rather than attempting to compute all these different variables at once, the best way to determine PLA print temperature is to run some test prints, as discussed in the final section of this article.
Most FDM printer users set their PLA print temperature to around 210 °C. Here are some recommended PLA print temperature settings from a selection of material manufacturers:
MatterHackers Build Series PLA: 205±15 °C
Fillamentum Extrafill PLA: 220±10 °C
Ultimaker PLA: 200–210 °C
Recommended reading: PLA vs ABS: Which filament should one use?
Failed or low-quality PLA prints are often the result of overly high bed or print temperatures. Setting these values too high can occur when using the wrong printing profile in your slicer, for instance, or when using a narrower nozzle diameter that requires a lower print temperature than the default settings.
Symptoms of excessive PLA bed temperature:
Elephant’s foot: A common PLA printing issue is when the first few layers of the print are splayed outwards due to being overly melted by the heated print bed then subjected to stress from subsequent layers. Elephant’s foot can be resolved by reducing the bed temperature or disabling the heating function altogether.
Over-adhesion: A heated bed can improve the first-layer adhesion of PLA parts. But setting the bed temperature too high can actually lead to the part sticking too well and requiring extensive scraping to remove it from the build surface. Slightly lower temperatures can maintain adhesion while reducing the need for scraping and prising.
Symptoms of excessive PLA print temperature:
Heat creep: If the nozzle temperature is too high, it can inadvertently melt the filament outside of the designated melt zone, especially when using an all-metal hotend.
 Heat creep often kicks in midway through a print, after the temperature has gradually risen up the hotend, and results in patchy or incomplete sections.
Sagging: When printed at too high a temperature, PLA parts can droop and sag, particularly during bridging (the printing of unsupported horizontal features). This can often be resolved by reducing the print temperature or by increasing the cooling fan power. Note, however, that excessive cooling can potentially lead to other issues like poor interlayer adhesion.
Oozing and stringing: High nozzle temperatures can lead to inadvertent leakage of the material from the nozzle during travel movements. This issue can be mitigated by reducing the print temperature or adjusting retraction settings.
Recommended reading: 3D printer stringing: How to fix it
The low temperature requirements of PLA mean that issues caused by too-low temp settings are less common. However, these issues can still arise in certain circumstances: when using nonstandard PLA filament, when the ambient temperature is especially cool, or when using a wide-diameter nozzle, for example.
Symptoms of insufficient PLA bed temperature:
Poor first-layer adhesion: In rare instances, PLA can fail to adhere to the print bed, leading to a dislodging of the part and ultimate print failure. This issue might be fixed by increasing the bed temp, but other solutions can include lowering the cooling fan power, cleaning the build surface (or introducing an adhesive coating), and bed leveling.
Symptoms of insufficient PLA print temperature:
Under-extrusion: When printing PLA, an insufficient nozzle temperature can lead to under-extrusion, which can manifest itself as holes in the print or a rough surface texture.
Clogs and jams: Insufficient temperatures can lead to insufficient melting of the PLA filament, potentially resulting in clogging of the nozzle and jamming that interrupts the print.
 These issues can be mitigated by increasing the print temperature or using a wider nozzle.
Recommended reading: How to fix under extrusion: Maintenance and print settings
Manufacturers of PLA filament typically provide recommended bed temperature and nozzle temperature settings that are optimized for their unique product. In some cases, however, these recommended settings do not lead to satisfactory results.
One way to find the best PLA printing temperature for your particular 3D printing setup — printer, nozzle, material, etc. — is to run some test prints and evaluate the results. But instead of printing a selection of ordinary parts, it can be helpful to print a particular 3D model known as a temperature tower.
Temperature tower exhibiting failure at lowest temperature
A temperature tower such as this one consists of several horizontal blocks, each of which is printed at an incrementally higher or lower temperature than the last.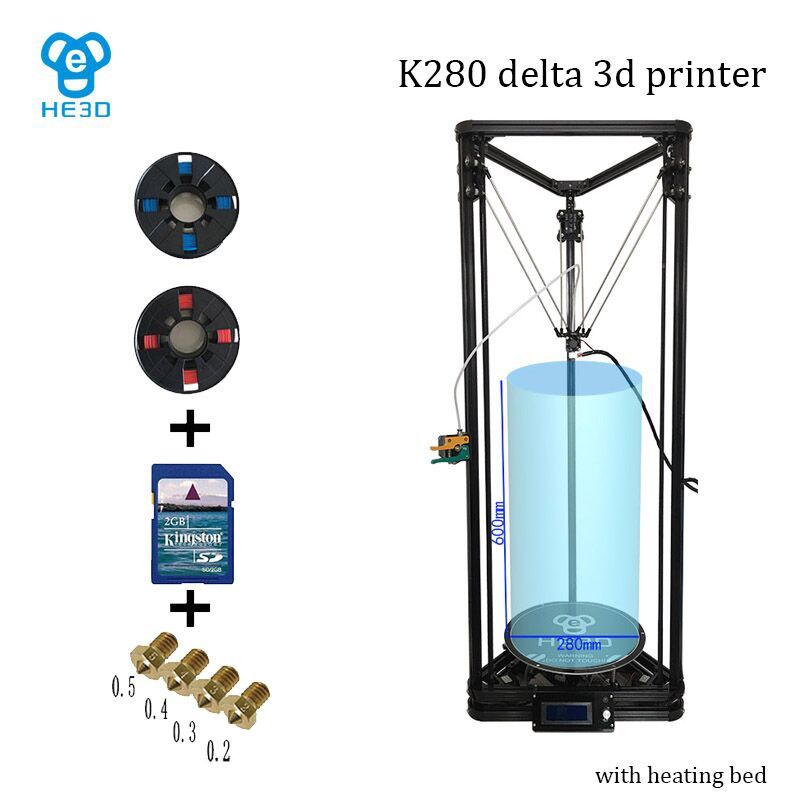 The numbers are printed onto the side of the tower (200, 205, 210, and so forth) so the user can quickly identify which block has been printed at which temperature. Each block of the temp tower typically contains features like gaps, overhangs, and fine features, providing a clear picture of the printer’s performance with each different temperature setting.
Of course, printing a temperature tower is a little trickier than an ordinary print, because the slicer must instruct the printer to adjust the temperature at each relevant increment. (Cura users can install and utilize the ChangeAtZ plugin to switch the nozzle temperature at the required intervals along the Z-axis.)
When the temperature tower has finished printing, users can simply visually inspect the print to see which blocks have printed well and which have not. The block with the least stringing or artifacts and the best quality on fine features indicates the optimal print temperature for the material on that specific printing setup.
In general, the best PLA bed temperature is around 50 °C, while the best PLA print temperature is around 210 °C. As we have seen, however, different factors can affect the optimal temperature range, which makes testing imperative when printing PLA for the first time.
[1] Vanaei HR, Raissi K, Deligant M, Shirinbayan M, Fitoussi J, Khelladi S, Tcharkhtchi A. Toward the understanding of temperature effect on bonding strength, dimensions and geometry of 3D-printed parts. Journal of Materials Science. 2020 Oct;55(29):14677-89.
[2] Bergström JS, Hayman D. An overview of mechanical properties and material modeling of polylactide (PLA) for medical applications. Annals of biomedical engineering. 2016 Feb;44(2):330-40.
How to Get the Perfect Printing & Bed Temperature Settings – 3D Printerly
One of the most important factors when it comes to 3D printing is getting your temperatures correct, but even more so, getting them perfect.
There are a few key ways that you’ll see 3D printing professionals dial-in and optimize their settings, so this article will give you a good idea of how to get that done.
Keep on reading for some useful details and information on improving your 3D printing quality and experience for your 3D printing journey.
What is the Best Printing Temperature for 3D Printing?
Every 3D printer comes with its own set of unique characteristics. Similarly, the printing temperature depends on the type of material you will be using to print items with.
There is no single best printing temperature; it varies greatly with the kind of printer and filament you use. A variety of factors determines the printing temperature best-suited to the material you work with.
They consist of layer height, print speed settings, and nozzle diameter, to name a few.
Before printing, make sure you have a clean and level bed. It is an indispensable part of the printing process.
Best Printing Temperature for PLA
Polylactic acid aka PLA is the gold standard for most thermoplastic printing applications. Formulated with plant-based materials and polymers, this non-toxic, low-odor material does not require the use of a heated bed.
Out of the most popular PLA filaments on Amazon, the recommended printing temperature is in the range of 180-220°C.
Best Printing Temperature for ABS
Acrylonitrile Butadiene Styrene aka ABS is a highly durable and impact resistant filament that prints at a higher temperature than most materials. A heated bed is preferred for best results.
Out of the most popular ABS filaments on Amazon, the recommended printing temperature is in the range of 210-260°C.
Best Printing Temperature for PETG
Polyethylene Terephthalate Glycol aka PETG filament is a fine alternative to PLA and ABS, due to its toughness, clarity, and stiffness. You can print over a vast array of conditions and enjoy increased durability at a light weight.
Out of the most popular PETG filaments on Amazon, the recommended printing temperature is in the range of 230-260°C.
Best Printing Temperature for TPU
TPU is the ultimate choice for printing specialized, dynamic designs. Highly elastic and flexible, it’s resistant to abrasion and oils, ensuring durability and performance.
With proper settings, TPU is easy to print thanks to excellent bed adhesion and the filament’s tendency to not warp. Out of the most popular TPU filaments on Amazon, the recommended printing temperature is in the range of 190-230°C.
What is the Best Bed Temperature for 3D Printing?
Heated beds play a crucial role during printing. Reason being that a heated bed ensures better bed adhesion, improved print quality, minimal warping, and effortless print removal.
As mentioned earlier, there is no ideal bed temperature. The best way to find out the optimal bed temperature for your 3D printer is by experimenting. Although filaments come with a recommended bed temperature, they are not always accurate.
You need to adjust print settings and find out what works best for you.
Best Bed Temperature for PLA
PLA is a relatively easy filament to work with. However, issues like sloppiness, poor bed adhesion, and warping can arise if you don’t adjust your bed temperature properly. Out of the most popular PLA filaments on Amazon, the recommended bed temperature is in the range of 40-60°C.
Best Bed Temperature for ABS
ABS enjoys the reputation of being slightly tricky to print with. Bed adhesion is a common issue that users deal with when printing with ABS filament. Thus, getting your bed temperature right is of utmost importance.
Out of the most popular ABS filaments on Amazon, the recommended bed temperature is in the range of 80-110°C.
Best Printing Temperature for PETG
PETG is renowned for having the strength and durability of ABS and effortless printing process of PLA. However, it is not immune to defects. You must find the best bed temperature for your printer by trial and error.
Out of the most popular PETG filaments on Amazon, the recommended bed temperature is in the range of 70-90°C.
Best Bed Temperature for TPU
TPU is a highly popular flexible filament known for its strength and durability.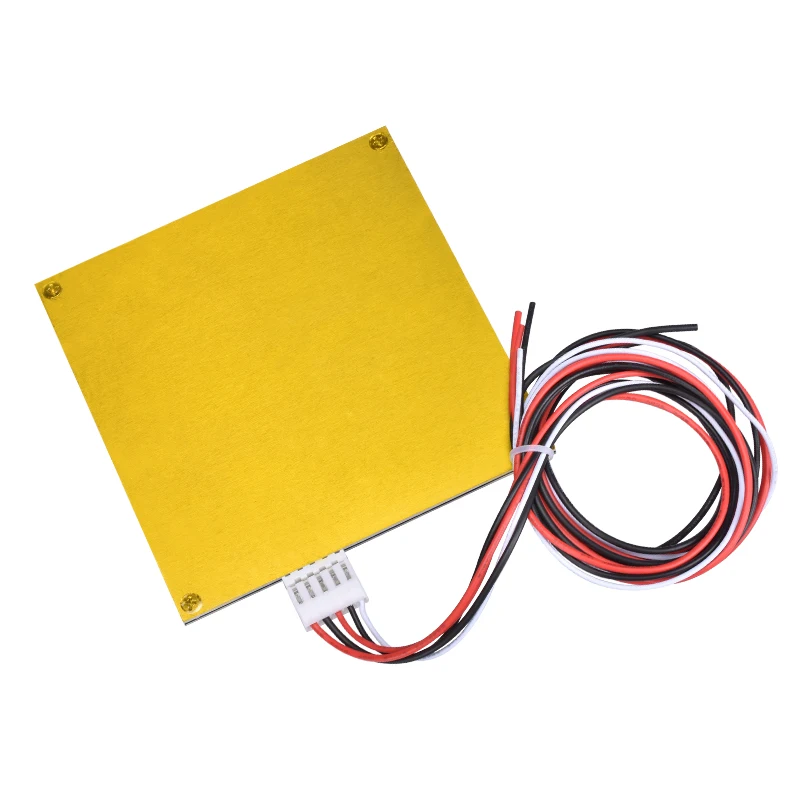 A heated bed is recommended while 3D printing with TPU filament for best results.
Out of the most popular TPU filaments on Amazon, the recommended bed temperature is in the range of 40-60°C.
How Do You Get the Best Printing & Bed Temperature?
Getting the print and bed temperature right plays a significant role in determining the quality of your print. Often, new users and enthusiasts have a hard time knowing what works best with their 3D printers.
An ideal way to know the best printing temperature for your printer is with the help of a temperature tower. A temperature tower, as the name suggests, is a tower 3D printed using different temperature ranges, with one stack on another.
When you 3D print using different temperature ranges, you can see the difference between each layer of the print. It will help you know the best and worst printing temperature for your printer.
A temperature tower is an excellent way to know the best print settings for your 3D printer.
Cura has now added an in-built temperature tower, as well as other calibration tools in the slicer.
The video below by CHEP starts off with a retraction tower, but also explains how to create the temperature tower within Cura, so I’d recommend following this video for getting the best printing temperature.
As far as bed temperature is concerned, we recommend following the filament manufacturer’s guidelines. However, you must also test them since ambient temperatures are not always accurate and can result in differences.
You want to make slight adjustments depending on if you are 3D printing in a cold room or warm room, but it shouldn’t make a massive difference.
How Hot Should Your 3D Printer Bed Be?
Your heated bed is ideal for the best results and a seamless printing experience. However, it is only possible if the bed temperature is set at an appropriate degree. The heat of your print bed largely depends on the kind of filament you are using.
It carries a lot of importance as it helps avoid printing issues like poor bed adhesion, warping, and difficult print removal. That being said, you must seek a temperature that is not too hot or too cold.
A print bed too hot can result in the filament not being able to cool and harden fast enough and may give rise to a condition called Elephant’s foot, where the melted filament blob will surround your print.
A print bed too cold will harden the extruded filament too soon and can result in poor bed adhesion and a failed print.
The key to a proper bed temperature lies in experimenting and using good quality filaments. These filaments come with a recommended bed temperature that you can follow.
However, we also suggest you find the temperature best suited for your 3D printer through trial and error.
Should I Use a Heated Bed for PLA?
While PLA does not necessarily require a heated bed, it is beneficial to have one. Printing PLA on a heated bed has a wide range of benefits. A heated bed means strong bed adhesion, minimal warping, easy print removal, and improved print quality.
Many 3D printers that have PLA as their main printing material don’t have a heated bed at all, so it’s very possible to 3D print PLA without a heated bed.
Using a heated bed while printing will open doors for you. It equips you with the freedom to not only print PLA but a variety of other materials as well. Users and enthusiasts from all over the world recommend using a heated bed while printing PLA.
How to Fix PLA Bed Temperature Warping
Warping is one of the most common printing issues users have to deal with frequently. Although PLA is a filament that is least prone to warping, you need to have measures in place to combat it.
Listed below are a few things you need to take care of:
Make Heated Bed Adjustments
Using a heated bed is the first thing we recommend adjusting to eliminate warping and provide good bed adhesion.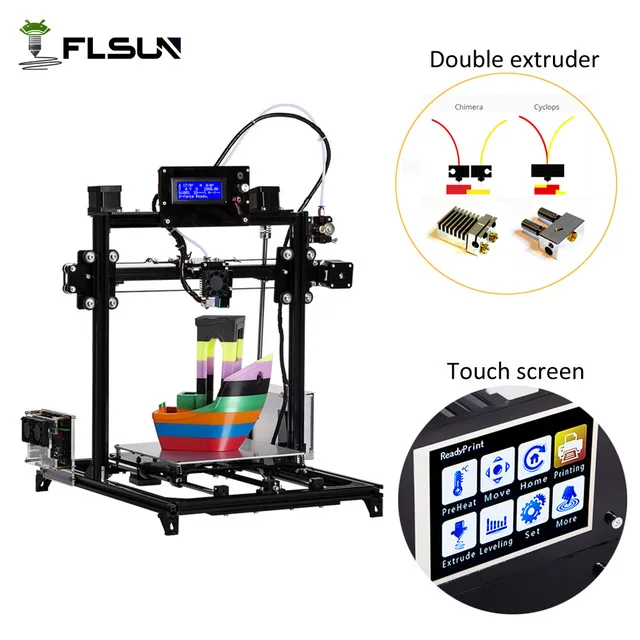 It can prevent warping by regulating the temperature. A PEI build surface works very well.
I’d recommend getting the Gizmo Dorks PEI Build Surface from Amazon. It is made in the USA and is really easy to install on top of your existing build platforms like glass due to the laminated adhesive that peels off smoothly.
They advertise that you may not even need to use additional adhesives or tape if you make use of this specialized 3D print surface, even for ABS which is known for warping a lot.
Level & Clean Your Print Bed
Leveling the bed may sound cliché but it plays an important role. If you don’t level the bed properly, your prints are a lot less likely to the stick to the build surface.
You should learn how to properly level your print bed so that the nozzle is the ideal distance from the print bed. When you print your first layer, it shouldn’t be digging into the build surface, or be drooping down onto the bed.
There’s a certain distance where your nozzle pushes out the filament enough where it squishes a little on the build surface, enough for proper adhesion.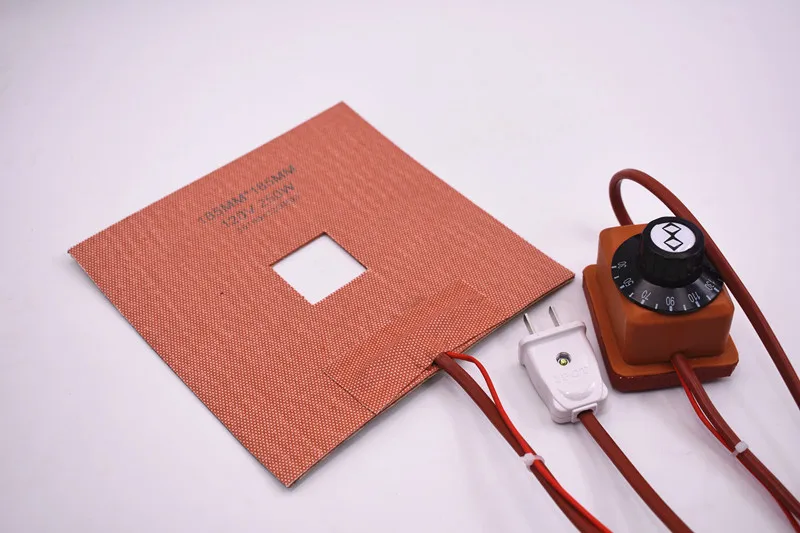 Doing this will lead to better adhesion and less warping overall.
Likewise, cleaning the bed is equally important.
A dirty and improperly leveled bed can result in poor bed adhesion and warping. You’ll be surprised how much small a small smudge or a bit of dust from your general area can reduce your bed adhesion.
Many people use something like the CareTouch Alcohol 2-Ply Prep Pads (300) from Amazon for their bed cleaning needs.
Equally, you can use something like the Solimo 50% Isopropyl Alcohol from Amazon, along with paper towels to clean up your build surface.
Using an Enclosure
Utilizing an enclosure while printing can help prevent warping to a large extent. A closed chamber can maintain a constant temperature throughout the printing process, along with reducing negative effects from drafts and thus, avoid warping.
You want to make sure temperatures don’t get too hot though since PLA is a low-temperature filament, so try to leave a slightly open space in your enclosure.
Plenty of 3D printer hobbyists have gone with the Creality Fireproof & Dustproof Enclosure from Amazon. Not only does it prevent dust from decreasing your bed adhesion, it keeps in the heat to a good level that improves overall printing quality and success.
On top of these benefits, in the unlikely event of a fire, the flame retardant material means that the enclosure would melt rather than light on fire so it doesn’t spread. You also get some sweet noise reduction from your 3D printer.
For more information about enclosures, I’d recommend checking out my other article 3D Printer Enclosures: Temperature & Ventilation Guide.
Make Use of Adhesives
Adhesives – Using adhesives can go a long way in preventing warping. Elmer’s glue and the standard Blue Painter’s tape are some of the popular adhesives that creators use while printing with PLA.
Using an adhesive can usually solve your bed adhesion and warping problems in one go, especially if you get the right product. Some people have had success with Elmer’s Glue Sticks or Blue Painter’s Tape from Amazon.
These can work really well.
Many people swear by the very popular Layerneer 3D Printer Adhesive Bed Weld Glue from Amazon.
Although it is fairly pricey, it has several positive ratings and rates 4.5/5.0 at time of writing.
With this specialized 3D printer glue you’re getting:
- A long-lasting product that can be used several times on a single coating – it’s able to be recharged with a wet sponge
- A product that costs pennies per print
- Low odor and water-soluble item that works very well
- An easy to apply glue that won’t accidentally spill with the “No-Mess Applicator”.
- A 90-day manufacturer guarantee – full money back if it doesn’t work for you.
Best Ambient Temperature for 3D Printing PLA, ABS
The most important thing about your ambient temperature for 3D printing PLA or ABS is that you have temperature stability, rather than worrying about the specific best temperature.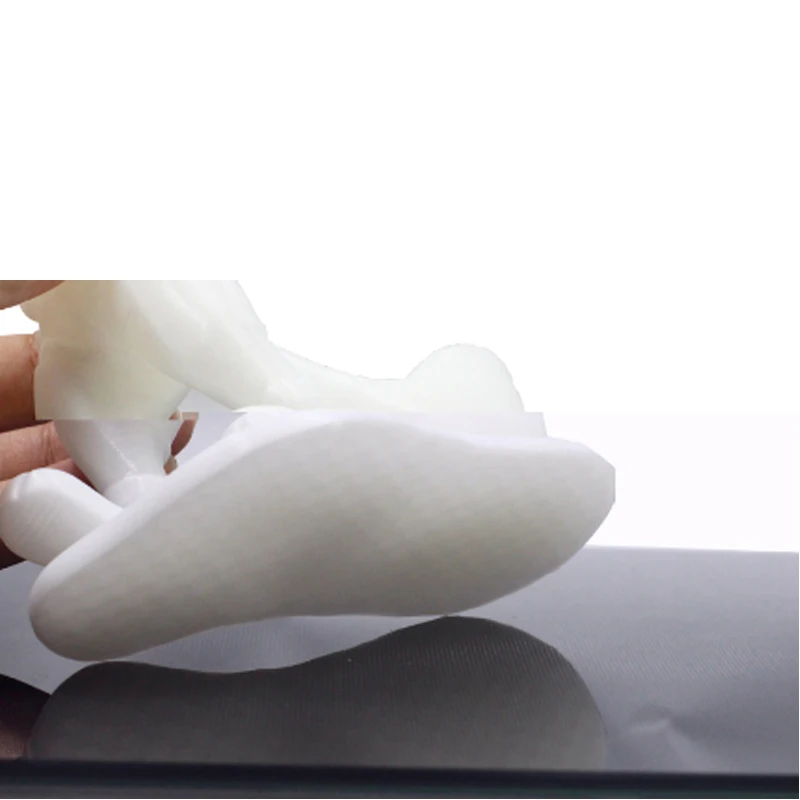
Regardless of the temperature, as long as it’s within a fairly common range, and isn’t extreme, you’ll find pretty similar results in print quality.
What I would advise is for you to make use of an enclosure to keep temperature stable, as well as to block out any drafts that may come about because that resulting change in temperature can lead to warping in your prints.
If you do want a best ambient temperature for 3D printing ABS or PLA, I’d go for between 15-32°C (60-90°F).
The melting temperature of plastic on a 3D printer and the subtleties of its choice
- Correct setting of the thermocouple in the hotend
- Firmware setting
- PID setting
 It is very important to choose the right temperature when printing, as a change of even 1 degree can completely change the quality of the model: its appearance and strength.
 Types of plastics and their melting points
The most important is the choice of nozzle temperature, because it determines how exactly the plastic will extrude and stick to the previous layers.
Too high will result in model geometry distortion, cavities, or even printer failure. This will also affect the model: the plastic will not have time to harden in the place where the printer squeezed it out and move a little. Also, with a slight cooling of the throat, traffic jams will appear in it, completely stopping the seal.
And at too low a temperature, the plastic can be squeezed out in insufficient volume, thereby deteriorating the strength and appearance of the model. If the plastic is too hard, then the printer will not be able to push through the required volume.
The temperature of the table is important for the adhesion (adhesion) of the first layer. Rarely seen in budget printers, but still fairly well known, thermal chamber technology helps prevent cracking if the shrinkage of the plastic (i.e. reduction in volume with a drop in temperature) is too high. Next, we look at the most popular plastics, their print temperatures and features.
PLA
This abbreviation stands for polylactide. Made from corn and sugar cane, PLA is one of the safest plastics for home use. Due to its ease of 3D printing and low toxicity, this plastic is the most popular for beginning 3D printers.
Temperature settings:
-
Nozzle temperature: 190-210°C
-
Table temperature: 60-70°C
-
Fan speed: 100%
The printing temperature of PLA plastic is one of the lowest among all the variety of materials, but it is worth paying attention to the fan speed of the model, as this plastic remains flexible over a wide range of temperatures. With insufficient airflow, the edges and corners of the model may be bent. In order for the model to adhere better to the table, it is necessary to set the temperature of the nozzle to about 210°C, and the temperature of the table to about 70°C. On the second and subsequent layers, it is better to reduce the temperature in order to prevent the above problems with curling edges.
ABS
Despite the difficulties in 3D printing with this plastic, it is the second most popular, as it combines cheapness and versatility. Much more flexible than PLA plastic, allowing springs and bendable parts to be printed. Due to its lower strength, it is easier to process it mechanically: with needle files and sandpaper. But due to the release of toxins when heated, this plastic is best not used when printing dishes or kitchen appliances.
Temperature settings:
-
Nozzle temperature: 230-250°C
-
Table temperature: 90-100°C
-
Fan speed: 50-75%
ABS plastic shrinks a lot, so it is better not to increase the fan speed above 40-60%, but if there are small parts or printing of bridges, then the speed can be increased to 75-80%. If the part cools too quickly, it may crack right during printing.
The strength of this plastic is highly dependent on temperature, so if accuracy is not so important, then it is better to increase the temperature up to 250 ° C. If you print at the lowest temperature, then the strength of the part may decrease by 2 times, relative to the same model printed at the maximum allowable temperature.
Be careful when printing with ABS indoors, you may experience dizziness or headache! Printing on a 3D printer should be carried out in well-ventilated areas, covering the 3D printer from direct drafts so that the fumes from the plastic do not harm you.
PETG
This plastic has a high chemical resistance, so it is used in the manufacture of dishes. At the same time, it combines the strength of PLA plastic and the flexibility of ABS. But it takes a long time to set the correct temperatures for your printer in order to remove all print defects.
Temperature settings:
-
Nozzle temperature: 230-260°C
-
Table temperature: 60-90°C
-
Fan speed: 25-50%
Often there is a problem with “hairs” in some parts of the model. In such cases, the retract distance can be increased. Changing the temperature does little to change the situation. Due to the low adhesion of plastic to itself, the fan speed should not be adjusted above 50%, otherwise the model will easily break apart between layers.
HIPS
This plastic is used as a backing material for printers with multiple extruders. Usually the main plastic is ABS or PLA, since they are neutral to D-limonene, and HIPS is completely soluble in it. This allows you to get an almost perfect quality of overhanging elements.
Temperature settings:
-
Nozzle temperature: 230-240°C
-
Table temperature: 90-100°C
-
Fan speed: 0%
Since the strength and hardness of this plastic is extremely low (sometimes it can be pushed through with a fingernail), it should not be used as the main material of the model.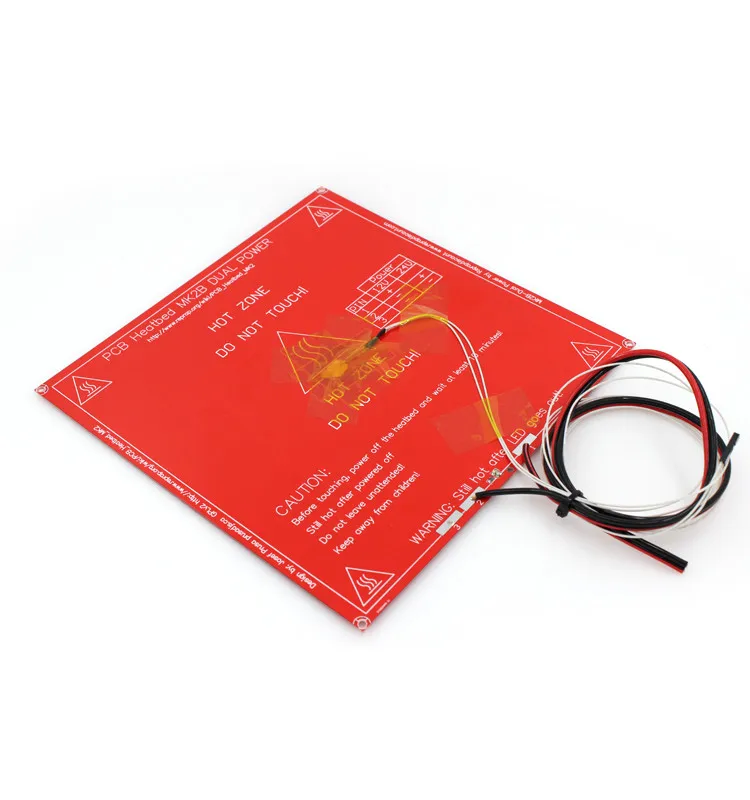 Airflow is not needed, because even when using HIPS for the entire model, it has time to harden during the printing of the layer.
Add to Compare
Product added to compare Go
| Manufacturer | Tiger3D |
Add to compare
Product added to compare Go
| Manufacturer | Tiger3D |
Add to compare
Product added to compare Go
| Manufacturer | Tiger3D |
Add to compare
Product added to compare Go
| Manufacturer | Esun
SBS
The main property of this plastic is transparency and flexibility. This allows you to make bending parts: loops, fasteners, clamps. When processing the model with a solvent, the model becomes almost completely transparent, as in the photo below. But two simple rules must be observed: thin walls and complete filling of the space between them.
Temperature settings:
-
Nozzle temperature: 220-230°C
-
Table temperature: 60-80°C
-
Fan speed: 50-100%
Tip: If you want to print a sealed part, then the flow should be increased by 1-2%. This will increase the dimensional discrepancy with respect to the model, but will make the model completely airtight.
Nylon
This plastic is familiar to many in everyday life thanks to nylon clothing. It is used in the manufacture of gears and other moving parts due to its flexibility, strength and low coefficient of friction.
Temperature settings:
-
Nozzle temperature: 240-260°C
-
Table temperature: 70-90°C
-
Fan speed: 0-25%
Plastic requires a long time to choose the right temperatures, as it has many problems: poor sintering between layers, low adhesion, hygroscopicity (the ability to absorb moisture from the air).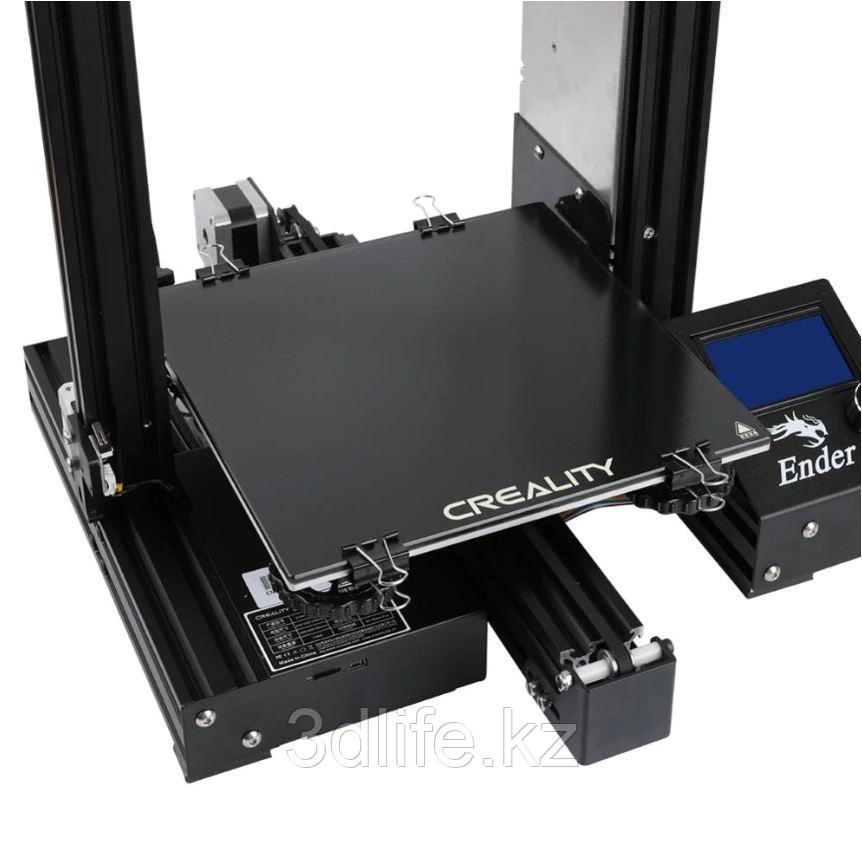 The last characteristic is extremely important, since it radically changes the behavior of plastic. Due to the presence of water particles in the plastic, the model becomes very fragile, and the surface is rough, for example, as in the photo below.
Therefore, it is extremely important to keep the plastic dry. And if it is not known whether the plastic has gained moisture, then it is better to dry it using special devices or in an oven at a temperature of 60-70 ° C for 2-5 hours.
TPU
Some call this plastic “rubber”. And this name suits it, because it is the most plastic material for 3D printing, capable of stretching up to 4 times, relative to its initial size. However, over time, it returns to its original form.
Temperature settings:
-
Nozzle temperature: 210-240°C
-
Table temperature: 50-70°C
-
Fan speed: 50-100%
Due to its flexibility, printing problems can occur, namely plastic jamming in the feed mechanism. It is recommended to print with this plastic only in direct extruders at low speeds, not exceeding 40 mm/s. You can try to print them in bowdens, but then the speed should be no more than 20-30 mm / s, otherwise the filament will curl up in the tube and the printing will stop.
The cause of this problem is the gap between the hole where the filament exits the extruder and the feed gear. Special spacers that reduce this gap will help solve this problem.
PVA
Water soluble plastic used for printing supports. It has low strength, which makes it impossible to use as the main material of the part. Unlike HIPS, which has similar properties and applications, PVA is much easier to remove from the part, since even when heated and dissolved in water, it remains absolutely harmless.
Temperature settings:
-
Nozzle temperature: 220-230°C
-
Table temperature: 65-75°C
-
Fan speed: 0-50%
Since this plastic is only needed to create supports, it is better not to use airflow. If a high-quality part is required, consisting entirely of PVA plastic (for example, a soluble cork or fastener), then the blowing speed should be below 50%, since the adhesion of the layers of this plastic is extremely low. You can increase the strength of the PVA plastic model with water: you need to gently moisten the part, wait 5-7 minutes and dry the surface. Thus, the outer walls of the part will “stick” to each other much more strongly, thereby increasing the overall strength of the part.
Add to compare
Product added to compare Go
| Manufacturer | Esun
Add to compare
Product added to compare Go
| Manufacturer | Esun
Add to compare
Product added to compare Go
| Manufacturer | Esun
Add to compare
Product added to compare Go
| Manufacturer | Bestfilament |
PC
This name stands for polycarbonate. It has great strength, but has relatively little flexibility, less than that of PLA. Also, when tanning, it tends to self-extinguishing, which increases fire safety.
Temperature settings:
-
Nozzle temperature: 290-310°C
-
Table temperature: 90-120°C
-
Fan speed: 0-25%
Like PETG, this plastic is very hygroscopic, so it needs to be stored in a dry space, preferably in a silica gel bag. Due to the need to maintain high temperatures and storage characteristics, polycarbonate is not widely used in 3D printing.
PEEK
This plastic is difficult to 3D print, but it has outstanding mechanical characteristics. Therefore, parts are made from it, designed to work with high loads and friction. It is also neutral to various chemicals.
Temperature settings:
-
Nozzle temperature: 350-410°C
-
Table temperature: 120-150°C
-
Fan speed: 0-25%
To print PEEK, you need to have professional 3D printers. If you use a 3D printer designed for home use, then there is a chance of burning the extruder and the heating element in it. A heated chamber is also required.
Composite plastics
This category includes filaments containing particles of any material. Such a material consists of two parts: a base (usually PLA, ABS or other plastic) and an added component (wood, metal, ceramic or carbon fibers). These plastics differ not only in the type of added component, but also in percentage. Usually, the higher the content of the additional component, the more the properties of the plastic differ from those of the base.
The temperature depends on the basis of which the filament is composed. All necessary parameters must be obtained from the manufacturer.
A common feature of all plastics in this category is the need to use a nozzle with a large outlet diameter (from 0.5 mm). Otherwise, the nozzle will quickly become clogged with the added component. The material of the nozzle is also extremely important, as conventional brass nozzles will wear out quickly.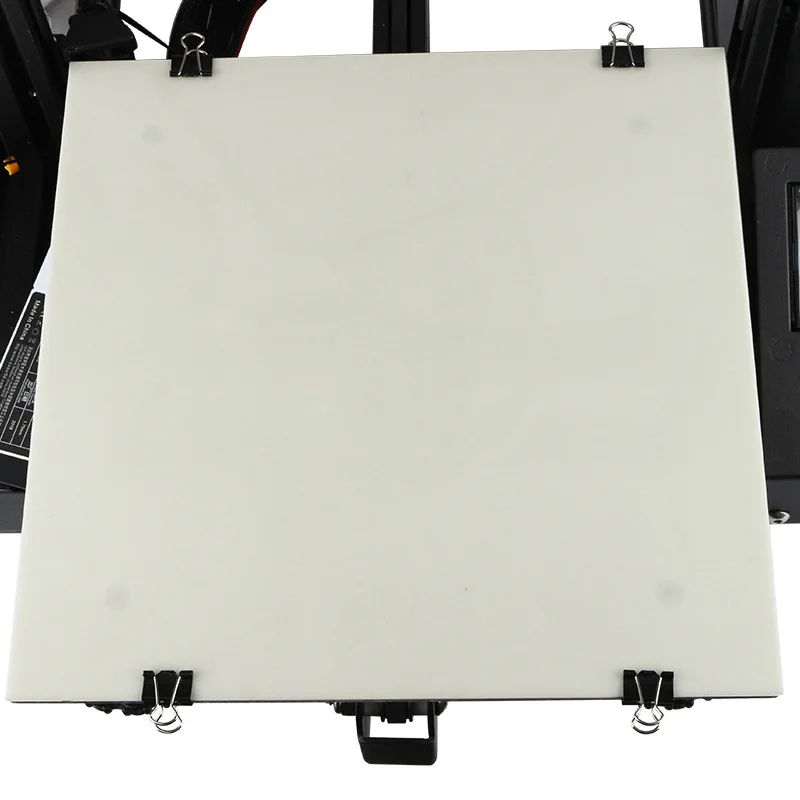 Hardened steel nozzles are usually sufficient.
Temperature setting on printer
Before you start printing, it is very important to be sure that the printer heats the nozzle to the correct temperature and does it without jumps. To do this, you need to make sure that the printer firmware is configured and that the thermocouple is installed correctly.
Correct placement of thermocouple in hot end
The printer receives data on the temperature of the hotend using a thermocouple, which is installed in the hotend. Usually there is a special hole for this, you need to insert a thermocouple as deep as possible into it. It is important to secure the thermocouple wire. Often, for this purpose, there is a hole in the hot end where the screw is screwed. It is best to run two wires on opposite sides of the center of the screw. This will securely fix the thermocouple in the hotend. If there is no provision for mounting the thermocouple, then it is necessary to fix the thermocouple wire on the wire of the heating element. An example of how to do this is in the photo below.
Attention: a poorly fixed thermocouple may fall out of the hot end, thereby creating a fire hazard!
Firmware setting
If the printer is assembled on its own, then it is important to select the type of thermocouple in the firmware. If you are going to use the Marlin firmware, then you need to go into the Configuration.h file and find the line:
#define TEMP_SENSOR_0 0
In place of the last digit, there may not be a zero, but another digit. In most cases, if your printer has a thermistor in the form of a “droplet”, then instead of the last digit you need to put 1. As a result, you should get a line:
#define TEMP_SENSOR_0 1
If the printer determines the temperature incorrectly, then you should try changing the last digit to a different one. A list of numbers and the thermocouples they represent is written above this setting.
The table has the same setting, it can be found by the line:
#define TEMP_SENSOR_BED 0
Here you should also change 0 to 1.
PID tuning
This abbreviation hides a complex name: proportional-integral-differential controller. In simple terms, this is a function that allows you to more accurately keep the temperature within the specified limits. Since the printer can only turn the heating element on and off, the only way to control the temperature is to turn off the heating element when the desired temperature is reached, and turn it on if the temperature falls below the set temperature. But in this case, the temperature will “jump” strongly due to the inertia of the heater. This is what the PID function is for - to compensate for the inertia of the heater. But each printer needs its own PID setting, as the inertia can vary greatly depending on many parameters.
PID tuning requires a wired connection to the printer. The best way to send commands is to use Repetier-Host. As soon as you connect to the printer, you need to send a command to it:
M303 C3 S210
Here, the number after C is the number of heat-up cycles the printer will go through, and the number after S is the temperature for which the PID is being tuned. Although the printer will be set at a certain temperature, these settings will work for higher temperatures.
After some time, the printer will send to the console the values of three PID parameters: Kp, Ki and Kd. These parameters are responsible for tuning the PID. To enter these numbers into the printer settings, you need to send a command:
M301 P14.82 I0.8 D68.25
Here, the letters P, I, and D are followed by the corresponding Kp, Ki, and Kd values from the previous step. If you enter this command, then the PID setting will be saved only until the printer is turned off. You can add this command to the start GCODE for each model you will be printing. For some printers, you can change these settings through the printer's menu.
Softening temperature and post-processing
After 3D printing, you can process the part using high temperature. This allows you to increase its strength and change the geometry of the part. At home, you can use the oven for these purposes. But you should be careful: some plastics release hazardous substances when heated, so it is better to use other methods. For example, a steam bath, hot water, or a hair dryer can serve as an alternative. The main parameter of such processing is temperature. It is necessary to have a sufficiently high temperature so that the material of the model begins to change from a solid state to a sluggish flow, but not to exceed a certain temperature threshold, after which the part can change its geometry uncontrollably.
List of plastics and their softening points:
-
PLA - 70°C
-
ABS - 105°C
-
PETG - 80°C
-
HIPS - 85°C
-
Nylon - 125°C
-
TPU - 95°C
-
PC - 145°C
-
PEEK - 255°C
The data is relatively inaccurate because plastics don't have a specific temperature when they fully transition from one state to another.
Universal table
For those who often use various plastics, we have prepared a table containing all the necessary information for adjusting the temperature of a 3D printer on the fly.
| Plastic | Nozzle temperature, °C | Table temperature, °C | Blowing speed, % | Peculiarities |
| PLA | 190 - 210 | 60 - 70 | 100 | Safety Strength |
| ABS | 230 - 250 | 90 - 100 | 50 - 75 | Flexibility |
| PETG | 230 - 260 | 60 - 90 | 25 - 50 | Chemically neutral Friction resistance |
| HIPS | 230 - 240 | 90 - 100 | 0 | Soluble Supports |
| SBS | 220 - 230 | 60 - 80 | 50 - 100 | Transparency, great flexibility |
| Nylon | 240 - 260 | 70 - 90 | 0 - 25 | Chemically neutral Heat resistance |
| TPU | 210 - 240 | 50 - 70 | 50 - 100 | Huge flexibility Frost resistance |
| PVA | 220 - 230 | 65 - 75 | 0 - 50 | Water solubility |
| PC | 290 - 310 | 90 - 120 | 0 - 25 | Strength Heat resistance |
| PEEK | 350 - 410 | 120 - 150 | 0 - 25 | Strength |
Add to compare
Product added to compare Go
| Manufacturer | Tiger3D |
Add to compare
Product added to compare Go
| Manufacturer | Esun
Add to compare
Product added to compare Go
| Manufacturer | Esun
Add to compare
Product added to compare Go
| Manufacturer | Raise3D |
#Useful
Expert in the field of additive and subtractive technologies, 3D equipment and CNC machines with over 10 years of experience.
Share
all materials
Do you have any questions?
Our specialists will help you with the choice of 3D equipment or accessories, consult on any questions.
Optimum temperatures for 3D printing PLA, PETG, Nylon and TPU plastics
3DPrintStory 3D printing process Optimal temperatures for 3D printing with PLA, PETG, Nylon and TPU plastics
Although almost all 3D printing materials are thermoplastics, each has its own temperature requirements. The specificity arises from the fact that individual fibers differ greatly from each other in chemical composition. Some, like PLA, are made from starches, while others, like ABS, are oil-based.
The chemical composition of a thermoplastic directly affects its glass transition temperature, the temperature at which the material changes from a brittle filament to an extrudable elastic substance. It is this temperature that must be maintained for high-quality 3D printing. And since each material has a different glass transition temperature, each plastic must be used for 3D printing at a different extruder temperature.
In addition to a specific extrusion temperature, some materials require a specific hot bed temperature. When some fibers cool, they shrink and deform. The heated bed allows these plastics to cool more slowly during extrusion so that bending is minimized.
The heated bed also provides additional adhesion, ensuring that the first layer adheres well and the part does not separate from the base during 3D printing.
So the temperature of 3D printing is a very important parameter, which differs depending on the material that is used.
Recommended temperature for 3D printing with PLA plastic
PLA is the most popular plastic in the world today. One of the reasons is undemanding to the conditions of 3D printing.
PLA prints best around 210°C, although it is very versatile and can work at temperatures from 180 to 230°C. It does not require a heated bed to print, but if your 3D printer has one, set the bed temperature somewhere between 20 and 60°C.
When printing with PLA, make sure the cooling fans are turned on. PLA produces the best results when cooled properly.
Overall, PLA is very easy to use and doesn't require much tambourine dancing to be successful.
Recommended temperature for 3D printing with ABS
Until recently, ABS was the most widely used material for 3D printing. Then ABS lost to PLA in the battle for the lead. The main reason is the great difficulty during 3D printing.
ABS requires a slightly higher temperature to print successfully. Recommended nozzle temperature is 210 to 250°C. Requires a heated bed set to 80 to 110°C.
In addition, ABS should be printed on a closed 3D printer so that the plastic cools down more slowly. This is because the ABS shrinks as it cools, and if the model cools too quickly, it deforms. For the same reason, the cooling fans must be turned off when printing ABS.
Recommended temperature for 3D printing PETG plastic
PETG is a relative newcomer to the 3D printing media market, combining many aspects of PLA and ABS.
It requires very high nozzle temperatures of 220 to 250°C. However, unlike ABS, PETG does not require a heated bed.
PETG prints best with blue masking tape on the table. Without it, the table must be heated to 50-75°C so that the extruded material will adhere well to the table on the first layer. And because this material doesn't flex like ABS, cooling fans can be turned on during 3D printing.
Although PETG is not as easy to use as PLA, it is far less demanding than ABS and is now the top of the list in popularity.
Recommended temperature for 3D printing Nylon with plastic
Nylon is another popular and interesting material, although it is more difficult to work with.
It requires a higher temperature than any of the other materials on the current list: 240 to 260° C is recommended.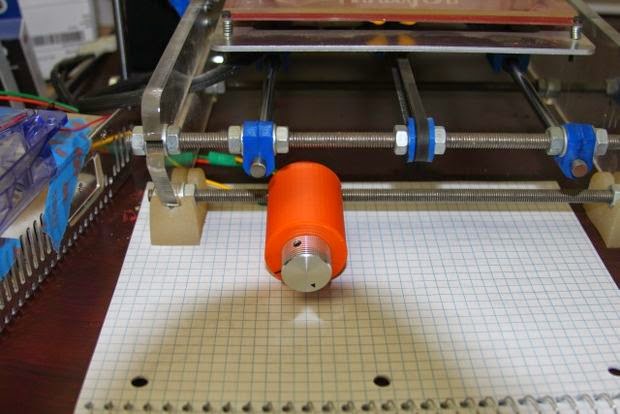 Required table temperature is 70 to 100° C. However, the glue stick layer is very important as Nylon suffers from adhesion quality problems first layer.
Nylon should not be printed with cooling fans as this will cause layer adhesion problems.
This material is also very hygroscopic, meaning it absorbs moisture from the air very actively. This significantly reduces the quality of 3D printing, so the nylon must be dried before printing or a quality thermal box must be used.
Nylon can be problematic at first, but once you learn how to print properly with this material, it will cover many of your questions and needs.
Recommended temperature for 3D printing TPU plastic
The flexible materials known as TPU are an unusual and sometimes very useful material, but very difficult to work with.
TPU is used at the same temperatures as PLA. Works best between 210 and 230°C with table temperatures between 30 and 60°C.
Because this material is very flexible, it can bend and stretch from the extruder gear to the nozzle itself.