3D printer gift guide
15+ Best Gifts for 3D Printers (2022)
- by The Engineer's Bible
- |
- Updated:
- 13-Jun-2022
Looking for a gift for the 3D printer lover in your life?
Then look no further!
We've listed the best gift ideas for 3D printers.
Let's jump straight in!
UPS System
An Uninterruptable power supply (UPS) allows a 3D printer to continue in the event of a power cut.
Read More →
Screwdriver Set
A precision screwdriver set is one of the most useful and inexpensive tools a 3D printer can have.
Read More →
Resin Printer
The Anycubic Photon Mono X 3D resin printer is a high-end 3D printer that produces 3D prints with exceptional quality.
Read More →
We’re reader-supported – when you buy through links on our site, we may earn an affiliate commission.
Table of Contents
Best Material Gifts for 3D Printers
One of the most important items for a 3D printer owner is the material they choose to print with.
The material used can have a massive impact on the quality, strength, and appearance of the printed model.
It’s also important to find out what type of printer they have so you know what type of material they can use.
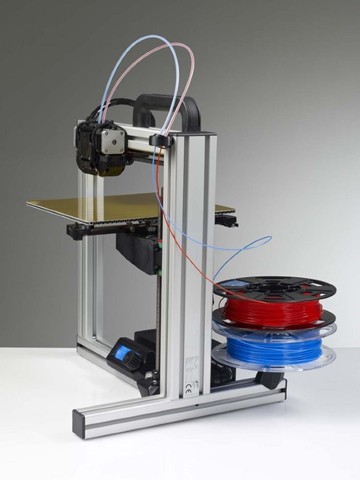
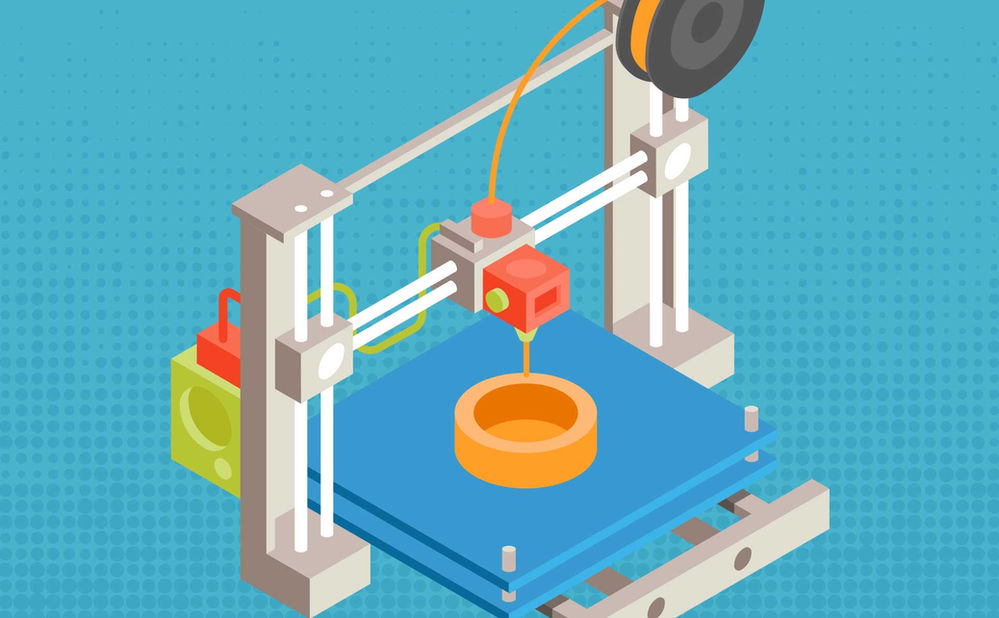
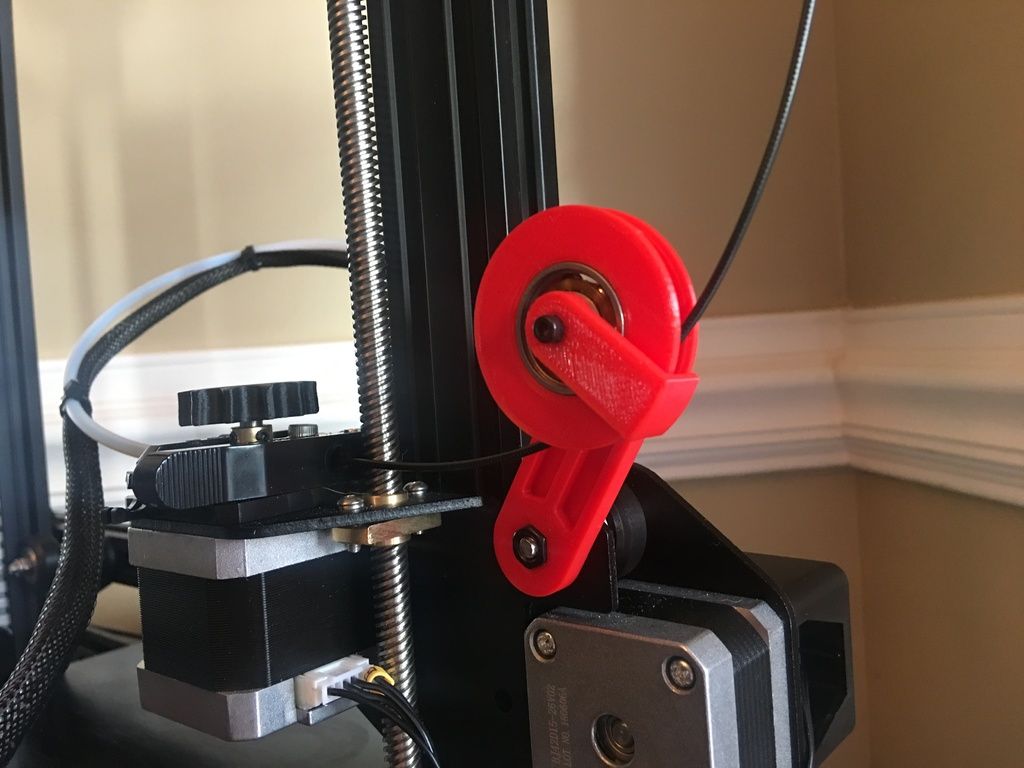
If they have a filament printer (that looks something like the Ender 3) then they will be able to print filament material such as PLA or ABS.
Look out for a spool of filament like below:
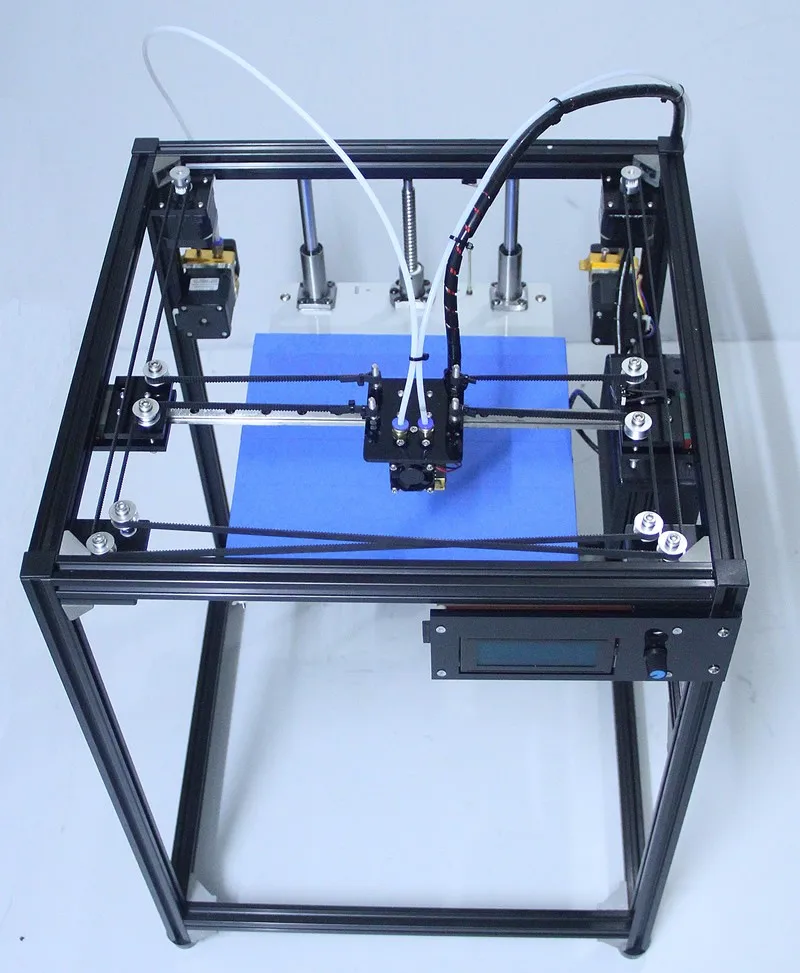
If they have a resin printer (for example this Anycubic resin printer) then they will need a UV resin.
Resin printers do not have a spool of filament – instead they have a vat of resin.
If you’re not sure then just ask them! They will be flattered if they are asked for a picture of their setup – as self-professed 3D printer nerds we know this is true!
If in doubt just say that you have someone who is interested in learning about 3D printing and wanted to show them.
Wood PLA filament makes a great change from using traditional PLA material.
The filament contains wood fibres to give prints the look and feel of wood – it even smells like it too!
eSun PLA+ filament uses PLA+ which is less prone to warping than ordinary PLA and leads to better quality prints.
This filament is also several times stronger stronger than ordinary PLA.
Silk PLA gives an outstanding finish to 3D prints.
One of the annoying tasks for a 3D printer owner is to polish the model to give a smooth appearance.
Silk PLA gives a metallic finish so there is no need for polishing.
This is one of the coolest 3D printer gifts going.
The filament is made of a special material that makes prints glow in the dark – giving a great spooky glow to models.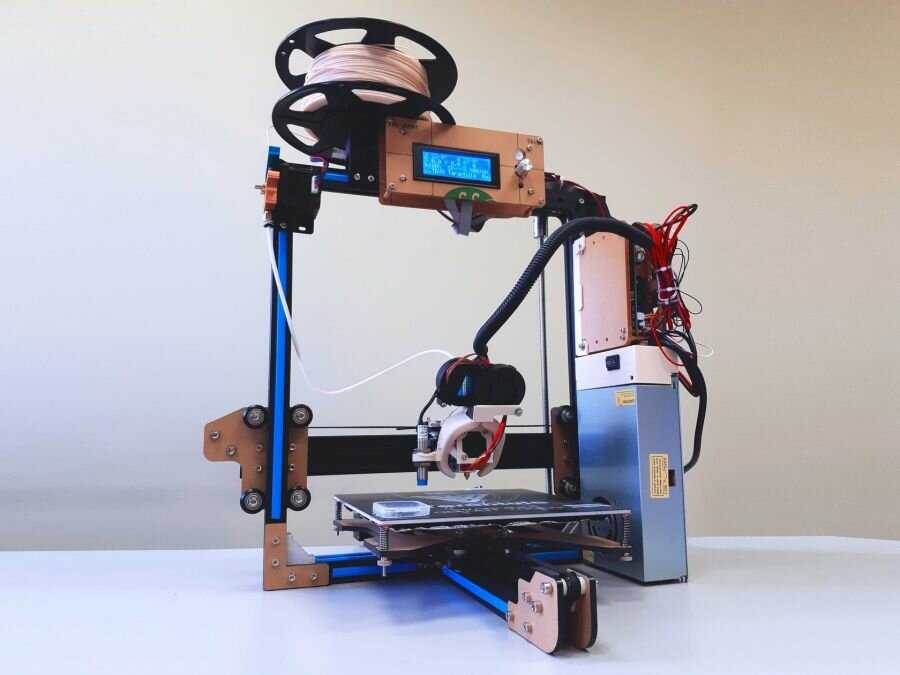
Resin is required for owners of a resin 3D printer.
This style of printing uses UV light to harden the resin to create the 3D model.
This ELEGOO is highly rated and gives a stunning appearance.
Best Upgrade Gifts for 3D Printers
A 3D printer owner is constantly looking at ways to improve their prints.
One way to do this is to upgrade their setup for 3D printing.
These gift ideas below will take their printing to the next level.
Octoprint
Octoprint is a way of setting up a camera to watch 3D printer whilst it is printing.
This is great for safety as it allows the 3D printer to check upon their print from anywhere – in another room or away from home.
Having a camera watch the print also allows you to create cool time-lapse videos from the print.
To set up Octoprint you will need a camera and a computer such as the Raspberry Pi, we recommend the following:
Camera
We recommend the Wyze Cam – it has great visual and is perfect for watching models being 3D printed.
To run Octoprint we recommend you use a Raspberry Pi to run the OctoPi software on it.
We strongly recommend getting at least the Raspberry Pi 3B or Raspberry Pi 4B.
A smart plug is great for safety – it allows you to turn off the printer from anywhere.
Imagine if you were watching the print away from home using Octoprint and something goes wrong with the printer. You could easily make the printer safe by turning off the smart plug connected to it.
One of the 3D printer owner’s biggest fears is that the power will cut out in the middle of a print.
It takes a long time to 3D print – many hours or even days – and losing power means this time is wasted and the model is scrapped.
Having an uninterruptable power supply gives backup power in case of a power outage and can save lots of time and frustration.
Sometimes the best upgrade is another printer!
Having another printer allows more prints to be done at the same time.
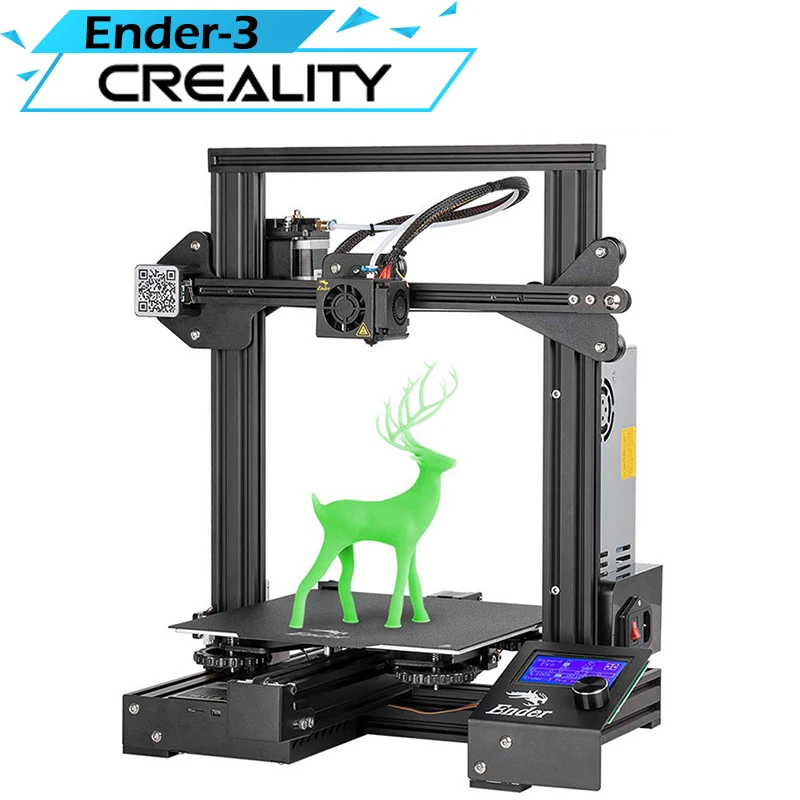
It could also be an upgrade from a basic printer. The Ender 3 is a highly rated filament printer that produces outstanding results for its price.
A resin printer will take 3D printing to another level.
Resin printers have unparalleled quality compared to filament printers. They are perfect for creating models with lots of fine details such as miniatures and cosplay items.
Best Tool Gifts for 3D Printers
To quote Maslow’s hammer – “If all you have is a hammer, everything looks like a nail”.
Tools make using 3D printers much easier and more enjoyable – knowing the correct tools to use can make all the difference.
Here are some of our favourite tool gifts for 3D printers:
A precision screwdriver set such as the ORIA precision screwdriver set is one of the best tools a 3D printer can have.
When tweaking or upgrading the 3D printer this will be their go to tool for the job – and cost per use will be pennies.
A good work light is essential when working up close with 3D prints.
Lots of time is spent looking at the finished model and cleaning up the print – a light with a magnifying glass is perfect for polishing or painting a model.
3D printing can lead to “stringing” which is where the print looks hairy or has whiskers of plastic.
The best way of clearing this up is by using a deburring tool.
Removing a 3D print from a print bed can be very difficult if not using a tool and can lead to damaging the part.
Using a scraper designed for the task can remove the headache of removing the seemingly-superglued model from the bed.
A heat gun is a very versatile tool for 3D printing.
It can lead to better print quality – gently heating up a print can reduce the stringing and give a smoother finish.
A heat gun can also be used to create metal threads in prints. A threaded nut can be heated up and pressed into the 3D print. When it sets the nut will stay in place and screws can not be added.
Other uses include solder reflow, using heat shrink, and print reshaping.
Wrap-Up: Which Gift for a 3D Printer Did You Choose?
All of these gifts for 3D printers listed above are great in their own right.
The gift that you choose will depend upon your budget, the experience level of who you are giving the present to, and what type of 3D printer they have.
So, which gift did you choose for the 3D printer lover in your life?
Let us know by leaving a comment below right now
- No Comments
- No Comments
Teachings and Tools for Engineers
Connect
Twitter Youtube Instagram
Twitter Youtube Instagram
© 2022 The Engineer's Bible
38 Genius Gifts for 3d Printing Enthusiasts (2022) » Make It A Special Gift
They are relatively rare, but they are here; if you luckily have one, you understand that getting gifts for 3d printing enthusiasts is ideal.
Generally, I’m a big fan of getting gifts for people based on their profession, hobbies, or interest; for 3D printing lovers, a gift tailored in that area fits all three.
We "may" earn a little affiliate commission from purchases made with the links we suggest.
Those guys are pretty creative, and I understand how difficult it is to pick gifts for them. A while ago, 3d printers were quite expensive, but in recent years, that field has grown, and things have gotten cheaper.
No, it isn’t just the printers they need; keep reading to see other accessories a 3d printing lover will need. Also, you can check out gifts for drummers from here.
Top Gifts for 3D Printing Enthusiasts
[table id=21 /]
All Gifts for 3D Printing Enthusiasts
1. 3D Printer Tent
First, you should get your favorite 3D printing enthusiast a 3D printer tent; this is very beneficial if they are always on the road with their printer. I
t wouldn’t take much to install; it could be folded and stored, is easy to carry, and has different observation features. With this tent, their 3D printer can have a constant temperature, reducing the weather temperature around it.
Available Here
2. 3D Printers from FlashForge
It is possible to be a 3D printing enthusiast without having a 3D printer; however, how do you really express yourself? How does a true enthusiast really show the world how much of a 3D printer enthusiast they are without a good 3D printer to practice and create with?
Typically, the 3D printers we are used to costing from $500 and above; this may come off as too pricy for many people, but guess what? We can still get formidable 3D Printers at reasonable rates, no, there isn’t some random suggestion.
I came across FlashForge; typically I stick to pretty popular merchants, but again some brands may not be as famous as Amazon but do such a great job with making available goods and services. Check out their deals; they offer these deals generously, in my opinion.
Examples of FlashForge 3D Printers to consider- Flashforge Adventurer – Ultra-Mute Cloud Printing ($370 – $530)
This is perfect for kids; this printer would help that young kid become that inventor she has always wanted to become. This is the ideal choice for kids due to most great features like its plug-and-play operating feature, ease to use, already set up, and much more.
Available Here
- Flashforge Foto – 4K LCD Higher Print Speed ($240 – US$ 761)
Trusted reviews around admit this is one pretty fast printer, and for obvious reasons. What I find more appealing about this printer is its 4k mono screen, with this, your receiver would always get a complete bird’s eye view of what he is working on. There are many other features, though.
Available Here
- Flashforge Foto – Higher-precision 6K LCD 3D Printer ($350 – US$900)
The printer above offers 4K resolution, right? Well, it appears Flashforge outdid itself by grabbing a printer with a 6K resolution. This takes things a bit higher, giving your receiver more ability to carry out the best printing. This resin printer comes already set up, all your receiver has to do is get it running and enjoy an edge cutting printing technology.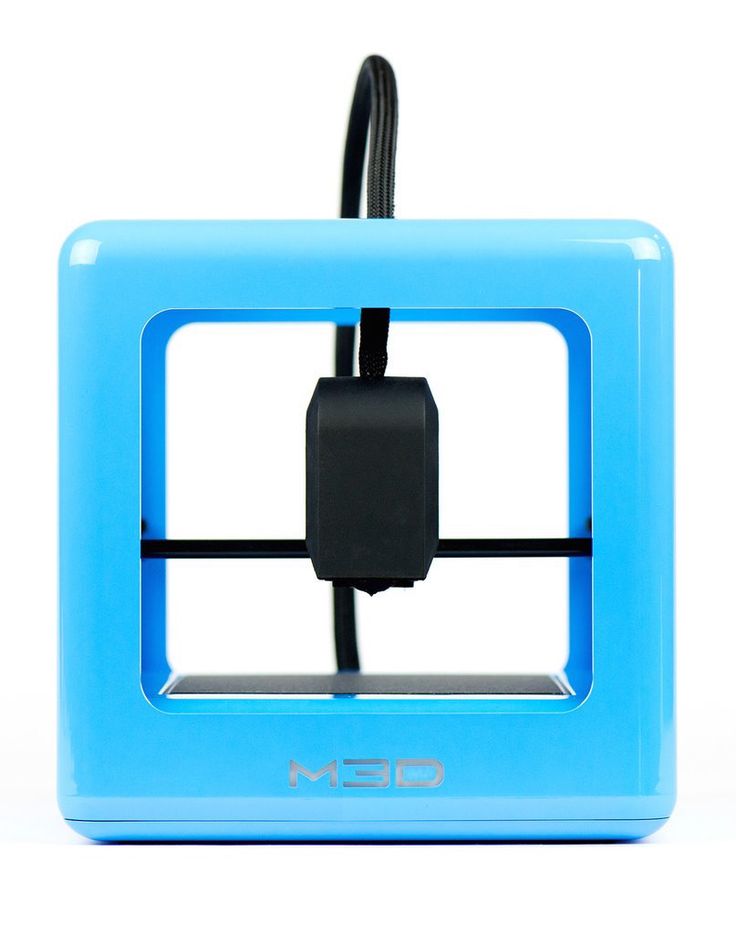
Available Here
3. Printing Filament Box
Those guys don’t joke with their filaments or any accessory they use, so you can settle for this filament storage box if you don’t go for the 3D printer tent. This box can bake its filament at a designated temperature for hours.
It can also weigh their filament to know how much filament is left. It is designed to keep filaments dry and dehumidify various filaments, especially moisture-sensitive ones. You may not understand what these features mean to them; they indeed will *wink.
Available Here
4. Professional Printing 3D Pen
Every 3D printing enthusiast is a big fan of a good printing pen such as this one. With this pen, they can easily make their imagination or creativity come to life.
When drawing with a random pen and paper, you are freestyling, but with this pen, you will have a pretty optimal pen that could help regulate their speed and help them achieve success.
Available Here
5.
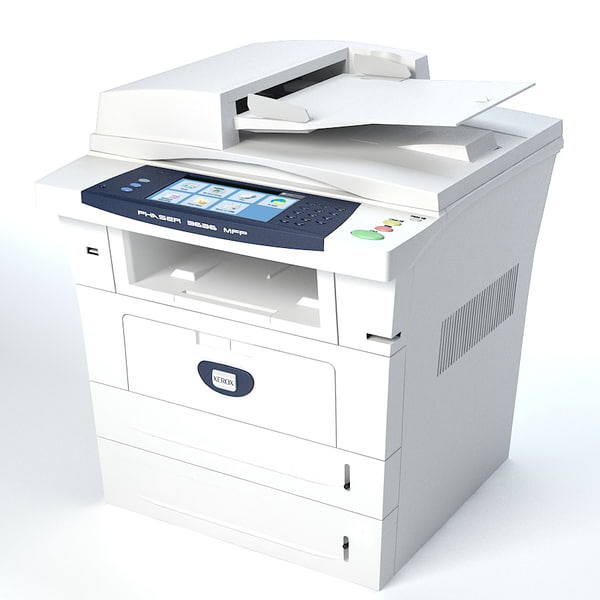
 MakerBot Replicator + 3D Printer
 Most 3D printing enthusiasts love having more than one 3D printer; if you can, you can get this luxurious gift for your favorite 3D printer lover.
Although it is worth over a thousand dollars and might be expensive to some, it is worth it; a purchase will give you one MakerBot replicator and one 3D Printer.
Every other feature I’ll have love to list here about this printer is a bunch of garbage for you -maybe. But this is one phenomenal 3D printer.
Available Here
6. High-Performance Rotary Tool
This is one tool they will very much appreciate. It is a premium rotary tool kit with a 4300 high-performance tool, five attachments, etc. Its high-performance motor delivers maximum performance even in the most demanding applications.
Available Here
7. 3D Printers Beginners Guide
If they developed an obsession with 3D printing or have wanted to try it out but haven’t gotten the materials to start, you should grab this 3D printer’s guide.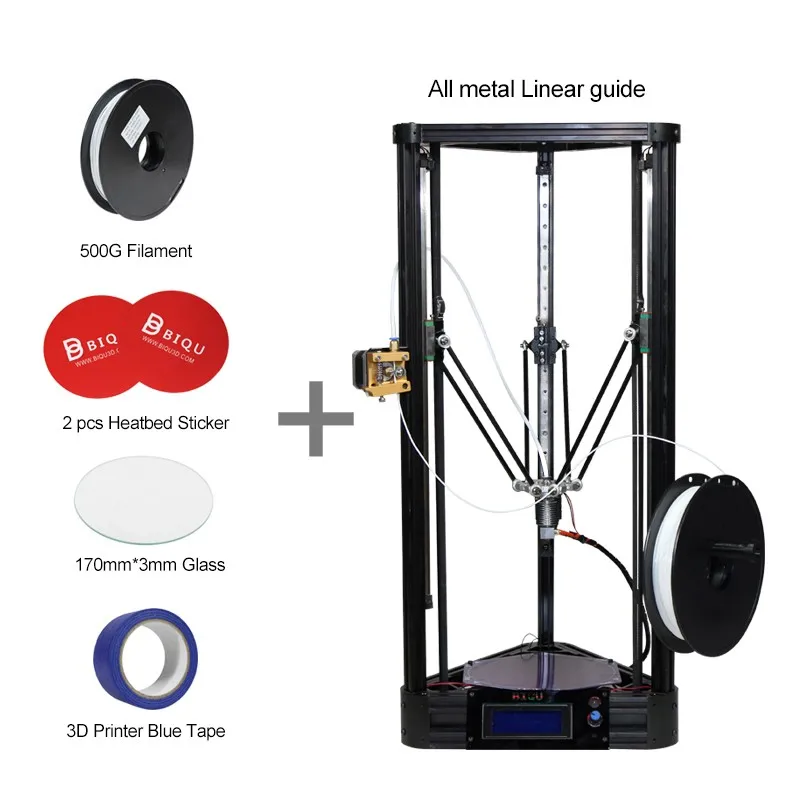 This book will teach the basics of 3D construction with essential information on data files and software.
They will also discover different options for kits and ready-to-use printers while learning how to make their first 3D-printed part. In a nutshell, this book will give them all it needs to be a 3D printing professional.
Available Here
8. 3D Printer Nozzle Cleaning Tool
The more dirt and unwanted materials pile on the 3D printer, the quicker the journey to spoiling, but this 3D printer nozzle can correct that. These 3D printing tweezers are great for nozzle maintenance and cleaning excess support material.
It is Ideal for gentle maintenance of their nozzles and hard-to-reach places like the feed gears. The items come in a neat, handy, safe, and stylish plastic container tube with a screw lid to keep them safely together.
Available Here
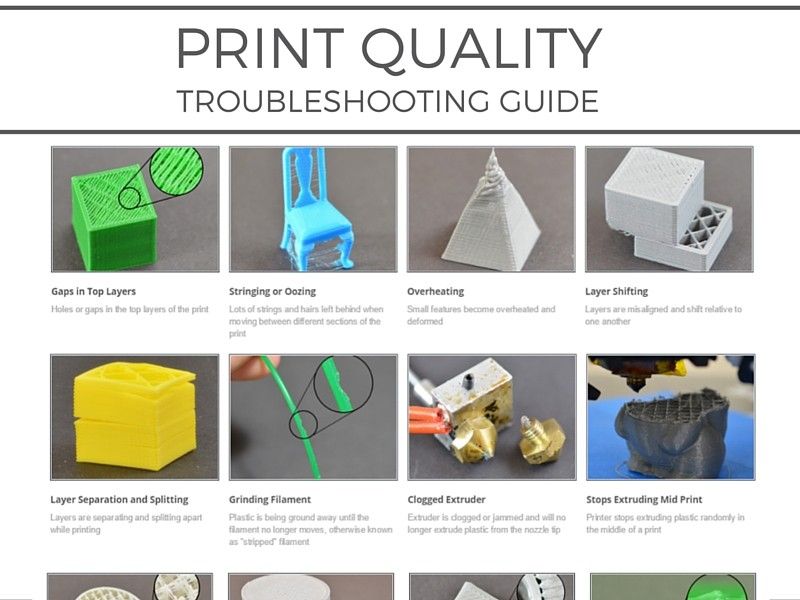
9. 3D Printing Failures
Even after carrying out 10s of 3D printing jobs, novice or not, they are still prone to making mistakes, but with this book, they will diagnose and repair all 3D printing problems quickly.
There are a ton of errors they can repair on their own without needing to go to a repairer, and it could be a bit expensive.
Available Here
10. Unique 3D Printer
This 3D printer is compatible with all operating systems, so your new 3D printer enthusiasts can focus on learning how to use the device and not getting a new system or installing a new OS which could result in loss.
Available Here
11. 3D Printer Tool Kit
A 3D printer enthusiast needs so many materials to get a perfect job, and this tool kit has everything they need. It features 25 essential tools for all 3D Printing professionals, hobbyists, and makers.
One thing with professionals is they love to have every tool available; even if they will never use these tools, they should be available for when they need them.
Available Here
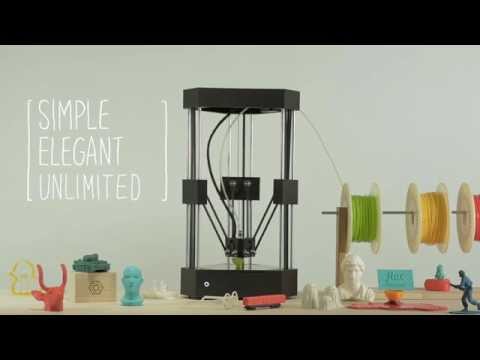
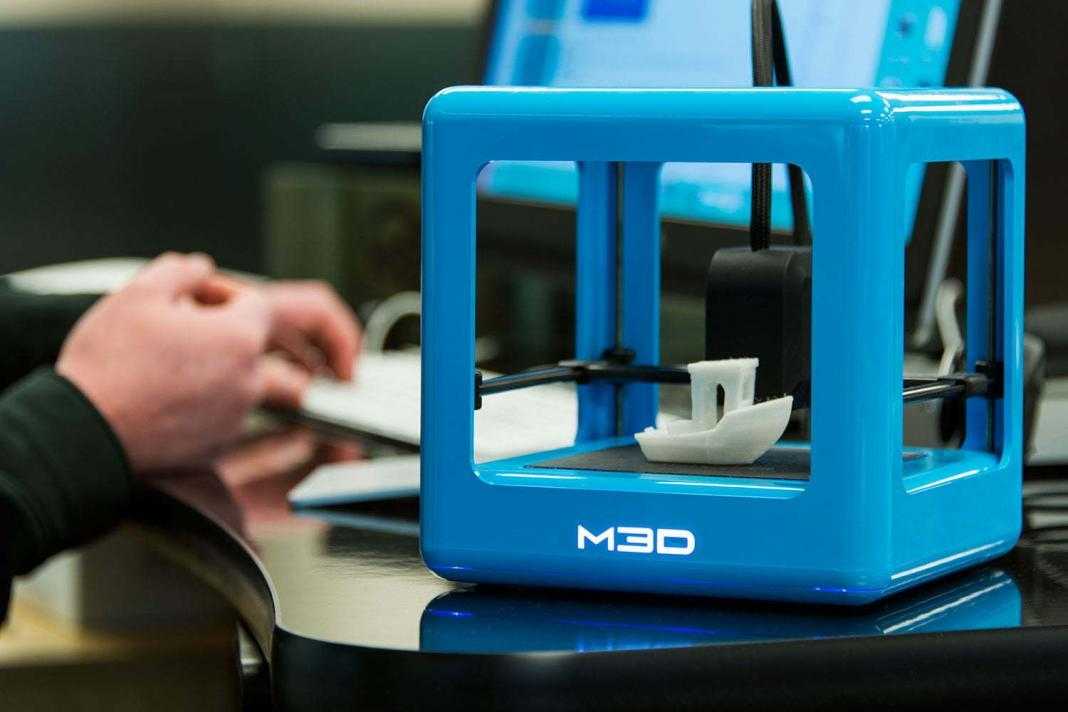
12. Mini 3D Printer
If you aren’t ready to break the bank for the 3D printers above, you can get this mini 3D printer. Not all 3D printers are worth thousands of dollars; some are worth a few hundred dollars, and this is one of them. It would make more sense for an enthusiast who is just starting.
Available Here
13. X- Acto Compression Basic Knife Set
This isn’t some random knife set, and worst you won’t be needing this in the kitchen. It is instead an awesome knife set for your dear 3D printer enthusiast.
With its different uses, how it works, and how easy it is to work with it is an ideal 3d printer accessories gift.
Available Here
14. Programmable Robot Ball
Yes, they also have toys, though they are somehow technical for me, you *wink. Sphero Mini packs a ton of fun into a tiny programmable robot the size of a ping-pong ball.
It has many geeky things, and I’m talking features that would interest your dear 3D enthusiast family member.
Available Here
15. Photo Studio Box
As 3D printing enthusiasts, they will take pictures, and this photo studio box can help with that. It wouldn’t take them much time to assemble, a minute or two. It fits various product sizes and comes with a power supply, user manual, and pre-installed removable bright-white backdrop.
Available Here
16. Hot Air Gun
This heat gun has a scientific ergonomic design handle that can prevent repetitive strain injuries and other musculoskeletal disorders. It is perfect for professionals.
Available Here
17. 3D Printer Creator Pro
Another not-too-expensive 3D Printer you should check out is this item. It offers a sturdy metal frame that is substantially more stable than other versions; its original wood frame is built with a considerable thickness.
Available Here
18. Arduino Project Starter Kit
This project starter kit is perfect for 3D enthusiasts who want to kick-start their careers. It is one compact kid case that features every Arduino platform and kit they’ll need. It makes more sense considering you won’t spend much to get it.
Available Here
19. Pi Camera + Octopi Webcam
Its extension cable is long enough to mount the camera, which is especially useful when they don’t want to place it near the Raspberry Pi. It is an inexpensive, thoughtful gift for a 3D enthusiast that is relatively easy to set up.
Available Here
20. Transparent 3D Pen Mat
The question of symmetry, accuracy, precision, and so much more would be tackled upon receiving this gift. This mat helps out with printing. I mean, it is a printing mat. They can work with both their 2D and 3D pencils on this mat, and this mat would make their job of 3D printing more bearable.
Available Here
21. Digital Vernier Micrometer Caliper
Want’s printing without measurements? Every 3D printing lover needs a caliper to get precisely what they want, and when you get this digital Vernier caliper, you will be doing a great thing for them.
Available Here
22. Funny 3D Printing Evolution T-shirt
Most times, a cool T-shirt such as this could get the job done. It has a cute, funny depiction of human evolution; they should get what it means.
Available Here
23. High-Performance Rotary Tool Kit
This rotary kit adds finishing touches and designs their craft correctly. Equipped with a LED light, it helps illuminate the piece being worked on even in the dark. So they can do what they love doing, even in the dark.
Available Here
24. 3D Printer Nozzle Cleaning Kit
Your 3d enthusiast feed gears, amongst others, are one difficult place to clean; with this nozzle cleaning kit, they can quickly get those tight edges.
Available Here
25. 3D Printer Tool Kit
If you aren’t sure what to get as a gift for 3d enthusiasts, settle with this full printing kit. It features an impressive collection of what your favorite 3d user would need to make a great piece.
Available Here
26. 3D Photo Crystal Rectangle
An ideal 3D-printed gift would be this photo crystal, all you have to do is send a photo you’ll want in the rectangle, and they’ll get the job done for you. It is best as a gift for your mom, even if she isn’t a 3D enthusiast, as this item is a nice decoration to have at home.
Available Here
27. 3D Photo Crystal Heart
Just like the item above, this is another 3D-printed gift idea. Instead of a rectangle, it is a crystal heart shape making it the ideal gift for 3d printer lovers.
Available Here
28. 3D Printed Darth Vader Pen Holder
If your 3d printer nerd also passes as a Star Wars fan, this pen holder would make his table look cool. We also have gifts for star wars lovers here.
Available Here
29. Funny 3D Print T-Shirts
This funny and cool 3d printed gift idea would surely bring a good laugh. You can print almost every crazy thing for them, making it a personalized 3D gift.
Available Here
30. Printing Pen Filament
You’ll be doing him a great favor if you ensure he has spares available. This is a complete pack of printing pen filaments, and it is available in so many colors. He will love adding this to his stacks already.
Available Here
31. Funny Busy 3D Printer Shirt
The fun part of this craft is you can literally create anything. This gives you some type of power, and the ability to create something exactly how you want it is incredible. This t-shirt discloses the typical day of your unique gifts for 3d printing enthusiasts.
Available Here
32. 3D Printing Projects – Hardcover
Besides teaching the young 3D enthusiast all it takes to be a professional, this book also shows them some tasks to try themselves.
Available Here
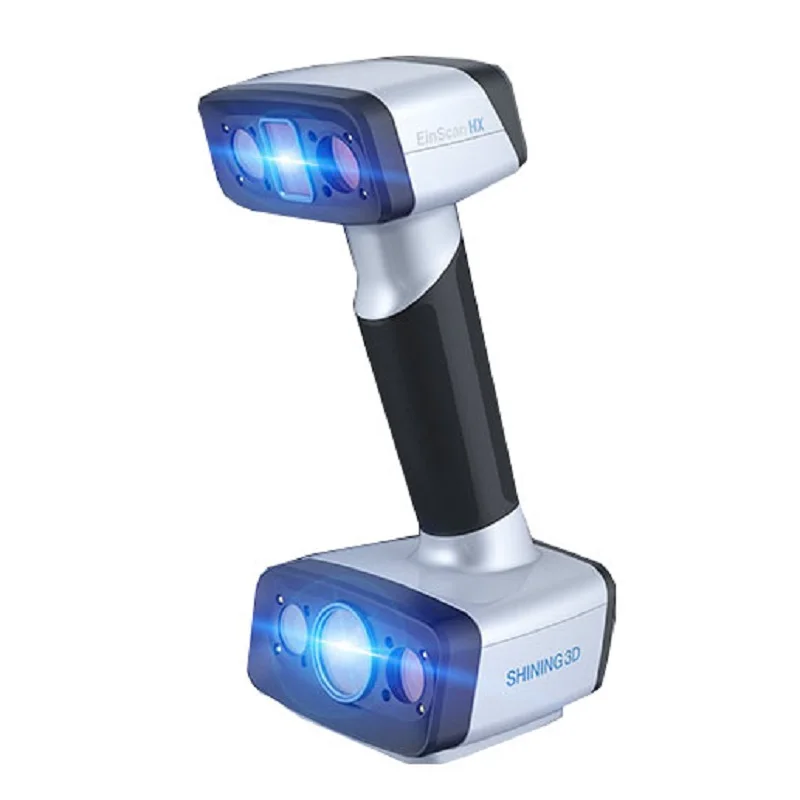
33. 3D Scanner with Tripod
You mostly see this excellent tool in movies; well, I’m here to let you know it is part of what a 3D printing enthusiast needs.
There can replicate anything with this scanner; this device would catch every detail and produce some awesome results.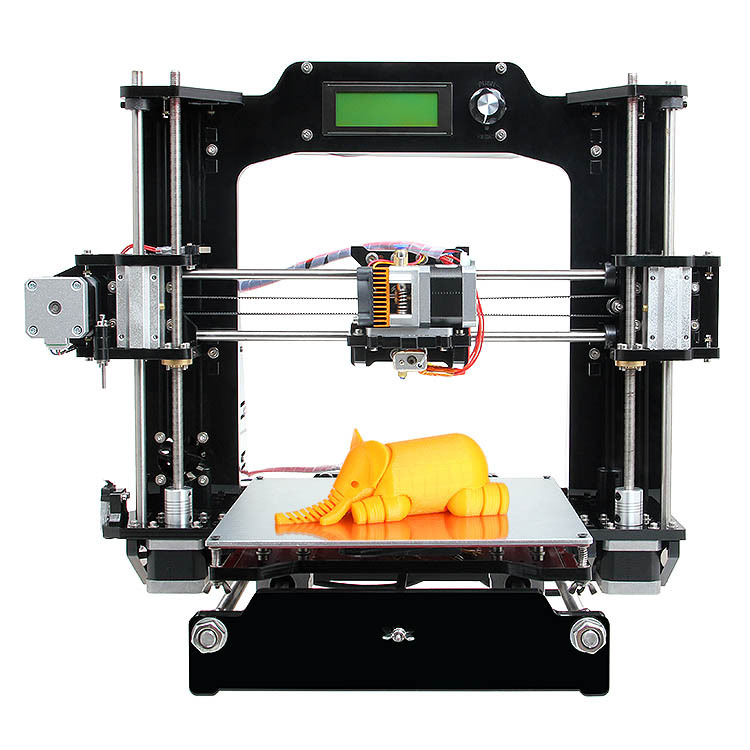
Available Here
34. 3D Printing Projects
Inspire in that enthusiast the zeal to keep printing and to keep testing new things. This book features a truckload of projects for every 3D printing lover’s stage.
From the kid printer to the adult printer, this is an excellent gift for a 3d printer because it would help it work and do what it was created for.
Available Here
35. Printing Spatula
Part of the job entails carving and cutting out some details of what has been printed, and this is the act of perfecting the work. Make this job easy for her by grabbing this printing spatula, and it does a great job with that.
Available Here
36. How Things Work – Hardcover
There are so many things we use these days, things we have come to be pretty familiar with to the point and have zero knowledge of how it works.
With this book and his curious mind, he learns how so many things work, including a 3D printer; this would give him an edge in the world, plus a more detailed understanding of the act of 3D printing.
Available Here
37. MFS1V1 3D Scanner
This is another extraordinary type of 3D scanner, and I included it on this list because of how it resembles a disk jockey. Your dear enthusiast would love this.
Available Here
38. Isometric Graph Paper Notebook
When I sat with someone who does professional 3D printing, I learned that getting a professional job entailed plotting some graphs, calculating here or there, and much more. With this graph notebook, your enthusiast can do a truckload of things and prepare notes that would help with the job.
Available Here
Wrapping It up on Gifts for 3d Printing Enthusiasts
Although the 3D printing field is not that vast, it has seen dramatic growth in the last few years. I first noticed something in this field on Star Wars and felt that purchasing a 3D Printer was too expensive, but today they are pretty affordable.
So if you are looking for gifts for 3d printing enthusiasts in your life, this gift guide has given you so many options. You can settle for the 3D printer tent or the 3D printer tool kit. If you feel they need another 3D printer, I have three here, and if you aren’t ready to get the expensive ones, you have the Mini 3D Printer and other accessories they will need. Thank you for stopping by; please have a great gift shopping.
Preparing a gift
Creativity
Subscribe to the author
Subscribe
Don't want
5
In connection with the departure of the head of the unit, it was decided to leave a small souvenir as a keepsake. Due to the tight deadlines (until the last they hoped that the management would not let him go):
half of Thursday and Friday for modeling and printing;
Saturday and Sunday for sanding and painting.
The gift turned out with defects in the form of scratches, moreover, it was fragile (the rays often fell off). nine0003
Thursday:
The finished models were in 3d Max and were incorrectly modeled for 3d printing there (polygons between different parts are not stitched).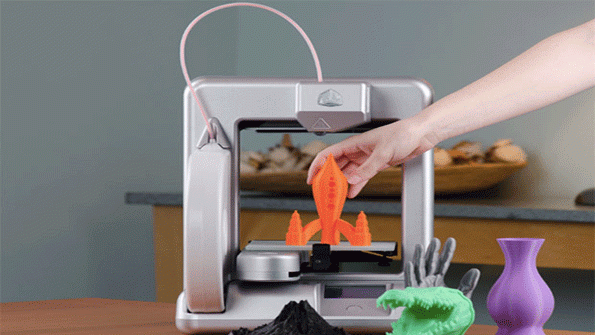 In connection with these, when saving in stl, gaps and complete horror appeared. The meshmixer and netfab failed to eliminate the defects (deleted small parts with ends). In 3D Max itself, it would be too hemorrhagic to stitch surfaces together (the mesh is fine).
It was decided to model in Solidvox, it took a little more time than searching for the finished model and 2 times less than manipulating to fix the model))
There was not much time left,
Therefore, the model was printed with a small infill of 10% and thin walls of 3 perimeters. It was a fatal mistake for which I had to take the rap later....
Friday:
The ball was printed in two halves, the rays were also divided lengthwise into halves, the stand was printed separately.
If everything went well with the balls and rays, then in the middle of printing the support ran out of plastic (we left for lunch without looking ...), I had to print this part again. nine0003
The ball leaned over with a bang, and the rays did the same (printed with ABS, glued with 'ABS').
Saturday:
Started grinding parts.
The beams were inserted into a screwdriver and leveled with a sandpaper (quickly and without any problems, except for 1 beam, which twisted the benefit was a spare one).
I had to tinker with the balls, because they were going to paint in silver paint, which glitters and partially reflects the image. The surface had to be perfect!
The ball was sanded, beams were glued, rubbed with alcohol and covered with primer. Since it’s hot outside, and the soil from the can stinks just like paint, they turned on the air conditioner and dust flew off with snow, which neatly stuck to the soil ... Without noticing this effect, after the soil dried, they covered it with paint and then all the defects crawled ... dust, under-skinned scratches, the model burst in a couple of places (in layers) due to the screed with primer and paint with a small wall thickness, which were still partially erased with sandpaper. A small filling led to the fact that the inner wall and the outer one practically did not stick together (the filling did not reach the walls, as a support).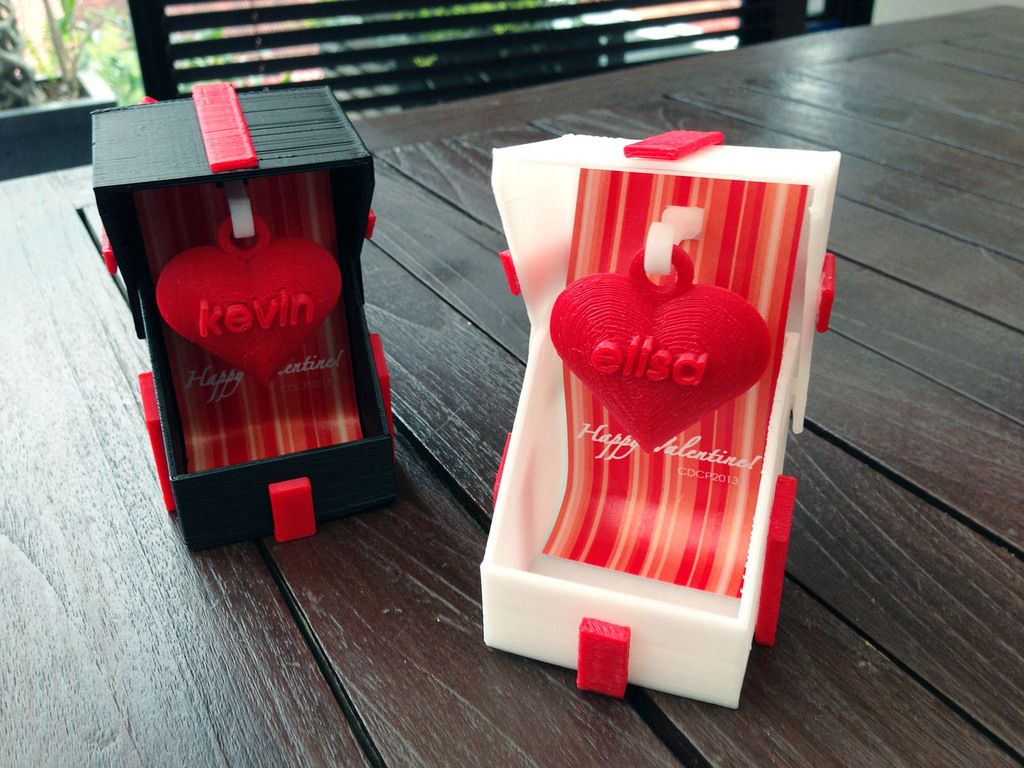 nine0003
In the upper part of the ball, 3 small holes were worn, each mm thick, which were not replaced when grounding, but were like a stain after painting ...
We waited until the paint dries, sanded again, covered the cracks and holes. At the moment of sanding, the rays at the base of the ball broke off.
Sunday:
We started all over again.
Sanded (it turned out already worse than 1 time), covered with primer, painted.
In parallel with this, the base was ground, which was very difficult to do this, since the large flat parts, but terribly strongly bend if you press a little harder. Painted beams stuck, but badly. The paint that was on the beams fell between the ball and the beam and the gluing was not tight. nine0003
Monday:
The model was handed to the boss.
As a result of these days:
I am not satisfied with the work, it turned out clumsily, many shortcomings, they did not have time to cover it with varnish (there were no tests between this paint and varnish).
Follow author
Follow
Don't want
5
Architectural 3D Printing Modeling Strategy and Software Use Guide
Brief Information
3D printing brings huge benefits to the conventional architectural workflow. You can print complex designs without the need for skilled craftsmen, and quickly modify these designs without too much difficulty. Stereolithographic (SLA) 3D printing delivers incredibly high surface quality and detail, making it suitable for architectural applications. This paper explores modeling strategies and software workflows that enable architects and designers to easily integrate 3D printing into existing design methodology, create best practices based on internal testing by Formlabs and architecture firms, successfully using Form 2 to create 9 models0003
WHAT YOU WILL LEARN:
Strategies for designing 3D printed architectural models
Tips for improving your workflow Pre-print processing software
- Building information model (Revit, ArchiCAD)
- Surface modeling (Rhino, SketchUp)
Effective post-processing techniques
- Compound
- Finishing
Introduction
The 3D printing market today offers affordable options in both price and scale. While professional-grade technology used to be costly, desktop stereolithography 3D printers allow architects, designers, and model makers to offer high-quality, in-house fabricated parts. nine0003
Most models cost less than $10 per part.
3D printing opens the door to creating complex designs with less effort and fewer materials, but the successful transition from CAD model to printable file is based on a basic understanding of design for 3D printing. This document will help you understand how standard modeling constraints relate to preparing a file for 3D printing, as well as approaches and decision making for intelligent modeling - from scale selection to design and assembly for post-processing. nine0003
To integrate these strategies into existing workflows, this booklet explores ways to approach modeling strategies tactically by examining three of the most common software ecosystems: allows you to include small details even on the smallest models. This example of a small city model has a scale of 1/32″ = 1’ and is completely printed on a Form 2 3D printer. Many small details and parts of this design will take significantly longer if cut and assembled by hand. Model from LaneyLA Inc.
This auditorium section was 3D printed as one piece on a black resin Form 2. Model from DLR Group.
Modeling strategy
Architectural models are usually assembled using various materials and components. 3D printers help combine these components into as few separate parts as possible, but assembly manipulation is still necessary for two reasons:
- Build volume limitations : High build volume printers are either expensive or compromise on surface quality. Form 2 build volume is 57 x 57 x 69 inches (145 x 145 x 175 mm)
- Need to show interior details or materiality : Some models require components to be separated to show more design information.
DESIGN FOR ASSEMBLY
All 3D models require preparation before they can be sent to the 3D printer.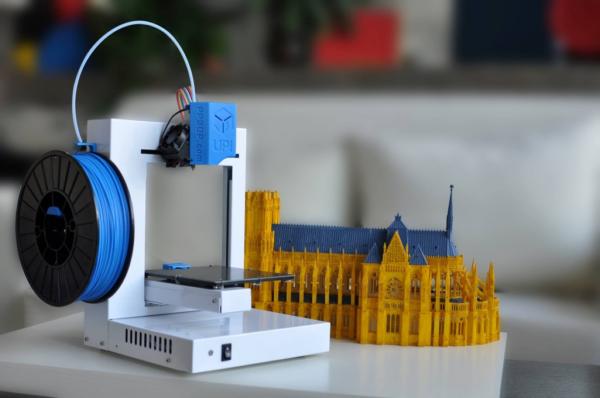 In the case of architectural models for the Form 2, this often involves splitting the model into smaller parts to fit the scope of the Form 2 build. The parts can then be easily joined together by chemical adhesive or mechanical assembly; high precision printing ensures that the parts fit together.
When choosing dimensions for parts to be separated, consider the final orientation of the model. Most architectural prints need to be oriented at a 45 degree angle due to floor slabs being considered large horizontal projections. Dividing the model into long, thin parts helps maximize the diagonal length of the build volume while achieving perfect orientation
Strategy overview
There are several strategies for assembling 3D printed models. Your strategy will depend on what you hope to represent with the design, as well as the scale and geometry of the model. Consider the following parameters:
- Need to show internal or external parts
- Easy Split (You want to split the model by the least complex part of the model)
It is necessary to show a certain part of the program: typology, structure, floor layout
| Seam separation | Separation by component |
| Section model | Separation by program |
| Straight cut | Separation by structure |
| Aligners |
Splitting at a seam
STRAIGHT CUT
The easiest way to split a model is with a straight cut.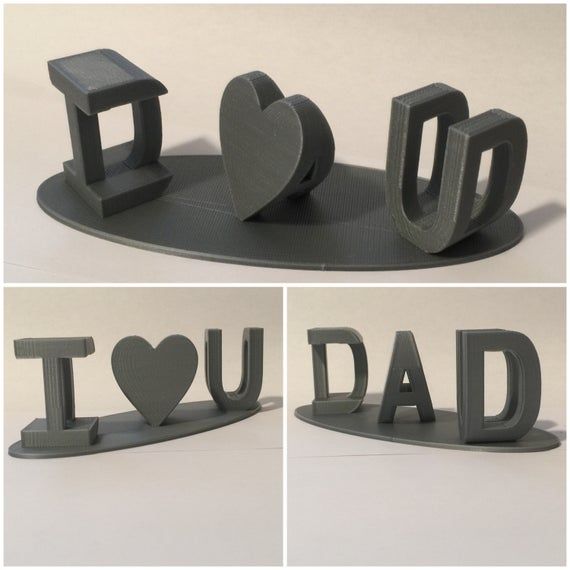 This is a simple command to execute in most CAD software. The bridge model is divided lengthwise using straight cuts into four parts, one of which is shown above. Each support post is inserted into
mating hole that does not require glue. Regardless of which method you choose, if you have a large number of parts (more than 10), it can be helpful to add a unique identifier for each part to help solve the puzzle during assembly.
Pros:
- Least heavy use of CAD
- Greater tolerance for prints that warp or have a higher degree of dimensional change nine0095
- Assembly requires manually leveling each piece and fixing it in place until the adhesive is fully bonded
- Easy alignment Parts that are not accurate
- Easy to assemble (mating parts help create a large surface area for adhesion)
- High precision SLA allows tight fit with high tolerance and can be used without adhesive
- Parts that are not true to size will not fit well. High fine details are often less accurate. nine0092
Cons:
Try to print all components in the same orientation so that the layer lines and subsequent dimensional inaccuracies follow the same pattern.
ALIGNMENT TOOLS
Another approach is to add features to the design that will allow the prints to align. When adding mate fixtures, try to subdivide the model in areas with the least complex geometry. Use the CAD tool of your choice to split your model and add basic alignment fixtures such as slots, pins, grooves, recesses and flanges, or more complex fixtures such as dovetails and cuts that follow existing model curves. In addition, it is important to create a design with ~0.25 mm tolerance between mating parts to prevent additional sanding at the post-printing stage. nine0003
Pros:
Cons:
SECTION MODEL
The separation of the model with a seam has the additional task of showing the section model for structures with irresistible interior details. Initially, the model can be presented as a whole to the client, and then disassembled to reveal interior details as desired. These LaneyLA examples show how the same model conveys different types of information based on open and closed configurations
This model from LaneyLA was printed on a White Resin Form 2. nine0003
Using devices for combining: Methods component
SOFTWARE SPLIT
By breaking a building into a program, you can represent the building as a set of parts, providing a clear understanding of all design components without a plan and section drawings. You can print each floor slab separately and then assemble using mates, or just print one component of the entire building separately from the rest. A good example is the model from Stanley Sitetowitz | Natoma Architects Inc (SSNAI), who used the Form 2 to model the residential complex. nine0003
Model by Stanley Sitetowitz | Natoma Architects Inc.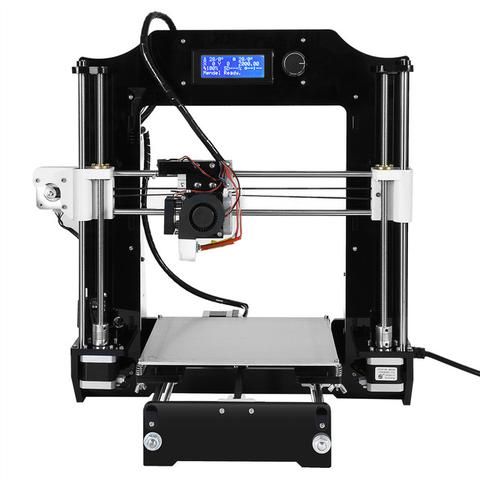
Since each body block followed the same pattern, it makes sense to simply print one detachable block that will allow the customer to understand the typology of the typical device to print as a single block or separate along the seam. nine0003 This method usually works for models that do not have straight lines, such as typical building blocks, but complex structures, such as detailed building sections, bridges, pavilions, or airports. First, break these models down into components that can be 3D printed with minimal supports. This saves post-processing time (removing supports for delicate models can be tedious) and reduces material costs and print times. nine0003 This bridge example demonstrates multiple partitioning methods. First, the model is divided into several parts (Figure a). While they fit the Form 2 build platform, they require painstaking removal of supports around more delicate areas such as cables and railings. To solve this problem, each part is broken down into three sub-components: base plate and railing, vertical tensile cables, and solar panels on top (figure b). They can be printed with significantly fewer supports, making it easier to finish, Once completed, the components simply need to be assembled using the alignment functions that were included in the design phase. Smaller parts are also easier to place on a single build platform, with the entire bridge being printed from five 100ml parts. Model from T.Y. Lin Architects This playground model was created using laser-cut fiberboard. The primary building was 3D printed from clear and white resin. nine0083 Model by Schwarz Silver Architects Materials play an important role in conveying the basic design concept. It is not always necessary to model the exact color and texture of a material, but it can help separate different materials. The transparent façade is illuminated from within, simulating the visual conditions of this site at night. nine0120 Black, White and Gray out of the printer have a smooth, opaque finish and provide an excellent neutral palette for architectural models. Gray and white resins are also easy to process and can be finished with just a few coats of paint, as discussed further in the finishing section of this document. Formlabs Clear Resin is excellent for printing features that mimic translucent materials. If your model requires more transparency, you can simply dip the printed part in clear resin and let it dry evenly, as described in this article on making clear resin parts. You can also spray any clear coats on the model to increase the transparency and glossiness of the surface. 3D PRINTING AND TRADITIONAL MATERIALS This model uses the Form 2 to print very fine details such as the cornice, clock and railing. Model by Miles Burke Architectural Models Inc. Instead of 3D printing an entire building, sometimes it's better to print only complex components. Complex facades, slings and cornice details are excellent candidates for SLA 3D printing. Flat walls, floor slabs and topography can be laser cut or even hand-drawn This complex façade is parametrically designed based on solar trajectory analysis and would be incredibly difficult to fabricate in any other way at this scale. Good printing comes from a well-designed 3D model. This section will cover modeling best practices and workflows for printing in some of the most common CAD environments: Revit, SketchUp and Rhino CAD software is typically the biggest bottleneck in the transition from drawing to 3D printed model 901 PreForm 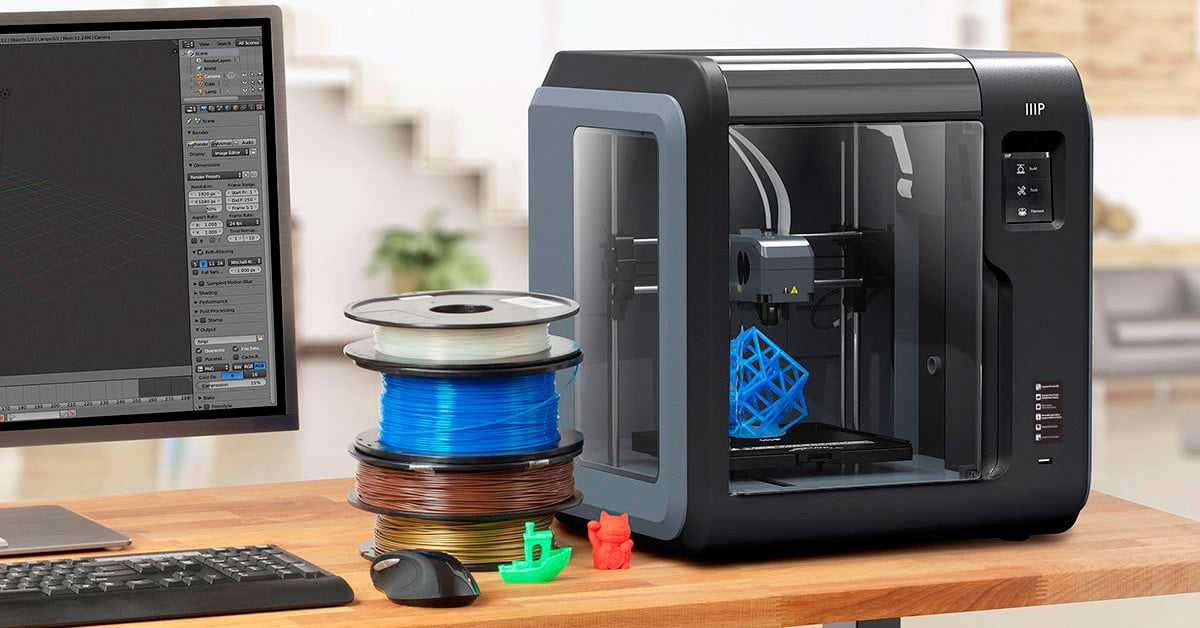
Materials
 Dividing a model into its components allows for the display of materiality, as parts can be printed in different materials or individually dyed in different colors.
 Formlabs Matte Resins
 nine0003
 Software workflow
General workflows
IMZ workflow
IMZ workflow
Although BIM (Building Information Model) software is popular with architecture firms, it is not always used for direct 3D printing models.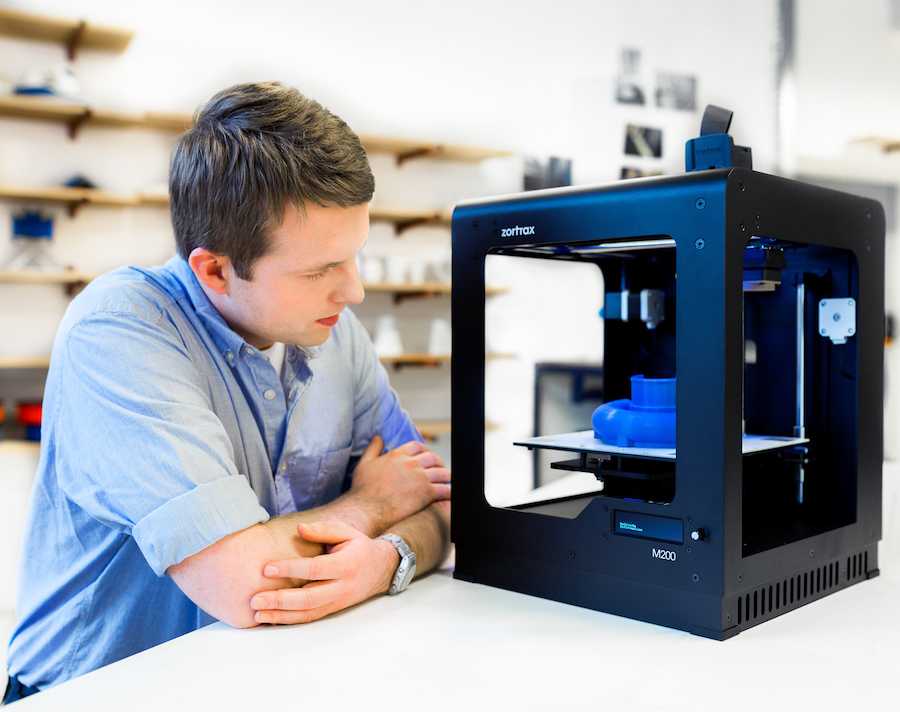 There are some high level steps that you can take
take to create a 3D printed model from these programs. This workflow is widely applied to Autodesk Revit or Graphisoft ArchiCAD software, both of which are IMZ parametric modeling programs.
PREPARE THE FILE
STEP 1: Prepare a separate offline file
STEP 2: Manage components: remove ducts, double glazing, HVAC units and internal parts that will not be visible in model
STEP 3: Select all components to be sealed (eg doors, windows, walls, slabs). The parametric nature of the model allows you to simultaneously compact the dimensions of several objects.
EXPORT FILE
Select the scale at which you want to export the file. Select export options depending on the needs of your model:
EXPORT AS STL
Exporting the file as a mesh is very difficult to manipulate, so this is only useful if you don't want to edit any geometry after this step. You can then use your software to correct the mesh of your choice, as well as subdivide the mesh along the main Cartesian planes. nine0003
EXPORT AS 3D DWG
Export as surfaces allows you to easily manage and edit geometry in Rhino or SketchUp. This step is recommended for those who want to split the model programmatically or by component, or split by a seam that is not on a normal Cartesian plane. You can then export the STL file from Rhino or from SketchUp using the plug-in
EXPORT USING ARCHICAD
Perform a geometry transformation to Morphs and a "consistency check" before exporting the model as STL. When printing in parts, use tool
"Divide" to cut the model for multiple print platforms if needed. This operation basically creates printable files, but a quick check in mesh repair/analysis software never hurts.
USING STL REVIT EXPORTER
This method automatically removes smaller details such as doorknobs and railings. However, it is not reliable and still often requires some post-processing in other CAD environments before being sent to print. nine0003
Surface Modeling Workflow
AutoCAD → Rhino/SketchUp → Model Diagnostics → PreForm
This workflow is often an easier approach and starts with 2D drawings solely for the purpose of 3D printing
FILE PREPARATION STEP 1: Hide unwanted layers STEP 2: Identify and remove unnecessary elements such as furniture, trees, etc. EXPORT FILE STEP 1: Export the simplified drawing from Rhino as DWG STEP 2: Import into Rhino STEP 4: Start extruding and trimming until you get the outer shell. STEP 5: Export as STL STEP 6: Mesh Analysis/Correction STEP 7: Import to PreForm Note: If the model will be printed in several parts, split it before exporting as STL THICKNESS WITH RHINO Instead of parametrically controlling the thickness of the components directly in the BIM file, you can also use the BoxEdit component in Rhino. This allows you to simultaneously scale a number of elements in relation to their center lines. BoxEdit is ideal for models that need to be scaled parallel to three Cartesian axes. Non-uniform scaling is a little trickier. nine0003 For non-rectilinear geometries, we suggest converting the part to a mesh and then using the Weaverbird thicken command, which simply offsets any non-standard mesh geometry outward by a given distance. Alternatively, it is possible to "split" complex parts into surfaces and then offset them instead of importing volumes from Revit. SELECTING SMALL GEOMETRIES WITH RHINO Another valuable Rhino feature is the SelSmall command, which allows you to select all elements in the Stage that are smaller than the custom bounding box. You can then select those objects and use BoxEdit for individual scaling or just remove them. This is useful when you are dealing with a file that does not have a well organized layer system. Although performing a logical connection on all geometries is ideal, often the problem can be solved with simple overlapping geometries. PreForm will interpret them as one closed geometry in most cases, but be sure to check printability with the "slicer" tool in the right pane in PreForm . CONTINUOUS / LOGICAL JOINT GEOMETRY Note : PreForm is Formlabs free software that prepares your 3D model for printing in Form 2. Once the part is set up, you can save it as a FORM file for future use in preform. COMPUTATION WORKFLOW Although it is a less common workflow, computational design is slowly being introduced into mainstream architectural workflows. Software such as Grasshopper and Dynamo are used to create parametrically generated geometries that are often so complex that they can only be created with 3D printing. nine0003 Since geometries are already easy to manipulate, it's usually best to create a separate component that allows you to easily control the basic dimensions of all thin objects. MeshMixer) and resizing until you arrive at a printable file. All workflows described below share a potential "generic diagnosis". This is an optional (but often necessary) step to ensure that the model is fully printable. Free programs such as Autodesk's MeshMixer and Netfabb are tools that allow you to repair, smooth, cavity, and split 3D print files. nine0003 MESH FIX Formlabs PreForm software uses Netfabb's built-in mesh fix, so NetFabb and MeshMixer must be used for custom fixes or to preview problem spots in print. Materialize Magics is a great proprietary tool that covers the entire preprint workflow for a wide variety of printer types. The mesh patching software part is most important to the Form 2 print workflow and can save you a decent amount of preparation time. Netfabb has a beautiful built-in model cutter that allows you to effectively split and restore large files along any Cartesian plane. SPLITTING THE MODEL It is also possible to split the model in NetFabb, which splits and fixes the split parts into printable volumes. In Rhino, you will need to close open volumes. Be sure to leave a tolerance of ~0.25mm between adjacent parts, this will allow them to be inserted without friction. See our technical data sheet for details on tolerances. PREFORM SLICER Architectural models are highly detailed and it is often difficult to isolate each print issue. A combination of the above practices and mesh repair software is usually used for almost all problems, but it's always wise to use the PreForm Slicer tool to make sure there are no thin unsupported areas and enclosed volumes (such as rooms with no doors, elevator shafts, and parking spaces) . nine0003 “Building and architecture structures are not meant to be 3D printed, they are meant to be built. This creates problems of scale and complex geometry. Matt Lemay. Lead Enterprise Solutions Provider, Autodesk Customer Service The modeling strategy section of this booklet covers some ways of splitting and aligning parts together, but glue is always needed to securely join. Architectural parts are bonded in two main ways: CYANOACRYLATE Cyanoacrylate (CA or Super Glue) creates a fast, strong enough bond, ideal for small to medium sized parts. CA does not bond dirty surfaces well, so be sure to thoroughly clean the part before applying adhesive to the surface of the model. nine0003 POLYMER For smaller prints, you can use liquid resin as a binder. Dispense a small amount of resin into the tray from a bottle or cartridge, use a dropper or syringe to lift it up, and place it on the surface of the part to be bonded. Join parts and wipe off any excess resin that may be spilling around the edges. To cure the resin and bond the parts, use a 5 mW laser pen at 405 nm and point it at the bonding area around the parts. nine0003 This method creates a chemical bond, just as if the part had been printed on your SLA 3D printer, but only applies to small bonding surfaces because a low power laser pen cannot penetrate the model deep enough to create a strong bond . FINISHING Parts printed on Form 2, especially matte standard resins, have a smooth surface immediately after exiting the printer. However, visible areas with supports almost always require sanding. In addition, you can prime and paint parts in any desired color. nine0003 GRINDING Sanding will help you remove the support marks and any remaining inaccuracies from your model. Start by carefully dry sanding the surface of the part using ~150 grit sandpaper to remove large support marks and smooth out the edges of the joint. In most cases these two steps will create a fairly even finish, but you can continue to increase the grit size of the sanding paper by a factor of 2 and use wet sanding on the entire piece until the surface is the desired smoothness. Once you have finished sanding your model, wash the model in soapy water to remove any dust or debris and dry thoroughly before proceeding to the last step. The architectural models are very detailed and it is quite difficult to access certain areas with only sandpaper. You can use different sizes of nail files to get to problem areas of the model. nine0003 PRIMER AND PAINTING Priming is required before parts are painted to ensure the paint adheres to the surface. Priming can also make it easier to find areas that require additional finishing. General plastic primer gray matt shows details very well. Apply it to surfaces in several thin layers for best results. Continue sanding in critical areas, reapply a light coat of primer and repeat this process until the entire part is smooth. Most spray paints work best in warm, slightly damp conditions with no airflow, but always check the specific paint or data sheet for manufacturer's recommendations. nine0003 “Models are becoming rarer in a field where photorealistic renderings and virtual reality technology are advancing, but physical models allow architects to test spatial qualities in ways that digital models cannot. If we weren't using a 3D printer, we would be forced to spend more time visualizing designs through renderings and drawings. Being able to get a physical model of a complex design straight from a 3D CAD model gives us several impressive looks in less time.
 In this case, it's a simple matter of trial and error; running the exported geometries with a print test (PreForm,
 Model Diagnosis
 nine0003
 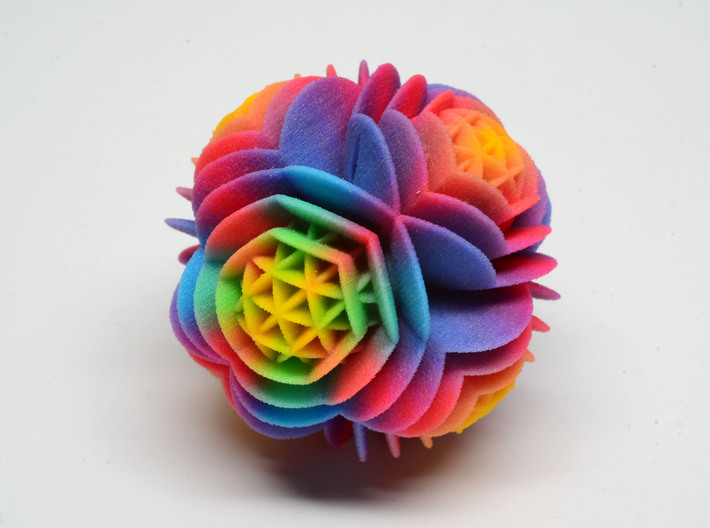 By combining Netfabb's powerful mesh repair tools with the precision of the Form 2, you can prototype and visualize designs faster and in more detail, benefiting more for your business and speeding up your project's design review process.”
 Post-Processing
Joining

 Once the surface of the part is smooth, wet sand with 320mm sandpaper to remove any remaining layer lines. Move the sandpaper randomly to avoid grain formation. nine0003
  A quick spray of primer over the model makes the support marks very visible, so you can instantly identify areas that need additional sanding.
Learn more