Best small 3d printer 2023
Prusa MK3S+ 3D Printer Review: The Heavyweight Champ Continues to Dominate
Tom's Hardware Verdict
The Prusa MK3S+ continues to hold its own in a market saturated with low-cost competitors.
Pros
- +
+ PrusaSlicer provides best-in-class model slicing
- +
+ Flexible build platform sets the standard
- +
+ Automatic bed leveling
- +
+ Stealth Mode enables a nearly silent printing experience
Why you can trust Tom's Hardware Our expert reviewers spend hours testing and comparing products and services so you can choose the best for you. Find out more about how we test.
There are few 3D printers with as many industry accolades as the Prusa i3 MK3S+, and after spending some time with this printer, it’s easy to see why it’s one of the best 3D printers currently on the market. With a price tag of $999 for an assembled machine or $750 for a DIY kit, the price point of the MK3S+ is towards the high end for an open format consumer 3D printer, but the features of this machine and the ecosystem created by Prusa (they make their own hardware, software, filament, and more) have made the MK3S+ a formidable machine for anyone interested in taking their 3D printing game to the next level.
The features of the MK3S+ (silent stepper drivers, power-panic, etc.), noteworthy when originally launched, have largely become standard on lower-cost machines and may not seem particularly impressive on a spec sheet. However, clever software implementation and well-written documentation have created a machine that provides a best-in-class printing experience. For instance, the auto-leveling SuperPINDA probe of the MK3S+ maps the build platform for surface distortions, but the printer firmware is capable of storing multiple Z-offsets so you can switch build platforms without having to recalibrate every time.
The MK3S+ is a visually distinct machine; and the Prusa team has kept their black and orange color scheme for their smaller printer, the Prusa Mini+. The bright orange printed parts on the MK3S+ have created instant brand-recognition for the Prusa line of printers, and Prusa has doubled down on this by reinforcing their branding across their machine. In fact, you can find the word ‘Prusa’ printed, engraved, or etched into the MK3S+ in 25 places, 29 if you’re using a spool of their Prusa Polymers Prusament PLA material.
Specifications
Swipe to scroll horizontally
| Machine Footprint | 16.5 x 16.5 x 15 inches (42.0cm x 42.0cm x 38.0cm) |
| Build Volume | 9.84 x 8.3 x 8.3 inches (250mm x 210mm x 210mm) |
| Material | 1.75mm PLA, ABS, ASA, PETG |
| Extruder Type | Direct Drive |
| Nozzle | .4mm |
| Build Platform | Magnetic Heatbed with removable PEI spring steel sheets |
| Power Supply | 240 Watts |
| Connectivity | USB, SD Card |
| Interface | 3.4-inch Mono LCD and click wheel |
| Filament Run-Out Sensor | Yes |
Included with Prusa MK3S+
The fully assembled Prusa MK3S+ ships with all of the accessories required to make your first print, and also includes enough spare parts to replace almost every fastener on the machine. The fully assembled MK3S+ also includes a bag of Haribo Goldbears, a signature addition from the Prusa team.
Image 1 of 2
(Image credit: Tom's Hardware)(Image credit: Tom's Hardware)The Prusa MK3S+ includes a full spool of silver PLA material, screwdriver, a metal part scraper, a glue stick (for adhesion), an isopropyl alcohol wipe, lubricant for the linear rails, power and USB cables, a sheet of stickers, a printed handbook, and a diagnostic printout that confirms the functionality of the mechanical and electrical systems.
Image 1 of 2
(Image credit: Tom's Hardware)(Image credit: Tom's Hardware)The usefulness of the handbook is hard to overstate. When you’re starting out with your first 3D printer, it can be difficult to pinpoint the cause of problems such as loss-of-extrusion, poor layer adhesion, or a clogged extruder. The included handbook is full of detailed photographs, troubleshooting workflows, and solutions to common problems. This is an invaluable resource for beginners, amateurs, and experts alike, and it’s clear to me that Prusa has set the standard for technical documentation.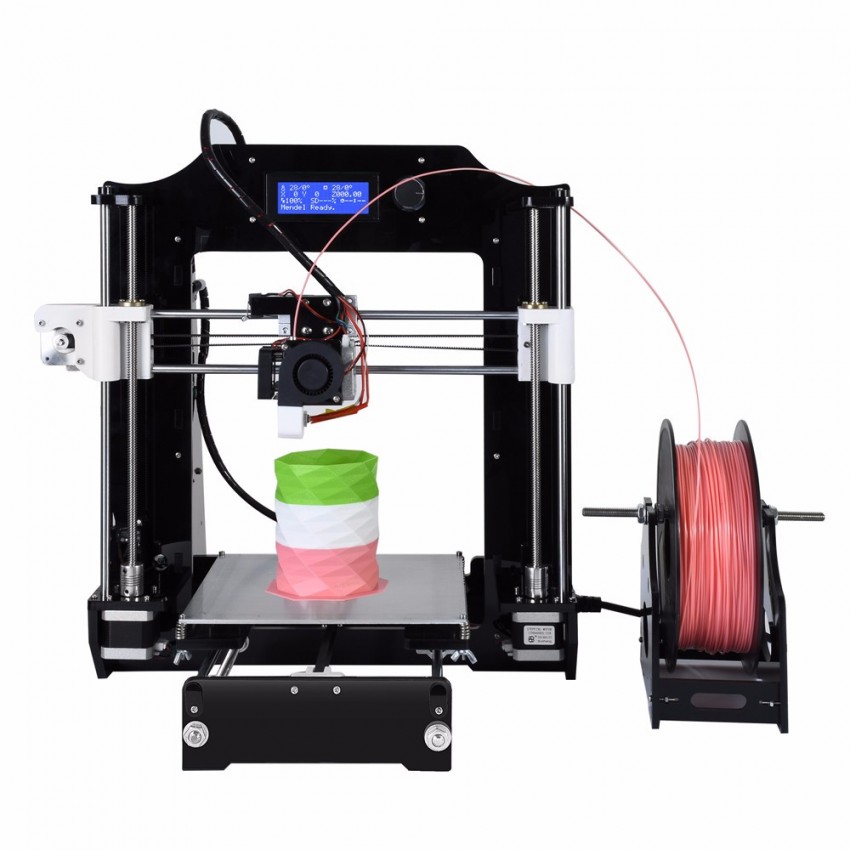
Setting up the Prusa MK3S+
(Image credit: Tom's Hardware)The Prusa MK3S+ ships with a completed print attached to the build platform. This print features a serpentine line with 90 degree angles, curves, and a solid block in the center with the Prusa logo facing upwards. This print serves to confirm that the printer is functional and has been properly assembled and calibrated. I was able to easily remove the print from the build platform by bending the steel sheet and carefully removing it.
(Image credit: Tom's Hardware)After powering on, the printer automatically runs through an initial setup process. This process involves calibrating the Z axis by running it all the way to the top of the printer, running the mesh bed leveling process to set the Z offsets, and loading the filament. This entire process only took me a few minutes, and the high level of automation involved means that the only thing I needed to do was insert the filament into the extruder after it had heated up.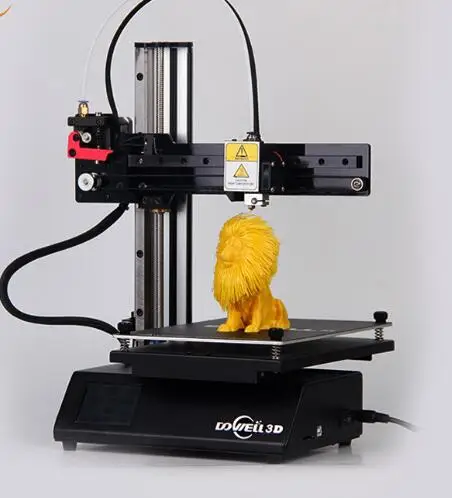
You might be surprised to find that the Prusa MK3S+ is based on the RepRap i3 (third iteration) frame, originally released in September of 2012. Despite this nearly decade-old release date, the MK3S+ is full of modern advancements and enough innovative features to still be a top contender in the prosumer 3D printer market.
Image 1 of 2
(Image credit: Tom's Hardware)(Image credit: Tom's Hardware)The bright orange color makes the 3D printed parts on the MK3S+ easy to spot. The brackets mounted to the printer are printed in-house by Prusa using their own Prusament PETG filament. These brackets are robust and sturdy, and the uniform appearance between the printed parts give the printer a professional appearance. This version of the MK3S+ shipped with orange printed brackets, but the printer is also available in an all-black variant. A large selling point of the MK3S+ is the open-source nature of the machine, which means the printed parts are all available to download if you want to download, modify, or print them out yourself.
The monochrome LCD interface and click-wheel on the MK3S+ is one of the few less-than-impressive features on this machine; it feels dated and the UI navigation can be a little clunky. This stands in contrast with printers like the Anycubic Vyper, a sub-$400 machine that features a bright and responsive color touchscreen that shows detailed print statistics during printing. This monochrome display was industry standard when the original 8-bit i3-style of printers was introduced, but it feels outdated when compared to recent printers with color touchscreens.
(Image credit: Tom's Hardware)The MK3S+ uses a filament spool holder that mounts directly to the frame of the printer. The T-shaped holder is able to hold two spools simultaneously, which is ideal if you plan on swapping between multiple colors to produce a multicolor 3D print. The direct-drive extruder on the MK3S+ feeds filament straight down into the hot end, so mounting the filament directly above the extruder gives the filament a straight path between the spool and the extruder.
At the heart of the MK3S+ is the 8-bit Einsy RAMBo board, housed in a 3D printed enclosure mounted to the frame of the machine. This board is equipped with Trinamic 2130 silent stepper drivers, user-replaceable fuses, and the cable management is clean and professional.
The features made possible by this board (power-panic, live-Z adjust, silent steppers) were all major leaps when originally introduced, but many of these features have made their way down to less expensive FDM 3D printers like the Elegoo Neptune 2. The interface feels sorely in need of an update, and the addition of a color touchscreen and a 32-bit board (such as the one equipped on the Prusa Mini+) would refresh this platform.
(Image credit: Tom's Hardware)The attention to detail on the Prusa MK3S+ is clear, and a perfect example of this is the wire management across the machine. Current-carrying wires are attached to the extruder module with zip ties that act as a strain-relief to prevent the wires from fatiguing and separating. The wires from the power supply are tucked neatly under the frame of the machine, out of sight and reach from users to prevent accidentally unplugging them during printing.
What Makes the Prusa MK3S+ Different?
It can be hard to understand why the Prusa MK3S+ costs so much more than a printer like the Creality Ender 3 Pro, which seems to have similar specs on paper. To understand why this machine is so much more expensive, we need to take a closer look at the individual components of the MK3S+.
(Image credit: Tom's Hardware)Critical to the success of the MK3S+ is its custom-made Delta 240 Watt power supply, mounted to the frame of the machine. This unit supplies 24V power to the bed with a max current of 10 Amps, which provides fast and reliable heating for printing high temperature materials like PETG and ASA. Less expensive machines typically use lower wattage power supplies, such as the 150W power supply used by the Flashforge Adventurer 3 Lite, which take longer to heat and can have difficulty maintaining a higher temperature.
The 24V heated bed is able to reliably hit 100C, which is more than enough to allow high temperature materials like PETG and ASA to adhere to the build platform without delaminating. The magnetic build platform is firmly held in place without any clips or latches and can easily be removed once it cools to room temperature. PETG in particular is easy to remove from the textured surface of the textured spring steel sheet, and the MK3S+ build platform is best-in-class for high-temperature adhesion.
Image 1 of 2
(Image credit: Tom's Hardware)(Image credit: Tom's Hardware)The MK3S+ is equipped with a genuine E3D hot end, and it has the holographic sticker to prove it (seriously). E3D manufactures every component in the hot end from the nozzle to the heatbreak which means you are very unlikely to run into the type of manufacturing defects that occasionally pop up on less expensive printers (incorrectly drilled nozzles, degraded PTFE tube liner, etc. ) In addition, this nozzle is rated for a max temperature of 300C (572F), which is easily hot enough to extrude most common thermoplastics and even some higher-temperature engineering-grade materials like Nylon and Polycarbonate.
Image 1 of 2
(Image credit: Tom's Hardware)(Image credit: Tom's Hardware)The printed parts on the MK3S+ are a perfect example of a company applying its in-depth knowledge of a subject to its product. The printed brackets found on the MK3S+ have been printed in PETG, and the outward-facing textured surface shows the level of quality you can expect from using a textured sheet.
In addition, I appreciate that Prusa has applied DFAM (Design for Additive Manufacturing) principles to these parts. These DFAM principles include concepts like printing hexagons instead of circles for relief holes, which print without requiring support material, and printing brackets perpendicular to their intended load to create mechanically tough parts.
(Image credit: Tom's Hardware)The Prusa MK3S+ comes equipped with a SuperPINDA probe which is used for hands-free leveling of the build platform. The SuperPINDA (which stands for Super Prusa INDuction Autoleveling sensor) operates by detecting the proximity of the probe to the build platform and storing that information in firmware. The MK3S+ isn’t the first printer to use a probe for bed leveling, but the software implementation in PrusaSlicer means that after the printer has been set up, you can print without spending much time thinking about calibration.
Compared to the manual bed leveling process of a printer like the Creality Ender 3 Pro, the MK3S+ is faster, easier to use, and requires less trial and error. PrusaSlicer includes a “G80” command in the start G-code (the instructions the printer reads when making a part), and this command performs a ‘Mesh Bed Leveling’ which probes the bed in a 3x3 grid to create a mesh surface that is used for calibration. This mesh surface causes the Z-axis motors to undulate over uneven areas while the print head remains perpendicular in the X/Y axis.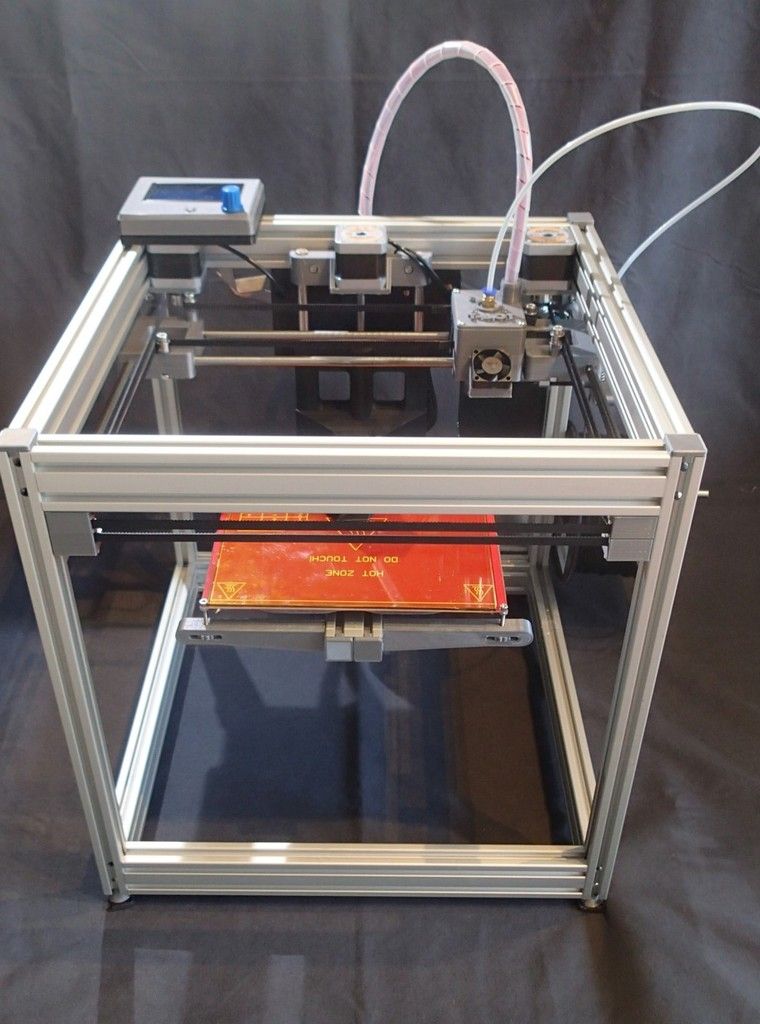 During my testing, I didn’t need to run a single non-print calibration on the printer after the initial mesh bed leveling.
Build Platforms on Prusa MK3S+
(Image credit: Tom's Hardware)Removing a printed part from the build platform of a 3D printer can be a challenging experience if the printer isn’t calibrated correctly. The Prusa MK3S+ attempts to solve this problem by using a removable build platform that is held in place magnetically and can be flexed to remove parts after the platform has cooled. I’ve tried many different types of build surfaces, and the smooth PEI sheet used by Prusa is by far one of the easiest to print on, remove parts from, and clean.
(Image credit: Tom's Hardware)Prusa also offers a textured steel build platform for the MK3S+ that has a gritty surface which can give printed parts a more uniform appearance. In fact, the signature textured look of the printed parts on the MK3S+ come from this build platform.
Parts printed on a smooth build platform will have a smooth bottom surface, which looks visually distinct from the striations on the sides of the part. By using a textured sheet, I was able to make prints that have a textured appearance on the bottom as well as the sides. This sheet is ideal for printing with PETG; the high print temperature of the material requires a textured surface to stick to, but also needs a surface that it can easily detach from.
Printing on the Prusa MK3S+
(Image credit: Tom's Hardware)The sample prints on the included SD card with the Prusa MK3S+ are a refreshing change from the sample parts that are typically included with low-cost 3D printers. The MK3S+ includes 16 pre-sliced parts that have been prepared for PLA with the total print time included in the file name. The sample prints vary in time from 23 minutes (a simple block with the word PRUSA on it) to almost 14 hours (a castle printed at .1mm layer height), and have all been prepared using sensible settings for the machine and highlight various features (variable layer height, multicolor printing, and fine .1mm layer resolution).
Image 1 of 2
(Image credit: Tom's Hardware)(Image credit: Tom's Hardware)One of my favorite sample parts is the planetary gear bearing that prints in a single print. I printed this model using the Prusament Jet Black PLA material, and after removing it from the build platform I was able to easily spin the gear freely. This part really highlights the ability of the MK3S+ to produce parts with functional strength and purpose in addition to parts designed with aesthetics in mind.
(Image credit: Tom's Hardware)Another stand-out sample print included with the MK3S+ is the dragon model titled Adalinda the Singing Serpent by Loubie3D. This model takes a little longer to print (about 8 hours), but the final print is another favorite of mine. Because this model was sliced by Prusa for the MK3S+ printer, the sample print comes out with a high level of detail and no unexpected settings that can cause problems (too many exterior shells, no retraction, etc. ) like the sample prints included with other FDM 3D printers.
Printing with PrusaSlicer on the Prusa MK3S+
(Image credit: Prusa)Prusa has developed its own in-house slicer for the Prusa MK3S+, called PrusaSlicer. PrusaSlicer is a fork of the confusing-to-pronounce Slic3r app, which is also a free and open-source app. Prusa has invested a considerable amount of time and effort in PrusaSlicer, and this has translated into one of the most powerful 3D printing slicer apps available for desktop 3D printers on the market.
(Image credit: Prusa)The current version of PrusaSlicer (2.3.3) includes profiles for printers by Prusa, Creality, Lulzbot, and more, and also includes a library of material profiles. In addition to these profiles, PrusaSlicer also includes multiple print setting profiles, which range from ultra-high detail at 0.05mm layer height to a draft mode which offers .3mm layers fast print speed at the expense of reduced quality.
Slicing Models in PrusaSlicer for the Prusa MK3S+
(Image credit: Prusa)PrusaSlicer is a feature-rich program with a simplified interface that is accessible to beginners, experts, and everyone in between. I’ve spent a lot of time in the PrusaSlicer settings, and I appreciate how much work Prusa has put into making almost every parameter of the printing process addressable without creating an overwhelming interface.
The settings are broken down into three primary categories: Print Settings, Filament Settings, and Printer Settings. Print Settings generally focuses on the speed / quality of the print, Filament Settings is used to determine temperature and extrusion parameters, and Printer Settings is used for global parameters and determining start / stop instructions.
(Image credit: Prusa)The primary interface offers three settings: Simple, Advanced, and Expert. Simple offers a stripped-down experience with only a few parameters able to be adjusted, while Advanced and Expert allow you to adjust the print on a more granular level.
PrusaSlicer Quality Settings for the Prusa MK3S+ / PLA
(Image credit: Prusa)Swipe to scroll horizontally
| Material | Prusa Basic PLA, Silver |
| Layer Height | 0.20 mm |
| Infill Percentage | 15%, Gyroid |
| Print Speed | 45mm/second |
| Extruder Temperature | 215 degrees Celsius (419 degrees Fahrenheit) |
| Heated Bed Temp | 60 degrees Celsius (140 degrees Fahrenheit) |
| Print Time | 1 Hour, 34 Minutes |
There are few prints that are better at testing out a printer than the 3DBenchy, so I used the included spool of silver Prusa PLA to print this model out using the default . 2mm Quality PrusaSlicer settings. I was impressed with the overall quality of the Benchy, and even with a highly-reflective material like a silver PLA which can highlight defects from uneven layers, the layers looked even and consistent throughout.
Image 1 of 2
(Image credit: Tom's Hardware)(Image credit: Tom's Hardware)The Benchy boat model is designed to highlight various features of a printer (such as the ability to print steep overhangs, small features, etc.), and a quick examination of the model shows that the MK3S+ performed very well and didn’t have any of the common defects typically seen on this model.
PrusaSlicer Spiral Vase Settings for the Prusa MK3S+ / PLA
(Image credit: Prusa)Swipe to scroll horizontally
| Material | Prusament PLA, Galaxy Purple |
| Layer Height | 0.20mm |
| Infill Percentage | 0% |
| Print Speed | 60mm/second |
| Extruder Temperature | 215 degrees Celsius (419 degrees Fahrenheit) |
| Heated Bed Temp | 60 degrees Celsius (140 degrees Fahrenheit) |
| Print Time | 3 Hours, 9 Minutes |
Slicing a model using the ‘Spiral Vase’ mode in PrusaSlicer will automatically create a model that is composed of a single continuously rising helical contour, which allows models to be printed a fraction of the time it would normally take to print using multiple layers. This mode is ideal for printing objects like vases or enclosures that only require a single contour as opposed to multiple contours and an infill structure. I printed the Curved Honeycomb Vase by eggnot to highlight this printing mode.
The Prusament Galaxy Purple is a favorite color of mine due to the glitter additive in the filament. This additive creates layer lines that are evenly blended and have a textured appearance. Combining this material with the Spiral Vase mode produces parts that look almost conventionally manufactured, with layer lines that are difficult to see. This model printed in just over 3 hours in Spiral Vase mode, as opposed to over 13 hours if it had been printed using conventional settings.
PrusaSlicer Speed Settings for the Prusa MK3S+ / PETG
(Image credit: Prusa)Swipe to scroll horizontally
| Material | Prusament PETG, Chalky Blue |
| Layer Height | 0. 2mm 2mm |
| Infill Percentage | 15%, Grid |
| Print Speed | 60mm/second |
| Extruder Temperature | 250 degrees Celsius (482 degrees Fahrenheit) |
| Heated Bed Temp | 90 degrees Celsius (194 degrees Fahrenheit) |
| Print Time | 4 Hours, 5 Minutes |
Image 1 of 2
(Image credit: Tom's Hardware)(Image credit: Tom's Hardware)PETG is a material that offers increased mechanical toughness, heat resistance, and flexibility when compared with parts printed with PLA. Prusa has taken advantage of these material properties by printing many of the components on the MK3S+ with PETG, which creates a rigid part that is able to withstand mechanical stress. PETG is also notoriously difficult to print with due to the high level of stringing that can occur when printing multiple parts simultaneously, but I didn’t have any issues when printing with the Prusament PETG material on the MK3S+.
Image 1 of 2
(Image credit: Tom's Hardware)(Image credit: Tom's Hardware)I used the default settings in PrusaSlicer to print the clamp model provided by Prusa that was designed specifically for PETG. This model features a functional thread, a flexible ball-and-socket joint, and can be tensioned without snapping the body of the clamp. The part printed in multiple pieces without stringing, and I was able to easily assemble it and verify functionality without damaging the clamp. If printed in a more brittle material (like PLA), I would expect the clamp to crack at a transition point on the body, but the PETG was able to hold tension without deforming or breaking.
PrusaSlicer 3MF Import for the Prusa MK3S+ / PLA
(Image credit: Prusa)Swipe to scroll horizontally
| Material | Prusa Basic PLA, Silver |
| Layer Height | 0. 20mm 20mm |
| Infill Percentage | 15%, Grid |
| Print Speed | 60mm/second |
| Extruder Temperature | 215 degrees Celsius (419 degrees Fahrenheit) |
| Heated Bed Temp | 60 degrees Celsius (140 degrees Fahrenheit) |
| Print Time | 2 Hours, 17 Minutes |
PrusaPrinters (the online file repository created and maintained by Prusa) offers the unique ability to share 3D printable files that have been pre-sliced and prepared for the MK3S+ with detailed print statistics available from the site. A perfect example of this is the Bag Clip by Andrei; a cam-driven bag clip that highlights the type of design freedom offered by a 3D printer.
This model has been uploaded as a .3MF file that contains all of the information required to print, such as slicer settings, nozzle and bed temperature, and custom support structures (visibile in the screenshot above. ) 3MF is an increasingly popular alternative to the STL file, which doesn’t contain much information aside from the raw geometry of a model.
This part printed flawlessly on the first try, and the provided .3MF (or .gcode) allows a user to send this file to anyone else with the same printer and material and feel confident that the part will be indistinguishable in appearance and performance. I’ve always thought of a 3D printer as the replicator from the Michael Crichton novel Timeline, which is able to produce identical objects at various locations by converting them into digital information. However, the success of a part is frequently beholden to the settings selected by a user for fabrication, so the ability to share the fabrication plans is one step closer to being able to send a physical product as a form of digital data.
(Image credit: Tom's Hardware)At a price-point of $999 for an assembled printer (or $749 for a kit), the Prusa MK3S+ is a machine that doesn’t compromise on user experience and is absolutely one of the best 3D printers currently on the market. The MK3S+ has a professional and neat appearance, but the 8-bit monochrome LCD user interface might be a challenge for some users to get past, given the steep price. Interface aside, the prosumer features of the MK3S+ make it a stand-out machine for anyone who is looking for a reliable machine to produce functional parts without worrying about spending a lot of time tinkering.
If you are looking for a less expensive machine outside of the Prusa ecosystem, the Elegoo Neptune 2 (currently on Amazon for $180) offers similar printing size and features (with the notable exception of automatic bed leveling) at a fraction of the price but without the same level of robust support and documentation provided by the MK3S+ or any of the name-brand components like the E3D hotend. If you want the Prusa experience but are looking to spend a little less money, the Prusa Mini+ (available from Prusa for $399 assembled, $349 for a kit) is an excellent place to start.
Andrew Sink first used a 3D printer in 2012, and has been enthusiastically involved in the 3D printing industry ever since. Having printed everything from a scan of his own brain to a peanut butter and jelly sandwich, he continues to dive ever more deeply into the endless applications of additive technology. He is always working on new experiments, designs, and reviews and sharing his results on Tom's Hardware, YouTube, and more.
Best 3D Printer for 2022
In this article:
- What to consider before buying a 3D printer
- Best 3D printers
- Best 3D printers for beginners
- Midrange 3D printers
- High-end and professional 3D printers
- 3D scanners
- 3D printing FAQs
In the last few years, 3D printing has become much more commonplace and accessible for hopeful hobbyists. No longer do you have to make a trip to your local university or library to print out 3D objects as inexpensive machines have started to offer fantastic results straight out of the box.
Because 3D printing technology has come a long way in recent years, I've doubled down on being creative and gotten into 3D scanning and laser cutting as well, which lets you sculpt real-world designs from leather and wood. Advanced makers are also using resin machines that create amazingly detailed prints.
Current 3D printers, which range from affordable (under $300) to high-end (over $4,000), are great gifts for a creative person in your life. Even better, they're great for you to craft your own personalized designs if you're looking to open an Etsy shop or something similar.
These models by Fotis Mint are extremely detailed.
James Bricknell/CNETWe've taken a deep dive into many of the best 3D printers available today. This list includes both small and large 3D printers, with attention paid to print speed, the size of the build plate, the cost of PLA filament, the kind of print head included and other important details. And once you've decided to take the plunge into additive manufacturing -- that's what 3D printing essentially is -- there's an FAQ below.
What to consider before buying a 3D printer
Purchasing your first 3D printer can be nerve-wracking but don't worry; we are here to help. There are a few main areas that you should consider when choosing the best 3D printer and we have them covered here.
What am I 3D printing?
When deciding on what 3D printer to buy you first have to know what type of things you want it to print. Resin 3D printing is good for highly detailed models such as character busts, dental work or tabletop miniatures. Even jewelry can be made using a resin 3D printer.
For almost every other application, an FDM, aka filament, 3D printer is likely the best choice. Filament 3D printing is versatile in the types of material you can use and offers much larger build volumes to work on models. Cosplay armor and helmets, practical parts and large-scale models are best printed on an FDM printer.
Read more: What Is 3D Printing?
What is build volume?
Build volume is the amount of space a printer has to produce a model. Often calculated in millimeters cubed, it is the combination of the width, height and depth that your printer's nozzle can reach.![]() This is not always the same as the internal volume of a 3D printer because the wiring and other mechanical parts can get in the way of the nozzle, reducing the area available.
This is not always the same as the internal volume of a 3D printer because the wiring and other mechanical parts can get in the way of the nozzle, reducing the area available.
Most FDM printers have a build area of around 220 by 220 by 250mm, though some of the best 3D printers have larger and a few of the best budget 3D printers have smaller. I think the 220 by 220mm build plate is a good size for starting out as it has room for large, practical pieces or several smaller models at once.
Should I wait for a deal to buy a 3D printer?
3D printers are often available throughout the year at a discount price. Special days like Prime Day, Black Friday and Cyber Monday are great occasions to pick yourself up a new machine, but there are still plenty of deals to be had on a normal day. Make sure you stay fluid and choose your 3D printer deal based on the availability of the machine and what your research has told you is the best.
Best 3D printers
Dan Ackerman/CNET
Creality Ender-3 S1
Best 3D printer for beginners
I'd avoided Ender-3 printers for a long while, because they came in kit form and required many hours of assembly, setup and fine-tuning to use. For just a little more than the kit versions, the newer Ender-3 S1 comes nearly fully preassembled, and with high-end features like a direct drive extruder and self-leveling bed.
Print quality even out-of-the-box was excellent, although a lot of that comes down to having good models to work from. I'd love it to have a touchscreen and Wi-Fi, but apart form those missing features, this is a great way to get polished results from a $400 3D printer.
Read our Creality Ender-3 S1 review.
$399 at Amazon
$340 at Creality3d
You're receiving price alerts for Official Creality Ender 3 S1 3D Printer with Direct Drive Extruder CR Touch Auto Leveling High Precision Double Z-axis Screw Silent Board Printing Size 8.6X8.6X10.6in, Upgrade Ender 3 V2 for Beginners
James Bricknell/CNET
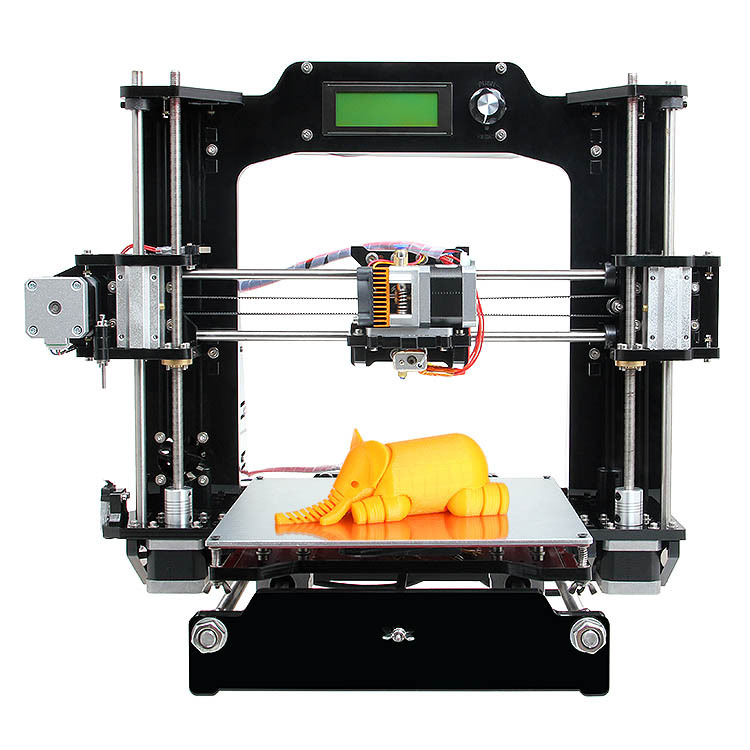
Prusa Mk3S Plus
The standard candle for home 3D printing
No best 3D printer list is really complete without the Prusa MK3S Plus. For nearly a decade it has dominated the market and continues to be the go-to printer for anyone looking to make a business from 3D printing. It is fast and creates quality prints every time. I can count the number of print fails from MK3 on one hand, and I have had it for nearly seven years. If you have the $800, you should buy one of these.
$800 at Prusa Research
James Bricknell/CNET
AnkerMake M5
Speed and quality combined
The AnkerMake M5 is a new breed of 3D printer. Its speed is unrivaled on this list and the quality of the end product is on par with anything I've seen. When you can get this quality level in a 3D print job in around half the time of its closest competitor, it's hard to recommend anything else for someone with the money to buy one.
Read our AnkerMake 5 review.
$799 at AnkerMake
Dan Ackerman/CNET
Anycubic Vyper
Best for out-of-the-box printing
The Anycubic Vyper FDM printer attempts to be both an affordable 3D printer and easy to use. It's a tricky needle to thread. Plenty of 3D printers offer automatic bed leveling and calibration to make sure prints come out even and firmly anchored to the print bed. This, however, is the first time I've seen a 3D printer run its bed leveling once, with zero manual input from me, and be totally good to go. I printed a 3D test file from the included SD card within minutes of powering on, and I've never seen a first print from a 3D printer come out so perfectly.
Read our Anycubic Vyper review.
$359 at Anycubic
Anycubic
Anycubic Kobra Max
Best to make big projects easily
The Anycubic Kobra Max earned a 9 out of 10 in our recent review, in large part because it's one of the most enjoyable printers I've used in years. The build area is large enough to print entire helmets for cosplay, and the auto-bed-leveling system makes setting the machine up a breeze. The Kobra Max is the best choice for a large build area printer, bar none.
Read our Anycubic Kobra Max review.
$529 at Anycubic
Best 3D printers for beginners
These 3D printers are excellent for anyone just starting out in 3D printing. Check out our expanded list of the best budget 3D printers for more in this category.
Prusa Research
Prusa Mini Plus
Small but mighty
The Mini Plus is one of the best small-footprint printers you can buy. It has everything you would expect from a Prusa machine: Auto bed leveling, crash detection and great print quality, all for under $450. Building it with my son gave us a lot of good insights into how a 3D printer works, and potentially how to fix one.
$429 at Prusa Research
Sarah Tew/CNET
Anycubic Mono
Best inexpensive resin 3D printer
Resin printers are the next step up in rapid prototyping design technology when you want your printing to look as high quality as possible. Just be warned: The liquid resin is harder to work with, and it requires both good ventilation and a portable UV light to properly cure. This model is extremely popular with board game hobbyists who want to print pro-looking miniatures, and sometimes you'll see it fall in price. Note that you can save $20 at Amazon by activating the instant coupon on the product page.
$250 at Amazon
You're receiving price alerts for ANYCUBIC Photon Mono 4K, Resin 3D Printer with 6.23" Monochrome Screen, Upgraded UV LCD 3D Printer and Fast & Precise Printing, 5.19" x 3.14" x 6.49" Printing Size
Dan Ackerman/CNET
Monoprice Mini Delta V2
Best for tiny desks
I had high hopes for this dirt-cheap 3D printer with a tiny footprint. It's usually under $200 and requires no additional assembly. And I do like it, but it's for a specific audience. This is not the great low-cost entry-level printer I was hoping for. It required some tweaking and troubleshooting to get up and running. The included microSD card was so cheap and corrupted it never worked, the built-in Wi-Fi was never able to connect to my network, and the machine's arms got caught on some poorly installed plastic wire covers (I just ripped the paper-thin covers off).
But once I had all the problems ironed out, it was a reliable little machine for quick jobs. It would make a great second 3D printer, or if you need to fit one into a small space. I especially liked the auto-leveling, which worked well, and the color touchscreen, which is a feature that often gets chopped from low-cost models. If you're willing to put a little effort into getting it set up correctly, it's a great printer for the price.
$180 at Amazon
Midrange 3D printers
James Bricknell/CNET
Elegoo Saturn 2
The best resin experience right now
The Elegoo Saturn 2 is an almost perfect upgrade from the original Saturn. It is bigger and more powerful, with better quality prints than its predecessor and my No. 1 choice for a midrange resin 3D printer. If you are looking to print serious details or a lot of tiny models, this is simply the best choice. It's $671 on Amazon, but you can get it for $60 off when you apply a coupon at checkout.
$671 at Amazon
You're receiving price alerts for ELEGOO Saturn 2 8K MSLA 3D Printer, UV Resin Photocuring Printer with 10-inch 8K Monochrome LCD, 8.62x4.84x9.84 Inch Larger Printing Size
James Bricknell/CNET
Flashforge Adventurer 4
Best 3D printer for ease of use
The Flashforge Adventurer 3 has long been one of CNET's favorite midprice 3D printers. The updated Adventurer 4 brings a handful of iterative improvements that make for a winning evolution. The Adventurer 4 is a fully enclosed unit, which helps control the temperature and block drafts. The build area is 220 by 200 by 250mm, and it has a system for easily swapping out nozzles -- all good features to have in a mid-level to high-end printer.
$849 at Walmart
$749 at Amazon
You're receiving price alerts for Flashforge Adventurer 4
High-end and professional 3D printers
Creality
Creality CR-30
Best for small biz or pro cosplayers
A word of warning; the CR-30 is not for the beginners out there. It is a complicated machine, and you will need some 3D-printing knowledge to really get the hang of it. It's also a very different beast, and instead of printing on a static-sized build plate, it uses a conveyor belt to create an "endless Z-axis." That lets you print very long things or lots of things over and over again.
If you are a cosplayer looking to make weapons or large armor pieces, the CR-30 gives you a lot of room to create. I've managed to print Squall's Gunblade from Final Fantasy VIII as well as the Whisper of the Worm from Destiny 2 (both were printed in two halves and attached together). It's great for small businesses looking to mass-produce small parts, and with just two CR-30s you could create a small empire on Etsy or Shopify. --James Bricknell
$982 at Amazon
You're receiving price alerts for Creality CR-30
Sarah Tew/CNET
Glowforge 3D Laser Cutter
Best for woodworkers
I can't begin to tell you how much I love the Glowforge. Laser cutters can create projects from wood, leather, lucite and other materials, making it an interesting creation alternative to filament-based 3D printers. Even better, what would take a 3D printer hours to do takes just minutes in the Glowforge.
With it, I've created laser-etched LED lights, birch wood tool caddies, and even a three-tier box for my Nespresso sleeves. There's a robust community of makers creating and sharing files, but pretty much any line drawing you can create in something like Adobe Illustrator can be turned into a project.
The software is all cloud-based, which adds a layer of complication (you need internet service to use it), but the ability to create amazing gifts and more from simple 0.125-inch or 0.25-inch cheap plywood is pretty empowering.
See some of my laser cutter projects (and download my SVG files) here.
$3,995 at Glowforge (Glowforge Basic)
$4,995 at Glowforge (Glowforge Plus)
3D scanners
Revopoint
Revopoint Pop 2
Incredible details
While the software has a pretty steep learning curve, the end result is extremely detailed. I've really enjoyed using the handheld version to scan larger models while the included turntable makes scanning smaller objects a breeze. If you are looking for a professional-grade scanner and can spend some time on the software, the Pop 2 is a great choice.
$689 at Amazon
You're receiving price alerts for Revopoint Pop 2
Sarah Tew/CNET
SOL Desktop Laser 3D Scanner
Best 3D scanner for easy replicas
Recreate pretty much anything by putting it on this 3D scanner, where a rotating base and built-in camera create a 360-degree copy, which is then editable in any 3D program and printable on your 3D printer. Simply scan the object, import the scan into your slicing software for cleanup, and print. The included software alerts you of next steps in the printing process with either sound or texts. Scan quality and print resolution are great, and setup is easy, although you might want to clean up your 3D model a bit in a 3D software app after.
$799 at Amazon
You're receiving price alerts for SOL Desktop Laser 3D Scanner
3D printing FAQs
What material should I use to print with?
Most home 3D printers use PLA or ABS plastic. Professional printers can use all sorts of materials, from metal to organic filament. Some printers use a liquid resin, which is much more difficult to handle. As a beginner, use PLA. It's nontoxic, made mostly of cornstarch and sugarcane, handles easily and is inexpensive. However, it's more sensitive to heat, so don't leave your 3D prints on the dashboard of a car on a hot day.
Which brand of PLA is best?
Generally speaking, Hatchbox has never let me down and runs about $25 for a full 1kg spool on Amazon. Some of the printers I tested only accommodate narrower 0.5kg spools. In those cases, I sometimes used a larger Hatchbox roll with a separate spool-holder. Other times, I had good luck with AIO Robotics 0.5kg spools, which are a little more expensive, at $14 for 0.5kg. Amazon Basics and Monoprice can also be good, but for any brand, weird colors like metallic or glow-in-the-dark filament can be hit-or-miss. Note that a 1kg roll prints a lot of stuff.
What settings should I use?
Most 3D printers include or link to recommended software, which can handle converting 3D STL or other files into formats supported by the printer. Stick with the suggested presets to start, with one exception. I've started adding a raft, or bottom layer of filament, to nearly everything I print. It has cut down dramatically on prints that don't adhere to the bed properly, which is a common issue. If you continue to have problems, rub a standard glue stick on the print bed right before printing.
What are supports?
Your 3D models probably need some help to print properly, as these printers don't do well with big overhangs -- for example, an arm sticking out from a figure. Your 3D printer software can usually automatically calculate and add supports, meaning little stands that hold up all those sticking-out parts of the model. After the print is done, clip the supports off with micro cutters and file down any nubs or rough edges with hobby files.
Where do I find things to print?
Thingiverse.com is a huge online repository of 3D files for anything and everything you can think of. Pokemon chess set? It's there.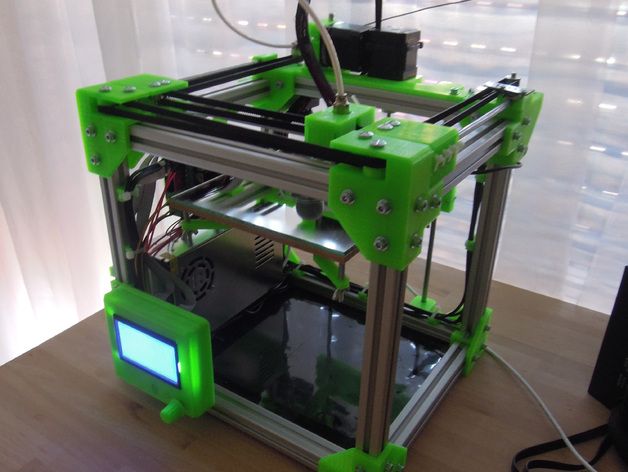 Dyson vacuum wall mount? You bet.
When you're ready to create your own designs, there are a ton of software packages to choose from, but it's easiest to start with the browser-based free TinkerCad app from Autodesk.
Crazy things I've made on a 3D printer
+15 more See all photosMore creative recommendations
- Best 3D Printer Filament
- Best Budget 3D Printer
- Best Laptops, Desktops and Tablets for Designers and Creatives in 2022
- Best Vlogging Camera for 2022
- Best 3D Printer Resin
TOP-15 best models in terms of quality and reliability
A 3D printer is a device used for 3D printing. In this article, we will tell you how to simplify the search for the necessary 3D printer model among the variety on the market. We analyzed the options available in online stores, studied their functionality, got acquainted with the technical characteristics and user reviews. Here we present the ranking of the best 3D printers for 2022-2023. They are grouped by the most popular request categories. nine0003
Ranking of the best 3D printers for 2022-2023
| Place | Designation | Price | Description |
|---|---|---|---|
| Best 3D printers by price/quality for 2022-2023 | |||
| 1 | Wanhao D12/500 | Ask for a price | Best in price/quality for 2022-2023 as selected by users |
| 2 | Creality 3DPrintMill CR-30 | Ask for a price | High quality 3D printer using conveyor printing method |
| 3 | Phrosen Schuffle XL Lite | Ask for a price | Stable and easy to use large format 3D printer |
| Best Kids Education 3D Printer | |||
| 1 | Creality Ender 7 | Ask for a price nine0030 | Best Educational 3D Printer for Kids |
| 2 | Anycubic Vyper | Ask for a price | Excellent value for money 3D printer with new board and high performance control chip |
| 3 | Flying Bear Aone | Ask for a price | Budget model of children's educational 3D printer |
| Top Industrial 3D Printers | |||
| 1 | Anycubic Photon Mono X | Ask for a price | The best industrial printer according to experts today |
| 2 | Phrozen Sonic Mighty 4K | Ask for a price | Robust 3D printer for industrial projects |
| 3 | CF Chef | Ask for a price | A new chocolate 3D printer that is suitable for creating various types of chocolate figurines |
| Top Resin 3D Printers | |||
| 1 | Creality HALOT ONE PLUS | Ask for a price | Best Large Area Resin 3D Printer Chosen by Users Today |
| 2 | Phrozen Sonic 4K 2022 | Ask for a price | Good photoresin 3D printer often used in dentistry and dental laboratories |
| Best Home 3D Printers | |||
| 1 | Creality Ender 3 Pro | Ask for a price | Best 3D printer for home projects |
| 2 | Flash Forge Adventurer 3 | Ask for a price | Reliable and high quality 3D printer for various home projects |
| Best Inexpensive 3D Printers | |||
| 1 | Creality Ender 3 | Ask for a price | Best budget 3D printer available as a do-it-yourself device |
| 2 | Anycubic Mega-S | Ask for a price | Inexpensive 3D printer with excellent functionality |
Contents
- Top 3D printers 2022-2023 ranking
- How to choose a 3D printer?
- Best 3D printers by price/quality for 2022-2023
- technology and volume of printing;
If you are going to produce high precision and small parts, SLA or DLP is the way to go.
 If the range of tasks is wider and low manufacturing cost is important, then your choice is an FDM printer.
 - working space size;
Many 3D printers have a working space of 200x200x200mm. This is enough for most tasks. However, you may need a smaller size, or vice versa, you will need a larger one, it depends on your needs. nine0003
- print precision;
Nozzle size affects print accuracy. Not only smooth layers depend on it, but also the detailing of the model. A smaller nozzle diameter gives more detail, but slower production speed. Many printers have the ability to change the nozzle for a specific task.
- platform heater;
The presence of this function ensures better adhesion of the first layer. Engineering plastics, for example, cannot be used without heating the table, since the figures can warp. nine0003
- camera type;
Can be open or closed.
 The latter options are usually presented on more expensive and advanced models.
 - number of extruders;
When printing complex elements, you will need a model with two materials and corresponding extruders in order to be able to print supports from soluble material. Models with a large number of angles greater than 30 degrees or a large number of hanging elements are called complex. If the models are not too complex, one extruder will suffice, which will greatly help save the budget. nine0003
- print speed;
The parameter implies the maximum head movement speed. A 14x4x10 tablet stand will print approximately 6-6.5 hours at 100mm/sec.
- functionality;
Printers can support wireless communication with various devices: phones, tablets, etc., as well as memory devices. Plus, as a rule, printers are already equipped with software when they are sold. Pay attention to the compatibility of the OS with the OS of the computer.
 nine0003
 Best Price/Quality 3D Printer 2022-2023
1. Wanhao D12/500
Wanhao D12/500 is the best price/quality 2022-2023 user vote. A 3D printer that is great for mass production. The optimal size of its zone makes it possible to print a large model in one cycle. The control system here is intuitive and clear, the user can easily calibrate the printer to fit their needs. nine0003
The Wi-Fi connection helps you connect to your PC or laptop. Extruders will allow you to print using supports. The color display with touch keys will be an excellent assistant in setting up the device.
Designed with a heavy duty frame and adjustable straps. The working surface is automatically heated to achieve adhesion to the first layers of plastic. The switch is equipped with 2 fuses for emergency protection. nine0003
Specifications:
- Print technology: FDM/FFF/PJP
- working space dimensions: 500x500x500 mm;
- print speed (extruder speed): 150 mm/s;
- number of extruders: 2;
Advantages:
- 2 extruders;
- high speed printing;
- workspace size;
Drawbacks:
- cost;
2.
 Creality 3DPrintMill CR-30
 The Creality 3DPrintMill CR-30 is a quality 3D printer using a conveyor printing method, which is perfect for small and medium businesses with the ability to organize mass production. Instead of a platform, there is a nylon-based transport tape with excellent adhesive properties.
The design allows printing of long products of non-standard dimensions. Three powerful fans provide excellent airflow. Management is carried out using a convenient display, which is located on the right side of the case. There is an SD slot for downloading files offline. nine0003
End of filament sensor will stop the device if the filament breaks. In the event of a power failure, auto-update will help restore functionality. The maximum extruder temperature is 240 degrees.
Specifications:
- Print technology: FDM/FFF/PJP;
- working space dimensions: 200x170 mm;
Advantages:
- wireless connection;
- the ability to adjust the temperature and speed; nine0218
- is suitable for small and medium businesses;
Disadvantages:
- noisy;
3.
 Phrosen Schuffle XL Lite
 The Phrosen Schuffle XL Lite is a stable and easy to use large format 3D printer. It makes it possible to print both large models as a whole, and many small ones at once. The new matrix shows excellent print accuracy. The software is included in the kit, so it is quite easy to manage the device. nine0003
The printer is suitable for dentistry, jewelry and prototyping as it prints reliably with high precision. The double linear guide guarantees long-term operation without interruption.
Operation is simplified by a large and bright display with an easy-to-use touch panel. The device can be used not only by professionals, but also by amateurs. Z-axis of the printer is stable, has zero fluctuations during printing.
Specifications:
- print technology: DLP, LCD;
- print material: photopolymer;
Advantages:
- acceptable cost;
- high precision printing;
- stable Z-axis;
Disadvantages:
- sometimes there are some difficulties when changing already programmed material;
Best Kids Educational 3D Printer
1.
 Creality Ender 7
 The Creality Ender 7 is the ultimate children's educational 3D printer and one of the fastest in the mainstream segment. Its speed is its main trump card, but you need to remember that it is impossible to work with some types of thermoplastic at high speed. In general, not very high-precision details are printed quickly.
Operation is carried out using a convenient display, which is located in the central part of the housing. For downloading files offline, there is an SD slot and a USB connector. The maximum extruder temperature is 260 degrees. nine0003
The print platform is heated to 100 degrees. The nozzle has one of the most popular diameters of 0.4 mm. The printer is also equipped with a filament control sensor, and calibration is automatic.
Specifications:
- Print technology: FDM/FFF/PJP;
- working space dimensions: 250x250x300 mm;
- print speed (extruder speed): 250 mm/s;
Advantages:
- reasonable cost;
- high speed printing;
- large working space;
Faults:
- small print area;
2.
 Anycubic Vyper
 The Anycubic Vyper is a great value 3D printer with a new board and high performance Cortex M3 control chip. It features good speed and smooth operation. It prints not only accurately, but also silently. The platform has a high-strength coating that provides easy removal of the finished model. nine0003
The blower system consists of a pair of fans that will allow you to quickly cool the models. Management is carried out using a large touch screen. It features a new interface, simple and smooth operation, and the ability to switch languages to English and Chinese.
The electronic system automatically calibrates the platform with sixteen points. The dimensions of the device are compact, and the working space is large. Printing is recommended at a speed of 80-100 mm/sec.
Specifications:
- Print technology: FDM, FFF, PJP;
- working space dimensions: 245x260x245 mm;
- print speed (extruder speed): 100mm/s;
Advantages:
- quick and easy to assemble;
- silent operation of the device;
- convenient and clear control;
Disadvantages:
- not very convenient location of the coil; nine0218
3.
 FlyingBear Aone
 The FlyingBear Aone is a low cost educational 3D printer for kids in a compact package suitable for home projects. It comes as a self-assembly kit. Its case is open, like many inexpensive models. The printing table is heated from 60 to 100 degrees Celsius.
Print speed up to 100 mm/sec. Management is carried out using a special color touch screen, which is located at the bottom of the printer. nine0003
The USB port can be used to connect to a PC or laptop, while the SD slot is suitable for stand-alone operation. The power supply is installed in the bottom of the case and is built-in. The extruder is equipped with a nozzle with a diameter of 0.4 mm.
Specifications:
- Print technology: FDM, FFF, PJP;
- working space dimensions: 190x190x190 mm;
- print speed (extruder speed): 100mm/s;
Advantages:
- fast and clear assembly;
- inexpensive 3D printer;
- is easy to use for beginners;
Disadvantages:
- very noisy fans;
Best industrial 3D printers
1.
 Anycubic Photon Mono X
 The Anycubic Photon Mono X is the best industrial printer according to experts today. It has the largest printable area among resin printers. It features good speed and smooth operation. It prints not only accurately, but also silently. The platform has a high-strength coating that provides easy removal of the finished model. nine0003
Controlled by large touch screen. It features a new interface, simple and smooth operation. The dimensions of the device are compact, and the working space is large.
Printing recommended at 80-100 mm/sec. The printer is equipped with a wireless Wi-Fi connection to connect to the Internet, to a computer or laptop. The matrix light source consists of UV LEDs. This improves accuracy and reduces exposure time.
Specifications:
- Print technology: LCD, SLA;
- working space size: 120x245x192 mm;
Advantages:
- high detail;
- large height and print area;
- comfortable and bright screen;
Disadvantages:
- high cost of spare parts;
2.
 Phrozen Sonic Mighty 4K
 The Phrozen Sonic Mighty 4K is a robust 3D printer for industrial projects with a large build area and high print speed. It is an excellent choice for both creative and professional use. The new matrix shows excellent print accuracy. nine0003
The software is included, so the device is easy to operate. The printer is suitable for dentistry, jewelry work and prototyping, as it has a reliable print with high accuracy.
Double linear guide ensures long, trouble-free operation. Operation is simplified by the presence of a large and bright display with a convenient touch panel. The device can be used not only by professionals, but also by amateurs. Z-axis of the printer is stable, has zero fluctuations during printing. nine0003
Specifications:
- Print technology: DLP/LCD/SLA;
- working space dimensions: 200x220x125 mm;
- printing speed (layer building): 80 mm/h;
Advantages:
- quiet operation;
- fast printing;
- compact dimensions of the device;
Disadvantages:
- high cost;
3.
 CF Chef
 CF Chef is a new chocolate 3D printer that is suitable for creating various types of chocolate figurines. It can be used to create openwork chocolate toppers for confectionery, print corporate chocolate gifts, make text messages and logos, and print chocolate figures.
The dimensions of the printer are 300x300x380 mm, so it can be placed in any room, but the working area is quite large. The printing time of chocolate models depends on their complexity. The printer allows you to create 2D, 2.5D and 3D products. You can use a USB cable or a wireless WI-FI connection to connect to a computer. The printing speed can reach 100mm/s. nine0003
Specifications:
- print material: tempered chocolate and chocolate glaze;
- print speed: 100 mm/s;
Advantages:
- the ability to connect to a computer or laptop;
- good print speed;
- is suitable for the food industry;
Drawbacks:
- cost;
Top 9 Resin 3D Printers0005
1.
 Creality HALOT ONE PLUS
 Creality HALOT ONE PLUS is the best large area photoresin 3D printer according to users today. It can be used for both business and home projects. The device is controlled using a convenient display, which is located in the central part of the case.
Wi-Fi port and USB port for uploading files and updating firmware. The nozzle has one of the most popular diameters of 0.4 mm. The printer is also equipped with a filament control sensor, and calibration is automatic. nine0003
UV source for improved detail and print quality. Windows and Mac OS are compatible with the printer. Quad-core ARM Cortex M4 processor provides high power and performance, as well as stable operation.
Specifications:
- Print technology: LCD;
- working space dimensions: 102x160x172 mm;
Advantages:
- low cost; nine0218
- the presence of a USB connector;
- UV source;
Drawbacks:
- 1 extruder;
2.
 Phrozen Sonic 4K 2022
 The Phrozen Sonic 4K 2022 is a good photopolymer 3D printer that is often used in dentistry and dental laboratories. The new matrix shows excellent print accuracy. The software is included in the kit, so it is quite easy to manage the device. nine0003
The printer is suitable for dentistry, jewelry and prototyping as it prints reliably with high precision. The double linear guide guarantees long-term operation without interruption.
Operation is simplified by a large and bright display with an easy-to-use touch panel. The device can be used not only by professionals, but also by amateurs. Z-axis of the printer is stable, has zero fluctuations during printing. In the event of an unexpected power outage, operation can be resumed from the point at which it was stopped. nine0003
Specifications:
- Print technology: DLP, LCD;
- working space size: 134x200x75 mm;
Advantages:
- improved accuracy;
- excellent performance;
- availability of various interfaces;
Disadvantages:
- very high cost;
Best 3D printers for home
1.
 Creality Ender 3 Pro
 The Creality Ender 3 Pro is the ultimate 3D printer for home projects. It is quick to assemble, easy to understand and set up and ensures stable operation. Both an experienced user and a beginner can handle it.
Operation is carried out using a convenient display, which is located in the central part of the housing. For downloading files offline, there is an SD slot and a USB connector. The nozzle has one of the most popular diameters of 0.4 mm. nine0003
The printer is also equipped with a filament control sensor and calibration is automatic. The device can be used both as a main and as an additional to professional equipment. Branded power supply makes the device more stable. The camera of the printer is open, like many inexpensive models.
Specifications:
- Print technology: FDM, FFF, PJP;
- working space dimensions: 220x250x220 mm; nine0218
- print speed (extruder speed): 180mm/s;
Pros:
- is great for beginners thanks to easy assembly;
- simple and inexpensive repair;
- inexpensive model;
Disadvantages:
- noisy model;
2.
 FlashForge Adventurer 3
 FlashForge Adventurer 3 is a reliable and high quality 3D printer for various home projects. With its use, you can print pre-prepared files. The device has a closed chamber. The supply end sensor will tell you when to add it. The printer will automatically stop when the media runs out. nine0003
The nozzle has a typical diameter of 0.4 mm. It is made of stainless steel, which perfectly resists mechanical stress and quickly warms up during operation. LAN, USB and WI-FI interfaces allow you to connect to a computer or laptop. The printer is compatible with all major operating systems: Windows, Linux, MAC, which will be a big plus. The main working program FlashPrint will provide professionals and hobbyists with all the basic functions to work with.
Specifications:
- print technology: FDM, FFF, PJP;
- working space size: 150x150x150 mm;
- print speed (extruder speed): 100mm/s;
Advantages:
- convenient and clear slicer;
- works silently;
- flexible detachable platform;
Disadvantages:
- expensive to repair;
Best Inexpensive 3D Printers
1.
 Creality Ender 3
 The Creality Ender 3 is the ultimate budget 3D printer that comes as a DIY kit. The device is controlled using a convenient display, which is located in the central part of the case. For downloading files offline, there is an SD slot and a USB connector.
One of the most popular nozzle diameters is 0.4 mm. Mechanical and electronic parts of the device are separated from each other. The device can be used both as a main and as an additional to professional equipment. nine0003
Proprietary power supply makes the device more stable. The camera of the printer is open, like many inexpensive models. The workspace allows you to manage most projects. Even a beginner can handle this device.
Specifications:
- Print technology: FDM, FFF, PJP;
- working space dimensions: 220x250x220 mm;
- print speed (extruder speed): 180mm/s;
Pros:
- platform area is great for most applications;
- simple and clear assembly;
- budget model;
Disadvantages:
- slightly skewed in the Z-axis due to design features;
2.
 Anycubic Mega-S
 The Anycubic Mega-S is an inexpensive 3D printer with excellent functionality that reproduces plastic products in layers. It features good speed and smooth operation. It prints not only accurately, but also silently. The platform has a high-strength coating that provides easy removal of the finished model. nine0003
The dimensions of the device are compact and the working space is large. Printing is recommended at a speed of 80-100 mm/sec. After a power loss, the device automatically resumes the interrupted operation.
The control is carried out using a special display. The camera of the device is open, like most inexpensive models. The new extruder allows you to choose not only standard types of plastic, but also its more flexible varieties.
Specifications:
- print technology: FDM, FFF, PJP;
- working space dimensions: 210x205x210 mm;
- print speed (extruder speed): 100mm/s;
Advantages:
- prints well with a minimum number of settings;
- ease of assembly;
- budget model;
Disadvantages:
- the original firmware does not provide printing from a computer;
Which company to choose?
Good quality 3D printer companies: Creality, Anycubic and Phrozen.

Choosing the right 3D printer model is easy if you stick to the list of criteria you need. The more precisely you can determine the necessary parameters, the more and longer you will be pleased with the service life of the device.
Useful video
Review of models and tips on which one to choose in the video below:
candidate for the title of the best 3D printer in 2022 / 3D printers, machine tools and accessories / iXBT Live
If you want quality printing out of the box, as well as a solid build, then Kywoo3D Tycoon Max is the way to go. This printer attracted me with interesting features at a low price.
 And most importantly, what attracted me is a very reliable design. After all, it is she who affects the quality of the print.
 I found the first mentions of this manufacturer and printer on Kickstarter, and then on local sites. Then the model was simply discussed, but there were no real owners. But then the first reviews appeared, and to be honest, the printer was not praised in them. Despite the thoughtful design, the printer had problems with airflow and buggy firmware. Therefore, when I needed a 3D printer, I took myself Anet ET4 Pro. But then there was a need for another printer, so I, again returning to the question of choice, decided to take myself a Tycoon Max. And now, having used the printer for several weeks, I realized that I made the right choice. The printer for its price really gives excellent print quality, and if necessary, also a very fast print speed comparable to deltas. nine0003
Characteristics of Kywoo3D Tycoon Max:
Well, in words, I’ll add something that is not in the table:
- Print area: 300 * 300 * 230mm
- Print type: FDM
- Number of extruders: 1 print l.
 902 -0.4mm
 - Nozzle: 0.4mm
- Control: USB, MicroSD card, Wi-Fi
- Power: 350W
- Maximum table temperature: 100C
- Maximum extruder temperature: 260C
- -10mm s (personally tested up to 140mm/s and it prints fine)
- Additional information about the structure:
- Rigid aluminum profile frame.
- X-axis rails, Y-axis shafts.
- Z-axis motor belt synchronization
- 16-point auto-leveling
- 3.5-inch touch screen for printer and printing control
- Convenient filament threading using ring 9028 on extruder
Now let's talk about the printer itself. It was ordered from a warehouse in the Russian Federation, and the delivery time took 5 days. A huge box weighing 16kg was received in the mail:
Inside the box is a printer disassembled into two parts. Everything lies in layers, which are laid with foam material. So it is unlikely that anything could be damaged along the way. Opening the box, the first layer I saw was the bottom frame of the Y axis with a heating table and ultrabase:
Below the next layer is the main frame of the Z axis, a reel of PLA test plastic, a box with accessories:
I’ll tell you right away about the complete plastic.
 It has a weight of 500g, wound on a plastic reel, sealed in a vacuum bag. I printed part of the coil during the tests, and I liked the plastic. nine0003
 As for complete accessories, everything is relatively standard. Inside the box are a spatula, a set of hexagons in a convenient case, several spare ties, wire cutters, clips for the ultrabase, four screws for assembling the printer, a Phillips screwdriver, a piece of heat pipe, a spare 0.4mm nozzle, a needle for cleaning the nozzle, a wrench for unscrewing the nozzle, spare limit switch, USB cable, reel mounting stand. Also included is a card reader and a MicroSD 8Gb flash drive manufactured by Netac ( a good manufacturer, I have several flash drives of this company, and they work well )
The printer is powered through a detachable cord with a European-type plug. If necessary, it can be replaced without any problems:
Also included with the printer is an assembly and configuration manual. It is made on high-quality printing, but, in fact, there is no great benefit from it:
Now let's consider ultrabase glass.
 It has dimensions of 305*320mm and a thickness of 4mm. On the edge there is an inscription with the logo of the manufacturer:
 Having already printed enough parts, I can say that the quality of the Ultrabase is excellent. It is strong, there are no problems with plastic sticking, it heats up evenly. And at the end of printing and cooling, the parts come off without problems.
The ultrabase is attached to the heating table with 4 stationery clips (they are included). The heating table itself is made of metal, and is attached to the frame on shafts through plain bearings. By the way, in order to reduce weight and inertia during movement, the manufacturer made the table itself with holes that do not affect rigidity. nine0003
By the way, the table is connected to the control board via the XT60 connector. This is the first time I see such a solution, but logically, this is a fairly reliable connection.
Another thing I would like to note on the table frame and X-axis is the presence of good legs that can be adjusted in height.
 This is useful if the printer is not standing on a completely flat surface, and correct adjustment will avoid unnecessary movement of the frame when printing.
 Now let's move on to inspecting the frame along the YZ axes. It also contains the control board and power supply. It also has an extruder. This is what it looks like:
The first thing I want to pay attention to is the overall rigidity of the frame. It uses a double frame made of aluminum profile, on which there is a metal box on top. This box serves two purposes: hiding the interior of the printer and adding rigidity to the frame. And it has a very good effect on the quality of the print.
The Z-axis of the printer is fixed on the frame through two shafts rigidly fixed to the frame itself and a closed plain bearing, and for moving there are two studs with stepper motors on both sides. Additionally, the manufacturer has added a belt that synchronizes the operation of these stepper motors:
Rails are installed on the printer to move the extruder.
 They are quite high quality, and during the work I personally did not have any problems with them. For better sliding, the rails are immediately lubricated from the factory, and the rails themselves also have holes through which this lubricant enters the rails. Also, through these holes, the rails were fastened along the entire length of the frame.
 As for the extruder, the manufacturer did not reinvent the wheel, and equipped the printer with a proven solution. This is MK10, but with some modifications. First, it adds an iron frame that looks good while protecting the user from contact with hot extruder elements. I would like to think that this frame also serves as an additional radiator, but if you look at how it is fixed, it immediately becomes clear that there is not much heat coming to it. And the second addition is a special lamb for scrolling plastic when refueling. And this is a really handy feature. When refueling, you do not need to press anything, as in other printers.
 We simply pull the plastic through the plastic sensor, point it into the hole of the extruder and turn the lamb. Plastic itself immediately clings and is pressed through. A simple and elegant solution that is sorely lacking in other printer models. nine0003
 Also immediately above the extruder is a low filament sensor. This is also a pretty good solution, since the distance between the sensor and the extruder is minimized here. And this means that you don’t have to throw out 20-30 cm filament bars that simply cannot be pushed into the printer. The amount of waste here is minimal.
As for blowing, a fan with an impeller is used here, which is mounted near the nozzle. Fan model pb04010ms4. The airflow itself is realized through a wide slot. I personally did not notice any problems with blowing during printing, there is enough blowing, and it blows directly on the model. The blowing speed can naturally be adjusted both during the cutting of the model, and already directly during printing, the fan has speed control.
 nine0003
 I also once had to disassemble the extruder to replace the nozzle during printing. What was in the kit, I managed to score on my own stupidity, alternating types of plastics without changing the temperature. Therefore, I will show the extruder in disassembled form:
I also want to draw attention to the fact that the printer has a table auto-calibration function. For this, a BL Touch sensor is installed here. More precisely, there is not the original 3D Touch with a plastic plug.
But by the way, I have no complaints about his work. The table calibrates perfectly, and even if there is a misalignment of fractions of millimeters, everything is taken into account and there are no problems with printing. The table itself is calibrated using 36 points (6*6) and looks like this:
Also, in addition, I can also note the presence of a silicone lining on the hotend, so that the temperature is more stable:
Well, after we have examined both halves of the frame, we can start assembling the printer.
 She's very simple. The existing 4 screws are screwed through the grooves, and we stretch harder.
 Additionally, you need to connect the connector to the table and connect the motor along the X axis. By the way, in the printer, all the wires are laid right away, and where they can be fixed with ties. Therefore, nothing dangles here, does not hang down and is as neat as possible:
That's it, the assembly is finished. This is what the assembled printer looks like, well, with the exception of the ultrabase and the bracket for installing the filament spool.
The bracket itself, by the way, is standard, like most printers in this price range. Metal profile and plastic tube. The bracket is installed at any point of the aluminum profile, through two spacer nuts:
Well, once the printer is assembled, you can consider the rest of the design elements. If you look at the back of the printer, you can see the power button and the port for connecting the power cord:
On the other hand, there is a sticker on the frame with information about the printer:
Separately, I would like to note one more convenient feature of this particular printer, which I have not seen anywhere else.
 These are convenient carrying handles:
 They are metal and rigidly fixed to the frame, you can safely lift the entire structure with them and not worry that something will break. For me, this is very important, since my printer can be transferred to different points around the room, and even between rooms. Depending on how long the print is placed. nine0003
If you look at the printer from the right end, then you can see a slot for a MicroSD card through which a model for printing is thrown onto the printer. There is also a MicroUSB port for connecting to a computer (does anyone use this method of printing?) and another slot for SD cards, the purpose of this slot remains a mystery to me:
Well, now the most interesting. It is, of course, a touch screen. When you turn on the printer, we first see a splash screen with the manufacturer's logo, and then the main desktop, from which you can get to different settings:0003
All items on the desktop are interactive. Management is implemented by clicking on the desired element.
 For example, by clicking on the ruler of XYZ axes, we get to the axis calibration menu:
 And if you click on the flash drive icon, the files for printing located on the flash drive are opened:
The printer sees folders and subfolders without problems, but there are Russian file names Problems. In the current firmware, the Cyrillic alphabet looks like unreadable krakozyabry.
If you click on the gear icon, then naturally we get into the settings menu. Here you can select the temperature of the preheating of the table and extruder, change the filament during printing or in idle time. Find out information about the firmware, set up Wi-fi and select the interface language ( there is no Russian language in the photo, but it has already been added in the latest firmware )
By the way, the printer has a built-in Wi-fi module, and it can be run in access point mode or connected to a home wi-fi network.
In the first case, you can connect to the printer and use an additional plug-in in Cura to send files for printing over the air, as well as monitor the status of the printer:
True, the wi-fi module has one minus.
 It stands inside a metal case, and it dampens the signal very noticeably. If the printer is in the next room, then I can no longer connect to it because the signal level is too weak. In fact, the range of the access point is about 5-6 meters maximum. nine0003
 But back to the screen. Despite the modern 32-bit processor, another disadvantage that I want to point out is the lack of model previews. This option is already firmly in use, and I would like to hope that it will also appear in future firmware. But so far the interface looks pretty simple. By the way, this is also visible at print time, when progress is displayed simply as a blue bar with a percentage of completion.
But in general, the management here is really convenient. You can change the Z-axis gap on the fly, change the speed of the blower fan and the temperatures of the table and extruder. nine0003
Well, I also want to show the inside of the printer without disassembling it. How could I get the camera. The printer is powered by the built-in Mean Well LRS-350-24 power supply.
 Already by the name it is clear that this power supply produces 24v / 350w.
 In the future, I plan to crawl up to this PSU and add a backlight tape to the printer frame so that you can see the printing process.
The brains of the printer are located in the upper part of the case, it is already much more difficult to crawl up there with the camera:
But since the board is sold separately, I'll just add a photo from the manufacturer here:
True, in this photo it is not clear which processor is used in the board. But let's hope it's good enough.
In general, if we talk about the assembly, then it did not raise any questions for me. The frame here is well thought out and very rigid. All axles run smoothly and there is no backlash. The printer is large, solid and heavy. And gravity, as we know from the words of Boris Razor, is good and reliable.
Now it's time to talk about the printing process and the models I have printed
The first thing I decided to do was to check the speed characteristics of the printer.
 The specifications indicate that its maximum speed reaches 150mm / s. Therefore, I printed a test cube at this speed:
 I shot with a macro lens so that the flaws in the layers were immediately visible. And they are here, since my plastic is not the best, besides, it’s also old, taken from the remnants.
Then I printed the same cube, but at a speed of 180mm/s, and put it next to the first cube:
Try to guess from the photo which of these two cubes was printed at what speed.
I'll give you a hint. On faster printing, at 180 mm/s, the plastic from the nozzle no longer has time to come out and lay down evenly, so the layers appear thinner, and there are gaps between the layers.
And yes, on the left it's a cube printed at 180mm/s and on the right it was 150mm/s.
And by the way, this speed is quite suitable for printing rough parts, when you need to determine the degree of fit and size, without regard to quality. This saves a lot of printing time.
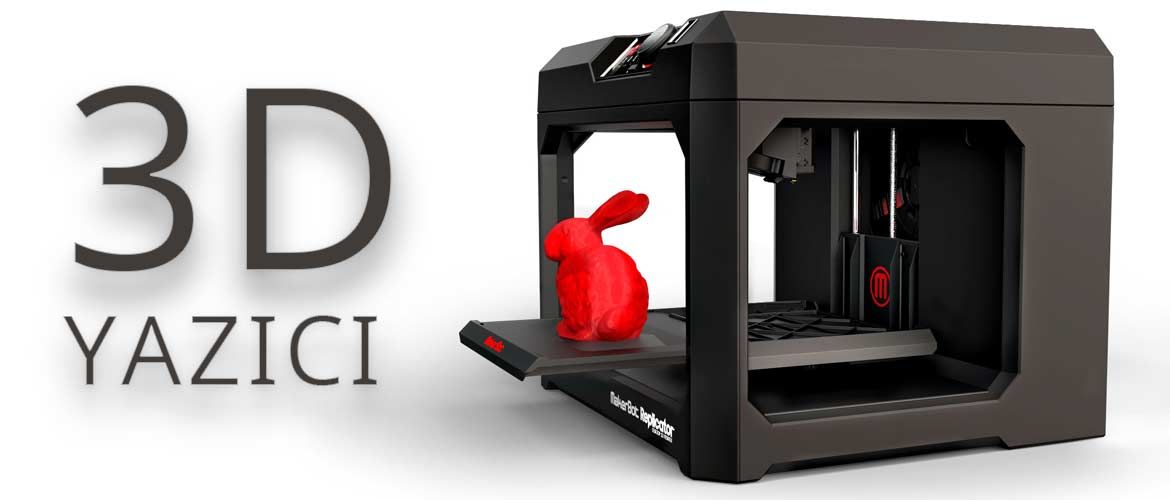 nine0003
 Well, at a speed of 150mm / s, you can already print full-fledged models. Here, for example, I printed a model at this speed:
And this is not a draft part, but a full-fledged one, for a commercial order. Here is what I printed, the size of this medal is 22 centimeters:
If you look at macro photography, you can evaluate both the detail and the level of stacking layers at this print speed:
By the way, as you can see, the medal was printed in two colors of PLA plastic. This type of printing is not difficult, just at a certain moment of printing, you can pause the printer and replace the filament. But I want to add that Cura has a handy plugin that allows you to precisely set the pause on the desired layer. To do this, go to the plugins, and select the “Filament Change” function in the post-processing plugins, in which we simply set the layer on which the pause will occur. The printer will stop printing at the right moment, move its head to the extreme left side in front and squeak loudly, calling for a replacement of the filament:
Through this plug-in, you can set the replacement of the filament at least on each of the layers, which is very convenient and allows you to achieve interesting effects when printing art objects.
 I hope my advice will be useful to those who are fond of 3D printing.
 I have also printed an axolotl toy for children, which consists of closed links:
Printed at 120mm/s, and could have been more successful if I had not forgotten to remove the automatic supports in Cura. But since there were supports, I had to spend time post-processing and separating the supports, as well as cleaning up excess plastic in the links. This is what this axolotl looks like on a macro shot:
Layer height 0.25mm, travel speed 120mm/s, table temperature 60 degrees, extruder temperature 220 degrees.
The next model was among the models on the flash drive provided with the printer, this is a ghost keychain.
By the way, I want to add a macro photo of the substrate that remained after printing, so that you can evaluate the uniformity of laying layers and tracks:
a piece of ordinary sponge to clean the plastic from dust, which is very visible on white parts. Some print different boxes and cases, but I just took a piece of dish sponge and pierced it with a filament, which I then moved on.
 After that, the parts became noticeably cleaner. nine0003
 Another custom-printed detail. Steering shaft bushings for Nissan Qashkai. Designed to eliminate the runout between the shaft and the tube in the steering reach adjustment mechanism:
Another model. Decepticon logo overlay for standard Mazda car logo:
Spinner gear. A toy that I printed to test the possibility of printing gears:
Stand legs for Sony PlayStation 4 Slim:
Well, there were many other models that were printed to order, but I did not have time to take high-quality photos. I mainly use PLA and Petg plastics when printing. Well, a little ABS, which I really dislike because of its capriciousness to ambient temperature and drafts. And as you can see from the photo, there are no problems with printing. The only problem I had was changing different types of plastic during printing and clogging the nozzle as a result. But it's my own fault, I shouldn't have experimented. nine0003
Conclusion:
As you can see from the review, I really liked the Kywoo3D Tycoon Max 3D printer.
 It is definitely worth the money, here it is clear that the manufacturer did not save on everything and everyone, as is the case with other manufacturers. I will try to indicate the advantages that the buyer receives:
 Reliable design and rigid frame . A double profile and a metal frame are assembled into a single design that is reliable and does not give any backlash. This has a positive effect on detail and print quality, as well as on the maximum print speeds. Also, all cables and wires are correctly laid in the printer immediately from the factory. And the heating table is attached through the XT60 connector, which has long proven its reliability. nine0003
Shafts along the axes Z and X. The presence of shafts and plain bearings also has a positive effect on printing accuracy and overall reliability of the design. Since they are less subject to wear and play, unlike wheels that drive along a profile.

Axis rail Y . The advantage of rails over conventional wheels, I think, is not even worth discussing. This is a more accurate movement of the extruder, and the absence of backlash, and durability. Of course, it would be better to have rails on all axes, but this will significantly increase the price of the printer, and it will no longer be so interesting. nine0003
Easy filament threading with scroll knob . Here I will attribute this not only to pluses, but directly to huge pluses. Such a trifle like, but very much affects the work with the printer, especially if you print a lot and often change the filament.
Short feed extruder MK10 . Allows you to safely print any type of filament, including flex. In addition, unlike Bowden, plastic is saved here. The retract works more adequately. In general, I personally prefer Direct extruders, although I have a printer with a bowden system. nine0003
Availability of Wi- fi module.
 Let him be weak, and not everyone needs him. But for some it will be very useful and necessary.
 Axis motor synchronization Z . Another little thing that many manufacturers neglect. Meanwhile, this little thing affects the accuracy of printing. And many people customize their printers by adding a Z-axis belt.
Auto level. The printer builds a table map using 36 points and then takes into account any irregularities during printing. Which is very good for the adhesion of the base layer. Well, of course, there are no dances around the printer with a leaflet for an exact fit. To be honest, this process is what I dislike the most during printing. nine0003
Print area 300*300*230mm. With these dimensions of the printed area, you can print a much larger number of details than with the usual 220 * 220mm in most models. True, as a minus, the dimensions of the printer themselves are already acting here.
 Under it, you need to prepare a surface with dimensions of 62 * 62 centimeters, and not every table is suitable here.
 But to be honest, I did not find any minuses for the printer. Well, except perhaps the dimensions and the weak signal of the Wi-fi module. But I already wrote about this above. Well, perhaps the relatively simple firmware can be attributed to the minuses, although it does not affect the print quality, it's just an interface. nine0003
Kywoo3D Tycoon Max is currently my main 3D printer, on which I print most models. For yourself and to order. Print field 300 * 300 * 230mm allows you to print large enough parts or batches of parts, which suits me completely. I also liked the robust, well-thought-out and monolithic design of the printer, as well as the speed of its operation. As for working on wi-fi, this did not take root for me. At first I dabbled in sending and monitoring, and then, out of habit, I returned to the flash drive and card reader again. In terms of noise, the printer does not raise any complaints, it is the same as most FDM printers.

Learn more