3D printer for use near me
3D Printing | 3D Print Services
Find a 3D Printing Location
Print Functional Prototypes
You can use 3D printing for prototypes or one-of-a-kind items. Let The UPS Store® bring your ideas to life. We can even use your 3D CAD file.
Construct Manufacturing Jigs and Fixtures
We understand when you do your own manufacturing, jigs and fixtures are critical for insuring high-quality and efficiency during assembly and testing. Our 3D printer can create complex parts so you are not dependent on a CNC machine.
Create Custom Accessories
Want to design your own smartphone case or money clip? Most items that are smaller than a breadbox and can be made out of single color of plastic are perfect for 3D printing.
Build Architectural Models
You can work in just about any 3D architectural design program and then export to common 3D CAD file types. The finished product is ready to show off or you can sand and paint your building to give it just the right look.
3D Printing Services Expanded Across Nation
The UPS Store continues to expand 3D printing services nationwide to meet the growing demands of its small business customers. 3D printing now available at approximately 20 The UPS Store locations. Use the interactive map below to find a participating location near you, or check out the full list of all The UPS Store locations offering 3D printing services.
3D CAD and 3D Scanning Services
The UPS Store 3D print locations can now also offer you 3D CAD and 3D scanning services through HoneyPoint3D. Getting a custom 3D print has never been easier - you dream it, HoneyPoint3D designs it, The UPS Store prints it. Enjoy the HoneyPoint3D benefits of an easy quoting process, affordable and quality engineering, online viewing of your 3D files, and efficient turn-around times. Get your 3D CAD or scan quote today!
Netfabb® at The UPS Store®
Participating The UPS Store 3D print locations are utilizing Netfabb software for 3D print file preparation and customization. Services available at these locations include:
- File fixing
- Text labeling
- Logo labeling
- Cutting
Contact or visit these Netfabb locations to learn more about their advanced 3D offerings.
3D Printing Frequently Asked Questions
Here a few questions we frequently hear about 3D Printing.
Please feel free to contact your local The UPS Store for any other questions you may have
-
What is 3D printing?
-
3D Printing is a manufacturing process that uses a digital file to create three-dimensional objects one layer at a time. We run a system that uses ABS plastic and soluble supports to create realistic prototypes and marketing models.
-
What kinds of things can I 3D print?
-
Small business owners and aspiring entrepreneurs will have the opportunity to print prototypes as part of the new product development process. With this printer, The UPS Store locations will be equipped to produce items like engineering parts, functional prototypes, acting props, architectural models, fixtures for cameras, lights and cables.

-
How long does it take to print?
-
The time it takes to print an object will depend on the complexity of the design. A simple object may take 4-5 hours, while a complex object may take 24 hours.
-
Which UPS Store locations are offering 3D printing?
-
The UPS Store is in the process of rolling out nearly 100 3D printing locations across the country. Visit /print/3d-printing/locations for more information.
3D Printing in the Denver Public Library ideaLABs
We've made some changes to the way we offer 3D printing!
We're excited to let you (yes, you!) get more hands-on with the printers and run your print job yourself. This does mean we are no longer running a print queue or accepting submissions for printing - but now you will have the chance to run the entire process yourself, from design to finished print.
Use of the 3D printer is by reservation - please drop in or call the branch to reserve time. You will need a Denver Public Library card to make a reservation in advance. The maximum time you can reserve is two hours. We ask that people only make one reservation per week so as many people as possible can use the printers. Please read the full 3D Printer Policy below for details. We also have an FAQ below that for general questions about 3D printing.
Every ideaLAB has at least one Lulzbot printer. Visit your neighborhood lab to learn more! Please note that the ideaLAB at the Central Library will remain closed due to on-going renovations to the building.
Denver Public Library ideaLAB 3D Printer Policies
As the ideaLBs reopen, the use of tools may look somewhat different than in the past. One of the big changes we’re making is to give customers more of a hands-on experience using the 3D printer.
In order to help you use the 3D printer successfully (and safely), we ask that you read through the following policies:
- Please try to read through the 3D Printing Guide before your first visit if you can.

- Use of the 3D printer is by reservation only. For the present, a reservation gives you the right to use the printer for two hours, once per week. We ask that families and groups not make multiple or back-to-back reservations under different accounts - that makes it much harder for other people to get access to the 3D printers.
- Please know that if you don't show up within 10 minutes of your reservation time, the system will automatically cancel it.
- If the printer is broken when you have a reservation, we'll do our best to let you know ahead of time, but sometimes that may not be possible.
- You must check in with ideaLAB staff before using the machines so you can get the material you're using approved by lab staff and get the 3D printer toolkit. We want to make sure everyone is safe and that you're comfortable with the equipment.
- We're sorry, but you can't bring in your own filament. We want to keep jams and fumes to a minimum for everyone.
 We will provide free PLA+ filament, but we can't change out colors for each customer nor guarantee you a specific color.
 - We'll give you some basic troubleshooting tips, but if something goes wrong, please don't do anything that involves disassembling printer hardware. Doing so will result in loss of privileges to use the machine. Please let us know if a problem pops up and we'll help!
- Things happen. Occasionally extruders will jam, beds will get scorched, and minor disasters will occur - these are understandable, and part of the process of learning how to use the printer, and will not affect your ability to reserve and use the machines. If you do something intentionally dangerous or that we've asked you not to do - using unapproved filament, removing parts from the machines, etc. - you will lose your privilege to use the machines..
- DPL printers can not be used to print out any weapons (if it's for cosplay, talk to staff and we'll try to figure it out). Outside of that, most things should be fine, but the Library retains the right to refuse any print request for any reason.
- Set-up and clean-up time is part of your 2 hour reservation, so please plan accordingly! Please finish your 3D printing jobs at least 10 minutes before the session ends so you can clean up materials and station. Jobs can not be left running overnight or past the end of your 2 hour reservation.
3D Printing FAQ
What is 3D printing?
Start with this definitive guide where you’ll find everything you need to know about 3D printing, beginning with the very basics before diving deeper.
How much does it cost?
3D Printing is currently free at Denver Public Library!
What can be printed?
All printing is done with PLA, a bioplastic made of corn. It might get a little melty if you leave it on your car dashboard, and you may not want to use it to make shelving mounts for your prize kettlebell collection. It's possible to make your model a little bit stronger by making it's walls thicker or requesting more infill.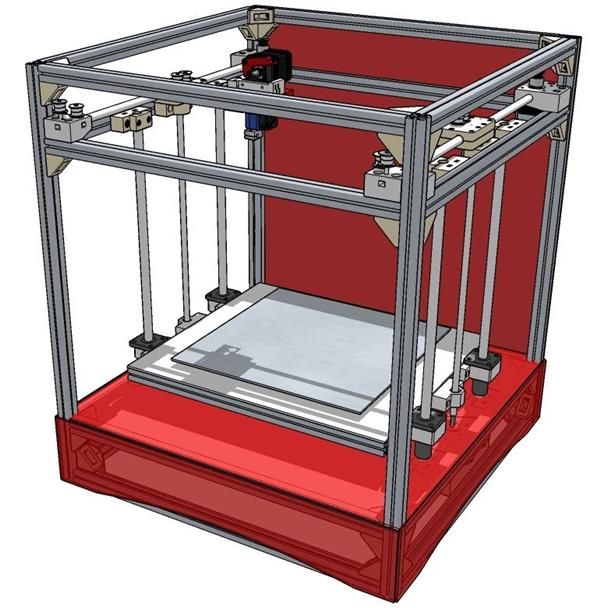 Ask us about it and we'll try to help you out. But if the piece you're printing is really mission critical in some way, use it at your own risk.
What cannot be printed?
Due to demand and limited resources, we can't print any job that will take over two hours. If you have something you'd like to print that will take longer than that, we're happy to help you try to figure out how to break up your model into smaller jobs, scale your print, or point you to one of the many paid 3D printing services. We also will not print out any weapons. Outside of that, most things should be fine, but the Library retains the right to refuse any print request for any reason.
Who can operate the printer?
Anyone who goes through an orientation with a staff member can! Read through the 3D Printer Policy above to learn how.
How To Get Your Object Printed
-
Create a file
- You can download an object file from a site like Thingiverse, Bld3r or use some of the lab's free modeling software like Tinkercad, Blender or SketchUp to make your own designs.
- Export your object as a .stl or .obj file. Need help? Just ask!
- You can download an object file from a site like Thingiverse, Bld3r or use some of the lab's free modeling software like Tinkercad, Blender or SketchUp to make your own designs.
-
Make your reservation
- Reserve time by coming by the branch, calling, or come into the ideaLAB during our open hours. You can reserve up to two hours on the machine.
-
Print out your creation
Construction 3D printing is waiting for a breakthrough The first construction projects using this technology appeared only in 2014. We are talking, first of all, about the so-called small architectural forms (benches, flower beds, fences). They never even dreamed about building houses. But already in 2015, the Russian startup Apis Cor made a splash - it printed a whole house in the Moscow region. Since then, news about new 3D printed houses has periodically appeared. However, despite the fact that the technology proved to be very promising in terms of the speed of construction of housing and the reduction in the cost of construction, no mass implementation followed.
Construction is the world's number one market. And, if many technological innovations are being introduced in the field of high-rise construction, then little has changed in the field of low-rise construction over the past decades. The last 30 years have seen the availability of the Internet, mobile phones, mobile internet, robotics taken to a new level, etc., but when you get to a house construction site, you are unlikely to find many technological innovations. Automation is practically non-existent, and manual labor prevails. 2020 was a test of strength for the whole world, and also led to the highest level of inflation, which, first of all, hit the construction market, there was a dramatic change in prices for metals, cement, wood and much more.
This Internet meme shows what happened to the cost of building materials in just a year. And the process is still going on. At the same time, there is a serious rise in the cost of labor, and there is an acute shortage of it. All this leads to a sharp rise in the cost of building houses. No matter how strange it may sound, statistics show that the growth of automation does not occur when everything is fine, but precisely in crisis situations, during increased competition, reduced demand and the need to urgently look for new technologies to increase production efficiency. So it happened this time, and after some stagnation, construction 3D printing received a new impetus for development.
Preparing to write an article, I turned to the founder of Arkon - Boris Kozlov y. Arkon was established in 2020 and is engaged in the production of construction 3D printers, both a workshop type for creating prefabs (prefabricated houses) and a portal one capable of printing a two-story house. I asked Boris the key, in my opinion, question:
- Construction 3D printing appeared in 2014, but no mass introduction of this technology followed in 7-8 years. Why do you think this happened, and why is there a surge of new projects right now?
- It seems to me that the reason is the snowball effect.
The technology had to mature, grow from a hypothesis to a pilot implementation, and finally to commercialization and scaling (what is happening now). In addition, it should be borne in mind that construction is one of the most conservative industries, where, unlike even aviation and the automotive industry, there is still an extremely low introduction of digital solutions and automation in the field of the production process itself - the construction itself. The issue of regulation and certification also plays an important role - this process is long and creates an additional lag.
In 2014-2016 the first samples of building 3D printers and prototypes of printed buildings appeared. The concepts of various form factors of construction 3D printers and types of printing materials were tested.
In 2017-2018 in the world, the first notable investments were made in a number of construction 3D printing start-ups. Further, by 2020, these investments "rolled" in the form of reaching a certain level of technology maturity - the first commercial products (3D printers and houses) appeared.
Finally, in 2020-2022 it became clear that the hypotheses of the effectiveness of construction 3D printing were justified (cheaper, faster, more environmentally friendly), and large investments began in the industry. A striking example is the investment of GE (the French division of General Electric) in the Danish COBOD or the achievement of a capitalization of $ 2 billion by the American company ICON.
In 2022-2023 over 1,000 buildings will be printed worldwide already, scaling from single buildings/pilot projects to entire villages and major infrastructure/reinforced concrete implementations. In addition, in a number of countries, by now, a regulatory framework has been created or is being actively created for the introduction of additive technologies in the construction industry.
Thus, I believe that the specified time period is a fairly natural cycle of technology development, which is likely to experience exponential growth in the next decade.
According to ResearchAndMarket report, the global construction 3D printing market is valued at USD 354.3 million in 2022 and is projected to reach USD 11068.1 million by 2027, growing by 99.04%.
Various market processes affect the prices and behavior of participants in the global 3D construction printing market. They create price signals that are the result of changes in the demand and supply curves for a product or service. They can be associated with both macroeconomic and microeconomic factors. Even human emotions can also drive decisions, influence the market, and create price signals.
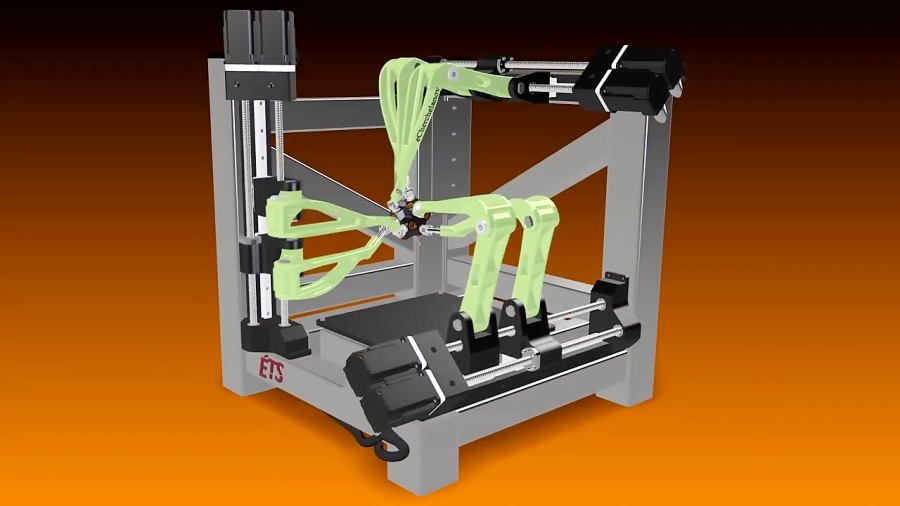
Now let's take a quick look at what the construction 3D printer is. Without delving too deeply into the technology, we can say that construction 3D printers are very similar to classic FDM/FFF printers that print with plastic, but instead of plastic, the material here is a cement mixture, which is fed directly into the nozzle and forms an object by layer-by-layer overlay. Printers are also portal, on the basis of a flying boom, with a robotic arm.
Pictured left is a construction printer based on a boom. The figure on the right is a gantry construction 3D printer
In the figure above, a construction 3D printer in the form of a robot arm installed on a mobile platform.
Everything changed completely when, in the summer of 2021, the American company ICON, which was trying to introduce 3D printing into the construction of various auxiliary facilities, signed a contract with one of the largest American developers, Lennar, to build a village of 100 houses in Texas and immediately became a unicorn , having received 200 million dollars of investments from several investment funds.
Pictured is a 3D printed house in Austin, Texas. A 3D printed house in Austin, Texas. At the same time, the Danish company COBOD, created by the world's largest construction formwork company PERRI, began selling its gantry 3D construction printers and participating in construction projects around the world. In the photo below, a modern two-story house built in Germany and a school building in Malawi, built in record time with a minimal budget.
Few things unite developed, developing and poor countries, everywhere their problems and tasks, but Affordable housing shortage is a global agenda . If in poor countries there is an acute problem with the increase in the number of homeless people due to a lack of housing, as such, then in developing countries it is necessary to dramatically accelerate the number of new housing being built to meet the needs of a growing population. In developed countries, the problem is primarily in the cost of housing, which has risen in price to such an extent that it has become practically inaccessible to young people. And with the simultaneous increase in life expectancy in these countries, this problem is only getting worse.
At the same time, the trend towards "green agenda " is developing, reducing CO2 emissions, building with more environmentally friendly materials, etc. But, unfortunately, so far the construction industry is the absolute leader in CO2 emissions, as well as in the amount of garbage that each construction site leaves behind. This is not to say that construction 3D printing solves all these problems, but at least it is moving in the right direction. Let's look at this with a few illustrative examples.
Today, when we talk about 3D printing houses, we are talking about printing walls. Everything else (foundation, windows, doors, ceilings and roof) is done in the traditional way. 3D printed walls are built as fixed formwork, which significantly saves the amount of cement used , and this, in turn, reduces the cost of construction and reduces the environmental impact of cement production. In addition, with this method of construction, no additional waste is produced, the strength of the structure does not suffer. It can be reinforced, as shown in the photo on the left, and engineering communications can be immediately laid, as shown in the photo on the right, which also affects the final speed of the construction of the object. At the same time, the total weight of the structure is reduced, the remaining cavities can be filled with lightweight foam concrete, insulation, straw or any other available material. Such a lightweight design can use a lighter foundation. The construction method itself is more economical in terms of material, and therefore environmentally friendly.
Eco-concrete with the addition of polymers is being actively developed, the production of which reduces CO2 emissions from 30% to 100%. The Apis Cor company mentioned at the beginning of the article, which built a house in the suburbs in 2015, is now based in hot Florida, plans to start using this material in its projects.
Another startup from Russia, Mighty Buildings, headquartered in California, initially relied on a polymer with the addition of mineral chips. And while the company doesn't build entire homes, it only makes wall panels, it has won numerous design awards, as well as a $400 million valuation in several investment rounds.
As a result, with a rough calculation, we can say that the total savings on the construction of walls can reach 30%, and the total cost of the house can be reduced by 10%. This is true for houses designed for conventional construction. And if you initially design with 3D printing, you can improve this ratio by optimizing the laying of communications, the ability to immediately print interior walls, bookmark niches for bathrooms, fireplaces, built-in wardrobes and kitchens, as was done in the house built by COBOD in Germany.
"There are spots on the sun." Despite all the advantages of construction 3D printing, has several significant disadvantages of . The main one is layering, which cannot be avoided at the current level of technology development.
The photo above shows the layering of the 3D printed walls.
This task can be worked in several directions:
-
Ribbed walls can be plastered, painted and played with as a design element.
 That's how ICON does it in the US, for example their latest project House Zero is done that way and has won a number of design awards.
-
Use special "shutters" on the print head that allow smooth layers, as COBOD and other manufacturers do. The photo below shows that this does not ensure the complete absence of layering.
-
Fully sand the surface to get the usual smooth wall for plastering, painting, wallpapering or other finishing. It is possible, but it will require huge labor costs, which can reduce the overall efficiency of using 3D printing.
Pictured above is a 3D printed wall sanded smooth.
The second problem is the required temperature. Ideally, printing should take place at temperatures between +5C° and +30C°. Humidity is also important. Using additives, you can push these boundaries, but not indefinitely. At strong sub-zero temperatures, printing will be possible in the field only if the construction site is covered with a dome and the required temperature is reached inside with the help of heat guns. In conditions of intense heat, it is preferable to print at night. Another solution could be to print the wall panels in the shop and assemble them on site. Of course, each of these decisions will have a negative impact on the economic efficiency of the project.
Building 3D printing can be useful not only for the construction of houses . With its help, you can solve many other problems, and there its disadvantages will not matter. For example, the American concern GE uses COBOD printers to build towers for wind turbines in the shop. Ribbed surface and temperature restrictions in this case do not play any role. Construction takes place in the shop, after which the object is transported to the installation site.
3D printed wind tower. 3D printed wind tower. Construction 3D printing, or, as it is also called, additive construction, has just appeared, and I want to believe in its bright future. There are many prerequisites for this, but a lot still needs to be done for success. First of all, it is necessary to develop principles for designing houses for building 3D printing. Then it is necessary to attract top architects to create landmark projects, which can be followed by the mass introduction of a new and very promising technology. Construction 3D printing could help solve the global housing shortage and bring more automation to other areas of construction.
Alexander Kornveits
Expert in the field of additive technologies and 3D printing, head of Tsvetnoy Mir company
Two-extruder handsome and my path to two-extruder printing Preface1 39002
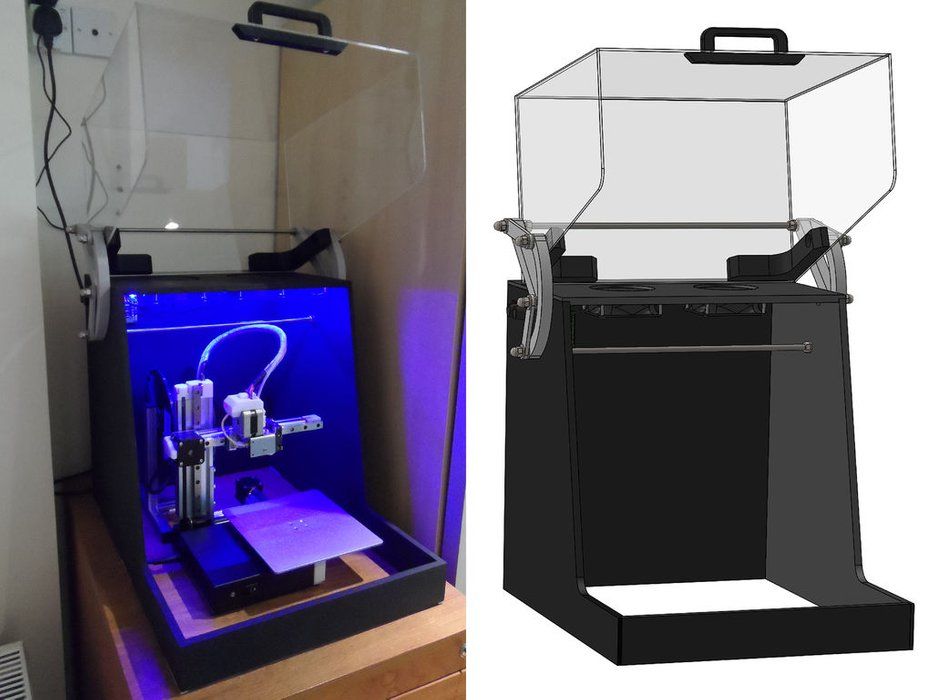
At the very beginning of my 3D journey, I thought about purchasing a dual extruder printer. A photo I found online of a case with a complex geometry being printed on top of a water soluble backing inspired me to look for an affordable solution.
This is how Vovan-1 was ordered with the Chimera extruder from the previous review. And that was a mistake in the context of dual extruder printing.
In my humble opinion, Chimera is an unsuccessful crutch that only conditionally implements printing with two materials. In fact, for a number of reasons, it is difficult to get a good and stable result on the Chimera. But it was possible to find out later. If you want, I can tell you the reasons for this statement in the comments.
Vovan never got around to screwing in the second nozzle, and he remained an excellent single-extruder hard worker and helper. I am still pleased with them.
My search for an affordable dual extruder solution continued. I began to study ready-made solutions available on the market. The result of the search was Picaso Designer PRO 250 from the manufacturer PICASO 3D, based in the city of Zelenograd, located 37 km northwest of the center of Moscow.
In the summer of 2017, this FDM printer was almost the only domestic solution that allows printing with two materials out of the box. At that time, this model was already 1.5–2 years old.
The price of the new PRO250 was quite biting for a hobby. Therefore, the first thing I did was go to the well-known site for free ads and, lo and behold, I found a new printer there for 65 tr. Yes, even with ~ 10 kg. "free" plastic.
According to the marking on the box, this printer was released at the end of 2015. But as it turned out later - the printer, from the moment of purchase, was not even taken out of the box.
After paying the seller, loading the box with the printer and a bag of plastic in a taxi, I headed home.
So, on August 2, 2017, your obedient servant became the proud owner of a brand new Picaso Designer PRO250.
First introduction to the printer
Arriving home and dumping my swag in the middle of the room, I studied the names of the generous plastic bonus and proceeded to unpack the printer.
By the way, FL-33, which is in the photo, turned out to be one of the best plastics that I printed with. It's a pity they don't make it anymore.
In the box with the printer, in addition to the printer itself, 2 more plastic spools, a minimal set of tools and a chisel were waiting for me! 😊
As I said, the printer was brand new. Even the shipping clamps were in place.
On this cheerful note, after placing the printer directly on the computer table, the study of the modest accompanying "documentation" and the contents of the complete memory card began.
Thus began an exciting adventure with the subject.
The first happy note was struck when I turned on the printer and ran the table calibration. The printer turned out to be quite noisy in operation. I immediately came to the conclusion that being at the same table with him would not be comfortable. Vovan with his quiet drivers worked much quieter.
I note that the printer is equipped with semi-automatic table calibration - a pretty handy thing.
On the memory card that accompanies this unit, were recorded: the distribution of the proprietary slicer "Polygon", calibration templates, test models for single and dual extrusion printing, as well as garbage that remains after MacOS X (sic!) and . .. a virus!
Yes, yes, the same virus that assigns an icon to .exe files and pretends to be a folder. I'm sure many of you have experienced this. There was a screenshot somewhere, though, but I don't think I'll be able to find it after 3.5 years.
But no - the screenshot was found ... #not photoshop
After eliminating minor misunderstandings with the memory card, I proceeded to the next stage of preparing the printer for work - correcting nozzle offset. This is necessary for accurate printing with two materials.
For this, ABS and HIPS were filled into the printer: into the first and second extruders, respectively.
Filling, unloading and changing the plastic, as well as most typical operations, are carried out in a semi-automatic mode. When unloading plastic, the printer performs a so-called "atomic" cleaning.
All calibration came down to printing a special template, and adjusting the nozzle offset through the printer menu, according to the divisions on the template.
I couldn't bear to try the printer's main feature - dual-extruder printing!
To do this, the “complete” slicer was immediately installed, a two-color cat was prepared and printed.
Polygon 2.0 proved to be an easy-to-use slicer with the necessary functionality, designed for any user with minimal 3D printing skills.
What to say? For the first (almost the first) time it turned out not bad. A slight overflow is visible.
I printed the cat on the extrusion coefficient x1.0 that I was used to, but this is not the norm for this printer. A feature of Picaso printers of the classic line is that for normal printing, this coefficient lies in the range of 0.95–0.97 (i.e., 95–97%). 100% supply of plastic with a diameter of 1.75 is guaranteed to lead to overflow.
I really wanted to quickly pick the still warm cat off the table, so the patient suffered a little.
A small video of the process of printing a cat - my first dual extruder printing:
One of the very useful functions of the printer is the ability to view the operating time of the printer in hours and spent filament. This allows you to schedule printer maintenance activities.
The mileage of the printer after calibrations and the first unsuccessful attempt to print a cat.
Next, Drakosha was printed, the G-code of which was recorded on the memory card in the “.plg” format file.
Isn't it bad for a domestic printer of 2015?
I was satisfied with the print quality.
After a minimum of hand stuffing, more serious models went into action.
In the photo: The process of printing one of the airflow prototypes for Vovan.
Result printed with water-based support. The PVA backing material is a water soluble polymer that has a lot to do with PVA glue.
The support has not completely dissolved yet. It is probably faster to do this in an ultrasonic bath.
For more complex models, Polygon 2.0 was not enough, so I tried using a more advanced alternative adapted by the printer manufacturer - the Kissicer PRO slicer.
I will not go into the description of this slicer. In a nutshell: a completely professional product that allows you to solve any printing tasks, but with a specific interface.
The last one seemed to me too far from the concept of "user-friendly".
More like a psychedelic CGI trip from the early 80s movie TRON.
From that moment began my journey in improving the printing process and the printer itself.
Small deviation
It is worth saying that during the operation of this rather difficult printer device, questions often arose. This was due to a large number of subtleties and non-obvious moments.
Legendary-Nikita-of-Picaso-3D support often helped me in solving issues. I want to give him great respect! It is hard to imagine how many users of Picaso printers he has helped with professional advice.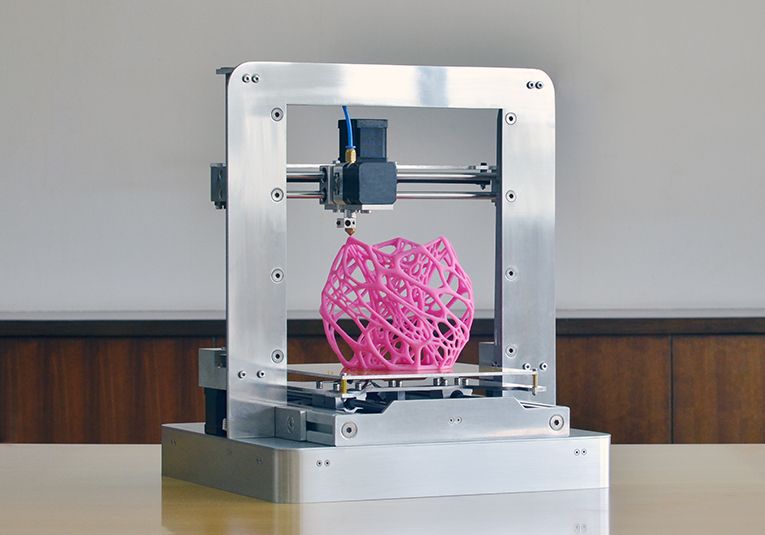
Sergemax gave me a great introductory excursion. Without it, it is unlikely that I managed to set up the process so smoothly on the PRO250. By sharing his rich experience, Sergemax saved me from stuffing bumps and stepping on a large number of rakes. Sergey, thank you very much for your help!
In general, at that moment I got the impression of a certain information vacuum between the manufacturer and an ordinary user, such as myself. The cycle of treatment in those. support to get an answer to questions that must have been asked thousands of times, seemed to me suboptimal, long. I set myself the task of eliminating this vacuum for myself and other users.
For this, the PICASO-3D Unofficial group was created in Telegram, which over time acquired a large number of experienced participants and accumulated a knowledge base. You can join the channel at the link
Modernization
The first upgrade was not about the printer itself, but rather about the user experience: an attempt to make the printer friends with the Simplify3D slicer I was used to.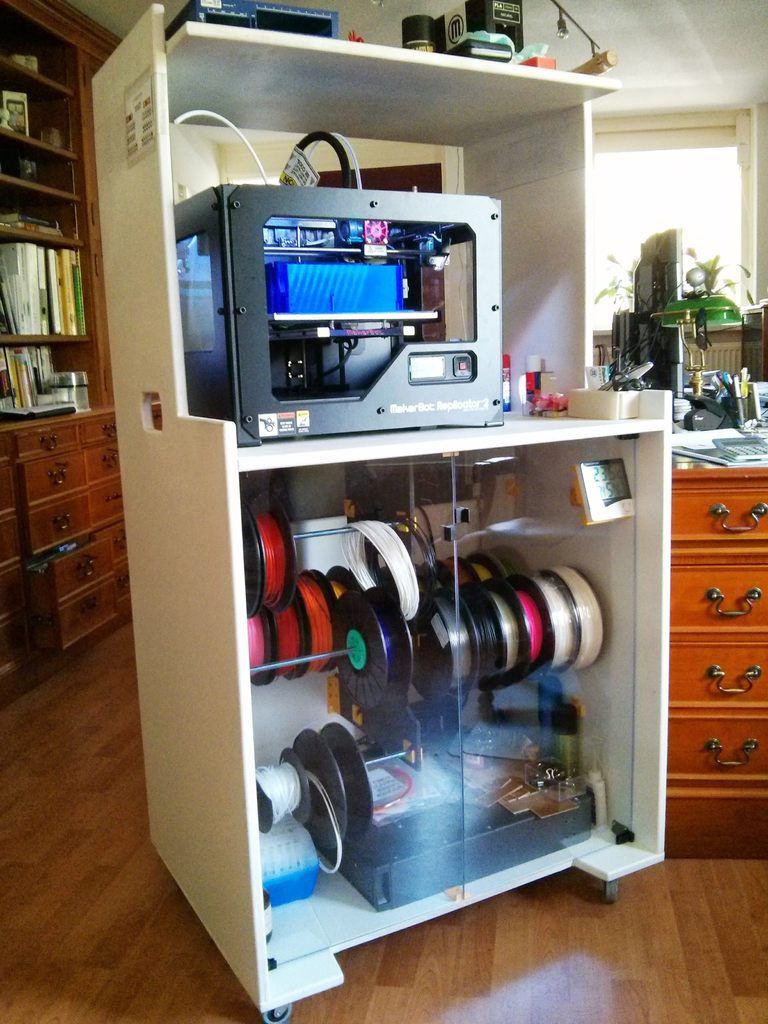
An article from Gyorg helped me with this. For this article, I would like to once again thank him!
One of my two extruder jobs with model preparation in Simplify3D can be seen in this article.
I. Replacement of belts
The first upgrade of the printer, on the advice of experienced, was to change the stock white belts with steel cord to polyurethane with neoprene fibers.
This improved fine print quality and overall repeatability. I ordered belts from here.
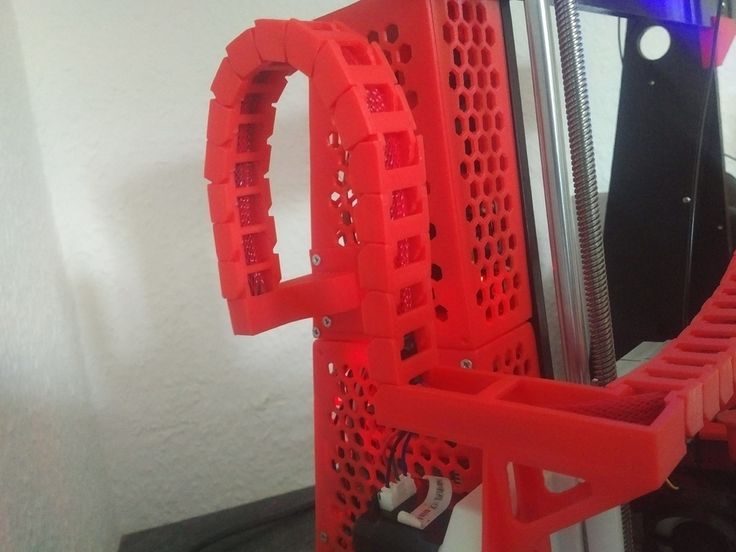
II. Cleaning system upgrade
When printing with two materials, I had a problem cleaning the second nozzle due to the inability to separately calibrate the second nozzle. For this, the modernization described in this article 9 was made0003
After switching to printing with another extruder, the printer first cleans the nozzle from plastic leaking when heated using special “drip nozzles” and only then continues printing with another extruder.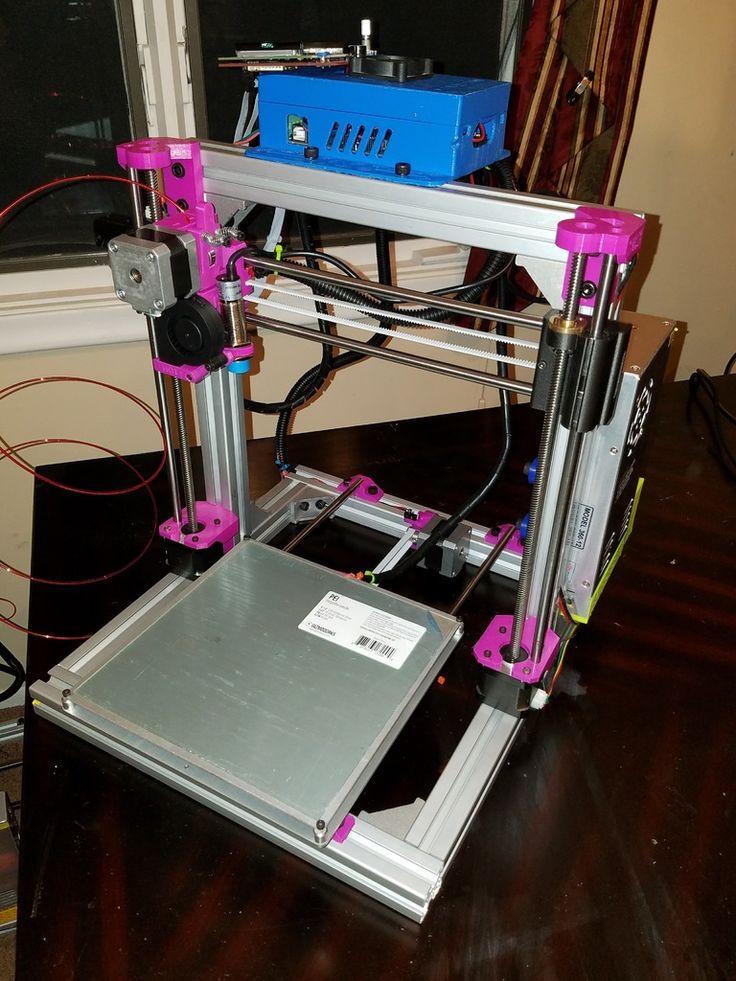
After some time, we established communication with the manufacturer in the above group PICASO-3D Unofficial .
Participants wrote their wishes regarding the improvement of the firmware. After some time, a new firmware was released (if memory serves v1.06) in which some of the wishes were implemented. Now you can calibrate the second nozzle separately.
III. Solving problems with plugs
At the cost of a sufficiently high maximum printing temperature, Picaso printers have never been structurally omnivorous due to the metal thermal barrier. Because of this, with most plastics having a low softening point, there was a high probability of catching a “cork”, and therefore screwing up the seal.
An attempt was made by the manufacturer to modify the nozzles, but this did not solve the blockage problem.
To solve the problem of printing with such plastics, using the experience gained with the operation of the E3D V6 on Vovan, I developed a thermal barrier of a different design using a Teflon insert.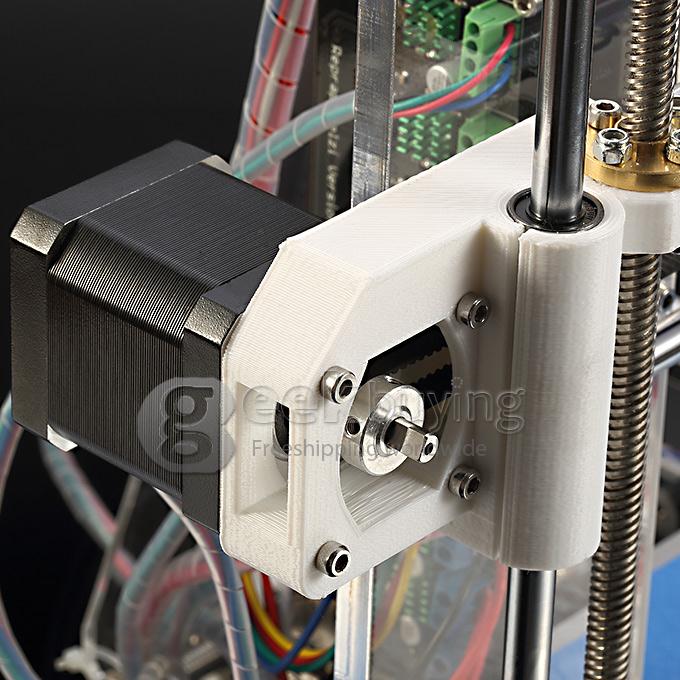
Now it seems that you can even buy it, but this is not certain.
Later, the manufacturer for the X line released their version of the hot-end solving the above problem, called "Block-250", which works on the same principle using a Teflon insert.
IV. Available multi-caliber
The next upgrade was a hot-end allowing the use of Chinese nozzles of different diameters. Together with a high-quality thermal block made of BrX and a Teflon thermal barrier, this solution showed itself quite well.
At that time, only 2 types of nozzles were available for the PRO250: 0.3 and 0.2 mm. My solution allowed the use of inexpensive Mk8 nozzles of any diameter. Probably such a kit can also be purchased.
V. Taming the Shrew it is quite noisy.
The next "serious" upgrade I developed was a kit that allows you to plug silent drivers from TMC into the printer.
Modernization has significantly reduced the noise emitted by the kinematics of the printer, and comfortably work with the printer in the same room.
About this upgrade, one of the owners of this kit wrote an article.
This is how the Picaso PRO250 sounds with SilentKit installed:
And you can listen to how it works in stock in the video with the cat.
Now I practically do not assemble and sell silent kits, but I still have about ten unsoldered boards and the corresponding looseness.
Epilogue.
In my hands, the printer proved to be a fairly reliable workhorse. In terms of print quality, it still gives odds to many modern printers.
Let's sum up my "review". The Picaso Designer PRO250 was and remains one of the few affordable dual extrusion printing solutions on the market. Now it is no longer produced, but it can be found on the secondary market for an adequate price. For this price, you are unlikely to find a ready-made solution that allows you to close out of the box issues that require dual extruder printing.
Closed chamber and high maximum extruder temperature allow printing with many engineering plastics (ABS, Neylon, PC, etc.). My upgrades allow me to cure some "sores" that the user is not ready to put up with. Users with straight hands should not have any problems with this device at all.
Many studios and productions still use this printer as a workhorse, and it is available from the secondary market to ordinary mortals like me.
For many users, this tool has become a good friend and helper. Yes, there are problems with it, but basically they are caused by the fact that the printer does not really like to forgive user mistakes. Some problems may be caused by the mediocre quality of parts or the desire of the manufacturer to print these parts.
Going deeper into the possibilities, I can say that the printer supports work via a serial port, therefore, it can be used in conjunction with Octoprint. The web interface is a good help to increase the efficiency of the workflow.