3D printer fabric
3d Printed Fabric - Etsy.de
Etsy is no longer supporting older versions of your web browser in order to ensure that user data remains secure. Please update to the latest version.
Take full advantage of our site features by enabling JavaScript.
GERMANY Find unique items from around the globe that ship to Germany
(1,000+ relevant results)
Direct-to-Textile 3D Printing - Stratasys
Since its unveiling at New York Fashion Week last fall, the ability to 3D print directly onto fabric has drawn significant interest from the world of high-end fashion. Exemplified by the works of fashion designers threeASFOUR and Travis Fitch on NYFW’s catwalk, this technological milestone gave the world a preview of what fashion design could look like when combining the geometric and aesthetic freedom of 3D printing with the comfort of fabric.
Since then, Stratasys has been working closely with a number of household fashion brands to optimize its novel PolyJet Technology™ to meet the needs of modern-day apparel fabrication and make customized fashion design commercially viable.
As the company works towards this goal, Stratasys is proud to reveal today two collaborative works with esteemed fashion designers Julia Koerner and Ganit Goldstein. The works form part of Re-FREAM, a collaborative research project funded by the European Union bringing together artists, designers, engineers and scientists to co-explore the use of technology and 3D printing for the future of fashion.
ARID Collection – Julia Koerner.
At today’s virtual ARS Electronica Festival, Koerner unveiled her latest collection: ARID. The works are built on research focusing on digital processes from 2D to 3D for nature-inspired geometries and the connectivity and adaptability of textiles with multi-color 3D-printed parts – with an underlying focus on material efficiency and sustainability.
ARID amalgamates this research into a collection of 38 3D-printed parts that can be combined to form a full-dress, or cascade into a number of different looks and combinations. Using Stratasys’ PolyJet Technology, the digital designs were 3D printed directly onto sustainable fabrics in vivid colors, creating an enigmatic shimmer effect when the garment is in motion, while maintaining the comfort and wearability of fabric garments.
The collection also allows for the easy adaption of personalized sizes through modified 3D printed connectors, which are derived from 3D scans of the wearer.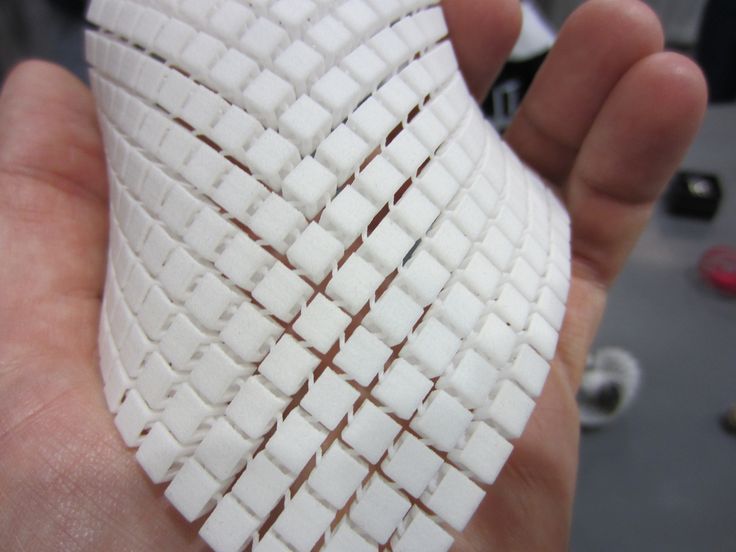 There is no sewing involved in the final assembly of the parts. Instead, all seams are connected with 3D printed joinery, which is the first time 3D printed connectors have ever been used in the assembly of textiles.
Customized Design – Ganit Goldstein.
Goldstein teamed up with Stratasys to achieve her mission of customized fashion design by combining craft methods with direct-to-textile 3D printing to produce a Japanese-style dress (see video here).
“Looking at the fashion world today, I want to introduce a new way of manufacturing – moving away from mass production to customized design,” says Goldstein. “3D printing has always offered the potential to personalize design in ways not possible before, but to truly create a new way to manufacture requires a new kind of textile.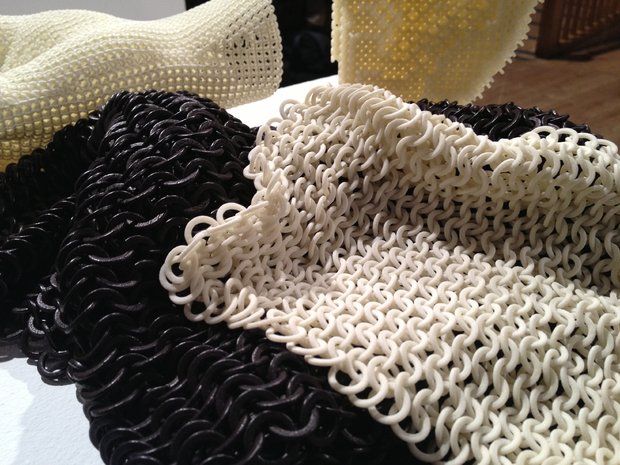 My goal is to create a new hybrid world of crafts and multi-color 3D printing – connecting past, new and future techniques to evolve fashion design.”
Goldstein spent a year in Japan to learn interweaving and was inspired by Asian craft embroidery and textile painting. Her kimono design follows the Japanese ‘ikat’ coloring method. While Japanese embroidery is the soul of the project, direct-to-textile multi-color 3D printing is at the heart of it. The kimono follows an algorithm that is composed on the 3D body scan and translated to the print surface during the printing process.
For the first time in 3D printed fashion, textiles can be leveraged as the skeleton of the garment. This allows for extra movement within the fabric, but also enables full gain between the capacity and material thickness that is printed on top of the fabric. This enables designers to bring unique designs to market that are not possible in any other way. It also challenges Stratasys to take the technology to places it’s not been before to support the emerging demand for direct-to-textile printing.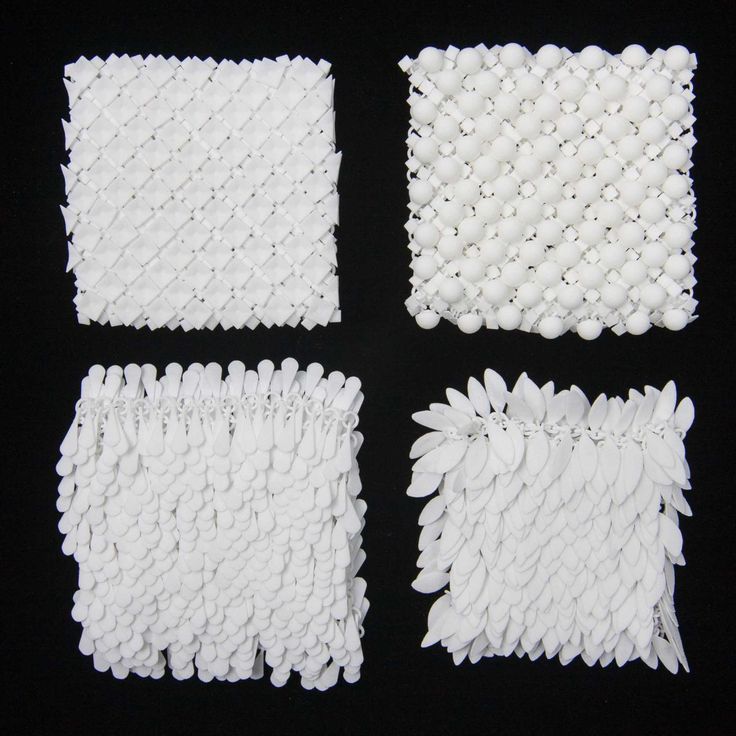
“In fashion, it’s important that we continually optimize and evolve to introduce new design forms,” says Goldstein. “During the past year, I experimented with numerous different fabrics and technologies to incorporate 3D printing within textiles. Achieving this milestone takes us away from 2D design and opens up a world of wearable 3D garments.”
Koerner and Goldstein leveraging Stratasys’ direct-to-textile printing technology exemplifies Re-FREAM’s goal of fully digitizing design workflows – from design through to production. In doing so, it demonstrates the possibility for localized manufacturing and mass customization – regarded by many as the future of fashion.
As Goldstein attests to in her video, direct-to-textile 3D printing has the potential to be a game-changer for the fashion industry. With the commercial interest in this innovative technique already at an advanced stage and pilot-testing underway, it may not be long before potential becomes reality.
To find out more about the latest developments from Stratasys in design and fashion, check out the latest podcast from The Artian featuring Stratasys Creative Director for Art, Design, and Fashion, Naomi Kaempfer.
3D printed mesh fabric
Prologue
Hello everyone! I am developing "smart sequins" - electromechanical color-reproducing devices for designer clothes. Our team is passionate about the idea of creating clothes and accessories that can change their color at the request of the owner or depending on environmental conditions.
In this article I want to talk about how we used 3D printing in our project, share our experience and tools. nine0008
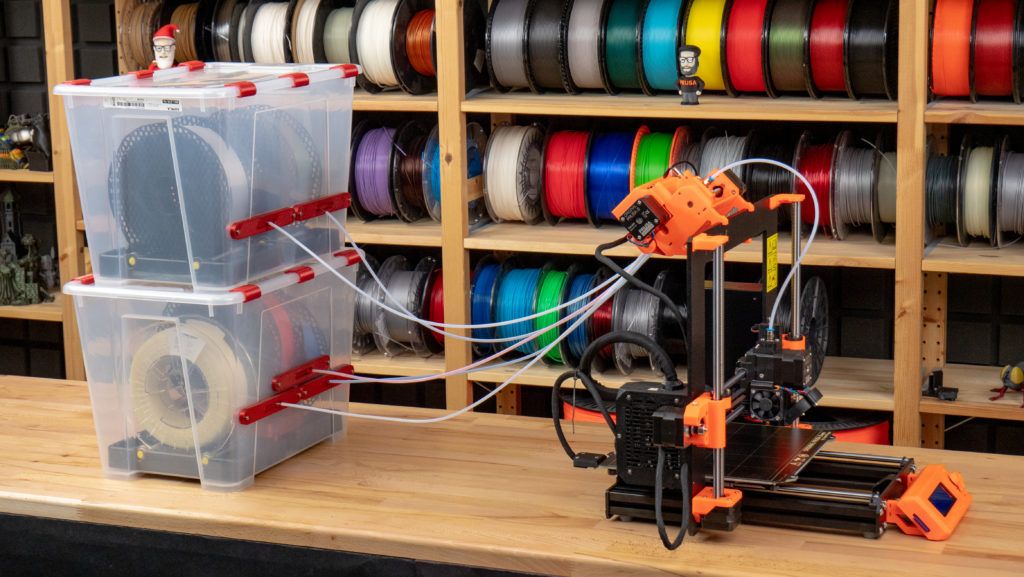
3D printing on fabric
One of the tasks that I had to solve was to figure out how to make an elastic fabric out of plastic sequins, which in its properties would resemble textile materials. At the same time, it is necessary to provide for the possibility of easily creating electrical connections between the sequins.
There are quite a few articles and materials on making clothes on a 3D printer. Many different methods have already been invented, from creating hinges right in the printing process to printing with elastic plastics. nine0008
While looking for a solution, I came across this video. From it, I first learned about the method of printing on mesh fabric using a conventional FDM 3D printer.
The author himself claims that he spied the idea here: Shorey Designs.
The essence of the method is very simple. We create a 3D model of a fragment of the future canvas, then arrange a lot of fragments so that we get a whole canvas. We start the slicer and prepare the G-code. Before sending it to the printer, you need to insert a pause and raise the extruder before printing a certain layer. The printer will stop during operation. At this point, we cover the printed layers with a mesh cloth. We continue to print. Due to the presence of large holes in the fabric, the layers of plastic will interlock with each other, as in conventional printing, and the mesh fabric will be firmly integrated into the parts.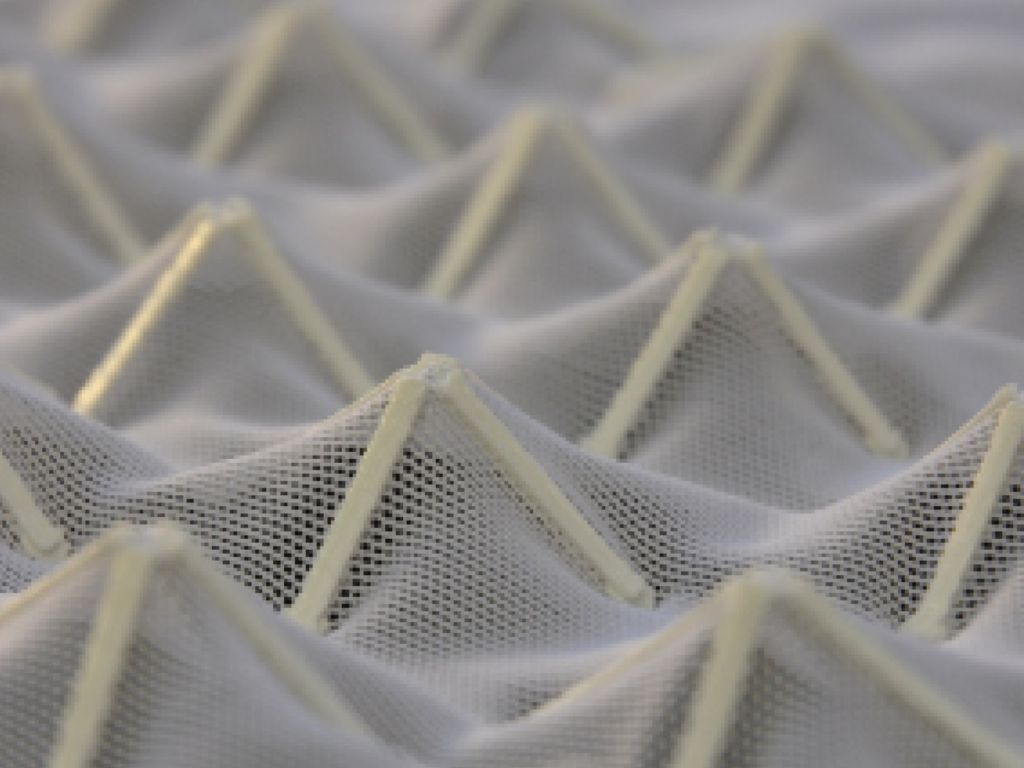 nine0008
Modifying G-code
I use Cura version 3.2.1 as a slicer. 3D printer - homemade H-bot controlled by a board based on ATmega2560 (RAMPS 1.4) with Marlin firmware.
To pause the printer, there is an M25 command. Command for lifting in Z by 20mm: G0 Z20. It is noteworthy that the M25 must go before the ascent, otherwise the next command is processed first. Why this happens is a mystery to me, apparently somehow connected with the processing of commands by the printer. nine0008
Add commands to G-code:
Operation automation
Manually searching for the required line in the G-code file and inserting commands is not the most modern solution, I thought and wrote a simple program that allows you to open and view toolpaths.
For the convenience of viewing the layers, the “explode” command is provided, which allows you to visually increase the distance between the layers of the model. After pressing the "insert pause" button, the distance between the marked layer (red) and the previous one increases.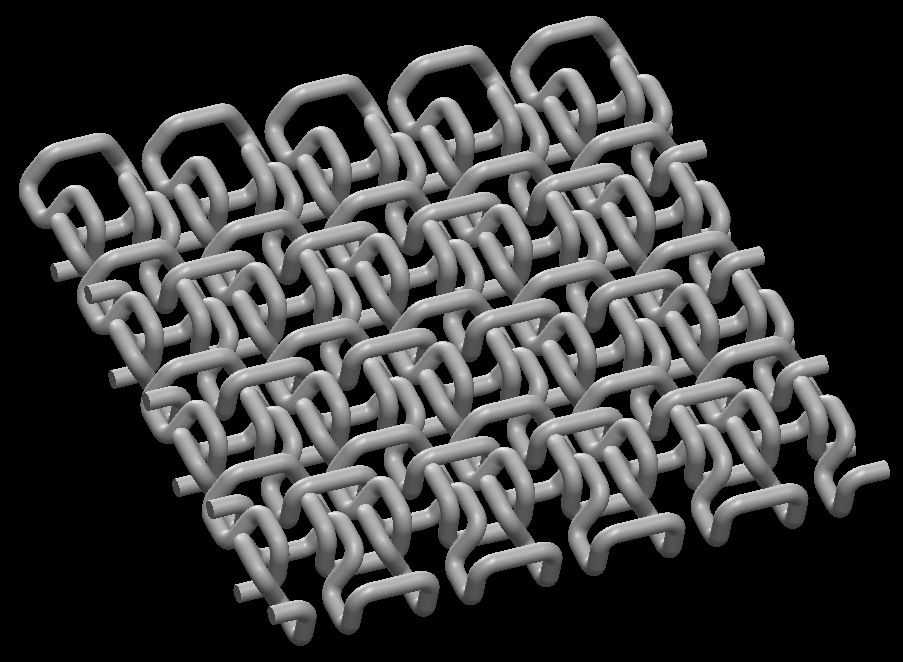 This means that the print will be interrupted precisely between these layers. nine0008
To understand where one layer ends and the next begins, I used the comments that Cura kindly provides in its output files. The keyword ";LAYER:X" allows you to accurately find the boundaries of layers in a text file.
Pressing the "write file" button allows you to save the modified G-code in the specified location.
Save the file to the SD card and bring it to the printer.
It's funny that only while preparing this article, I came across a video that tells how you can do the same using standard Cura tools ... But the process is already running, it's too late to slow down! nine0052 Here, starting at 7:30, it is described in detail how to do it. Well ... hurry up - learn how to parse G-code!
Trying to print
Formation of the first layers. We print on glass. Heated table. Table temperature 60⁰С, printing temperature 220⁰С.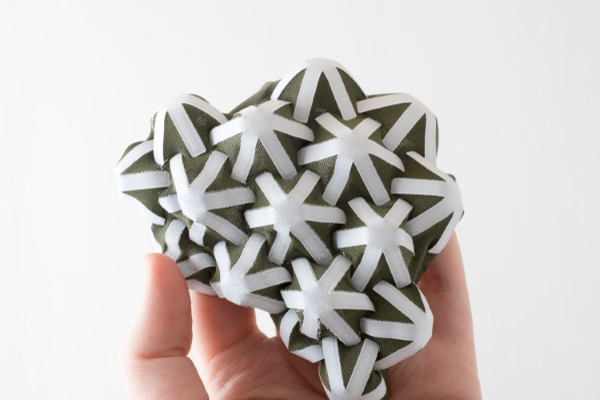 The print material is PLA plastic. Layer height 0.2mm.
During the pause, place a piece of fabric and fix with magnets. Since the table is aluminum (paramagnetic), we put the magnets on the top and bottom sides of the table. Fixation is made in 4 places, in the corners of the part. This is quite enough. The main thing is not to place them too close to the print area, otherwise the magnets will stick to the print head. nine0008
After 40 minutes, this is the structure. The thickness of each 6 carbon element is 1mm. The gap between the elements is 2mm.
In this experiment, tulle was used as the backing fabric. It is a lightweight mesh fabric of medium stiffness, woven from polyester threads.
Experiments have also been made with mosquito net printing. In the hardware store, there were two types of them: fabric and fiberglass. Fabric mesh is softer than tulle, but has greater mechanical tensile strength, as well as less elasticity. The fiberglass mesh is harder than tulle, its mechanical strength is the highest of all participants in the experiment. nine0008
Hexagonal sequin printing on fiberglass mosquito net. The gap between the elements is 1mm. The matrix is very hard. Clearance is clearly not enough.
Round sequin printing on fiberglass mosquito net. The gap between the circles is 2mm. It has a lot of flexibility, but there is too much unfilled space between the sequins.
After several test prints, the fabric mesh was chosen. She formed the basis of the matrix of smart sequins. The resulting matrix can bend in all directions. nine0008
The video demonstrates the operation of the program, the printing process and the final result.
Conclusion
The method of printing on mesh fabric proved to be very good. This is an ideal solution for our task, because the fabric substrate allows us to weave conductive threads into it, which are used to provide electrical connection between the individual sequins of the matrix. Moreover, the formation of a “pattern” of conductors can be carried out at the preparatory stage. And the 3D printing itself is later. nine0008
The strength of the resulting structure depends mainly on the strength of the substrate material. But the flexibility will also depend on the distance between the sequins, as well as their shape.
The developed program still needs to be improved. For example, you can finish the retract before lifting, allow the user to adjust the height of the extruder.
Link to the source code for the processing environment.
And also a link to the release with the .exe file of the program.
By the way, we recently launched our "smart sequins" on the crowdfunding platform. For those who want to get to know our work better, I will leave a link. nine0008
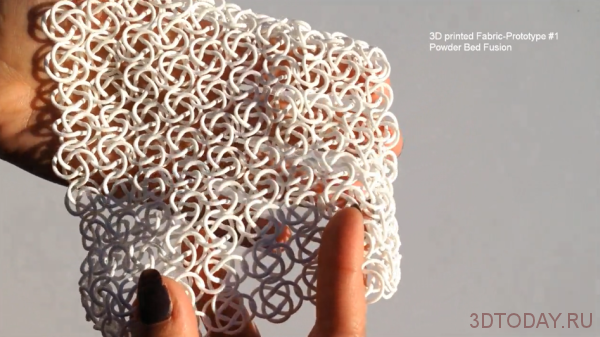
The irregularity of 3D printing made it possible to create a plastic analogue of fabric
American engineers have learned how to print mesh structures on a 3D printer, which are similar in structure and properties to fabric.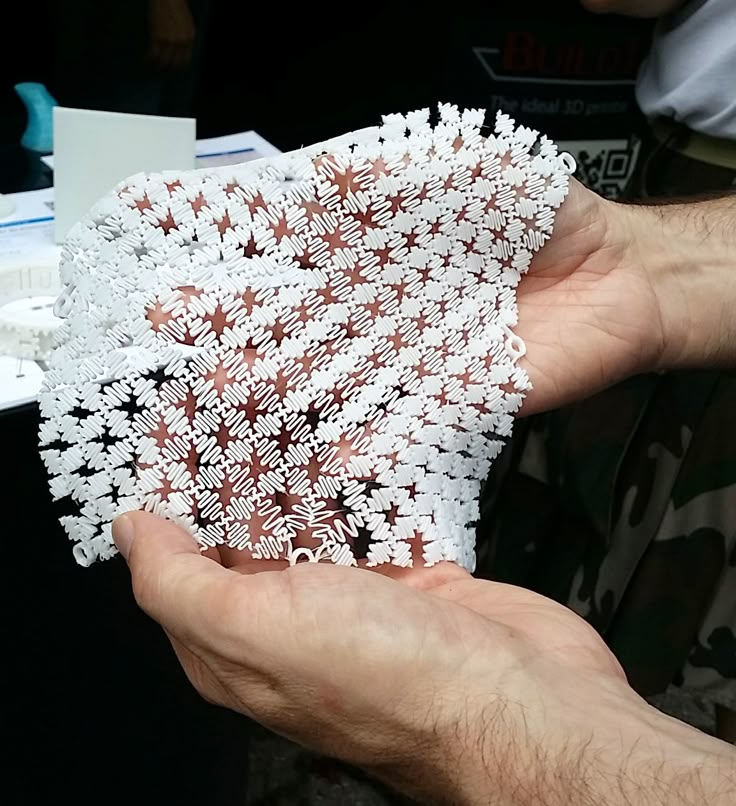 They are obtained when the material exits the printer extruder unevenly. The method allows you to create a “fabric” structured on different scales, designed for different applications, say the authors of an article presented at the UIST 2020 conference. on the other hand, it can be stretched, bent or wrinkled without damage. Engineers not only improve the properties of fabrics and weaving methods, but also try to create materials with similar properties, but with a different composition and structure. Some of them propose to create an array of randomly oriented fibers, others create hybrids with a woven base and inserts printed on it, others directly repeat the woven fabric structure using only 3D printing. nine0008
MIT engineers led by Hiroshi Ishii have developed a simpler method. It is based on the classic and most popular type of 3D printing - FDM or Fused Deposition Modeling. In this method, the printer's print head melts the filament and extrudes the melt through a nozzle, applying it to the substrate or previous layer. One of the features of the method is that the quality of application and retention of the material depends on its viscosity and extrusion volume. With some combinations of parameters, the application becomes uneven. In particular, with a low extrusion volume, a series of bumps can form, connected by a thread that does not touch the previous (lower) layer. nine0008
The authors decided to use this application mode to create a network structure, somewhat reminiscent of fabric. As a material, engineers used various substances, mainly PLA plastic. They conditionally compare the line passing through the tubercles with the warp, and the line formed by thin threads with the weft by analogy with the same structural elements in weaving.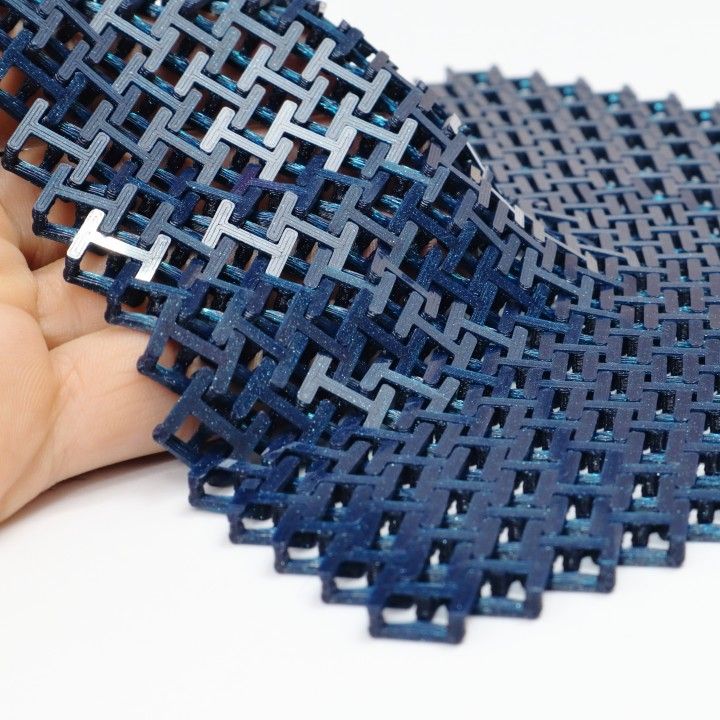 Depending on the order in which the layers are applied, the structure is different. If the direction of each next layer is the same as that of the previous one, then the base in each next layer shifts to the side. And if the direction of the layers alternates, then the structure is even. nine0008
The difference between the new type of material and the fabric is that it can be created not only flat, but also voluminous. For example, you can print an origami structure that resembles an accordion. The engineers printed many different prototypes, including a foldable lampshade, a phone or wallet pocket attached to a T-shirt with an iron, guipure patterns, and others.
Recently, engineers from the Netherlands and Canada learned how to combine embroidery and 3D printing to create functional clothing. The method allows you to sew electrical circuits made of conductive fiber into the fabric, and above them to print plastic buttons that can be used, for example, to control the player.