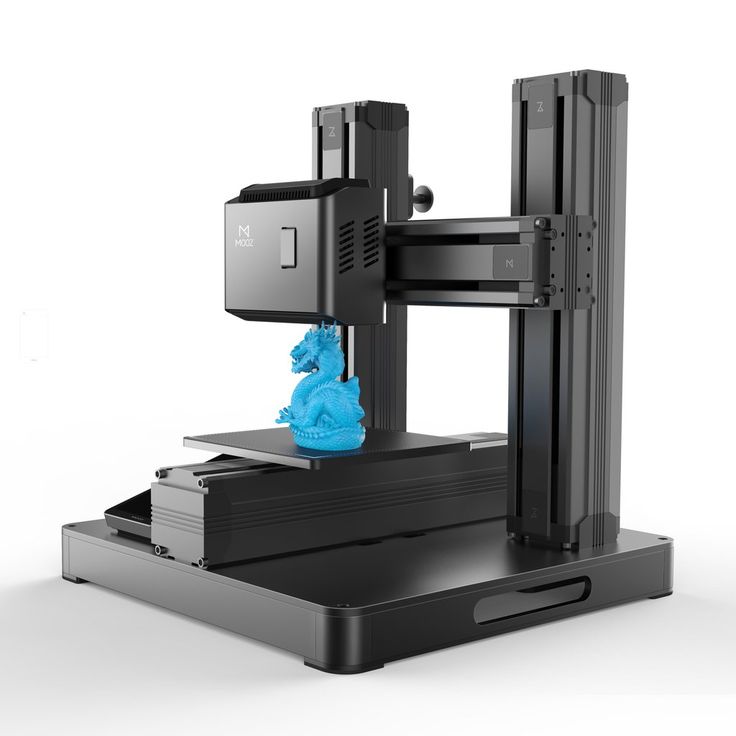
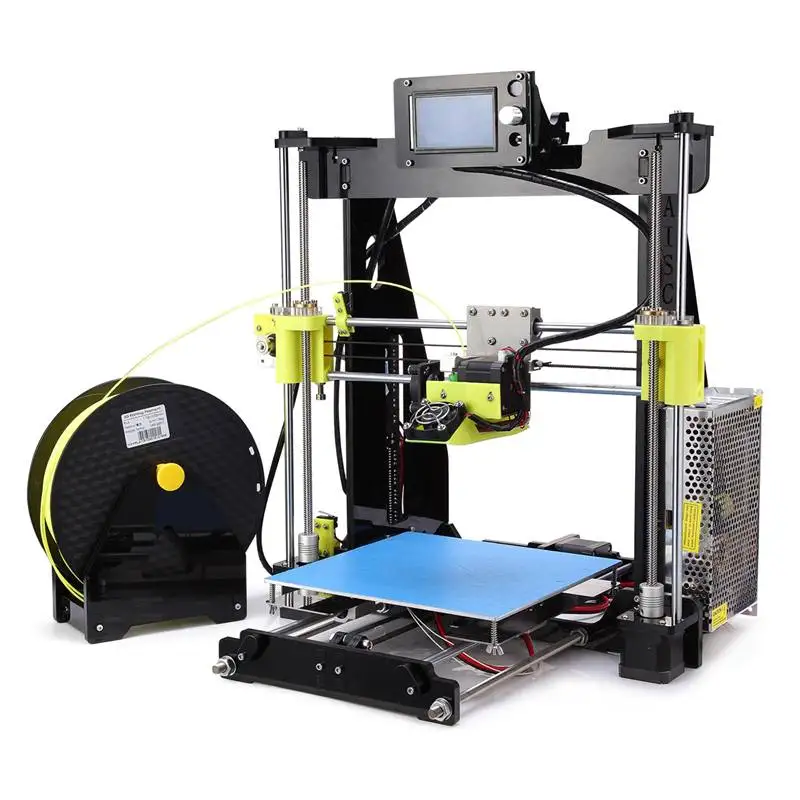
3D printer desks
The 10 Best 3D Printer Tables and Workbenches in 2022 – Clever Creations
A 3D printing workspace is so much more than the 3D printer itself. Along with it come the filament rolls, various tools, accessories, and post-processing setup. Initially, you can do with a bare minimum table for a 3D printer; however, as you progress with the hobby, you will likely find the need for a dedicated 3D printing setup.
A 3D printer table or workbench allows you to organize your stuff and find it quickly when you need it. But, with loads of options available in the market, it can get confusing to select the ideal one for your needs.
In this article, we’ll get into the different criteria for choosing a 3D printer table or workbench and then look at the options available in the market for you to buy. Read on to learn more about these tables and choose the best 3D printer table that suits your setup.
| Best 3D Printer Table | Surface Area | Storage | Price (~) | Best Offer |
|---|---|---|---|---|
| Seville Classics UltraHD Lighted Workbench | 48" x 24" 122 x 61 cm | ** | $399 | Amazon |
| Safco Products Deskside Wire Machine Stand | 24" x 20" 61 x 51 cm | *** | $109 | Amazon |
| Seville Classics Rolling Cabinet Workbench | 77" x 37. 196 x 95 cm | ***** | $999 | Amazon |
| Gladiator Steel Cabinet | 31" x 28" 79 x 71 cm | **** | $299 | Amazon |
| Seville Classics Workbench Desk Table | 48" x 24" 122 x 61 cm | * | $189 | Amazon |
| Gladiator Wide Hardwood Workbench | 66.5" x 19.96" 169 x 51 cm | * | $299 | Amazon |
| 2x4 basics 90164 MI Custom Workbench | Customizable | **** | $76 | Amazon |
| Husky Extra Deep 46 in. 9-Drawer Mobile Workbench | 46" x 25" 117 x 64 cm | ***** | $655 | Amazon |
| Mighti Foldable Heavy Duty Workbench | 44.5" x 27.5" 113 x 70 cm | ** | $229 | Amazon |
| IKEA LACK table(s) | 21.65" x 21.65" 55 x 55 cm | * | $31 | Amazon |
Best 3D Printer Tables and Workbenches in 2022
Seville Classics UltraHD Lighted Workbench
Best overall
Check Price
Amazon
If you have a single 3D printer and need a robust and sturdy table, the Seville Classics Ultra HD is an ideal desk for you. It has solid steel construction, a thick wooden flat surface, and fluorescent light along with a cantilever top shelf.
The workbench features a huge pegboard that you can use to hang large tools that you need to use frequently. You get a power surge protector included with the workbench with six power sockets and 2 USB plugs, giving you an easy solution to plug in all your 3D printers and accessories, like a UV curing station.
The table can hold an evenly distributed weight of 500 lbs (227 kg), and the drawers are designed to hold an additional 60 lbs (27 kg) of weight. With its industrial design, durable build quality, and wide desk surface, the Seville Classics Ultra HD is in our book the best 3D printer table for beginner and advanced hobbyists.
Standout Features
- Fingerprint-resistant drawers
- Easy-to-reach power strip
- Powder-coated finish
Technical Details | |
|---|---|
Dimensions (W x D x max. H) H) | 48" x 24" x 65.5" 122 x 61 x 166 cm |
| Weight capacity | 500 lbs 227 kg |
| Material | Crafted solid steel body and solid beech wood top |
What We Like
- Rigid build quality
- Perfect area for printing essentials
- Adjustable legs
Could Be Better
- Limited storage capacity
- Limited tabletop depth
Find Seville Classics UltraHD Lighted Workbench at
Amazon
Safco Products Deskside Wire Machine Stand
Best on a budget
Check Price
Amazon
The Safco Deskside machine stand is a budget 3D printer table that can be used for a single 3D printer, and it can fit an Ender 3 V2 or small resin 3D printer like those from the Elegoo Mars series. The table was initially intended for paper printers and office stationery, but its rugged build quality and low price make it equally suitable for 3D printing.
This table has three shelves, with the top desk surface designed to hold up to 100 lbs (45 kg) of weight. The bottom shelves have a mesh design and can hold 50 lbs (23 kg) of materials each. One great way to use this arrangement is to keep a 3D printer on the top work surface, with filament spools in the middle rack and the other tools on the bottom shelf.
The table is supported on four swivel wheels for easy mobility. The assembly is easy, with straightforward guides and an easy setup process. Overall, the Safco Wire stand is a decent quality table for small-sized 3D printers and beginners on a budget.
Standout Features
- Swivel wheels
- Adjustable shelf height
- Lightweight design
Technical Details | |
|---|---|
| Dimensions (W x D x H) | 24" x 20" x 27" 61 x 51 x 69 cm |
| Weight capacity | 100 lbs 45 kg |
| Material | Steel and Laminate |
What We Like
- Easy to move around
- Durable build quality
- Affordable
Could Be Better
- Lacks drawers or cabinets
- Limited weight capacity
Find Safco Products Deskside Wire Machine Stand at
Amazon
Seville Classics Rolling Cabinet Workbench
Most futureproof
Check Price
Amazon
The Seville Classics rolling workbench comes with an elegant yet purposeful design.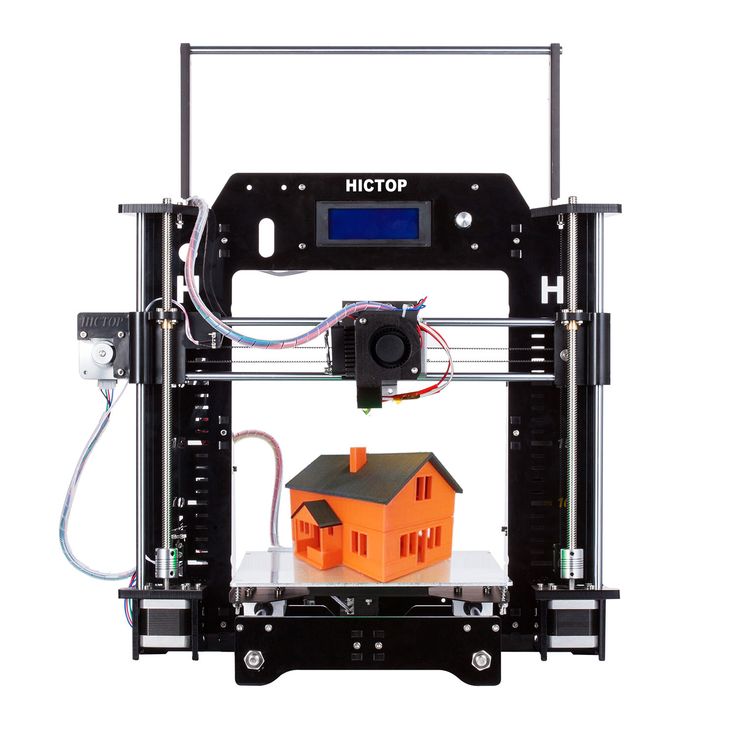 It has a rugged and durable build quality, with a solid wooden flat work surface, metal frame, and drawers. It is suitable for holding multiple 3D printers at once, including their accessories.
The workbench features eleven drawers that you can use to store and organize tools, spare filament spools, and more. It also has a two-door cabinet with a full-width shelf with four adjustable positions. All front surfaces are coated to prevent fingerprint marks, and you can lock the drawers and cabinet to protect your equipment.
To move the workbench quickly, it comes with five heavy-duty wheels. You can lock two of these to fix the table in one place. Overall, the Seville Classics is a solid, durable, and rugged table that you can use to accommodate all your 3D printing stuff and still have room for future expansions.
Standout Features
- Multi-sized drawers
- Hard rubber 5" wheels
- Polyurethane bumpers
Technical Details | |
|---|---|
Dimensions (W x D x max. H) H) | 77" x 37.5" x 20" 196 x 95 x 51 cm |
| Weight capacity | 500 lbs 227 kg |
| Material | Stainless Steel |
What We Like
- Versatile design
- Wide tabletop
- Lots of storage capacity
Could Be Better
- Costly
- Large footprint
Find Seville Classics Rolling Cabinet Workbench at
Amazon
Gladiator Steel Cabinet
Best 3D printer storage cabinet
Check Price
Amazon
The Gladiator steel cabinet is a heavy-duty table suited for use in a garage space. It can accommodate a single 3D printer, and you can store the rest of your accessories on the cabinet shelves below the tabletop.
Its shelf is adjustable to fit a variety of 3D printer tools, and you can use it to hold up to 75 lbs (34 kg) of weight. You also get adjustable legs so that you always have an evenly leveled desk surface. Optionally, you can add caster wheels if you need more mobility and want to move your 3D printer cabinet around.
The included instructions are not particularly detailed, and you will need to have some experience and be careful during the assembly process. The Gladiator steel cabinet is best suited for storing filament spools, small tools, and 3D printer electronics.
Standout Features
- Adjustable storage shelves
- 10-year limited warranty
- Steel cabinet panels
Technical Details | |
|---|---|
| Dimensions (W x D x H) | 28" x 18" x 31" 71 x 46 x 79 cm |
| Weight capacity | 300 lbs 136 kg |
| Material | Alloy Steel |
What We Like
- Solid build quality
- Ideal for heavy-duty use
- Can be stacked on top of other table
Could Be Better
- Poor quality instructions
Find Gladiator Steel Cabinet at
Amazon
Seville Classics Workbench Desk Table
Best adjustable table
Check Price
Amazon
The Seville Classics workbench table is a heavy-duty, height-adjustable desk. Its height can be easily adjusted between 28.5″ (72.4 cm) and 42″ (106.7 cm) at 1.5″ (3.8 cm) increments. It gives you the flexibility to adjust the table surface according to your needs and get easy access to the 3D printer without compromising on your posture.
The table’s construction is solid with a metal frame and a 1.5″ (3.8 cm) thick wooden work surface that lets the desk hold 1000 lbs (454 kg) of evenly distributed weight.
This workbench does not have cabinets or drawers to store your extra 3D printing stuff. Nonetheless, considering its adjustable nature, large surface area, and ability to hold large weights, the Seville Classics workbench is an ideal 3D printer table for a large 3D printer.
Standout Features
- Adjustable height
- Easy to assemble
- Multi-purpose desktop
Technical Details | |
|---|---|
| Dimensions (W x D x max. H) | 48" x 24" x 41.5" 122 x 61 x 106 cm |
| Weight capacity | 1000 lbs 454 kg |
| Material | Wood, Alloy Steel |
What We Like
- Wide range of height options
- High weight capacity
- Durable build quality
Could Be Better
- No storage options
Find Seville Classics Workbench Desk Table at
Amazon
Gladiator Wide Hardwood Workbench
Most minimalist table
Check Price
Amazon
The Gladiator Wide Hardwood workbench is an excellent solution if you need a simple yet sturdy 3D printing table. It comes with a generous desk surface, solid construction, and is easy to set up for any workspace.
Its 1-1/2″ (38 mm) tabletop can support up to 1500 lbs (680 kg) of weight, making it ideal for heavy 3D printers. The top of the desk is treated with a UV cured coating that helps it resist any chemical stains, ideal if you work with a resin 3D printer.
The Gladiator Wide hardwood workbench also comes with steel leveling legs that will help you get a perfectly level work surface. There is no option to add caster wheels for more mobility, however.
One limiting factor of the workbench is its depth, and it restricts the maximum size of the 3D printers you can use it for. Aside from that, the Gladiator hardwood workbench is an excellent option if you’re looking for a heavy-duty yet basic 3D printing table.
Standout Features
- UV-cured coated tabletop
- Supports 1500 lbs / 454 kg of weight
- Minimal assembly
Technical Details | |
|---|---|
Dimensions (W x D x max. H) H) | 66.5" x 19.96" x 38.31" 169 x 51 x 97 cm |
| Weight capacity | 1500 lbs 680 kg |
| Material | Steel |
What We Like
- Good for large 3D printers
- Chemical-resistant surface
- Simple to assemble
Could Be Better
- Lacks storage space
- A bit overpriced
Find Gladiator Wide Hardwood Workbench at
Amazon
2x4 basics 90164 MI Custom Workbench
Most customizable
Check Price
Amazon
If you need a fully customizable solution for your 3D printing workspace, the 2×4 custom workbench is probably the best table for your needs. It comes with four workbench legs and six shelf links that you can set up in various configurations and get the perfect table for your 3D printing setup.
This workbench is somewhat of a DIY project, and you will need to provide your own lumber to build the table and shelves. This means this workbench needs more time and effort than the others on this list, but you can also fully customize it to your needs.
The brackets are made up of heavy gauge structural resin that can support 1000 lbs (454 kg) of weight when combined with the lumbar. For the construction process, you only need to execute straight and 90-degree cuts, removing the need for more serious equipment like a miter saw.
While purchasing, you can select various options and choose which one best matches your requirements. Because of its high configurability, the 2×4 basics Custom Workbench is the best table for DIY enthusiasts and experienced users who need a custom-built solution for all their 3D printing needs.
Standout Features
- Pre-bored screw holes
- Durable construction
- Versatile use cases
Technical Details | |
|---|---|
| Dimensions | Customizable |
| Weight capacity | 1000 lbs 454 kg |
| Material | Heavy-gauge resin |
What We Like
- Completely customizable design
- High weight capacity
- Only straight cuts required
Could Be Better
- Requires additional components (lumber)
- Needs extra time and effort
Find 2x4 basics 90164 MI Custom Workbench at
Amazon
Husky Extra Deep 46 in.
 9-Drawer Mobile Workbench
 Most rugged
Check Price
Amazon
The Husky extra deep mobile workbench has an all-metal construction and it comes with nine lockable 24.5” (62 cm) deep drawers. Each drawer can hold up to 100 lbs (45 kg) of weight, with the bottom ones rated for 200 lbs (91 kg).
This workbench comes with a power strip with four outlets and two USB ports for easy access to power for all 3D printers and other powered tools. The four castor wheels and ergonomically designed handle let you quickly move your table to your desired location, whenever you need.
At almost $700, the Husky mobile workbench is undoubtedly not a cheap option. You should only consider it if you’re a serious professional who needs a rugged and heavy-duty 3D printer cabinet for long-term use.
Standout Features
- Ball bearing slides
- Lockable
- Extra deep drawer storage
Technical Details | |
|---|---|
Dimensions (W x D x max. H) H) | 46" x 25"x 37" 117 x 64 x 94 cm |
| Weight capacity | 1200 lbs 544 kg |
| Material | Steel, wood |
What We Like
- Rugged construction
- Easy to move around
- Integrated power strip
Could Be Better
- Heavy
- Costly
Find Husky Extra Deep 46 in. 9-Drawer Mobile Workbench at
Amazon
Mighti Foldable Heavy Duty Workbench
Best foldable 3D printer workbench
Check Price
Amazon
If you have limited space in your garage and need a 3D printer table that you can move easily out of the way, the Mighti Foldable workbench is perfect. It folds up when you don’t need it and reclaims your space for other activities.
It comes with a pegboard for organizing and attaching your tools with ease. The pegboard also substitutes the lack of storage drawers with a cantilevered shelf on the top.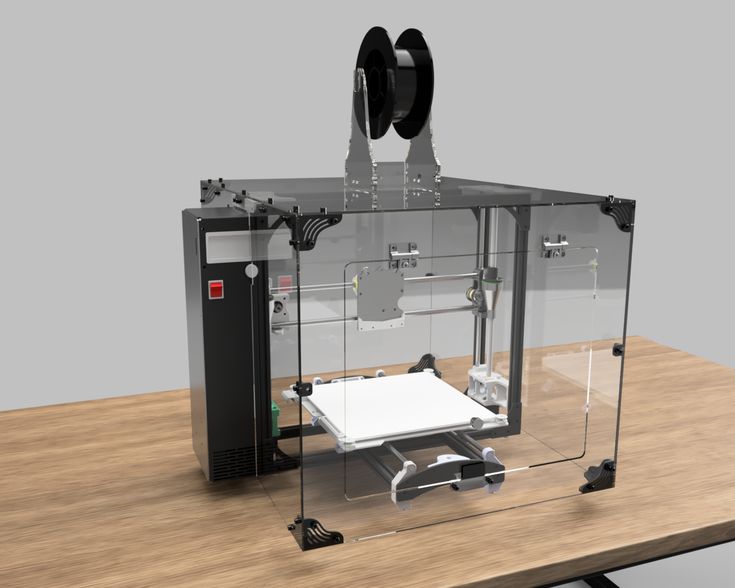
The thick MDF tabletop supports 400 lbs (182 kg) of weight, making it suitable for heavy-duty applications. The table needs no assembly, and you can get started using it within a few minutes from unboxing.
Overall, the foldable design and the metal construction make it suitable for use in cramped spaces and for holding heavy 3D printers. It is ideal for people who have a small-sized 3D printing workspace but still need a solid 3D printer table.
Standout Features
- Foldable design
- Large surface area
- Big pegboard
Technical Details | |
|---|---|
| Dimensions (W x D x max. H) | 44.5" x 27.5" x 62" 113 x 70 x 158 cm |
| Weight capacity | 400 lbs 182 kg |
| Material | Stainless steel |
What We Like
- Easy assembly
- Saves space
- Study construction
Could Be Better
- Limited storage space
- Advertised weight limit differs from actual
Find Mighti Foldable Heavy Duty Workbench at
Amazon
IKEA LACK table(s)
Best DIY 3D printer table
Check Price
Amazon
IKEA LACK tables are one of the popular 3D printer tables you can buy right now. They’re highly modular, cheap, and easy to build. You can stack these tables on top of each other and create a basic yet effective 3D printing workbench for your 3D printer.
Due to its design, stacked LACK tables also help enclose your 3D printer from all sides. 3D printer enclosures let you print with additional materials and isolate your 3D printer from the external environment. Prusa3D has an excellent guide on how to construct your own enclosure with these tables.
It is an elegant and versatile table/enclosure solution that you can use in your home, garage, and offices. The LACK IKEA table is an excellent choice for someone who wants to build a cheap DIY 3D printing table, but still needs flexibility in terms of design and features.
Standout Features
- Minimal design
- Easy assembly
- Versatile use
Technical Details | |
|---|---|
| Dimensions (W x D x max. H) | 21. 7" x 21.7" x 17.7" 7" x 21.7" x 17.7"55 x 55 x 45 cm |
| Weight capacity | 55 lbs 25 kg |
| Material | Particleboard, Fibreboard, ABS plastic |
What We Like
- Budget-friendly
- Aesthetic looks
- Can be used as enclosure frame
Could Be Better
- Not sturdy
- Limited weight capacity
Find IKEA LACK table(s) at
Amazon
What to Look for in 3D Printer Tables & Workbenches
Surface area
An important criterion for choosing the best table for your 3D printer is the surface area you get. It dictates the maximum size of the printer that you can fit on the table. A large surface area will guarantee that you have ample workspace for your 3D printer and extras. Especially when you work with (M)SLA/DLP printers, there are many resin 3D printing accessories that you need space for.
What is critical here is to ensure that the table will fully support the base of your 3D printer. Any overhanging edges or corners can lead to wobbling and leveling issues. Additionally, having a rigid, stable surface underneath your printer will reduce vibrations and help you get better print quality.
Most 3D printer tables mentioned in this list have sufficient length to support a medium-sized 3D printer like the Ender 3 V2 or the Prusa i3 MK3S+. However, we recommend measuring your 3D printer’s footprint and matching it with the table’s surface area to guarantee that your printer will be fully supported.
Storage Space
3D printers come with loads of printing accessories. Allen keys, flush cutters, repair tools, post-processing equipment, and extra filaments are only a few of them. The best workbenches will have sufficient space and allow you to store all these things in an easily accessible place.
Drawers and cabinets help you to organize and find your stuff quickly. Adjustable shelves will let you store oversized items without problems. If you want to 3D print with multiple 3D printing materials, like PLA, ABS, PETG, TPU, it can be helpful to have a dedicated drawer for each of them.
Stability
A 3D printer needs to be as stable as possible to get a high print quality during the printing process. A weak or shaky table will cause the printer to wobble and results in poor print outputs.
Stationary tables that do not have wheels will give maximum stability while printing. These have a solid foundation and will not move along with the motion of your 3D printer. In contrast, a table with wheels can sway with the movement of your hot end or the print bed at higher print speeds.
Material
If you’re looking for a heavy-duty and sturdy table, looking at its material will probably help you in the long run. A metal frame with a solid wood top tends to give the best stability and structural integrity for heavy loads.
While selecting a metal table, you will need to consider its post-processing. A corrosion-resistant coating offers you good protection against rust and exposure to the spilling of 3D printer resin, for example.
The same goes for a solid wood top. An epoxy or other coating for the wood top is likely to improve its long-term appearance.
Accessories
Power surge strips, pegboard clips, and lights are some of the additional accessories you can get with your table. These accessories will help you organize and use your workspace in a better way and 3D print more efficiently.
Basic tables will skip on other accessories to save on the cost. But if you’re getting a premium desk, it will be helpful to get one with as many attachments as possible. The Seville Classics Lighted Workbench is one of the best tables that comes with extra attachments designed to enhance your user experience.
Adjustability
Adjustability is not the prime factor for 3D printer tables. However, an ergonomically designed table that can be adjusted will be better suited for many users.
An adjustable height table will let you position your printer as per your preferences. You can quickly adapt the table to suit your workspace, and it will give you the flexibility to work on the 3D printer with more ease.
However, an adjustable desk will lose out on storage space and might have a less stable surface than fixed tables, reducing its stability and negatively affecting its user experience.
Weight Capacity
A 3D printer table should be strong enough to support the weight of multiple 3D printers at once. You will need to factor in the drawers and cabinets’ weight capacity, and it will inform you what items you can store within your table.
A solid table with a metal frame and wooden tabletop will be durable and have more weight-bearing capacity. Meshed structure or plastic legs will reduce the weight capacity of your table and result in a less sturdy table.
If weight capacity is your primary factor, the Gladiator Hardwood Workbench can support 1500 lbs (680 kg) of weight at once and is the best table in the list.
Frequently Asked Questions
Where is the best place to put a 3D printer?
The best place to put a 3D printer is on a 3D printer table. This will allow you to have a flat surface to work with and it will also provide stability for the printer. You will want to make sure that the table is level and that it is large enough to hold the printer and printing accessories without taking up too much space in your room.
Does a 3D printer need a stable table?
Yes, a 3D printer needs a stable table or desk to work properly. The table needs to be sturdy so that it doesn’t move around as the printer is working.
An unstable surface can cause the printer to produce inaccurate and low-quality prints. A big waste considering the time and effort that can go into optimizing a 3D printer’s performance.
Does a 3D printer need to sit on a level surface?
Yes, a 3D printer needs to sit on a level surface in order to print correctly. If the table, workbench or desk is not level, the printer’s frame can end up misaligned and prints might not come out correctly.
Can 3D printers make furniture?
Yes, 3D printers can most definitely make furniture! A lot of people don’t realize that 3D printing technology has come a long way in recent years and is now capable of printing out all sorts of objects, including furniture. In fact, there are even companies that specialize in manufacturing 3D-printed furniture.
So if you’re interested in getting some new furniture but don’t want to go through the hassle (and expense) of buying it from a store, then you might want to consider getting a 3D printer and making it yourself. It’s a great way to save money and have some fun too!
Can you put a 3D printer on the floor?
It is possible to put a 3D printer on the floor, but it is not usually recommended. Most printers are designed for use on a table or desk, and putting them on the floor can lead to problems with stability and printing quality.
If you do need to place your printer on the floor, there are a few things you can do to improve its stability. For example, you can set it on a non-slip surface like a rubber mat. Also make sure to keep any cords or cables clear of traffic areas so they don’t get stepped on or tripped over.
Can 3D printers be left alone?
Leaving a 3D printer unattended is not recommended, as it may cause a fire. The printers use heat to create objects from plastic filament, and if something goes wrong while the printer is printing, the heat can build up and cause a fire.
In addition, many 3D printers require active cooling to keep them from overheating, and if the cooling system malfunctions or is turned off, the printer can overheat very quickly.
Conclusion
A 3D printer table will help store all your materials in one place and let you organize your work efficiently. It needs to be robust, sturdy and has lots of storage space to accommodate all your 3D printing accessories and filament spools with ease.
The Seville Classics Ultra HD lighted workbench is overall the best 3D printer table that you can buy. It has a sturdy tabletop, sufficient storage space, pegboard, and an industrial design that easily fits any garage, home, or office space.
If customizability is your primary criterion and you love to DIY, the 2x4basics 90164 MI Custom WorkBench and Shelving Storage System is an excellent choice for you. Alternatively, if you need a versatile and future-proof table, the Seville Classics Rolling Cabinet Workbench is a well-rounded option for your needs.
Let us know your experiences with the 3D printer tables, and if you have any questions, feel free to comment below.
The Best Tables for 3D Printers 2022 - What to Look For
There’s something about buying new tech that makes us want to give it the perfect place to sit. Every new phone comes with wondering what kind of case you’ll get for it, and a new TV might look better on a different TV stand or wall mount. 3D printers are no different, and where they’re going to go and what they’re going to go on are important decisions to be made.
Getting a 3D printer is exciting, especially if it’s your first one. But before you plug it in and get going (but after you’ve built it if you’ve bought a 3D printer kit ?), there are a few things to consider when it comes to 3D printer stands and tables.
TL;DR: Just show me the best 3D printer tables ?
Olympia hardwood bench
Heavy-duty foldable workbench
Home office computer desk — that also works well as a 3D printer desk
IKEA Lack table
Bigger 3D printers require more space to fit them, while different types of 3D printers or projects will require different things like filaments, paints, or tools that should be kept handy. 3D printers are often at least 10kg, with most desktop 3D printers sitting at between the 13-15kg mark. For more professional 3D printers, expect them to be even heavier!
When deciding on your desk for your 3D printer, you’ll need to keep a few things in mind. Most 3D printers will need to be in well-ventilated areas for maximum safety, sometimes a 3D printer enclosure can work if you take any potential fumes into account.
There’s also the matter of easy access to peripherals. If you’re using an FDM printer, you’ll probably want easy access to your filaments, so your 3D printer table should include holders or at least enough space for a filament storage box.
While a standard workbench or desk will normally do, you’re going to want a 3D printer table surface catered to you and your printer to maximize both safety and efficiency. So here we’re going to look at some of the best, coolest, and most practical tables and stands for your needs.
What Do I Need from a 3D Printer Stand?
Many people will tell you that a table’s a table, and yes, that is true. Provided you don’t go too cheap, an IKEA table for a 3D printer isn’t a completely out-there idea.
While standard benches or desks may work well enough as 3D printer tables, there are some things you’ll want to look out for to maximize both safety and efficiency.
Space and Cleanliness
3D printers do require some space around them free of both dust and loose debris. Wood surfaces are perfect as they’re easy to keep clean and won’t get too hot during those long-haul projects.
When working with materials like resin, it may be tempting to keep your 3D printer stand covered at least partially in towel or cloth, but this will increase the risk of fires should anything go wrong. Let’s face it, any workstation is going to get stained eventually.
Even if you have a 3D printer with an enclosure, the space around it still needs to be clean to ensure proper ventilation and cleaner air around your workspace. Dust gets kicked up easily as it is without a working machine in the mix.
Stability
You wouldn’t put a baby in a wobbly high chair, and you wouldn’t ride a roller coaster with a broken safety bar. So definitely don’t put your 3D printer on an unstable surface.
Any table or stand for a 3D printer needs to be stable and capable of handling the printer’s weight.
Not only will this protect your likely expensive equipment from hitting the floor from 3ft up, but a sturdy 3D printer table will also mean that things won’t go crashing down mid-print. A working machine carries plenty of risks as it is, the last thing you want is a stand that might collapse while printing, which is an extreme fire hazard.
As well as sturdiness, shock absorption is also important to lengthen the shelf-life (pun intended ?) of your workspace. While there are vibration-free tables out there, simply tightening the screws and level-checking from time to time should be enough.
A simple shake test to check for wobble is usually fine, but also make sure your table can take the weight of your 3D printer.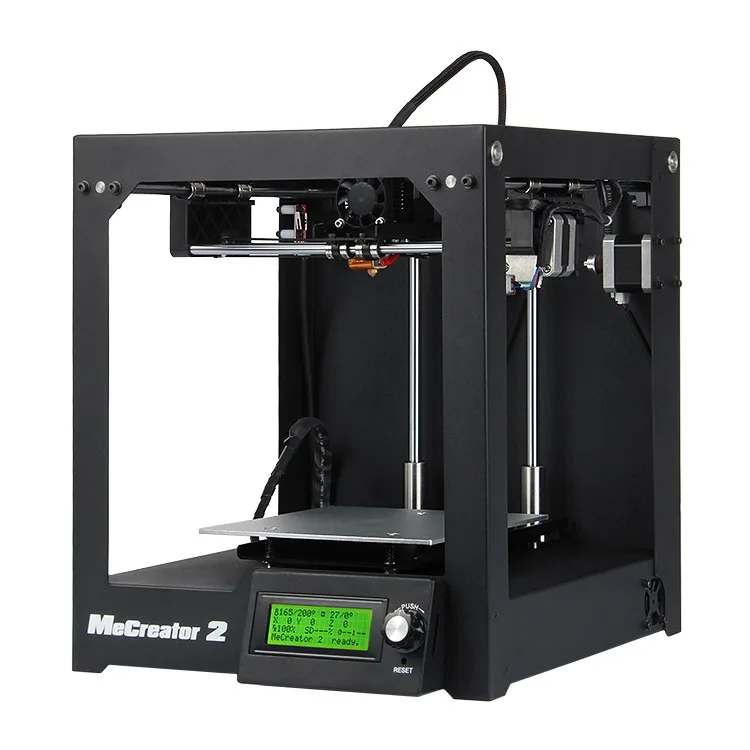 Some are heavier than others, and not all stands are created equal, so just make sure you’ve got a strong surface that doesn’t buckle under your printer’s weight and you should be good to go!
Practicality
A clean and sturdy surface will make for a safe 3D printer table, but there’s nothing wrong with some extra additions to make your work more efficient.
If your 3D printer needs to be connected directly to your computer, installing hooks under the table to hold the wires will both clean up your work space and reduce the risk of tripping.
Filament and material storage is also good. If you have your 3D printer in a cool and dry place – like a garage – then it’s handy to have a 3D printer stand or desk with enough space to store your filaments makes for a more efficient workspace.
Provided you have enough space, desktop storage for resin, gloves, scrapers, and any other tools will make the whole printing to post-processing much smoother by keeping all necessary components in easy reach. Digging through a toolbox or disorganized drawers (which many of us are guilty of having) is never a fun job, and built-in slots or holders for your tools is a great way to cut out all the rifling.
For other tools that can come in handy, read our guide to 3D printer accessories
Where are the best tables for 3D printers?
If you don’t already have a usable surface, or if you just want to make sure you’re getting the best, you can buy plenty of workbenches, stands, and tables ideal for 3D printers that come with a variety of applications.
From vibration-free fixtures to specifically shaped drawers, finding the 3D printer stand that’s right for you is just a matter of knowing what you need.
It’s worth noting that I do not recommend wheeled 3D printer tables. There are a lot of people who recommend them, but I’m personally paranoid about weak brakes, so I avoid them for hot, electric things like 3D printers. They can also be less stable, and you don’t want anything making your 3D printing environment less sturdy that could have even a minuscule effect on your print’s surface finish.
3DSourced is reader-supported. When you buy through links on our site, we may earn an affiliate commission. Learn more
Olympia Hardwood Workbench
- Price: Check on Amazon here
Not just one of the strongest affordable benches out there, the Olympia hardwood workbench is also one of the best-looking.
If you like to show off your workstation, then this hardwood desk is definitely something to add to your cart. As well as being very nice to look at, the Olympia works very well as a 3D printer table.
Sturdy enough to hold several times what the average 3D printer weighs, and with enough desktop space to keep any peripheral tools or resins within a safe distance, the Olympia is an ideal 3D printer stand.
Hardwood is also famously easy to clean, so it’s easy to keep dust-free. And for under $200, it’s definitely worth adding to your wish list at least.
Heavy Duty Foldable Workbench
- Price: Check on Amazon here
While the foldable nature of this heavy-duty 3D printer workbench isn’t useful for the not-so-portable machines that are 3D printers — it’s the sturdiness that really counts here.
With a pedal lock on the bottom of the legs, this workbench is a great 3D printer table as it’s more vibration-resistant and stable than many others.
In addition, it comes with a pegboard for handy access to scrapers and other tools without risking leaving them around and cluttering up your space or, worse, getting lost.
Home Office Computer Desk — Also works as a 3D printer table
- Price: Check on Amazon here
Sometimes simplicity is key. Bells and whistles can make for confusing spaces, and while drawers and pegboards do come in handy, sometimes you just want a strong surface to use as a 3D printer stand.
Despite being designed for computers, this home office desk is an easy-to-assemble steel frame that’s deep enough to comfortably fit most 3D printers and still leave enough space for extra tools, gloves, and other pieces.
The extra space can also be used for the desk’s original purpose; a computer to plug directly into your printer.
The lack of drawers does limit storage somewhat, but the wide space below is perfect for storing boxes of filament.
If built-in storage is a must for your 3D printer table, however, there’s also this computer desk with shelves on which you can keep resins and tools. Available in a variety of sizes, you can choose which version of this table suits your 3D printer and/or your available space.
IKEA Lack Tables — They make great 3D printer stands
I wasn’t kidding earlier. 3D printers and IKEA lack tables do actually go together really well.
If like me, you don’t have a lot of space to spare, IKEA Lack tables are sturdy and strong 3D printer tables for smaller models.
Not only are they stylish, they’re also fairly cheap and don’t take up much space. They can make your 3D printer something of a centerpiece, or be put into the corner so nothing gets in the way.
The empty underside means you can store things safely under them too, and the variety of available colors means you can even pick one out that goes well with your printer.
Types of tables for a 3D printer
Home / Blog / Useful / Choosing a table for a 3D printer. Calibration and adjustment
21.04.2021
Contents
-
- Print platform materials
- Heated table
- Non-heated table.
- Table surface
- Calibration types
- Automatic calibration
- Manual calibration
- Cartesian kinematic 3D printer table calibration
- Delta printer table calibration
- Total
- Print platform materials
The correct calibration of the 3D printer bed, or as it is also called Hot Bed, is very important. The first layer is like a foundation for a house, if the foundation is not strong, then the house will not stand for a long time.
If the plane of the printed surface is uneven, then the model may be partially peeled off or deformed. The first layer may not stick to the printing platform at all, and the result of many hours of printing will not be a neat 3D model, but plastic noodles.
Print failure example
Therefore, it is very important to properly calibrate the table. Printing platforms can be conditionally divided into two types - adjustable and not.
The adjustable table is attached to the printer with spring-loaded screws. It is not rigidly fixed in height and with the help of screws it is possible to calibrate the plane and the gap between the 3D printer table and the nozzle.
Adjusting screw
Unregulated is a printing platform that is rigidly fixed to the printer body. This solution is used in delta printers. Calibrate them only programmatically.
Non-adjustable delta printer table
Print platform materials
The material from which the table is made may vary depending on whether the table is heated or not.
Heated table
There are several types of heating elements for a 3D printer platform - aluminum, textolite, silicone and kapton. Each of them has its pros and cons.
Textolite heater - inexpensive, but fragile and can be strongly bent when heated.
Silicone heater - can not be used alone. Usually used in conjunction with a metal base.
An aluminum table is expensive, but it heats up more evenly and is less subject to thermal deformation than other platforms.
The Kapton heater is very expensive and cannot be used on its own. Usually glued to a metal base. Can be heated up to 200 degrees.
Types of heated printing surfaces
Most often, an aluminum heating table or a silicone heating pad is used in conjunction with an aluminum plate. Low price, ease of processing and high thermal conductivity make aluminum the most popular material for the manufacture of heated printing tables.
The main advantage of heating the printed surface is to increase the adhesion (adhesion) of the first layer of plastic. If the printer is with a closed case and a heated platform, a “passive thermal chamber” is created inside. Due to this, plastics with high shrinkage do not crack in layers during printing, the adhesion of layers (interlayer adhesion) increases, and internal stress is more evenly distributed during cooling.
But there are also disadvantages - when heated, the metal table expands a little, and since it has nowhere to expand, it begins to bend. For a printing platform up to 200x200 in size, deformation will not be very critical, but for larger tables this becomes a tangible problem.
Each manufacturer of 3D printers with a large printable area solves the problem of deformation of the metal table in its own way. For example, in Raise 3D, the table is fixed along the entire plane with pins at 13 points.
Heated table fixing Raise 3D
Table without heating.
An unheated printable surface is often used in 3D printers designed to work only with PLA and other low temperature plastics. For example - printers for children or large printers with an open case.
An unheated printable surface is often used in 3D printers designed to work only with PLA and other low temperature plastics. For example - printers for children or large printers with an open case.
Acrylic Printer for Children
Tables without heating are made of aluminum or acrylic. If the table is aluminum, then glass or any other coating should be used on top. Aluminum is a soft metal and even a brass nozzle can scratch or damage it if not properly adjusted.
Heating table with aluminum base and mirror
Acrylic tables are often used in inexpensive 3D printers designed for kids. Acrylic is difficult to damage or break. You can print on an acrylic table without glass or other coating.
Free Shipping
Add to compare
Product added to compare Go
| Manufacturer | Raise3D |
Add to compare
Product added to compare Go
| Manufacturer | Raise3D |
Add to compare
Product added to compare Go
| Manufacturer | Raise3D |
Free Shipping
Add to compare
Product added to compare Go
| Manufacturer | Flash Forge |
Tabletop
In order for the first layer to adhere to the table tightly, different surfaces are used that increase adhesion. It is more convenient to remove the model from the removable surface. If you need to immediately start printing another model, you can simply quickly change from one removable surface to another.
The most popular table surface is the regular tempered glass or mirror. It is not expensive and available. It is believed that the accuracy class of the mirror is higher, but for small working areas (up to 200x200 mm), ordinary tempered glass is enough.
Glass itself does not hold the first layer well, so various adhesives or stickers are used to increase adhesion.
Ordinary glass can burst from a temperature difference or “crumble”, then the model comes off along with pieces of glass. Good thing it's easy to replace.
A piece of glass came off with model
Sitall glass - in fact, it is ordinary glass with the addition of boron oxide. This makes it stronger than ordinary glass and resistant to temperature changes. But the cost of such glass is much higher than ordinary or tempered glass.
Sitall glass
Perforated table - mainly used for printing ABS plastic. Thanks to the perforation, the plastic adheres firmly to the print platform. In order for the bottom of the model to turn out to be even in the slicer settings, you need to enable printing on a raft (substrate).
Perforated table used in UP printers!
Stickers - There is a huge variety of stickers for printing platforms. It can be either ordinary masking tape or a specialized surface (rough with an adhesive surface).
The finished model is easier to remove from a flexible substrate than, for example, from glass. With some substrates, the model can be easily removed after the printing platform has cooled down. For some, you need to heat the table and only then tear off the model.
Separately, you can select a variety of compositions that are applied to the surface of the printing platform to increase the adhesion of the first layers. 3D varnishes, 3D adhesives, etc. Probably every 3D maker has his own special recipe for the same composition that almost everything sticks to. It can be BF glue mixed with a solvent or alcohol, ABS diluted in acetone, kvass with sugar, glue stick, etc.
Do not spray varnish or other sprays inside the printer. Glue particles can settle on mechanisms, fans, and even get on electronics. This can lead to damage to the 3D printer. Simply remove the platen surface from the printer and apply the adhesive.
Add to compare
Product added to compare Go
| Manufacturer | Raise3D |
Add to compare
Product added to compare Go
| Manufacturer | Flash Forge |
Add to Compare
Product added to comparison Go
| Manufacturer | Flash Forge |
Calibrations
In addition to choosing the surface of the print platform, it is important to correctly level the plane of the table and set the correct gap between the table and the nozzle. Calibration can be automatic or manual.
Printers with large print surfaces, such as the Raise 3D Pro 2 and Pro 2 Plus, are calibrated at the factory. The user only needs to check the gap between the table and the nozzle, because it may go astray during transportation.
Automatic calibration
Automatic calibration is performed using a sensor (optical or contact), which is mounted next to the extruder. The printer checks several points on the print platform one by one and remembers the values. The first layer will be printed correct for the curvature of the table.
You can meet the calibration using a conductive substrate that is placed instead of the printed surface. This method is rare, but still has a place to be. It is commonly used to calibrate 3D printers with delta or delta robot kinematics.
Automatic calibration allows you to quickly and effortlessly level the table. It becomes especially indispensable for printers with delta or delta robot kinematics.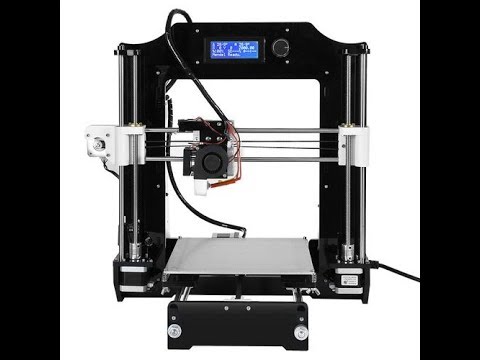 Optical sensors "do not see" glass, so for printers with an optical sensor, it is better to use other surfaces of the print platform.
Some printer models have a menu with hints to help you properly set the platform plane and gap. It is enough to launch the “assistant” and follow the instructions on the screen. This is not exactly automatic calibration, but with such help it becomes much easier for a beginner to correctly calibrate the table.
An example of a 3D printer with automatic calibration is Raise E2. The Raise E2 extruder has a contact sensor to determine the distance between the nozzle and the printed surface. The resulting values help to correct the print height of the first layer. You can calibrate not the entire table, but only the area on which the model will be located.
Manual calibration
Manual calibration is when the user sets the plane of the table and the gap between the table and the nozzle himself. To do this, under the printing platform there are screws or winglets with which you can adjust the height of the printing platform.
Calibration screws
The standard gap between the platform and the nozzle, for most printers, should be - 0.1-0.2mm. If there is no set of probes at hand, a standard A4 sheet folded in half can replace it. Before calibration, the print surface (if it is heated) and the nozzle must be heated.
Sometimes manufacturers of 3D printers recommend a gap between the table and the nozzle - 0. Therefore, read the instructions before calibrating.
We will consider the calibration of the two most common kinematics - Cartesian and delta.
Cartesian kinematics is based on the Cartesian coordinate system and the movement of the 3D printer's head along the x, y, z axes.
Printer example with Cartesian kinematics
In deltas, the extruder moves along 3 identical axes using carriages moving along vertical guides. The delta printer can be called a simplified delta robot, but these are still two different kinematics.
Example of a printer with delta kinematics
3D printer table calibration with Cartesian kinematics
Different manufacturers may have slightly different calibration instructions. We will consider here the calibration of the printer with standard kinematics.
-
Heat up the table and nozzle. When heated, the metal expands slightly, so the gap between the printing platform and the nozzle may differ between the “hot” and “cold” ones.
-
Through the printer menu, send the table and extruder to the "home" or zero position in all axes. Usually the zero point is the near left corner of the extruder and the top position of the print platform. Be sure to make sure that the 3D printer does not rest the nozzle on the table and does not damage it. If this is the first calibration, use the nuts to lower the table as low as possible.

-
Through the printer menu or manually (for this you need to turn off the motors through the menu), move the extruder so that the nozzle is above the adjusting screw.
-
Use a feeler gauge and adjusting screw to set the gap between the print bed and the nozzle.
-
Repeat all steps for all calibration screws. Usually there are 3 or 4 screws.
-
After aligning the plane above the screws, move the extruder to the center and check the gap. If the gap matches the feeler gauge, then the table plane and platform distance are correctly calibrated.
Delta printer table calibration
Calibrating a delta printer is a very large topic, so here we will only describe the general principles.
The delta printer does not have the x, y and z axes we are used to. Instead, the delta printer has 3 towers - A, B, C, on which the carriages move.
Since the delta table is static, it is calibrated programmatically. The gap is calibrated by 3 points (at the columns) and the lens (center) of the table. The lens can be concave or convex.
Before calibration, check the mechanics of the printer - the belts must be tensioned evenly, there must be no play in the carriages and the effector (the plate to which the extruder is attached). If the belts are loose or uneven, it will be problematic to calibrate the printer.
Some 3D makers check belt tension with a tuner. Evenly tensioned belts will sound the same, but the correct “note” is found empirically.
There are a huge number of programs for delta calibration, but one of two is usually used - Pronterface or Repetier-Host. Using them, you can directly access the printer using special commands and change the values in the firmware.
As auxiliary programs, you can use a virtual calculator and from there transfer the values \u200b\u200binto the firmware or download the finished GCode. They need to specify the parameters of your printer - firmware (usually Marlin or Repetier), diagonal length, circumference, etc. These parameters can be taken from the firmware or measured with a caliper. It is important to specify all the parameters as accurately as possible, otherwise the printer will not be able to calibrate.
First, 3 points are aligned at towers A, B, C, and only then the lens in the center of the table is corrected.
Manual delta calibration is tricky, but it doesn't have to be repeated often. Typically, the printer only needs to be recalibrated after some mechanical parts, belts, or print bed cover have been replaced.
Totals
The calibration process may seem tedious and complicated, but in fact, once you do it yourself, the process will no longer seem so intimidating. In addition, most manufacturers try to help novice users and equip their printers with auto-calibration sensors or try to simplify this process as much as possible with detailed menu prompts.
And a variety of coatings for a printed table will help you find exactly the surface that suits your needs. As practice shows, every 3D maker, novice or experienced, has his own proven way to make the first layer stick tightly.
Don't be afraid to experiment and let every 3D print be successful.
#Useful
Expert in additive technologies and 3D printing with over 5 years of experience.
Share
all materials
Do you have any questions?
Our specialists will help you with the choice of 3D equipment or accessories, consult on any questions.
Heated glass table without staples
The table is a rather problematic part of the printer. And everyone solves it in their own way. Andrey aka boroda003 suggested his own version of fixing glass on the table http://3dtoday.ru/blogs/boroda003/wanhao-duplicator-i3-fasteners-glass-on-the-table/ Discussions in the comments prompted me to write this article. The reason for the discussion was the design of glass fastening proposed by me using silicone. So, let's begin.
Air, of all the bodies available to us, is one of the worst conductors of heat. This property is used in most well-known thermal insulations, such as foams and cotton wool. Therefore, we apply, for example, thermal paste to remove air between the processor and the heatsink. Although the thermal conductivity of KTP-8 is not the highest (0.65 W/(m*deg)), the efficiency of processor cooling increases significantly.
Initially, we fixed the table with double-sided tape, but not that. Here is a thermal image of the same table: the first is tape, the second is just glass, the third is silicone.
The thermal conductivity of air at 100 degrees Celsius is 0.03 W/(m*deg). And the thermal conductivity of the most common silicone is 0.12. Those. 4 times higher. You can find silicones (silicone rubbers) with thermal conductivity up to 1. 0 W / (m * deg), and even higher. But they are sold in barrels :(.
The air in the space between tables has another bad habit: it is mobile. And if there is also airflow, drafts, then we waste a lot of energy.
Any extra details in the working area also bother me , just to the point of bad words.0003
So what do we end up with by gluing glass to a heating element with silicone?
- Increases table efficiency by reducing heat loss;
- Increases heating rate by increasing heat transfer and reducing heat loss;
- Increases the resource of the heating element due to the elimination of local overheating;
- It is possible to increase the specific power of the heating element (increase the supply voltage above the recommended one) due to better heat dissipation;
- Increased table rigidity;
- Nothing interferes with the flight of the printing body in the printing area;)
The low modulus of elasticity (low rigidity) of silicone allows the table and the heating element to expand independently, while providing sufficient structural rigidity. Which is very good for drygosts.
In the comments to the article boroda003 there were fears of large financial expenses in case of glass breakage. To be honest, I have been using glasses for more than a year and everything is intact. But life is multifaceted...
And just then new glasses arrived, striking with their black glamor. When I started this story with silicone, I was afraid that such a slippery comrade as silicone, and even with no less slippery glass, would not be friends for long. Even at the beginning, various crazy heating modes were specially made, with drafts and an industrial fan. No, there were no delaminations, at least where they were not at the very beginning. The fact is that I specifically made a few bubbles to see what would happen. Never mind.
And so, armed with a string, we began to separate the glass and the heater. Alas, silicone proved to be stronger. Then the spatula went into action, which won the love of these two.
White inclusion is PVA, which was the impetus for writing the article http://3dtoday. ru/blogs/p8u/the-game-is-pla-from-clan-pure-glass/
After cleaning, the heater is like new
Thus, it has been experimentally proven that nothing will be done to this table!
Now let's restore the working structure. The printed surface will be glass-ceramic, which can only be broken purposefully. And all sorts of thermal shocks are on her side. People use about such tables under the brand name 'sitall', 'sitall glass', although it's just a fireplace glass. My version is a little smoother, a little more polished, sharpened for dirt and other surprises, such as spilled water on the included table. You can buy the usual version of 'sitall' for 2 r / cm2, if you decide.
What we need:
- Heating element, also known as fastening the table to the printer - here you can do anything, there are no special requirements.
- Glass (ceramic), glass-ceramic, glass-ceramic, borosilicate glass. You can and the usual, but it is very capricious.

- Two part silicone. One-component will not work - it needs moisture from the air. I have an idea about silica gel powder, well saturated with water (whose blue color), the current is not literally, but in pairs! If you mix it with one-component silicone, it should work. I have experience making foam silicone with baking powder. When heated, the latter releases moisture, which polymerizes the silicone. But also carbon dioxide, which makes foam. According to the idea, silica gel will give only water. In general,
Edisonexperiment rocks. - Adhesive, it is also a primer, it is also a primer for better adhesion of silicone to glass and heater. Here you need to consult with the seller of silicone or again
with Edisonexperiment. - Gasoline 'Galosh', acetone - I don't think they need to be introduced. Other solvents may be required for certain types of adhesive.
We are preparing the workplace, remember that we have limited time and there will be no time to find something.
Degrease with petrol and then with acetone. This sequence paid off. Next, we apply the adhesive (primer), simply by wiping our surfaces with a lint-free cloth soaked with it.
While it sets (30 minutes for mine), we prepare the silicone for application. I recommend putting a watch in a conspicuous place - it is easier for the nervous system. The amount of silicone is calculated from the calculation of the required layer thickness. I took at the rate of 0.5 mm. The video will show the unfilled corners, but in fact they are filled due to the capillary effect. The main thing is that there is enough silicone. Sometimes I make beads so that the silicone does not spill, but I am also lazy ;). The process is simple, but, as they say, see once than read.
The result is this
As you can see, the corners are completely shed.