3D printer cnc conversion
Why 3D printers can’t be CNC mills – Tom's 3D printing guides and reviews
Hey, how’s it going, everyone? Have you ever wondered why 3D printers and actual CNC machines seem to be so similar, but rarely you ever see anyone successfully using a 3D printer as a milling machine and vice-versa? Well, today we’re going to look at why that is and maybe at what a compromise could look like to handle both!
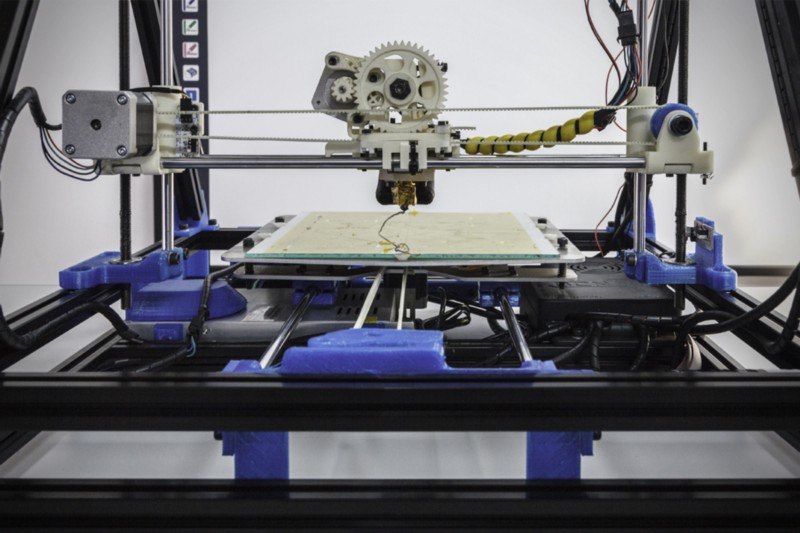
So the three printers, well, the three machines I have here today are the CR-10, a fairly common and actually surprisingly okay 3D printer, my converted MendelMax 3, which used to be an oversized 3D printer and is now a super-light-duty engraver, mill, whatever you want to call it, you can watch the conversion process here, and yes, it’s not perfect by any means, and lastly, the Sienci CNC, which from now on I’m just going to call Bob because I’m sick of every time having to clarify whether I’m talking about the CNC category or the Sienci product (hrmpf, “Slic3r”), ‘scuse me, and this is a light-duty mill.
I know, I’m using the terms “milling machine”, “router” and “engraver” somewhat interchangeably here, at least for these machines, because they are neither, actually. They’re not built like a router, which typically has a moving portal, which is this part right here, and that’s great for cutting sheet goods; they’re also not built like a milling machine, which has a smaller work surface, but much sturdier construction with a rear column and often a moving work surface, which is heavy and slow, but great for machining metals.
Neither Bob nor the MendelMax is either of those, but both of them are built like your typical Mendel-style 3D printer with a fixed portal and a moving bed, the MendelMax has the X-axis mounted on top of the Z-axis, and Bob has the Z-axis on top of the X-axis, but otherwise, their basic kinematics are the same.
Differences between Bob and MendelMax
openbuilds-style V-slotAnd while we’re at it, let’s actually take a look at how these two are built differently.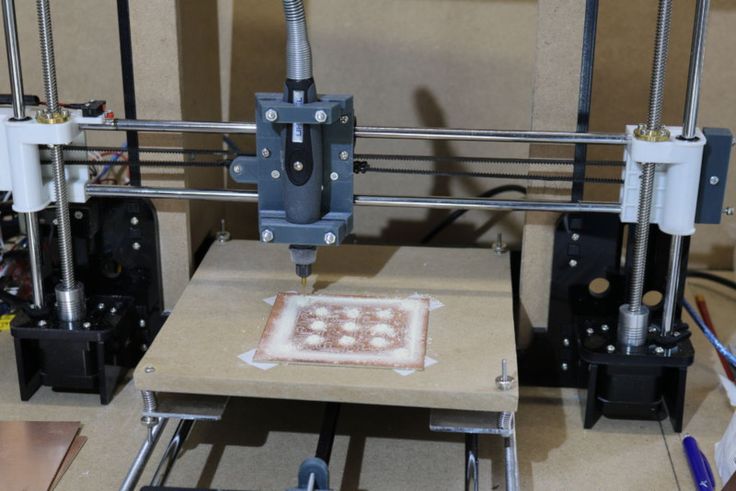 First difference: The frame. Both 3D printers here use machine profiles and both are actually using the openbuilds-style V-slot, which already is a good bit sturdier than your regular 8mm smooth, unsupported round bars, and Bob has these massive aluminum angle profiles with the wheels running on the edges of that.
Proper milling machines would either have linear carriages like these or sliding dovetails, which look like this. And why? Because rigidity. On a 3D printer, there are no forces between the toolhead, that is your hotend, and your workpiece, so the printbed and your print because the hotend is basically just skimming over the part and lays down molten plastic as it goes. On a milling machine, you have the cutting edges of your tool actually digging into the material you’re cutting and that does, in fact, generate quite a significant amount of force.
Use the ForceLet’s see what that force does with these machines: For reference, here’s a Prusa MK2… The CR-10… Mendel Max 3… Bob… and my glorified drill press “milling machine”.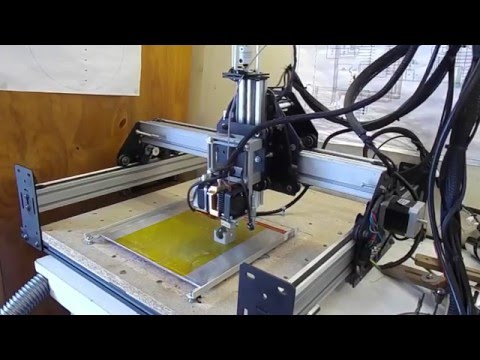 That’s quite a difference. The floppier a machine is, the more it is going to deflect when cutting and that means the more likely it is going to start ringing or doing some other weird stuff that is completely inappropriate for milling. What also plays into this is that 3D printers typically use belts, and especially the cheaper belts are often incredibly elastic – which is the same as having a non-rigid frame. Some CNC routers use steel-reinforced belts, but typically you see trapezoid leadscrews or even ballscrews. Simply speaking, these don’t flex at all.
belts flexing
Steel-reinforced belts
And you always have to keep the key difference in mind when looking at 3D printers vs. CNC machines: 3D printing is, by definition, an additive process, meaning you’re adding material to your workpiece as it gets processed; milling, turning, etc, on the other hand removes material as the part gets processed. So with 3D printing, you only put in as much material as the finished piece is going to use, plus supports, brim, priming, whatever, that’s a tiny amount of waste, but with any subtractive process, you actually need a larger blank of solid material that then gets gradually shaved away.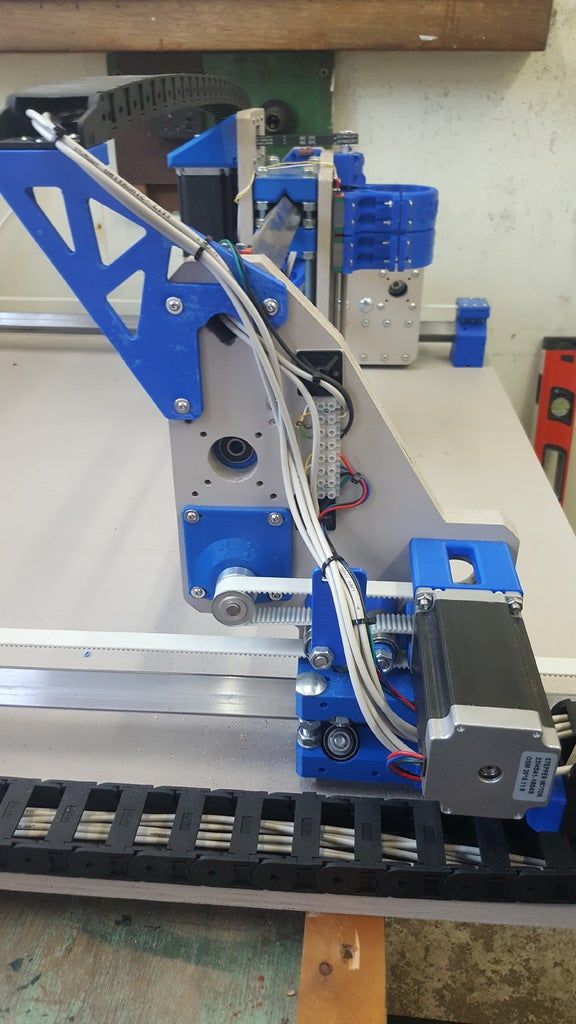 So basically, with a milling process, any part is already in here in the blank, it just needs to be freed from all the waste material around it, which, is actually a pretty cute way to think about it. Where does that extra material go? Well, shavings. If you’re machining wood, you’re often also getting a ton of dust, but aluminum shavings aren’t much nicer to deal with, either, because they are sharp, pointy, small, and large in numbers.
It’s one of the things you’re very likely to underestimate if you’ve never used a CNC and are thinking about converting a 3D printer, for example. There’s going to be a lot more of these than you expect and they will get everywhere. Oh, and the noise. It’s pretty intense.
So, let’s actually make something with these machines, shall we?
Make thingsSponsor Message
And while that’s printing and milling, let’s talk about today’s sponsor, Skillshare! Skillshare is an online learning community and right now, they’re offering over 19. 000 classes for you to learn more about the things you enjoy. Daniel has been using Skillshare to get up to speed with videography and editing and I’ve been taking classes on how to be a better boss for him. One of the classes we’ve both taken is “DIY cinematography” by Ryan Booth, and it’s a great, compact course on the basics of lighting, camera angles and motion in any video or film,and that will help us out make better YouTube videos, but if you’re not into videography, Skillshare also has courses on 3D modelling, for example with Fusion 360, or basically any other topic you want to learn about just for yourself or even for turning your hobby into a full-time job!
Once signed up, you can watch as many courses as you want, and while premium memberships are usually around $10 per month, the first 150 people that sign up with this link will get 2 months for just 99$ct. These spots do go quickly, so make sure you don’t miss out. Thanks Skillshare!
We made something
CNC vs 3DPrintedSo in this case, the milling job was already a bit faster than the 3D print, and this just gets amplified the larger a job is.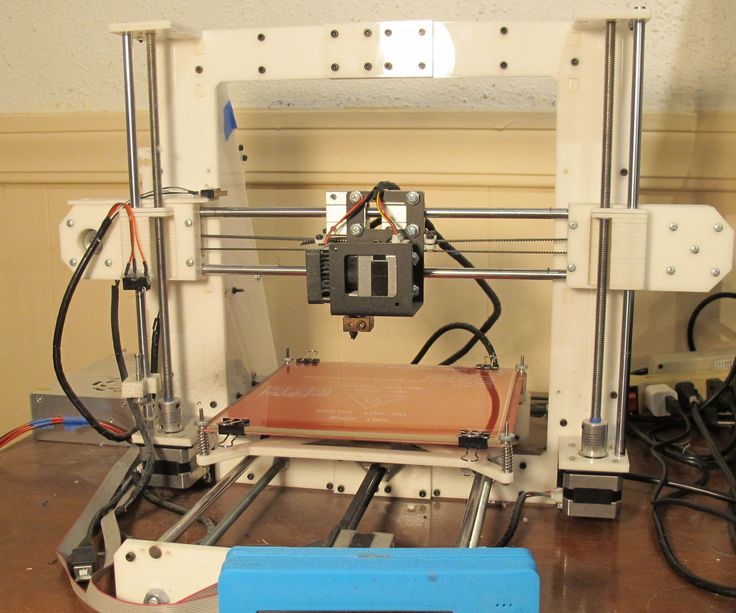 If it’s really intricate parts, a 3D printer does have the upper hand as complexity doesn’t nearly “cost” as much as with a subtractive process, but because a 3D printer will need to lay down every bit of material instead of just not shaving it away, it’s not quite as scalable as a milling process.
Now, a 3D printer, at this point in time, is pretty much always built in the same, very simple sequence: The machine starts at the bottom, works its way up vertically and once it reaches the tallest spot of the part you want to make, it’s done!
Single headWith a CNC, it’s not always that simple. What you often see with these smaller machines is just a single tool being used for the entire job – often that’s an ⅛” square endmill – but on nicer machines, you have all sorts of tools from a cutter head over roughing endmills to finishing endmills, chamfering tools, taps, drills, reamers etc. In which order those tools are used and for what areas is really up to the user, so the process of preparing a file for machining is typically much less automated than the process of preparing a 3D model for 3D printing – which just uses a single nozzle size for the entire print, typically. In both cases, how the input file is processed has a huge impact over how the finished part is going to turn out, but with CNC’ing, there’s no simple one-size-fits-all-solution.
3D printers in general are quite the rigid concept – it’s three movement axes, X, Y, Z, plus an arbitrary amount of extruders that basically work as extra linear axes along the length of the filament. On a CNC machine, you usually also have X, Y and Z that position the tool relative to the workpiece, but you might also have, for example, a B and C rotational axis that rotates the tool or workpiece about the Y or Z axis in a four- or five-axis machine. But let’s not forget there’s not just mills, there’s a CNC lathes, combination machines and completely different types as well.
multi axis cncOther “details” are actually surprisingly similar between 3D printers and other CNC machines, like the part cooling fan control on a 3D printer and a coolant pump on a CNC, temperature control of a hotend and RPM control on a spindle, etc, etc, so it’s no surprise that DIY CNC routers are increasingly using electronics, firmware and just general components that might not be directly 3D-printer specific, but at least based on the developments from 3D printing. Like with Bob, all the electronics are based on 3D printing boards, the motors are standard NEMA17, the computer interface is the same software serial port – it’s basically a beefed-up 3D printer.
But let’s not forget that 3D printers originally did originate from the larger CNC machines. Things like G-code are directly carried over that, and many of the early 3D printing developments were built to suit both CNC applications and 3D printing – think firmware and even the back-then slicer, Skeinforge. What also carried over is that these machines are maybe not dumb, but at least blind. If a cutting tool breaks, the workpiece dislodges or anything else happens, the machines are often not going to notice it and will just keep going. That is just now getting better for both 3D printers and mills, and bigger CNC machines are using things like load monitoring, the same thing the Trinamic drivers are doing on 3D printers, as well as Servo motors that have a feedback loop etc.
So yes, 3D printers and CNC milling machines are actually quite similar and knowing one of them well will help you get a head start with the other. But the differences in machine construction, especially when it comes to rigidity and top speed, don’t really make combination machines all too viable, at least for “real” applications. Maybe with a somewhat rigid frame and high-pitch leadscrews, you could build something that does both, but it would neither be a great 3D printer nor a great CNC mill.
Wrap Up
Ok, so with that, I think we’re set for trying some more CNC machines! I hope this video clarified some of the differences for you, if it did, give it a thumbs up, get subscribed if you want to see more like it and… and do hit that bell to get notifications when new content goes live. Also check out the affiliate links below where you can get the products we used in this video – like the CR-10! And that’s it for today, thanks for watching and I’ll see you in the next one!
The three CNC/printers shown:
Sienci Mill One
Converted Mendel Max
CR-10
CNC to 3Dprinter conversion - from CNC to 3Dprinter
CNC to 3Dprinter conversion | from CNC to 3Dprinter
CREATE A 3D PRINTER WITH YOUR MACh4 CNC (mil / router)
COMPLETE THE CONVERSION IN 6 SIMPLE STEPS:
and print any 3D object from a 3D drawing (step or stl).
Once the conversion is completed, 3D printing is obtained simply by uploading to the printer, the 3D drawing modified by the slicer .
INTRODUCTION
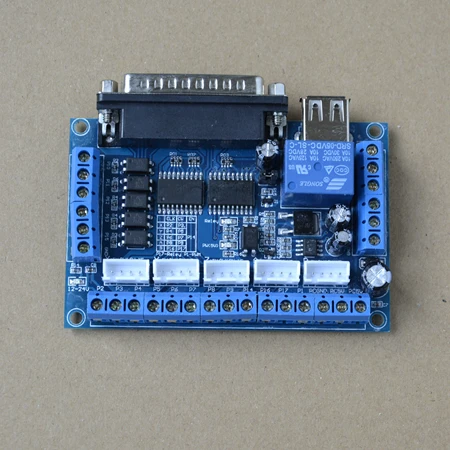
To proceed with the CNC to 3Dprinter conversion, first of all remember that the CNCs based on the Mach4 software controller use the G-code language to move the axes automatically managing the stepper motors; these are the motors connected through the LPT1 to a PC with a Windows operating system. Also 3D printers use the same G-code language, but with some instructions dedicated specifically to the temperatures of the devices connected to the printer. The simple installation of the Extruder & Bed Controller (EBC), device that we are presenting, and of the relative software utility, allows to transform the CNC into a 3D printer. Let’s see how:
INSTALLATION
1. Mounting of print head and heated bed:
on the web there are several models of extruders similar to each other, you can use indifferently with the EBC interface; in the case described here, we have chosen an MK5 head type. The only requirements for the correct driving of the print head are: 24Vdc power supply and K type temocouple.
As for the heated bed, the only requirement is the supply voltage of 24Vdc.
2. Extruder & Bed Controller
The EBC interface directly controls the temperature of the print head and the heated bed, continuously monitoring its progress.
As a standard 3D printer, it is able to set the different temperatures required during the different printing phases, thanks to the connection with Mach4 through a simple RS232 port.
.
3. Creating a Mach4 printer setting
Following the activation of the fourth axis with which the stepper motor of the extruder is driven, you can simply duplicate the Mach4’s milling setup.xml and rename it in 3D_Printer.xml. Then proceed with the calibration of the correct ratio step/mm, to obtain the exact quantity of plastic filament necessary for the print head based with the speed of the 3 main axes (X, Y, Z).
.
4.
 Installing the EBC-uty software utility (supplied with the EBC interface)
This setup then automatically installs all the software parts used by Mach4 to talk with Extruder & Bed Controller; the installation also creates (within the Macros directory) a new folder called 3D_Printer, which contains all the necessary macros. The installed software is therefore able to interpret the G-code generated by the slicer, routing the instructions for the fourth axis (filament motor) and those intended for the head temperature and heated bed (EBC).
5. Installing the slicer software
Slicer3R allows to generate the Mach4 G-code directly; this software, absolutely complete and intuitive in use, also becomes an integral part of the system. Although other packages (eg Skeiforge, Replicator, Ultimaker Cura) can be found on the web, the availability of Slicer3R for the most common operating systems – Windows / OSX / Linux, the freeware source and the declared compatibility with Mach4 make it the tool that we suggest.
6. Printing any object
Your CNC has become a professional 3D printer.
Print speed depends only on the features of your CNC, the faster your XYZ movements are, the faster your prints will be.
It is worth remembering that, if the performance speed of a small and light 3D printer is hardly reached, it is equally certain that the final result will not be any less: on the contrary, the CNCs typically have substantially better movements and backslashes than those small “toys”; all this allows precise definitions even in small printed details.
NOTES:
Through the macros created by us, the G-code specific commands for the RepRap / Prusa type 3D printers (today the most common on the market), are managed via RS232. A specific driver (also installed by EBC-uty) takes care of transferring to the EBC interface all the G-codes concerning temperatures and fan speeds. The EBC interface then interprets the aforementioned commands, generating the electrical signals and supplying the necessary power for the heaters; lastly, thanks to a smart PID, the nose and heated bed temperatures are instantly updated and kept under constant control, ensuring an optimal print quality.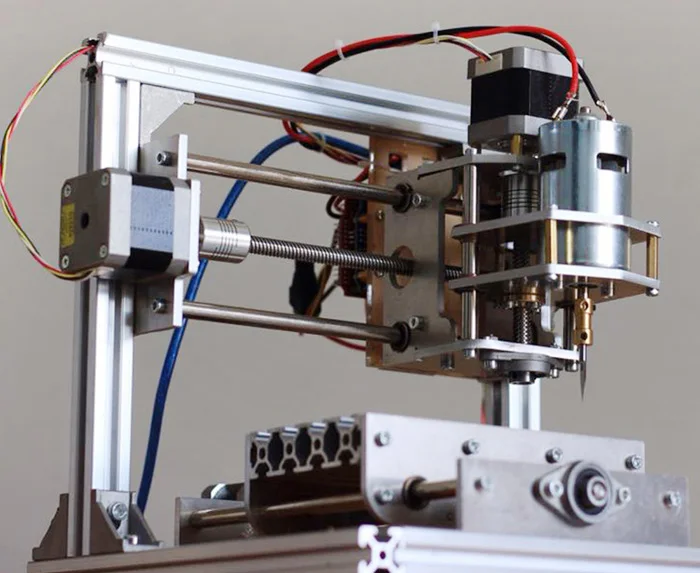
TECHNICAL DATA
IMPLEMENTED MACROS:
M104 Pxxx Set1 extruder target temp to xxx
M104 Sxxx Set2 extruder target temp to xxx
M109 Sxxx Set3 extruder target temp to xxx active PID and send R0 xxx
M105 Read current temp and send R0 xxx
M106 Pxxx Fan ON/OFF ON xxx>127 OFF xxx<127
M140 Pxxx Set bed target temp to xxx
M190 Pxxx Set bed target temp to xxx active PID and send R1 xxx
RS232 IMPLEMENTATED COMMANDS
Once the CNC to 3Dprinter conversion is completed, with these commands, you can send using a simple HyperTerminal software, the relative modifications are obtained. Serial setting: baud 15200.8, n, 1.
Ex. “0” followed by “CR” generates the switching off of the currently selected PID. Below is the list of available commands:
| 0 1 +/- p+/- i+/- d+/- S M104 Pxxx M104 Sxxx M109 Sxxx M105 M106 Pxxx M140 Pxxx M190 Pxxx | PID out ON/OFF.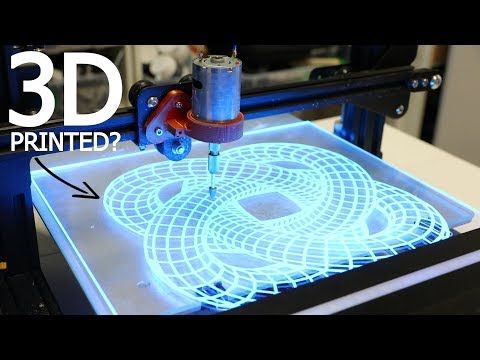 Reset. Add1 +5/-5°c to target temp. Add2 +20/-20 to KP. Add3 +20/-20 to KI. Add4 +20/-20 to KD. ShowPid extruder/bed. Set1 extruder target temp to xxx Set2 extruder target temp to xxx Set3 extruder target temp to xxx active PID and send R0 xxx Read current temp and send R0 xxx Fan ON/OFF ON xxx>127 OFF xxx<127 Set bed target temp to xxx Set bed target temp to xxx active PID and send R1 xxx |
Here you can download the RepRap GCode Cheat Sheet: the instruction set for common RepRap 3D printers.
Trademarks are the property of their respective manufacturers.
How to convert a CNC machine into a 3D printer?
Before you start converting the CNC machine into a 3D printer, you first need to stock up on the necessary tools and materials. This is the most important and preparatory stage, where you can buy cheap used devices at a lower price. When planning to turn a CNC machine into a 3D printer, anyone can significantly expand the functionality of the equipment. In order to manage the transformed machine-printer in the future, it is recommended to use the Mach4 program. To print in 3D, you need to create a file in STL resolution. It is supported by most 3D printers. If you need to convert the file format, then you can use one of the following programs: Soildworks, google Sketchup and other programs.
To print in 3D format on a desktop CNC machine, it is recommended to use a 3D printer extruder. The temperature sensor must first be replaced with a 3K thermocouple.
What to do
There is a myth that it is almost impossible to convert a CNC machine into a 3D printer without professional technical knowledge. However, if you use the ready-made instructions, select the necessary materials and tools, then everyone will be able to cope with the task.
To obtain a proper result, the following procedure is recommended:
• Remove the spindle holder. In the holes that have become free, it is necessary to fix the adapter-corner.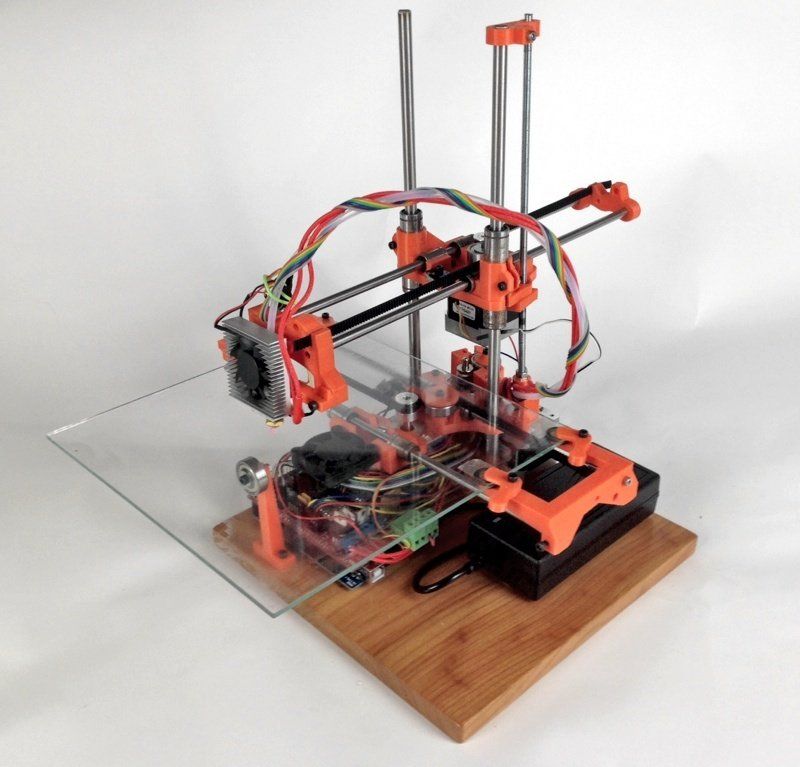 It is necessary in order to install and fix the print head of the 3D printer;
• To fix the filament spool for 3D printing, you need to assemble a stand made of aluminum profile. It is a resistant metal that is tolerated by almost any mechanical impact;
• on an existing CNC machine, you need to fix a special stand with a spool and thread for 3D printing;
• install additional software;
• download the Mach4 program from the official website of the developer. It is worth noting that the program does not require heavy-duty hardware for normal operation. The package contains Skeinforge software, which enables the normal conversion of 3d files to G-code;
• In addition, you need to install the Russian-language interface. In this case, management becomes much easier;
• Mach4mill must be selected to run the Mach4 program. After the download comes to an end, you need to go to the menu and find "Wizards" select "Pick Wizard";
• double click on the button and select "Open STL File"print addon"";
• click on the file and find Open in English.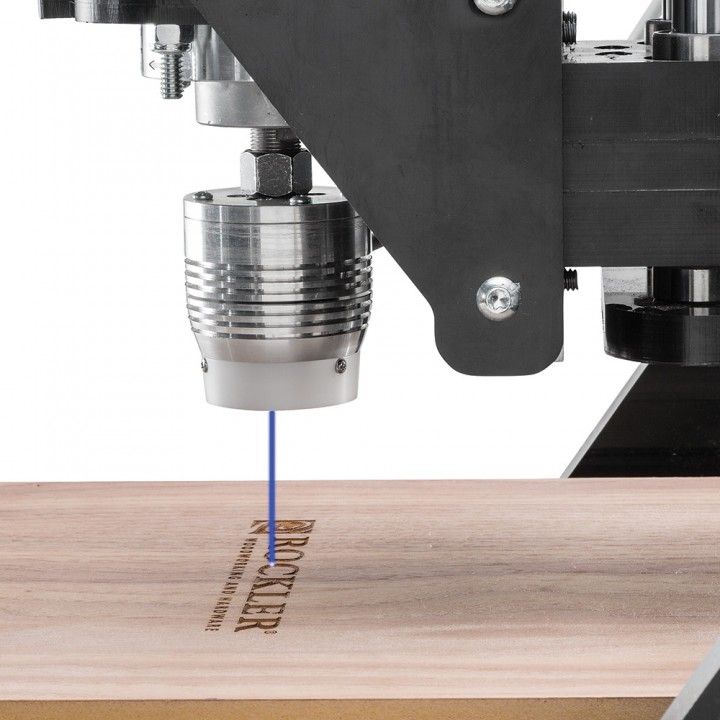 It is necessary to wait until the program completes the creation of the 3D file, then the settings with printing in 3D format should open;
• Next, you need to return to the Mach4 window, you must click on the Post Gcode to Mach4 button. The resulting code is easy to save.
After you manage to bring the print head to the starting print location, you need to erase or reset the coordinates of the tools.
Printing is started by simultaneously holding the combination ALT + R.
What materials can I buy
To make your own 3D printer, you can alternatively purchase the following devices and materials:
• Arduino Mega 2560. This is the main element that will be responsible for the future control of the printer in 3D format. Can be purchased from the Chinese store Aliexpress;
• if you plan to buy the brain offered above, then Mosfet transistors with any other powerful devices are best suited;
• foil fiberglass;
• M6 threaded stud in the amount of 3 pcs.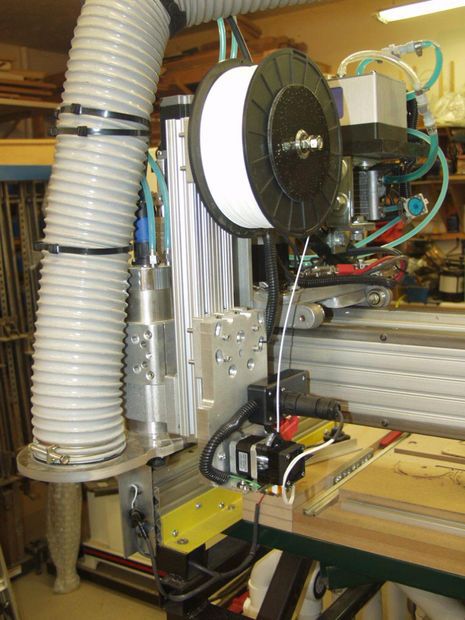 Each is one meter long;
• guides for X, Y, Z axes. In order not to spend extra money, it is enough to use old printers. However, most often there are differences in diameters. Therefore, the bushings will have to be made independently.
You can also borrow stepper motors from an ordinary dot matrix printer. It is necessary to prepare at least 5 pcs. To make a CNC printer, it is not necessary to spend a lot of money to purchase important technical items.
You can choose from our catalog
Wedding Rings 804
More info
Quick view
Add to favorites
Wedding Rings 1072
More info
Quick view
Add to favorites
Wedding Rings 976
More info
Quick view
Add to favorites
Wedding Rings 653
More info
Quick view
Add to favorites
Wedding Rings 1458
More info
Quick view
Add to favorites
Wedding Rings 896
More info
Quick view
Add to favorites
Wedding Rings 579
More info
Quick view
Add to favorites
Wedding Rings 1436
More info
Quick view
Add to favorites
Wedding Rings 1296
More info
Quick view
Add to favorites
Wedding Rings 1956
More info
Quick view
Add to favorites
Wedding Rings 1451
More info
Quick view
Add to favorites
Wedding Rings 266
More info
Quick view
Add to favorites
CNC machine on 3D printer
Drawings of a CNC machine that can be printed on a 3D printer
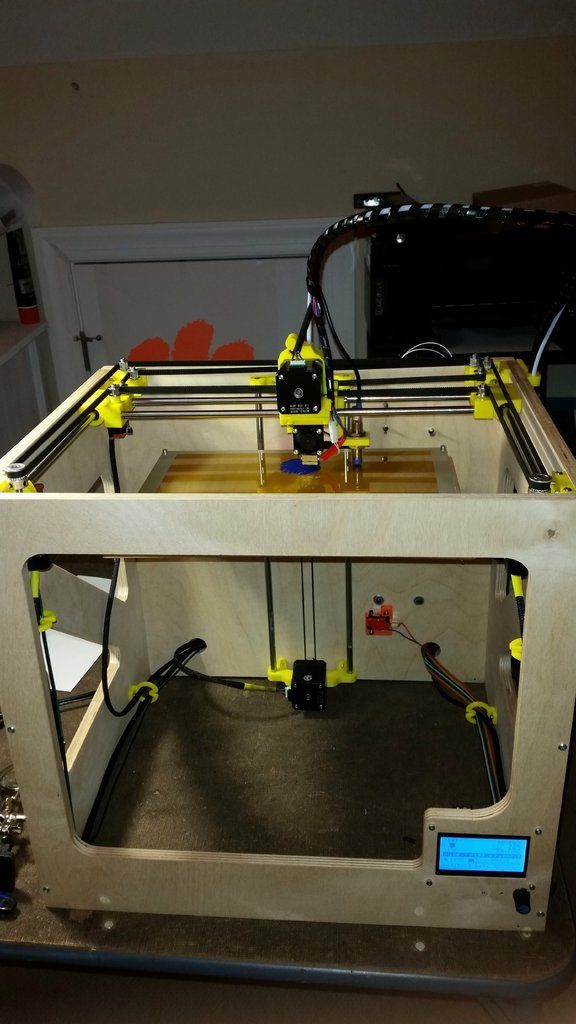
Probably every owner of a 3D printer has thought more than once that: 3D printing is, of course, good, but it would also be cheaper to make a CNC router.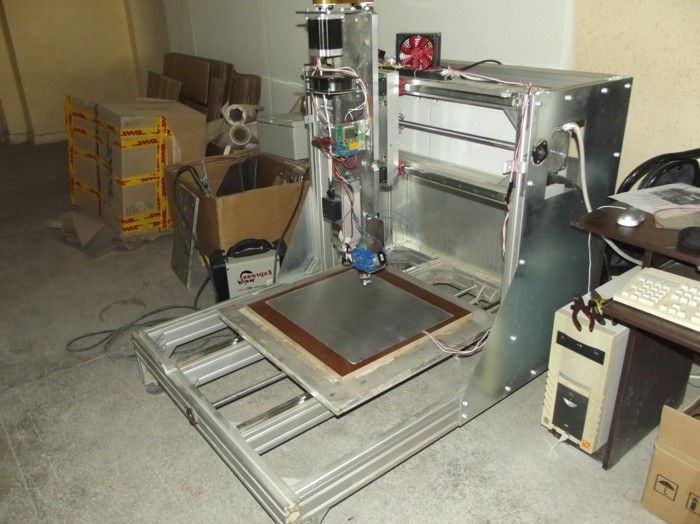 Wood costs an order of magnitude less than plastic, and if the object being manufactured can be assembled from flat parts, then plywood cut on a CNC machine turns out to be almost waste material.
At the end of this article, you can download drawings of CNC machine parts and print them on a 3D printer. Also in the article there is a video of the assembly and operation of this router.
The CNC machine turns out to be very technological and easy to assemble, in fact, after printing, you will have a constructor that you just need to connect with nuts and screws.
If you collected constructors in childhood, then you can also handle the assembly of the CNC machine!
Despite the fact that the machine is assembled on parts printed from PLA, it is quite capable of working with the Makita RT0700C router - it is he who was photographed. You can also supply a budget spindle with Aliexpress ER1 500w, see links to electronics and spindle at the end of the article.
What you saw in the photos at the beginning of the article is a modified version of the CNC machine, with cable channels and connecting a vacuum cleaner. But initially the concept was much simpler and at the same time - it worked great!
Video of assembly and testing of the printed CNC machine
The video above shows the assembly of the CNC machine from parts printed on a 3D printer, as well as its test runs. Printing is done with PLA plastic, it is quite strong in bending and has less shrinkage than ABS plastic. See below for a list of fittings and electronics for assembly.
As you can see, despite the apparent fragility of the design, the CNC router performs test tasks without problems. And if you need faster work with a large depth of the cutter, then with this machine you can cut a set of drawings of a durable plywood CNC machine.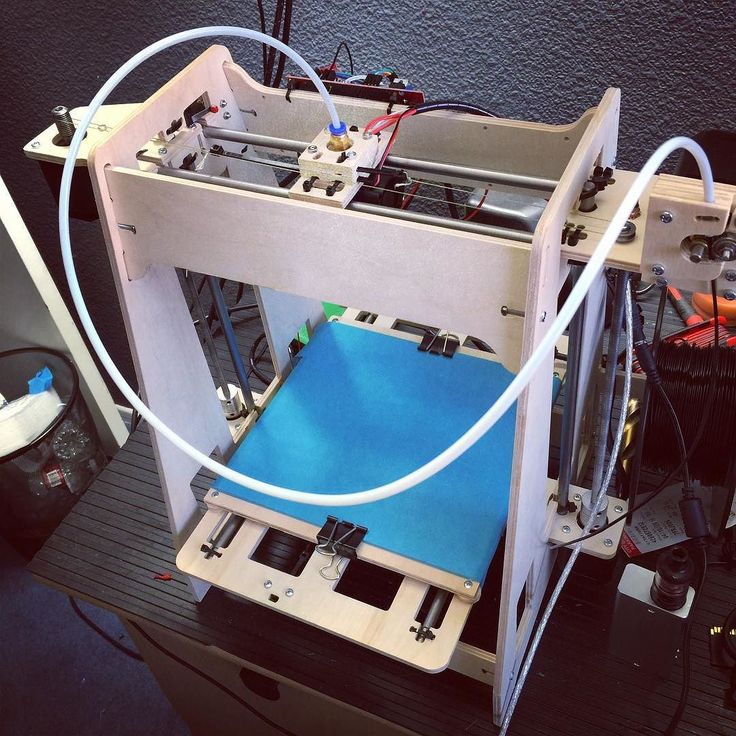
Like any other do-it-yourself homemade product, this CNC machine printed on a 3D printer has undergone improvements. Cable channels and a nozzle for connecting a vacuum cleaner are not only beautiful, but also practical! Detail drawings can be found in the archive with the machine itself at the link at the end of the article.
The third video shows another refinement, this time an increase in the size of the working area. Fortunately, for such a refinement, it is enough just to change the profile to a longer one and put the corresponding lead screws, which in this case are made from an ordinary construction stud.
The whole alteration takes an hour, a maximum of two of your time. By the way, you can store the machine in disassembled form, assembly and disassembly takes only 10-15 minutes.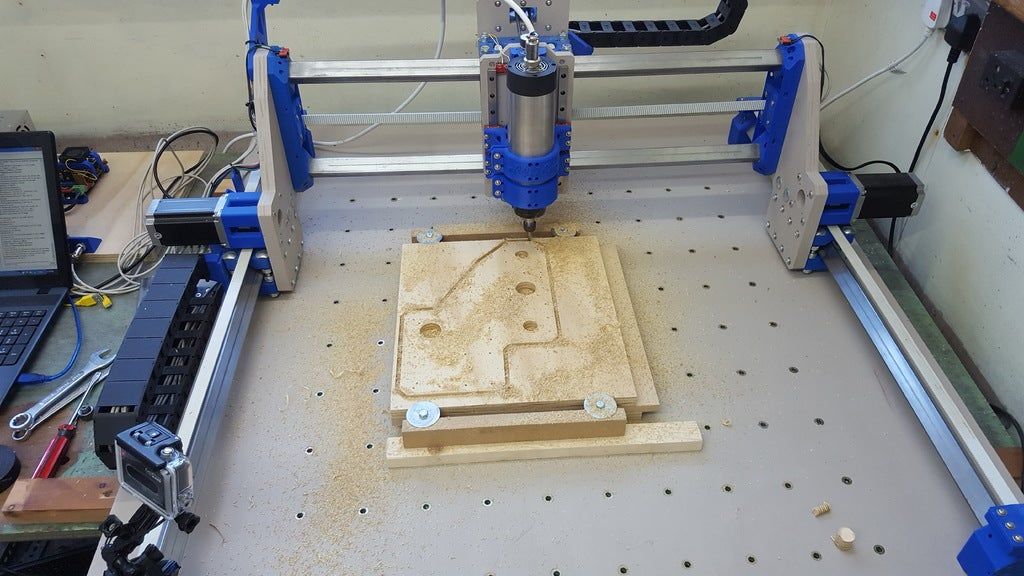 If you only need the CNC machine from time to time, then you can save a lot of space in your home workshop by disassembling the CNC when you don't need it.
Accessories for assembling CNC machine
- 04x | Stepper motor Nema17
- 03x | Flange nut M5 / M8
- 04x | Aluminum profile 20x40 mm (see length according to your working area)
- 03x | Lead screw T8, with nut (100 mm shorter than aluminum profile)
- 14x | Nylon wheel with 5 mm bearing (type B in the link)
- 02x | Chrome steel rod 8 mm in diameter and 180 mm long (Z-axis)
- 01x | 200 mm lead screw T8, with nut (Z-axis)
- 04x | LM8UU linear bearing
- 03x | Standard 8mm bearing
- 01x | Pulley GT2 20 teeth, 5 mm inner diameter
- 01x | Pulley GT2 20 teeth, 8 mm bore
- 01x | Timing belt GT2 200mm ~ 220mm
Screws and nuts (also take a nut and washer for each screw):
- 12x | M6 x 30 mm screw
- 04x | Screw M6 x 35mm, 35mm VERY important for attaching the spindle to the Zaxis cart
- 26x | M5 x 50 mm screw
- 22x | M4 x 15 mm screw
- 08x | M4 x 10 mm screw
- 16x | M3 x 15 mm screw
- 20x | Wood screw 4mm (fixing the CNC machine to the base)
- 30x | M4 clamp nut
CNC electronics
Arduino CNC Shield from Protoneer is used as control electronics, there will be a separate article about it soon.