3D printer clean hot end
How to Clean Your 3D Printer Nozzle & Hotend Properly – 3D Printerly
The nozzle and hotend on your 3D printer go through plenty when it comes to 3D printing, so properly cleaning them is essential. If you don’t properly clean them, you can run into quality issues and inconsistent extrusion.
The best way to clean your 3D printer nozzle and hotend are to take apart the hotend and use a nozzle cleaning kit to clear out the nozzle. Then clean off any stuck filament around the nozzle with a brass wire brush. You can also use a cleaning filament to push through the nozzle.
There are more details and other methods that you can use to clean your 3d printer nozzle and hotend properly, so keep on reading to find out how to get this done.
Symptoms of Clogged Nozzle on Your 3D Printer
Now, there are clear symptoms that the nozzles are clogged or jammed because they are not clean.
Continuous Adjustment of Feed Rate
You would have to adjust the feed rate or the flow settings again and again, which you never did before this time. This shows that your nozzle has started to clog, and the particles are accumulating there.
The Problem in Extrusion
The extrusion, the very first layer of the printing, will start to look uneven and would not stay consistent throughout the whole printing process.
Motor Thumping
Another symptom is the motor that is driving the extruder starts thumping means you would see it jumping backward because it can’t keep up with the other parts that make it turn.
Dust
You would see more dust than usual around the extruder and motor part, which is a clear sign that you need to clean everything starting from your nozzle.
The Odd Scraping Sound
One thing you can notice in terms of noises is an odd scraping sound which the extruder is making because it is grinding the plastic and it cannot push the gear fast enough now.
Other Symptoms
The printer would start showing print blobs, uneven or rough printing, and a poor layer adhesion feature.
How to Clean Your Nozzle
There are a few methods that people use to clean their nozzles, but generally, it comes down to heated up the nozzle to a fairly high temperature and manually pushing through filament.
It’s usually done with a needle from a good nozzle cleaning kit.
A good nozzle cleaning kit that you can get from Amazon for a great price is the MIKA3D Nozzle Cleaning Tool Kit. It’s a 27-piece kit with plenty of needles, and two type of precise tweezers for your nozzle cleaning worries.
When a product has great ratings on Amazon, it’s always good news, so I would definitely go with it. You have a 100% satisfaction guarantee and quick response times if ever needed.
After heating up your material, using a high-quality needle works wonders.
What this does it heat up any built-up material, dust and dirt within the nozzle then push it out straight through the nozzle. You are likely to get a build up of dirt if you are printing with many materials which have different printing temperatures.
If you print with ABS and some filament gets left inside the nozzle then you switch to PLA, that leftover filament is going to have a hard time being pushed out at lower temperatures.
How to Clean Outside of 3D Printer Nozzle
Method 1
You can simply use a paper towel or napkin to clean the nozzle when it has cooled down. This should usually do the trick to clean the outside of your nozzle.
Method 2
If you have larger, stubborn residue on the outside of your 3D printer nozzle, I would recommend heating your nozzle up to around 200°C, then using needle nose pliers to pick the plastic off.
3D Printer Nozzle Cleaning Brush
For rigorous cleaning of your nozzle, I would suggest you buy a good quality cooper wire toothbrush, which will help you get all the dust particles and other residues from the nozzle.
But remember, always heat the nozzle before using the brush to get it to the temperature where it was in its last printing session.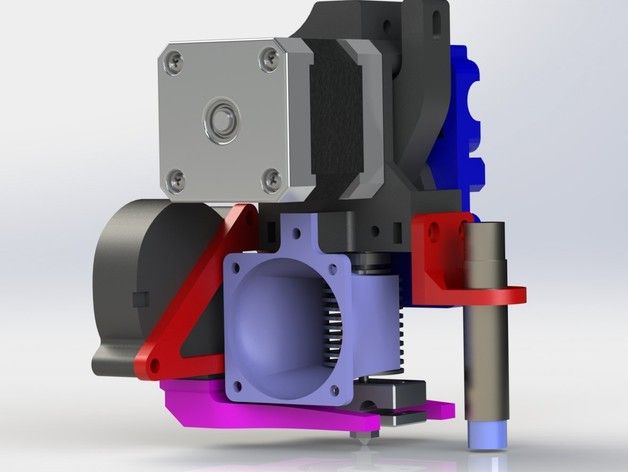
A solid nozzle cleaning brush from Amazon is the BCZAMD Copper Wire Toothbrush, specially made for 3D printer nozzles.
You can use the tool even if the wires get deformed. The best thing about this tool is that it is very handy, and you can easily hold the brush while cleaning the surface and sides of the nozzles.
Best 3D Printer Cleaning Filament
NovaMaker Cleaning Filament
One of the better cleaning filaments out there is the NovaMaker 3D Printer Cleaning Filament, which comes vacuum-sealed with desiccant to keep it in optimal conditions. It does an amazing job cleaning out your 3D printer.
You get 0.1KG (0.22lbs) of cleaning filament. It has excellent heat stability, allowing it to have a wide range of cleaning abilities. It goes anywhere from 150-260°C without giving you issues.
The slight viscosity of this cleaning filament means you can take easily take residual material out of the nozzle without it jamming inside.
Using cleaning needles alongside this is a great solution to prevent your nozzle clogging while transitioning between lower and higher temperature materials.
It is recommended to use the cleaning filament at least every 3 months for regular maintenance and unclogging procedures.
eSun Cleaning Filament
You can use the eSUN 3D 2.85mm Printer Cleaning Filament, which has a size of 3mm and gets easily inside the nozzle.
The good thing about it is that it possesses a certain level of adhesive quality, which clears out everything and will not clog the extruder during cleaning. You can use it for cleaning the nozzle and extruder both before and after the printing.
It has a wide cleaning range of almost 150 to 260 degrees Celsius that allows you to take up the temperature to a good level to let the particles inside the printer soften up for the removal.
How to Use 3D Printer Cleaning Filament
Cleaning filament can be used in your 3D printer to do cold and hot pulls which are popular methods widely used by 3D printer users.
A hot pull is perfect for getting those large carbonized materials out of your nozzle when there is a serious blockage. A cold pull is where you remove the remaining smaller residue so that your nozzle is completely cleaned up.
To use your 3D printer cleaning filament, load the filament as you usually would into your 3D printer until it has replaced your old filament and actually extrudes from the nozzle.
Change the extruder temperature to make sure it stays hot, for a temperature between 200-230°C. Then extrude a few centimeters of filament, wait, then extrude more a few times.
After this, you can remove the cleaning filament, load up the filament you want to print with, then make sure the cleaning filament is completely displaced after starting your next print.
This filament can be used to clean the printers print core by applying hot and cold pulls. Hot pulls are used to get the biggest parts of carbonized material out of the print core and are highly recommended when the print core is clogged.
With a cold pull, the remaining small particles will be removed, ensuring the print core is completely clean.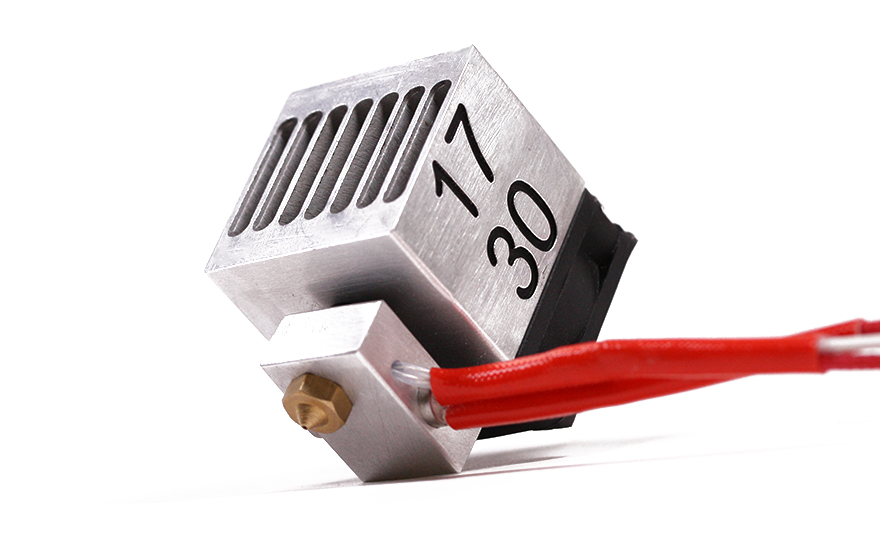
How to Clean a Hotend Tip Covered in PLA or ABS?
You can use a failed ABS print, push it onto the tip and push it straight up. But first, you have to heat the hotend to almost 240°C, and then when you have applied the failed ABS print, let the hotend cool down for a minute.
After this, pull or twist off the piece of ABS, and you will get a clean hotend.
If you are having trouble with cleaning the hotend covered in PLA, you can follow this procedure, which I am going to explain.
You have to first heat the hotend to a temperature of 70°C, and then you need to grab the PLA from any side with a pair of tweezers, or you can use pliers but carefully.
The best thing about PLA is that it gets soft on high temperature and makes it easy to be pulled off, leaving the hotend clean.
Cleaning an Ender 3 Nozzle Properly
Method 1
Cleaning Ender 3 nozzle would require you to open up its fan shroud and remove it from its place to get a more clear view of the nozzle. Then, you can use an acupuncture needle to break the particles which are stuck in the nozzle.
This would help you to make the particle break into small pieces. Then you can use a filament from the top size of the nozzle from the extruder part and enter it from there until it comes out with all those particles.
Method 2
You can also remove the nozzle completely from the printer and then clean it by heating it at a high temperature with a hotgun to let the particles soften up and then use a filament, let it stay inside for a while and then do a cold pull.
Keep doing this cold pull until the filament starts coming out clean.
How Often Should I Clean My 3D Printer Nozzle?
You should clean your nozzle as and when it gets fairly dirty or at least every 3 months for regular maintenance. If you don’t clean your nozzle too often, it’s not the end of the world, but it does help to give your nozzle more life and durability.
I’m sure there are plenty of people who rarely clean their nozzles and things are still working fine.
It depends on how often you print with your 3D printer, what nozzle material you have, what 3D printer materials you are printing with, and your other maintenance.
Brass nozzles can last a very long time if you exclusively print with PLA at low temperatures and have your bed leveling methods perfect.
[Guide] Clean up the Hot End after a cosmic disaster - 3D Print
Post Views: 2,067
There are same days, in 3D printing as well as in any other activity where all go wrong, and when we have to clean up the Hot End after a disaster is one of those. One example is getting up in the morning, and when we go to our beloved printer to see what was produced in the night, we find this:
Moreover, to make things worse, which may already be unpleasant enough, we also put the filament, since it is not just PLA, but Nylon. I foresee an intense morning!
But you must not be discouraged, even in the worst of situations and you must always try to catch that minimum of good that apart from borderline situations (I’m always talking only about 3D printing) there is on every occasion!
So I take advantage of this trouble to write a small guide to the deep cleaning of the hotend, after these situations, which in technical jargon are called: “A mess!”.
A small digression about the filament
Specifically, this is Nylon from the company Tecnology Outlet. Those who follow this blog know very well that I am hardly critical of the filaments. I understand that in any case they are people who do their best to bring a product with a spectrum of uses as wide as possible. So that it works with all the machines on the market (which are now really many) and with the custom settings of the users. In cases where I have encountered a few problems I have limited myself to giving feedback with some advice, and in some cases I have also been ascribed.
This time, it’s different. Unfortunately I didn’t find any points that could be saved. I did a lot of tests, with different temperatures, insulating the printer, increasing the flow. I also dried the roll with a special dryer for 48 hours. Nothing, the filament was always printed inconsistently.
Don’t think it’s a material change problem. I have already successfully printed nylon many times before, but not this one.
I sincerely hope I’ve been very unlucky. To date, in all sincerity, I don’t feel like recommending it.
But back to us and our little guide!
The guide is divided into 3 steps, each of which is done with materials and ideally in a different place!
Clean up the Hot End – Step 1: Save the saveable
Where: Near the Printer
Danger: Burns, beware of the temperatures!
Equipment:
- Tin Welder
- Long pliers
- Cardboard protection (any card)
- Lots of patience (not for sale)
First, heat the hotend cube to the highest possible temperature and grab it with the clamp. At the same time, when heating the welder too, you should start to remove as much material as possible, trying not to be too close to the cables of the heater and the probe so as not to damage them.
It’s a long and tedious job! Once most of the material has been removed, try to dismantle the hotend piece by piece.
It is advisable to remove the heater as a last resort and while it is always in operation rub it with a paper towel folded many times to form a very thick layer, at least about 1 cm, so as not to burn. At this point the cartridge will be at about 300°, so be careful!
Ideally at this stage you will have probe and cartridge clean, or otherwise no longer encrusted. Should test cartridge and probe, they are delicate, and could break. In case you notice some malfunctioning it is better to replace them directly, since they are very cheap
In this phase it is always advisable to cut a few millimetres of the PTFE pipe that certainly does not benefit from all the heating/cooling. Take advantage of this to give new life to the tube! Usually just 1/2 mm is enough and we would have the equivalent of the new tube!
To Step 2!
Clean up the Hot End: Step 2: The Cleaning continues
Where: Kitchen (to the delight of your mother, wife, girlfriend, or the male equivalent)
Danger: burns by temperature/flame
Equipment:
- Iron tongs
- Kitchen Glove
- Chisels
- Cleaning nozzles of the right size
- Recycled cardboard to be used so as not to dirty
It is important to use the blue flame of the kitchen and not the yellow flame of the lighter as it is more caloric and has less residue. So your nozzle (for example) will return bright and not black smoke! This part is also feasible with a cooking torch, if, rightly, you want to continue working in your space.
Light the kitchen fire, put the glove in the supporting hand, grab the pliers. Grab one of the 3 objects you brought, then cupboard, nozzle or throat and start putting them on the fire. When you see that the plastic material starts to skim, place them on the cardboard and with the chisel start cleaning them until you have removed the plastic. Repeat these steps a few times. For the nozzle, once you have cleaned it from the outside, start using the cleaner as well, to try to remove the material from the inside. I recommend using the correct size on the tip side and the largest size you have (alternatively also a drill bit of the correct size, to remove the material on the other side! As before, help yourself with a handkerchief folded several times and you can make the pieces shine!
Clean up the Hot End: Step 3: Inner Cleaning
Where: Garage, a non-domestic place
Danger: Chemical abrasion – highest attention –
Equipment:
- Caustic soda in flakes or pure acetone (depending on wich material you are cleaning)
- Safety glasses
- Mask
- Work gloves, better if leather
- A nail or similar piece of metal
- A glass or ceramic container, even a glass
However much you worked well in the previous step, there was certainly some residue left in the threads, so you have to take it out!
As you already know, caustic soda removes all types of residue, while pure acetone is specific to ABS.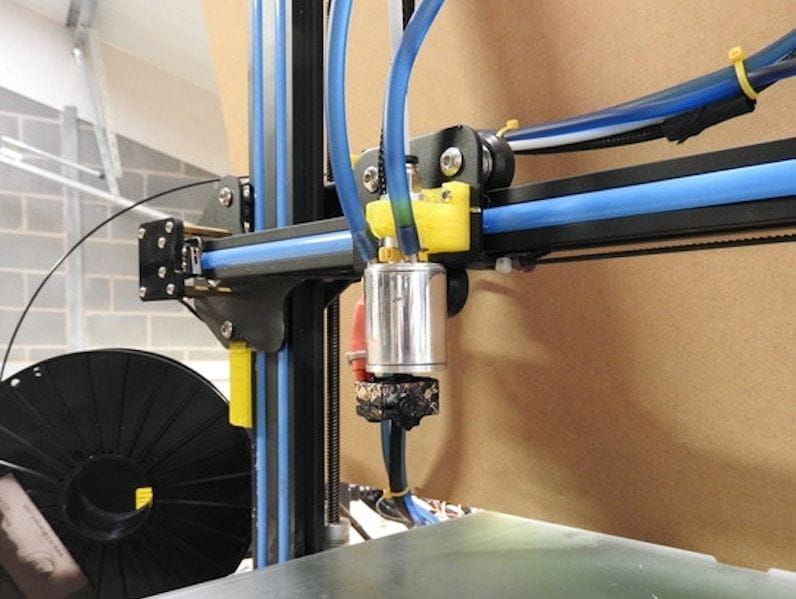
Wear all protective equipment, including a long-sleeved sweatshirt * DO NOT PLAY WITH CAUSTIC SODA*.
Place about 1 or 2 cm of soda flakes inside the glass, and our 3 objects to clean. Now fill the glass almost to the brim with water and start mixing with a metal object. You will see that slowly the temperature inside the glass will rise and the liquid will start to fry.
Continue stirring gently until you feel the 3 objects inside the glass. I say you will hear because at this point the loiquid will be opaque and you will not be able to see inside. Now leave the glass in a safe place, not within reach of children or animals for 3/5 hours.
On your return, slowly pour the soda down from a sink and rinse the objects with water. It is possible that they have a patina that should be removed with a rub. In some cases you can also have the desired brilliance regained with sandpaper.
FINISH!
All you have to do is reassemble everything and you’ll have a brand new hotend again! You weren’t hoping for that, were you?
While you are at this stage, and if you have to buy some equipment I highly recommend the silicone socks for the cubes.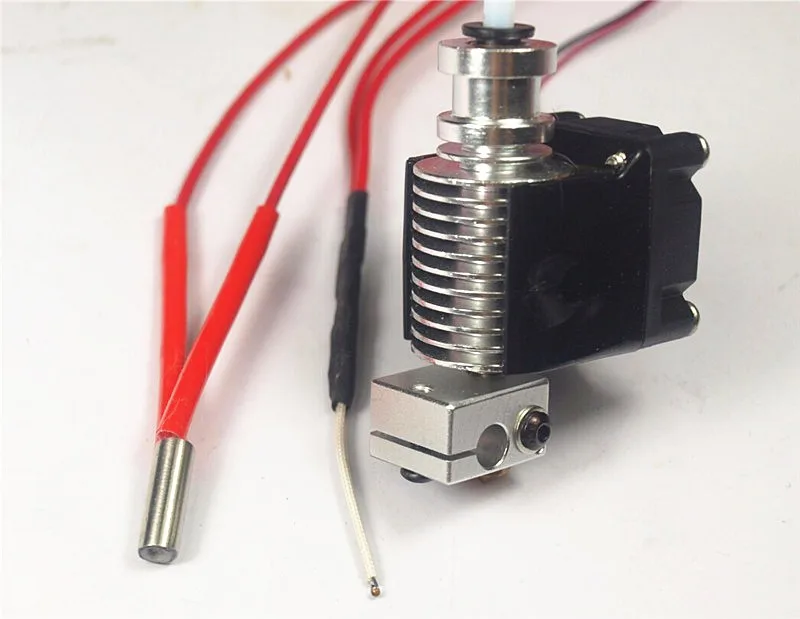 They definitely improve your life! First of all the cube will feel much less of the fan layer, keeping the temperature more easily! Secondly, if you recapitulate something like this, the silocone will protect your hotend and make cleaning much easier! There are many sizes available! Check that we are suitable for your hotend!
If you have found this post useful, please LIKE on Easy 3D Home Facebook’s page to receive updates on all the news of the Blog! You can find other guides about 3D in our Guides section!
Like this:
Like Loading...
Plastic leak from heater block 2.0 (with pictures)
Guys, such a problem, in the hot end, during warming up, plastic is formed around the 'neck' / 'neck' / 'metal tube with a thread' (underline as necessary). After a while, a massive puddle gathers, and it begins to flow from the block to the nozzle, and already from the nozzle to the model. Large drops remain and in general, high-quality printing fails ((
I will try to explain it more clearly.
This is a clean heating block:
I type with only one hotend, the left one. The right one is still 'whole', plastic has never been in it.
But if you look closely, you can already see some black plastic around the thread.
Here's what actually happens after 30 minutes of printing or just warming up:
See? A puddle of plastic is forming! I think you can clearly see the contrast between the silver heating block and the black plastic. And on the right side, the plastic begins to drain, and pours directly onto the model!
What do I think about this...
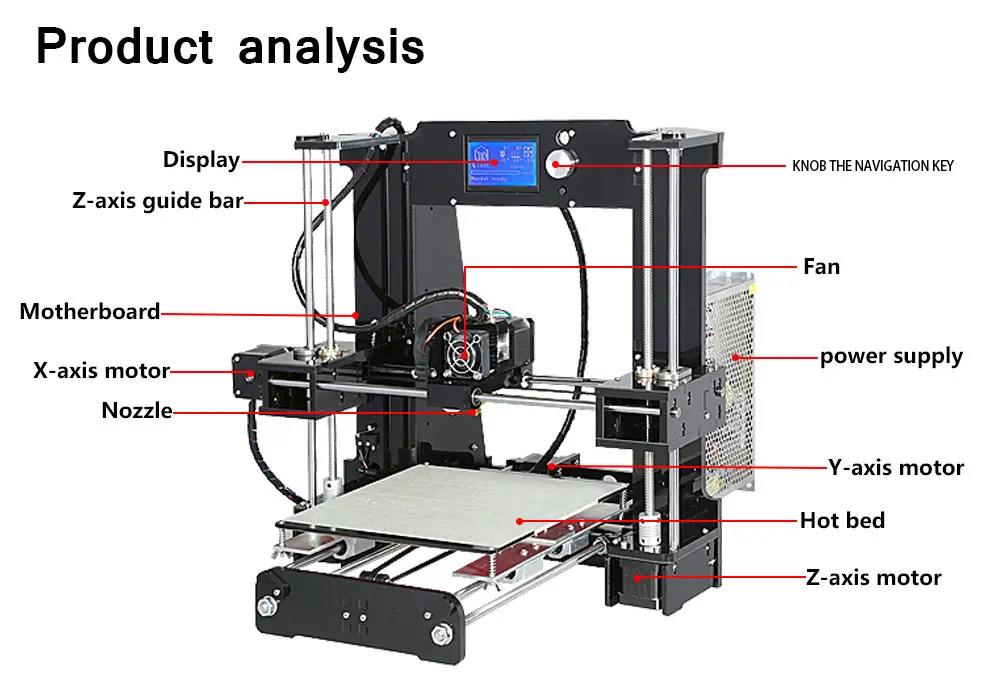
Once I changed the filament and couldn't get into the hotend, unscrewed the little thing called 'pipe conection' (see the diagram below).
Inserted the plastic, started screwing it back in, but it couldn't because of the Teflon tube.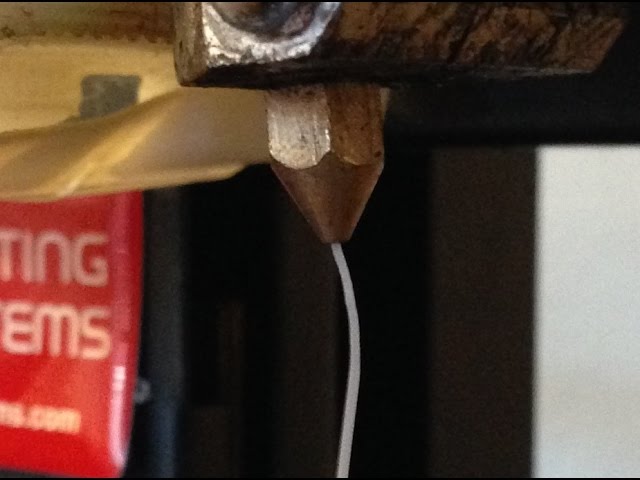 I took it and foolishly cut it to the right size. Put everything in place, screwed it up.
Apparently after that incident, it started to leak. The plastic fell into the vacated space between the tube and the nozzle and flowed out along the ?! thread ?! I don’t understand how it gets out, so I actually appeal to you.
In short, I took a Teflon tube from the second nozzle, cleaned everything from the plastic inside the hot end, and inserted it in place of the old one. Everything should be by default or, more simply, in the form in which it came to me, but no! Even with a normal long tube, plastic flows out and spoils the models! Before each print, you have to remove the cooler and clean the block from the accumulated plastic! How can I get rid of this horror?!
Here is a schematic representation of the hotend for your convenience.
Although I don't have E3D, the essence of the work is the same.
The arrow points to the place where it flows from
I would be sincerely glad if you could describe to me:
1) The reasons for this problem
2) Options for eliminating this problem
3) Did I use incorrect terms or made mistakes in the text, related to 3D printing
Printer: zonestar P802QR2
I have been printing on it for no more than a month, but the 'experience' of 3D printing is about 2 years, this is the first time I have encountered such a problem.
Thank you all in advance for your help!
FAQ
kesha47
Loading
12/05/2022
502
Hello! I installed the TMC2208 in the hope that the printer would be quieter, but it wasn't there. I remember doing everything according to the instructions, even reflashing the printer....
Read more
APToni
Loading
21.11.2022
349
Good afternoon, there is a board in Tevo Tornado, there was such a question, how to use USB 2.0 as an alternative to the SD connector.
On...
Read more
slic3r puts bridges before laying out the top layers, but the beautiful Simpli3D doesn't do that :(
So this is green. ..
..
Read more
small things for a 3D printer / Sudo Null IT News
Very, very popular and fresh spare parts for 3D printers, which can be in demand by everyone without exception. Suitable for upgrading or replacing standard components of your printing machines. Selected in the article based on personal experience ...
If you already have a 3D printer and are looking for something useful to upgrade - then my article may be useful. In fact, many things are already well known, someone is already using it, someone was just going to. But all this small things (inexpensive) can be in demand, especially if you suddenly want to connect your 3D printer remotely, or make it print in several colors at minimal cost.
So. If you don’t go into the wilds of DIY and grab a soldering iron right away, but look for ready-made solutions, then you can find a unique Geeetech 3D WiFi Module.
This module is based on ESP8266 and STM32 ARM processor. In fact, it is a universal Wi-Fi bridge for printing. Supports memory cards (MicroSD), USB drives, connects to the printer via a native USB cable. You can control it through the Geeetech Easyprint3D application from your smartphone, tablet or computer.
The board has a fairly dense layout, its own memory for storing g-code. Suitable not only for printers from Geeetech, but also for other models. Actual for budget 3D printers that print only via USB, and for others it will not be superfluous. The Easyprint3D application allows you to immediately download the desired models from your smartphone, start slicing and printing. Available printer management, print settings adjustment.
If you want more remote control options, then a good and fast option is Octoprint based on a single-board computer Raspberry Pi 3.
All you need is:
b) install Raspberry Pi;
c) connect to the web interface of the unpacked octoprint.
Plugins are downloaded directly from the application. You can install a webcam to control the 3D printer. Link to source.
Control is also available from a smartphone, with certain settings there is access via the Internet - you can remotely control the printer, run tasks, change settings or stop / stop printing.
If you want to try something new, check out the dual hotend for color printing and for printing with soluble supports (eg HIPS).
This is the new XCR-2IN1 V2 3D Dual Hot End. You can install it on almost any printer, you will need a minimum of alterations. Additionally, you will need an engine and a feed mechanism (extruder), as well as adjusting the firmware.
There are several configuration options in the lot, there is a simple heater block (NV6), there is a Volcano / Crater for fast printing. As well as a 12V / 24V fan power option. If you choose NV6, then a silicone "sock" for thermal insulation is included as a gift.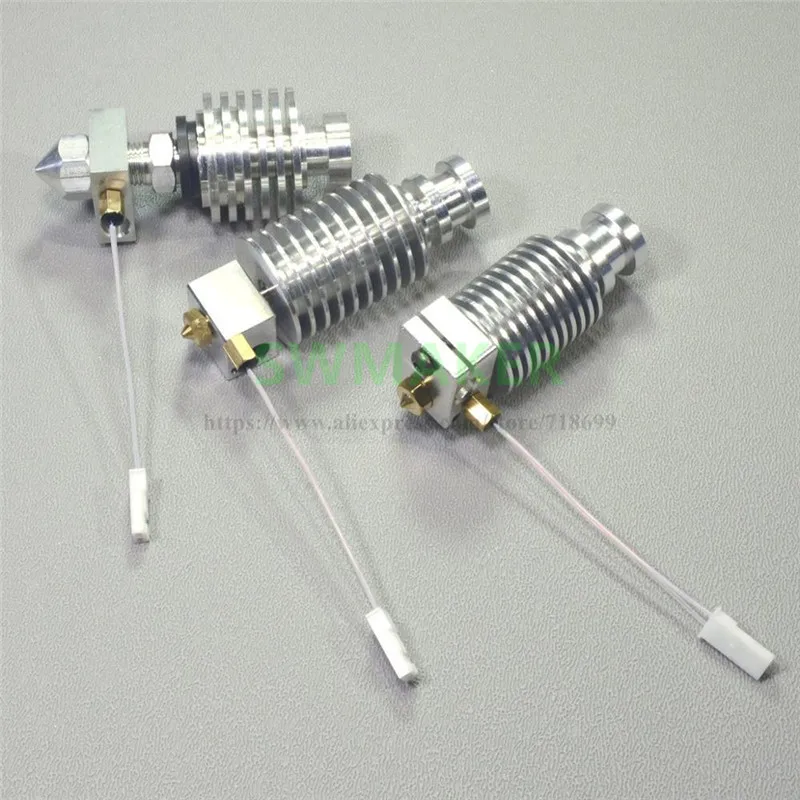
This is one of the most advanced, inexpensive and efficient ways to add a second printer extruder today.
Pay attention, there is another version of the double hotend, simpler, cheaper.
This is a variation of the E3D hot end with a dual heatsink, also comes assembled.
In this version, thermal insulation is quite simple, "one-time". But you can buy a "sock" for the hot end separately.
A simple silicone cover for draft protection and temperature control of the heating block - the price is symbolic. Isolates the block and part of the nozzle from external influences. A very handy thing. You can take it off/put it back on with no problems.
I will not dwell on double printing for a long time, but I would like to talk about delamination of models during printing. Not always this negative effect can be overcome quickly and painlessly.
If you have problems with adhesion or just want to make it easier to print on a table top, look into printing stickers.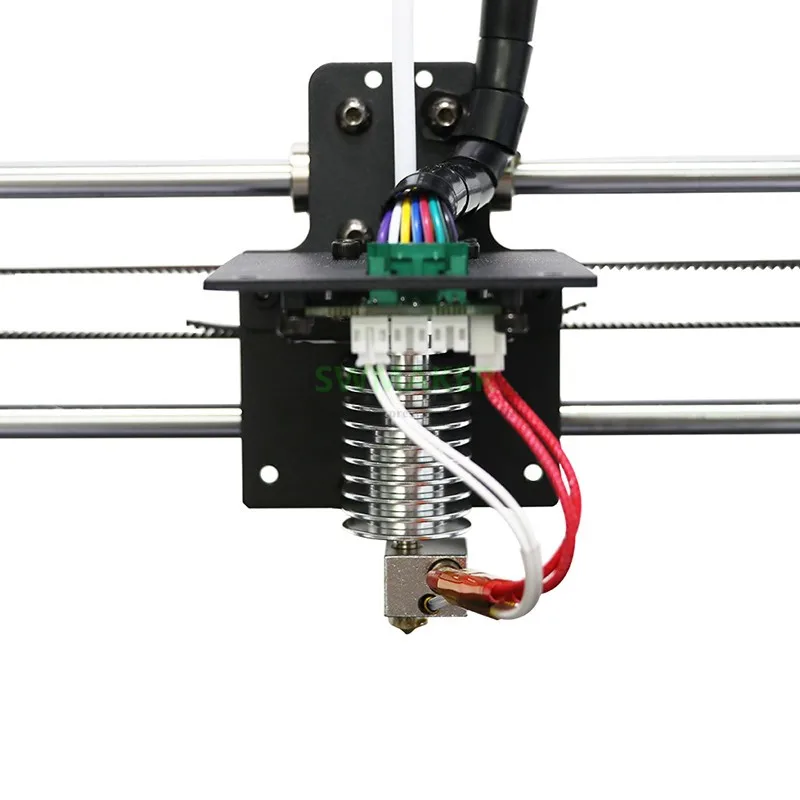
These are special adhesive stickers that are available in a range (various sizes and quantities per lot).
Original stickers from Creality3D, size 235mm x 235mm.
Lot of 3 stickers 235mm x 235mm.
Lot of 3 stickers 300x300mm.
Installed without any problems. The bottom surface has an adhesive layer (double-sided tape 3M), pasted on a clean table. Can be cut to size with an ordinary clerical knife.
But if you want even more convenience, pay attention to adhesive magnetic stickers. A good option is the Creality Ultra-Flexible Removable Magnetic Surface For CR-10S PRO. Size 300x300 mm.
These stickers consist of two parts: a magnetic base that sticks to the table with double-sided tape, and a removable surface for printing. This method allows you to remove the model after printing without deformation, immediately. You don't need spatulas or waiting for the model to cool.
A more expensive option, but no less effective, is special textured heat-resistant glasses.