3D printer bed frame
Bed best 3D printer files・Cults
Rc MAN KAT 1 flatbed 5t 1/10
€15
Molette pour le bed
Free
Bed Level Wheel Direction Reminder CR10 Ender 3 2 S1 Smart Pro Prusa Anycubic
€0.93
murphy bed twin
€5.88 -10% €5.29
bed (infant to toddler)
€11.76 -10% €10.58
Magnetic Effector with embedded bed probe
Free
Bunk Bed
€11.74 -10% €10. 57
Murphy Bed
€2.61 -2% €2.56
Bed barrier or rails for children's bed
Free
Bunk Bed
€3.51 -6% €3.30
Murphy Bed Single
€4.81 -6% €4.52
Murphy Bed With Sofa
€5.88 -6% €5.53
Murphy Bed
€4. -10% €3.80 22
22
Kids Furniture
€6.11 -10% €5.50
Murphy Bed With Study Table
€3.51
Bed Level thumb screw
Free
murphy bed
€5.87 -10% €5.28
LulzBot Mini bed USB camera mount, v2.1 Lulzbot extruder toolhead
Free
Bambu Lab Bed Sheet QR codes - xile6
Free
clip for glass tray for ender 3 s1
Free
cloud light
€6 -30% €4.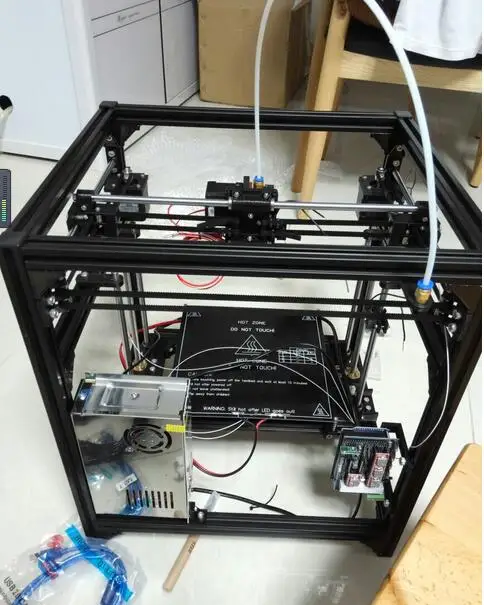 20
20
Ikea vikare bed rail extension
€1.50
Bunk Bed Castle
€12.50
Insulation walls for headed beds on 2020 Frame
Free
Glass holder / clips for a round bed. BIQU
Free
bed leveling tool
€2
Japanese Bed Base
€0.52
Sheet (glass) holder
€0.57
Yet Another Bed Level STL
Free
Heatbed Handle for Anet A8
Free
Qidi Tech Z-Axis Shim 5.5mm for Glass Bed - For 8mm Rods
Free
Qidi Tech Z-Axis Shims for 1/8" and 1/4" Glass Bed - For 8mm Rods
Free
Clip for 4mm glass bed
Free
Overbed Table 3D Model
€11. 63
63
DIAL INDICATOR HOLDER ENDER 3 V2
€1.25
Bedside Tray set
€3.48
Baby Jesus in a Manger by Nicosh Studios
€4.80
Submarine gold sluice / Submarine gold sluice
€6 -50% €3
Doll house bed -Montessori.stl
€1.02
Rc MAN KAT 1 cabine 1/10
€20
Artillery X1 dial indicator bracket
€3 -50% €1.50
Kossel Hot Bed fixing
Free
Minimus Precision Layer Calibrator
Free
Stackable raised garden bed/compost
€2. 05
05
Air pump adapter - Double lock valve
Free
Fluid bed sluice / Fluid bed sluice
€5 -50% €2.50
Bed clamp
Free
HicTop Heated Bed Wire Holder
Free
Heated Bed | Hackaday
November 29, 2021 by Tom Nardi
For a few years now it’s been an open secret that Prusa Research was working on a larger printer named, imaginatively enough, the Prusa XL. Positioned at the opposite end of their product spectrum from the wildly popular Prusa Mini, this upper-tier machine would be for serious hobbyists or small companies that need to print single-part objects that were too large for their flagship i3 MK3S+ printer. Unfortunately, the global COVID-19 pandemic made it difficult for the Czech company to focus on bringing a new product to market, to the point that some had begun to wonder if we’d ever see this mythical machine.
But now, finally, the wait is over. Or perhaps, it’s just beginning. That’s because while Prusa Research has officially announced their new XL model and opened preorders for the $1,999+ USD printer, it’s not expected to ship until at least the second quarter of 2022. That’s already a pretty substantial lead time, but given Prusa’s track record when it comes to product launches, we wouldn’t be surprised if early adopters don’t start seeing their machines until this time next year.
So what do you get for your money? Well, not an over-sized Prusa i3, that’s for sure. While many had speculated the XL would simply be a larger version of the company’s popular open source printer with a few modern niceties like a 32-bit control board sprinkled in, the reality is something else entirely. While the high purchase price and ponderous dimensions of the new machine might make it a tough sell for many in the hacker and maker communities, there’s little question that the technical improvements and innovations built into the Prusa XL provide a glimpse of the future for the desktop 3D printer market as a whole.
Continue reading “Prusa XL Goes Big, But That’s Only Half The Story” →
Posted in 3d Printer hacks, Engineering, Featured, hardware, SliderTagged 32-bit, CoreXY, heated bed, load cell, multi-material, prusa, Prusa XL, reprapFebruary 9, 2019 by Donald Papp
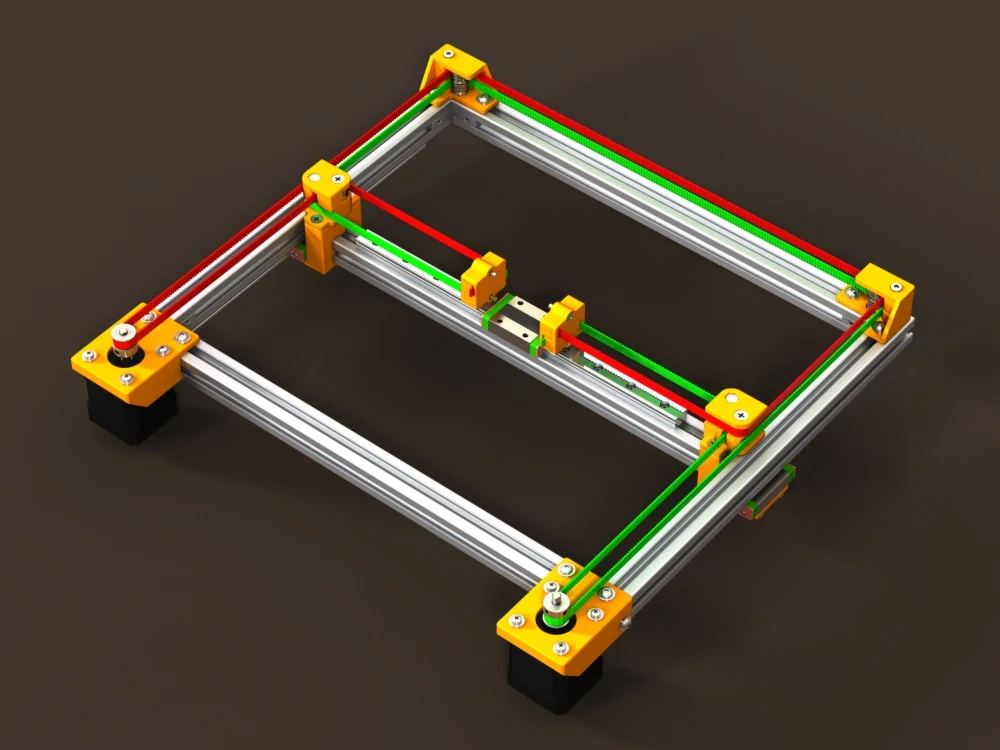
Aluminum bed with new kinematic mount and base on printer Son of Megamax, at the Milwaukee Makerspace[Mark Rehorst] has been busy designing and building 3D printers, and Son of Megamax — one of his earlier builds — needed a bed heater replacement. He took the opportunity to add a Kelvin-type kinematic mount as well. The kinematic mount and base efficiently constrain the bed in a controlled way while allowing for thermal expansion, providing a stable platform that also allows for removal and repeatable re-positioning.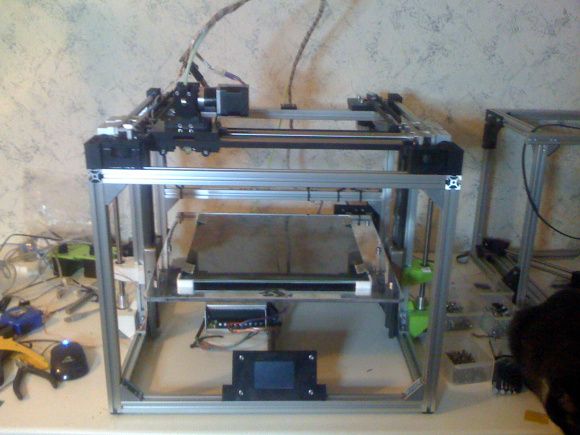
After a short discussion regarding the heater replacement, [Mark] explains the design and manufacture of his kinematic mount. Of particular note are the practical considerations of the design; [Mark] aimed to use square aluminum tubing as much as possible, with machining requirements that were easily done with the equipment he had available. Time is a resource after all, and design decisions that help one get something working quickly have a value all their own.
If you’re still a bit foggy on kinematic mounts and how they work, you’re not alone. Check out our coverage of this 3D-printed kinematic camera mount which should make the concept a bit clearer.
Posted in 3d Printer hacks, hardwareTagged 3d printer, 3d printing, cnc, heated bed, heater, kinematic, son of megamax, thermal expansionJanuary 20, 2018 by Dan Maloney
Thanks to the holiday gifting cycle, many homes are newly adorned with 3D printers. Some noobs are clearly in the “plug and play” camp, looking for a user experience no more complicated than installing a new 2D printer. But most of us quickly learn that adding a dimension increases the level of difficulty substantially, and tinkering ensues.
One such tinkerer, [Marco Reps], has been taking his new Cetus 3D printer to new places, and his latest video offers a trio of tips to enhance the user experience of this bare-bones but capable printer. First tip: adding a heated bed. While the company offers a heated aluminum bed for ABS and PETG printing at a very reasonable price, [Marco] rolled his own. He bolted some power resistors to the aluminum platen, built a simple controller, and used the oversized stock power supply to run everything.
To contain the heat, tip two is an enclosure for the printer. Nothing revolutionary here — [Marco] just built a quick cover from aluminum profiles and acrylic.
But the clear case allows for tip number three, the gem of this video: synchronized time-lapse photography.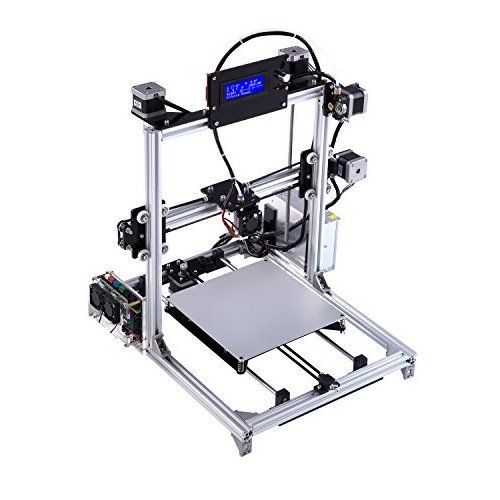 Unhappy with the jerky time-lapse sequences that are standard fare, he wrote a Python program that uses OpenCV to compare webcam frames and save those that are similar to the last saved frame. This results in super smooth time-lapse sequences that make it look like the print is being extruded as a unit. Pretty neat stuff.
Did you find a 3D printer under your Festivus Pole, and now you’re wondering what’s next? Check out [Tom Nardi]’s guide for 3D newbies for more tips.
Continue reading “Trio Of Tips For A Cetus Printer” →
Posted in 3d Printer hacksTagged Cetus3D, frame dropping, heated bed, opencv, printer, time-lapseSeptember 17, 2016 by Moritz Walter
A while ago Wanhao was reaching out to its customers and resellers, warning them of a design flaw in their Duplicator i3 that may cause fires. The printers suffered from an issue that caused crimp connections of the nozzle heater cartridge’s supply line to fail due to the mechanical stress in the cable drag chain.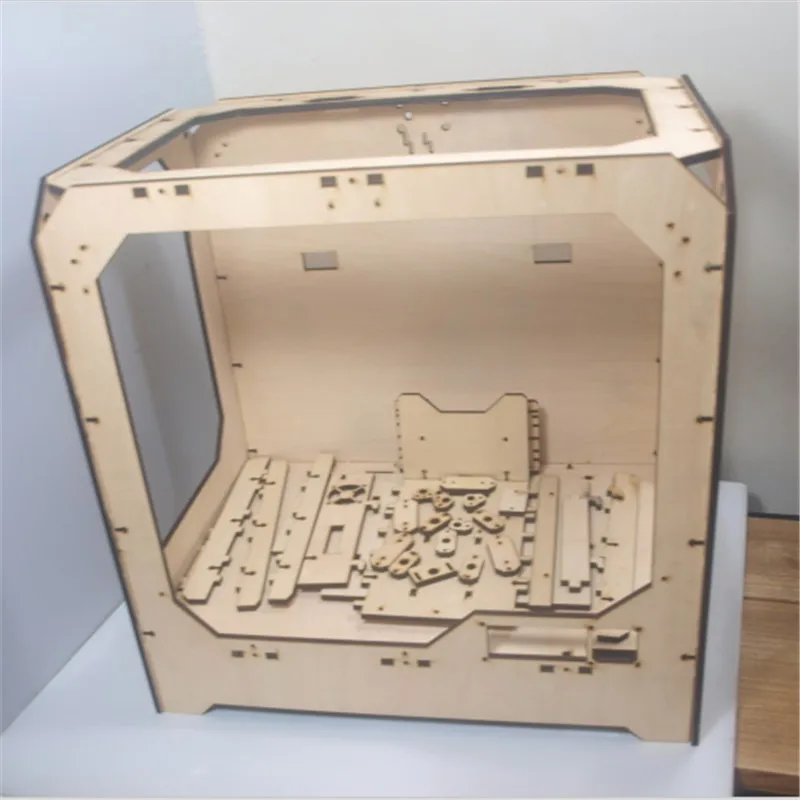 In their “Recall” titled note, Wanhao provides instructions on how to fix the issue.
Now, [Chuck Hellebuyck] released an unboxing video on the Duplicator i3 Plus, during which the heated bed emitted magic smoke that could be rationally explained as another design flaw.
Continue reading “Possible Fire Hazard: Wanhao Duplicator I3 3D Printer” →
Posted in 3d Printer hacks, News, SliderTagged cheap 3D printers, design fail manufacturing, heated bed, heater cartridge, product recall, short circuitJuly 6, 2016 by Moritz Walter
3D printers have become incredibly cheap, you can get a fully workable unit for $200 – even without throwing your money down a crowdfunded abyss. Looking at the folks who still buy kits or even build their own 3D printer from scratch, investing far more than those $200 and so many hours of work into a machine you can buy for cheap, the question “Why the heck would you do that?” may justifiably arise.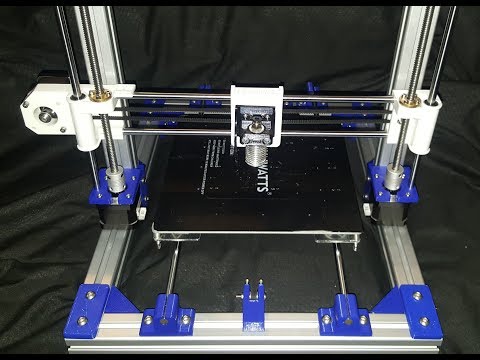
The answer is simple: DIY 3D printers done right are rugged workhorses. They work every single time, they never break, and even if: they are an inexhaustible source of spare parts for themselves. They have exactly the quality and functionality you build them to have. No clutter and nothing’s missing. However, the term DIY 3D printer, in its current commonly accepted use, actually means: the first and the last 3D printer someone ever built, which often ends in the amazing disappointment machine.
This post is dedicated to unlocking the full potential in all of these builds, and to turning almost any combination of threaded rods and plywood into a workshop-grade piece of equipment.
Continue reading “Build A 3D Printer Workhorse, Not An Amazing Disappointment Machine” →
Posted in 3d Printer hacks, Engineering, Hackaday Columns, SliderTagged 3d printer, 3d printer upgrade, 3D Printering, 3d printing, amazing disappointment machine, garolite, heatbed, heated bed, marlin, mendel, MK42, Octoprint, PEI, polyetherimide, prusa, Prusa i3, prusa mendel, Repetier, reprap, tufnol, yodaDecember 16, 2015 by Brian Benchoff
Converting mains voltage down to 12 or 24VDC to drive a heating element makes no sense. To get 120 watts at 12 volts requires thick wires that can handle 10 amps, whereas at 120V, tiny 1A wires will do. If you’ve ever felt the MOSFET that switches your heated bed on and off, you know it’s working hard to pass that much current. [Makertum] is of the opinion this is a dumb idea. He’s creating a 110 / 230 V, mains-powered heated bed.
Creating a PCB heat bed isn’t an art – it’s a science. There are equations and variables to calculate, possibly some empirical measurements by measuring the resistance of a trace, but Ohm’s Law is a law for a reason. If you do things right, you can make a PCB heat bed perfectly suited for the task. You can even design in safety features like overcurrent protection and fuses. It can’t be that hard. After all, your house is full of devices that are plugged into the wall.
However, there’s a reason we use 12V and 24V heated beds – they give us, at the very least, the illusion of safety. Therefore, [Makertum] is looking for a few comments from specialists and people who know what they’re doing.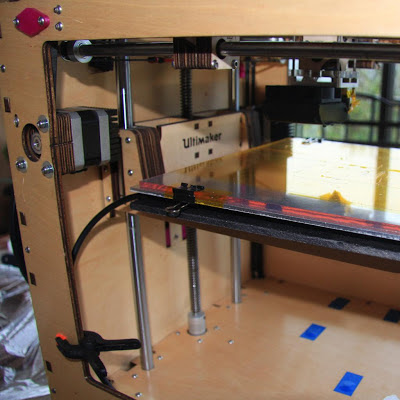
Although a mains powered heated bed sounds scary for a hobbyist-built 3D printer, there are a number of positives to the design. It would heat up faster, thin down a few parts, and significantly reduce the overall cost of the printer by not requiring another 100 Watts delivered from a 12V power supply. It’s a great idea if it doesn’t burn down the house. Anyone want to help?
Posted in 3d Printer hacks, SliderTagged 3d printing, hackaday.io, heated bed, PCB heat bedSeptember 9, 2015 by Al Williams
A heated bed is nearly essential for printing with ABS. Without it, it is difficult to keep parts from warping as the plastic cools. However, heating up a large print bed is difficult and time consuming. It is true that the printer easily heats the hot end to 200C or higher and the bed’s temperature is only half of that. However, the hot end is a small insulated spot and the bed is a large flat surface. It takes a lot of power and time to heat the bed up and keep the temperature stable.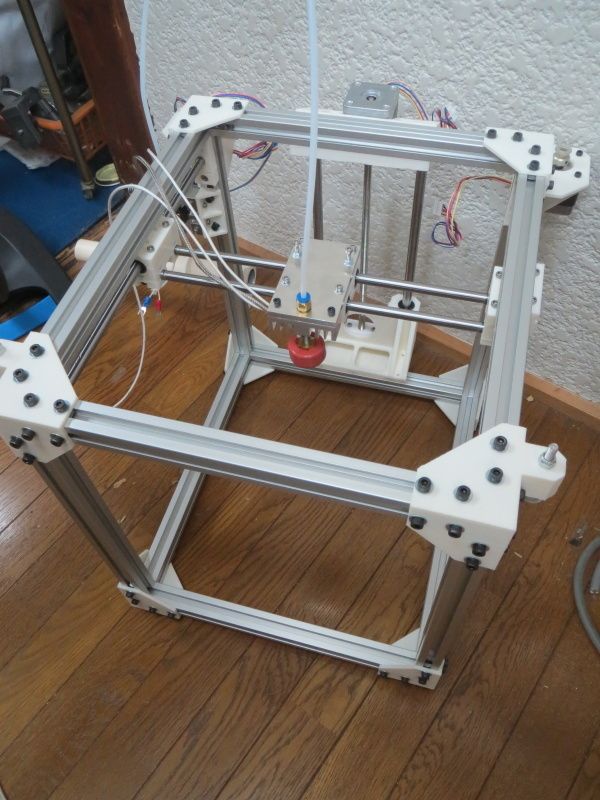
We’ve used cork and even Reflectix with pretty good results. However, [Bill Gertz] wasn’t getting the performance he wanted from conventional material, so he got a piece of aerogel and used it as insulation. Aerogel material is a gel where a gas replaces the liquid part of the gel. Due to the Knudsen effect, the insulating properties of an aerogel may be greater than the gas it contains.
Continue reading “Aerogel Insulation For 3D Printers” →
Posted in 3d Printer hacks, Tool HacksTagged aerogel, heated bed, insulationFrom flophouses to palaces: ten 3D-printed buildings
iPhone-priced garbage houses and palaces printed in a few days. We tell how 3D printing has transformed the construction industry and what modern printers are capable of
Refuge from the elements in Amsterdam - 8 sq. m
In 2015, the Dutch bureau Dus Architects built a tiny house of 8 square meters. m. It is located in the industrial area of Amsterdam, and anyone can rent it. Despite the small area, the shelter has a veranda and a sofa that converts into a double bed. The bathroom, also created on a 3D printer, is taken outside. The shelter was built from bioplastic based on linseed oil. To make a stable house without heavy frames, the engineers designed the walls in the form of a honeycomb.
Photo: DUS Architects
Urban Retreat is part of a temporary functional housing project. The Dutch authorities hope that 3D printing will help provide housing for victims of natural disasters in the future.
Garbage and clay houses - 30 and 60 sqm m, the cost of which was only about $ 1,000. The building received the symbolic name Gaia - in honor of Gaia, the ancient Greek goddess of the Earth, since only natural materials were used in the construction.
Engineers believe the cost-effective technology can be used to build temporary shelters for victims of natural disasters or refugees. The house became part of the Shambhala Village project, the first settlement in the world where all buildings will be printed.
Photo: WASP
Another WASP project is the futuristic Tecla house created in 2021 with Mario Cucinella Architects. Residential building with an area of 60 sq. m printed in 200 hours.
Photo: dezeen
The company's printer can use both concrete and a biodegradable mixture of clay, straw, rice husks and hydraulic lime as "ink". Construction takes place in two stages: first, the concrete frame of the wall is printed, and then the printer fills its inner layer with clay. The main advantage of the technology that WASP uses is the absence of construction debris.
Printed house in the suburbs - 37 sq. m
An unusual house in Stupino near Moscow is one of the first projects of Apis Cor, a Boston startup with Russian roots. The construction of the building was completed in the winter of 2017. House of 37 sq. m was built in 20 hours, and its cost was ₽590 thousand. The material sets only at temperatures above 5°C, so the construction site was covered with a tent. At the same time, the finished building can withstand temperatures down to minus 35°C. For construction, an industrial printer weighing 2.5 tons was used, which allows you to design up to 100 square meters. m of housing per day.
Unlike most competitors, Apis Cor prints its buildings on site rather than assembling them from prefabricated blocks. The house in Stupino became an advertisement for startup technology: Apis Cor founder Nikita Chen-yun-tai intended to sell printers, not houses. The idea of the Russian startup was successful - even Time wrote about an innovative house in the Moscow region.
Homes for the homeless - 38 and 45 sq. m
Icon is an American robotics startup focused on 3D printing of large-scale objects. For example, together with NASA, they designed a prototype rocket landing pad, and are now planning a project for a printed lunar space station, Olympus. But the company is also engaged in more mundane buildings.
Together with design firm Logan Architecture, Icon printed six houses for the poor in 2020.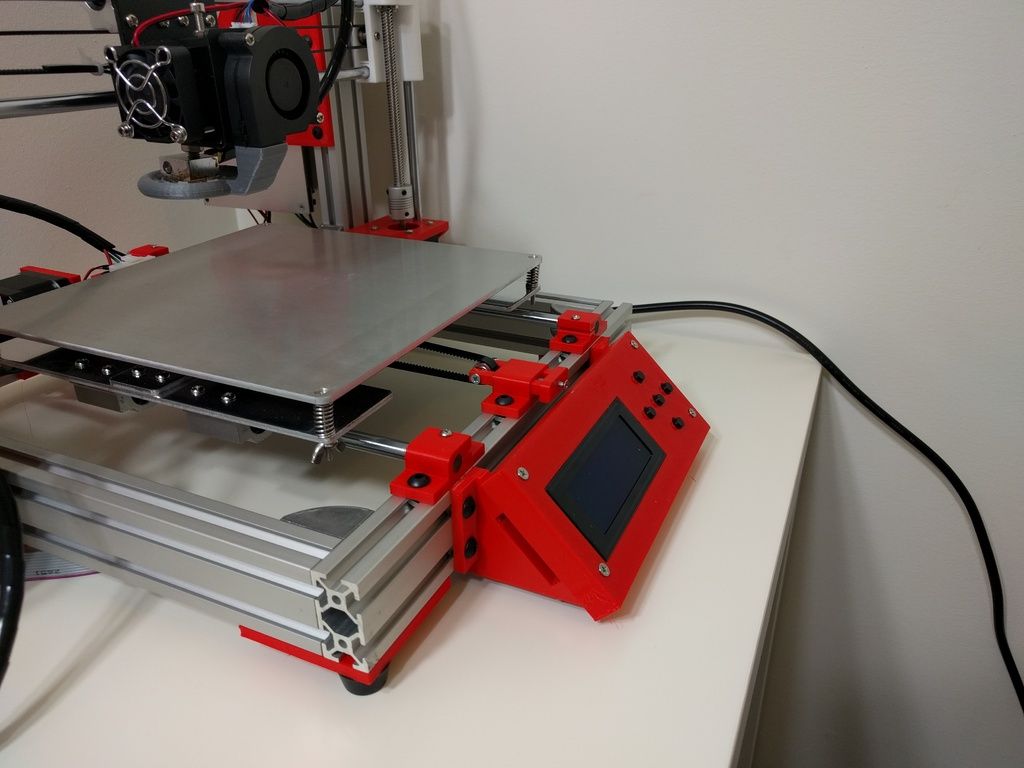 Each area is 38 sq. m. For construction, a Vulcan II 3D printer and special concrete were used. All buildings have an equipped kitchen, living room, bedroom and bathroom. The 3D quarter was built on the territory of an already existing community for the former homeless, where more than two hundred people now live.
Photo: Shane Reiner-Roth / The Architect's Newspaper
In Mexico, Icon is partnering with New Story, a foundation that raises donations to build safe, affordable housing for the poor. In 2019th project organizers said they plan to print 50 houses, each of which will have two bedrooms, a bathroom, a kitchen and a living room. The area of Mexican houses is 45 square meters. m.
Photo: Icon
Because 3D-printed houses are built many times faster and cheaper than usual, they can be a lifesaver for the homeless.
"Lotus House" - 60 sq.m. m. It was designed by students of the University of Washington as part of the Solar Decathlon China 2018 competition.
 The task of the participants was to create an environmentally friendly building that would run on alternative energy sources. The student team went further and decided that even the construction process itself should be waste-free and carbon-neutral.
 The building itself is only partly 3D printed. On it, engineers made molds for casting concrete walls. The advantage of this approach is that the printed designs can be used at least a hundred times. In conventional construction, wooden molds are used, which wear out after only two castings.
The building itself was made in the shape of a lotus - the designers said that they wanted to emphasize the beauty and delicacy of Chinese culture in the design.
Photo: Liam Otten / Archinect
Germany's first two-storey printed house - 80 sq. m
A two-story villa printed in North Rhine-Westphalia is an example of the use of 3D printing in the construction of luxury housing with custom design. The living area of the building was 80 sq. The 3D villa is a joint project of MENSE-KORTE ingenieure+architekten and developer PERI GmbH.
Photo: Mense-Korte
The villa was built using a unique BOD2 3D printer that can print pipes. This feature gives designers a free hand: complex engineering solutions on BOD2 can be completed faster and cheaper than with standard construction. ArchDaily writes that an innovative printer used in the construction of a German villa can print 1 sq. m wall in just five minutes.
Curve Appeal Ecosystem House - 240 sq. m
Another example of conceptual 3D printing is the Curve Appeal 240 sq. The building belongs to WATG Urban Architecture Studio. The printing of the building was completed in 2020.
Construction lasted three years. The building project was created back in 2016, and then won first place in The Freeform Home Design Challenge. Designers received $8,000 from the organizers to implement the concept.
Photo: WATG
Curve Appeal is made from 28 printed panels. The unusual design maintains the microclimate of the house: according to the designers, the temperature inside the building does not depend on the weather outside.
The world's largest printed building in Dubai - 641 sq. m
The world's largest 3D printed building is located in the UAE. Building with an area of 641 sq. m for the municipality of Dubai in 2019 was built by Apis Cor - the same startup with Russian roots that printed a house in the Moscow region. According to the plan of the Dubai authorities, by 2030, 25% of new buildings will be built using 3D printing, as the technology allows to reduce the cost of construction by six times.
Photo: Thomas Page / CNN
The structure and appearance of the building is similar to a conventional building, made of concrete and rebar. It took 500 hours to print, but preparations for construction took three whole years. The creator of Apis Cor, Russian Nikita Chen-yun-tai, said that this project brought him $ 1 million in revenue and attracted new customers. Among them is the Orwo film studio from Louisiana, for which the startup will print scenery for films.
The first residential building made of concrete was printed in Russia for 594,000 rubles / Sudo Null IT News0001
More than 70 years ago, the first 24-hour concrete house pouring machine was built in the United States by engineering genius Robert Gilmore LeTorneau. Here is a video from 1946. In general, this idea of Thomas Edison is more than 100 years old (patent). Over the decades, concrete printing technology has changed, full-fledged 3D printing for individual projects has begun to be used. Now these houses look much nicer. For example, in February 2017, a residential building was printed in Stupino, near Moscow, on the construction printer Apis Cor. This is the first house in the Russian Federation, printed as a whole, and not assembled from printed panels.
Building area 38 m². The total cost of turnkey construction, including the foundation, walls, ceilings, roofing, electrical wiring, doors and windows, exterior and interior decoration, amounted to 593,568. 19 rubles (detailed estimate), but this is without the cost of the work of some specialists.
The printer is completely mobile. The loader brings it in the back and installs it on the prepared foundation at the construction site.
The printer is connected by a hose to a large concrete mixer, that is, an automatic system for mixing and supplying the mixture. It looks like this.
Then the work begins. All work on the construction of the house took about two months in Stupino. The project started in December 2016 and ended in February 2017. The advertised 24 hours is just the pure machine time of the Apis Cor printer. It was included at different stages to print self-supporting walls, partitions and building envelopes.
The device has an interesting design. It is located on a movable arm in the center and prints around itself, gradually rising. After the printing of wall structures is completed, it is removed with a crane - and it continues to work outside.
The appliance itself consumes 8 kW during the process, so you need to provide it with electricity during construction work.
The cost of printing a concrete house is much cheaper than building a conventional "box" of blocks.
In addition, such houses have a lot of additional advantages, which makes them truly unique.
1. Virtually arbitrary shape of the walls. Rounded walls with any corners. Here, the accuracy of construction is perfect, a drunken bricklayer will definitely not screw up your project. The printer has a built-in automatic leveling and stabilization system.
2. The walls are ready for painting with decorative plaster immediately after processing. You can roll yourself in one day and paint the house in arbitrary colors, and then repaint to suit your mood at any time. Plastering with a level and beacons is not required. There is an additional reduction in the cost of finishing work. This applies to both interior and exterior finishes.
3. You can perfectly plan the shape of the walls, the size and position of the windows, taking into account the surrounding landscape and lighting. By the way, there is an assumption that the walls on one side can be made slightly inclined to further increase the illumination. However, the design fantasy is limited by the available forms of double-glazed windows, because here you can’t get by with ordinary glasses, you need to install double-glazed windows so as not to freeze in winter.
Among the disadvantages that come to mind is the flat roof.
It is clear that the developer guarantees that the roof effectively withstands high snow and operational loads. But it seems that stagnant water can accumulate on such a roof with all the ensuing (or rather, not ensuing) consequences. To prevent this from happening, a special wedge-shaped thermal insulation PIR Slope is used on the roof - a ready-made constructor for creating the necessary slopes and counter-slopes. They say that precipitation will be effectively removed from the roof surface, but still somehow unusual.
How the thermal insulation between the inner and outer walls will work is also interesting to check. Now the developer is experimenting with two methods of insulation: from Logicpir filling crumbs on one part of the house (thermal conductivity 0.022 W / m * K) and polyurethane filler composition on the other (0.023-0.025 W / m * K). Insulation was carried out simultaneously with the printing of structures, which significantly increased the construction time.
Well, not everyone will like the small size of the house - after all, not everyone is ready to live in a one-room apartment, a small studio. Although such an option for 38 m² is quite suitable for a single person to live. In addition, as mentioned, the technology allows you to build larger houses.
Yes, and for a round house, you have to buy a concave TV if you want to play computer games on a big screen.
This technology can also be used to print three-story houses, but they will cost much more than $10,000.
Other disadvantages are restrictions on construction dates. The use of a concrete mixture used as "ink" is possible only at a temperature of 5 ° C above zero. So if you do not want to put up an awning with a heater, then construction in winter is impossible. In the future, they promise that the printer will learn how to work with geopolymer concrete from natural components - such material can be printed at lower temperatures. In addition, it is superior to ordinary concrete in other parameters.
After all, there is definitely no place in the house to install a boiler or other heating system. Probably the only option for living in winter is an electric heater.
The estimate for the first house was around $10,000, although the estimate does not include the work of all specialists. The estimate includes the installation of window and door blocks, wall decoration, facade painting, drainage, waterproofing, thermal insulation, but the rest of the work is not taken into account. Probably, with these works, a turnkey house will come out twice as expensive, that is, approximately $20,000.0003
| Foundation | RUB 14,819 |
| Walls | RUB 95,629.64 |
| Ceilings, roofing | RUB 144,267.55 |
| Wiring | RUB 12,650 |
| Doors and windows | 211 052 RUB |
| Exterior trim | RUB 46,250 |
| Interior trim | RUB 68,900 |
But the contractor notes that expensive materials were used in this demonstration project. If you use cheaper materials, then the cost will drop to about $8100.
The authors of the project from the PIK Group of Companies and Apis Cor note that this demonstration house on the territory of the Stupino Cellular Concrete Plant is the first residential building in Russia to be printed entirely on a printer.