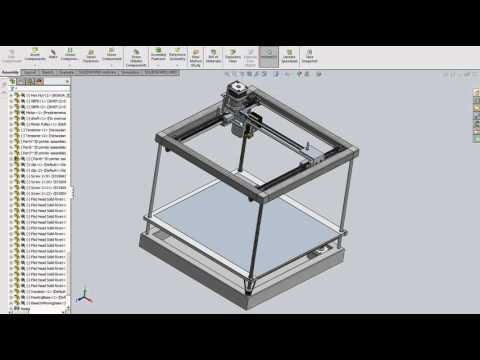
3D printer for solidworks
The Best 3D Printer for SOLIDWORKS is a Stratasys F120 Machine
3D printing is becoming very popular with designers, engineers, educators, and especially SOLIDWORKS users who want to create prototypes of their CAD models. We are often asked the question “What is the best 3D printer for SOLIDWORKS?”
That is a great question as there are many good 3D printers on the market right now and they vary in size, technology, and of course price. It also depends on your 3D printing requirements and the budget you have available.
Best 3D Printer is a Professional Machine
But the one thing you want to ensure when shopping around for a 3D printer is to choose a ‘commercial/professional’ machine and not a ‘consumer’ machine. In a previous article we outlined the advantages of a commercial machine over a consumer printer; but the main reason is if you use SOLIDWORKS for professional design work then you need a proven professional-grade commercial 3D printer that is going to last and consistently print good results for you every time. So for an affordable professional-grade machine we recommend the Stratasys F120.
In this article we will outline the three main reasons why we recommend the Stratasys F120 as the best 3D printer for SOLIDWORKS:
Professional 3D printing applications
Review the table below to compare the applications of a Stratasys F120 to leading consumer 3D printers. Note that the F120 is able to be used for ALL phases of your design process. Whereas a consumer 3D printer is not able to be used in applications beyond the concept phase:
| PRODUCTION PHASE | APPLICATION | COMMERCIAL Stratasys F120 | CONSUMER 3D PRINTERS |
|---|---|---|---|
| Concept Phase | Earliest Concept | Good | Good |
| Initial Product Iteration | Good | Good | |
| Communication Model | Good | Fair | |
| Focus Group Model | Good | Fair | |
| Basic Fit Testing | Good | Fair | |
| Ergonomic Testing | Good | Fair | |
| Architectural Model | Good | – | |
| Complex Design | Good | – | |
| Functional Prototyping Phase | Fit and Assembly Prototype | Good | – |
| Solid Colour Models | Good | – | |
| Functional Test Parts | Good | – | |
| Manufacturing Phase | Jigs, Fixtures, and Gauges | Good | – |
| Surrogate Parts | Good | – | |
| Production/End-use Parts | Good | – |
1.
 3D print with genuine ABS-M30 and ASA Plastic
The majority of today’s consumer products — and many commercial ones — are composed of thermoplastics. When designing a new product, you can best predict its end performance by prototyping with a material as similar to it as possible. The F120 creates parts with the same types of raw material found in injection molding facilities around the globe, this allows you to 3D print plastic parts for many different applications from concept modeling through product development and manufacturing.
Here are just a few benefits of the materials used by the F120 machine:
- Mechanically strong and stable over time.
- Layer bonding is significantly stronger for a more durable part than materials from competitors.
- Greater tensile, impact, and flexural strength than materials from competitors.
- Versatile Material: Good for form, fit and functional applications.
- ABS-M30 and ASA work with soluble support material to create complex models, and support removal is hands-free.
- Available in a variety of colours
- ABS-M30 includes six colours: Ivory, white, blue, black, red, and dark grey
- ASA includes ten colours: Ivory, white, blue, black, red, grey, dark blue, green, yellow, and orange
2. Higher quality models and better performance
The F120 is powered by Stratasys’ patented FDM® (Fused Deposition Modeling™) technology. It’s the technology on which thousands of design engineers test their designs and creates stronger more robust models than leading consumer 3D printers. Here are just a few reasons why the F120 is the best 3D printer to prototype:
2 (a) Easy collaboration
What’s more powerful: showing a 3D model, or a physical part that everyone can hold? Through every design iteration, the F120 turns your ideas into strong, functional models ready for collaboration and testing. The Best 3D Printer builds accurate, stable 3D parts in ABS plastic. They’re ideal for determining form, fit and function in everything from ergonomics to manufacturing processes.
- Model House
- Shock Absorber Model
- Faucet Model
- Valve Model
- Air duct model
- Clip Model
2 (b) Product Functional Testing
When it’s time to test your concepts, F120 models stand up to functional testing whereas consumer 3D printer models can easily break. You’ll get more quality feedback, resulting in a better product. With a footprint of just 889 x 870 x 721 mm (35 x 35 x 29 in.), the F120’s ability to produce quick, inexpensive models will help you efficiently review multiple concepts right from your desk.
2 (c) Better quality model and machine performance
Typically consumer 3D printers have issues when producing models on a regular basis. You will find models that have stringing and oozing or are warped. Also printer performance is not consistent with material nozzles that get clogged, difficulties with printing small details and misaligned prints. The F120 has none of these issues and creates reliable consistent models every time.
3. Stratasys F120 can be used for manufacturing
Let’s have a look at the manufacturing phase applications in more detail as this is where the F120 is best 3D printer to aid your manufacturing:
3 (a) 3D print Jigs, Fixtures, and Gauges
Manufacturing relies on tools, including jigs, fixtures, templates and gauges, to maintain quality and production efficiency – now you can quickly manufacture them with an F120. Instead of spending time and money to machine, fabricate, mold, or cast your tools you can easily design them in SOLIDWORKS then print them with the F120 3D printer using production-grade material. The F120 will:
- Reduce lead times by 40 to 80 percent.
- Reduce costs by 70 to 95 percent.
- Improve assembly accuracy.
Jig & Fixtures Example
3 (b) Create Surrogate Parts
Mock-ups, or surrogate parts, may be substituted for production components during the assembly and interface evaluation phase of a project. Surrogate parts preserve all of the critical details for an installation while minimizing expense and lead time when they are manufactured with an F120. Produced as needed, with up-to-date configuration changes, the F120 surrogates will:
- Confirm clearances and interfaces for installation assessment;
- Highlight serviceability issues and;
- Validate routing interfaces for wiring harnesses and fluid conduits.
Surrogate Part Example
3 (c) Create Production/End-use Parts
Using a Stratasys F120 3D printer is a unique alternative for the production of end-use items. Having little in common with traditional manufacturing methods, the uniqueness of 3D printing can change the decision-making process, overturns old principles and creates new criteria.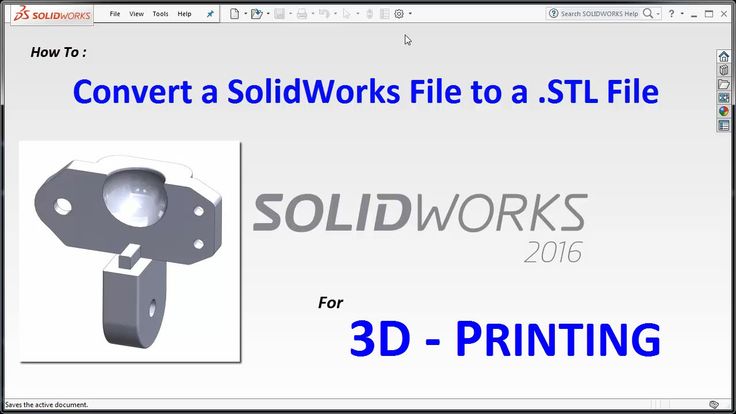 The primary advantage of 3D printing parts is that it removes constraints imposed by traditional manufacturing processes, such as injection molding or die casting and allows you to:
- Replace expensive molding, machining or tooling.
- 3D print a short or limited run production.
- Create complex or small intricate parts which would be hard to manufacture with traditional processes.
3D Printed End-use Parts
Conclusion: Stratasys F120 is the best 3D Printer for SOLIDWORKS
So there you have it, three good reasons why the F120 is the best ‘starter’ SOLIDWORKS 3D printer:
- Able to print with true ABS and ASA Materials
- Creates better prototypes than consumer 3D printers
- Can create end-use parts and manufacturing tools.
Learn about Stratasys F120 »
The Best 3D Printer for SolidWorks | Best Picks + Buyers Guide
3D printing is becoming more and more popular as time has gone on. With the price of 3D printers and the materials needed for their use becoming cheaper, it’s made it a lot easier for people to try their hand at making some models. Printing itself is really cool and it allows you to make all sorts of creations and tools. Whether it be the next miniature that you want to use in your next D&D campaign or a neat little plastic clip. 3D printing allows you to do practically anything. Let’s get started with our Best 3D Printer for SolidWorks Guide.
Position
Best Pick
Budget Pick
Premium Choice
Name
Monoprice Voxel 3D Printer
Dremel Digilab
QIDI TECH 3D Printer
Snapshot
Price
$570.00
$305.00
$1,499.00
Check Availability on Amazon
Check Availability on Amazon
Check Availability on Amazon
Position
Best Pick
Name
Monoprice Voxel 3D Printer
Snapshot
Price
$570.00
Check Availability on Amazon
Position
Budget Pick
Name
Dremel Digilab
Snapshot
Price
$305.00
Check Availability on Amazon
Position
Premium Choice
Name
QIDI TECH 3D Printer
Snapshot
Price
$1,499. 00
00
Check Availability on Amazon
Table of Contents
Best 3D Printer for SolidWorks Guide
Though with the amount of choice out there it can be pretty daunting. Not to mention how to actually get the printing process started with what materials you need and the software you have to use. This is why we’ve put this list together of some of the best 3D printers you can get, which all work with a very popular piece of CAD software. SolidWorks is one of the most popular and most used 3D modelers used by both professionals and aspiring printers, so either way, we’ve got you covered! Let’s jump into our list for ‘The Best 3D printer for SolidWorks’.
SUNLU 3D Printer
- Resolution – 50 – 300 Microns
- Volume – 12.2” x 12.2” x 15.7”
- Weight – 8lbs (Shipping Weight)
- Connections – USB, SD Card
Our first printer on this list is an excellent starting point for anyone who has not yet entered the world of 3D printing. This SUNLU printer offers a lot of high-quality performance for an entry-level printer and is great for the inexperienced. This Sunlu printer offers a very sleek looking piece of equipment. With an all-black frame which is complemented by the white building plate. The plate in question has a build size of 12.2” x 12.2” x 15.7”, so you’ll be able to build some pretty decent-sized models here. The setup process is fortunately not that complicated, though it may seem daunting to those who are new to the 3D printing world.
Though beginners should be careful as this type of printer doesn’t have any doors or housing to protect the prints while they’re being printed. It’s completely open-faced which allows you to see the entirety of the process but obviously can be pretty dangerous in some circumstances. When it comes to the prints themselves, this printer creates very highly detailed models which are great for almost anything you build.
Some other cool features that this printer has are its connections for both USB and SD cards. Allowing you to use whatever storage device is more convenient to you. The small screen located on the front of the machine is informative but don’t expect anything too fancy like a touchscreen. The biggest benefit that this machine has, especially for beginners in printing, is its ability to continue printing even if there’s been a power cut. Allowing the process to continue right where it left off. This printer is a fantastic choice for beginners and even those who are experienced in the world of 3D printing.
Pros:
- Great Build Quality
- Large Build Volume
- USB & SD Card Slots
Cons:
- Not Enclosed
- Requires Some Assembly
Check Availability on Amazon!
Monoprice Voxel 3D Printer
- Resolution – 100-400 Microns
- Volume – 5.9” x 5.9” x 5.9”
- Weight – 5lbs
- Connections – USB, Wi-Fi
Our next entry on this list offers a pretty different printing experience. This is the printer for those who don’t need massive building spaces and prefer a lighter printer. This Monoprice printer does exactly those things, by combining the functionality of an FDM printer in a small and enclosed unit.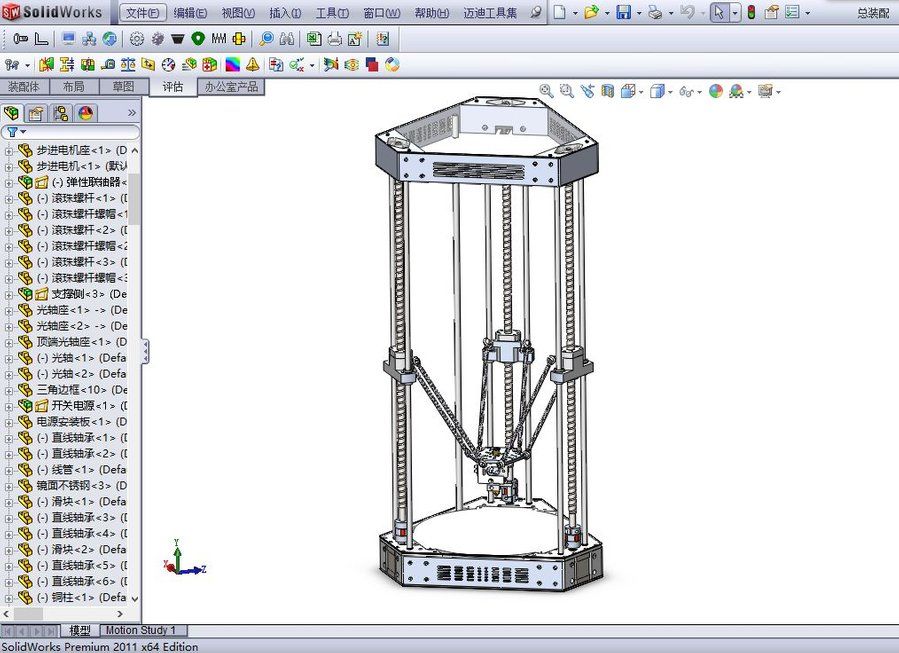 The printer in question is small and reasonably lightweight, with a grey and black body. It has a door panel on the front that opens to let you place things inside the printer and view the printing process. As well as transparent panels on the top and left-hand side. The build area on this printer spans 5.9” x 5.9” x 5.9”, so it’s a fairly small square area.
The volume isn’t the biggest and it might limit you based on what exactly you want to build. If you plan on making miniatures or smaller tool bits and toys then this will do fine. But if you’re thinking any bigger than that, you’d best look elsewhere on this list. But in terms of build quality, you’re getting a fantastic printer here. It produces highly detailed and sharp models that will consistently look great and perform well.
The 2.8” screen on the front of the printer is where you’ll be controlling all of its functions and it does exactly what it needs to do. It’s a touchscreen with a crisp display, though it is a little small. So if you have particularly big hands you might get a little annoyed at it. Another great part of the printer is the built-in camera on the inside that allows you to view the printing process as it’s happening.
Pros:
- Great build quality
- Good built-in camera
- Accessible Design
Cons:
- Small touchscreen display
Check Availability on Amazon!
Dremel Digilab
- Resolution – 100 Microns
- Volume – 0” x 5.9” x 5.5”
- Weight – 15.43lbs
- Connections – USB, SD Card, Wi-Fi
Our next option on this offers a lot of what made our last option great, with a few extra positives here too. This Dremel Digilab 3D FDM printer is another great option for both beginners and experienced printers alike. The unit itself consists of a white and grey metal box with a blue lid. The blue lid can be removed to allow access into the mechanisms of the printer and there’s a door on the front to access the build plate.
This printer is designed to be a lot lighter and more compact than a lot of other printers of its type which is why it only weighs 15.43lbs. It’s a great option for those who want a printer that’s a lot lighter than bigger and heftier models. Though with the size does come with a suitably smaller build volume of 9.0” x 5.9” x 5.5”. So you won’t be building anything that’s too big.
Visually this printer has a sort of retro aesthetic that is reminiscent of old printers, which helps it stand out. Though with this aesthetic comes a few issues. The rather simple design means that the viewing angles of the printer are severely limited, allowing you to only view the print from the front door panel. This is annoying if you’re someone who likes to watch and keep an eye on the process. This printer also has a touchscreen, though it is a bit on the small side so that may or may not be an issue for you. Overall this is another fantastic printer and it’s especially great for those who want something that is smaller and more manageable to transport.
Pros:
- Small Form Factor
- High Print Quality
- Easy Setup
Cons:
- Small Touchscreen
- Lack of Viewing Angles
Check Availability on Amazon!
FlashForge 3D Printer
- Resolution – 100 – 500 Microns
- Volume – 9” x 5.8” x 5.9”
- Weight – 24.3lbs
- Connections – USB, SD Card
The next entry on this list is going to appeal to those who have a little more experience with 3D printing and want something that’s going to perform well. This FlashForge 3D FDM printer offers a lot right out of the gate. The unit in question is an enclosed unit in a black metal frame. Which looks very stylish along with the general aesthetics of the printer.
On top of the printer is a transparent plastic lid that protects and encloses a lot of the vital parts of the machine and allows you to access its insides. With the main access being the plastic panel on the front of the printer. This printer is fairly light weighing in at 24.3lbs, meaning it shouldn’t be too much trouble to transport and move around.
The build volume on this printer is 8.9” x 5.8” x 5.9”, which is the perfect size for making miniatures, tools, and toys. If you want something that is going to make large-scale models for you this isn’t the one. But the main thing that this printer offers is very high-quality printing in a very easy and accessible way. It requires little to no assembly apart from placing your filament and as soon as that’s done, you’re ready to go. A few other nice touches are the inclusion of both USB and SD card ports.
As well as a control display which is clear and easy to read, though it isn’t a touchscreen which might disappoint some. It also suffers from poor viewing angles as the only way to actually view the printing process is through the front panel. Ultimately this is another fantastic printer that performs to a high standard and doesn’t mess around with any complicated assembly.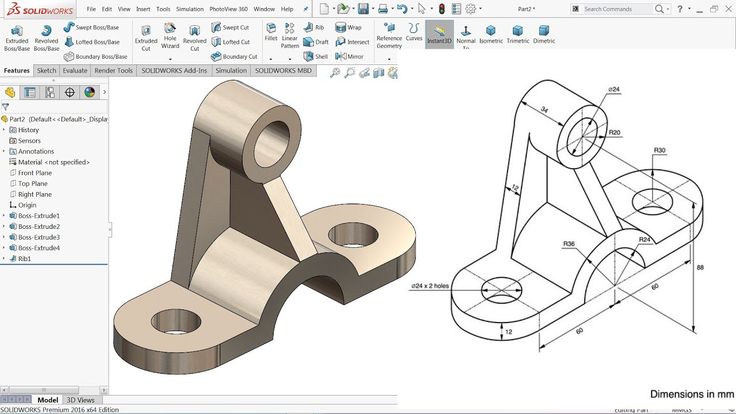
Pros:
- Small Form Factor
- High Print Quality
- Easy Setup
Cons:
- Lack of Touchscreen
- Lack of Viewing Angles
Check Availability on Amazon!
QIDI TECH 3D Printer
- Resolution – 50 – 400 Microns
- Volume – 8″ x 9.8″ x 11.8″
- Weight – 61.7lbs
- Connections – USB
Our final entry on this list is for those who are experienced with printing and want to take their prints to the next level. For these purposes, we’ve chosen this QIDI TECH 3D printer due to its performance and quality on the higher end of 3D printing. With this printer, you’re getting an enclosed unit with a black body that both looks stylish and offers a lot of protection for the parts inside. The access points on this printer are few but they get the job done. One lies on top of the printer for access to all the moving parts and the other is on the front which acts as the main access for your prints.
This printer unfortunately has pretty poor viewing angles which might be annoying for those who like to watch the process. Though the main downside here is the weight of the printer, which comes in at 61.7lbs, which might make it pretty difficult to transport and move around.
Though that weight means that this machine is able to build a whole lot more. With a build volume of 11.8″ x 9.8″ x 11.8″, meaning that you can make some pretty big builds. Making this the perfect machine for those who want to make prints that are both big and small. Fortunately, the build quality on offer here is also fantastic. With this printer, your builds are going to be highly detailed and more importantly, consistent. Other bonuses with this machine include the large and clear touchscreen on the front of the printer. As well as the overall fantastic build quality of the printer itself. This is an amazing option for those who are experienced with 3D printing or those who want to upgrade their printing arsenal.
Pros:
- Large Touchscreen
- High Print Quality
- Easy Setup
Cons:
- Heavy
- Lack of Viewing Angles
Check Availability on Amazon!
See Also: The Best 3D Printer for ZBrush
Buying Guide
If you’ve gotten this far in the list and you still have no clue about what printer you want to get if you don’t know where to begin with 3D printing, we’ve got you covered. In this section you’ll find some advice and information about 3D printing.
How to use SolidWorks
SolidWorks is one of the most popular pieces of software when it comes to 3D printing. It acts as a CAD modelling system that lets you draw out and model the prints you want to make. You then save these files as STL files and can place them into your printer to begin the printing process. It’s a fairly simple and easy system that is universal across most CAD software. So even if you decide to not use SolidWorks for whatever reason, they all work fundamentally the same. Though the main benefit that you get with SolidWorks is a professional grade modelling suite
SolidWorks is software that is supported on Windows, but not officially on Mac. Which isn’t saying you can’t use it on Mac, it just means that it isn’t officially supported and you might need to look for other ways to get it to work. But for a Windows PC, you’re going to need at least a decent PC with the following hardware:
- Windows 10
- 16GB RAM (minimum)
Or
- 32GB RAM (recommended)
- At least 20GB of free space on a hard drive or SSD
- 4GB VRAM
These requirements aren’t exactly the most taxing in the world, but it does mean that you’ll need a semi-competent PC. So you won’t really be able to use this software on machines that are older than Windows 10 (though you can get builds for Windows 7 and 8). Lastly, this software has a free trial version that allows you to see what the suite has to offer, but after that you’ll need to pay. So bear these things in mind when you decide to either upgrade your pc to meet these requirements, or when using this software in general.
Buy the printer that’s right for you
Now this probably sounds pretty obvious, but it’s a statement that still stands. You shouldn’t feel like you need to overspend on hardware that you don’t need and don’t plan to use to its full capabilities. Aim to get a printer that does exactly what you need it to. For instance, if you want to print miniatures and small toys, you won’t be needing a professional grade printer.
Ultimately the advice here is to be smart with your purchase. If you are someone who likes to spend a lot on their tech and wants to prepare for making more complex prints, you should still pay attention to what you’re getting. Bear in mind what you want to actually make and remember that you can always upgrade when you feel like you want to make bigger and better things.
Buying Tips
- Pay attention to the type of printer you’re getting.
 Make sure you know the difference between filament (FDM) and resin (SLA) printers. As the experiences you’ll have with both of these will be wildly different.
 - Some printers use their own proprietary types of filament and others are able to use almost any kind of filament. Make sure to check which your chosen printer supports so that you can always find the cheapest deals on printing materials.
- If you already own a printer and are looking to upgrade, make sure that the experience with the new printer is going to be a better one. Often you can find a printer that seems to be better, but due to the resolution or the quality of the printer itself, you might find it offers a worse experience.
Verdict
We’ve come to the end of our list for ‘The Best 3D printer for SolidWorks in 2020’. If it helped you at all and kickstarted your journey into 3D printing, let us know down in the comments!
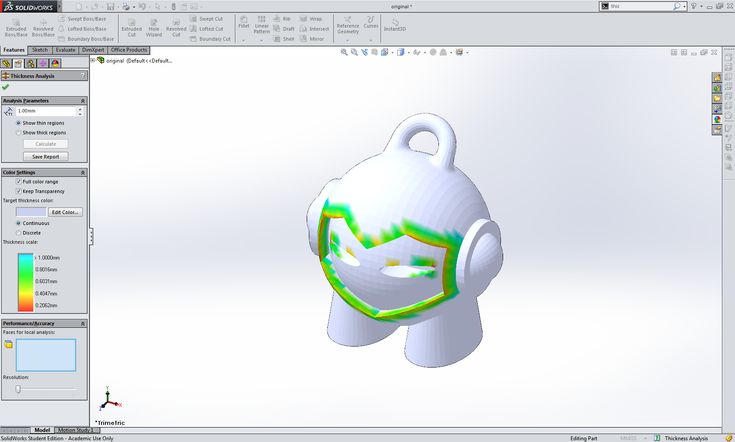
Preparing a model for 3D printing in SolidWorks
by 3DAdmin · 10/09/2016
In this article, you will learn how to create and prepare a model for subsequent 3D printing in SolidWorks.
The process of building a three-dimensional model of the part:
- Open the SolidWorks program, create the document “Part”.
- Open the Design Tree, click on the Top View icon.
- Orient this plane perpendicularly in the View Orientation panel.
- On the "Sketch" toolbar, click on the "Rectangle" icon and draw this shape in the sketch.
- With the left mouse button (LMB), click on any free space in the drawing window. The rectangle will turn blue, indicating that no dimensions have been set.
- Click on one of the sides of the rectangle and delete it.
- In place of the remote side, draw an arc using the “Arc through three points” function.
- The next step is to relate the origin to the sketch elements. You can do this by activating "Add Relationship".
- Between the center of the arc and the starting point, we establish the relationship “Coincidence”.
- After that, open the window and set the dimensions of the sketch.
- Click LMB on any point of the figure, and then on any free space outside the drawing. This activates the "Automatic Dimensioning" function.
- Create a solid element.
- Click on the “Extruded Boss” icon, set the extrusion. We activate the function.
- Create a cylinder.
- Activate the top face of the base with LMB.
- Click on the “Create Sketch” icon and call the “Perpendicular” function.
- Activate the “Circle” icon.
- Move the cursor to the starting point and click LMB. Move the cursor away from the center and press the button again to designate the second point.
- Set the circle size on the SolidWorks toolbar. Activate the "Automatic dimensioning" function.
- Click on the “Extruded Boss” icon and extrude the circle by 30mm.
- Building a square cutout.
- Activate the top face of the base. Click on the “Create Sketch” icon and orient it perpendicularly.
- Click on the “Rectangle” icon, draw a square and enter its dimensions from the edges of the part.
- Activate the "Extruded cut" function, enter a value of 20 mm.
- Click on the “Slope” icon, enter the parameters. “Tilt angle” - 15 mm, “Neutral plane” - the bottom of the square cutout.
- In the “Slope faces” window, double-clicking the LMB, we write the side faces of the square cutout.
- Click on the “Rounding” icon, enter the value of the rounding radius -10 mm.
- Create a cutout. Orient the sketch plane perpendicularly.
- Select the "Polygon" icon. Click LMB on the place where the polygon will be located. Click again with LMB and specify the position of one of the vertices.
- Activate "Add Relationship". Click LMB on one of the edges of the polygon and set the relationship “Vertical”.
- Enter the edge size - 10 mm.
- Set the size of the position of the center of the figure.
- We establish a relationship between the starting point and the center of the polygon.
- Activate the "Extruded cut" and set the value to 150 mm (inside the part).
And so, we have created a 3D model. And now the most important part - preparing the model for 3D printing.
- In order to be able to print a 3D model, it must be “water tightness” (i.e. solid, forming a closed volume). If blue surfaces are visible on the model, then more layers should be added so that this color is not visible. Each edge should have no more and no less than two layers, if this is not the case, then the extra surfaces should be removed. The most common errors when modeling in SolidWorks:
- Internal surfaces
- Holes
- Keep in mind that if your model consists of several objects (for example, letters), they must be combined into one object using a slicer.
- It is desirable that the base of the model be flat. If it is not so, delamination may occur, as a result of which the coordinate axes may shift. If it is not possible to make the base flat, the model should be printed on a raft.
- If your model has a lot of overhanging structures, make a support for each. In order to successfully print the model, the angle of inclination of the walls should be no more than 45 degrees.
- If the model has many small parts, they must be larger than the nozzle diameter. Otherwise, the 3D printer will not be able to print them.
- If your model is large, it is better to print it in parts. To do this, it should be cut, and then connected with glue. However, it will be better if you immediately foresee this and make secret connections.
- You should also think about the strength of the model. It is better that the load is distributed across the layers. But if you make it across, the model will quickly unstick.
- It remains to decide on the file format. The most popular and convenient is STL. It is with him that most slicers work, including Repeater-Host and Cura.
Thus, we have learned how to create parts in the SolidWorks application and prepare them for subsequent printing on a domestic or industrial FDM 3D printer. Now try to apply the acquired knowledge and create your own unique model.
Did you like it? Show your friends!
You will like it
3d modeling in SolidWorks | Planet3DRu
11/27/2021
In this tutorial, you will learn how to create motion in assemblies based on the physical properties of various materials, and also analyze the results of the interaction of various elements of an assembly with each other using SOLIDWORKS Motion (more…)
10/29/2021
You will learn how to create a thread in SolidWorks in several ways, these are really simple and convenient ways. (more…)
06/19/2021
If you don't know how to make a drawing from a sketch or an assembly in SolidWorks to make a part according to the drawings, then in this lesson a detailed explanation (more...)
03/13/2021
In this SolidWorks lesson, you will learn how to split a large part into several smaller ones if, for example, the part is not within the printable area of a 3D printer. (more…)
03.03.2021
In this article, you will learn about ten rules of good form when modeling products in SolidWorks. (more…)
01/25/2021
In this lesson, you can learn how to create threads in various ways (more…)
07/09/2020
In this SolidWorks video tutorial you will learn how to create a 3D model using a photo as a reference. (more…)
05/11/2020
Lesson 9: Creating assembly drawings and product specifications (more…)
04/30/2020
This is the eighth lesson of the SolidWorks Foundation Course. This time we will talk about creating part drawings. (more…)
04/29/2020
The seventh lesson from the basic course SolidWorks. (more…)
04/29/2020
The sixth lesson from the basic SolidWorks course, in which I will show you how to create assemblies. (more…)
04/29/2020
The fifth lesson in the SolidWorks Core Course, in which we continue our introduction to the basics of part modeling.