Dye 3d print
The Quick and Easy Way
Currently, the Markforged materials suite offers two different types of plastic: Nylon and Onyx. This limits the colors you have essentially to translucent white and matte black, with “highlights” of yellow (Kevlar), pink (fiberglass) or black (carbon fiber). Sometimes you may want your parts in a different color for an aesthetic or professional touch. We’ve discussed the nylon dyeing process in the past, but today we’ll show you an even simpler method to color your 3D printed parts almost any color you want, with just a tea kettle and some dye.
Nylon is a hygroscopic material, meaning that it can easily absorb water (this is why you need to store it in a drybox). This affects the part if the nylon gets wet prior to printing, but won’t degrade the 3D printed nylon part post-printing. Therefore, when nylon absorbs water with a water-soluble dye, it absorbs the water and dye and ends up permanently colored. By heating up some water and adding dye, the dye can easily diffuse into the water, and the combination, when heated, can more easily dissolve into the 3D printed nylon. This allows the part to absorb the dyed water quickly.
Our old dyeing process, if not executed well, could leave parts with bubbles or warped spots, and this method ends up being a lot quicker. Here are the steps we advise:
1. Selecting Dye:We suggest using RIT liquid dye for dyeing 3D printed nylon parts- although it is listed as a fabric dye, it works really well on our nylon (because nylon is commonly used for fabrics!). If you choose to use another dye, just ensure that it works on nylon. You can purchase RIT liquid dye here. You can choose to dye your parts pretty much whatever color you want as long as you can find it!
RIT Dye, the suggested brand Markforged uses for dyeing 3D printed parts.2. Preparing the 3D Printed Part:There isn’t much needed to prepare the part, but just remember to remove the support material, and clean excess glue off of the bottom face of the print, or else the nylon will not absorb dye through that face. In this example, I printed our standard Markforged nylon sample part.
Apart from the dye and the part, you’ll also need a tea kettle and/or a microwave, a container or mug you don’t want to drink from again that fits your part fully inside of it, a pair of pliers or tweezers you can use to pick up your part, and a paper towel (not pictured). It’s best if the container is insulated, like a mug or bowl, so heat doesn’t escape easily. Just make sure you only use it for dyeing and not for drinking after you use it to dye parts, so label it clearly and don’t store it with the rest of your kitchenware!
The materials needed to dye 3D printed parts.4. Preparing the Solution:You’ll want to use about a 5:1 water to dye ratio. For lighter dyes or larger parts though, we suggest a more concentrated solution of about 3:1. Figure out about how much liquid you need to completely submerge the part, and pour just the dye into the container. Boil some water in a kettle or on a stove. Once it’s boiled, pour it carefully into the container with the dye.
Pick the part up with the pliers and submerge it in the dye solution. This is important to do immediately, while the water is still hot, or else the part won’t absorb the dye well. You may want to monitor the temperature of the solution with a thermometer (this one is what some of our engineers use). The dye works best between 60C and 80C. Below 60C, and the dye won’t seep in well. Above 80C, and the part may warp or bubble.
Dip the part in the container, and check it every few minutes until you get the shade you want.I leave parts in for about a minute, but it’s really up to you: the longer you leave the part in the dye, the darker it will be. Usually, what I’ll do is dip my parts in and pull them out or glance in every few seconds until I get the look that I like.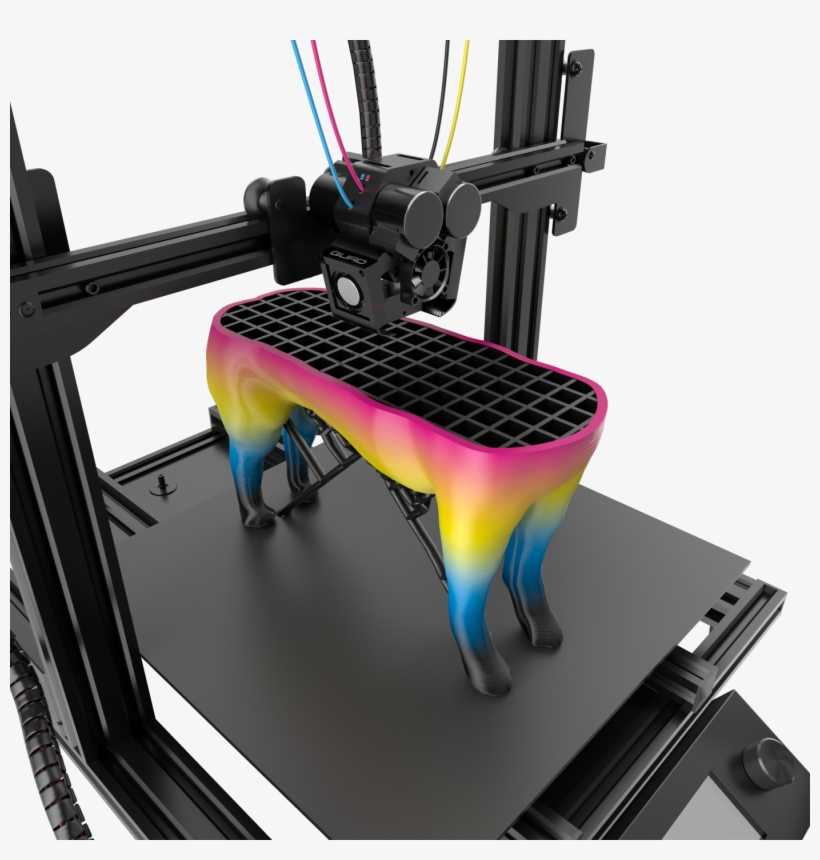 Here are a few examples of red dyed nylon parts left in for different amounts of time:
Rinse the part under running water for a bit to clean off any excess dye. then lay the part out on a paper towel, pat it down, and let it dry for a few minutes.
7. Other Tips:
Reusing Dye: The dye is less effective when cool. If the dye has cooled down (which you can check if you have a thermometer, as mentioned above) and you want to reuse it to dye more parts, just take your parts out and reheat the solution in the microwave until it is simmering.
Keeping Dye Hot: If you have a large part and you’re concerned that the solution won’t stay at temperature, using a laboratory hot plate to keep the dye temperature within range will ensure the solution won’t cool down during the process.
Alternative – Using the Microwave: If you don’t have access to a tea kettle, you can dye parts with just a microwave. Instead of heating up the water in the tea kettle, mix the dye and the water in the container first, and then heat it up in the microwave until simmering. Remove the container and dip the parts in as described in Step 6.
Fiber Appearance with Dye: Because fiber layers can usually be seen through the nylon, they also can show through even when the nylon is dyed. If you want to hide the fibers, the part should be dyed a bit darker, but they still show through a little bit. Here are some examples with carbon fiber, our darkest fiber material:
Dyeing darker will hide the fiber to a point.Dyeing Onyx: Our other plastic material, Onyx, does not produce the same results because we are dyeing an already black material. Onyx already has a superb matte black surface finish, so you may not want to dye it anyway. However, after a bit of time, it does give parts an slight colored tinge:
Onyx is black,, but the dye does slightly affect its color.I hope these steps helped simplify the dying process so that you can easily make alternately colored parts. Don’t forget to order a sample part if you want to try dyeing it yourself!
How to Dye Your 3D Prints
3D Printing & Imaging
7
Colleen Jordan is an Atlanta-based industrial designer and founder of Wearable Planter
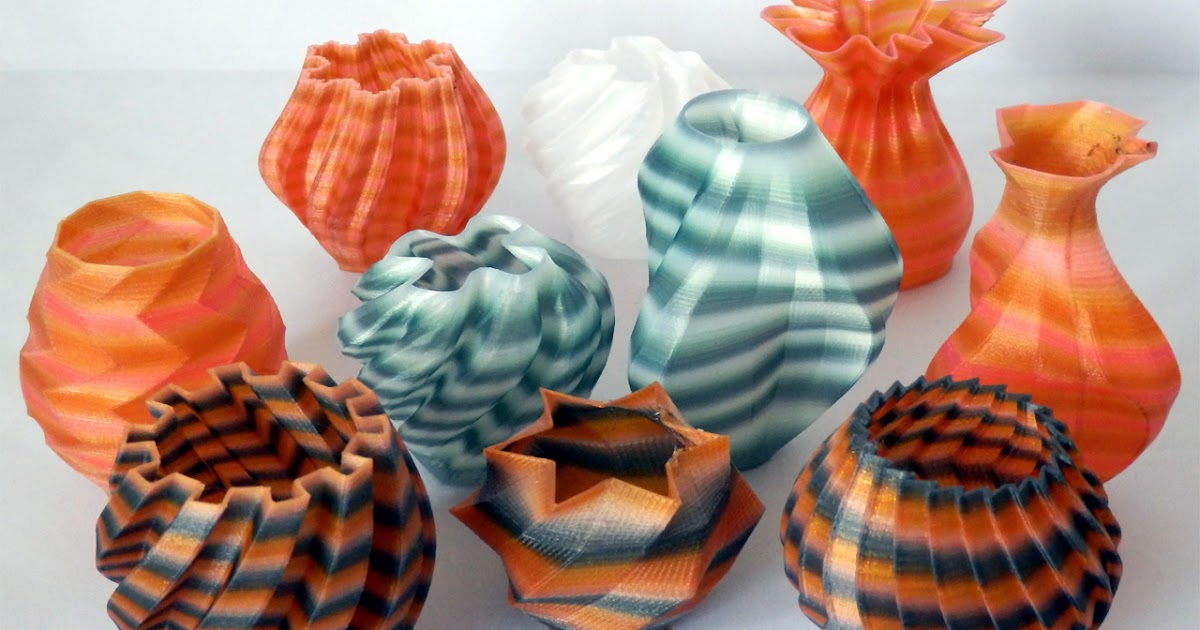
3D Printing is currently a big buzz word in the design, arts and crafts, and technology worlds. We make all of our jewelry with 3D Printing, and in the time we’ve been making 3D Printed creations, we’ve learned a lot about ways to manipulate the material to change its color and appearance. 3D Printing, also known as additive manufacturing, produces objects from CAD files by building up material layer by layer to create the final form. You can 3D Print in a wide range of materials from squishy rubber to hard metals.
Have you created something with 3D Printing? A lot of design students and hobbyists now have access to the technology thanks to services like Shapeways and Ponoko.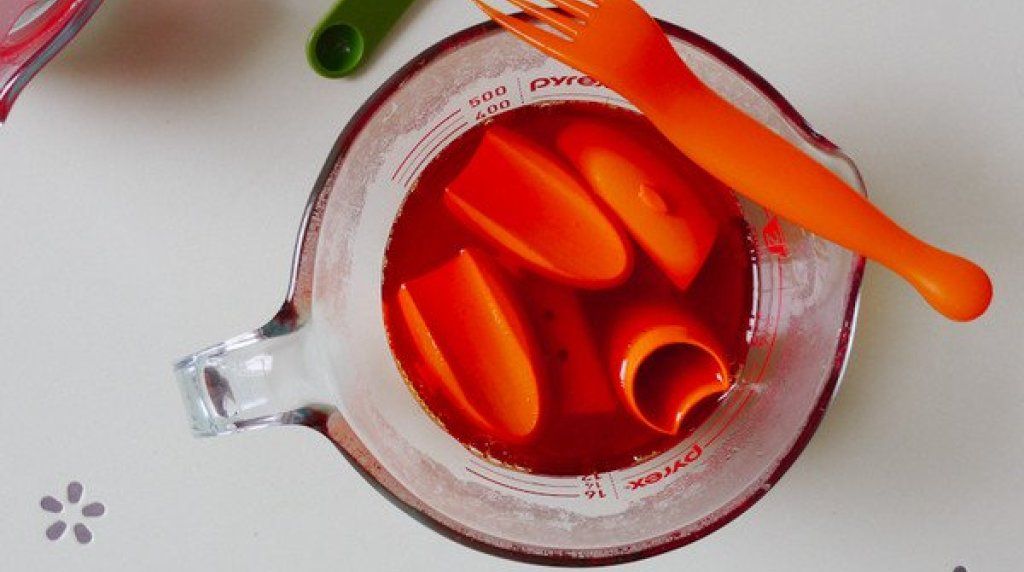 If you printed your object in polyamide, you can dye them at home to whatever color you want. Polyamide is a porous material that accepts color really well. Some companies offer dying of your prints for you, but that adds extra processing time and is only available in a small range of colors.
If you’re tired of the boring white that many 3D Prints come in, we will show you how to add color to your prints. This is a tutorial for dying nylon (or polyamide) 3d Prints with fabric dye. This material is known by different names at different printing companies. Shapeways calls it “White Strong and Flexible”, Ponoko calls it “Durable Plastic”, Sculpteo “White Plastic”, and iMaterialise “Polyamide”. We’ll use Rit brand dyes in our tutorial since it is easy to find in craft, fabric, and grocery stores. You can also dye your prints with Jacquard brand acid dyes with a similar process, but that will require carefully measuring vinegar to change the acidity of the solution and constantly heating the solution.
This process is similar to dying fabric, and we learned a lot about how dye 3D Prints by reading this article on dyeing techniques by Rit.
Step 1: Gather Your Materials
The first thing that you will need to do is gather your materials. You’ll need your nylon 3D Prints, your desired color of fabric dye, a bowl to do the dyeing in, measuring spoons, and boiling water (not pictured). We also recommend having access to a microwave to reheat your solution while dying as needed.
Decide which color you would like to dye your prints. Rit has a great guide to tell you which colors you can dye your prints with; other brands of dye will have similar guides. Nylon absorbs the dye really quickly, and we usually use slightly less dye than the guides recommend. For this batch of bike planters we will be dying them using Rit’s Sunshine Orange. We’re using 1.5 tsp of powdered dye to 1.5 cups of boiling water.
Remember that you are working with fabric dye that will stain clothes and shoes. So if you care about the clothes that you are wearing wear an apron or change into something that you don’t love so much. Fabric dye can also stain your skin, so wear latex gloves if you don’t want tinted hands. Rit dye will come off easily with scrubbing, so if you do get some on your skin, it can be easily removed.
Step 2: Soak Your Pieces
Before you begin the dying process, soak your prints for at least 30 minutes. We recommend doing this overnight if you have the time. Having your prints saturated will allow the dye to color the piece more evenly. This will also help remove any dust on the surface of your prints left over from the printing process. If there is residual powder on the surface of your prints, it will affect the color of piece. The powder will be dyed, and will come off easily when the piece is dry, leaving a white spot underneath.
This piece had some leftover powder stuck to it when it was dyed, and you can see the large white area left behind from removing the powder.
Step 3: Add Color
Carefully measure your required amount of dye and add your boiling water. Stir it really well so all of the powder is dissolved in solution.
Add your prints to the the solution and stir. Agitate the solution frequently to ensure that your prints are colored evenly. The longer that you leave your prints in the solution, the more saturated the color will be. These prints stayed in the dye for about 6 minutes to achieve the color. If you need to leave your prints in the solution longer, microwave it at 15-30 second increments to reheat the water to near boiling temperatures. We’ve noticed that some dyes require higher temperatures to stay in solution than others. In our experience pink and blue dyes require hotter temperatures and longer dying times to achieve their desired colors.
Step 4: Rinse
Rinsing your prints is very important. You can rinse it with cold water to remove the excess dye. We also like to let the pieces sit in boiling water for a few minutes for any excess dye to soak out. If you’re going to be dying jewelry or anything that will be worn close to the skin, this is a very important step as excess dye could stain the skin or clothes.
Step 5: Dry
Step 6 (Optional): Seal
Nylon is a porous material that will readily absorb particles and dirt it is exposed to. We recommend sealing your prints with a polymer varnish (like liquitex) or clear acrylic paint to protect the color and your piece from getting dirty.
Step 7: Show it Off!
One of the bike planters in action
You just put all of this hard work into your 3D Printed object- show it off and tell everyone about it!
This post was originally published on the Wearable Planter blog.
Tagged 3D Thursday dyeHow to prime and paint 3D printed models (with video)
Primer
Primer is a special paint that adheres strongly to the part and ensures that the paint adheres to the surface evenly. There are different primers designed for different purposes. Spray primer is the best way to paint 3D printed parts as it quickly covers the surface in an even coat. There are primers available for brush application, but they are difficult to work with and are better suited for fine finishes. For best results, choose a plastic-compatible primer and paint from the same manufacturer. We love the Krylon and Montana brands (although they are thick), but Tamiya's paint is unparalleled - it forms a very thin and even coat, retaining all minor surface features.
Rotary tool
Sometimes you need to finish sanding quickly. The use of interchangeable nozzles for rotating tools allows you to grind and polish models in various ways. The drum allows you to quickly grind marks from supporting structures, and steel wire cleans marks well on flat surfaces. Rotary tools are designed for rough cleaning, so you will need sandpaper to make the surface smooth. There are many great brands: Dremel and Craftsman are popular in the US, and Proxxon is popular in Europe. In order not to burn your model, reduce the speed to a minimum (usually 500-1000) and do not apply pressure to the tool.
Flat files
These tools are not as clumsy or inaccurate as a hand sander. An elegant instrument...for a more civilized age.
The flat file is one of the simplest yet most effective tools for effectively removing support structures and sanding surfaces. By holding it firmly in your hand, you can remove marks with greater precision than with a rotary tool. Keep a wire brush handy and clean the file blade regularly (otherwise plastic and resin can get stuck in it). Like a rotary tool, a flat file leaves a rough surface, so it is best used for removing large imperfections.
Sandpaper
Sandpaper is the ugliest tool in the workshop. Over the past decade, it has made a real breakthrough with the release of flexible sanding sheets. Flexible sanding sheets can be purchased at hardware stores. They last 15 times longer than paper ones. They won't curl, puncture or bend, and can be used wet to reduce dust and prevent build-up. Thanks to their flexibility, they easily reach small interior spaces and rounded surfaces.
Dust removal
Even after sanding with a damp tool, a small amount of dust remains. Remove plaque with water and a soft brush (an old toothbrush is fine for this purpose). For serious cleaning, you can take an inexpensive ultrasonic device that will quickly remove small particles trapped in corners and surface cracks. If you are working in a hard water area, using deionized or distilled water will help prevent blemishes between coats.
Dust Pad
The Dust Pad is a piece of soft and slightly tacky cotton cloth designed to remove remaining dust and provide a clean surface for painting. Let your model dry before using the dust cloth: the waxed surface reduces its effectiveness on wet surfaces.
Block, pins and drill
This little trick will keep you out of trouble in the paint booth (we were ecstatic when we saw this technique in Adam Savage's how-to video). By mounting the model on a pin (you can often use a pre-drilled hole in the part), you can quickly maneuver while spraying and paint the model from all sides, penetrating hard-to-reach places and leaving no fingerprints. If you want to apply an even layer on all sides of the model, this is very important. We recommend ordering pins in different sizes. To make the hole in the part as small as possible, start small and increase until the model is firmly seated. Drill an appropriate hole in the block of wood or chipboard and mount the model to it with a dowel - now you do not have to hold the model with your hands while spraying.
Protective equipment
Spray paint involves working with aerosols and solvents that are hazardous to health. Be sure to use a National Institute for Occupational Safety and Health (NIOSH) approved respirator and work in a well-ventilated area. When painting, use nitrile gloves to keep the paint off your hands and to avoid leaving fingerprints on the model.
Painting recommendations for 3D models (PLA, ABS, PETG, NYLON)
3DPrintStory Reviews Recommendations for painting 3D models (PLA, ABS, PETG, NYLON)
Despite multi-material extruders and a stunning variety of 3D printable plastic colors, you'll still want to paint some of your 3D models sooner or later. The most common reason is to improve the external 3D model, especially if you are printing on an FDM 3D printer where the model is built up by layering material over time. It is FDM 3D printers that form a model with feature lines along the Z axis.
When finishing a 3D model, small cavities between layers are sanded, filled, or both. The result is a smoother surface. Painting can also help protect the model from the environment.
This article is divided into two parts: the first will introduce you to the different techniques for painting a 3D model, and the second will (hopefully) answer all your little questions about painting techniques and how best to do it. Read on to find out how to enhance your 3D models with paint!
Primer is paint's best friend
Priming the printed model improves ink adhesion. With any painting method (other than nylon dyeing), using a primer is a good idea. Spray primer is said to be the easiest way to get good results. The process for using the primer is very simple:
- Clean and sand your 3D model.
- Apply the primer in thin, even coats.
- Sand after first and last coats to achieve a smooth surface.
- Let each coat dry according to the instructions supplied with the primer.
Method 1: Paint with a brush
Best for: PLA, ABS, PETG plastics.
If you paint a 3D printed model with a brush, you will definitely achieve a unique "handmade" effect.
Try a few brushes first because it's easier to get good results with a comfortable brush. As a rule, it is enough to use only 1 or 2 different flat brushes.
Brush
- Choose a quality brush that is hard enough to handle the viscosity of the paint you are working on.
- Experiment with different bristle types and handle shapes to find the one that works for you.
- Pause the paint to clean the brush as soon as the paint starts to dry. Naturally, the brush must be cleaned after each use. Do not leave drying paint on the brush bristles.
- The brush must be stored on the handle after cleaning and not on the bristles.
Paint
When it comes to brush painting, you're better off with acrylic paints.
Painting process
- Clean and sand your 3D printed model.
- Apply the paint in thin, even coats.
- Let the individual layers dry.
Method 2: Spray painting
Best for: PLA, ABS, PETG plastics.
If you want to paint a 3D printed model uniformly using one color, then using an aerosol will give the best result.
Spray can
Some brands offer nozzles with different specifications.
Shake can according to manufacturer's recommendations before use. Allows the paint to come out more evenly.
Keep the nozzle clean. This is usually achieved by spraying the inverted can slightly at the end of each session.
Keep can away from open flame and store in a cool place. Don't forget that this is a high pressure container!
Paint
When looking for spray paint, you will find that there are many varieties. If you want to use a specific shade, please read the RAL, CMYK and RGB values on the can carefully.
Painting process
- Clean and sand your 3D printed model.
- Start spraying by aiming the jet a little beyond the edge of the object you want to paint.
- Apply the paint by spraying on the surface you want to paint in slow, even strokes.
- Stop spraying by directing the jet a little beyond the object you want to paint.
- Let the paint dry.
Method 3 Liquid Color (nylon only)
Best for: NYLON plastics.
Instead of trying to get paint to adhere to the surface of your 3D printed nylon model, we recommend using liquid dye instead. Note that this will not work with other materials. Although PLA is hygroscopic and absorbs some water from the environment, it cannot be dyed by absorbing dye. ABS and PETG are also not suitable for this technique.
In order for the ink to give a good pronounced color after absorption, it is better to use a translucent or white nylon material when 3D printing. Darker nylon fibers can also be dyed, but the color will be much less pronounced.
Colorant
There are many brands of colorant to choose from, but MatterHackers recommends Rit DyeMore for example. But in general, if the dye is intended for synthetic fabric, then everything will be in order.
Staining process
Since nylon is very hygroscopic, it absorbs water even outdoors. This is why you should always dry your nylon material before 3D printing. We recommend painting the finished model, not unprinted.
How to use
Read the manufacturer's instructions for your colorant. In short, using a dye is a pretty simple method:
- Clean up your 3D model. When sanding, remember that painting will not cover scratches and marks on the surface of your model. Everything will be visible even after staining.
- Mix the dye with water and heat in a saucepan.
- Use a thermometer to monitor the dye temperature. Follow the manufacturer's instructions, but keep the temperature below the thermal deflection temperature of the filaments.
- Attach the weight to the 3D print and drop it into the paint pot.
- After coloring, rinse well in a bath of cool water.
- To make sure you get the expected color, it's worth doing a few test coats.
How to tell if a paint will set with a 3D model
Probably the most important factor that causes the paint or liquid of your choice to stick to a solid surface is the difference in surface energy between the liquid and the solid. The one with the most surface tension always wins (surface tension has its own unit called dynamos, or dynamos per square centimeter).
The general rule is that the surface tension of the paint must be at least 10 units lower than the solid material for good adhesion. This means that we have a liquid with a high wetting ability on a solid, and we need wetting.
To get an idea of how well the surface to be painted is wetted, look at the shape of the drop of liquid on the solid surface:
- Apply a drop of paint or liquid to the surface of the 3D model you want to process.
- If the liquid forms a ball, it has too much surface tension to effectively wet the object, and the solid cannot "pull" the liquid onto itself.
- If the liquid spreads over the surface, forming something like a lens, wetting is better.
Is it possible to paint a 3D model from any material?
Painting 3D models from PLA and ABS plastics is a fairly simple task.
PETG can have paint durability issues, but the same techniques apply as for PLA and ABS. But if you really need a rich, vibrant color, then it's best to print your 3D PETG model in the desired color and leave it as it is.
When it comes to nylon, which is used for 3D printing, we must remember that the paint does not set well. In general, it is possible to paint with acrylics and nylons, but this will require some heat treatment to maximize the surface tension and allow the paint to wet. Often this is done with an open flame or plasma... In general, this does not look easy at home, so it is better to use dyes.
Planning before 3D printing
In order to facilitate the process of finishing and painting, before 3D printing your model, we recommend that you consider the following:
- Lower 3D printing resolution saves printing time, but increases processing time.
- Consider the geometry of your model. Your tools should reach where you want to sand or paint.
- Do the smallest details need sanding, priming or both? If so, can they handle it without breaking?
- If dimensional accuracy is important for some parts of your 3D model, you may need to take this into account when modeling. Add material to be sanded to size, or reduce size to make room for primer and paint.
- Primer and paint add thickness and can completely hide the fine details of your model.
- Sanding removes material and makes your 3D model less durable.
Items to improve paint adhesion
And finally, a few simple steps to improve paint adhesion:
- When working with a 3D printed model, wear clean gloves to protect the skin from chemicals and the surface of the model from sebum.

Learn more