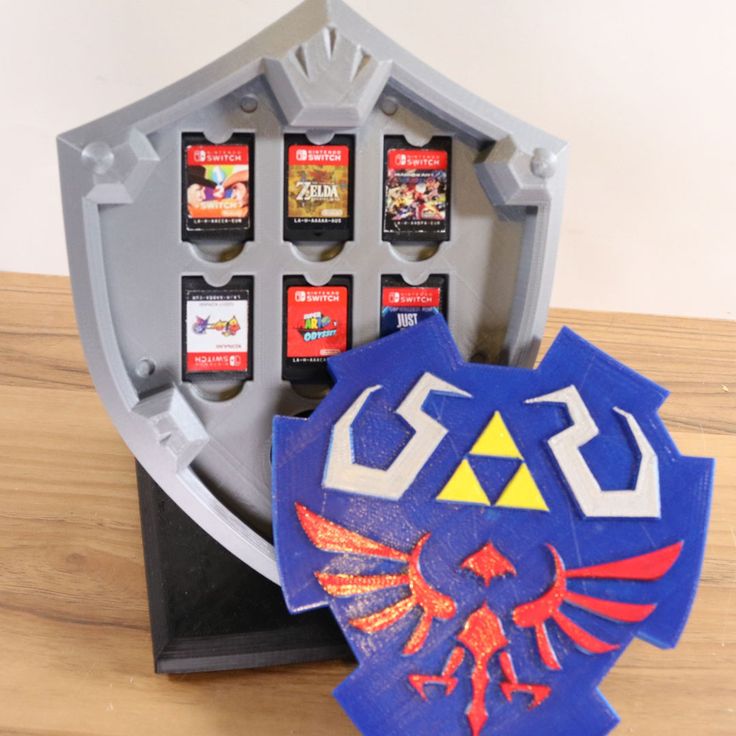
3D printed switch game holder
Free STL file Nintendo Switch Game Case Holder・3D printing idea to download・Cults
Playstation 4/3 Game Case Holder- Flat & Full Back Options
Free
Nintendo Switch Cartridge Game Holder
Free
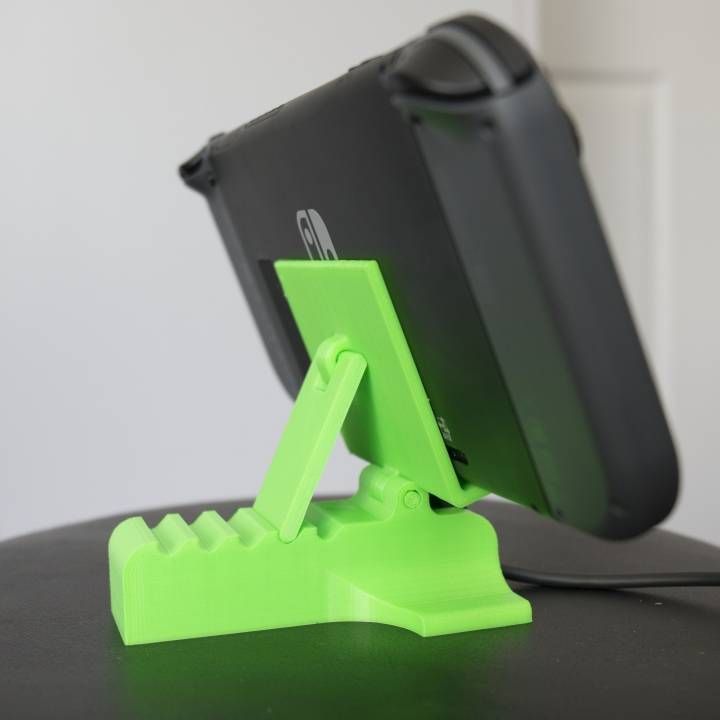
Nintendo 64 Controller Stand
Free
Nintendo 64 5 Slot Cartridge Holder
Free
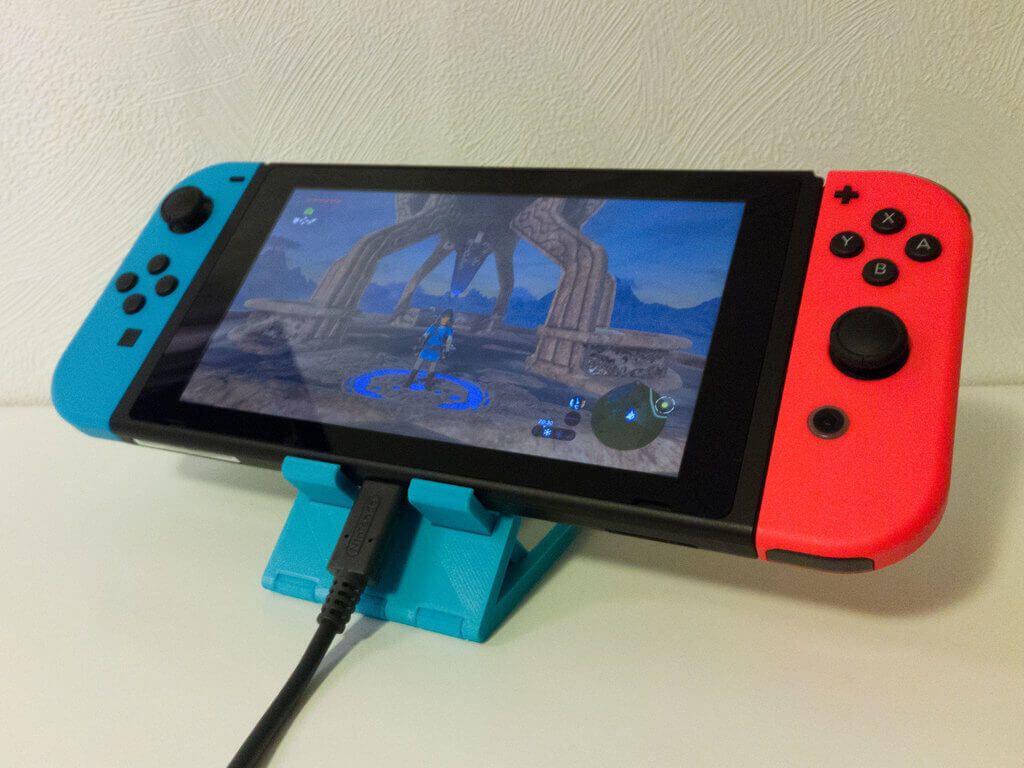
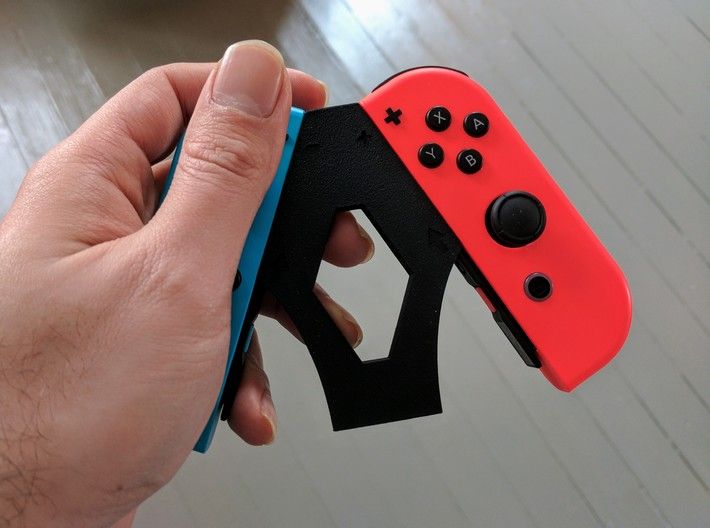
Nintendo Switch Joy-Con Basic Grip
Free
NES Cartridge Stand 5 Slot
Free
SNES Cartridge Holder
Free
Cactus Planter or Jewelry Holder
Free
Best 3D printer files of the Gadget category
Bottle Cap Keyboard
Free
Bicycle Water Bottle Cage
Free
Arduino Uno cover
Free
hornet's trap
Free
Toon style Beverage mug!
€1. 82
Android Prototype P-01
Free
Nutcracker Pin Walker
Free
COOKIE CUTTER COOKIE CUTTER WITH STAMP JUNGLE ANIMALS JUNGLE ANIMALS
€4.38
Best sellers of the category Gadget
Phone Holder NO:01
€1.25
Jack the fidget Zombie - Halloween
€2.29
Gato fantasma / spooky cat
€3.30
Perritos fantasma / Spooky dogs
€3.30
Working steam engine, print-in-place, fully assembled, no supports
€3.34
App to create dual text illusion
€3.68
Bone Finger Updated
€6.84
Karambit keychain spinner tiktok keyrambit NO BEARING
€1.73 -15% €1. 47
47
wall key holder (dragon ball)
€1.25
Owl - Wall Key Holder
€1.84
Brush rinse cleaner
€2.25
G17- DD17 Rails Frame
€7.50
Giromate
€3.04
DJI Avata Bumper
€3
AR-15 LOWER MULTI CAL. REINFORCED STRUCTURE
€8.50
Fidget Pumpkin Keychain - Halloween
€1.89
Would you like to support Cults?
You like Cults and you want to help us continue the adventure independently? Please note that we are a small team of 3 people, therefore it is very simple to support us to maintain the activity and create future developments. Here are 4 solutions accessible to all:
ADVERTISING: Disable your AdBlock banner blocker and click on our banner ads.
AFFILIATION: Make your purchases online by clicking on our affiliate links here Amazon.
DONATE: If you want, you can make a donation via PayPal.
WORD OF MOUTH: Invite your friends to come, discover the platform and the magnificent 3D files shared by the community!
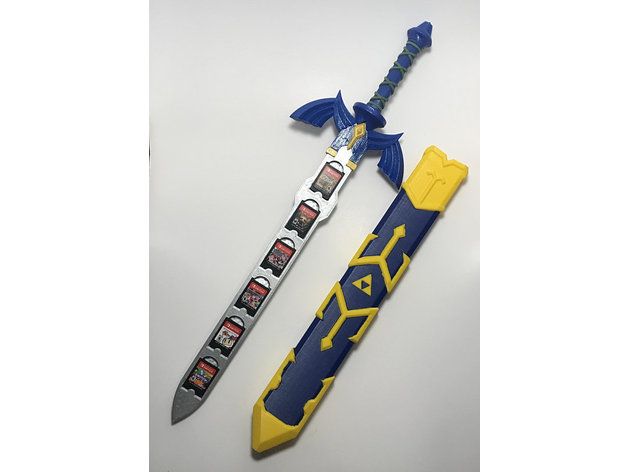
STL file Nintendo Switch Game Holder Oversized Gameboy Cartridge・3D printing model to download・Cults
Blink Camera Bird Feeder (2 Versions Included)
€3.33
Ring Camera Bird Feeder (2 Versions Included)
€3.33
Lord of the Rings One Ring Jewelry Tray
Free
Dragon Scale Can Koozie
Free
Gengar Card Display
Free
The Dwayne Chain
Free
Can Opener
Free
Dumbbell Weight! (Fill with sand or concrete)
Free
Best 3D printer files of the Game category
Minos
€9
Old paddle-wheel steam boat with display stand (visual benchy)
Free
Triceratops 3D Puzzle Construction Kit
€0. 50
50
Spining top
Free
Mandalorian Chess Set and display box
Free
Horizon Forbidden West, Aloys Bow
€20.48
Noga
€9
V - FIVE
€2
Best sellers of the category Game
Heavy Imperial Fire Support Weapons [Presupported]
€5
SM Healer Conversion Kit
€6
Nice Flexi Dragon
€1.77
Lion Foo
€5.50
Nice Flexi Hedgehog
€1.05
Wodfolk Explorer
€10.13
Catafrac Heavy Armoured Warriors - Limbs Pack
€1.85
First Line Attack Troopers - Truescale
€5
Combat Director
€1. 52
52
Alteyr Champion
€5.06
Dancing skeleton
€3.54
Short range artillery for the legionnaires
€10
Fotiann Wildmen
€10.13
Alteyr Emberwatch
€10.13
Articulated Dragon
€4.04
Off-Road Car
€2
Would you like to support Cults?
You like Cults and you want to help us continue the adventure independently? Please note that we are a small team of 3 people, therefore it is very simple to support us to maintain the activity and create future developments. Here are 4 solutions accessible to all:
ADVERTISING: Disable your AdBlock banner blocker and click on our banner ads.
AFFILIATION: Make your purchases online by clicking on our affiliate links here Amazon.
DONATE: If you want, you can make a donation via PayPal.
WORD OF MOUTH: Invite your friends to come, discover the platform and the magnificent 3D files shared by the community!
Free 3D file Switch Game Tin Insert with Poke Ball・Download and 3D Printable Model・Cults
Madoka Magica - Soul Gems
Free
Figure / Funko Pop Shelf
Free
DJI Goggles Battery Holder and Cable Wrap
Free
DJI 9 Goggles Battery Dock0004
Free
Bright solutions paper towel Key
Free
Base/stand for Wyze robot vacuum cleaner
Free
DJI Goggle Battery Cable Clip (Fat starp)
Free
Smoke alarm cover (kidde)
Free
The best files for 3D printers in the Tools category
Liquid propellant rocket engine, 1st supersonic horizontal flight, X-1, 1947
10. 13 €
13 €
covid 19 mask frame
free
Pegboard Holder for Mini Sanding Wedges
Free
In-Line, Water Cooled Engine, 6 Cylinder, Cutaway, 1910s
20.25 €
Anet A8 Spool holder - reuse Anet parts
Free
Accurate calibration/dimension test
Free
Stackable drawer
1 €
Spool Snail
Free
Bestsellers in the Tools category
Tool holder for 3D printer V3.0
1.11 €
Chill Buddy 9 lighter case0004
1 €
FAST PRINT STACKING STORAGE BOXES STACKING CONTAINERS
1,50 €
ENDER 3 S1/PRO SPRITE, V3 AIR DUCT 5015 OR 4020
€2. -fifteen% 1.96 € 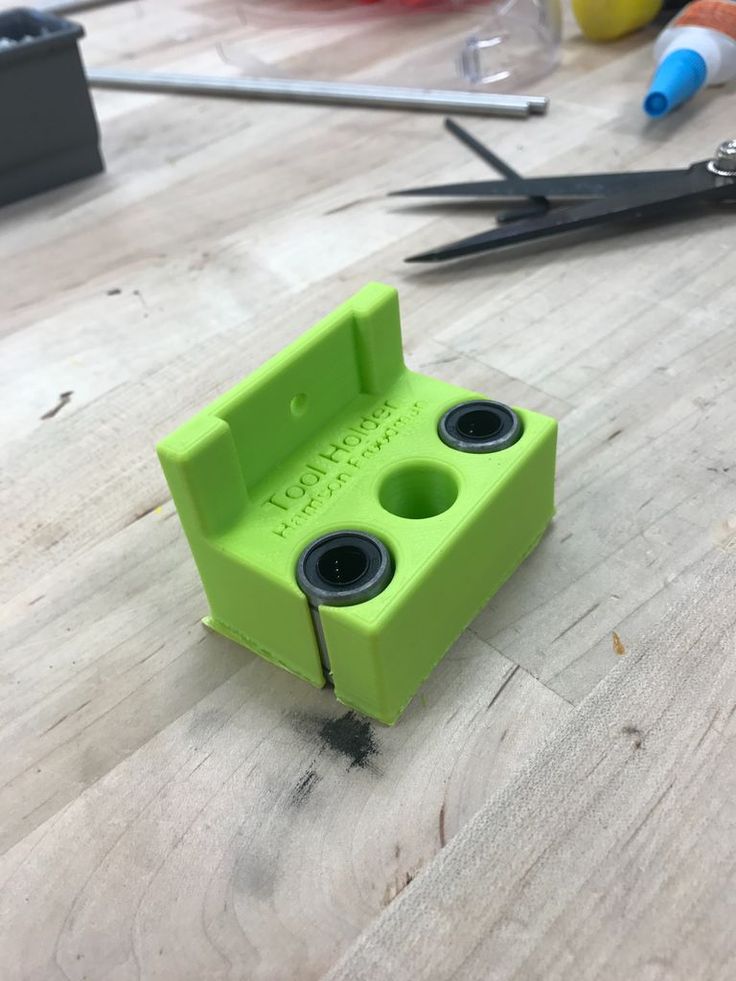 31
31
Version 2 Alligator 2 || Repeating crossbow || 3d printed shop || Inspired by Joerg Sprave
1.50 €
Cooling system Minimus Hotend
€2.51 -thirty% 1.76 €
Fire hydrant storage container
2.03 €
Grinder | Grinder
€1.50
INDICATOR FOR BETTER BED LEVELING FOR ENDER 3 V2
3.03 €
Printer boxes for Ikea Lack Table
1,99 €
Business card embossing system
3 €
Ender 3, 3 V2, 3 pro, 3 max, dual 40mm axial fan hot end duct / fang. CR-10, Micro Swiss direct drive and bowden compatible.
 No support required for printing
 1.66 €
Paint stand with scissors
€5.59
well designed: Hemera fan duct
2.50 €
Creality CR-10 Smart Pro Camera Mount Bracket X2 and CR10 screw
1.14 €
BMG E3D V6 direct drive for Creality Ender 3 (Pro/V2) & CR-10
4.49 €
Do you want to support Cults?
Do you like Cults and want to help us continue our journey on our own ? Please note that we are a small team of 3 people, so supporting us in maintaining activities and creating future developments is very easy. Here are 4 solutions available to everyone:
-
AD: Disable your AdBlock banner blocker and click on our banner ads.
-
AFFILIATION: Shop online with our affiliate links here Amazon.
-
DONATIONS: If you want, you can donate via PayPal here.
-
* INVITE FRIENDS: * Invite your friends, discover the platform and great 3D files shared by the community!
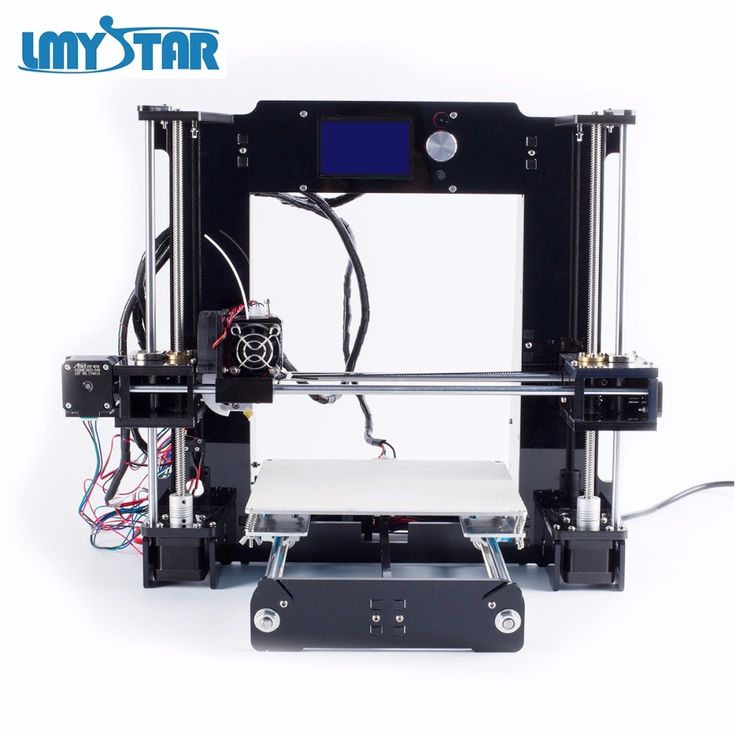
JG Maker - a worthy alternative to inexpensive 3D printers for beginners / Sudo Null IT News Everyone determines their own budget for themselves, and then the search begins for this cost of the printer, reviews are read, communities are considered ... As a result, the cheapest ones become the most common, as the threshold for entering 3D printing decreases from year to year. And if at the dawn of 3D printers they were assembled by enthusiasts from improvised spare parts, then acrylic constructors appeared, and then kits using extruded aluminum profiles began to appear en masse. Now there are already affordable solutions with factory metal parts and a minimum of plastic solutions, which raises the quality of such kits to a new level.
One of these printers is JG-maker from a fairly well-known company, which was one of the first to start production and sale of kits for assembling 3D printers.
I will not hide, the printer was provided for review, but I will try to tell everything honestly about it. From the moment I was offered to test it and before the courier delivered it to me, 4 days passed. This means that the printers are already in stock in Moscow and, if desired, they can be received faster than waiting from a warehouse in China. But, in practice, this slightly increases the cost. To whom it is critical, look from which warehouse the delivery takes place.
The printer arrives in this branded box. She, as I mentioned above, was brought by the courier home and handed over personally.
We open the package and see the instructions and a bag with various useful little things.
The instruction manual is duplicated from English into Russian. But the assembly instructions also have two languages, but one is Chinese and the other is English.
Fortunately, everything is illustrated step by step. Yes, and collecting here is not particularly difficult. Slowly for an hour, you can easily meet.
The following was found in a small package:
- Cable for connecting the printer to a computer or flashing the board. The board, by the way, is still based on Arduino. The solution is time-tested and very reliable, but many are already switching to 32 bits, although this again affects the cost.
- PLA Probe
- Several bags of screws
- Z axis end
- Filament Sensor
- X-axis belt tensioner
- X-axis belt
- Set of keys and hexagons
- Palette knife (now put instead of a spatula)
- Card reader with 8 GB memory card inside
- And spare parts in the form of ties, nozzles, fittings and other hardware
Further, on the top cover of the inner package there is an inscription that it is better to look at the instructions on the memory card before assembling.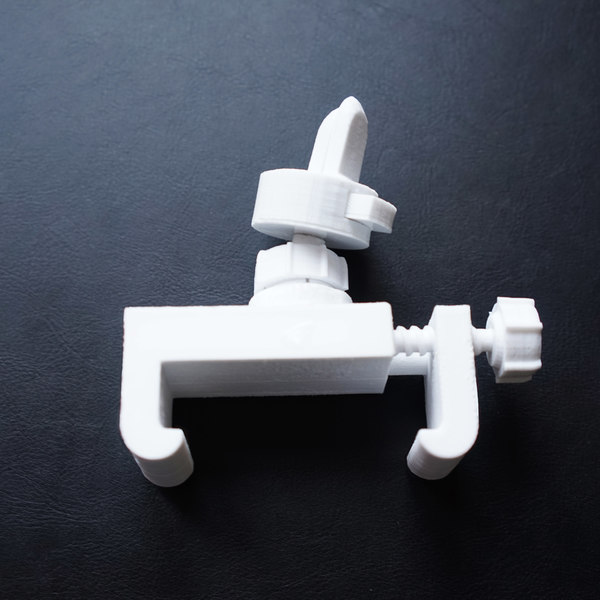 The manual is actually there, it is in PDF format. But paper is more than enough.
Actually, here are the main parts of the printer.
The movable table, control board and cables connecting it to the main components are one large module in a steel case. It is necessary to fasten the guides of the X and Z axes to it, as well as the holder for the coil, which is also made of metal. Everything is very reliable.
One of the main elements of any printer is its print head, where the hot end with the cooling system and the airflow of the printed area are located.
The extruder here is quite simple and unpretentious. This is one of the latest models of budget extruders with improvements that allow you to print with relatively soft plastics. For very soft plastics, such an extruder is not suitable. If the task is to print with soft TPU, TPE or Flex plastics, the extruder will need to be replaced.
The table has an additional layer with a rough coating, to which all plastics stick well.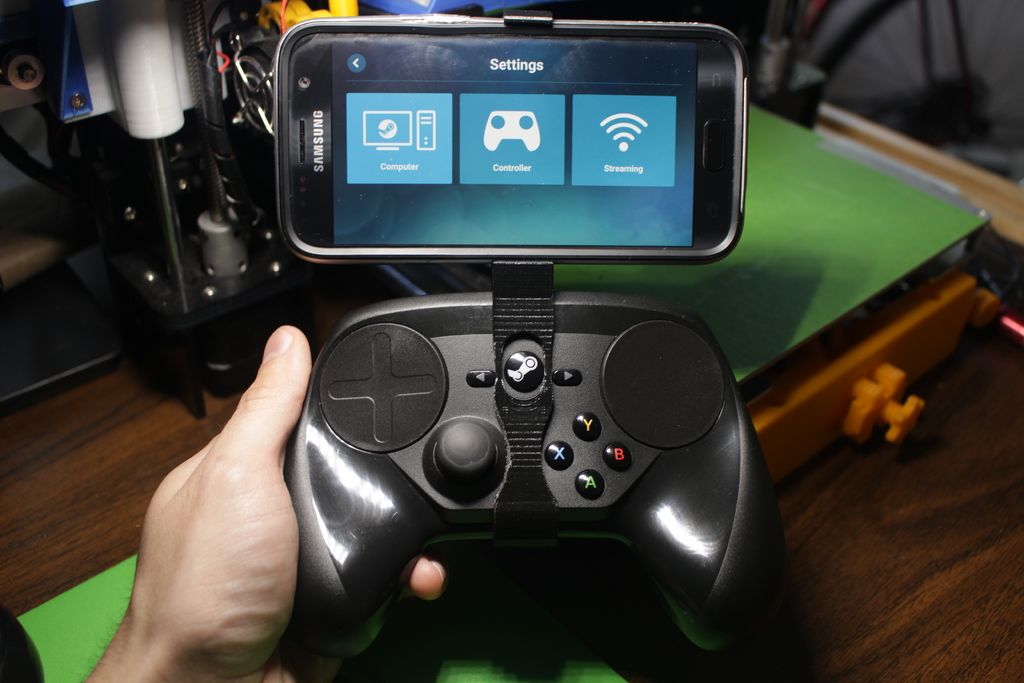 This coating was not glued directly to the surface of the table, but was glued to a thin textolite, which makes it easy to remove large printouts. It is enough just to remove and bend the table so that the part peels off.
One of the main elements of interaction with the printer is the card reader. It is designed for a standard SD card. Inside there is a spring-loaded latch. To remove the card, you need to click on it.
Power socket with internal fuse. There is a 230-110V switch on the power supply. The connector was sealed with a warning sticker so that you definitely do not forget to check in which position the switch is. Although maybe the sticker should have been nearby. But the case is covered with powder dye, to which stickers do not adhere well. I tried to re-glue this one, but it fell off by itself after a few minutes.
I noticed a nice nuance - a PTFE tube flared inside. This solution allows the bar to easily enter the tube without getting stuck and easily enter the hot end.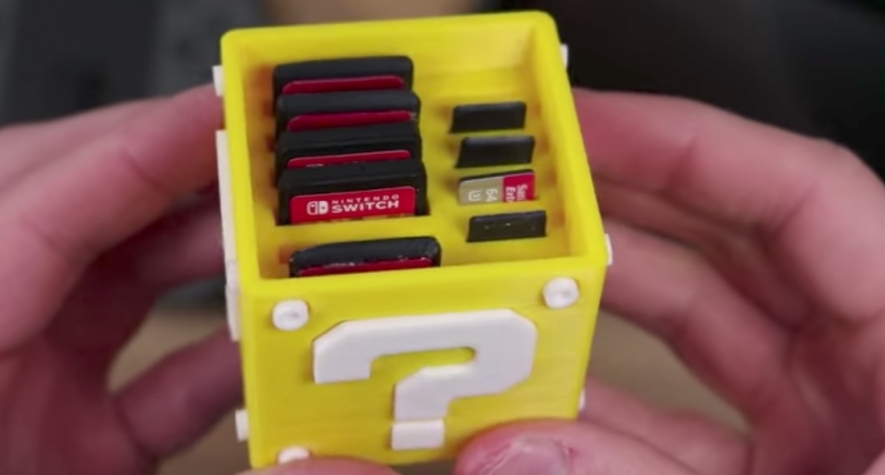 Nice little thing.
The table, also known as the Y axis, moves along cylindrical guides - shafts. The shafts are fixed with metal clamps. The belt spool is in a plastic cradle. But the plastic is molded by molding and should last a long time, there are no complaints about this knot.
Before starting the review, I looked at what the previous owners and bloggers had to say about the printer. The main claim was to the table. Since the wires were not fixed in any way + the table had a regular connector. As a result, the wires either broke from constant movement or there was a bad contact in the connector, and it burned. This model already has a modification of this node and, as can be seen above, the wires are not only fixed, but also securely soldered.
Under the hood of the printer is the control board and power supply. Well, the block, as usual, from the LED strip. But high-quality, with active cooling. But the board seems to be its own design from JG Aurora.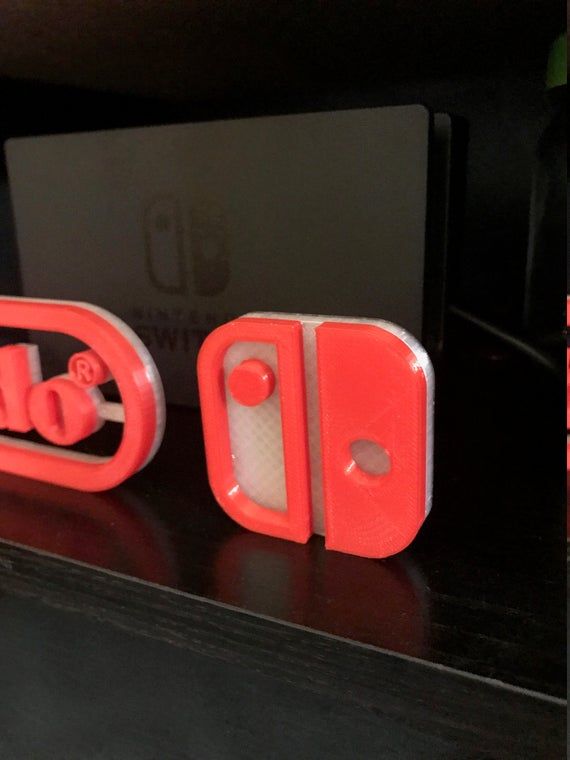
In principle, this is a fairly simple board with inexpensive drivers. These drivers aren't the quietest, but the printer doesn't make much noise. In addition, they do not heat up so much, which allows them to be used without radiators at all. But, if you have a desire to replace the drivers with fashionable 2208, then you will have to change the control board at the same time. The price of the printer affects, let me remind you that it is in the most affordable niche.
We assemble the Z and X axes. To do this, unpack the aluminum rails.
First, screw the Z-axis motor and limit switch. The end cap doesn't need to be over tightened. After assembling the printer, it will need to be moved a little more.
We screw 2 vertical guides ...
And proceed to the assembly of the X axis. There is a feature here, you need to correctly position the elements relative to the guide, in accordance with the recesses.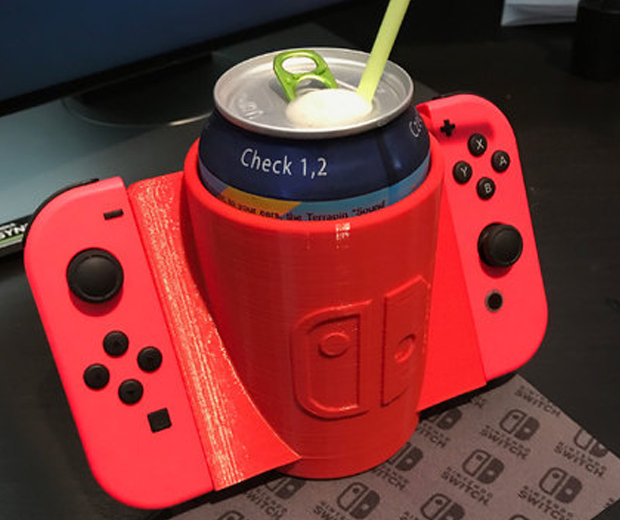 There are different distances from the edges to them.
Next, tighten the belt.
After you fix the belt in the “head” clamps, you need to adjust its tension. The belt should not be stretched like a string, but at the same time it should not sag. The roller on the left is responsible for the tension. It is necessary to loosen its clamp, insert something between the roller and the frame, slightly tighten and tighten the screws.
Next, place the X axis on the vertical guides.
It turns out like this.
At this point, you can already adjust the Z-axis stop. I advise you to tighten the slightly spring-loaded table screws and then adjust the stop so that the nozzle just barely touches the table. Then, by releasing the screws, it will be possible to easily adjust the gap of the first layer.
We screw the upper rod.
And install the decorative element on top. In addition to beauty, it also protects the upper groove of the profile from dust. It is not very convenient to wipe it there, and with such a cap it will be a little easier to keep the printer clean.
Insert the trapezoidal screw into the nut on the X axis.
And fix it in the clamp on the stepper motor. Next, we screw the motor with the extruder and the bar presence sensor.
We insert the signed connectors into the desired slots. We screw the holder for the coil and the printer is completely assembled.
Next, you need to adjust the table gap. To do this, we put the head in turn in each corner of the table and adjust the height of the gap with the lamb under the table. Here, as usual, you need to place a piece of paper between the nozzle and the table and clamp it until it moves with little friction. It is better to repeat the procedure a couple of times in a circle at each corner. Since there are four screws, and the plane is easier to set when there are three of them. With four screws, it doesn't align perfectly the first time, as the diagonal screws offset each other a little, and by raising one edge, the other can drop a little.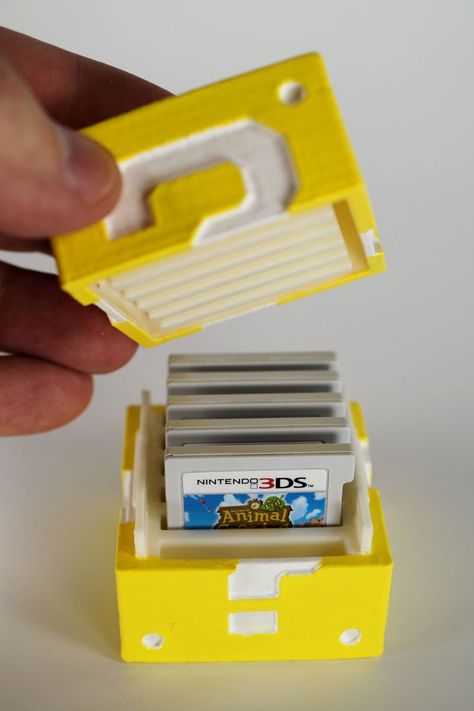 This is another non-critical minus. In principle, four screws are placed on the table in most printers. And in such printers with a moving table, the third screw will also be very difficult to adjust.
There is already a sliced file on the memory card. Through the G-code viewer we look at what is there. There is a test cube. He is on the raft. but the raft is not separable. In addition, for some reason it is cut with adaptive layers. Some are very thin, some are standard. But it prints fine. I did not use the test PLA, but immediately applied the proven PLA PRO. It has stable diameter and excellent quality.
Launching another model. And here it turns out that the holder is not very suitable for this type of coils. The coil is inserted very tightly there because of the high side on the edge of the holder. It is better not to risk it, otherwise you can not remove it later. I use a separate holder.
Prints smoothly and consistently. All without complaints.
After about 12 hours, we have a ready base for the brain puzzle.
There are slight irregularities in the layers in the direction of the Z axis. But, as for me, they are not very critical.
Next, in red again, print the puzzle pieces.
The puzzle is quite difficult to assemble. Well, the model has the opportunity to print the assembled version and it is already easier to assemble according to the sample.
After a couple of days, Yorick is ready. The puzzle pieces took about 16 hours to print on one half of the brain.
What is the result?
The printer turned out worthy for the money. In the initial segment of 3D printers, the choice has become wider, which is good. Everyone chooses for himself what he likes best.
This printer has the following specifications.
Printable area: 220x220x250 cm. The default nozzle is 0.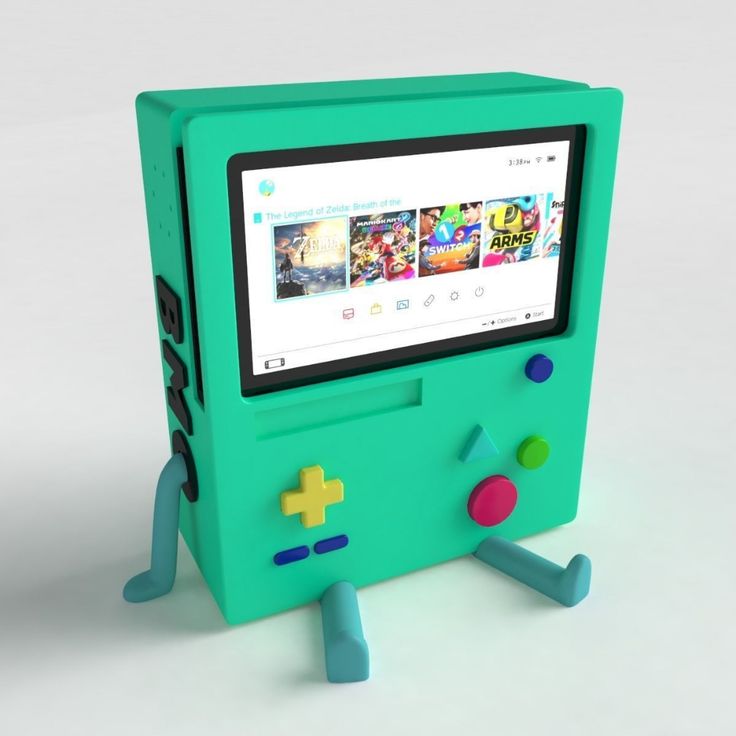 4 mm. Spare of the same diameter. The trapezoidal screw allows you to make a minimum step in height of 0.02 mm, I recommend cutting layers in the same multiple of this value.
The printer has an all metal body and 95% metal parts. All critical components are made of metal, this will increase the service life. Plastic parts to a minimum, but those that are made by casting in the factory. The printer is easy to assemble and ready to print within an hour of getting your hands on it. I put in an hour for assembly. Can be collected faster.
Minor cons: The spool holder does not fit certain types of spools. Namely, under 750 grams from the FD-layer. The same spools are used for the welding rod... Here you need to either sharpen the holder or use a free-standing spool holder. You can also print your version. Another disadvantage, but not critical, I would include the absence of eccentrics on the guide wheels. True, on my other printer, I haven’t touched them for 2 years already and everything prints smoothly, without going astray.