3D printed solder fume extractor
Build Your Own DIY 3D-Printed Soldering Fume/Smoke Extractor
Zach(
248
)
30 minutes
Solder contains lead. Breathing in lead is bad. Therefore, breathing in solder fumes is very, very bad. Even if you only solder things once in a while, it's a good idea to have a solder fume extractor nearby to suck in those toxic fumes and run them through a carbon filter to neutralize them.
Commercial solder fume extractors can cost upwards of $70. Combine that with the cost of good soldering irons, and you're looking at some expense. Today, I'll show you how to build your own for about $20.
For this project, we'll be using an amazing 3D-printable model designed by rdmmkr on Thingiverse (thanks, rdmmkr!) :)
If you don't have a 3D printer, read on and I'll share some ways you can get your model printed.
Let's get started!
| 3D printer | × | 1 | ||
| AC Infinity 80mm USB fan | × | 1 | ||
| Screwdriver, Phillips, small | × | 1 | ||
| USB power brick | × | 1 | ||
| Activated carbon filter | × | 1 | ||
| 3D printing filament, PLA, white | × | 1 spool | ||
| 3D printing filament, PLA, red | × | 1 spool | ||
Howchoo is reader-supported. As an Amazon Associate, we may earn a small affiliate commission at no cost to you when you buy through our links.
h/soldering • 3 guides
h/3dprinting • 90 guides
h/electronics • 8 guides
This project is comprised of three primary components: a 3D-printed housing, a fan, and an activated carbon filter. Links to everything you'll need is in the parts list above.
Choosing a fan
You have two options for your 80mm fan -- you can either solder your own fan circuit and add your own switch, or use one that's plug-and-play.
To save time, I'm using a 5V fan with a switch and wire built in. You can probably save a few bucks by soldering your own fan circuit, but the one I'm using is quite powerful and is only about $11. The downside is this fan has a lower CFM, meaning you'll need to keep it closer to what you're soldering.
Used here
See all
Check Price on Amazon
If you prefer a higher CFM fan, you can find one on Amazon, though you may need to bump up to a 12V fan to get a really high CFM.
If you'd like to solder your own fan circuit instead of using a USB fan, see the instructions on Instructables.
For the housing, we're going to use an excellent design created by rdmmkr on Thingiverse. Download the model from Thingiverse and print the five main parts of the model:
- The main housing left half
- The main housing right half
- The removable filter cartridge front half
- The removable filter cartridge back half
- The front panel plate
No supports are necessary. I printed the housing in white and filter housing in red to make it a bit more aesthetically pleasing. :)
Used here
See all
Check Price on Amazon
Check Price on Amazon
Don't have a 3D printer?
If you don't have a 3D printer, not to worry! I wrote a short guide on how to get your 3D model printed without owning a printer.
Use the four screws that came with the fan to attach it.
Remove the rubber feet and grilles that came with the fan.
Then, close the two halves of the main housing around the fan, ensuring that the fan is oriented correctly—to suck in air from the front and push the air out the back.
Finally, use the four included fan screws to secure the fan and its grill to the housing. This will also hold the back part of the housing shut.
You may need to reroute the fan wire by pulling it out of its housing.There's an internal hole in the unit that's meant to run the fan cord through if you created your own fan circuit. If you instead used a USB fan (as I did), you'll want to plug this hole so you don't get any air leakage.
To do this, simply use a bit of electrical tape or hot glue. Fan suction will hold the tape in place tightly.
The front panel holds together the front part of the housing and provides a spot for a small rocker switch (in case you decided to build your own fan circuit). Use two small screws to secure it in place. If you don't have any small screws laying around, you can also use super glue or epoxy to hold everything together.
Carefully cutting each filter into four equal squares.
The activated carbon filters I ordered are 130x130x10mm. Using a pair of scissors or a box cutter, cut each one down the middle twice, resulting in four 65mm² squares of equal size. This is exactly the size you'll need.
The ones I ordered came with five filters, meaning you get a total of 20 filters after cutting. Not bad.
Used here
See all
Check Price on Amazon
Place a filter into the cartridge and slide it into place.
Connect the fan to a USB power supply (this is the one I used). You can then turn the fan on and off using the controls on the fan's USB cable.
Used here
See all
Check Price on Amazon
You're all done! For maximum effectiveness, place the extractor close to where you're soldering.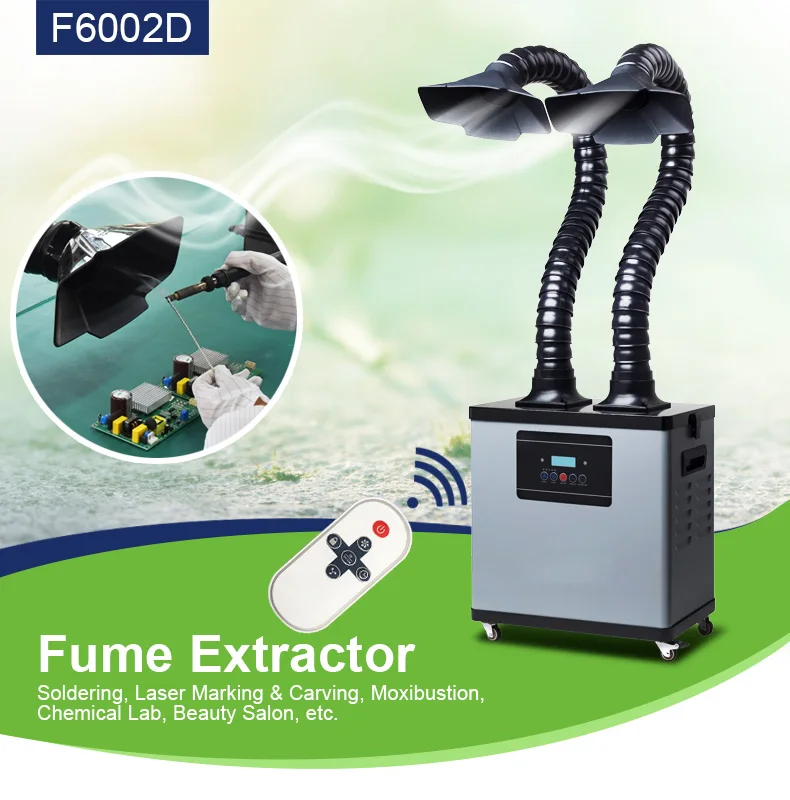
Need a soldering iron?
If you need a good soldering iron, then we've got you covered. Check out our guide on the best soldering irons for different tasks.
NEXT UP
Michael(
175
)
0
Every electronics DIY-er needs a good soldering iron. The Howchoo team uses soldering irons all the time for projects like Gamepad Zero or our hacked Raspberry Pi keyboard.
Continue reading
Build Your Own DIY 3D-Printed Soldering Fume/Smoke Extractor
Zach(
248
)
30 minutes
Solder contains lead. Breathing in lead is bad. Therefore, breathing in solder fumes is very, very bad. Even if you only solder things once in a while, it's a good idea to have a solder fume extractor nearby to suck in those toxic fumes and run them through a carbon filter to neutralize them.
Commercial solder fume extractors can cost upwards of $70. Combine that with the cost of good soldering irons, and you're looking at some expense. Today, I'll show you how to build your own for about $20.
For this project, we'll be using an amazing 3D-printable model designed by rdmmkr on Thingiverse (thanks, rdmmkr!) :)
If you don't have a 3D printer, read on and I'll share some ways you can get your model printed.
Let's get started!
| 3D printer | × | 1 | ||
| AC Infinity 80mm USB fan | × | 1 | ||
| Screwdriver, Phillips, small | × | 1 | ||
| USB power brick | × | 1 | ||
| Activated carbon filter | × | 1 | ||
| 3D printing filament, PLA, white | × | 1 spool | ||
| 3D printing filament, PLA, red | × | 1 spool | ||
Howchoo is reader-supported. As an Amazon Associate, we may earn a small affiliate commission at no cost to you when you buy through our links.
h/soldering • 3 guides
h/3dprinting • 90 guides
h/electronics • 8 guides
This project is comprised of three primary components: a 3D-printed housing, a fan, and an activated carbon filter. Links to everything you'll need is in the parts list above.
Choosing a fan
You have two options for your 80mm fan -- you can either solder your own fan circuit and add your own switch, or use one that's plug-and-play.
To save time, I'm using a 5V fan with a switch and wire built in. You can probably save a few bucks by soldering your own fan circuit, but the one I'm using is quite powerful and is only about $11. The downside is this fan has a lower CFM, meaning you'll need to keep it closer to what you're soldering.
Used here
See all
Check Price on Amazon
If you prefer a higher CFM fan, you can find one on Amazon, though you may need to bump up to a 12V fan to get a really high CFM.
If you'd like to solder your own fan circuit instead of using a USB fan, see the instructions on Instructables.
For the housing, we're going to use an excellent design created by rdmmkr on Thingiverse. Download the model from Thingiverse and print the five main parts of the model:
- The main housing left half
- The main housing right half
- The removable filter cartridge front half
- The removable filter cartridge back half
- The front panel plate
No supports are necessary. I printed the housing in white and filter housing in red to make it a bit more aesthetically pleasing. :)
Used here
See all
Check Price on Amazon
Check Price on Amazon
Don't have a 3D printer?
If you don't have a 3D printer, not to worry! I wrote a short guide on how to get your 3D model printed without owning a printer.
Use the four screws that came with the fan to attach it.
Remove the rubber feet and grilles that came with the fan.
Then, close the two halves of the main housing around the fan, ensuring that the fan is oriented correctly—to suck in air from the front and push the air out the back.
Finally, use the four included fan screws to secure the fan and its grill to the housing. This will also hold the back part of the housing shut.
You may need to reroute the fan wire by pulling it out of its housing.There's an internal hole in the unit that's meant to run the fan cord through if you created your own fan circuit. If you instead used a USB fan (as I did), you'll want to plug this hole so you don't get any air leakage.
To do this, simply use a bit of electrical tape or hot glue. Fan suction will hold the tape in place tightly.
The front panel holds together the front part of the housing and provides a spot for a small rocker switch (in case you decided to build your own fan circuit). Use two small screws to secure it in place. If you don't have any small screws laying around, you can also use super glue or epoxy to hold everything together.
Carefully cutting each filter into four equal squares.
The activated carbon filters I ordered are 130x130x10mm. Using a pair of scissors or a box cutter, cut each one down the middle twice, resulting in four 65mm² squares of equal size. This is exactly the size you'll need.
The ones I ordered came with five filters, meaning you get a total of 20 filters after cutting. Not bad.
Used here
See all
Check Price on Amazon
Place a filter into the cartridge and slide it into place.
Connect the fan to a USB power supply (this is the one I used). You can then turn the fan on and off using the controls on the fan's USB cable.
Used here
See all
Check Price on Amazon
You're all done! For maximum effectiveness, place the extractor close to where you're soldering.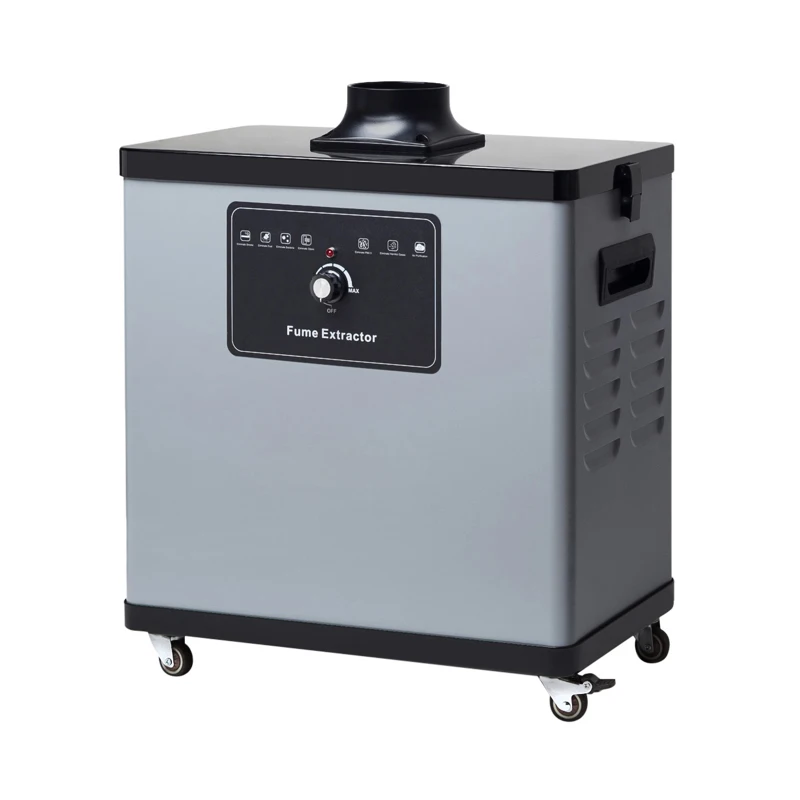
Need a soldering iron?
If you need a good soldering iron, then we've got you covered. Check out our guide on the best soldering irons for different tasks.
NEXT UP
Michael(
175
)
0
Every electronics DIY-er needs a good soldering iron. The Howchoo team uses soldering irons all the time for projects like Gamepad Zero or our hacked Raspberry Pi keyboard.
Continue reading
Homemade soldering smoke extractor / Sudo Null IT News
We have already published a translation of an article on a soldering smoke extractor. That article was about an Arduino-based sensor that automatically turns on the smoke detector when the soldering iron is removed from the holder.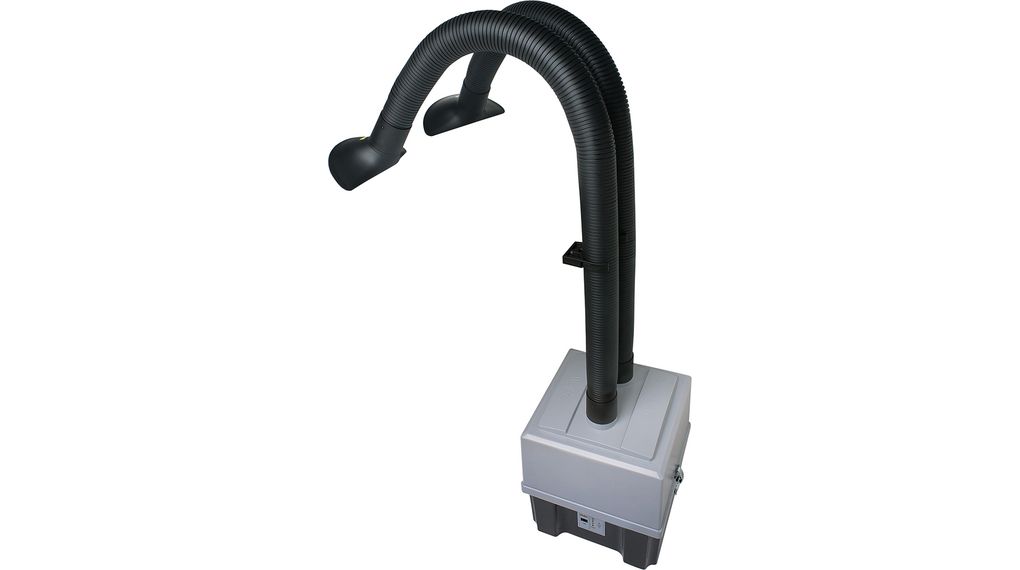 And today we will talk about the independent manufacture of a smoke detector.
Homemade Soldering Fume Extractor
Anyone who is into electronics knows that soldering plays a vital role in almost all of their projects. However, it is unlikely that anyone will like to inhale the smoke that is released when solder and flux are heated. This smoke has a terrible smell and can be harmful to health, but the dangers associated with it can be reduced by using a smoke extractor. This device, which captures poisonous fumes, is useful even for those who solder infrequently. nine0003
You can buy a good smoke extractor, but it will cost more than $70. After learning about this, I made such a device myself using a 120mm computer fan and a 3D printed case.
Project overview
I was inspired by a wonderful 3D printable model designed by rdmmkr. I modified this model for my needs in Autodesk Fusion 360. In my case, I used a 120x25 mm fan, and the original project was designed for an 80x38 mm fan. I also equipped the device with a fan speed control. nine0003
Here is a video tutorial for this material.
I would like to thank NextPCB for their support in this project.
Materials and tools
For this project you will need the following materials:
- 12V fan
- Fan speed controller
- Power connector
- Rocker switch 15x10 mm
- LED 5 mm
- 580 Ohm resistor
- Wires, 22 AWG
- Heat shrink tube
- Cage nuts M3
- Activated carbon filter
- Double-sided adhesive tape
- Screws M3x12
- M5x8 screws
- Rubber feet
Here is a list of required tools:
- Soldering iron
- 3D printer
- Cutting pliers
- Wire stripper
- Hot air gun
Step 1. Principles of operation of the device
Diagram of the device (source) (source)
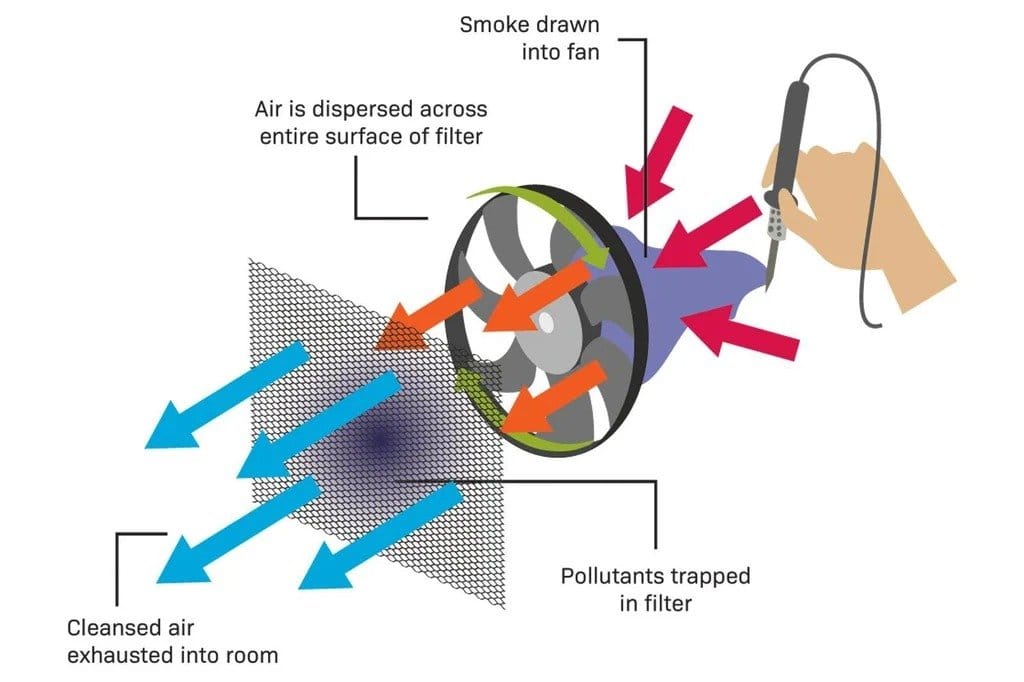
The main component of the smoke extractor is a 120x120x25 mm fan, which is usually used to cool computers. The fan draws vapors from the soldering area, they pass through the activated carbon filter. The filter purifies the air: removes unpleasant odors, adsorbs poisonous gases and provides a safe working environment. nine0003
Device schematic diagram
The device is powered by a 12-volt DC adapter through the power connector. The speed controller is used to control the fan speed. A 5 mm LED with a 580 ohm current-limiting resistor indicates power status. Between the power connector and the speed controller is a key switch that allows you to control the power supply to all components of the device.
Step 2: Preparing fan wires
Fan in the packaging
Packed fan
Fan
fan, prepared for included
in this project, I used the ARCTIC F12 computer.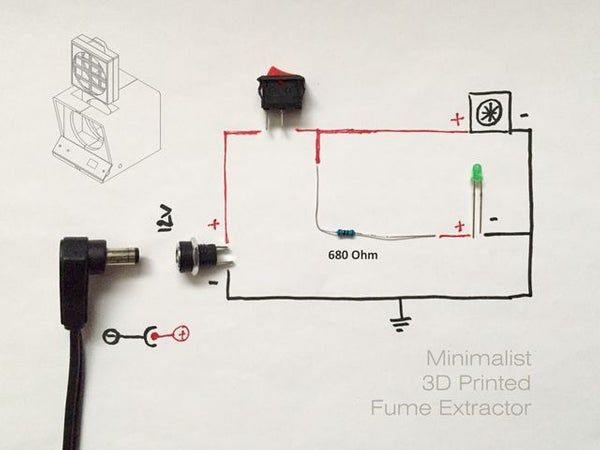 It has 3 wires going to it. They connect to the GND, 12V and Signal lines. We need only two of them that provide power to the fan, that is, 12V and GND.
In order to prepare the fan for further work with it, you need to cut off the connector and part of the wire responsible for connecting the fan to Signal. After that, it is necessary to strip the insulation on the wires connected to the speed controller. nine0003
Step 3. Preparation of the LED
LED and resistor prepared for soldering
Slusts and connecting wires
LED, ready to use 9000 9000 resistors needed to connect the LEDs
The red LED used in the project lets you know if the device is on or off. The forward voltage of such LEDs is usually in the range of 1.5 - 2 V. We need to power the LED from a line with a voltage of 12 V.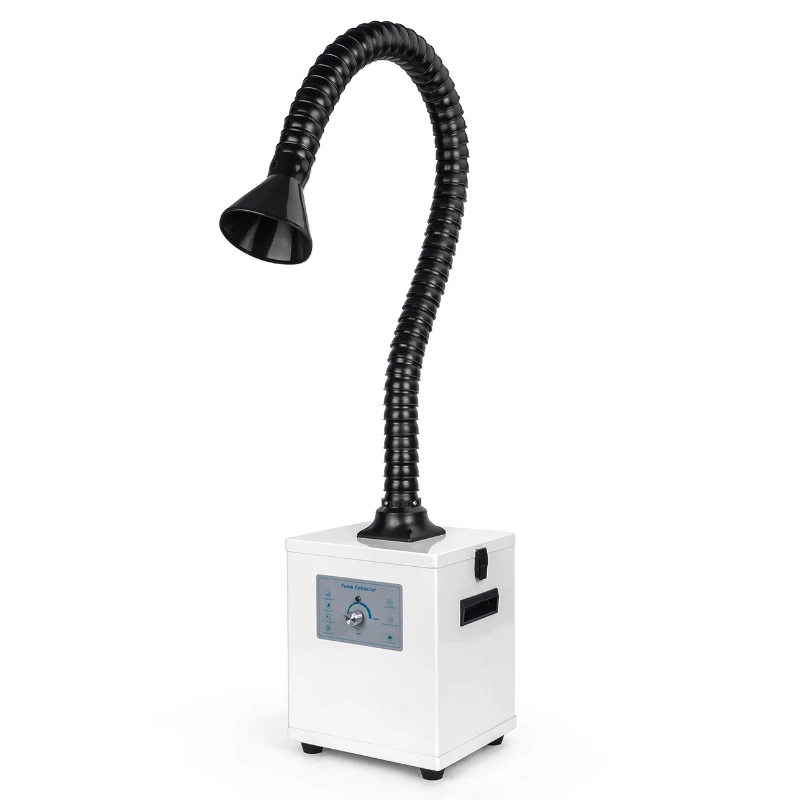 This can be done by applying a current-limiting resistor. You can calculate the parameters of the resistor using this online calculator. nine0003
Before soldering the elements, it is necessary to shorten the leads of the LED, given that the longer lead represents the anode connected to the "plus" of the power supply. It is to this pin that you need to solder the resistor, and to the resistor - the red wire. To the other leg of the resistor, connected to the "minus" of the power source, you need to solder the black wire. After that, you need to isolate the soldering points using a heat-shrinkable tube.
Step 4: Preparing the Power Connector
Power Connector
Power connector with wires soldered to it
Project-ready power connector
In my project, a 5.5x2.1 mm power connector is used to power the device from a 12V adapter.
To prepare a connector for use in a project, begin by applying a small amount of soldering flux to its pins. A red wire is soldered to the positive (short) terminal, and a black wire to the negative terminal. After that, the soldering points are isolated with a heat-shrinkable tube. nine0003
Step 5. Preparation of the fan rotation speed regulator
Setting a variable resistor from a speed regulator
Speech controller and variable resistor
Wires for connecting a variable resistor 9000
Speed control regulator with an excessed resistor -varied resistor. ready to be included in the project
First I tried to mount the speed controller directly on the front of the fume extractor. But, unfortunately, he did not fit there. Therefore, I decided to separate the variable resistor from the regulator board, connect them with wires, and then mount them. nine0003
When desoldering a variable resistor, it is worth using a solder suction unit.
Connect the resistor and the board with five wires and insulate the solder points with heat shrink tubing.
Step 6: Design Smoke Extractor Housing
Smoke Extractor Housing, Front View
Smoke Extractor Housing, Rear View
when designing the hull. nine0003
Housing consists of 5 parts:
- Right side of the housing.
- Left side of the body.
- Filter cartridge.
- Front panel.
- Fan grille
Step 7: 3D print the body
Body parts
I printed the body parts on my Creality CR-10 Mini 3D printer using blue and yellow PLA. The main reason I chose these colors is because they match the colors of my Hakko soldering station. It took about 10 hours to print the main body parts. It took about 4 hours to print the rest of the details. nine0003
Here are the settings I used:
- Print speed: 60mm/s.
- Layer height: 0.2 mm (0.3 mm works well).
- Fill density: 20%.
- Extruder temperature: 210°C.
- Table temperature: 55°C.
Step 8: Preparing the main body parts
Cleaning the body parts
Installing the cage nuts
Main parts of the body, ready for further work
Before assembling the main parts of the body, they should be cleaned with sandpaper. After that, in the appropriate places of the body, you need to place the cage nuts and fix them by heating with a soldering iron.
Step 9. Installing the power connector
Installing the power connector
Installed power connector
The power connector is placed in the hole provided for it, located on the right side of the case. Then it is fixed with a nut. Hot glue is used to secure the connector. nine0003
Step 10: Installing the Fan
Installing the Fan in One Part of the Case
Aligning the Parts of the Case with the Fan Installed
The fan must be inserted into one of the parts of the case, and then the second part of the case should be replaced. Parts of this design should fit snugly against each other. Before proceeding, you need to make sure that the fan is correctly oriented in the case - that is, that it draws air in from the front and ejects it from the back. nine0003
After the chassis parts are connected, the fan wire must be routed to the location of the chassis where the control panel will be mounted.
Step 11. Preparation of the filter cartridge
Part of the cartridge case
Part of the cartridge case and filter elements
The filter is installed in the cartridge
9000 9000 9000 Fan, used in our smoke excess and will draw in poisonous gases released during soldering.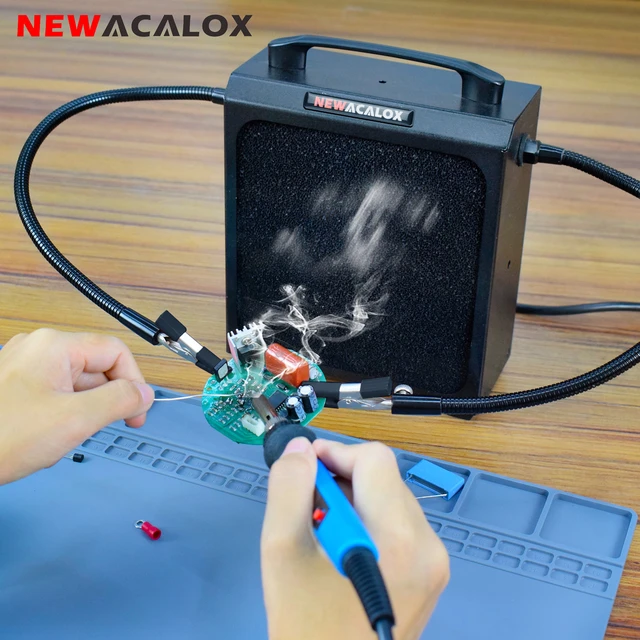 But if appropriate measures are not taken, the same gases will return to the room in which soldering is performed, they will be just as harmful to health as they were at the time of their formation. This problem can be solved by passing the air through an activated carbon filter. nine0003
I cut out the filter after measuring the dimensions of the cartridge. Here, to improve the efficiency of air purification, two pieces of filter are used.
After the necessary filter pieces are cut out, they are placed in the cartridge and the parts are joined together.
Step 12 Attaching the Fan Grille
Attaching the Fan Grille
Now you need to attach the fan grill to the back of the unit. My fan already had such a grill, it came with 4 M5x10 screws, so I used them. And if there are no screws, the grille can be attached to the body with glue. nine0003
Step 13: Connecting the electronics and assembling the device
Front panel with installed variable resistor connected to the speed controller, front view
Front panel with installed variable resistor, LED and switch, rear view
3 Front panel with mounted variable resistor, LED and switch, front view
Connecting electronic components
Front panel ready for installation
During the final assembly of the device, you need to install the speed controller variable resistor, LED and switch in the appropriate places on the front panel. Then you need to solder all the connections in accordance with the circuit diagram of the device, while not forgetting about the isolation and protection of the soldering points with a heat-shrinkable tube.
The positive wire from the switch should be connected to the speed controller input DC IN +, the negative wire from the power connector should be connected to the controller input DC IN -. Then the fan wires must be connected to the controller outputs MOTOR OUT + and MOTOR OUT -. nine0003
Front-mounted components must be fixed with hot glue. After that, you can replace the front panel of the device and secure it with a pair of M3 screws.
Step 14. Conditional tests of the device
A ready -made smoke exhauster with a power supply
Smoke user and a soldier station
Smokewater smoke excrete in the work
The smokelite is ready for the final tests.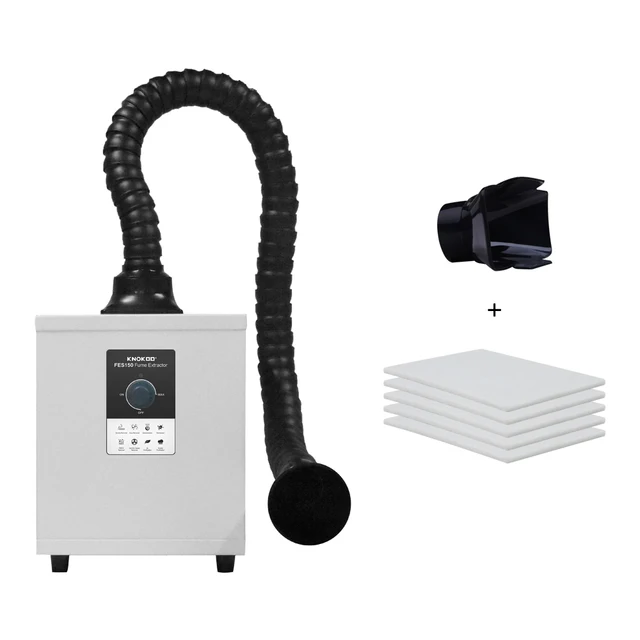 It remains only to connect the power adapter cable to the corresponding connector located on its right side, turn on the adapter and flip the switch. After that, the LED should turn on. You can set the fan speed to maximum by moving the variable resistor knob to the extreme right position. nine0003
If you now bring a soldering iron to the smoke extractor, on which there is a little flux from which smoke comes out, you will notice that this smoke is drawn in by the fan. In my case, it turned out that the device performs well when the soldering iron is 10 - 15 centimeters from it.
My smoke extractor is limited by the fan it uses (airflow 74 CFM, 126 m3/hr; rotation speed 1350 rpm). The low CFM of the fan means that the fume eliminator must be placed close enough to the soldering point to be effective. If this distance needs to be increased, you can look for a fan that provides a higher level of airflow. nine0003
Do you use fume extractors when soldering?
Air pollution in 3D printing
Main page
Articles
Smoke from a 3D printer
Smoke from a 3D printer
Introduction How does the printer pollute the air How does BOFA filter
What is 3D printing
3D printing is also known as additive manufacturing.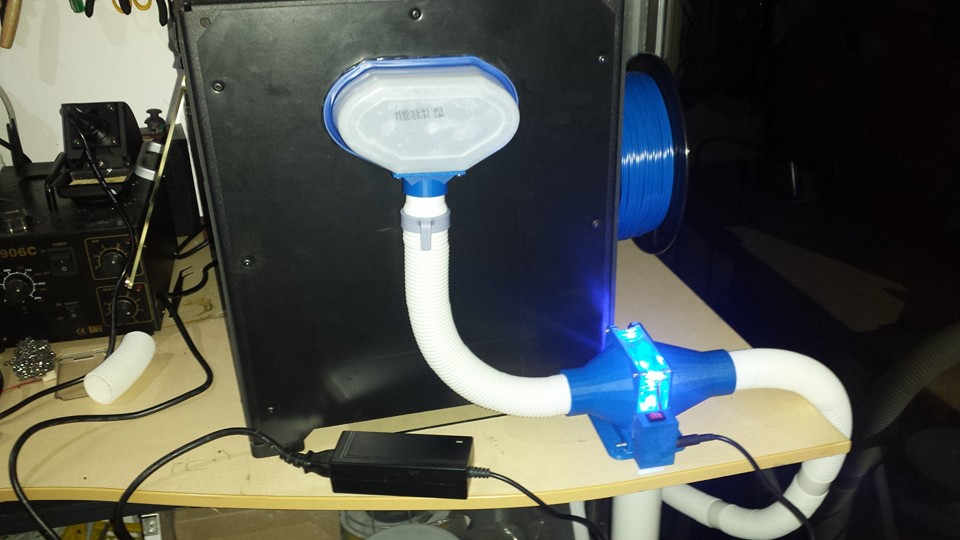 This means that the product is created by adding material in layers. The process is controlled by a coordinate XYZ robot with digital control. Printers work with plastic or metal. The material is fed to the deposition point in the form of wire or powder. The printer is melting the material. Then it connects to the previously applied base. nine0003
A 3D printer will produce objects of complex shape. This favorably distinguishes the additive process from the subtractive one, when excess is removed from a large piece of material. Machining, laser processing, soldering or welding generate more contamination. And a lot of material is wasted. 3D printing does not consume a lot of extra material. It appears to be a clean process, but it still pollutes the air.
Anyone using 3D printing needs to be aware of the health risks. The 3D printer seems safe. But it can generate toxic fumes and hazardous substance particles. Technological processes that transform the material pollute the air in the workplace. This applies to cutting, engraving, thermal decomposition in a laser machine, soldering with a toxic flux, etc. Molten metals and polymers are no exception. nine0003
Why is a 3D printer dangerous?
Ultrafine particles
Heating a substance causes the release of solid particles, droplets and vapors. They may be harmful if inhaled.
European scientists are gradually revealing the dangers of 3D printing to health. According to the 3D Printer Emissions Report , plastic melting releases small nanoparticles of material into the air. They cannot be seen without special equipment. But that doesn't mean they are safe. nine0003
PLA plastic nanoparticles are used in pharmaceuticals as a means of delivering drugs to various organs, including the brain. Cosmetics use the same effect. Ultrafine particles penetrate the skin. By themselves, PLA particles are not toxic. But no one knows about the consequences of accumulation in human organs.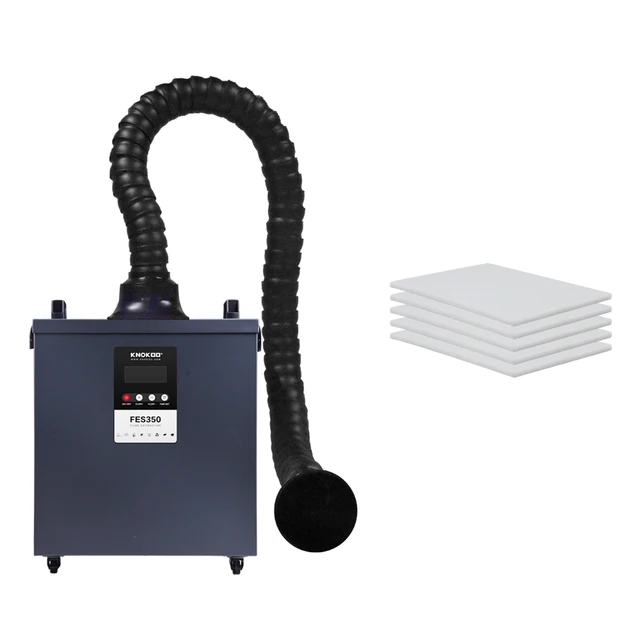 Nanoparticles condense into relatively large formations. It is known for certain about the harmfulness of nanoparticles of soot from automobile exhausts . They are associated with degenerative brain diseases, such as Alzheimer's disease. nine0003
ABS plastic is toxic when melted. Nanoscopic ABS particles are just as toxic. These particles are very small. During inhalation, they enter the brain through the olfactory nerve. They spread throughout the body through the bloodstream. Most organs can get rid of them naturally, but the brain and lungs become clogged for a long time.
In fact, particles as small as 10-200nm easily enter the bloodstream through the lungs. Their toxic action differs from the original substance in the usual shapes and sizes. According to study by the Italian Institute of Health and Consumer Protection nanoparticles are deposited in the lungs in greater quantities than e-cigarette smoke.
Gases or vapors
Molten ABS gives off a particularly unpleasant odor.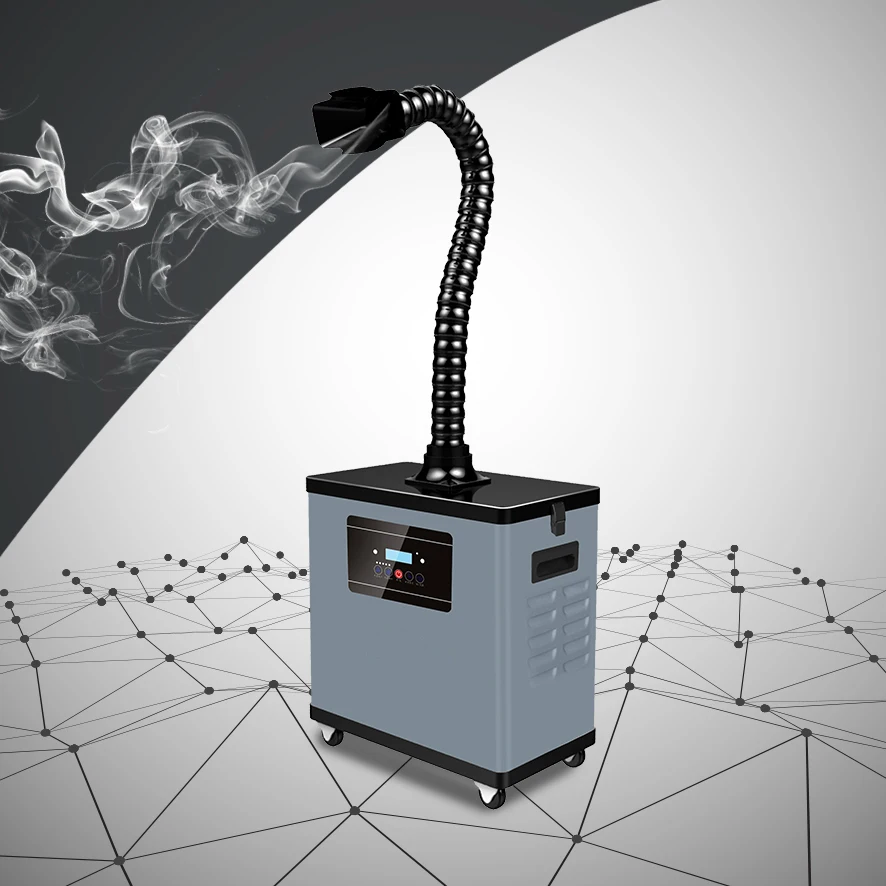 Other plastics including nylon, HIPS and HDPE emit the same toxic fumes but have less odor.
Polymer materials can vaporize some of their constituents. Dioctyl phthalate is often added to them for flexibility and mold resistance. During high heat or laser treatment, benzene is released in hazardous quantities. And while working with PVC, HCl aerosol condenses in the air. nine0003
The high temperature in the area of the printer head causes the air to expand. Vapors quickly spread in the work area along with plastic particles. Thermal degradation products of polymers are shown in the diagram below.
How does BOFA work?
A smoke extractor is an extractor hood with filters placed in one device. She got her name at the time when she removed the smoke of a soldering iron or a laser engraver. But these same devices with special filters are also suitable for a three-dimensional printer. The smoke extractor block for the printer is not much different from the soldering block.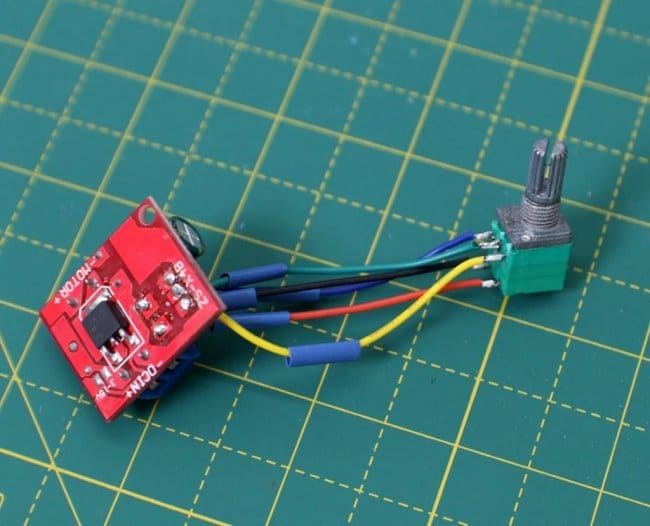 nine0003
3D printing is sensitive to changes in air temperature. Therefore, he is afraid of drafts. If you are using a small open printer, then the polluted air can be removed with a conventional smoke extractor. In order not to disturb the climate in the printer, select the minimum air suction speed.
If your 3D printer model is closed, there is a protective cover, then you can install a cleaning curtain. During operation, while the printer window is closed, it can be turned off. But it will clean the outgoing air when you open the box to take out the finished product. nine0003
If your printer is large and completely enclosed, then it will most likely have built-in pipes for connecting the hood. They can be connected to a smoke extractor with large filters. It can operate continuously or turn on at the command of the printer. The fume extractor captures dirty air and returns it back to the printer so as not to change the air temperature during the printing process.
3-stage filtration
A complete smoke extractor is equipped with three filters. The first is the pre-filter. It does not let in coarse dust, so as not to clog the main fine filter with it. The fine filter is HEPA. Particles of all sizes, including aerosols and nanoparticles, settle on its fibers. The gas filter completes the cleaning. It consists of densely packed activated carbon granules with interlayers of fiberglass. Activated carbon traps VOCs and nanoparticles that HEPA missed. nine0003
Smoke extractor against exhaust
The cheapest way to remove smoke is a duct fan and air ducts. The emission of polluted air through the window is prohibited by SanPin standards. And the smoke extractor has advantages.
- Good air purification from all kinds of solid particles and aerosols
- There will be no odors from melted plastic or metal in the room
- You will be sure that your health will not suffer
- The microclimate in the 3D printing machine will be stable
- Supply ventilation with heating or air conditioning is not needed, as for the extract through the window
Eliminate the harmful factor
The hood with filters will solve the problems with harmful emissions from 3D printing with polymers and metal powder.