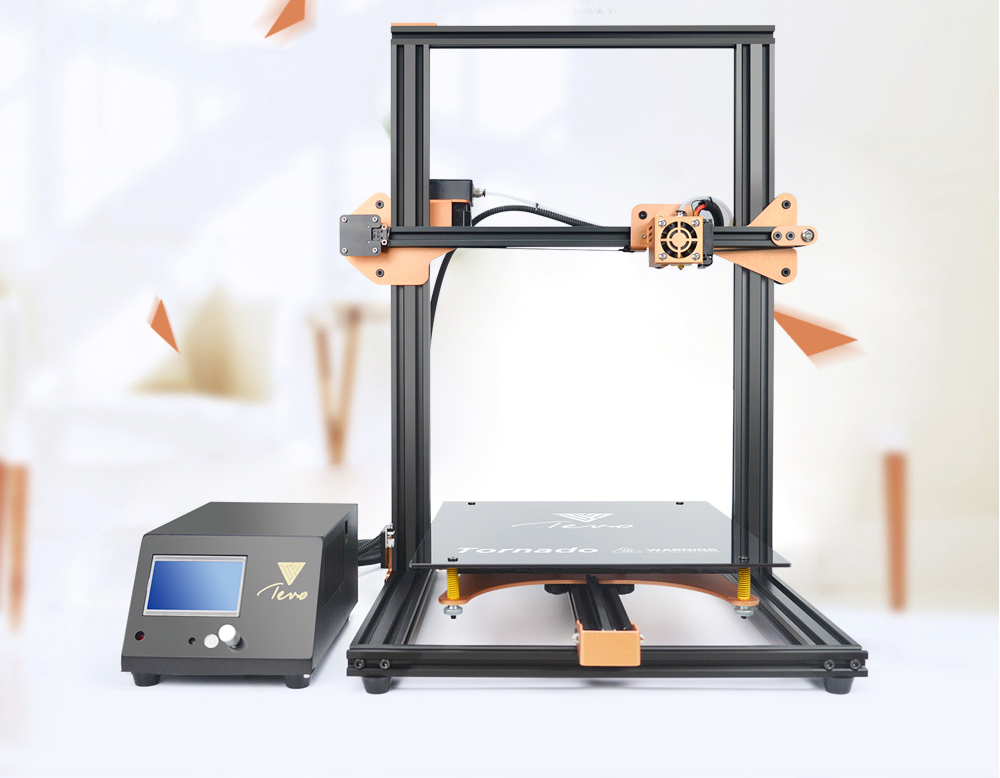
Tevo tornado 3d printer manual
TEVO TORNADO 3D PRINTER ASSEMBLY MANUAL
Table Of Contents
4-
page of 24
- Contents
- Table of Contents
- Bookmarks
Advertisement
Table of Contents
- Read Me First
- Table of Contents
Letter from TEVO
- Assembly
- Fine-Tuning
- Leveling the Build Plate
- Preparaing Slicing Software
How to Slice 3D Object for SD Print
- How to Flash Firmware
TEVO After-Sales
TEVO TORNADO
ASSEMBLY MANUAL
TEVO
-
1
-
TEVO 3D Electronic Technology Co. , Ltd.
Table of Contents
Previous Page
Next Page
Table of Contents
Related Manuals for Tevo TORNADO
- 3D Printers Tevo Tarantula Pro Assembly Manual
(24 pages)
- 3D Printers Tevo Michelangelo Assembly Manual
(24 pages)
- 3D Printers Tevo LITTLE MONSTER Manual
(22 pages)
- 3D Printers Tevo Black Widow Assembly Manual
(56 pages)
- 3D Printers Tevo LITTLE MONSTER Manual
(22 pages)
Summary of Contents for Tevo TORNADO
TEVO TORNADO ASSEMBLY MANUAL TEVO.
 TEVO 3D Electronic Technology Co., Ltd
Similar documents
FOLGER TECHNOLOGIES, LLC 2020 i3 3D Printer Kit
FOLGER TECHNOLOGIES, LLC 2020 i3 3D Printer Kit CONFIG GUIDE Rev. A http://www.folgertech.com 2020 Prusa i3 Config Guide Page: 1 / 15 You did it! You built your Folger Tech 2020 i3 Printer and now you
More information
Printrbot Getting Started Guide. For models: Simple
Printrbot Getting Started Guide For models: Simple Contents 4 4 4 5 5 5 6 6 6 6 7 8 Chapter 1: Welcome Overview Support Chapter 2: Your Printrbot has arrived... now what? Printrbot Kits Pre-Assembled Printrbots
More information
Printrbot Getting Started Guide. For models: Printrbot Plus (v2) Printrbot LC (v2) Printrbot jr
Printrbot Getting Started Guide For models: Printrbot Plus (v2) Printrbot LC (v2) Printrbot jr Contents 4 Chapter 1: Welcome 4 Overview 4 Support 5 Chapter 2: Your Printrbot has arrived.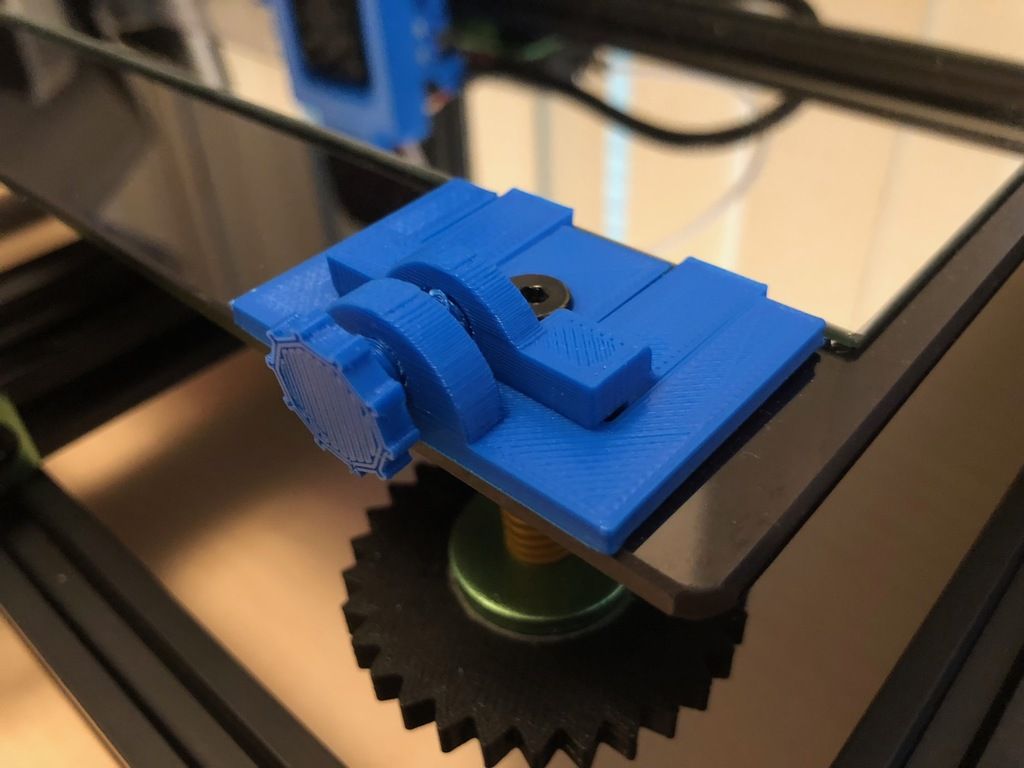 .. now what? 5
More information
Creator Start-up Guide
www.ff3dp.com Creator Start-up Guide Zhejiang Flashforge 3D Technology Co., Ltd. www.ff3dp.com Contents Precautions:... 1 1. What's in the box?...1 2. Unboxing... 2 3. Initial Hardware Installation...5
More information
WINDOWS 7/8 instruction guide for your Printrbot printer and computer software
Software To start printing with your Printrbot Simple 3d printer, you need to download 3 pieces of software and two digital models (STL files). 1. The teensy Serial Driver. This connects the printer to
More information
Hot-End Replacement Guide. BFB 3000 plus & 3D Touch
Hot-End Replacement Guide BFB 3000 plus & 3D Touch Pre assembly checks: Testing the hot-end before fitting: Check the heating cable: Set the multi-meter to read resistance (2000 ohms) Test the two outside
More information
3.
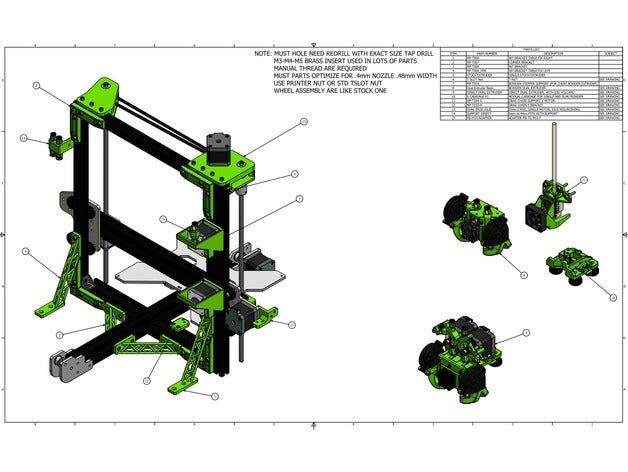 Loosen 3 x grub screws in the Dec end cap and unscrew the cap and counterweight shaft. NEQ6 Belt Modification Kit.
 NEQ6 Belt Modification Kit. Thank you for your purchase. Please read these instructions fully before fitting. Your package should contain 2 off 47 & 2 off 12 tooth aluminium pulleys 2 off belts 6mm wide
More information
ZAPPY 3 OWNER S MANUAL. Read this manual completely before riding your Electric ZAPPY 3.
ZAPPY 3 OWNER S MANUAL Read this manual completely before riding your Electric ZAPPY 3. TECHNICAL INFORMATION Model No. : ZAPPY 3 Product size Type of motor Motor power Battery type Battery Charger Charging
More information
OWNER S MANUAL Table Tennis Table Patent Pending
OWNER S MANUAL Table Tennis Table Patent Pending Be sure to write your model number and serial number here for future reference. You can find these numbers printed on the bottom of the table. MODEL # T8179
More information
Triple Threat 3-in-1 Game Table 3 IN 1 GAME TABLE
NG0M Triple Threat 3-in- Game Table 3 IN GAME TABLE Thank 3 in Y Game Table Thank you for your purchase of our product. We work around the clock and around the globe to ensure that our products maintain
More information
42U/45U 28" Wide Rack Installation & Service Guide
42U/45U 28" Wide Rack Installation & Service Guide 96-00171-005 Rev B Important Information Information in this document is subject to change without notice and does not represent a commitment on the part
More information
FTDI VCP DRIVER (free) (WIN/MAC/LINUX) http://www.ftdichip.com/drivers/vcp.htm
002 - CONNECTING THE PRINTER Now that you have an idea what 3D printing entails, we can continue and connect the printer to your computer. First make sure you have a computer with a decent amount of RAM
More information
User Manual. Instructions for installing the Sure Stitch on the Next Generation Quilting Frame. Parts Included:
User Manual Instructions for installing the Sure Stitch on the Next Generation Quilting Frame. Parts Included: 1: Display Console 1: Control Box 2: Encoder (Wires attached) (Not Shown) 1: 5v Power Supply
More information
Manual Premium Builder
Manual Premium Builder Version 1.0 We all become builders Specifications Printing Printer Print technology FDM / FFF Fused Deposition Method Weight: Small: 18 KG Medium: 22 KG Large: 24 KG Buildvolume
More information
Post Mount Light Installation*
Post Mount Light Installation* *For the general installation of most Post Mount Spotlights, many vehicles may need slight modifications to these instructions. You will need the following tools: High torque
More information
CETAC Z-Drive Assembly
CETAC Z-Drive Assembly Replacement Guide Manual Part Number 610144 Rev 1, 2012 CETAC Technologies, Printed in USA Overview This guide describes the necessary steps to replace the Z-drive assembly on your
More information
Service Guide. Gateway M275
Service Guide Gateway M275 Contents Replacing Gateway M275 Components.................................... 1 Identifying the convertible tablet PC model...................................... 2 Identifying
More information
SAFETY & OPERATING INSTRUCTIONS
SAFETY & OPERATING INSTRUCTIONS EDLUND TOMATO LASER, Models ETL -316, -140 & -380 READ AND UNDERSTAND THIS MANUAL AND ALL INSTRUCTIONS BEFORE OPERATING THIS SLICER. 159 Industrial Parkway, Burlington,
More information
Building A Computer: A Beginners Guide
Building A Computer: A Beginners Guide Mr. Marty Brandl The following was written to help an individual setup a Pentium 133 system using an ASUS P/I- P55T2P4 motherboard. The tutorial includes the installation
More information
Cable Drum Installation
20 Cable Drum Installation COUNTERBALANCE None Shake the TorqueMaster spring tube gently to extend the winding shafts out about 5" on each side. For single spring applications, there will be no left hand
More information
Zenbot CNC User s guide www.zenbotcnc.com
Zenbot CNC User s guide www.zenbotcnc.com Note: If at any point you are unsure what to do or would like assistance, don t hesitate to email service@zenbotcnc. com, or call 559-901-8329. Customer satisfaction
More information
FRONT BUMPER INSTALLATION INSTRUCTIONS 2007-2011 DODGE / MERCEDES SPRINTER
Aluminess Products Inc 9402 Wheatlands Ct. #A Santee, CA 92071 619-449-9930 FRONT BUMPER INSTALLATION INSTRUCTIONS 2007-2011 DODGE / MERCEDES SPRINTER Please read before beginning Stainless steel hardware
More information
Quick Start Guide See Inside for Use and Safety Information
3 rd Generation Personal 3D Printer Quick Start Guide See Inside for Use and Safety Information The USB Mass Storage Device Contains the User Guide and Quick Start Guide in other Languages Congratulations
More information
SPRITE and BIGFOOT DESKTOP CNC MACHINE KIT ASSEMBLY INSTRUCTIONS
SPRITE and BIGFOOT DESKTOP CNC MACHINE KIT ASSEMBLY INSTRUCTIONS README FIRST: Thank you for purchasing your MyDIYCNC Desktop CNC Machine Kit. We hope this versatile and innovative machine brings you many
More information
PRS X-axis E-chain installation: For tools with a 12 Z-Axis
PRS X-axis Energy Chain (Echain) Installation Page -1- PRS X-axis E-chain installation: For tools with a 12 Z-Axis This kit is compatible with PRS Shopbots that have an X-axis cutting area of 96 to 144.
More information
STEADYfast Stabilizer Installation Notes Fifth Wheel and Travel Trailers 11/23/13
STEADYfast Stabilizer Installation Notes Fifth Wheel and Travel Trailers 11/23/13 (See Supplemental Instructions for trailers with heavy duty round footplates and/or Power Leveling Systems) PHONE SUPPORT
More information
Cura for Type A Machines Quick Start Guide
Cura for Type A Machines Quick Start Guide 1 Table of Contents About Cura for Type A Machines Downloading Cura for Type A Machines Installing Cura for Type A Machines Mac Windows Linux About the Configuration
More information
WARNING CANADIAN D.
 O.C. WARNING
 Each product and program carries a respective written warranty, the only warranty on which the customer can rely. Avery Dennison Corp. reserves the right to make changes in the product, the programs, and
More information
INSTALLATION INSTRUCTIONS
INSTALLATION INSTRUCTIONS Accessory TRIM Application 2008 ACCORD 4-DOOR Publications No. AII 35362 Issue Date AUG 2007 PARTS LIST Steering Wheel Trim (Without Navigation) P/N 08Z13-TA0-100 Right steering
More information
TROUBLESHOOTING AND MAINTENANCE
TROUBLESHOOTING AND MAINTENANCE TABLE OF CONTENTS 1 TROUBLESHOOTING 04 Objects Do Not Stick to the Build Plate 05 Objects are Difficult to Remove from the Build Plate 05 Extrusion Stops 06 Replicator
More information
HP SATA/SAS hard drive and Solid State Drive installation
HP SATA/SAS hard drive and Solid State Drive installation This document describes how to install Serial ATA (SATA) and Serial Attached SCSI (SAS) hard drives or Solid State Drives (SSD) in an internal
More information
QSI Auto-Focus Mounting Bracket
QSI Auto-Focus Mounting Bracket The camera mounting bracket makes extensive use of sliding dovetails.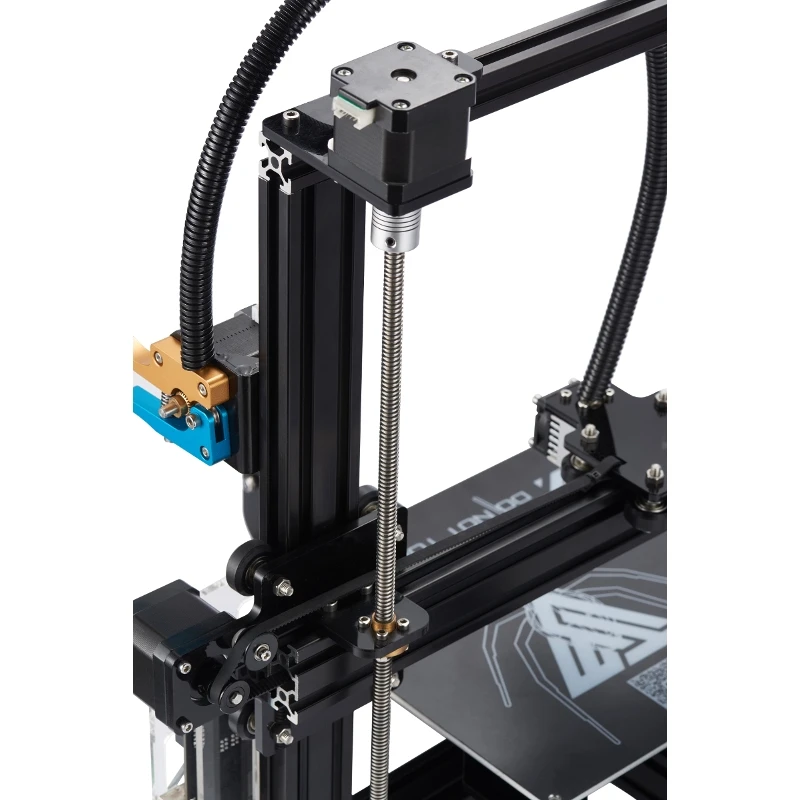 The dovetail joint gets immense strength from a trapezoidal pin trapped in a slot. The internal flats
More information
JANUS INTERNATIONAL CORPORATION INSTALLATION INSTRUCTIONS Pantheon Mini Operator
JANUS INTERNATIONAL CORPORATION INSTALLATION INSTRUCTIONS Pantheon Mini Operator The Janus Pantheon mini operator does not typically require the provision of any additional site requirements other than
More information
Accessing the printer system board
Accessing the printer system board 1 Turn the printer off. 2 Unplug the printer power cord. 3 Disconnect all cables from the back of the printer. 4 Locate the metal plate at the back of the printer. Loosen
More information
Installing RNS-E SAT NAV for Audi A4
As one of the major options on the A4 you can get a DVD Satellite Navigation System call the RNS-E.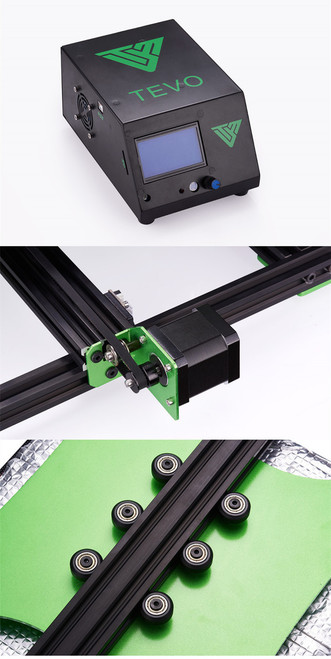 With the help of ebay these sat nav systems are now available to by at a rough cost of 650 plus the cost
More information
Express5800/120Ed. Rack Mount Kit Installation Procedures PN: 455-01607-001
Express5800/120Ed Rack Mount Kit Installation Procedures PN: 455-01607-001 Proprietary Notice and Liability Disclaimer The information disclosed in this document, including all designs and related materials,
More information
GENUINE PARTS INSTALLATION INSTRUCTIONS
GENUINE PARTS INSTALLATION INSTRUCTIONS 1. DESCRIPTION: Auto-Dimming Mirror Kit with Compass and HomeLink 2. APPLICATION: Titan 3. PART NUMBER: 999L1 WS000 4. KIT CONTENTS: Item Qty Description Service
More information
Compressor Supreme Force Feedback User Manual
1. Setting up Compressor Supreme 1. Connect the gear shifter to the back panel of the steering wheel column. 2. Connect the foot pedals to the back panel of the steering wheel column. 3. Connect the A.C.
More information
3D Printer Extruder. Application Note. Martez Steverson ECE 480. Design Team 8 3/28/14. Abstract
3D Printer Extruder Abstract Application Note By Martez Steverson ECE 480 Design Team 8 3/28/14 The purpose of this paper is to instruct the reader on how to construct an extruder for a 3D printer and
More information
Instruction: Replacing the analog Angle Dial with the DAD
THE DIGITAL ANGLE DIAL (DAD) KIT 1314.1 Instruction: Replacing the analog Angle Dial with the DAD Removing an old analog Angle Dial and replacing it with a Digital Angle dial the DAD --is not difficult.
More information
SERVICE GUIDE.
 Gateway Notebook
 SERVICE GUIDE Gateway Notebook Contents Replacing Gateway Notebook Components...................................1 Identifying the notebook model......................................... 2 Identifying
More information
MANUAL BUILDER. We all become builders. Version 3.02. Website link
MANUAL Version 3.02 We all become builders Website link PRINTING SPECIFICATIONS PRINTER Print technology FDM / FFF Fused Deposition Method Dimensions printer (LxWxH): Solo/Dual: 385x370x400 mm (15.16x14.57x15.75
More information
Original Assembly Guide
TCT Multipurpose Single Bevel Sliding Compound Mitre Saw Original Assembly Guide Read instructions before assembling this tool. Table of Contents GB Assembly Guide Read instructions before assembling this
More information
HOME GYM.
 Model. Retain This Manual for Reference OWNER'S MANUAL. www.hyper-extension.com
 NOTE: Please read all instructions carefully before using this product Table of Contents Safety Notice www.hyper-extension.com HOME GYM 50036 Hardware Identifier Assembly Instruction Parts List Warranty
More information
Documentation version 1.4 ASSEMBLY INSTRUCTIONS REV 1.1
Documentation version 1.4 ASSEMBLY INSTRUCTIONS REV 1.1 / 2 INTRODUCTION / 3 INTRODUCTION Target : Prupose a visual guide of the differents steps to build and use a µdelta printer Designers : Hugo Flye
More information
Pulleys and Belt. Install the Major Accessory and Pulley. Install the Motor Pulley NOTE. Align the Motor Pulley and the Tool Pulley NOTE
Pulleys and Belt Pulley Guard - 505862 Install the Major Accessory and Pulley 1. Place the short end of the mounting base holes, and insert - but don t tighten - the setscrews. If the Major Accessory has
More information
Original. The fast, easy to use, Open-source 3D printer. User manual. English Version 1.1
Original The fast, easy to use, Open-source 3D printer User manual English Version 1.1 Table of Contents A. Welcome to the Ultimaker Original A1. The Ultimaker experience A2. Specifications of the Ultimaker
More information
ADDING AN ELECTRIC AUXILIARY FAN TO RADIATOR STACK ON 03 ALPINE COACH
ADDING AN ELECTRIC AUXILIARY FAN TO RADIATOR STACK ON 03 ALPINE COACH The original design of the 03 Alpine Coaches (and perhaps other years as well) did not include any kind of engine fan engage mechanism
More information
Written By: Walter Galan
ipad 2 GSM Front Panel Replacement Replace the front panel in your ipad 2 GSM. Written By: Walter Galan INTRODUCTION Note: this is a complete guide for replacing a plain front panel. If you have a Front
More information
Oceanscience Cable Chimp II Cableway ROV System User Guide and Warranty
Oceanscience Cable Chimp II Cableway ROV System User Guide and Warranty Page 1 Table of Contents Introduction Page 3 Overview Page 3 Setup and Operation Page 5 Remote Control Page 6 Power Management Page
More information
Installation instruction do88 Intercooler for Volvo S40 / V50 / C30
Installation instruction do88 Intercooler for Volvo S40 / V50 / C30 This instruction shows how to replace the OEM intercooler with our performance intercooler. 2. 3. 1. 4. 5. Part number: ICM-170 6. At
More information
2100, 2200, 2300, 4100, 6200, MPB Series Side Mount Drive Package for Standard Load 90 Industrial Gearmotors
00, 00, 300, 400, 600, MPB Series Side Mount Drive Package for Standard Load 90 Industrial Gearmotors Installation, Maintenance & Parts Manual Featuring: Technology DORNER MFG.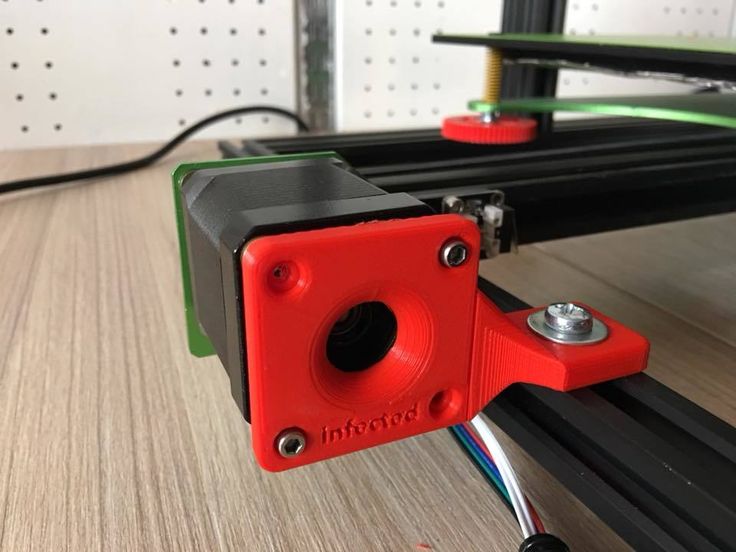 CORP. INSIDE THE USA OUTSIDE
More information
Written By: Walter Galan
ipad 2 GSM LCD Replacement Replace the LCD in your ipad 2 GSM. Written By: Walter Galan INTRODUCTION Use this guide to replace a broken LCD. TOOLS: iopener (1) Phillips #00 Screwdriver (1) Plastic Opening
More information
Series 30000 Hose Reels
Operating Instructions and Parts List for Series 30000 Hose Reels - MANUAL DRIVEN - - POWER DRIVEN - SAFETY PRECAUTIONS Personal injury and/or equipment damage may result if proper safety precautions are
More information
Written By: Walter Galan
ipad 2 GSM Rear Camera Replacement Replace the rear camera in your ipad 2 GSM. Written By: Walter Galan INTRODUCTION Use this guide to replace a broken rear camera.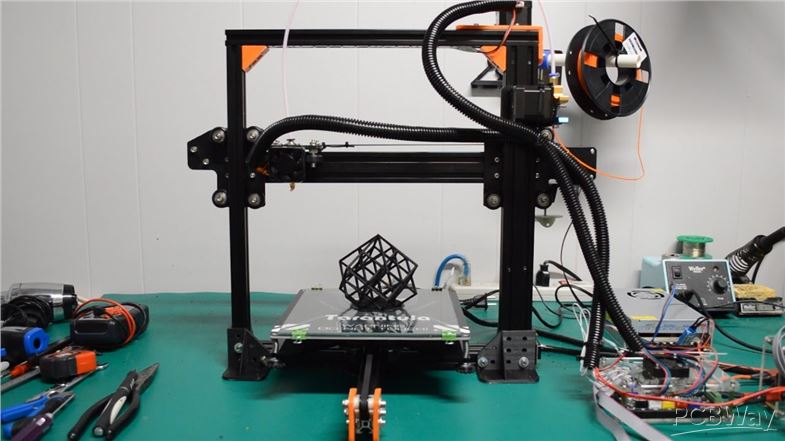 TOOLS: ifixit Opening Picks set of 6
More information
18974 (736) Singer No. 20-2. SINGER No. 20-2 ELECTRIC SEWING MACHINE INSTRUCTION MANUAL
SINGER No. 20-2 ELECTRIC SEWING MACHINE INSTRUCTION MANUAL Next Page Main Parts Accessories To start the Motor To Stop the Motor To Change the Speed Needles and Thread Relative Sizes of Needle and Thread
More information
User Guide LUXXOR VIDEO MICROSCOPE. 2 Luxxor Video Microscope Set Up
2 Luxxor Video Microscope Set Up User Guide LUXXOR VIDEO MICROSCOPE Column When removed from its packaging, the Luxxor Video Microscope will be configured as shown, with the Vertical Slide and Slide Stop
More information
assembly instructions
assembly instructions 1 // this guide is for Urban Chic gents & ladies. // this guide is for Urban Chic gents & ladies. 2 1 x ph screwdriver 2 x 10mm spanners 1 x 15mm spanners 1 x 13mm spanners 1 x 6mm
More information
WINBO 3D PRINTER USER MANUAL VERSION: WB20141117
WINBO 3D PRINTER USER MANUAL VERSION: WB20141117 Table of Contents A. MACHINE SPECIFICATIONS... 2 B. SOFTWARE INSTALLATION... 2 B.1 SOFTWARE INSTALLTION... 2 B.2 SOFTWARE CONFIGURATION... 3 C. SOFTWARE
More information
ASSEMBLY MANUAL MATERIA 101. Revision 04
ASSEMBLY MANUAL MATERIA 101 Revision 04 24 NOVEMBER 2014 00 INDEX 03 01 - Introduction 42 08 - Board wiring 05 06 07 07 07 08 02 - KIT Contents Parts list Box A Box B Box C Notes 46 49 09 - Calibration
More information
Epson Stylus Pro 7900/9900 QUICK REFERENCE GUIDE
Epson Stylus Pro 7900/9900 QUICK REFERENCE GUIDE Printer Parts Front Roll paper cover Roll paper holder Front cover Control panel Ink bay Ink bay Paper basket Casters Back Interface connector for optional
More information
TABLE OF CONTENTS.
 I. TROUBLESHOOTING... 2 - Section 1.01: Common Problems/Solutions... 2
 BAL Accu-Slide System I. Table of Contents TABLE OF CONTENTS I. TROUBLESHOOTING... 2 - Section 1.01: Common Problems/Solutions... 2 II. GETTING STARTED... 5 - Section 2.01: Tools You Will Need... 5 - Section
More information
ASSEMBLY MANUAL SE-4S35
Automatic drive ASSEBLY ANUAL SE-4S35 AI-4S35 SG-4R35 Battery box otor unit Inter-4 hub CONTENTS WARNING 1 INSTALLATION CONITIONS Battery box Speed sensor Cable lengths and diameters otor unit Recommended
More information
EXPLORE 4-Leg Teaming Table with Screen Share Assembly Instructions
EXPLORE 4-Leg Teaming Table with Screen Share Monitor Display Requirements: your flat panel display must confirm to the following requirements. y With the stand removed, the monitor must not exceed 40
More information
BODY-12, Door Handle - Removal, Installation, and Adjustment
Introduction BODY-12, Door Handle - Removal, Installation, and Adjustment There are many different procedures floating around describing how to replace the door handles on a 944 and every one of them will
More information
Safety and Compliance 05 About the MakerBot Replicator 07
USER MANUAL table of contents 1 WELCOME 04 Safety and Compliance 05 About the MakerBot Replicator 07 2 getting started 10 Accessory Checklist 11 Unpacking the MakerBot Replicator 12 Setting up the MakerBot
More information
Removing memory and option cards
These instructions can help you remove memory or option cards. Use the following illustration to locate the connector for the card you want to remove. Hard disk connector 1 Option card connector Firmware
More information
HP ProLiant DL165 G7 Server. Installation Instructions
HP ProLiant DL165 G7 Server Installation Instructions Identifying server components Front panel components Figure 1 Front Panel Components / 4 3.5 HDD Item 1 Thumbscrews for rack mounting 2 Drive status
More information
Replacing the Gateway M675 Keyboard
Replacing the Gateway M675 Keyboard This package includes a replacement keyboard for your Gateway M675 notebook and these printed instructions. Tools you need You need a small Phillips screwdriver and
More information
430 Power/Electronics Replacement
Replacing the main board WARNING Before proceeding, turn off the main power switch and unplug the power cord. Caution Make sure you are properly grounded with an ESD strap before continuing. The main printed
More information
MAINTENANCE & TROUBLESHOOTING
MAINTENANCE & TROUBLESHOOTING This section describes how to: clean the lens replace the projection lamp replace the batteries in the remote use the security lock feature troubleshoot the projector Cleaning
More information
KEYPAD LOCK RETROFIT KIT
KEYPAD LOCK RETROFIT KIT INSTRUCTIONS FOR ASSEMBLY IMPORTANT READ & SAVE THESE INSTRUCTIONS Tools Required for Assembly 5/32 hex (Allen) wrench #2 Phillips screwdriver Isopropyl alcohol or alcohol wipes
More information
HP 22-in-1 Media Card Reader
HP 22-in-1 Media Card Reader Introduction This document describes how to install the HP 22-in-1 Media Card Reader into an HP Workstations adapter bracket, and then install the media card reader and bracket
More information
READ CAREFULLY - FAILURE TO FOLLOW INSTRUCTIONS AND SAFETY RULES MAY RESULT IN SERIOUS INJURY
Owner s Manual LSP16H LS3001 LS3002H LS3003 LSP21H LS3101 LS3102H LS3103 LSP24H LS3201 LS3102H LS3103 LSP28H LS3301 LS3302H LS3303 mainframe bundle H-unit bundle accessory box mainframe bundle H-unit bundle
More information
Replacing the Gateway M320 Keyboard
Replacing the Gateway M320 Keyboard This package includes a replacement keyboard for your Gateway M320 notebook and these printed instructions. Tools you need You need a small Phillips and a small flat-blade
More information
SERVICE MANUAL. Corpus 3G. Seat system for electric wheelchair
SERVICE MANUAL US Corpus 3G Seat system for electric wheelchair How to contact Permobil Head Office of the Permobil group Produced and published by Permobil AB, Sweden Version 4, 2014-07 Item No.: 205260-US-0
More information
INSTALLATION INSTRUCTIONS FOR 2006-2009 VW MK5
CI100018 INSTALLATION INSTRUCTIONS FOR 2006-2009 VW MK5 Rabbit, Jetta 2.5L These instructions are applicable to vehicles equipped with either manual or automatic transmissions Thank you for choosing to
More information
INSTALLATION INSTRUCTIONS
INSTALLATION INSTRUCTIONS Accessory Application 2009 PILOT Publications No. AII 39408 Issue Date MAY 2008 PARTS LIST Steering Wheel Trim (With Cruise and Audio) P/N 08Z13-SZA-130B (Chocolate) P/N 08Z13-SZA-140B
More information
Build Your Own Solar Car Teach build learn renewable Energy! Page 1 of 1
Solar Car Teach build learn renewable Energy! Page 1 of 1 Background Not only is the sun a source of heat and light, it s a source of electricity too! Solar cells, also called photovoltaic cells, are used
More information
Trillium 40 Axis Spring Tensioner Wire Replacement Instructions
Trillium 40 Axis Spring Tensioner Wire Replacement Instructions 1 Overview The objective is to replace the broken axis spring tensioner wire. This requires the following tasks: 1. Remove the seismometer
More information
GT3B Hack Kit Install Instructions Written By Austin Hutchison
GT3B Hack Kit Install Instructions Written By Austin Hutchison Step 1: Remove 4 screws located on top of the radio. 1 Step 2: There are small plastic latches that also hold the top in place. The easiest
More information
WARNING! DO NOT ATTEMPT TO INSTALL THIS KIT IN A POWERED CONVEYOR.
Model: Document Number: 64058111 Kit Number: 64058112 Revision: 02 Description: Release Date: 04/08 Introduction This kit allows a PS90 scale to be integrated into a standard gravity conveyor. The kit
More information
INSTALLATION INSTRUCTIONS for Bifold Doors (JII103)
Thank you for selecting JELD-WEN products. Attached are JELD-WEN s recommended installation instructions for premium composite, hollow and solid core molded Bifold Doors. Bifolds are designed for fast
More information
Rack installation instructions
Rack installation instructions Review the documentation that comes with the rack cabinet for safety and cabling information. Before you install the server in a rack cabinet, review the following guidelines:
More information
Digital Photo Picture Frame. Operation Manual
Digital Photo Picture Frame Operation Manual 20070309 CONGRATULATIONS on your purchase of a Polaroid 7 LCD Digital Photo Picture Frame. Please read carefully and follow all warnings and instructions in
More information
Assembly instructions
The fast, easy to use, Open-source 3D printer Assembly instructions English version 2.0 Ultimaker Original+ Assembly manual Dear customer, Thank you for purchasing the Ultimaker Original+ DIY kit and welcome
More information
Manual Leapfrog Creatr
1 Leapfrog BV Dear customer, Congratulations with the purchase of your very own Leapfrog Creatr Single or Dual Extruder! We would like to help you get started so you can make your first 3D print on the
More information
HP Pavilion All-in-One MS200 series PC.
 Upgrading and Servicing Guide. Printed in
 HP Pavilion All-in-One MS200 series PC *579907-001* *579907-001* Printed in Upgrading and Servicing Guide Replacing a Wireless Keyboard or Mouse...2 Before You Begin... 2 Replacing the Keyboard or Mouse...
More information
Front Panel Board Cable Replacement Instructions
apple Mac Pro Front Panel Board Cable Replacement Instructions First Steps 1 Shut down computer. Note: Follow these instructions carefully. Failure to do so could damage your equipment and void its warranty.
More information
Handheld USB Digital Endoscope/Microscope
Handheld USB Digital Endoscope/Microscope ehev1-usbplus User s Manual INTRODUCTION FUNCTIONS AND APPLICATIONS The USB Digital Endoscope/Microscope is a new electronic product for the micro observations.
More information
GEK-90214B. GE Lift Truck. User s Guide 144D2933G1 144D2912G1 144D2911G5
g GEK-90214B GE Lift Truck User s Guide 144D2933G1 144D2912G1 144D2911G5 GE LIFT TRUCK EACH USER HAS THE RESPONSIBILITY TO INSTRUCT ALL PERSONNEL ASSOCIATED WITH THIS EQUIPMENT ON ALL SAFETY PRECAUTIONS
More information
Installation Instructions
READ BEFORE INSTALLING UNIT For Slider Casement Air Conditioners To avoid risk of personal injury, property damage, or product damage due to the weight of this device and sharp edges that may be exposed:
More information
PRS Y-axis EChain Installation
PRS Y-axis Energy Chain Installation Page -1- PRS Y-axis EChain Installation This document shows how to install the Energy chain (Echain) on the Y-axis on ShopBot PRS and PRS BT models. Note that the dust
More information
Installation Instructions Avalanche XUV Cap IMPORTANT! IMPORTANT!
Installation Instructions Avalanche XUV Cap IMPORTANT! Read all instructions carefully before commencing any work. Always wear safety equipment. Some installation steps will require two or more installers.
More information
Hardware Guide for the Classic and Elite CR Systems. 2011-08-04 PN 9G9637 Version 1.0
Hardware Guide for the Classic and Elite CR Systems 2011-08-04 PN 9G9637 Version 1.0 Use of the Content Carestream Health CR Systems are designed to meet international safety and performance standards.
More information
4-in-1 SWIVEL TABLE. 54in (1.37m) CONTACT INFO Hours. Technical Support Monday to Friday (9:00am to 5pm EST) WARNING:
54in (1. 37m) 4-in-1 SWIVEL TABLE CAUTINotOrecommended N: ELECTRI CALLY OPERATED PRODUCT for children under 8 years of age. As with all electric products, precautions should be observed during handling
More information
Anthro Tablet Charging Cabinets
Owner's Manual for Anthro Tablet Charging Cabinets Covers part numbers beginning TAB16 and TAB20. Components at a Glance The open views of the front and side of the cabinet below are for the TAB20 cabinet.
More information
MODEL T10023 ACCESSORY KIT #1 FOR T10010/T10097 WET GRINDER
MODEL T0023 ACCESSORY KIT # FOR T000/T0097 WET GRINDER INSTRUCTION SHEET Introduction The Model T0023 Accessory Kit # for the Model T000/T0097 Wet Grinder includes fixtures for sharpening small knives,
More information
Retrofit Instructions Installing a Sport Heated Steering Wheel - Leather, Multifunction BMW X5, E53, 2001 2006
Retrofit Instructions Installing a Sport Heated Steering Wheel - Leather, Multifunction BMW X5, E53, 2001 2006 Disclaimer: This set of instructions is simply a guide on how I installed my own heated steering
More information
EPSON Stylus.
 Start Here
 EPSON Stylus C84 EPSON Stylus Start Here C84 CPD-16675R1 4043482-00 XXX 1 Unpack 1 Remove everything from the box. Paper support Printer Manual Power cord Ink cartridges CD-ROM 2 Remove all the blue tape
More information
90,000 installation of the Tevo Taratula3D printer installation manual for installing the Tevo Taratula
Read the first
Read this manual before assembling and turning on the printer!
Hazards and warnings
The TEVO Tarantula 3D printer has motorized and heated parts. Always be aware of possible hazards when using the printer.
Electrical Hazard
Never open the printer electronics compartment while the printer is on. Always turn off the printer and unplug the AC power cord before removing the access door.
Burn Hazard
Never touch the extruder nozzle, heating block, or heated bed without first turning off the hot end (or heated bed) and allowing it to cool completely. It can take up to twenty minutes for a hot end (or heated bed) to cool down completely. Also, never touch newly extruded fibers. The thread may stick to the skin and cause burns. nine0007
Fire Hazard
Never place flammable materials or liquids on or near the printer while it is turned on or in operation. Liquid acetone and its vapors are highly flammable.
Pinch Hazard
When the printer is in operation, be careful not to touch any moving parts, including belts, pulleys, gears, wheels, or lead screws, with your fingers.
Static charge
Be sure to ground yourself before touching the printer, especially electronics. Electrostatic discharges can damage electronic components. To ground yourself, touch a grounded source. nine0007
Age Warning
Adult supervision is recommended for users under 18 years of age. Beware of choking around children.
Letter from TEVO
Dear Customer,
Thank you for purchasing a TEVO Tarantula 3D printer.
This manual will guide you through the assembly and first start of the printer. If you are having trouble building, please visit our Facebook group:
https://www.facebook.com/groups/TEVO.3dprinter.owners/
If you can't solve your problem there, feel free to contact us via the
website http://support.tevoprinter.com/
Make sure the frame is completely square and tight at all corners using a geometric triangle or other more sophisticated square tools (not included with the printer).
Regards,
TEVO team
assembly
- Remove the parts from the box and remove all tape and gasket from them. Inspect the parts to make sure they were not damaged in transit. nine0072
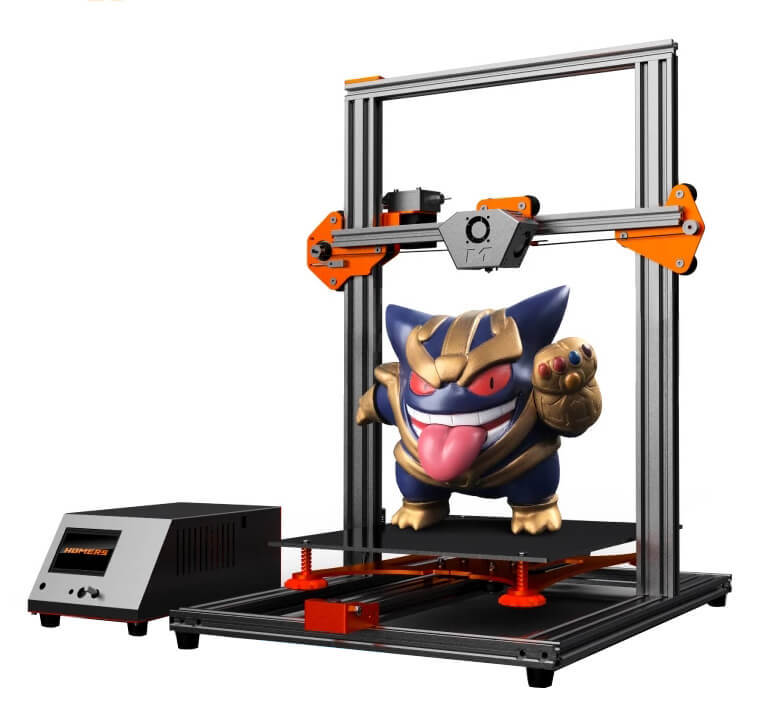
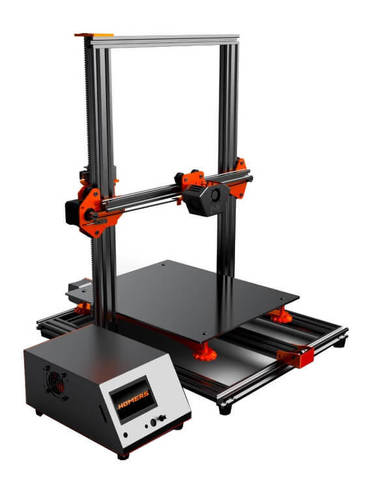
- Install the portal frame (A) on the support frame (B).
• Make sure the nozzle assembly on the portal frame is forward. On the base frame, make sure the stepper is at the back.
• Use M5x25 screws (4 pcs) and lock washers (4 pcs). Raise the base frame above the table. Insert the screws through the base frame into the threaded holes in the portal frame (as shown in the figure below). Tighten with an M5 hex wrench (hexagon).
3. Install the two T-shaped frame reinforcement plates. The plate with the limit switch comes from the side of the stepper motor Z.
• Loosen the T-nuts by hand and turn them until they fit into the grooves on the frames. Keep the nuts loose so that when you tighten the bolts, the nuts turn 90 degrees and grip the inside of the groove.
• Tighten all eight bolts with an M5 hex wrench (hexagon wrench).
4. Connect all electrical cables.
• Place the control box on the side of the printer with the lead screw side facing forward.
• Connect the heater cables to the control box. nine0059 Assembly support cable has four pins. The nozzle heater cable has eight pins. Rotate the connector until the pins slide into the socket easily. DO NOT JOIN them.
Once the pins are fully inserted, hand tighten the knot. url the nuts so they don't come off.
• Connect the stepper motor and limit switch cables.
Y-cables go to the stepper motor and limit switch on the back of the base frame.
Z cables go to the stepper motor and limit switch on the lead screw side of the base frame. Cables X and E (extruder) go to the portal frame. The X cables go to the stepper motor and limit switch that drives the ribbon, and the E cables go to the stepper motor that drives the extruder. nine0059 • Plug the power cord into the back of the control box and into a standard 220/110 V electrical outlet.
• Turn on the power using the switch on the back of the control box.
5. Make sure the PTFE tubing is fully inserted into the hot end, it may come loose during shipping. Push it into the hot end until it stops. Gaps between the PTFE tube and the nozzle will cause clogging.
Fine tuning
1. Adjust the worktable Y-axis tension on the base frame. nine0059 • Check the tension of the work table wheels. Try to turn the wheels under the work table without putting any effort on it. If the wheel turns freely or without much effort, then it is too loose.
• To tighten the wheels, turn the eccentric nut that connects to the wheel. Use an open end wrench to slightly turn the nuts until the wheels are snug against the Y-axis frame.
• The build plate assembly and belt should move back and forth without much effort, and there should be no side to side wiggle or play. . nine0007
2. Adjust the tension on the gantry wheels on the right gantry frame leg.
• Check portal platform wheel tension. Try to turn the wheels behind the plate without putting any effort on it. If the wheel turns freely or without much effort, it is too loose.
• To tighten the wheels, turn the eccentric nut that connects to the wheel. Using an open end wrench, turn the nut slightly until the wheel is snug against the Z axis.
3. Adjust the tension of the carriage wheels X in the X axis on the gantry frame.
• Check the X-carriage wheel tension. Try to turn the wheels under the work table without putting any effort on it. If the wheel turns freely or without much effort, then it is too loose.
• To tighten the wheels, turn the eccentric nut that connects to the wheel. Use an open end wrench to slightly turn the nuts until the wheels are snug against the X-axle frame.
• The hot end assembly and belt should move left and right without much effort, and there should be no wobble or play in front and back.
4. Check the tension on the belt that drives the Y-axis (under the work table). The belt must be tight, without sagging or warping.
• If the belt is loose:
• Loosen the four bolts at the front of the base frame holding the belt pulley.
• Pull the pulley to tension the belt. While holding the belt taut, tighten the four bolts. nine0007
5. Check the tension on the belt that drives the X-carriage. The belt must be tight, without sagging or warping.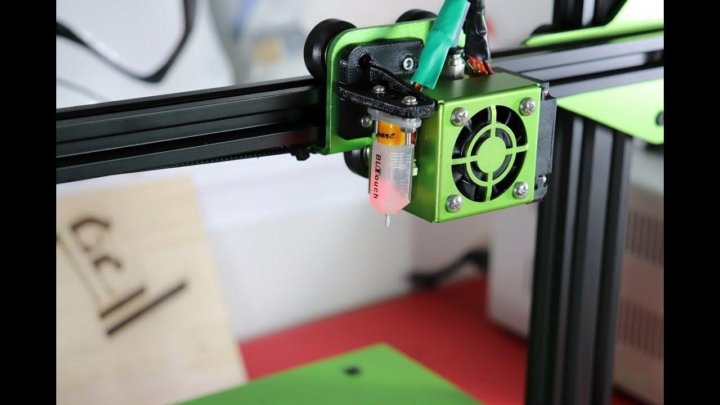
- If the belt is loose:
- Loosen the two bolts on the right side of the gantry holding the belt pulley.
- Pull the pulley to tension the belt. While holding the belt taut, tighten the two bolts.
6. Adjust the tension of the Titan extruder with the screw shown in the figure below if the filament does not come out smoothly during printing. nine0007
Aligning the build plate
To build good parts, the build plate must be level and the nozzle should be approximately 0.1 mm from the build plate at all points. This is approximately the thickness of one sheet of A4 paper. You want to adjust the height of the build plate so that you can barely push the paper between the nozzle and the build plate with little resistance.
- Select Prepare -> Preheat PLA . This will heat up the bed and nozzle to actual printing conditions, making the alignment more accurate.
- Select Prepare -> Car Home .
 This will move the nozzle to its home position at the front left corner of the build plate.
 - Select Prepare -> Disable Steppers . This will allow you to manually move the X-caret and desktop.
- Tips: The Z-axis stepper motor is also disabled and you don't want it to move at all. Therefore, handle the printer carefully during alignment. Keep it level and carefully move the X-carriage. nine0072
- Wait until the temperature of the print platform and nozzle reaches the set temperature. On the information screen, this information is displayed below the head and bed icons.
- Insert a sheet of paper between the nozzle and the worktable.
- Screw each of the four thumbscrews under the bed until the sheet of paper slides, with little effort, in all places on the build plate.
- You may need to fine tune the bed level when you start printing. The first print layer will show if the distance between the nozzle and the build plate is correct.
 You want it to be slightly pressed into the surface of the build to maximize surface area contact while still maintaining good extrusion flow. nine0059 • You can try to carefully adjust the thumb screws during the first layer of printing when the plate is moving until the distance between the nozzle and the build plate forms smooth embossed lines.
• After fine-tuning the platform level during the first layer, you can stop printing, clean the build plate, and restart printing.
Preparing the slicing software
This printer works with most of the slicing/printing programs like Simplify3D, Cura, Repetier-Host, etc. But we will focus on the Repetier-Host software and tell you how to set it up so you can make your first print. To get started, we recommend downloading the program from the official website. website: https://www.repetier.com
Once the installation is complete and the software is running, you should see the following screen:
Now we need to set up our printer in the settings so that the Repetier-Host can connect to it and know what build area size our printer is using. Open the printer settings window (click "Configuration" -> "Printer Settings").
First set port to whatever port your motherboard uses (when you connected your printer to the PC, it should appear here). Installed Baud rate to 250000 and DO NOT touch the other settings on this tab (see illustration on next page).
Click on the Printer Form tab and change the following values:
X Max - 320
Y Max - 320
Print Area Width - 300
Print Area Depth - 300
Print Area Height - 400
Go to Printer tab, change the value according to the image on the left.
Go to Slicer tab, select slic3r as slicer and click config.
In the Slic3r window, go to File -> Load Configuration. (The downloaded settings are for general printing using PLA filament.)
Select and load Tornado.ini from SD card.
Rename print settings, filament, printer to Tornado and save.
How to cut a 3D object for SD printing
Click Download, navigate to the location of file, then select Open.
Once file is open in 3D view, click the Slicer tab to go to the slicer page.
Select the correct print settings, printer settings, and extruder type, then click Slice with Slic3r.
After slicing, click "Save for SD Print" to save the G-code. file to the SD card with file a name of your choice. You can then insert the card into the printer and select Print from SD to start printing. nine0007
How to flash the firmware
To install the firmware on your printer, you need to download the following:
- Arduino IDE (http://www.arduino.cc) e.g. on our Facebook page). File in our customer service section or directly from Marlin and Repetier.)
In this chapter, we are going to use Marlin for the demonstration. nine0007
Configuration
The firmwares downloaded from our Facebook page or our customer service are preconfigured and you can use them without any modifications.
For configuration you need to edit two files: configuration.h and configuration_adv.h . You can visit their website for an explanation of the configuration file format and a summary of most of the options in these files.
Verify / Compile
Follow these steps to start the process:
- Double click Marlin.ino file to open it in Arduino IDE.
- Select Arduino / Genuino Mega or Mega 2560 from Tools -> Boards menu.
- Select the serial (USB) port your card is connected to. Tools -> Serial menu .
- Click the Verify / Compile button at the top of the window to ensure there are no configuration errors. (Or you can click on Download next to the Check/Compile button if you use Marlin on our Facebook page or our support team).
- Once all errors are fixed, continue downloading by clicking Download button.
 During this process, the blue or green LED on the board will flash rapidly.
Flash your board
To flash your board, follow these steps:
- Make sure Marlin.ino is open in the Arduino IDE. nine0072
- Select Arduino / Genuino Mega or Mega 2560 from Tools -> Boards menu.
- Select the serial (USB) port your card is connected to. Tools -> Serial port menu.
- Click the Download button to start flashing the controller board. During this process, the blue or green LED on the board will flash rapidly.
That's it! Now you have installed the firmware on your board, enjoy printing! nine0007
TEVO After Sales Service
Dear Customer,
Thank you for purchasing a TEVO 3D printer. We strive to produce low cost, high quality 3D printers and hope you enjoy them as much as we do!
If you have any problems / questions regarding the contents of the kit, please fill out a Service Ticket on our support page. http://support.tevoprinter.com
Creating a service ticket will be your official TEVO support request. Our support team will contact you within 48 hours .
SERVICE INFORMATION:
1. SPARE PARTS
1.1. TEVO products are covered by a parts replacement program for a period of 12 months from the date of purchase.
1.2. Missing / damaged / defective parts
1.2.1. Within 7 days from the date of delivery, TEVO will replace any parts, including shipping costs, free of charge.
1.2.2. After 7 days from the delivery date, TEVO will replace any parts free of charge, BUT the customer is responsible for shipping charges. nine0059 1.3. Parts damaged by the customer
1.3.1. The customer pays for parts cost and shipping cost.
2. LOSS OF MEDIA, DAMAGE, DAMAGE AND FAULTY PARTS
2.1. Claims for lost or damaged shipments must be reported to the carrier within the carrier's claim period and the customer must report to TEVO within 7 days of the delivery date.
2.1.1. If any parts are lost or damaged during shipping, the customer must take photographs or videos and provide them when completing the service request. If the claim number was issued by the carrier, please provide the claim number when creating the service ticket. nine0003 (Report a problem / Lost carrier parts.)
2.1.2. After resolving the dispute with the carrier, provide TEVO with all communications from the carrier. The customer is responsible for keeping TEVO up to date on ALL communications with the carrier.
2.1.3. TEVO will work with the customer to replace the parts in the claim.
2.2. For missing parts see Section 1.2, the customer must fill out a service card ( Report a Problem / Missing Parts .)
2.3. See section 1.2 for damaged parts of the equipment. The customer must take photographs or videos and provide them when filling out the service request ( Report a problem / damaged parts of the equipment .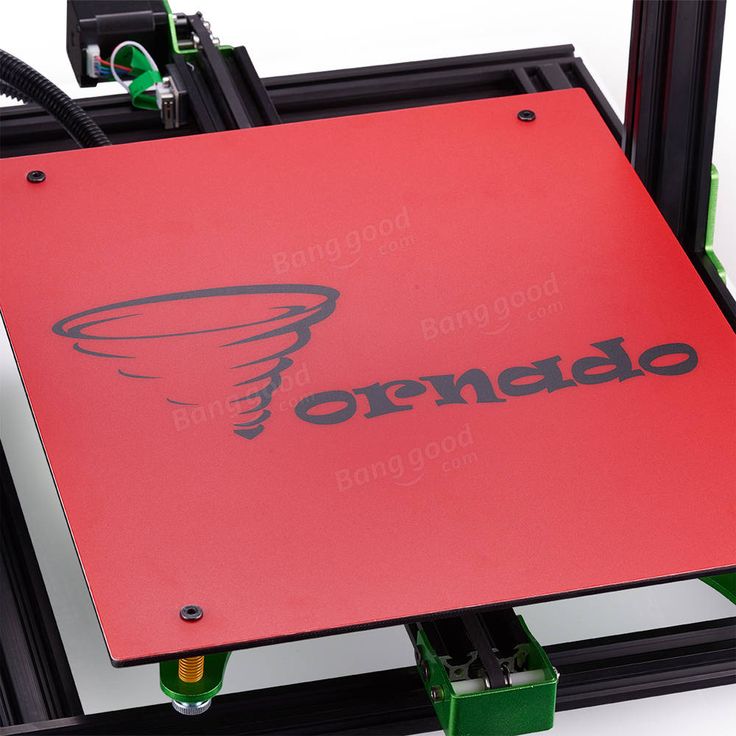 )
)
2.4. For faulty electronic components, see section 1.2. The customer must take photographs or videos and provide them when filling out the service request ( Report a problem / defective electronic components .)
2.4.1. If the part is an LCD panel, power supply or motherboard, the customer must send the part back to TEVO and TEVO will send a new part.
2.5. For customer damaged parts, see Section 1.3, send a service ticket ( Report a problem / Customer damaged parts .)
3. GENERAL SUPPORT
For information and support on building and operating your 3D printer TEVO Tornado visit the TEVO Tornado Owners Group. https://www.facebook.com/groups/TEVO.Tornado.Owners/
Documents / Resources
Recommendations
- - Software Repetier
- Owners of TEVO Tarantula PRO and Regular Prusa i3
- Arduino - Main
- support.tevoprinter.com/
- Owner group TEVO Tornado
- support.
 tevoprinter.com
Karopchan community - Karopka.ru - bench models, military miniature
| December 26, 2022, 9:09 am Afghanistan For some, Afghanistan is part of history. For some of us, it's part of life. The hardest and most honest. There are not only memories, but photographs. Participants: 110 Topic: Free topic | |
| November 25, 2022, 12:11 pm Submarine fleet Submarine and surface fleet of the countries of the world, its modeling and everything connected with it. Maybe a little off topic... Members: 132 Subject: Modeling | |
| November 23, 2022, 4:53 am IMMORTAL CORPS Everyone who wants to express their attitude to the History of RUSSIA, the HISTORY of the GREAT Patriotic War, to tell their personal history, to remember their relatives, friends, neighbors who defended the freedom and independence of our Motherland - the Union of Soviet Socialist Republics at the front and in the rear - the Union of Soviet Socialist Republics during the period of the Great Patriotic War of 1941-1945, you are invited to SIGN UP for the IMMORTAL CORPS and share it with your comrades in arms on KAROPP.  RU RU Participants: 6 Topic: Free topic | |
| May 2, 2022, 20:31 Armored vehicles 1/100 A group for those who make models from the hundredth, not game pieces. Members: 8 Topic: Modeling | |
| March 16, 2022, 23:49 Wehrmacht Wehrmacht (German Wehrmacht, from Wehr - "weapon", "defense, resistance" and Macht - "strength, power; power, influence", "army") - the name of the armed forces of Nazi Germany in 1935-1945 Members: 173 Topic: Simulation | |
| February 25, 2022, 10:44 pm We are from Novorossiya. Any Mutual Help! Establishment of various contacts. Organization of possible events. Not a denial of the past, but a sober perception of the present. Members: 22 Topic: Free topic | |
| October 24, 2021, 2:13 am Pankostroya sect Steam/diesel/cyberpunk style models.  |


