3D printed shoretrooper helmet
▷ shore trooper armor 3d models 【 STLFinder 】
Shore Trooper armor - Chest buckle and belt
thingiverse
From Sean Fields' files, a completely remodeled buckle to looks a little more similar to some foto references I've found.
shore trooper helmet
grabcad
helmet used by shore troopers iconic for their appearance in rogue one a star wars story also it is wearable if scaled correctly
Shore trooper Snout Add on
thingiverse
This piece is for V1 shore trooper helmets designed by Sean Fields. ...
Shore Trooper Armour Suit 6 Foot
thingiverse
Thanks again to DrMckay for providing this awesome rendition of Rogue Ones Shore Trooper. I have stripped the components back and split them up to the best of my ability and it could do with some serious smoothing. Something I have yet to learn. ...So...
Shore Trooper Armour Suit 6 Foot
prusaprinters
Thanks again to DrMckay for providing this awesome rendition of Rogue Ones Shore Trooper. I have stripped the components back and split them up to the best of my ability and it could do with some serious smoothing. Something I have yet to learn.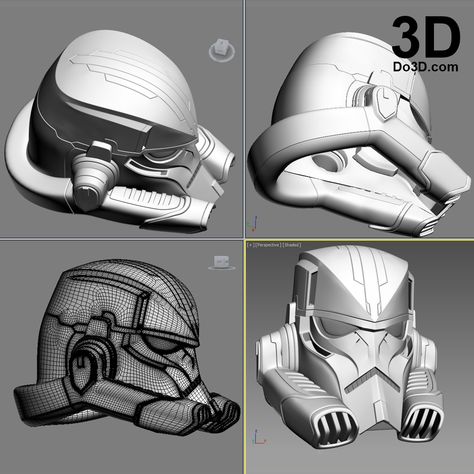 ...So...
scout trooper armor
thingiverse
scout trooper armor from star wars return of the jedi
Range Trooper Chest Armor
thingiverse
... ...I've split it up so that even an Ender 3 could have a build plate big enough to make this armor. If you haven't seen, the rest of the armor available free here in my other post, minus most of the boot, which is in the FB rang trooper groups,
Patrol Trooper Dog Armor
thingiverse
Patrol Trooper Dog Armor I made for my still amazing dog. Parts can just be scaled up for use with any size dog. You will have to attach some elastic straps to a normal dog harness to get it to stay in place though. This follows the same basic back...
Purge Trooper armor
cults3d
Purge Trooper armor with helmet This model is a wearable full size armor of Purge Trooper from the Star Wars series. The armor is designed for people high 170 cm, so it is better to scale it for your body height and type. Files contain pieces of the...
Storm trooper Armor remix
thingiverse
There are a few pieces I was not happy with on some of the other armor sets, so I cam up with my own. ...Will add the others as I can
Wearable Clone Trooper Armor
thingiverse
This is a remix of MasterDarkOnyx's Clone trooper, scaled up to ~6' 2" and converted to wearable pieces. I did this to use some of the pieces for a Clone Wars Obi Wan costume, but I thought I would do the whole thing. I didn't chop the files...
Range Trooper Armor
thingiverse
Rangetrooper inspired armor pieces. Test printed all using Overture PLA+ 20 Percent infill on the larger pieces and 30 percent on the Smaller knee connections. The boot bottom is an edit of Sean fields files, along with the knee modifications, full.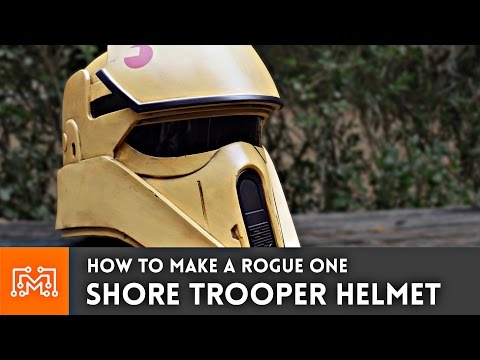 ..
..
Back plate, clone trooper armor.
thingiverse
Back plate, clone trooper armor.
Jet Trooper full size armor
cults3d
Jet Trooper full size armor Full body armor of First Order jet troopers from Star Wars series. All parts are separated to the smaller pieces that are ready to be 3D printed on a 200mm bed size 3D printer and also complete obj files, that are not...
Shore trooper Blaster E-22
pinshape
Model dimensions: - length – 815 mm - height – 195. 5 mm - width – 159.5 mm Model consists of parts: barrel boss 1, barrel boss 2, barrel front hub, barrel middle hub, barrel middle stripe, barrel part 1, barrel part 2,...
Shore Trooper CJ9 Bo-Rifle
thingiverse
Got as far with this model as my abilities go. Hopefully someone out there can improve on this model and upload it as a remix. I've included the original .OBJ if you want to have a go at stripping it back yourself all credit to DrMcKay for generating...
Armor Rock on Lake Shore
sketchfab
Rocks on beach north of Mckinely Marina, Milwaukee, WI
Clone Trooper Armor Kit 1/6
cults3d
Armor kit for 1/6 scale clone trooper.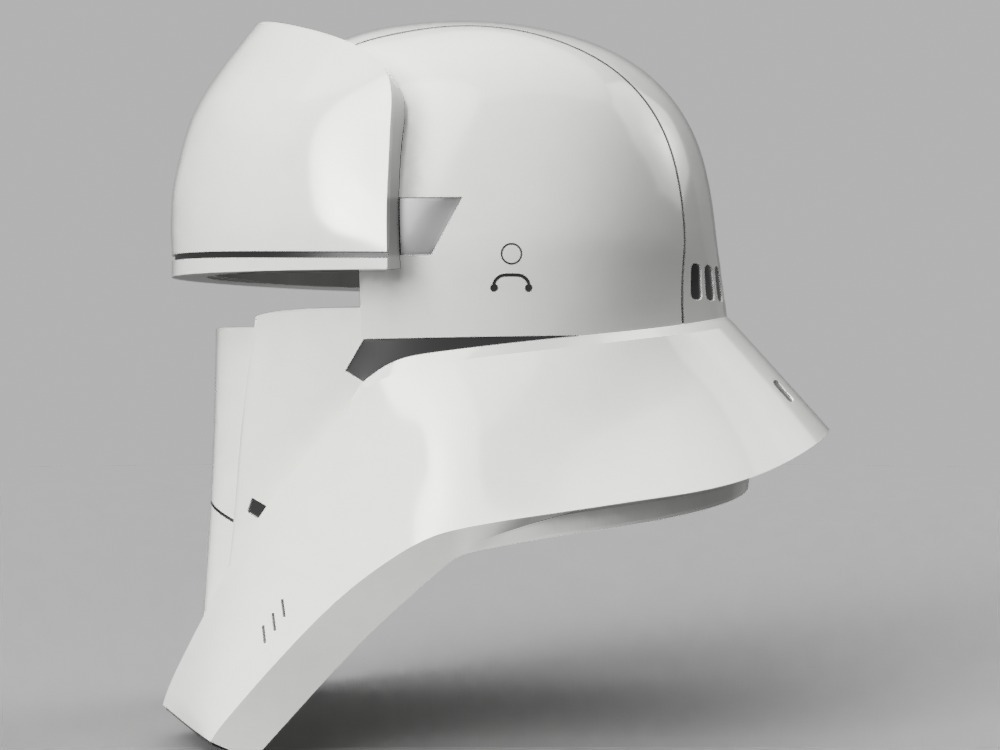 assemble your own clone trooper and make your own figures! *Includes armor kit *includes two phase 1 and 2 helmets *includes two versions of weapons *The last photo is only a visual reference of my kit, some...
Star Wars Imperial Scout Trooper Wearable Armor
cults3d
Star Wars Imperial Scout Trooper Wearable Armor made for cosplay. Comes in separated parts. Can be printed on CR-10 (300X300X400mm). For Cutting ask additioal service. ...All rights reserved by Lucasfilm and their respective owners and I have nothing in...
Mud Trooper Armor 3D print model
cgtrader
This is a complete set of models for the Mud Trooper armor from the Star Wars movie Solo. We designed them to fit a larger guy. XL-XXL will fit and enlarged version for XXL. There are many parts to print. if you have any questions on orientation...
Star Wars Clone Trooper Phase 2 Armor
thingiverse
My modifications: Tucked in some of the armor closer to the body that was creating overhangs. Tucking them in reduced the amount of supports drastically. Changed out the complex gun for a for a simple DC-15. The DC-15 is positioned in a way that...
Realistic ARC Trooper Armor Parts & Accessories
thingiverse
As these are all armor files, they are theoretically 'accurate', but I cannot guarantee they will be on an international basis. the files marked as mSLA were designed for and printed with mSLA, but they might be workable with FDM. Utilize at your own...
Galactic Marine Clone Trooper Armor 3D model
cgtrader
These files include all the hard surface parts necessary including: Helmet, Chest, Back, Backpack, Pauldron, Shoulders, Biceps, Elbow Pads, Forearms, Hand Pads, Knee Pads, Calves, Boot Cover, Belt Details Some details about the armor: The Backpack...
Shore Trooper Helmet V2 (Sean Fields) Split to fit 200x200 build plate
thingiverse
This is the V2 version of SeanKFields Shore Trooper helmet.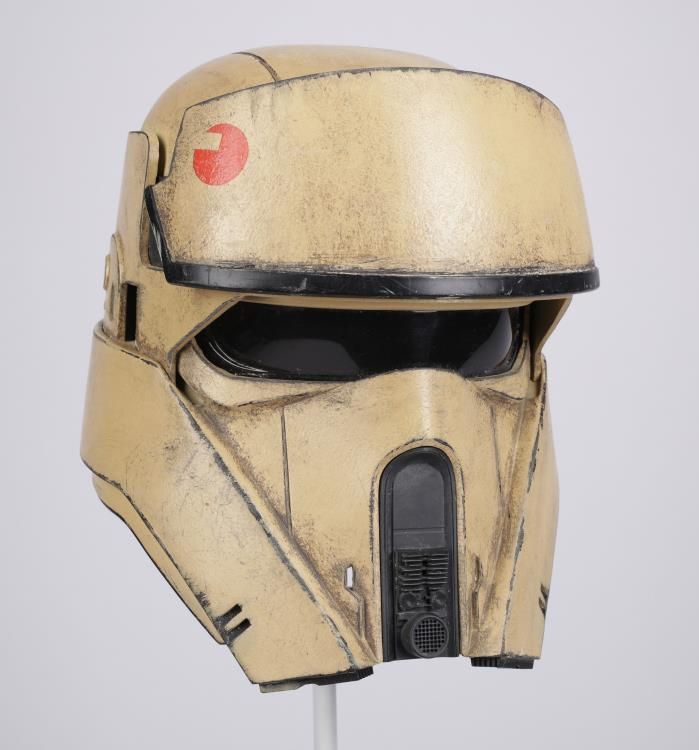 All credit for this model goes to him I merely chopped the files to fit my bed. The original files (including the armour) can be downloaded directly from http://shoretrooper.co.uk I only...
SW Shore Trooper Rogue One Helmet Printable
thingiverse
Found this on line several months back and had forgotten all about it. I see there is another one posted on thingy verse, which looks great. This one I have guestimated the size, so if you do decide to print it make sure you are happy with the size...
Sean Fields ( Shore Trooper Armour ) " See Link"
prusaprinters
<p>So many people have asked about this Armour, so here is Seans official link. <br/> <a href="http://www.shoretrooper.co.uk/">http://www.shoretrooper.co.uk/</a><br/> All credit to Sean Fields Cheers Jace</p>
Sean Fields ( Shore Trooper Armour ) " See Link"
thingiverse
So many people have asked about this Armour, so here is Seans official link. ... http://www.shoretrooper.co.uk/ All credit to Sean Fields Cheers Jace
Star Wars 28mm Phase II clone trooper armor
thingiverse
Star Wars Phase II clone trooper armor was the standard issue armor of the Grand Army of the Republic's clone troopers during the later days of the Clone Wars.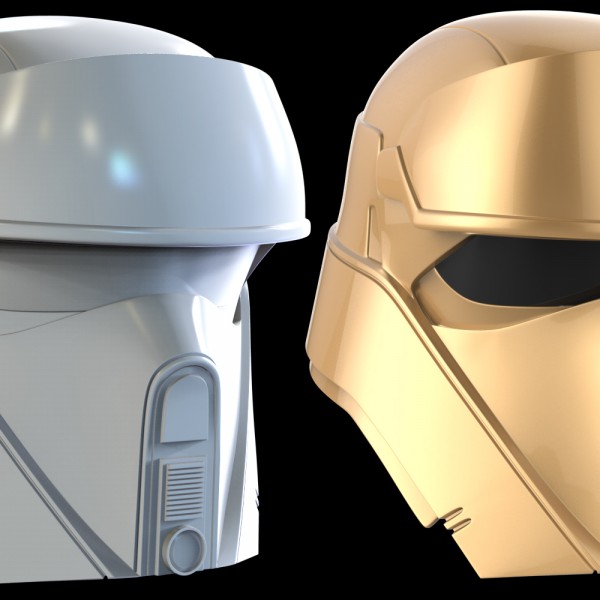 More advanced than its predecessor, it was capable of supporting more specialized...
Star Wars Cosplay - Arc Trooper Phase 2 Armor + Blaster
pinshape
Arc Trooper - Phase two Cosplay Armor + DC-15s File Advanced Recon Commandos, also known as ARC troopers, were an elite variant of the Republic clone troopers. Chosen from the ranks of the Grand Army of the Republic, the status of ARC trooper was...
First Order JET TROOPER - Chest Armor - backpack - StormTrooper Corp
cults3d
First Order JET TROOPER Chest Armor - backpack - StormTrooper Corp - Starwars for cosplay or custom Figure The STL is for personal use only.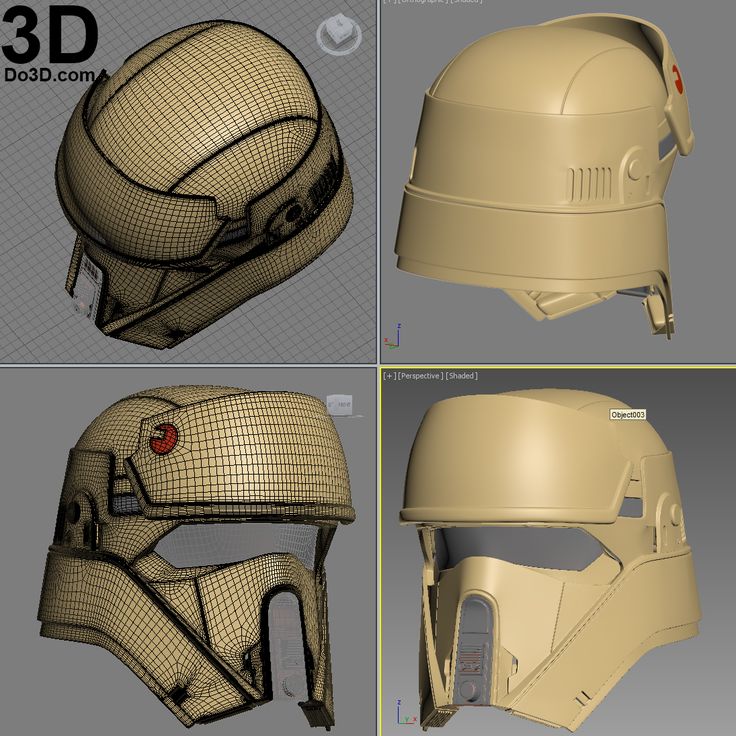 ...Do not copy or redistribute work (please contact me if you want to use it for Commercial Purposes ) if you...
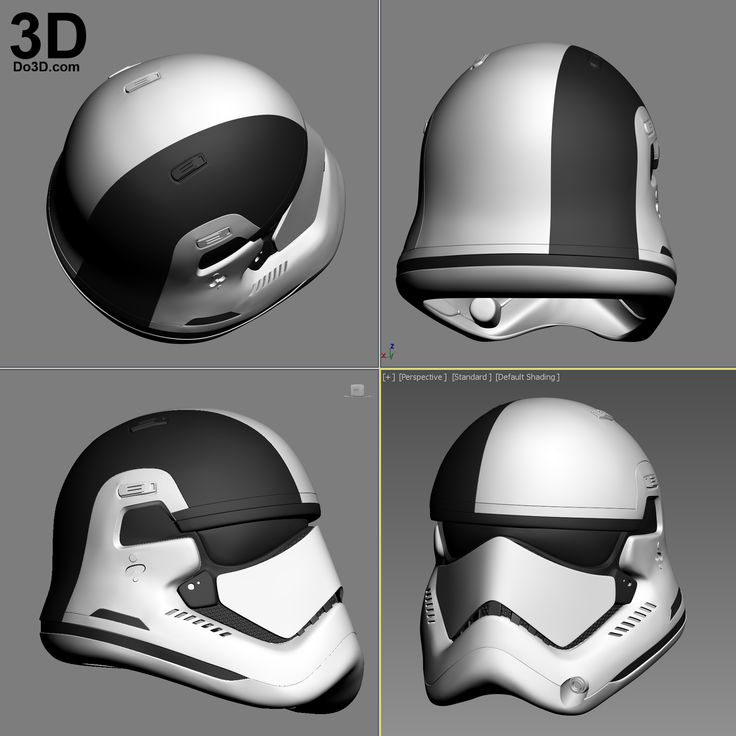
Prop Making: Shoretrooper Helmet. From a reel of filament to a replica… | by Nick O'Connor
From a reel of filament to a replica Star Wars prop!
The following is a build blog for Sean Fields’ 3D modeled Shoretrooper helmet, which he has made freely available on Thingiverse (when you hit the download button don’t forget to leave a tip!). Hopefully these few tips and images will help others and inspire you to print your own!
Printing the blast shield on a Aurarum Wombot Exilis XL.After downloading all of the files I initially loaded them into Cura and with all of the settings ready I noted the estimated print time of each piece. This would enable me to create a print schedule over the week.
Print settings: Wombot
Exilis XLLayer Height: 0.2
Initial Layer Height: 0.3
Infill: 10% (small pieces)–20%
Print Speed: 40mm/s
Travel Speed: 120mm/s
Temperature/Speed will depend on your printer and material, usually noted somewhere in an online 3D printing forum.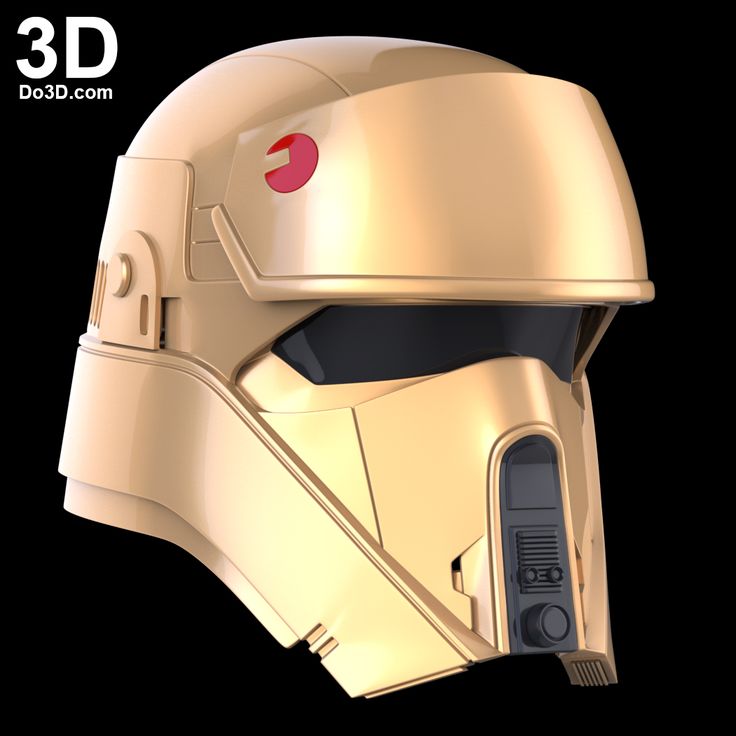
I used support structures and a skirt on each print, and altered the density of the support for the cheek pieces as I experienced some trouble when trying to achieve an accurate print for those parts. A glue stick was used to cover the glass print bed while the printer was self leveling (approximately 1 min before print started).
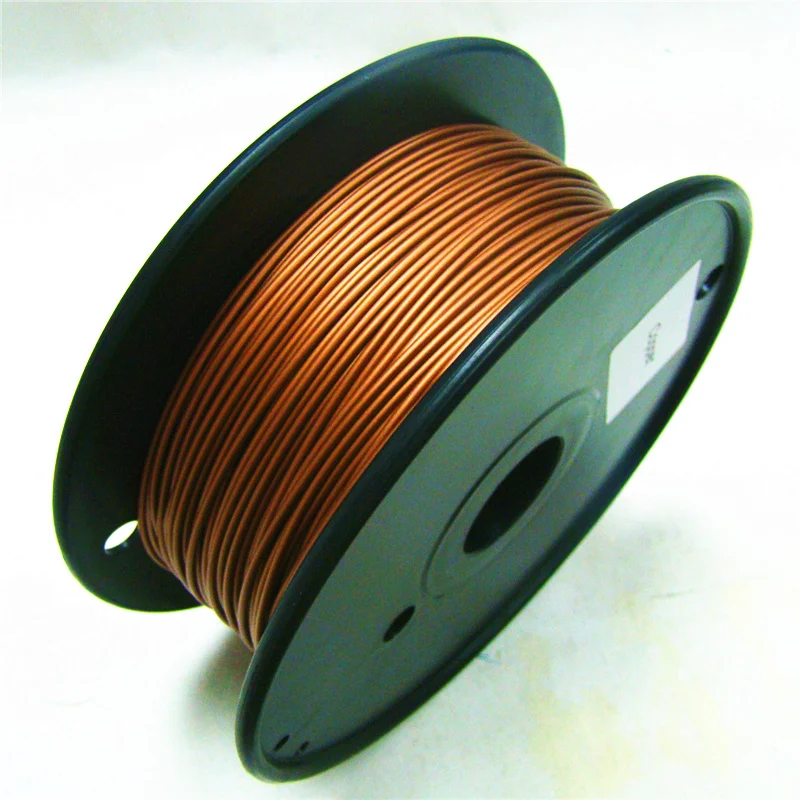
All together I would have been able to print all of these parts with a 1kg reel of PLA filament ($34 AUD), but due to two misprints I had to print one piece with a new reel of filament.
I quickly found out that the filament I was using didn’t like superglue. It was standard PLA, but for some reason a strong bond was never achieved even after a day of the superglue drying between two clamped parts.
Solution: acquire or borrow a rotary tool, insert a few inches of filament and crank it all the way up. As you press the filament into the seam, the friction will melt the plastic and the two edges. It is as if you had printed one whole piece instead of two, and with some sanding this is a very easy way to achieve a strong and clean bond.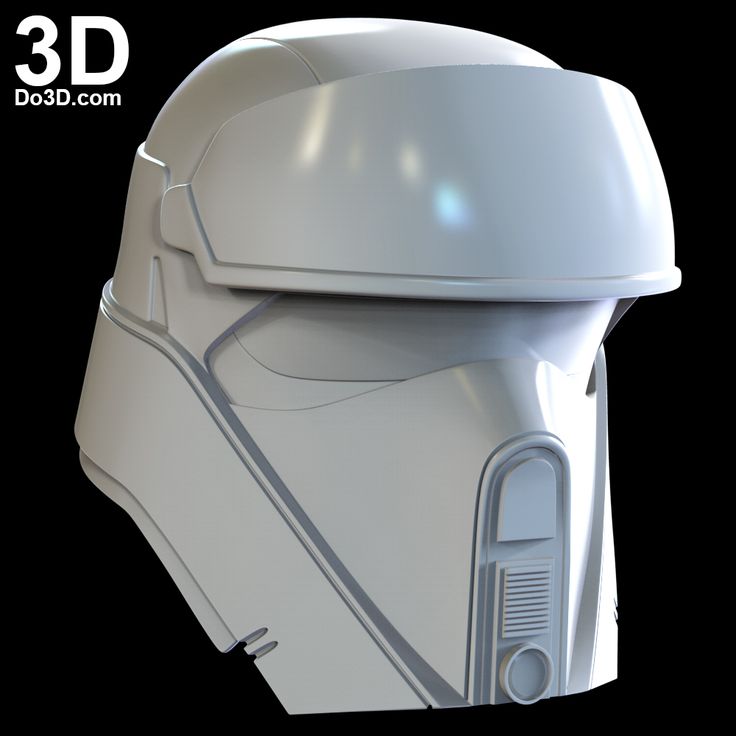
In order to smooth out the 3D printed parts I utilized some of Smooth-on’s XTC-3D print coating, which is easy to apply but when doing so make sure you are wearing a respirator — the stuff is absolutely toxic.
Once applied and left to dry overnight, I begun the sanding process. Starting with an 80 grit sanding block, I progressed to 120>220 and then wet sanded at 600 grit and up until I was happy with the final result. From here I hit it with a few layers of grey primer.
Post-primer Helmet.For the final touches I partly followed Paul Prentice’s Shoretrooper Helmet painting tutorial which was immensely helpful! I applied a few layers of black spray paint onto the whole helmet, let it dry for 24 hours before applying the tan.
In the process of painting/weathering. Lighting was a lot brighter in this photo.As Paul outlines in his tutorial, the idea is you then scrape back (I used steel wool and a flat head screwdriver for the edges) the tan to reveal the black. This gives some very realistic scratches and dents.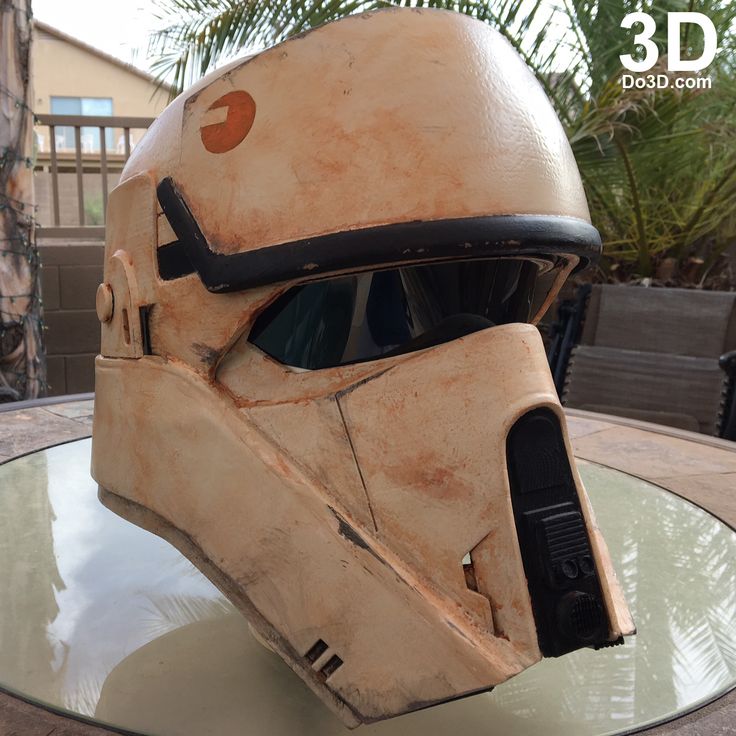 I also used a technique recommended by the guys at the local hobby store (www.metrohobbies.com.au) for a shrapnel-like weathering effect.
Basically, before applying the tan coat you spray any areas you want blistered with shrapnel with some high stick hairspray. Then you quickly sprinkle some sea-salt (make sure they aren’t perfect cubes you don’t want it to look uniform). Now once you have applied the tan spray paint, you take some steel wool or a knife and chip away at the salt which then falls off the helmet and revealing the black underneath.
The final prop!And there you have it, above is the finished piece. I would still like to weather the helmet a bit more, using an acrylic wash but this was the final piece I took to the Australian midnight release. The blaster shield symbol was hand painted with some red enamel, and the lens was made with a heat gun, dremel and acrylic sheet (light coat of spray paint to make it black and still slightly transparent).
Feel free to ask any questions, and you can see more images on my Instagram.
Again, a big thank you to Sean Fields for making this model available!
Stormtrooper helmet again. My version. (many photos)
We are printing
I know that similar works have been published on the portal more than once, but nevertheless I decided to share the attack aircraft helmet in my performance.
I have a friend. He's a fan of Star Wars stormtrooper ammo. To understand how much he is a fan about seven years ago, he glued a full-sized helmet made of paper, of course, he did not live long, but he brought a huge amount of enthusiasm. Personally, I would never have that kind of patience.
When I got a printer, the first question he asked me was whether it was possible to print such a helmet on it. Naturally, I said yes and promised that sooner or later I would pile him such a present. The word is not a sparrow. Yes, and his birthday is coming soon. In general, thinking after the New Year holidays, I took up this project.
I found the model of the helmet on tingverse (I will not give a link, it is so elementary here and there).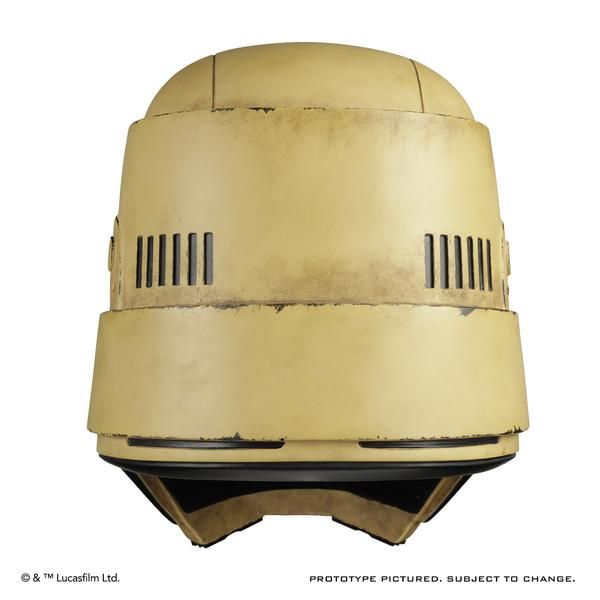 And started printing. Initially, I started printing from ABS from greg on a plush printer. The print didn't work. Permanent bundles in high models. In general, I had to change my profile to PLA.
I ordered snow white from FDplast and it started.
It took about a week of a day's printing on one printer with a 0.4 nozzle to print all the elements.
Plastic snow white, contrary to expectations and reviews, turned out to be quite problem-free for such a project and did not cause any trouble.
Start pre-assembly with masking tape:
Glue with a mixture of supports and dichloroethane. At first I tried to apply the mixture with a brush. Well, I’ll tell you what to do .. Then, peeping here, I began to use a medical syringe for a couple of cubes for this. things got a lot more fun. The main thing after work is to empty the syringe and leave it open. Then it can be reused. Do not try to store glue in a syringe. Throw away both the glue and the syringe.
When gluing, there were small discrepancies in the form of voids between the last seams. The largest gap was about three millimeters. It appeared as a result of incorrect calibration of the printer table, the first layers were practically eaten. When assembling the gap, I filled it with a mixture of dichloroethane with supports dissolved in it, and put pieces of filament into a large gap and filled them in the same way. In general, for such purposes, a 3d pen is needed, which I expect in the near future.
After gluing, I covered the model with primer from a spray can to see all the jambs of the model:
I chose white soil. Then the dreary days of puttying and sanding began. I did not achieve the results that my imagination drew in my head for a number of reasons:
1) hands from women.
2) winter, at home the spouse did not allow me to do this because of the smell;
3) once terrible.
In general, after painting, this is what happened:
I painted with enamel from a spray can on the street (at minus 15), having applied a layer, brought the model into the room and let it warm up again. It turned out to put five layers while hiding all the flaws. Black was applied first from a spray can, after pasting over the model, and then corrected with simple acrylic paint for models. The producer is a star it seems. He also corrected his clumsiness from black paint with their white paint.
What was used in the model for the design of the eye sockets, I did not use. Instead, I used a clear document cover and glued it on the inside with a hot glue gun. From the inside, I toned the film of the eye sockets with a piece of car tinting.
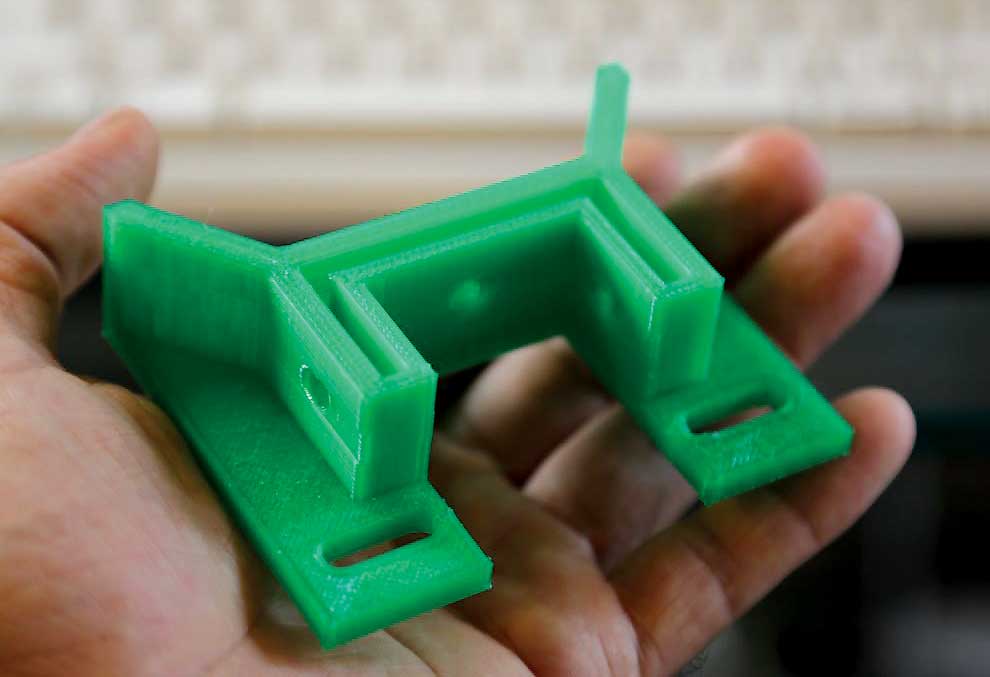
The helmet is very uncomfortable on the head. So I found an old helmet and removed the head harness from it. In order to secure it, I modeled four
mounts that I glued onto a mixture of dichloroethane and plastic inside the helmet.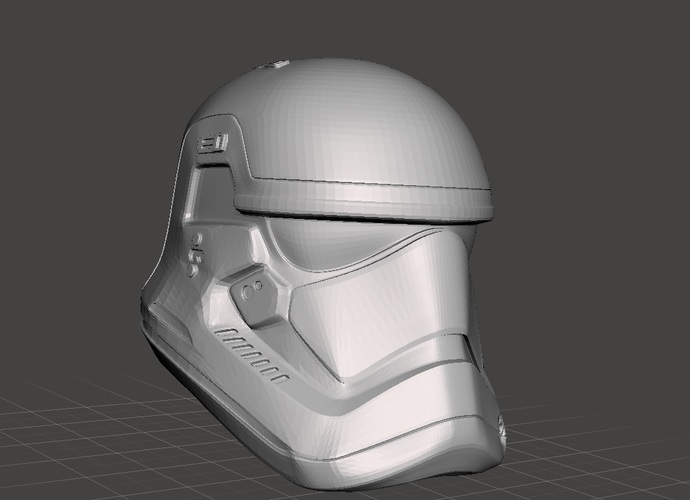 Here's what happened:
Now the helmet sits very tightly on the head, does not cause discomfort, allows you to freely turn your head. The only thing is that you don't look like it for a long time. The helmet is quite deep and needs additional ventilation holes. there was an idea to make through holes in the recesses of the mask and close them from the inside with a black cloth. But this is just a thought for now.
Of course the helmet is far from ideal. Perhaps in the summer, together with a friend, we will sand it again and paint it under normal conditions.
And so far.
Beaver everyone!!!
Subscribe author
Subscribe
Don't want
12
Best prints
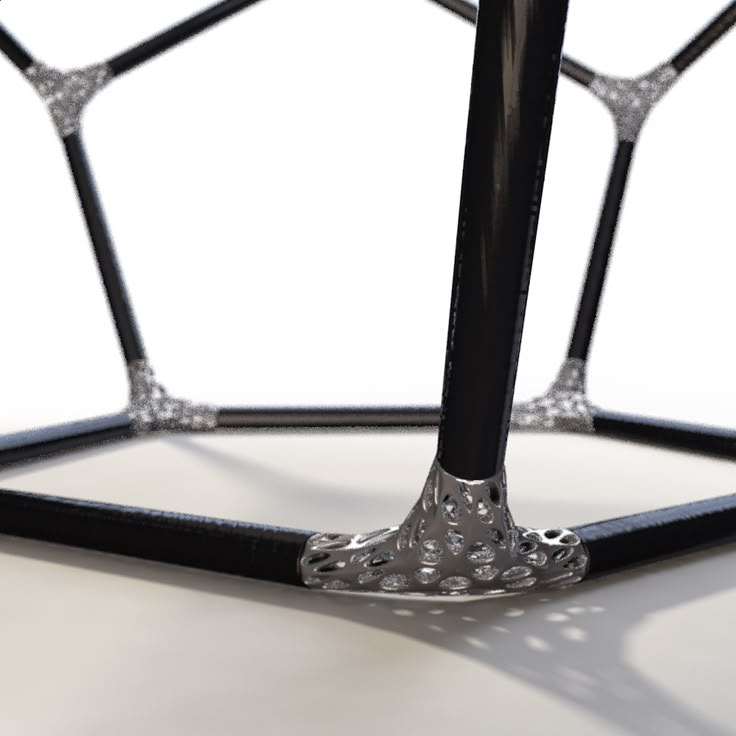
amforma
Loading
10.10.2022
312
ten
Subscribe to the author
Subscribe
Don't want
Frame fragment model master (half).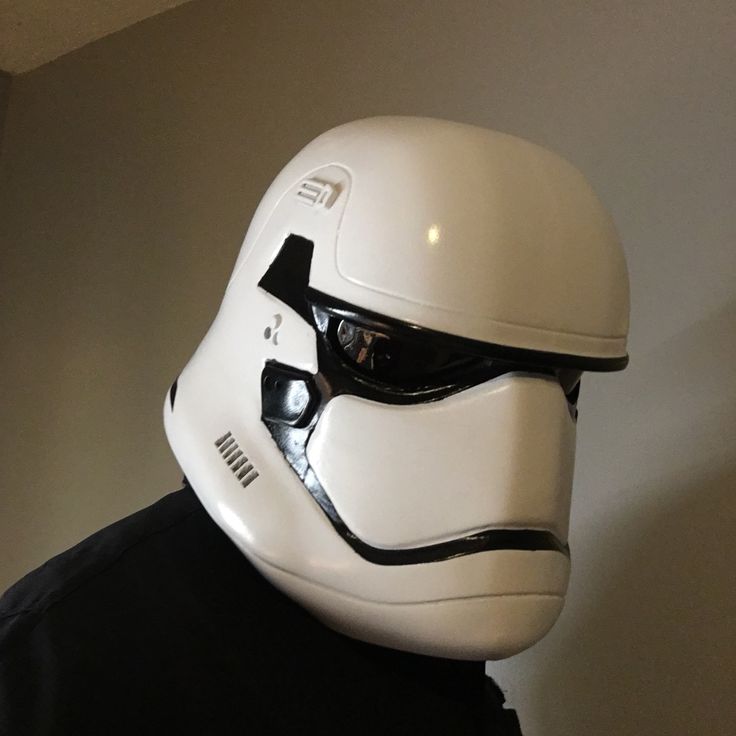 In the future, the frame will be cast in metal. Directly...
Read more
3
Subscribe to the author
Subscribe
Don't want
Printed on order stand for dice from DND. The dragon is not big (DND dice is the size of an ordinary toy...
Read more
jeka_tm
Loading
03/10/2018
29725
149
Follow the author
Subscribe
Don't want
Hello.
For a long time I wanted to assemble something on hydraulics, and I grab it on YouTube ...
Read more
What the first 3D printed steel bridge looks like
Trends
TV channel
Newspaper
Pro
Investments
RBC+
New economy
Trends
Real estate
Sport
Style
National projects
City
Crypto
Debating Club
Research
Credit ratings
Franchises
Conferences
Special projects St.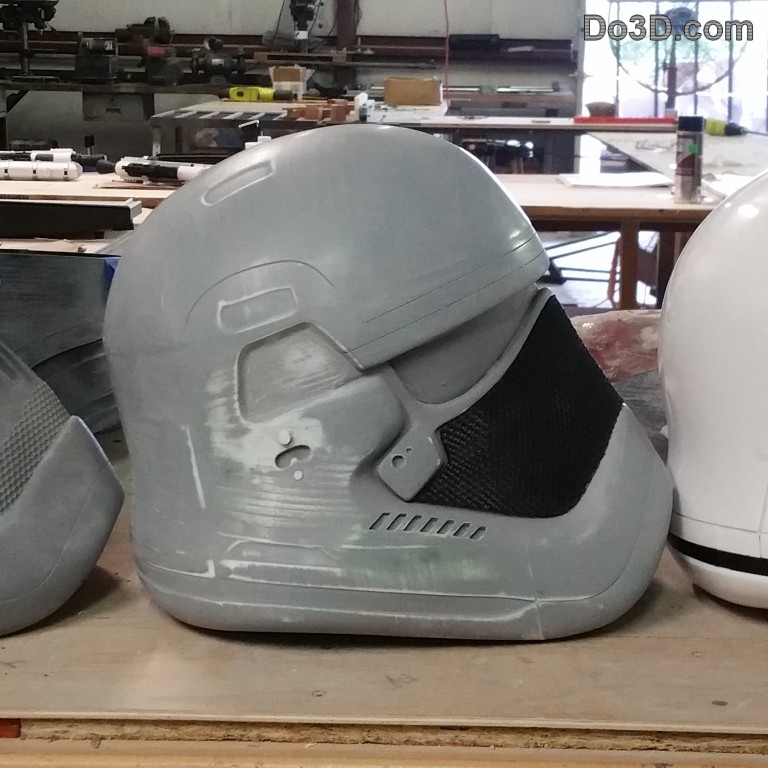 Petersburg
Conferences St. Petersburg
Special projects
Checking counterparties
RBC Library
Podcasts
ESG index
Politics
Economy
Business
Technology and media
Finance
RBC CompanyRBC Life
RBC Trends
Photo: Mashable / YouTube
The world's first 3D printed steel bridge has been installed in Amsterdam. The project was ready three years ago, but the installation of the bridge was constantly delayed
What's happening
- On July 15, the world's first 3D printed steel bridge was opened in Amsterdam.
 It connects the embankments of the Oudesijds Achterburgwal canal. The grand opening was attended by Queen Maxima of the Netherlands.
 - The structure weighs 6 tons and is 12 meters long.
- The bridge was printed by four robots by welding layers of stainless steel wire, it took them 4.5 tons of steel and six months to make a span of 12 meters. Then coastal supports and decorative elements were made.
- This project was developed by the laboratory of Joris Laarman and ABB, Air Liquide, ArcelorMittal, Autodesk, AMS Institute and Lenovo, while the Amsterdam-based company MX3D was fabricating and installing the structure.
- More than ten sensors are built into the bridge, with the help of which it will be possible to monitor its condition and deformation. Thus, he will himself indicate the need for repair. The sensors will also count the number of pedestrians crossing the bridge each day.
- The structure was installed for two years as a replacement for the conventional bridge, which will be under reconstruction at that time.

- This bridge was first presented at Dutch Design Week Eindhoven 2018, where the project won the Dutch Design Award and the Audience Award. After that, the finished bridge lay in storage for another three years: first, in anticipation of the reconstruction of the canal, then due to the coronavirus pandemic and lockdown.
What does it mean
In recent years, there has been an active development of 3D printing technology in construction. The Netherlands seems to be on a roll with this trend, with the first fully 3D-printed residential building in the EU populated in the suburbs of Eindhoven in early May, followed by the opening of the world's first 3D-printed steel bridge.
We have already said that 3D printing is the future of construction and design. Compared to classic buildings, 3D printing has a number of undeniable advantages, such as short construction times, reduced economic and environmental costs, and ease of execution of complex shapes.